
Yearly Archives: 2016
Storage Share, Nov. 17/18, 2016
- On: November 16, 2016
 0
0
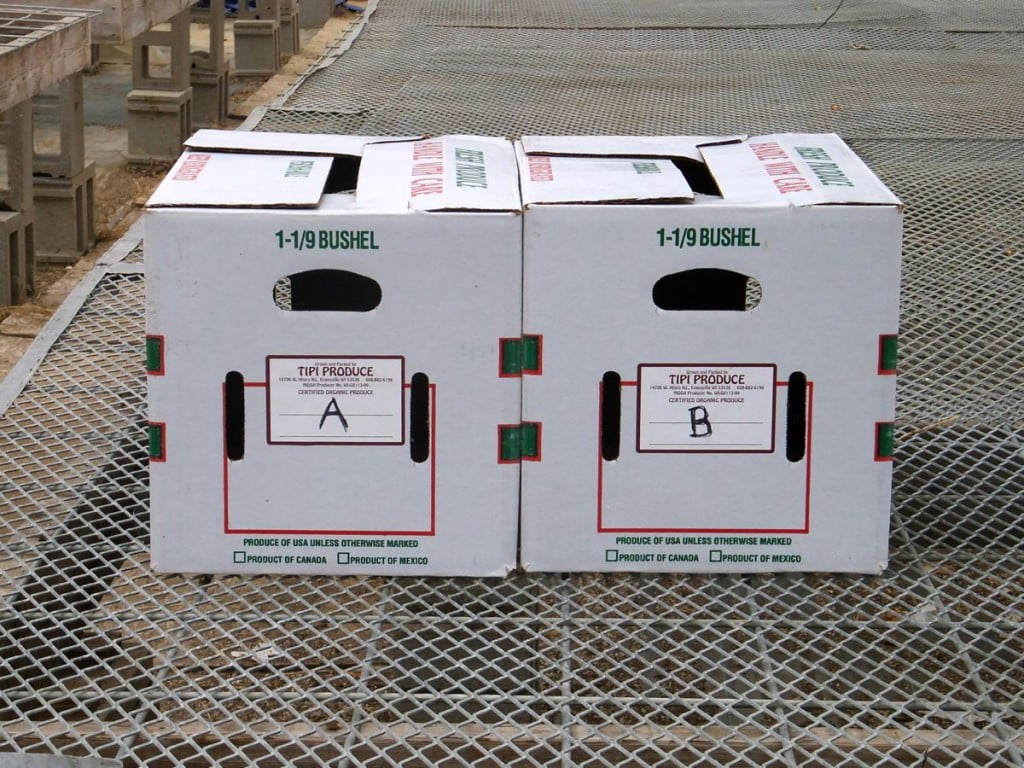

Take one box labelled “A” and one box labelled “B”.
Things you need to know about your winter share
* Your delivery will consist of two different boxes, labeled “A” and “B”. Take one “A” box and one “B” box. The boxes contain different vegetables.
* Please pick up your boxes on the day of delivery, during the normal hours for your site.
* Outpost members, please get your boxes on Friday. This is the busiest weekend of the year for the Outpost staff, so we cannot ask them to hold boxes past Friday.
* Members at outdoor sites, please carefully put the blankets back on the boxes. That keeps everyone’s produce in good shape.
* The boxes are heavy! It’s OK to take home the packed boxes, then return the empty boxes to your pickup site within two weeks. We’ll swing back and pick them up.
Veggie List and Storage Info (Storage share, Nov. 17/18, 2016)
We hope you enjoy this shipment of veggies! Strategize to use them well, as some will last longer than others. It was not a good winter squash year for us, so there are fewer squash than last year. Fortunately, the sweet potatoes over-performed to compensate.
* These vegetables are the most perishable: broccoli, Romanesco cauliflower, celery.
* These are the next-most perishable: Brussels sprouts, cabbage, leeks and onions. Keep an eye on your butternut, potatoes and sweet potatoes. The last two are susceptible to drying out.
* These will last the longest: Beauty Heart radish, beets, carrots, celeriac, garlic, parsnips.
Box “A”
Beauty Heart winter radishes, 1 to 3
Beets, 3 lb
Broccoli, 1-2 small head(s)
Brussels sprouts, on stalks
Carrots, 6 lb mixed colors
(orange 4 lb, yellow 1 lb, purple 1 lb)
Celeriac, 1 or 2
Celery
Green cabbage
Leeks, 2+ lb
Parsnips, 3 lb
Romanesco cauliflower
Box “B”
Sweet potatoes, 14+ lb
Butternut squash, 1 or 2
Russet potatoes, 5 lb
Superior (white) potatoes, 5 lb
Yellow onions, 5 lb
Garlic, 4
Beauty Heart radishes (round, white with pale green shoulders and bright pink interior) – Refrigerate. The interior color is lovely. Slice thinly and add to salads, cook lightly in mixed vegetable medleys or cut into matchsticks and add to pasta salads. We enjoy grated carrot and Beauty Heart salads all winter.
Beets – Refrigerate in a bag or container. Beets will store for two months or longer.
Broccoli – Refrigerate in a bag or container.
Brussels sprouts – Pluck from stalks and refrigerate in a bag or container. Eat soon.
Butternut winter squash – You will receive one or two Waltham butternuts, depending on size. Store your butternut in a cool, dry place. 50 F is ideal. Do not put in a plastic bag. Inspect your squash frequently and cook promptly if you see any soft spots developing. You can cook, mash and freeze the squash for future use. I find that you can refrigerate cut raw squash for up to one week. This runs counter to the accepted way to store squash, but is useful if you want to cook just half a squash. Try microwaving your squash for one to two minutes before cutting or peeling. This softens the squash and makes a large butternut easier to handle.
Cabbage – Refrigerate. Cut off chunks as needed.
Carrots, orange. Refrigerate in a plastic bag. Will keep for several weeks.
Carrots, yellow and purple. These varieties are pretty AND they taste good. The purple carrots will turn your tongue green. That should get the kids interested.
Celery – It took all year but the celery is finally ready, just in time for Thanksgiving stuffing. Cover and refrigerate.
Celeriac – Will store for months in your fridge. Cut off chunks as needed. Peel before using. I find it easiest to cut the celeriac into flat slices, then peel.
Garlic. Can be stored at room temperature.
Leeks. Refrigerate and eat within three weeks. Leeks are not a long-storage crop. You may need to strip off one or two outer leaves to freshen the leeks before you cook them. Your leeks will probably need washing. We finished preparing them after dark and didn’t realize how much soil was still on them.
Onions: Refrigerate or store in a cool, dark spot and protect from light. Exposure to light stimulates sprouting.
Parsnips (These look like large white carrots.) – Refrigerate in a plastic bag. Parsnips will store for two months but will darken in color. That is a harmless change.
Potatoes, Russets and Superiors – Can be stored at room temperature or in a cool spot, but must be kept in the dark so they do not turn green. A cloth or loose plastic bag draped over the paper bag will help avoid moisture loss, but do not close the plastic bag. Both types will store longer if kept cool. Around 40 – 50 F is ideal. The Superiors were grown by our friends/neighbors Peg and Matt Schaeffer. The Igl family near Antigo grew the russets.
Russets– We got the big ‘baking’ grade from Brad Igl so you have nice bakers for Thanksgiving. Excellent for mashed potatoes.
Superiors– Matt says these are good all-purpose potatoes, their family’s favorite for oven fries or for potato salad.
Sweet potatoes – These are a mix of the Covington and Beauregard varieties. Both types have developed excellent flavor and sweetness. This was our best-ever sweet potato crop. Store at room temperature, no lower than 55 F. Keep them on your kitchen counter where it’s easy to keep an eye on them. I like to keep ours in a paper bag so they don’t dehydrate. Cook promptly if they start to soften. The roots come in a wide ranges of sizes and all are good.
What are you cooking for Thanksgiving?
We are creatures of habit when it comes to Thanksgiving. Here are our plans so far: brined roast heritage turkey (Beth), Brussels sprouts with garlic-mustard vinaigrette (Steve), roasted sweet potatoes with garlicky yogurt dip (Sophie), glazed butternut squash (Beth), crunchy carrot-Beauty Heart salad with sesame-seed dressing (Steve), pickled onions (Beth & Ari), pickled peppers (Beth & Ari), pickles (Beth & Ari), homemade applesauce (Ari), and apple pie (Sophie). I’ll probably make stuffing with lots of celery, onions and mushrooms but that might be overkill. We love celebrating Thanksgiving and the end of harvest season!
Menu Ideas
There are many terrific Thanksgiving menus and recipes online right now. Many include vegetables that you will receive in this delivery. Search any of the sites below if you are stumped about what to do with your storage share. Check out the Thanksgiving collections online soon; they get taken down quickly after Thanksgiving.
* The New York Times Cooking app keeps getting better and better. They post appealing recipes and recipe collections every day. They have gone completely overboard for Thanksgiving this year, and have posted a Thanksgiving menu planner with 14 sub-categories, e.g. “Thanksgiving desserts that are not pies,” and “Thanksgiving appetizers,” and “Thanksgiving Sweet Potatoes.” In my opinion, Melissa Clark is the best NYT food writer. She’s practical and her dishes are always flavorful. David Tanis is my second-favorite. Recipes from Mark Bittman and Martha Rose Shulman are always worth a look. The app and recipes appear to be free to the public, but I think you need to be a NYT subscriber to save recipes.
* I like the lively Food52.com site, and always read the community comments.
* Smitten Kitchen is our go-to site for dessert recipes but has excellent veggie recipes too. Plus blogger Deb Perelman is funny. She has posted her Thanksgiving recipes and says that, this year, she is all about Team Casserole.
* The Kitchn. I found this site after wandering over from their Apartment therapy home-design site. Good recipes. Right now, they are featuring “Twenty Thanksgiving side dishes that travel well.”
* 101cookbooks. Always has good vegetarian and whole-grain recipes.
* Finally, remember that we have access to the entire catalog of Local Thyme recipes all winter. Check them out for Thanksgiving ideas.
Do you have favorite menu sites for fall and winter recipes?
If so, please share in a comment!
RECIPES FROM LAUREN
Autumn Root Vegetable Gratin
Adapted from Food 52
As much as I love stuffing (and that is a whole heck of a lot), I may go so far as to deem this the most festive Thanksgiving recipe that ever existed. It’s something about the abundance of local veggies effortlessly sliced and stacked high and the creamy richness that reminds me of all of my mother’s homecooking. This dish is elegant, decadent and exactly what you need on your Thanksgiving table. Oh and when I mention all that effortless slicing, note that I own a mandoline.†
Serves 8-10
Takes 90 minutes
3 cups whole milk
4 smashed garlic cloves
Pinch or two of ground nutmeg
2 tablespoons olive oil
1 medium to large sweet potato, peeled and thinly sliced (1/8-inch)
1 celeriac, peeled and thinly sliced (1/8-inch)
1 pound Superior white potatoes, peeled and thinly sliced (1/8-inch)
1 pound parsnip, peeled and thinly sliced (1/8-inch)
Salt and pepper
1/2 teaspoon dried thyme
1/4 teaspoon dried rosemary
2 cups of your favorite melty cheese (I always lean towards Gruyere or Fontina), shredded
2 cups finely shredded Parmesan cheese
- Preheat oven to 400 degrees.
- Add milk and garlic cloves to a medium saucepan. Heat over medium low heat until it just begins to bubble. Remove from heat and add nutmeg.
- Find a casserole or baking dish that is oven-safe and holds at least 12 cups. Rub the bottom and all sides with olive oil.
- Now you start stacking. Layer the veggies into the baking dish alternating sweet potato, celeriac, potato, parsnip, etc. in concentric, overlapping circles. You should use about 1/4 of the veggies for each layer. After each layer, season with salt and pepper, a sprinkling of the dried herbs and 1/4 of each cheese. Continue until you use up all the ingredients.
- Remove the garlic from the milk and pour evenly over the gratin. Bake for 45-60 minutes until bubbly and golden brown on top. Let the gratin sit and set for 5 minutes before serving. Enjoy!
—————-
Cornbread Stuffing with Leeks, Brussels Sprouts & Celery
Good stuffing takes a while. There is nothing you can do about it. The most time intensive part of this recipe comes after you pour everything together and get it roasting in the oven. I stirred my stuffing every 15 minutes to get an even browning, but if you want to run away from the kitchen for the 90 minutes it takes to roast, I’d tack on an extra 30 minutes and just expect the edges and bottom to be a little more browned than the center. Both methods will taste delicious.
Serves 10-12
Takes 2 hours, 30 minutes
3-4 tablespoons olive oil, divided
1 large yellow onion sliced
2 leeks, white and pale green parts only, halved and sliced
1 head celery, leaves removed and sliced
2 teaspoons Kosher salt
1/2 teaspoon black pepper
1-2 tablespoons olive oil
4 garlic cloves, minced
2 cups halved Brussels sprouts (quartered if large)
1-1/2 teaspoon dried sage
1 cup dry white wine
4 cups chicken broth, divided
2 tablespoons maple syrup
Large pinch red pepper flakes
2 eggs
2 cups whole milk
10 cups dried cornbread cubes* (see note below)
*For the cornbread you can use leftover stuff that you froze from an earlier meal or make it from scratch. You can also use store-bought. Regardless of what you decide to use, make sure you cut it into crouton-size pieces †the day before you plan to make the stuffing and leave them out on a single layer on a couple baking sheets. You want the cornbread to really dry out. It will still break up a bit when you add the liquid, but don’t distress!
- In a large cast-iron skillet, add 3 tablespoons of olive oil. Add onions, leeks and celery to pan along with salt and pepper. Saute over medium heat for 10 minutes, stirring often. Add garlic, reduce heat to low and cook 5 minutes more.
- Add the remaining tablespoon of olive oil at this time if the pan appears to be getting dry. Add brussels sprouts and sage to pan. Bring back up to medium and cook for 5 minutes.
- Preheat oven to 400 degrees.
- Add wine to pan and reduce until liquid is gone. It will probably be simmering pretty aggressively. Turn down to medium low if there is too much splatter. Add 2 cups of chicken broth and continue to simmer and reduce. This will help make the veggies more tender and flavorful. You want to keep simmering for 5-10 minutes until the liquid is mostly reduced. Add maple syrup and red pepper flakes and stir to combine. Turn off heat. Taste and adjust seasonings as desired. It may be a little salty, but that’s alright. You won’t be adding salt to egg mixture.
- In a large bowl, combine remaining chicken broth, eggs and milk. Whisk until smooth.
- In the a large, deep baking dish (at least 9×11), combine cornbread cubes and cooked veggies. Evenly pour egg mixture over cornbread vegetable mixture. Stir gently with a spatula to just combine. The cornbread pieces may fall apart. It may look like a big sloppy wet mess. Okay, it definitely will. Don’t stress. Let the oven work it’s magic!
- Bake for 90 minutes, stirring with a spatula every 15 minutes for more even baking and moisture.
- Serve warm with all the turkey and mashed potatoes you can get your hands on!
—————-

Extension share = an encore box
- On: November 02, 2016
- 0
Last week, we said “thank you and good bye.” Just kidding. Now it’s time for an encore.
This is the first time we have offered an optional Extension share. We made the change to ease a work crunch that occurs this time of year. Our carrots, cabbage and other storage crops are all harvested during an intense two weeks in November. Packing CSA boxes in the midst of that effort has always felt insane and risky. The days are short and often cold by now. The weather is mild this fall but we have harvested during snow storms in other years. We feared that, some year, working on a CSA delivery would cost us a storage crop.
This year, we shortened our regular CSA share from 26 weeks down to 24 weeks. Adding this week’s extension share allows 25 consecutive weeks for you folks, and frees one week for us to focus on field work. I think allowing ourselves one streamlined week will ease our lives greatly.
Our fall crops are not great this year but there’s still work to be done and coolers to fill … halfway. Quality looks excellent but the amounts to harvest are simply smaller than last year.
In two weeks, we will pack Storage shares for those who signed up. We will update you then on how our fall work proceeded. We’ll be in touch soon once we open our 2017 registration. After that, we say goodbye until spring.
Beth
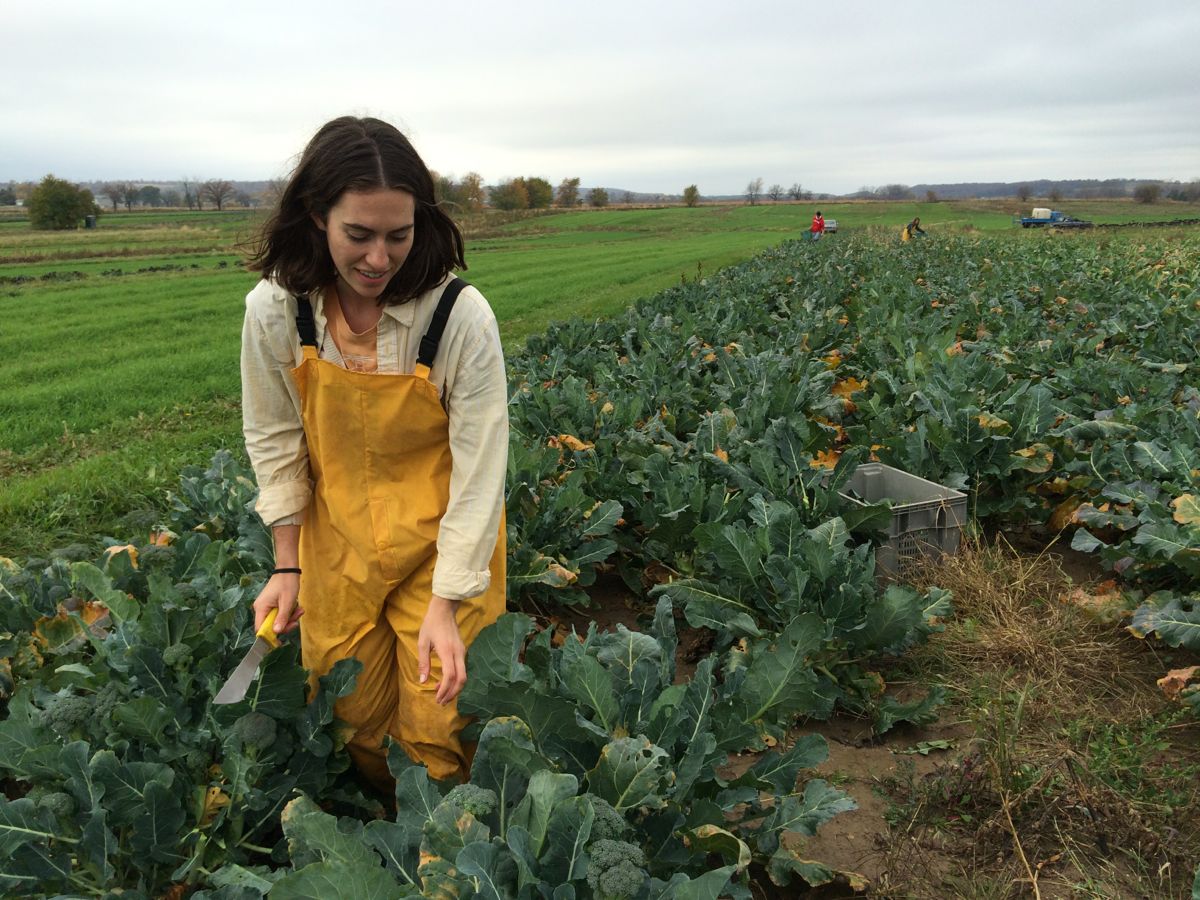
Lizzy harvests broccoli. We love the mild weather. No hats, no gloves, no bulky winter coats!
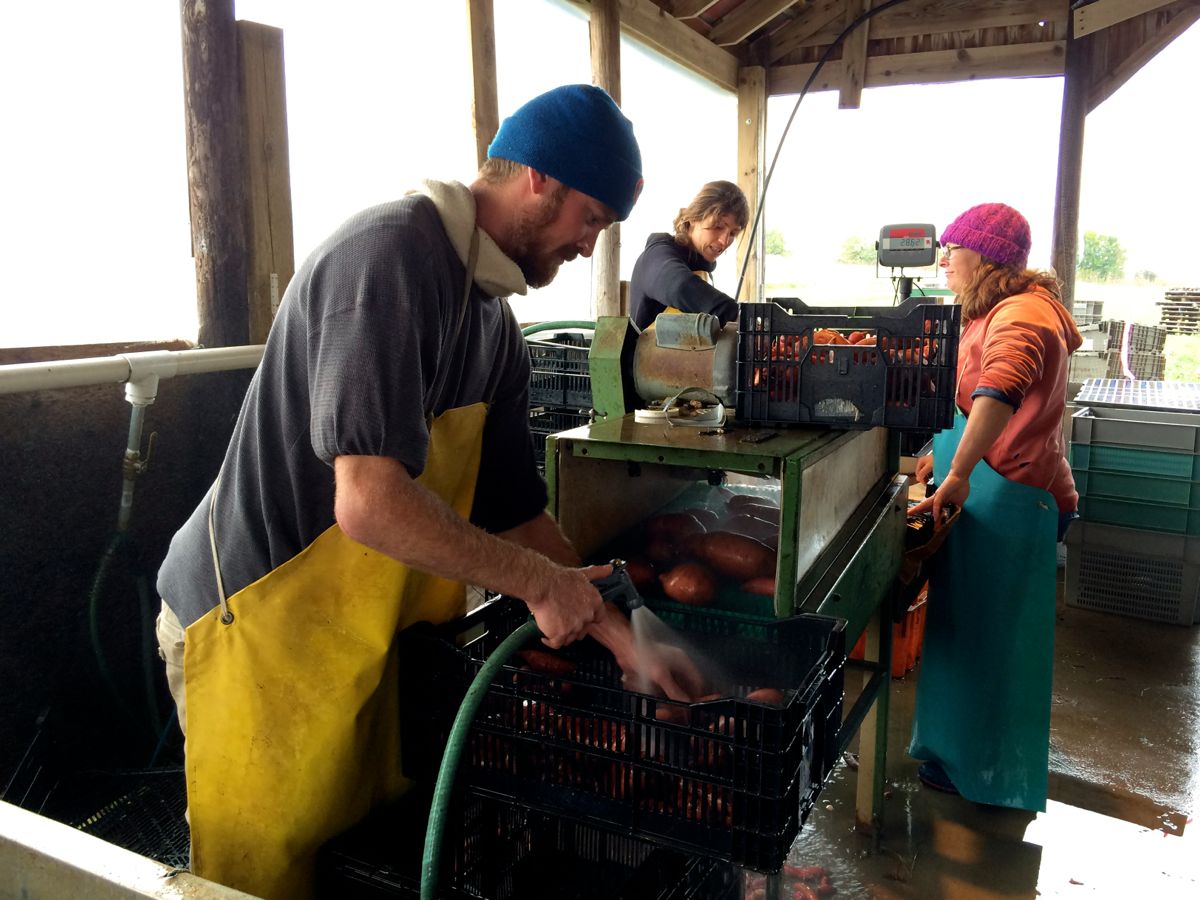
Billy, Charlotte and Kristin wash your sweet potatoes, another job that’s uncomfortable during typical November weather. Our seasoned crew members are tough enough for any conditions but, honestly, no one wants to be cold and soaked.
Veggie list and veggie notes (Extension share, Nov. 3/4, 2016)
Beth’s box logic. We are sending an array of root crops to roast together. I am intrigued with Pat’s recipe for Roasted Sweet Potatoes and Brussels Sprouts with Miso Vinaigrette. I’ve never tried that combination, although we often roast root vegetables this time of year. Here’s how I would roast this week’s roots. Start with parsnips, carrots (and turnips). Add potatoes if you have them. Even when roasted together, the roots retain their individual flavors. Cut in 1-inch chunks, toss with oil, spread in a single layer on a cookie sheet and roast at 400 F until tender. Stir once or twice while cooking. We add thick onion wedges at the beginning, but only a few because they release moisture. Turnips will flavor the other veggies so roast separately if you wish. Sweet potatoes cook more quickly so roast separately and combine with the other roasted roots at the end. Serve with Brussels sprouts steamed and dressed with slivered onions and a mustard-vinaigrette. Alternatively, make a batch of bean and leek soup with roots or cauliflower. Cook sliced collards in the soup for a one-pot meal.
I was eavesdropping in the grocery store and overheard this: “Just steam the cauliflower until tender, then puree it in the blender. Melt the cheese into the cauliflower and your sauce is done.” I thought to myself “Why have I never done this??” I wish I’d asked the young woman how she uses the sauce but we can figure that out on our own.
Sweet potatoes, ~ 3 lb
Brussels sprouts, ~ 1 lb
Parsnips, 1.4 lb
Carrots, 2 lb
Leeks, 1 lb
Collard greens, 1 bunch
Turnip(s)
Yellow onion(s)
Garlic
Some sites get cauliflower (white or orange or purple).
Some sites get Romanesco.
Some sites also get a little broccoli.
Sweet potatoes – These are from our second Beauregard harvest. The roots are bigger than the last Beauregard delivery; they really bulked up during the three weeks between harvests. As usual, we will distribute a range of sizes. All are good.
Brussels sprouts – This is terrific Brussels sprouts weather and they are finally plumping up. This week’s sprouts are noticeably larger than the ones we sent last week.
Parsnips (tapered, cream colored roots) – Those long, white roots are not carrots, they are parsnips. The two vegetables are related. When cooked, parsnips are sweet and starchy. For the best flavor, brown them to caramelize the sugars. Here are a few ideas for parsnip preparation:
– Caramelize the parsnips by roasting them in a vegetable medley.
– Parsnip fries are delicious: cut like French fries, coat very lightly with oil, place on a cookie sheet and roast in a hot oven until brown and cooked through.
– Try substituting grated parsnips in a potato pancake recipe. They brown beautifully and are very tasty.
– Steve loves pan-fried parsnips with onions and garlic.
Turnips (round root, white with purple shoulders) – Add these earthy roots to hearty grain-based stews or include in a pan of oven-roasted roots. Lauren offers some good ideas in her recipes.
Storage: Cover and refrigerate. Will store well for about one month.
RECIPES FROM LAUREN
ROOT VEGETABLE POT PIE
I love pot pie. I absolutely adore it. It’s not an everyday or even an every week kind of meal, but a few times per year, we make pie dough from scratch, stuff it†with all the savory things and just love every bite of flaky, creamy, rich delicious goodness. This pot pie is a little different than normal. It’s totally vegetarian and packed full of everyone’s favorite fall root vegetables. If dining on veggies and butter along is not your thing, you could buy a rotisserie chicken, shred it and add it to the mix. You could dice up some ham or some bacon if you really need some meat in this dish, but I love to let the vegetables sing all on their own.
I prefer the pie dough made from scratch and always, always follow Smitten Kitchen’s directions for the perfect each pie crust. Make the pie dough the day before and stash it in the fridge for a super easy weeknight dinner.
Serves 6-8
Takes 1 hour, 15 minutes (excluding time to make pie crust because hopefully you made it the night before or bought the store-bought stuff)
4 tablespoons butter
1 pound leeks, white and pale green parts only, cut in half lengthwise and sliced
2 cups peeled and diced sweet potatoes
1 cup peeled and diced carrots
1 cup peeled and diced turnips
1/4 cup flour
2 cups chicken broth (or vegetable broth if vegetarians), plus more if needed
1 teaspoon dried thyme
1/2 teaspoon dried sage
1/4 cup milk
Kosher salt and freshly ground black pepper
1 batch Smitten Kitchen All Butter, Really Flaky Pie Dough, preferably made ahead of time & chilled
Flour
1 egg
1 tablespoon water
- Preheat oven to 375 degrees.
- In a Dutch oven or stock pot, melt butter over medium heat. Add leeks along with a generous amount of salt and pepper. Saute for 5 minutes until fragrant. Add sweet potatoes, carrots and turnips. Cook for 5 minutes until soft.
- Reduce heat to medium-low and add flour. Stir well so that it evenly coats all the veggies. Keep cooking and stirring occasionally for a minute or two so that the flour starts to turn a light golden brown.
- Add chicken broth (or veggie broth), thyme and sage. Stir well to evenly incorporate the flour. Simmer gently for 5 minutes. Add a quarter cup of milk. Continue to simmer for 2-3 minutes. If the mixture seems too thick, add a little more broth. You want it to be a little thicker than a soup and a little less thick than a regular white sauce. Taste and adjust seasonings as desired.
- On a well-floured surface, roll out half of your chilled pie dough to fit in a deep 10-inch pie pan. (If you don’t have one, roll it a little thinner and fit it into a casserole dish). Add mixture.
- Roll out the remaining half of of the chilled pie dough on a well-floured surface. Lay it on the top of the dish and press down the edges to seal. Use a knife to cut little vents on the top crust.
- Combine egg and water in a small bowl until smooth. Brush over pie crust. Bake for 25-30 minutes until crust is golden brown. Enjoy!!
—————–
BRUSSELS SPROUTS & PARSNIP HASH
Adapted from a New York Times recipe
Takes 45 minutes
Makes 4 servings
2 tablespoons oil
1 pound Brussels sprouts
1 teaspoon Kosher salt, divided
1/2 teaspoon red pepper flakes
Generous freshly ground black pepper
2 parsnips, peeled and chopped
4 tablespoons butter
1 medium onion, diced
2 garlic cloves, minced
1/2 pound pork sausage, cooked
1 1/2 tablespoons dried sage
- Preheat the oven to 400 degrees. Prep your Brussels sprouts by cutting them in half (quarter especially large ones; leave especially small ones whole). Toss with olive oil, 1/2 teaspoon salt, generous amount of black pepper and red pepper flakes.
- Place on a baking sheet and bake for 25-30 minutes or until nicely brown and crispy around the edges, turning occasionally for even browning.
- Put parsnips in large oven-proof skillet. Cover with water. Simmer over medium heat for 3 minutes. Drain and remove from pan.
- Melt butter in same large skillet. Add onion along with 1/2 teaspoon salt and more freshly ground black pepper. Cook for 5 minutes over medium-low heat until soft. Add garlic and cook 3 minutes longer. Add cooked parsnips, pork sausage and sage.
- Turn heat to medium-high and cook for 20 minutes, stirring every couple of minutes. The idea here is to brown the parsnips but not burn them. Your pan should be so hot that you can leave it for 2 minutes without stirring and when you come back, things will just be nicely browned. If the parsnips or onions burn in 2 minutes, your pan is too hot.
- After things are nicely browned, put pan in the oven. Roast for 10 minutes. (This timed nicely for me, as my Brussels sprouts had exactly 10 minutes left). Toss hash with roasted Brussels sprouts. Top with some fried eggs and bam! Vegetable-centric meal in 45 minutes or less.
—————–
LOCAL THYME RECIPES
Comforting Classics
Apple Brussels Sprout Slaw
Warming Stone Soup
Slow Cooker Sweet Potatoes
Beef Barley and Winter Vegetable Stew
Outside the Box Recipes
Roasted Sweet Potatoes and Brussels Sprouts with Miso Vinaigrette
Stuffed Collard Greens with Moroccan Spiced Quinoa
Sweet Potato Breakfast Treat
Parsnip Biscuits with Black Pepper and Honey
Quick and Easy Meal
Roasted Carrots and Parsnips on a Bed of Quinoa
Thank you!
- On: October 26, 2016
- 1
Celeriac harvest on a lovely fall day.
This is the final box of our regular season. Thank you Tipi members! We truly appreciate your commitment to our farm. We could not farm without you.
Many of you have signed up for continued deliveries with our extension and storage shares. We will be in touch with more information as those deliveries approach.
We will open registration for our 2017 season within a few weeks. Watch for emails from us. In the meantime, you can continue eating our produce through the winter. Our stored cabbage, carrots and other roots will be on the shelves at these stores: Willy Street Coop (Madison, Middleton), Outpost Natural Foods (Mequon and Milwaukee area), Basics Coop (Janesville), Whole Foods (Madison only), Good Harvest Market (Pewaukee), and Health Hut (Brookfield).
How was the season? Our thoughts.
It has been a challenging year for us but you probably did not notice. It was a good year to test our version of CSA (Community Supported Agriculture). In the classic CSA model, you as members, would share in the risks of the farm. We operate a little differently. More than half the crops we grow are intended for our store customers but are available to the CSA as needed, providing a reliable buffer in a poor season. We dipped into that reservoir this year to make sure you got your expected value of good produce. For example, beets, summer carrots, and leeks all had smaller harvests than expected so we put them all into your CSA boxes. We were glad to have that supply at hand.
It was an unusually long growing season, with a record-early start. We were in the fields planting radishes and spinach in mid-March. The season extended with a mild fall, allowing us to harvest peppers right up to this week. Humid, rainy days in August and September did not do us any favors. The greatest effect was on our fall crops, then in their adolescent phase. This is why we grow 40 different crops. Each year, something will do poorly but something else will do well and take its place. That’s the nature of a mixed vegetable farm like ours.
It was a good year for peppers and watermelons. The greens and most summer crops thrived. The sweet potatoes are terrific. The cauliflower and Romanesco were late to produce heads but we are thrilled with how much we’ve had to harvest recently.
Our work crew was wonderful this year, both newcomers and old hands. They were a joy to work with: smart, diligent, thoughtful, and kind to each other.
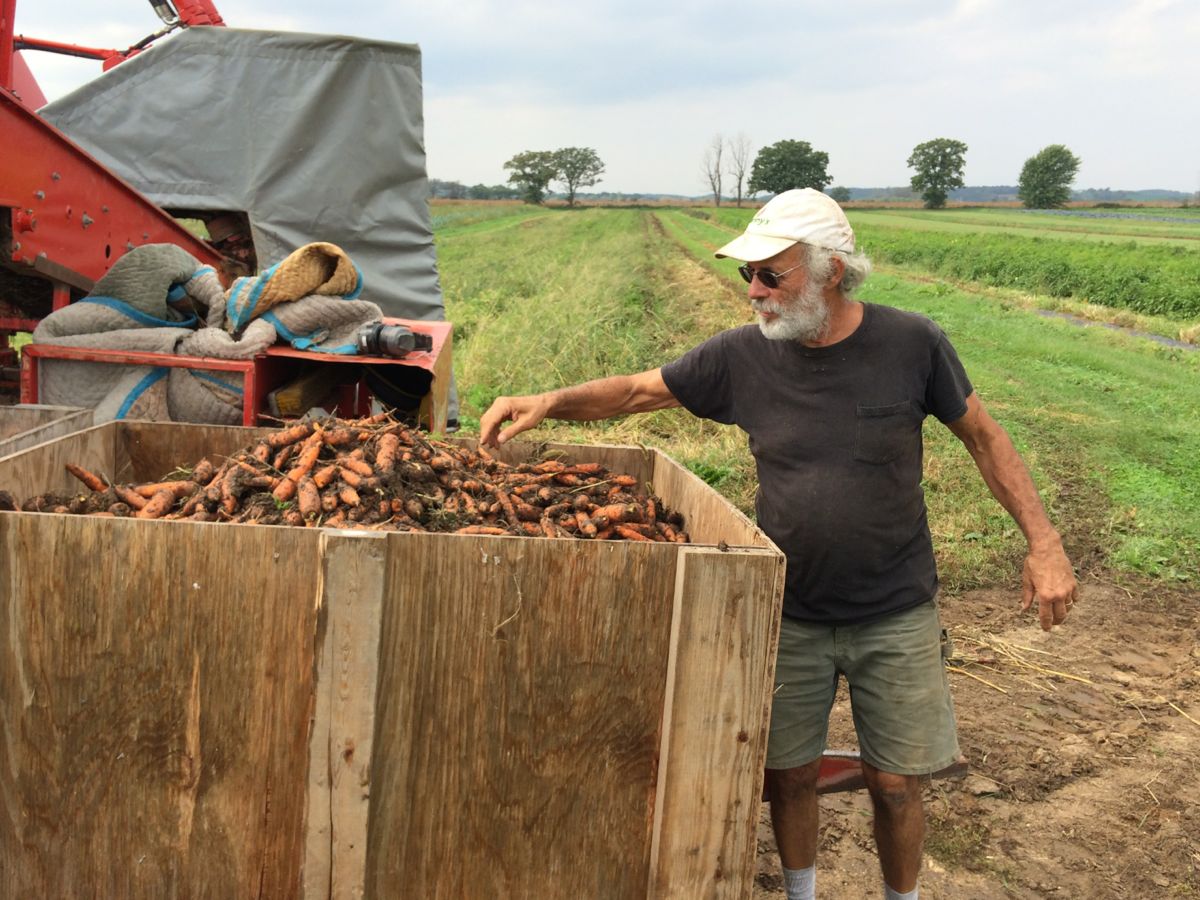
Our field work will continue for another three weeks, as we bring in cabbage, carrots and other roots to store and sell through the winter. It’s always a big effort, so we are preparing mentally and physically. Steve has run through his checklist. The carrot harvester is ready to go, with new modifications. The wooden storage bins are all in good shape. Steve and Roger are tightening up the coolers for winter. We expect to have all the crops out of the field by mid-November. Then we can slow down for a few months. Our crew drops from 25 people down to five. That’s enough people to prepare and deliver our winter crops. In December and January we will mull over our 2017 plans so we can order seed. Greenhouse work begins by early March, and everything flows from there. Soon we will wrap up our time as the Organic Farmers of the Year. It has been a very special year for us.
Thank you again for your patronage. We are already envisioning changes and progress for next year. Join in and give us your feedback.
Beth and Steve.
How was the season? YOUR thoughts.
Now it’s your turn to share your thoughts. Please complete our annual survey. I sent the link in our 10/27/16 email, and look forward to poring over the results. This is an essential part of the CSA model – we need to hear from you to make the CSA work for you.
This week on the farm
We kept ourselves busy with farm maintenance, in anticipation of our big upcoming harvests.

Our beautiful barn, before and after painting. Roger completed the project in a day and half, with helpers, a lift, harnesses and an extended handle on his paint sprayer. We almost made it to the roof peak. The top gap will have to wait until a friend’s taller lift is available.

Roger in the cage, with Billy steering.
Veggie list and veggie notes (Oct 27/28, 2016, week #24, purple EOW)
Red cabbage
Sweet potatoes, 2+ lb
Brussels sprouts, 0.6 lb
Kale, 1 bunch
Beets, 2 lb
Celeriac, 1 or 2
Yellow onions, ~2
Carrots, a few
A pepper of some sort
Jalapeños (HOT), 2
Baby ginger, 1 knob
Most sites get cauliflower (white or orange or purple) but we might pair it with Romanesco broccoli for some sites.
Sweet potatoes – These are the Covington variety. This is an especially tasty batch. Let’s repeat my newsletter information from a few weeks ago.
Here are a few things we’ve learned about sweet potatoes:
– For best flavor, cook your sweet potatoes so they brown and caramelize. We have a simple, favorite way to roast sweet potatoes. We used to prepare sweet potato fries. Now we just quarter the potatoes, rub with olive oil, dust with salt and place cut-side-down on a cookie sheet. Roast in a 450 F oven without turning until soft. The flavors will caramelize (like sweet potato fries) but preparation is simpler and the cooking time less exacting. Slender sweet potato fries go from undercooked to overcooked in the blink of an eye. Larger slices are less exacting, and therefore are easier. Small sweet potatoes can be cut just in half. Jumbos will need to be chopped into pieces. Otherwise, they will take a long time to cook.
– Store your sweet potatoes at room temperature. They suffer chilling injury below 50 F.
– The sweet potatoes we grow require slightly longer cooking than ones from the supermarket, perhaps because they contain higher moisture so soon after harvest.
– Sweet potatoes are good at any size. We have cooked everything from tiny to jumbo and consistently find that all sizes taste good.
Brussels sprouts – The B-sprouts have taken their time sizing up. Sprouts are small. I’ve given you our usual cooking instructions below, but recognize that all of this week’s sprouts are small.
Here is our method to cook Brussels sprouts. Wash the sprouts and trim the cut ends. Cut an X in the stem end of large sprouts. Cut a single slit in small or medium sprouts. This does two things. It helps the Brussels sprouts cook evenly, plus it allows them to soak up any marinade or dressing. Place sprouts in a pot with one inch of water in the bottom and steam until tender, 7 to 10 minutes. If the sprouts are uneven in size, then set aside the smallest ones and add to the pot after the larger ones have cooked for a few minutes. Don’t overcook them! You can also oven-roast Brussels sprouts. Here are a few dressing ideas for cooked sprouts:
– Sherry vinegar/olive oil/Dijon mustard/garlic/white wine/salt and pepper. This is our favorite, especially when you combine the Brussels sprouts with slivered peppers and thinly sliced onions. Delicious warm, cold, or at room temperature.
– Balsamic vinegar/olive oil/garlic/salt and pepper
– Lemon juice and zest/melted brown butter/poppy seeds/white wine/garlic/salt
Celeriac (knobby, round, bizarre-looking vegetable which smells like celery) – Flavorful celeriac is good raw or cooked. It is excellent in mixed roasted veggies or in soup. It’s especially good in cream soups, alone or mixed with potatoes. Grated raw celeriac is a great starting point for winter salads. Celeriac will store in your refrigerator for months. Cut off chunks as you need them. Peel before using.
Baby ginger – Wrap in a damp cloth or paper towel, and keep in the refrigerator in a plastic bag. Eat soon; baby ginger is perishable. It bruises easily so we gave it a light washing, and figured you could do the fine washing when you use it.

Everyone gets one knob of baby ginger.
RECIPES FROM LAUREN
GINGER, TURMERIC & COCONUT SOUP
Takes 40 minutes
Serves 4-6
2 tablespoon butter
2 carrots, diced
1/2 yellow onion, diced
1/2 celeriac, peeled and diced
1 jalapeno, seeded and diced
2 tablespoons minced ginger
1 teaspoon ground turmeric
1 teaspoon Kosher salt
1/2 cup white rice
3 cups chicken broth
1 can coconut milk
1 bunch kale (6-8 leaves), stems removed, leaves roughly chopped
1 teaspoon fish sauce
Lime wedges, to serve
- In a large stock pot or Dutch oven, melt butter. Add carrots, onion, celeriac, jalapeno and ginger. Saute for 5 minutes until fragrant. Add turmeric and salt and saute 5 minutes longer.
- Add rice. Stir for about a minute to combine rice and toast it gently. Add chicken broth, bring mixture to a boil and reduce to a simmer. Simmer until rice is cooked, about 15 minutes. Add coconut milk, kale and fish sauce. Simmer gently until kale is wilted, about 5 minutes.
- Serve with lime wedges.
————
SWEET POTATO & BRUSSELS SPROUT TACOS WITH RED CABBAGE SLAW:
Takes 1 hour
Serves 4.
5 cups diced and peeled sweet potatoes
1 cup Brussels sprouts, left whole if small, halved if a little larger
2-1/2 tablespoons olive oil
2 teaspoons Kosher salt
1 teaspoon cumin
1 teaspoon chili powder
1/4 teaspoon black pepper
Pinch cinnamon
Red Cabbage Slaw:
2 cups shredded red cabbage
1 red pepper (bell or fryer), seeded and diced
1 jalapeno, seeded and diced
1/2 yellow onion, diced
1 tablespoon olive oil
2 limes, juiced
1 teaspoon Kosher salt
1/2 teaspoon sugar
Flour tortillas
Avocado
Sour cream or Greek yogurt
Hot sauce, optional
- Preheat oven to 400 degrees and chop vegetables while you wait.
- Toss sweet potatoes and brussels sprouts with olive oil and spices in a large bowl to coat. Pour out onto a rimmed baking sheet. Roast for 40-45 minutes rotating occasionally.
- While the sweet potatoes and brussels sprouts roast, prepare the slaw. Combine all ingredients in a large bowl.
- To serve, top warm tortillas with a spoonful or two of sour cream. Add avocado, followed by warm roasted vegetables and cabbage slaw. Add hot sauce if desired. Enjoy!
- Roast at 400 degrees for 40-45 minutes
————
LOCAL THYME RECIPES
Comforting Classics
Cheddar Cauliflower Fritter
Chinese Spiced Hot Red Cabbage
Slow Roasted Vegetables with Mustard Seed Vinaigrette
Creamy Celeriac Dressing
Outside the Box Ideas
Roasted Cauliflower Salad with Hazelnuts
Sicilian Braised Red Cabbage with Capers and Olives
Red Velvet Cake
Celeriac with Lentils and Hazelnuts
Quick and Easy Meal
Sweet Potato Soup with Miso and Ginger
Final green EOW box
- On: October 19, 2016
- 0
This is the final delivery for our green EOW members. Thank you for joining us this season! We hope you enjoyed the produce and the experience. We will be in touch with a survey in the next few weeks.
Here is our remaining schedule:
Oct. 20/21 (this week) – final week for green EOW members.
Oct 27/28 (next week) – final week for weekly and for purple EOW members
November – Deliveries are available in November for members who signed up for our extension or storage shares. Those already registered should have received a recent confirmation email from us. We still have a few shares available. If interested, go here to sign up. The deadline to register and pay is this Sunday Oct. 23.
Getting ready for the big push
By mid-November, our coolers will be stuffed with crops to sell through the winter. It’s almost time to begin these harvests. The carrots and other roots are growing happily underground, so we don’t want to interfere yet. We think carrots, in particular, improve in quality if they get a month of cool nights as they mature. In the meantime, we continue our usual CSA work, as well as preparations for the big upcoming harvests.

Steve is making improvements to his carrot harvester, the one we imported from Sweden last year. It is a monster! He loves the thing! It operates best with a team of two or three people but, in a pinch, Steve can run it solo. He beams after a successful run with this machine.
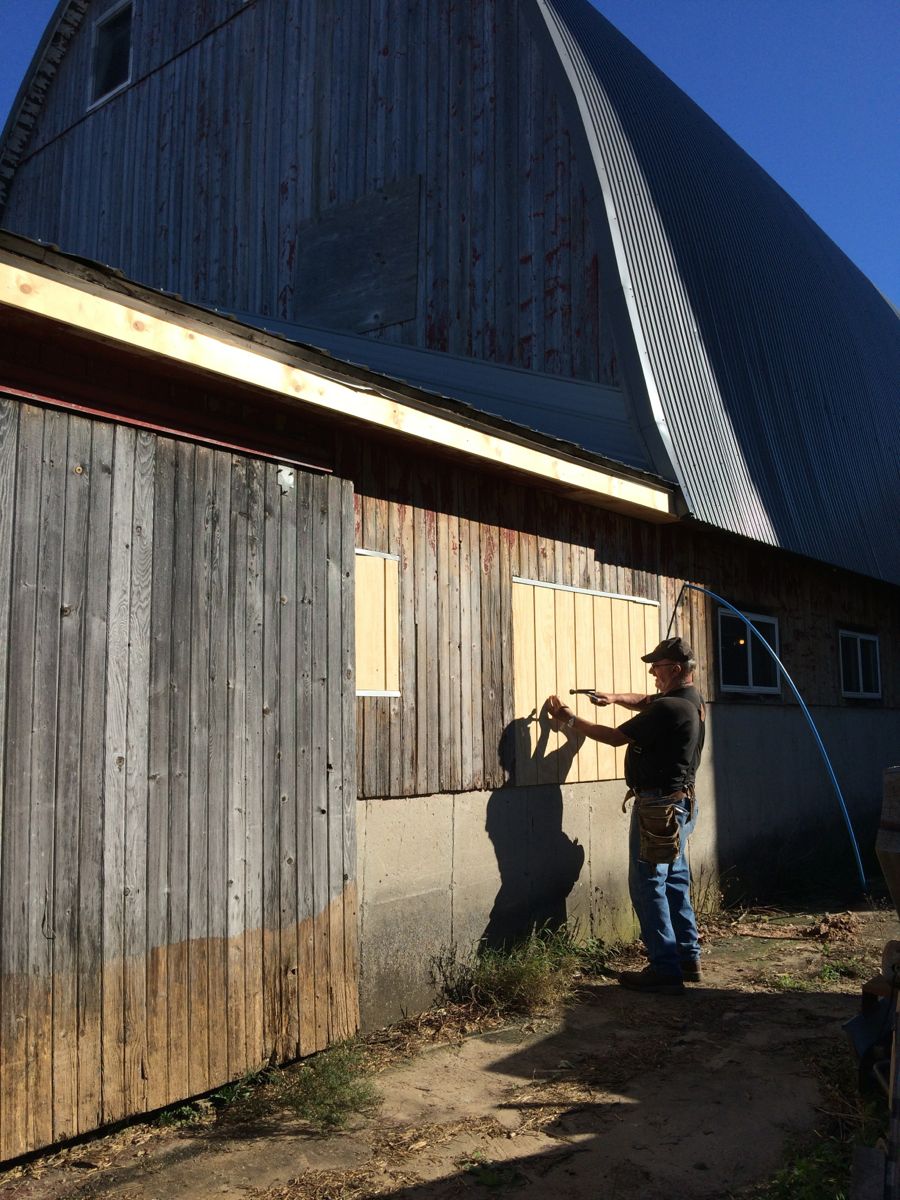
Roger patches weak areas on our barn. We plan to paint it next week if the weather holds.
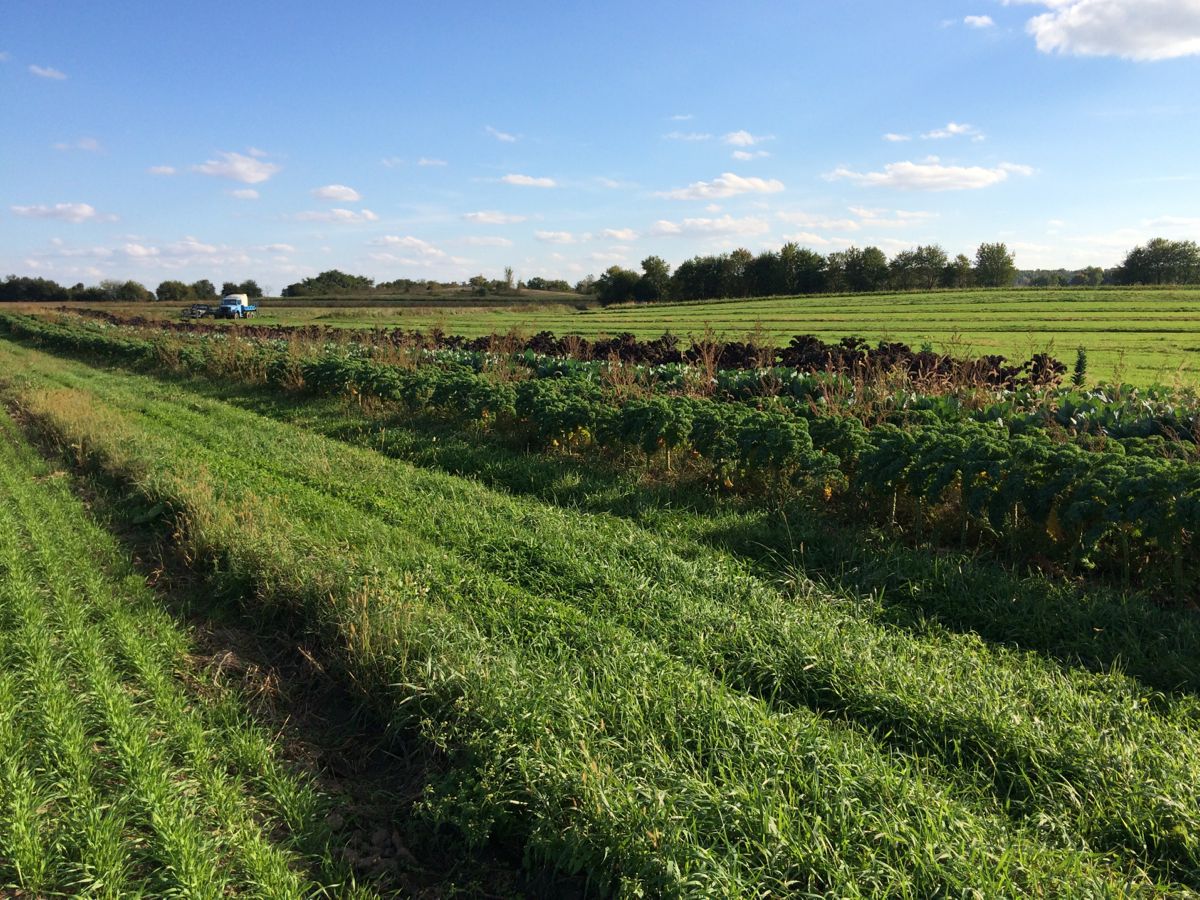
Looks like Ireland, doesn’t it? As each crop finishes, we plant the empty field with cover crops. The rye and vetch are in full, lush growth, a beautiful shade of green. The cover crops keep the soil from eroding over the winter then burst into growth in spring.

Maggie and Rebecca harvest kale. We’ve loved the mild weather. No rain, no snow, no mosquitos. Ahh.
Thinking ahead

Matt Schaeffer and Steve check out the remains of Matt’s mulched fields.
It’s not too soon to ponder improvements for next year. Steve and I visited neighbor Matt Schaeffer of Sandhill Family Farms to pick up his potatoes for this week’s CSA box. Matt and wife Peg raise organic vegetables about 15 miles south of us. It’s interesting to swap farming notes because they are so close, and grow many of the same crops. Steve and I wanted to see the tomato fields that Matt mulched with a thick layer of straw and hay. It gave him good weed control in a rainy, challenging season. It’s an approach we are considering for next year, so it’s helpful to see it in action on another farm.
I also checked out Peg and Matt’s winter squash, to compare notes on disease problems we saw this season. I showed Matt our stored squash a few weeks ago, ranting about how tantalizingly close they got to harvest before rot set in. Matt looked at me and said in his calmest voice,
“I’ve had enough time to come to terms with the winter squash problems. But you aren’t quite there yet, are you?”
Sigh. Two weeks have passed and I’m getting close. Beth
Veggie list and veggie notes (Oct. 20/21, 2016, week #23, green EOW)
Butternut squash
Carola potatoes, 3 1/3 lb
Leeks, ~1 lb
Yukina greens
Green frying peppers, ~2
Bell pepper, ~1
Poblano chiles (HOT, in bag), ~4
Carrots, 2 lb
Beauty Heart radish
Garlic
Some get cauliflower (white or purple or orange)
Some sites get broccoli.
Some get Romanesco broccoli.
Who knows, you might get a mix.
Butternuts – Like last week, many of the squash we send this week have flaws. Cut the flawed areas away before cooking because they are difficult to recognize once the squash is cooked. The squash are very good cooking quality, worth the bit of extra effort. The plants made beautiful squash before the rainy weather caused problems. We’re packing a mix of different butternut varieties. If you receive a small squash with very dark orange color, that’s the ‘Honeynut’ variety. They are quite small and very tasty, a result of breeding program directed at high quality, ‘single-serving’ squash. They are too small to send on their own, so I will pair it with other small butternuts.
Storage: Store at room temperature with good ventilation. Eat soon – these might not store for long.
Organic Carola potatoes – Carolas are small to medium potatoes with yellow skin and flesh, grown by Matt and Peg Schaeffer of Sandhill Family Farms. Matt says they are his favorite potato and referred me to this description online: “These yellow-fleshed potatoes have moist, creamy-sweet flesh and satisfying texture; a favorite for oven roasting to a rich golden-brown, as well as grilling, steaming, mashing or frying. They add sensational flavor and texture to soups and stews.”
Storage: Can be stored at room temperature or in a cool spot. Keep in the dark so they do not turn green. The Carolas are thin-skinned and prone to drying out, so keep an eye on them.
Yukina (large heads of dark green leaves) – This is my favorite fall green. It is nutritious, delicious, a great combination of mustard-like leaves with crunchy stems. These yukina look big, but will shrink once cooked. We usually steam and drain chopped yukina, then dress it with a cooked mixture of fried garlic and ginger simmered with olive oil, balsamic vinegar, soy sauce, a little sugar and a lot of paprika or hot pepper flakes.
Poblano chiles (triangular, shiny, green or red) – These are mildly hot. Poblanos are the creme de la creme of chiles. They have lots of great flavor in combination with manageable heat. Steve protected these plants from frost so we would have the chiles for you. Roast and add to soup or casseroles. For our household, they are emblematic of fall cooking.
Beauty Heart radishes (round, white with pale green shoulders and bright pink interior) – Refrigerate. The interior color is lovely. Slice thinly and add to salads, cook lightly in mixed vegetable medleys or cut into matchsticks and add to pasta salads. We have sent the Beauty Hearts in combination with carrots because they make lovely, mixed salads, like Lauren’s dish below.
RECIPES FROM LAUREN
BEAUTY HEART RADISH, CARROT & AVOCADO SALAD
Takes 20 minutes
Makes 4-6 servings
1 giant Beauty Heart radish, peeled and cut into 1/16-inch slices
1 pound carrots, peeled and cut into 1/16-inch slices
1-2 avocados (I always opt for more avocado when there’s an option), cut in half and sliced
Kosher salt
Orange Garlic Vinaigrette:
2 garlic cloves, minced as finely as you can
3 tablespoons fresh orange juice
3 tablespoons olive oil
1 tablespoon rice wine vinegar
1 teaspoon sugar
1/2 teaspoon Dijon mustard
1/4 teaspoon Kosher salt
Pinch black pepper
- Combine radish and carrots in a large bowl.
- In a small bowl, combine all vinaigrette ingredients. Whisk until well combined and creamy in appearance (this means it has emulsified and will hold together well–mustard helps you achieve this emulsification so don’t leave it out!). Taste and adjust seasonings (some people will like more vinegar, salt or sugar).
- Pour dressing over radish and carrots.
- Lay out 3-5 avocado slices on each plate. Top with radish and carrots. Sprinkle with salt and drizzle with any dressing that remains in the bowl.
—————–
FALL HARVEST RISOTTO
Takes 1 hour
Serves 6-8
4 tablespoons butter
2 large leeks, white and light green parts only, sliced in half lengthwise and sliced
2 cups Carola potatoes, diced
4 cups butternut squash, peeled and diced
1 cup arborio rice
1/4 cup white wine
6 cups chicken broth
1/2 teaspoon dried sage
Kosher salt & freshly ground black pepper
- Melt butter in a large stockpot over medium heat. Add leeks along with a couple pinches of salt and pepper. Cook for 10 minutes.
- Reduce heat to medium low. Add potatoes, butternut squash and a few more pinches of salt and pepper. Cook for 15 minutes until soft, stirring every couple minutes. The bottom of the pan may brown a little, but don’t worry about this. It will just add flavor!
- In a separate large sauce pan, bring broth to a low simmer.
- Add rice and stir to combine. Stir for a couple minutes to toast the rice. Add wine and use a wooden spoon to scrape any browned bits off the bottom of the pan.
- Use a ladle to add a couple spoonfuls of simmering broth to the stockpot. Stir to combine and continue stirring every minute or so to keep it from sticking to the bottom of the pan. The idea is to stir it often enough that it has no chance to stick, but not so frequently that it doesn’t have a chance to simmer. Add sage after first addition of broth. Continue adding ladlefuls of stock every few minutes. You will keep adding and stirring and adding and stirring (slowly) for 30-35 minutes. Taste occasionally to test the texture of the rice. You want it to be cooked but not too mushy at the end. Adjust seasonings as desired.
—————–
LOCAL THYME RECIPES
Comforting Classics
Rancheros Sauce
Yukina and Goat Cheese Frittata
Cauliflower Leek Blue Cheese Soup
Vegan Winter Squash Bisque
Outside the Box Recipes
Poblano Custard
Wilted Yukina with Raisins and Pine Nuts
Buffalo Cauliflower
Butternut Squash and Apple Calzones
Quick and Easy Meal
Box count down
- On: October 12, 2016
- 0
Our regular CSA season is almost over. Let’s review the final three deliveries.
– October 13/14 = This week (purple EOW)
– October 20/21 = Final delivery for green EOW members
– October 27/28 = Final delivery for weekly and purple EOW members.
Additional deliveries are available for those who have signed up for our Extension or Storage shares. Look for an email from us earlier tonight with instructions to register.
Farm News
It is likely to frost tonight. Run out and cover your garden plants, if you are still hanging on to something precious. I covered a beautiful dahlia that I can’t let go yet. We are protecting one pepper field with row cover, so we can continue harvesting for a few more weeks. Everything else is either already harvested (sweet potatoes, squash) or can handle substantial freezing (broccoli, kale, cauliflower, root crops, etc.) Brussels sprouts will even improve with frost.
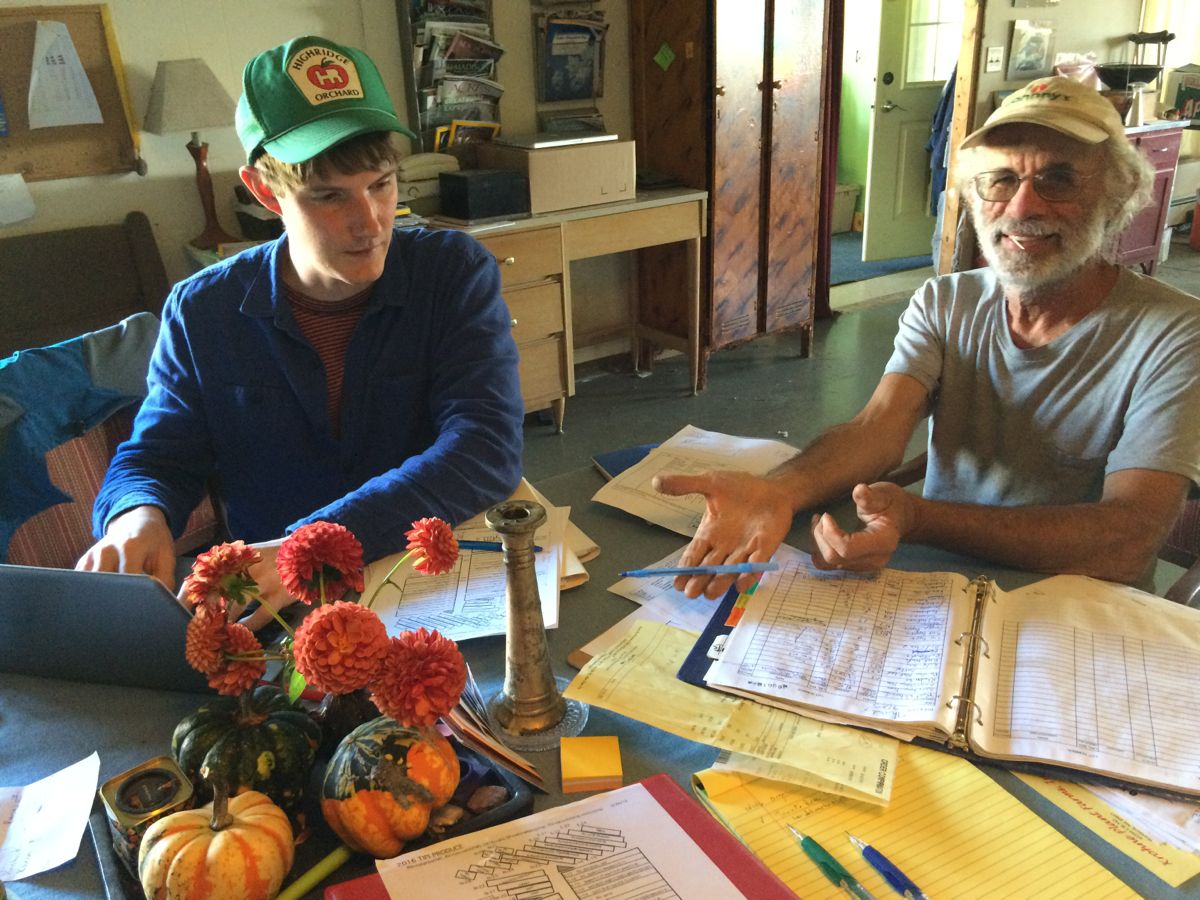
MOSA inspector Dan Marten and Steve review farm records at our kitchen table.
We had our organic inspection this week. It’s an annual step in maintaining our farm’s organic certification. Four hours of reviewing records indoors, on a beautiful sunny warm day. We passed with flying colors. The inspection is always interesting because it gives us on-the-ground insight into how other farms in Wisconsin are faring. Our inspector Dan Marten has visited vegetable farms all over the state. He reports it was a difficult season in most regions. Most got too much rain but some didn’t get enough. Like he said, “We didn’t get many gentle, overnight rains.” Seems like everyone got pounding deluges instead.
A few more gleaning photos.
I was taken with the mud boots everyone wore to our gleaning party. Here are a few beauties. You folks are so stylish!


Veggie list and veggie notes (Oct. 13/14, 2016, week #22, purple EOW)
We paired the napa cabbage with cilantro, scallions and jalapeños because they combine well in many Asian recipes. Temperatures are predicted to swing wildly this week. You can make a warm cooked dish with half your napa cabbage, then a cold salad once temperatures hit the mid-70’s again. Roast your butternut squash with a pan of oiled carrots and onions to warm the house. Then grill your peppers outside once it warms up.
Napa cabbage
Romano beans, ~1.5 lb
Butternut squash
Frying & bell peppers, mixed colors, 6 – 7
Carrots, 2 lb
Yellow onions
Scallions, 1 bunch
Jalapeño chile (HOT), 2, green or red
Cilantro, 1 bunch
UPDATE; Garlic, 1 bulb
Some sites get Romanesco broccoli.
Some sites get broccoli.
Some sites get cauliflower (white or purple or orange).
Some sites get Yukina greens.
If your squash or Romanesco is small, we’ll toss in an extra pepper or a sweet potato.
Napa cabbage (large, pale green cabbage with crinkled leaves) – This is an interesting vegetable, useful for both fresh, raw salads and for cooking. These napa are large enough to split among several recipes. Napa’s most famous use is fermented kimchi. I like to prepare a fresh, unfermented kimchi. Same seasonings, but it’s ready to eat right away. You will be amazed at how much shredded napa cabbage shrinks when prepared this way. See here for an example, but cut the salt in half: Grilled Flank Steak with Kimchi-style Coleslaw.
Storage: Napa stores very well. Cut off wedges as needed and keep the rest covered and refrigerated, and it will keep for several weeks. Peel off the outer layer and it will be ready to use. Here are a few preparation ideas from the ‘Asparagus to Zucchini’ cookbook.
– Chop raw napa into green salads.
– Substitute napa in traditional coleslaw.
– Chinese cabbage cooks quickly. Steam 3-5 minutes, or until leaves are wilted down but remain slightly crisp.
– Substitute napa cabbage for common cabbage in recipes, but reduce the cooking time by 2 minutes.
– Napa cabbage is the main ingredient in egg rolls. Try making an egg roll mixture to eat as a cooked side dish instead of preparing time-consuming egg rolls.
Romano beans – This is the final delivery of beans for the year. Quality is very nice. The beans are big but juicy and tender. We never thought we’d have this many to send in mid-October!
Jalapeño chile, HOT (small, green or red) – These are quite hot. As usual, remove the seeds and midveins to reduce their heat.
Cilantro – Well, it has taken us forever to get cilantro in the box again. We seeded repeatedly but none of the plantings work out. Except this one.
Cauliflower – We grow cauliflower in a variety of colors; white, purple and orange.
Garlic – This batch is from our friend John Hendrickson.
Butternut squash – This is our “Metro” variety, a favorite because it cures and sweetens quickly after harvest. These are medium-sized squash, average weight ~2.0 lb.
Hint for cutting winter squash: If you want to peel or dice your butternut squash, microwave the intact squash on high for one minute. That will warm and soften the squash, making it much easier to peel or cut. I find this trick useful even when just cutting the butternut in half.
Storage: Store at room temperature. On your kitchen counter is perfect.
BUTTERNUT FLAWS
Almost all of this week’s butternut squash have flaws, another legacy of the wet weather. The flaws are small enough to either peel away or cut around. We debated whether to pack them in the CSA boxes – I don’t usually send flawed squash. However, it was a choice between composting them (and having no squash for you this week) or sending them to you to enjoy, albeit with trimming. We hope you agree. Don’t try to hold these for long. Find the flaw and cut it out before cooking. It’s more difficult to recognize after cooking. Check around the stem.
RECIPES FROM LAUREN
NAPA STUFFED CABBAGE ROLLS
Adapted from Things I Made Today
I wish I could take credit for these cabbage rolls but alas I cannot. One of my favorite Madison bloggers- Vicky from Things I Made Today– whipped these up on a tired Sunday night after an exhausting day of housework and cooking. She didn’t expect them to be anything special and boy was she wrong! Something about napa cabbage, scallions, carrots, cilantro and hoison sauce is just magical. I love this dish endlessly and know you will to!
Takes 1 hour, 20 minutes
Makes 4-6
1 cup jasmine rice
1-1/2 cups water
1/2 teaspoon Kosher salt
2 tablespoons sesame oil
4 ounces mushroom of your choice, thinly sliced
1/2 teaspoon garlic powder
1/2 teaspoon dried ginger
1 pound ground pork
2 large carrots, shredded
4 scallions, sliced
1/2 cup cilantro, roughly chopped
1/4 teaspoon red pepper flakes
1 tablespoon soy sauce
1 tablespoon rice wine vinegar
1 large head Napa cabbage, leaves separated
1/2 cup hoison sauce
2 tablespoons peanut butter
1/4 cup water
- Preheat oven to 375 degrees.
- In a medium sauce pan, combine rice, water and salt. Bring to a boil, stir and reduce heat to low. Cover and simmer for 18 minutes. Remove from heat after 18 minutes (but don’t remove the lid!) and let sit for 5 minutes.
- While the rice cooks, heat oil in a large skillet over medium heat. Add mushroom along with garlic and ginger. Saute for 10 minutes until mushrooms are tender but not mushy.
- In a large bowl, combine cooked mushrooms, pork, cooked rice, carrots, scallions, cilantro, red pepper flakes, soy sauce and rice wine vinegar. Use your hands to combine.
- Lay a cabbage leaf flat on a baking sheet. Scoop 3-6 tablespoons of mushroom mixture into middle of leaf. Roll up leaf (tucking in sides if there’s extra leaf) and then place roll, seam side down, on baking sheet. Continue with remaining leaves.
- In a small bowl, combine hoison sauce, peanut butter and water. Brush the sauce over the cabbage rolls. Bake for 35-40 minutes until pork is cooked through.
- Enjoy!
————
BBQ Butternut Squash & Pulled Pork Pizza
You don’t have to have the pulled pork if you are vegetarian. I suggest doubling the butternut squash if you decide not to do the pork.
Takes 1 hour (not including time to make pulled pork), add an additional hour if you plan to make the dough from scratch
Makes 14-inch pizza that serves 4-6
1 batch pizza dough (your favorite or use my recipe below!)
2 cups peeled and cubed butternut squash
1 tablespoon olive oil
1/2 teaspoon Kosher salt
1/4 teaspoon freshly ground black pepper
3/4 cup BBQ sauce
1 cup pulled pork (here’s one of my favorite super easy slow-cooker pulled pork recipes!)
1 red Italian fryer, seeded and diced
1 green Italian fryer, seeded and diced
1 jalapeno, seeded and diced
1/2 yellow onion, diced
2 cups smoked cheddar cheese, shredded
For the pizza dough:
1-1/2 cups warm water
2 teaspoons active yeast
2 tablespoons honey
4 cups flour
2 teaspoons Kosher salt
- If you are making the dough from scratch, begin here. If not, skip to step 2. Combine warm water (but not hot!) with yeast and honey in a small bowl or measuring cup. Whisk to combine and let sit for 5 minutes. Combine flour and salt together in a large bowl. Make a well in the center of the flour mixture and pour in water with yeast. Stir to combine but do not work the dough at all, just stir until all the ingredients are incorporated together. Let dough rest for 15 minutes. Turn out onto a well-floured counter and knead for 3-5 minutes until smooth and uniform dough forms. Grease or oil a large clean bowl. Add dough, cover with plastic wrap or a towel and let rest in a warm place for an hour or until dough has doubled in size.
- Preheat oven to 425 degrees.
- Combine butternut squash, olive oil, salt and pepper in a small bowl to evenly coat. Add to a large baking sheet and bake for 30 minutes. Once finished remove from oven and add back to small bowl. Set aside.
- Preheat oven to 525 degrees.
- Once dough is risen. Roll it out on a well-floured counter until it’s about the size of the baking sheet you used for roasting the squash. Transfer the dough to the baking sheet.
- Top dough with BBQ sauce leaving an inch border on all the edges. Add pork followed by butternut squash, peppers, onions and smoked cheddar.
- Bake for 20 minutes until the crust is golden brown and the cheese is bubbly.
————
LOCAL THYME RECIPES
Comforting Classics
Buttered Romano Beans Pignoli
Chipotle Lime Cilantro Slaw with Napa Cabbage
Butternut Squash Soup with Cider Cream
Slow Roasted Salmon on Lentils Braised with Carrots and Greens
Outside the Box Recipes
Romano Beans with Caramelized Onions
Five Spice Stir Fry with Cabbage and Carrots
Butternut Pancake
Carrot Hummus
Quick and Easy Meal
NPR’s Ensenada Slaw with Fish and Pepper Tacos
Gleaning fun
- On: October 05, 2016
- 0
It is time to review our schedule for the rest of this season. We still have extension shares (Nov. 3/4, $30) and storage shares (Nov 17/18, $105) available for those who want to extend their CSA season. I’ll send information to register for these shares in the next few days.
– October 6/7 (this week) = green EOW
– October 13/14 = purple EOW
– October 20/21 = Final delivery for green EOW members
– October 27/28 = Final delivery for weekly and purple EOW members.
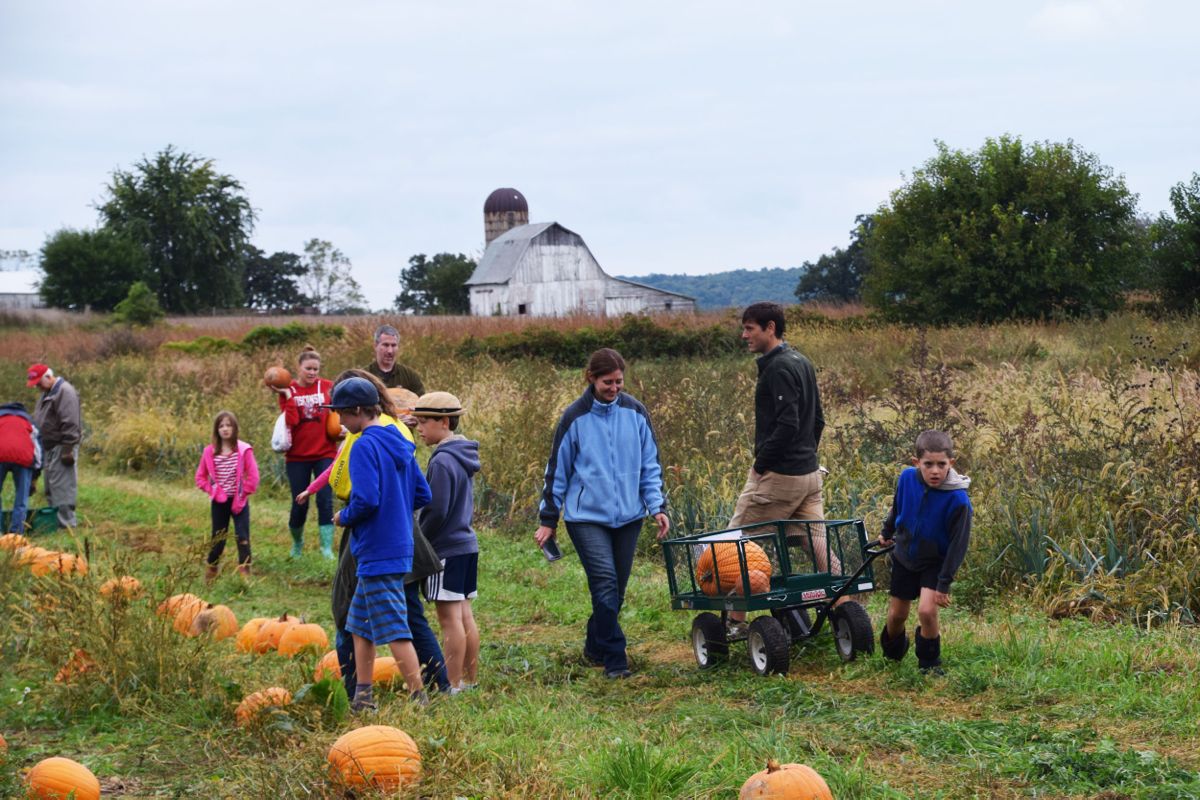
Gleaning party
Our pumpkin u-pick and gleaning party was a big success. I think it’s my favorite u-pick so far. Thank you to everyone who sent us photos! I’d like to share a collection from Katie Jarvis. Her photos capture her family’s experience as they wandered the farm.
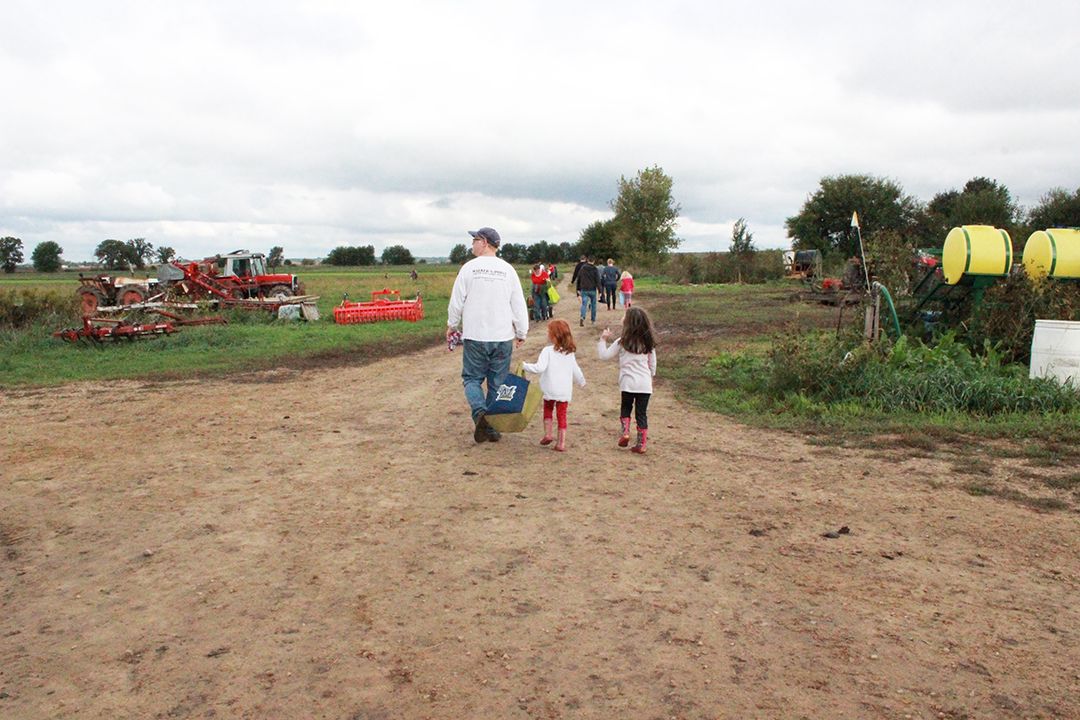
Arrival at the farm, with empty bags and anticipation.
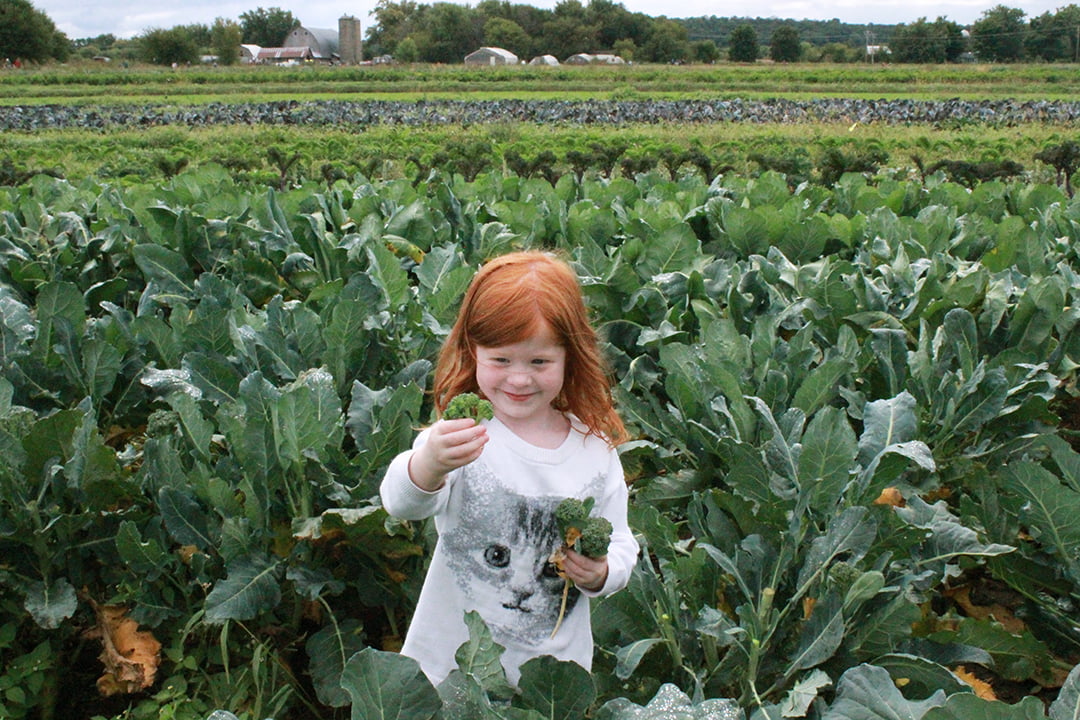
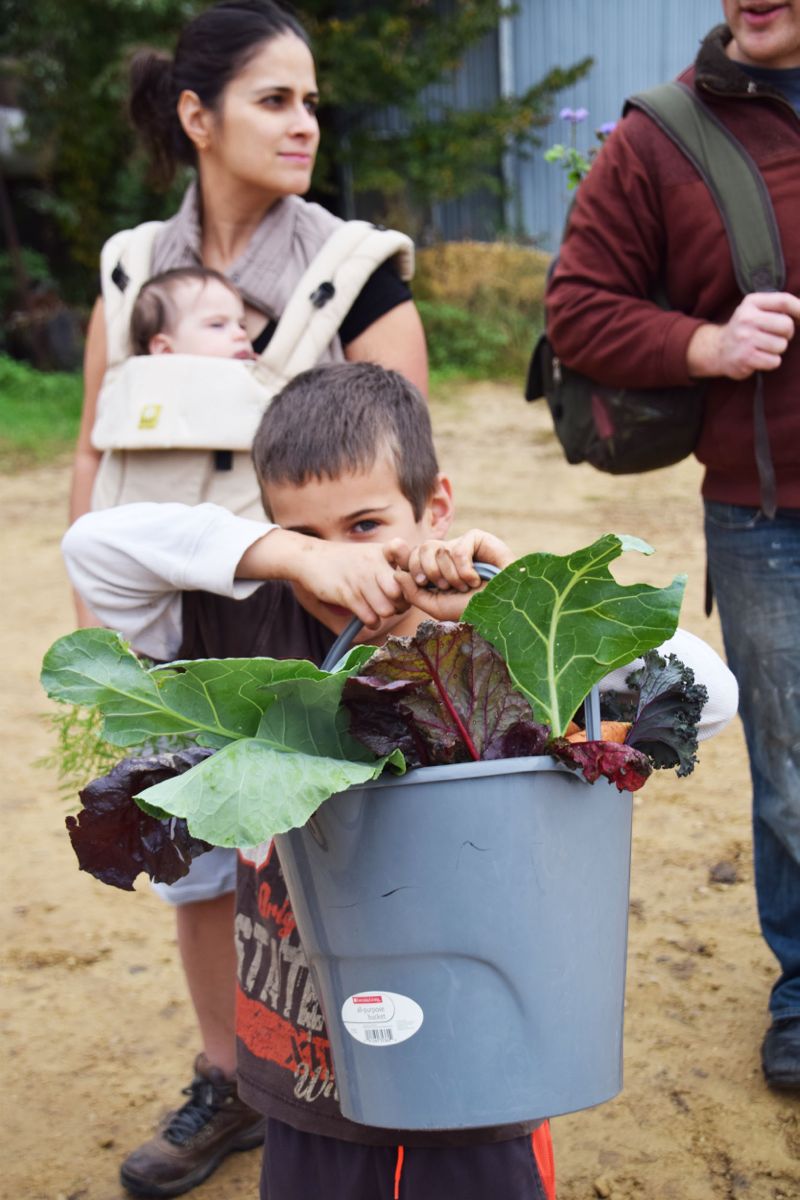
The broccoli side-shoots are the perfect size for kids.
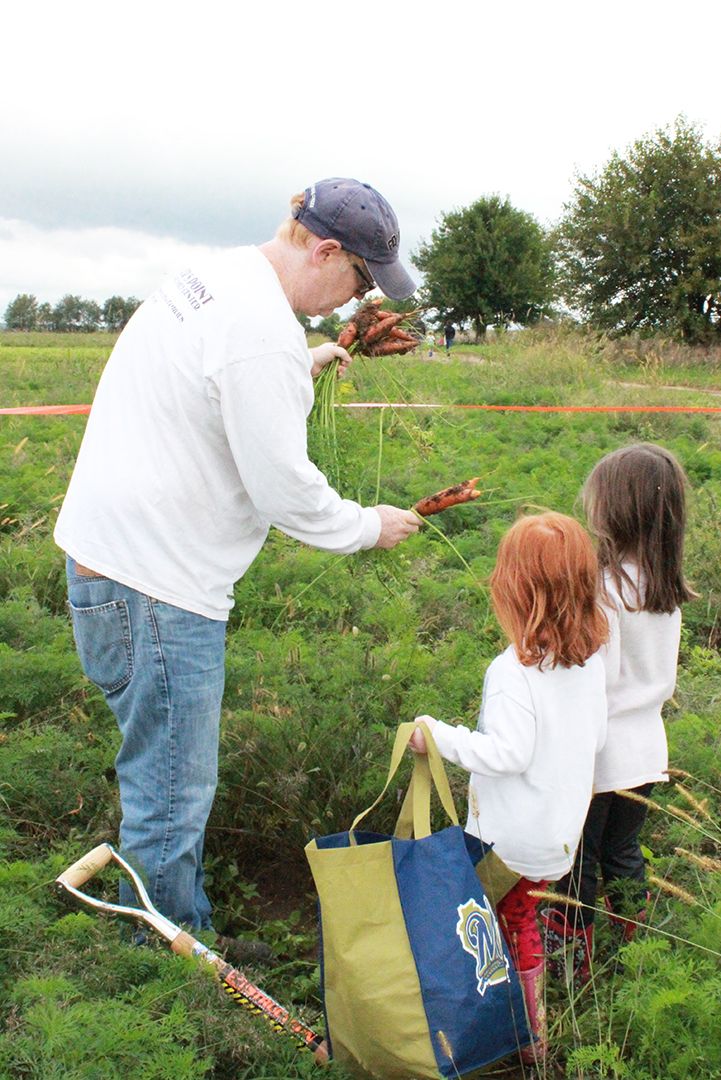
Carrots to dig!

Rhubarb to pull!

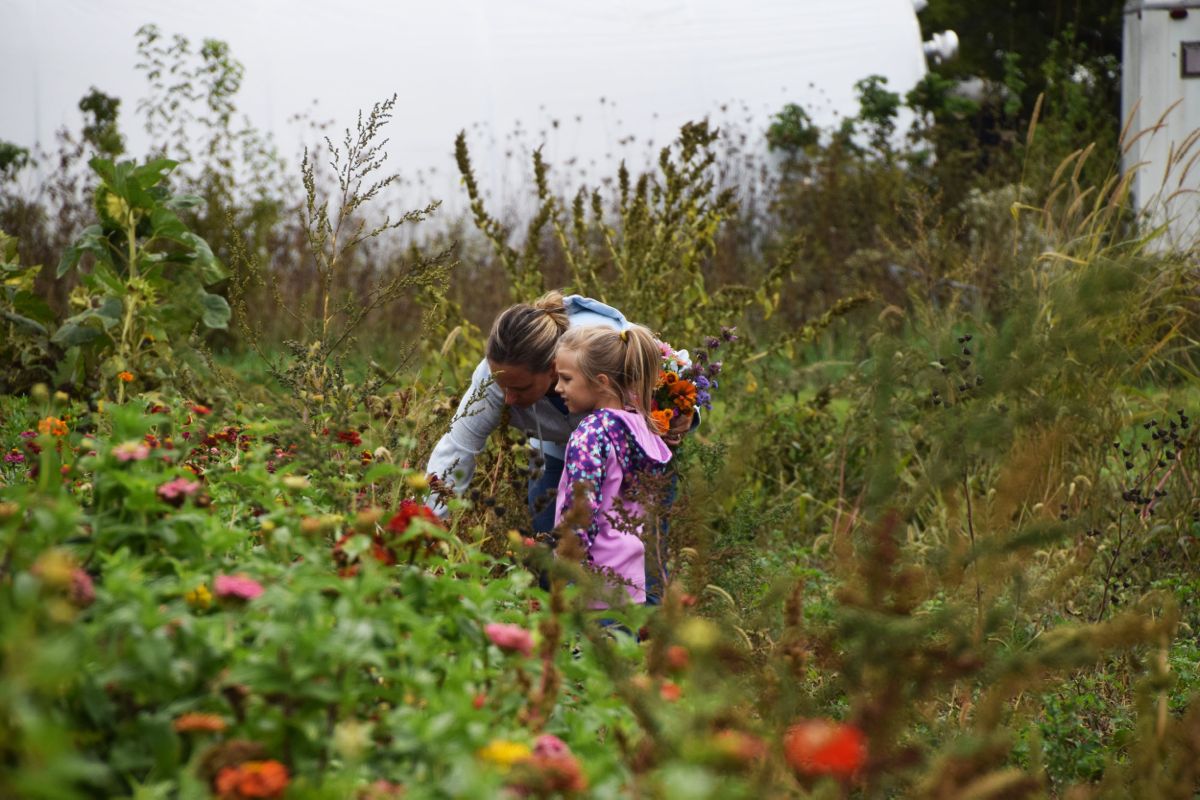
Flowers to pick!
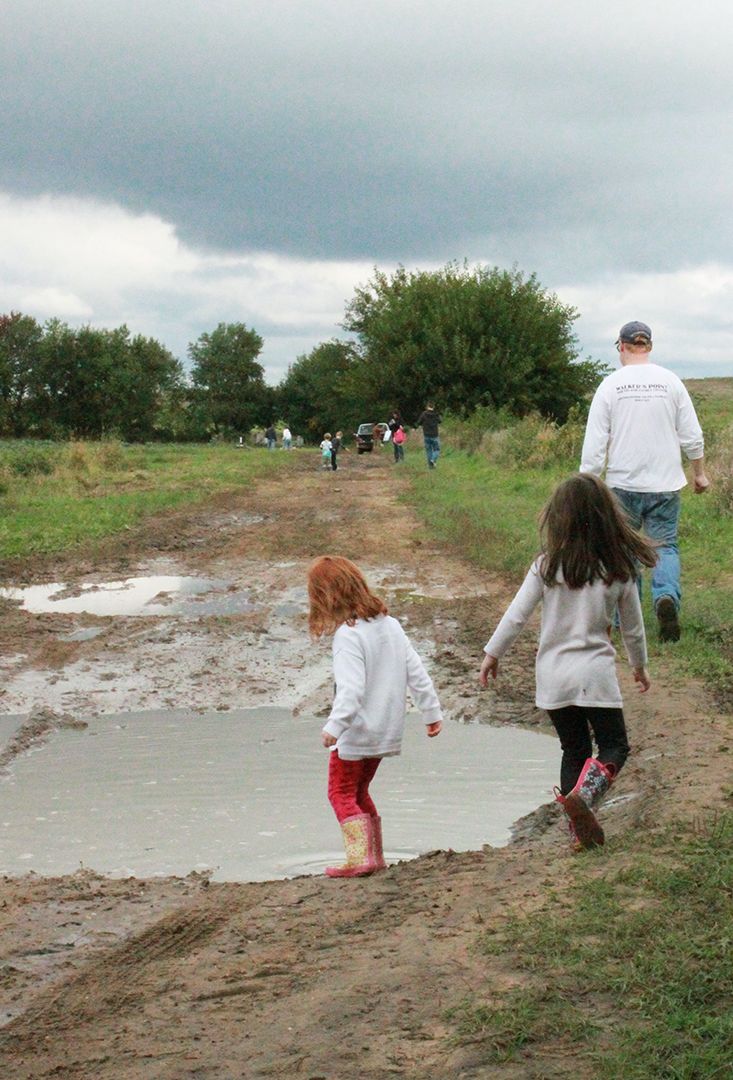
For many children, farm puddles were the main attraction.
The farm is unusually green for this time of year, because of all the rain. Despite the clouds, the weather stayed dry. That felt lucky.
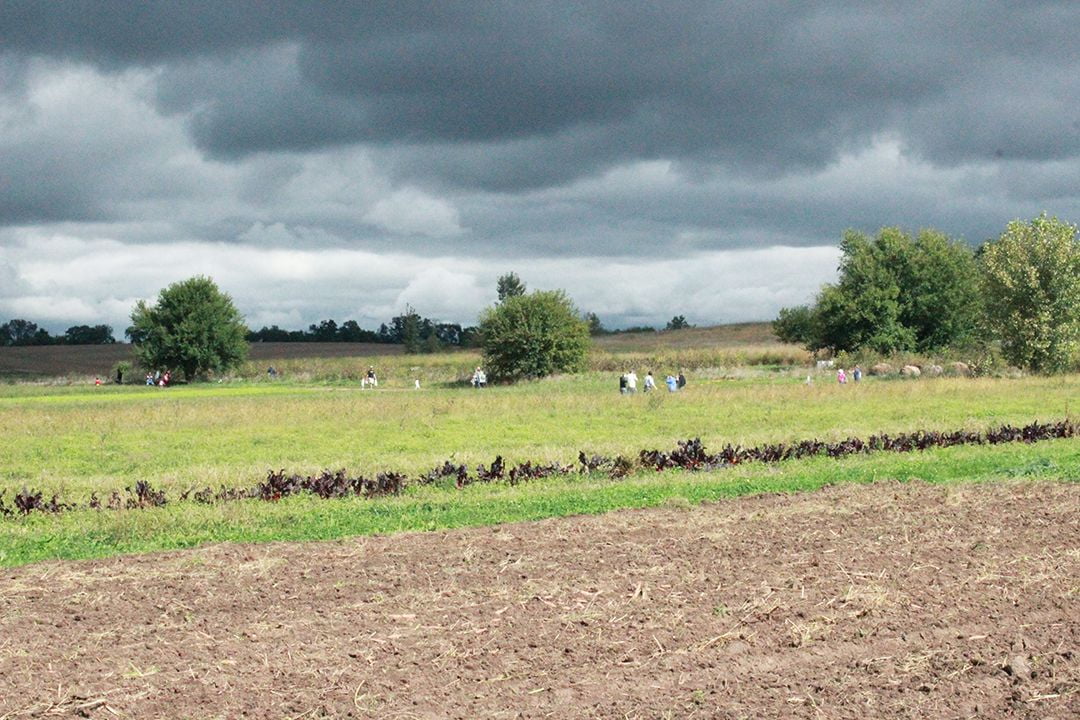
Julie Garret’s photos
Friend and farm advocate Julie Garret took some terrific photos. I think the overall message is that everyone found some corner of the farm to explore and enjoy.


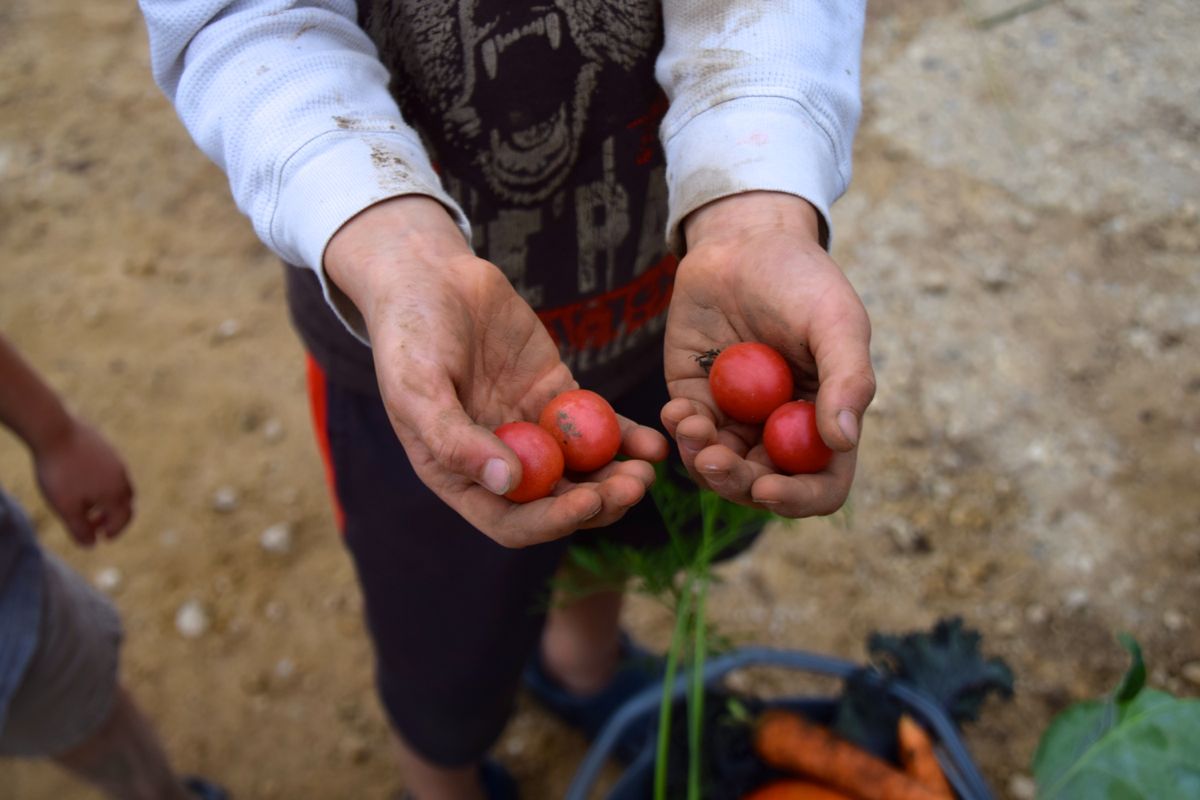
Getting dirty is part of the day.
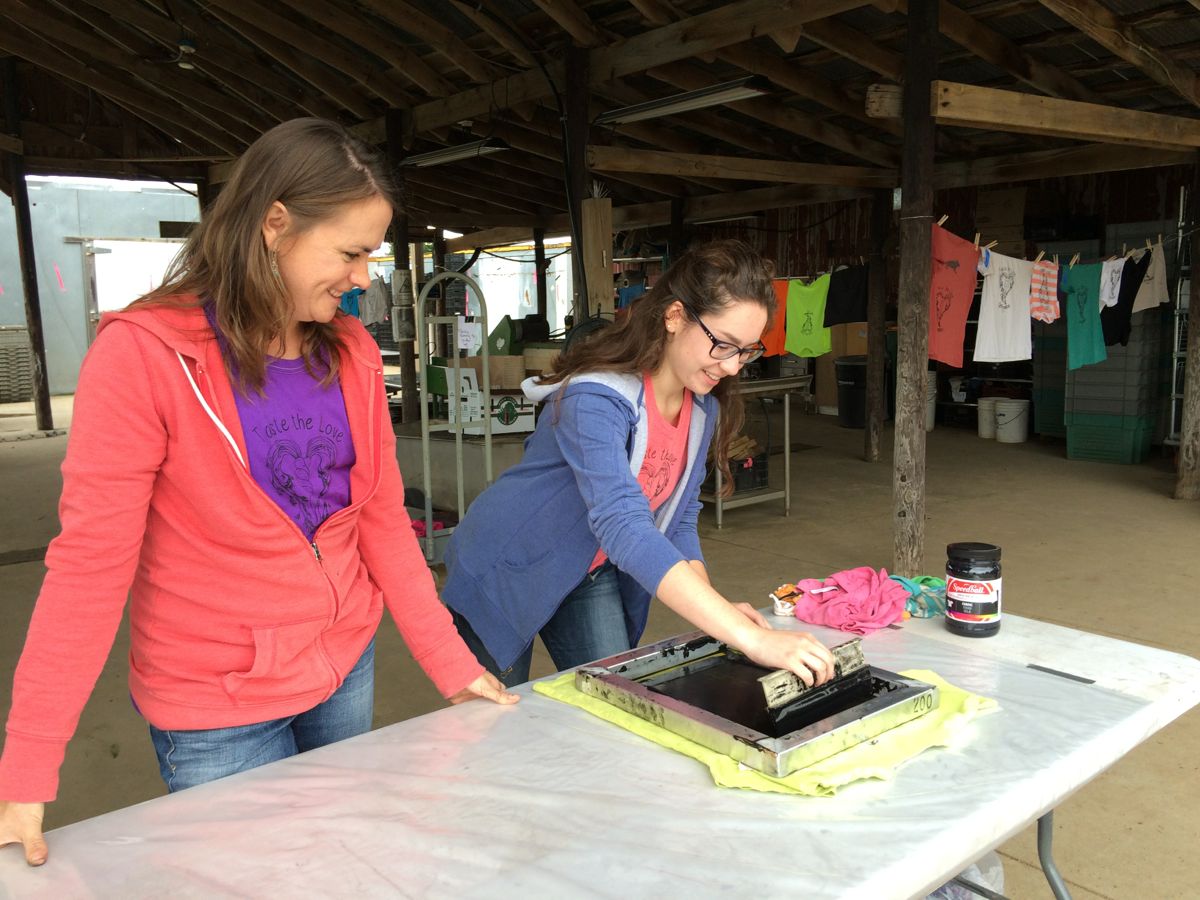
Karen and Sophie silk-screened t-shirts for everyone who brought a shirt.

Sophie’s favorite for the day!
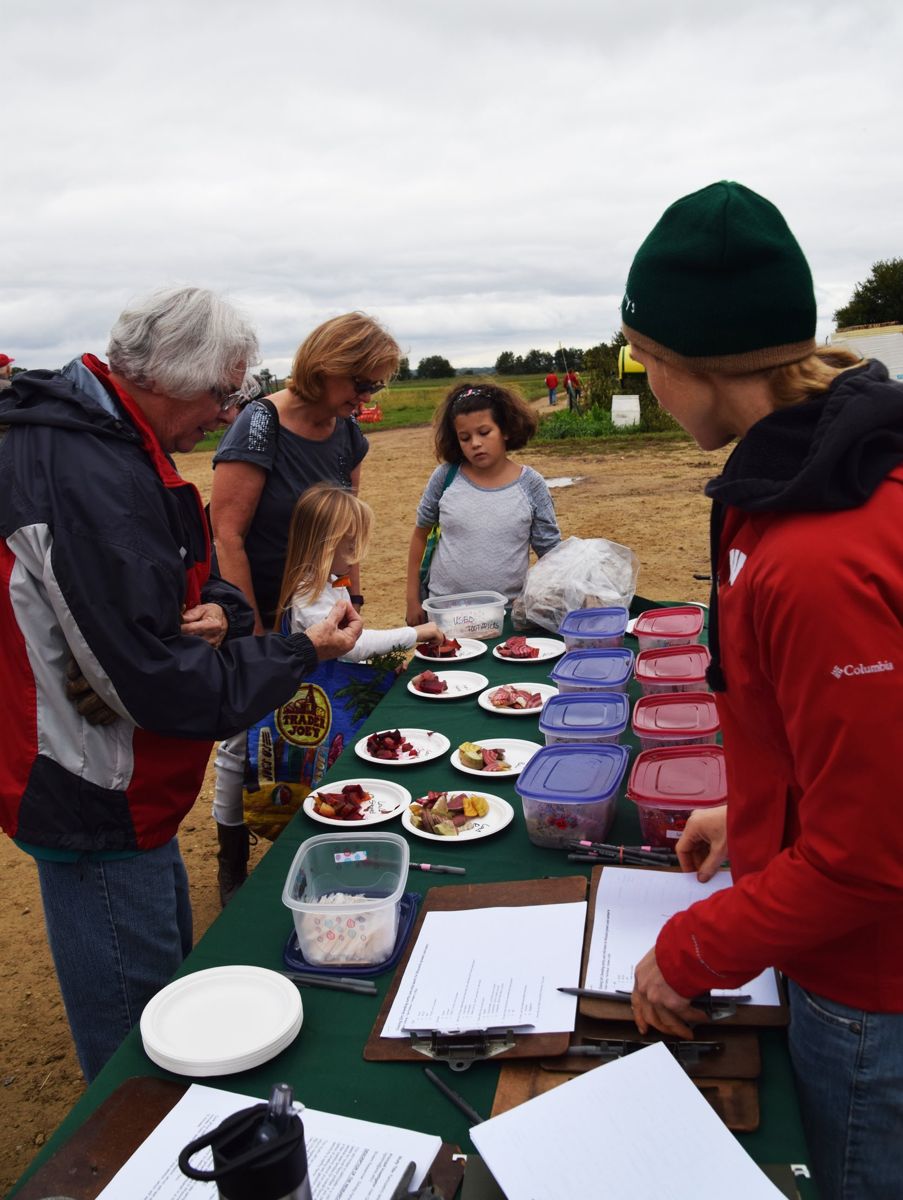
UW grad student Solveig Hanson offered beets for tasting. She collected members’ opinions about the flavor and appearance of her breeding lines. Solveig asked me to thank all of you who participated.
Veggie list and veggie notes (Oct 6/7, 2016; week#21, green EOW)
Beth’s box logic for this week:
– We timed the scallions to be ready with the bok choy, as they are a natural pairing. If you like spicy, the Anaheims will add a manageable amount of heat, color and flavor to a bok choy stir-fry.
– I also think the Anaheims will go well with the sweet potatoes. Think about oven-roasting your sweets, then topping with pan-fried onions and Anaheims spiked with vinegar or lime juice to sharpen the contrast with the sweet potatoes.
– You should get enough bell peppers for a small pan of stuffed peppers, especially if you split the peppers and stuff each half.
– We always eat our edamame directly out of the pods as a snack or appetizer. The cooked soybeans are a great addition to other dishes but (frankly) it’s easier on the cook if everyone shells their own soybeans!
– Pepper season will be over soon. Remember, you can chop and freeze peppers for use in winter.
– We start to cook beets as the weather turns cool. Steamed or roasted, we usually eat them dressed with oil, vinegar, black pepper and blue cheese. Pat has a few other ideas to offer.
Sweet potatoes, 2+ lb
Bok choy
Edamame soybeans, 1 bundle
Beets, 2 lb
Peppers, 4+, mostly green bells with something colorful mixed in.
Anaheim chiles, 2
(Note: If you find a slender green or red pepper in your box, then it is a spicy Anaheim. None of the sweet peppers this week match that description.)
Scallions, 1 bunch
Yellow onions
Some sites get broccoli.
Some sites get Romanesco broccoli.
Some sites get globe eggplant.
‘Beauregard’ sweet potatoes – Here are a few things we’ve learned about sweet potatoes:
– For best flavor, cook your sweet potatoes so they brown and caramelize. We have a simple, favorite way to roast sweet potatoes. We used to prepare sweet potato fries in the oven. Now we just quarter the potatoes, rub with olive oil, dust with salt and place cut-side-down on a cookie sheet. Roast in a 450 F oven without turning until soft. The flavors will caramelize (like sweet potato fries) but preparation is simpler and the cooking time less exacting. Slender sweet potato fries go from undercooked to overcooked in the blink of an eye. Larger slices are less exacting, and therefore are easier. Small sweet potatoes can be cut just in half. Jumbos will need to be chopped into pieces. Otherwise, they will take a long time to cook.
– Store your sweet potatoes at room temperature. They suffer chilling injury below 50 F.
– The sweet potatoes we grow require slightly longer cooking than ones from the supermarket, perhaps because they contain higher moisture so soon after harvest.
– Sweet potatoes are good at any size. We have cooked everything from tiny to jumbo and consistently find that all sizes taste good.
Bok choy (large rosette with thick white stems and green leaves) – This Asian green is good for stir-frying or sautéing or in soup. You can think of the stems and leaves as two separate vegetables. The stems require longer cooking. The leaves will cook almost as quickly as spinach. Bok choy stores well, so feel free to pull off leaves as you need them, or use the whole head at once. Refrigerate in a plastic bag.
Edamame soybeans (bundle of green stems with pods attached) – These edible soybeans are a treat. Pull the pods from the stem and wash well. It helps to submerge the pods and rub them together. Boil in water until the pods have split and the beans are quite tender. Season with salt and pop the beans out of the pods into your mouth. This Japanese specialty is becoming more and more popular in the USA.
Storage: Remove the pods from the stems promptly and refrigerate.
Bell peppers – You will get mostly green bell peppers this week. We stripped one of our three pepper fields in anticipation of a possible frost this weekend, hence the green bells. We will protect one or two fields from frost, so we should have at least a few peppers for another few weeks.
Anaheim chiles (MEDIUM HEAT, long slender peppers, red or green) – Anaheims usually have medium spiciness although it varies from pepper to pepper. As usual, the heat is concentrated in the seeds and midveins. Remove the seeds and midveins is to lessen the chili’s heat. Anaheims are easily mistaken for Italian frying peppers. We never send them in the same box for that reason. Keep this in mind if you have peppers left over from previous weeks.
Romanesco broccoli (pale green conical head, possible tinged with purple) – This is the prettiest vegetable we grow. Look at it closely to appreciate its branched beauty and repeating spiral pattern. It is called broccoli, but is closely related to cauliflower which it resembles in flavor and texture. Some of the heads have an unusual, leafy middle section. It’s harmless, just weird looking. The heads tighten up as the weather gets cooler.
Preparation: Like broccoli and cauliflower, it is fine eaten raw or cooked. It requires cooking times intermediate between the two. Don’t overcook it. I usually steam it, then dress it simply with a butter-lemon-garlic-mustard sauce.

The only slender green or red peppers in your box are spicy Anaheims. None of the sweet peppers this week match that description.
RECIPES FROM LAUREN
SWEET POTATO & PEPPER CHILI
Takes 1 hour, 15 minutes
Serves 10-12
2 pounds sweet potatoes, peeled and cut into bite-size chunks
3 tablespoons olive oil
3 teaspoons cumin, divided
5 teaspoons chili powder, divided
1 tablespoon Kosher salt
1/2 teaspoon freshly ground black pepper
2 tablespoons butter
1 yellow onion, diced
1 green bell pepper, diced
1 red bell pepper, diced
2 Anaheim peppers, seeded and diced
3 tablespoons brown sugar
1 teaspoon garlic powder
16-ounce can chili (or kidney) beans
15-ounce can cannellini beans, drained and rinsed
15-ounce can black beans, drained and rinsed
28-ounce can diced tomatoes (preferably fire-roasted)
28-ounce can diced tomatoes
8 cups water
- Preheat oven to 400 degrees.
- Combine sweet potatoes with olive oil, 1 teaspoon cumin, 1 teaspoon chili powder, 1 Kosher salt and 1/2 teaspoon black pepper. Roast for 35 minutes, rotating once during baking.
- Meanwhile, in a large stock pot, melt butter over medium heat. Add onion and peppers and reduce heat to medium low. Cook for 15 minutes until well-softened.
- Add remaining cumin, chili powder and salt along with brown sugar and garlic powder. Cook for a couple minutes then add beans, tomatoes and water. Bring to a boil then reduce to a simmer and cook for 30 minutes. Add sweet potatoes to the pot whenever they finish roasting.
————
BOK CHOY SALAD WITH CASHEW SESAME CRUNCH
Adapted from Dishing Up The Dirt
Takes 30 minutes
Serves 4-6
1 bundle edamame
2 tablespoons kosher salt
1 large head bok choy
1 bunch scallions, sliced
3 tablespoons sugar
1-1/2 cups roasted salted cashews
1/4 cup sesame seeds (white or black or a combination of both)
Tahini Honey Dressing:
1/4 cup honey
1/4 cup tahini
1-1/2 tablespoon rice vinegar
2 tablespoons soy sauce
- Remove edamame pods from the stalk. Place them in a small bowl and cover with salt. Rub to make sure salt evenly coats pods. Let sit for 15 minutes.
- Meanwhile, prepare bok choy. Remove leaves from head and wash well. Pile leaves into a single stack and thinly slice them beginning at the stems.†Toss sliced bok choy and scallions in a large bowl.
- Bring a large saucepan of salted water to a boil. Add edamame and boil for 6 minutes. Drain and allow to cool while you prepare dressing.
- Add†honey, tahini, rice vinegar and soy sauce to a small bowl. Whisk until smooth.
- In a large saute pan, heat sugar over medium heat. It will slowly start to melt. As soon as it all is melted, remove from heat and stir in cashews and sesame seeds. It will begin to cool and clump together. This is perfect! Break the pieces apart with your hands if they are too big.
- Squeeze edamame out of pods with your hands into the bowl of bok choy and scallions. Toss to combine and then add dressing. Serve salad with cashew sesame crunch
————
LOCAL THYME RECIPES
Comforting Classics
Bok Choy with Scallion
Romanesco with Caper Dressing
Harvard Beets
Sweet Potato Oven Fries
Outside the Box Recipes
Chili-Glazed Salmon with Bok Choy
Steamed Broccoli with Mustard Butter
Tuna and Beet Salad with Coddled Eggs
Sweet Potato Scones with Brown Sugar Icing
Quick and Easy Meal
Sesame Braised Chicken and Bok Choy
Box Logic
- On: September 28, 2016
- 0
As we plan each CSA box, we look for logical combinations. I’d like to share our thought process in designing this week’s box. I think it will help you cook and enjoy the produce.
Potatoes and leeks are an obvious choice to send together so you can make potato-leek soup, or warm the house with a potato-leek casserole. Check out Lauren’s recipe below for Potato and Leek Fritters. It’s a twist on the classic combo and sounds like perfect comfort food to me.
The Zavory chiles have excellent flavor with minimal heat, and will work well with the potatoes. Parsley combines well with almost everything in the box; beans, potatoes, peppers. You may have noticed (and wondered) why we have sent so many frying peppers this year. They have consistently been the best quality peppers on the farm this season, and very delicious, so we’ve sent them multiple times.
In summer, we fill the boxes with what the farm offers. There’s a steady supply of tomatoes, peppers, melons, zucchini, sweet corn, etc. We pack a member of the onion family in every box because they are essential in cooking. Then we choose a mix of items that can be eaten raw versus cooked, to make the box easy to use. If a vegetable is unstoppable in the field (tomatoes!) then it is in every box. If it’s not (fennel) we pack it with the vegetables we think it combines best with (tomatoes, garlic).
In fall, we can be more strategic. For example, we plan to alternate starchy vegetables in the upcoming boxes, from potatoes to sweet potatoes to winter squash. Then we add at least one brassica (broccoli, Romanesco, cauliflower, cabbage) as well as some type of greens (kale, bok choy, napa cabbage) plus alliums (onions, leeks, garlic). Then we fill in with all the other special things of the season, items like scallions, celeriac, parsnips and winter radishes. In summer, the boxes are driven more by volume, by the limits of what we can fit in the box. In fall, there are as many items (and as much weight) but less fluff, so the boxes are not as full and are simpler to pack.
Here’s what I plan to cook this week. The weather has cooled so we will turn on our oven and roast a pan of potatoes, onions and garlic, using our favorite (and adaptable) recipe for roasted veggies. We’ve already prepared many of our favorite pepper recipes this summer, so I plan to make a sauce with roasted peppers and onions, parsley, Zavory chiles and garlic. In a household of ‘diverse’ eaters, it helps to have a sauce on the side to enliven oven-roasted potatoes or steamed beans. Even if you dress your steamed beans in a light vinaigrette, adding roasted pepper sauce at the table is a nice boost. I’m intrigued with this roasted carrot harissa recipe, and will adapt it to extend my roasted pepper sauce.
Finally, remember you can freeze any extra peppers, whether raw or roasted. You will enjoy them this winter. Beth
Farm News
You will notice that no one is wearing mosquito nets in the photos below. The mosquitos have abated, freeing us from our net suits. We continue to work around the rainy weather. We accomplished a lot in the fields on Monday and Tuesday so we could focus on indoor jobs when it rained on Wednesday.
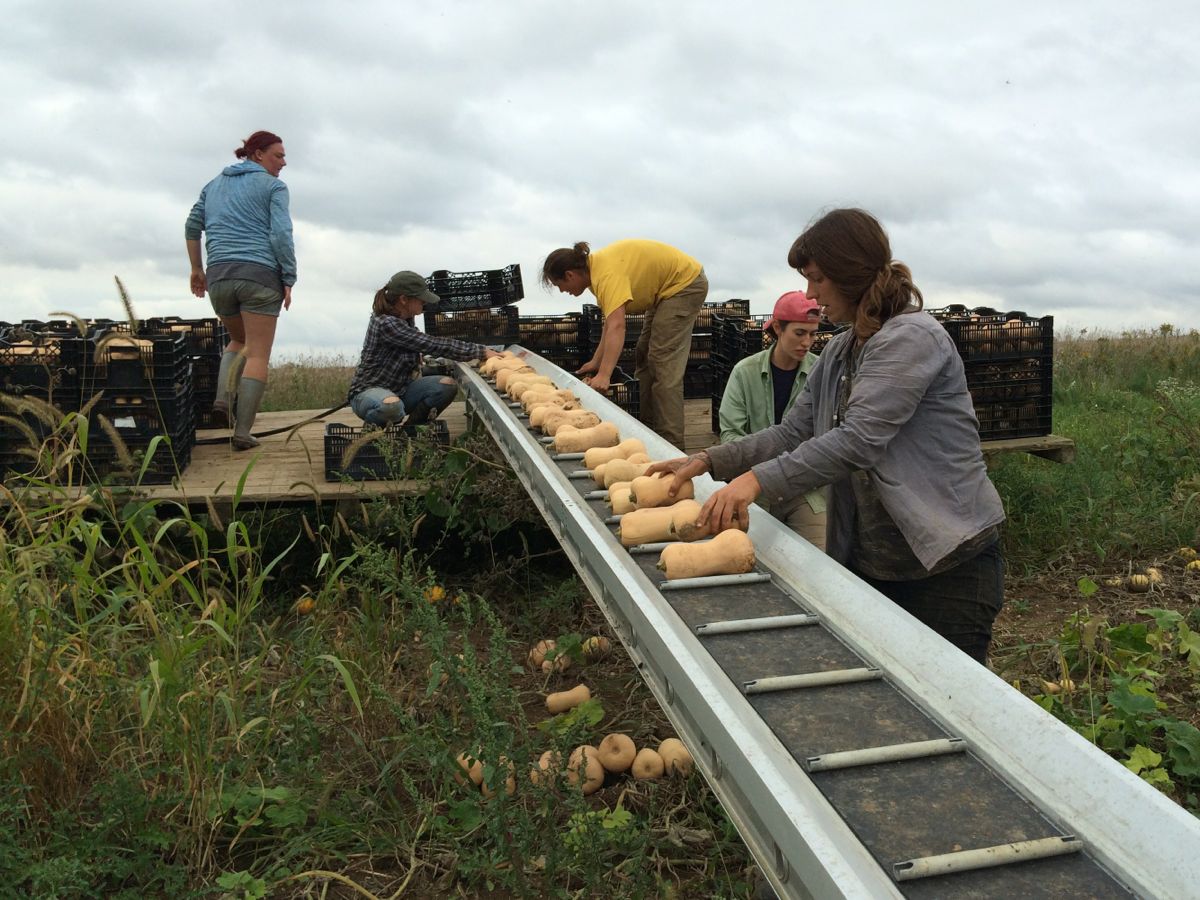
Butternut harvest is complete. From right, Charlotte and Lizzy load squash onto the harvest conveyor belt we take to the field. On the wagon, Jory, Karen and Madeleine pack and organize the squash. The butternuts are curing in our warm, dry greenhouse.
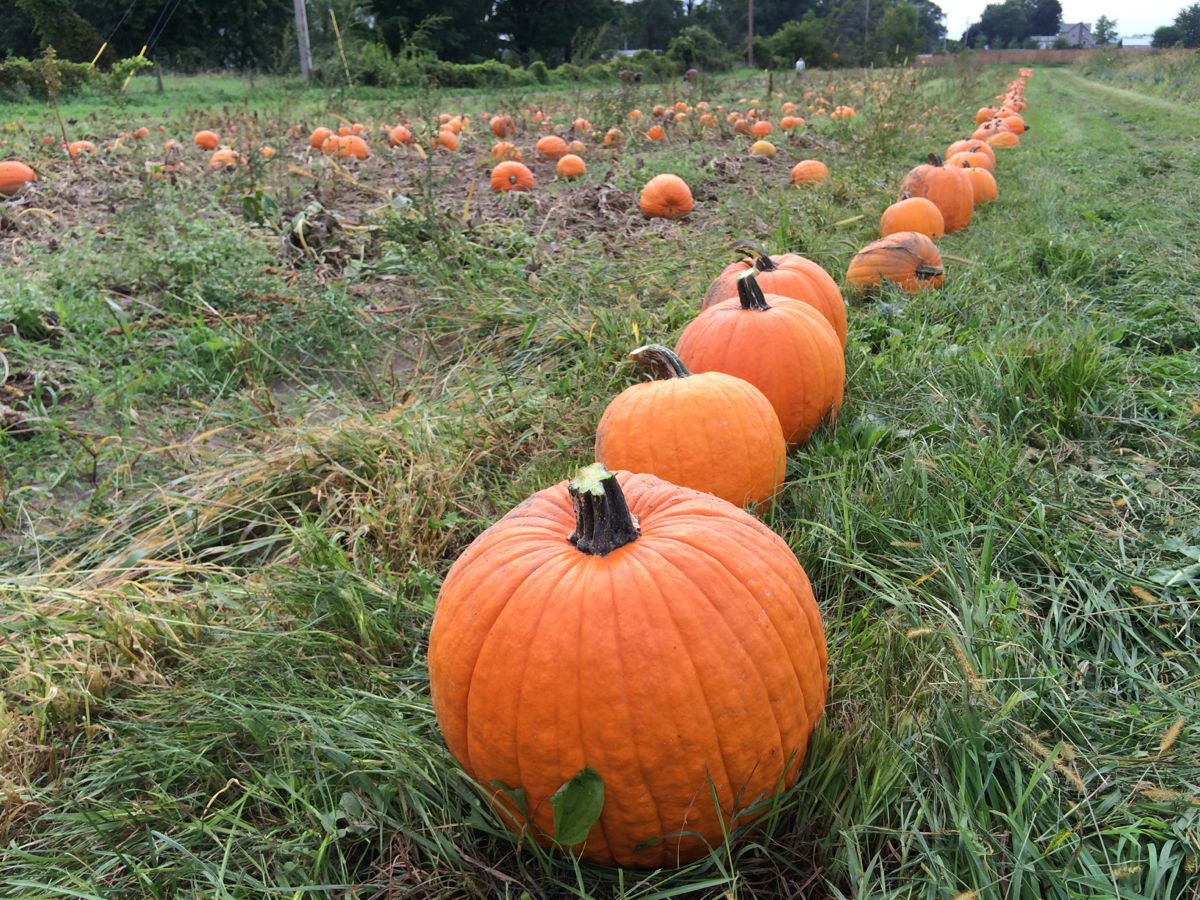
Pumpkins are clipped too.
Steve, Ari and I harvested carrots during a dry spell over the weekend. Carrot harvests will continue into November.
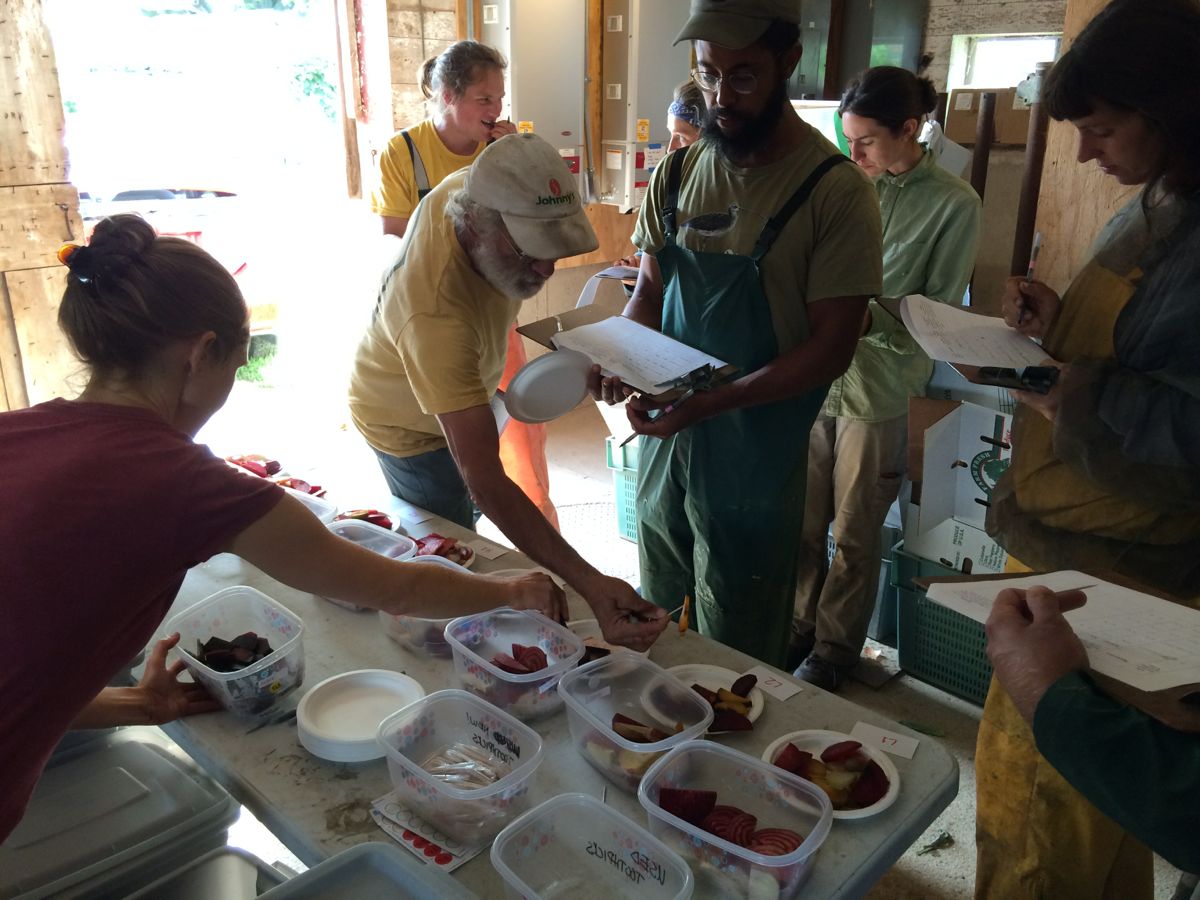
We hosted beet trials this summer for UW graduate student Solveig Hanson (at left in photo). Solveig is breeding beets for specific flavor and color profiles. She returned to the farm this week for us to sample and evaluate her breeding lines. The range of flavors is quite interesting. As a group, we are a mix of beet-lovers, beet-haters and beet-ambivalent types. Almost everyone found a breeding line they found appealing. You will have a chance to sample Solveig’s beet lines at our gleaning party. Stop by her table.
Veggie list and veggie notes (Sept. 29/30, 2016, week #20, purple EOW)
Satina yellow potatoes, 3.5 lb
Leeks, 1 lb
Broccoli, 1.25 – 1.5 lb
Romano beans, ~1.6 lb
Carrots, 2 lb
Yellow onions
A mix of peppers, mostly frying peppers, about 5 – 6
‘Zavory’ not-hot habanero chiles, a handful
Parsley, 1 bunch
Garlic (maybe?), 1 bulb
Next week’s box will probably contain sweet potatoes, bok choy, scallions, peppers, broccoli, edamame soybeans, and more.
Satina potatoes – These pale yellow potatoes are from our friends out at Driftless Organics. Satinas are an all-purpose potato with thin skin and smooth flesh. We oven-roasted a batch and they browned perfectly.
‘Zavory’ habaneros (small, orange or red) – These habaneros are NOT HOT. Almost all the spice has been bred out of them, leaving mild heat in the seeds. Now we can all learn what habaneros actually taste like. The blazing heat always got in the way, as normal habaneros are about 200,000 Scoville units. Lo-and-behold, these Zavory chiles have great, fruity flavor, really interesting. You should still approach them with caution. We’ve found rare off-types mixed in, but very infrequently, and not with the full heat of a normal habanero. As always, remove the seeds if you want to reduce the risk of spiciness.
RECIPES FROM LAUREN
MASHED POTATO & LEEK FRITTERS
Takes 1 hour
Makes 14-15 pancakes
2 pounds yellow potatoes, cubed
1-1/2 teaspoons Kosher salt, divided
2 tablespoons butter
1/2 cup whole milk
1 large leek, white and green parts only, halved lengthwise and sliced
2-3 Zavory peppers, seeded and minced
2 tablespoons minced parsley
2 eggs
1/3 cup fresh breadcrumbs or panko
1/4 teaspoon freshly ground black pepper
1 tablespoon olive oil
2 tablespoons vegetable oil
- Place potatoes and 1 teaspoon Kosher salt in a large pot. Cover with water and bring to a boil over high heat. Once boiling for 15 minutes, drain water and mash potatoes. Stir in butter and milk until thick and creamy. Add additional milk if needed to thin. Measure out 1-1/2 cups for the fritters. Save the rest for another use.
- Combine mashed potatoes, leeks, peppers, parsley, eggs, breadcrumbs, remaining salt and ground pepper in a large bowl. Stir until smooth. The mixture will be loose and wet, but this is just fine!
- Heat oils in a large skillet over medium-high heat until very hot but not smoking. Drop spoonfuls of the potato mixture into the hot pan in two tablespoons piles being careful not to crowd the fritters. Flip once browned (2-3 minutes) and then press down with a spatula to flatten. Remove from the pan once both sides are browned and gently move to a paper towel. They will still be quite delicate. Keep the first batch in the oven at 200 degrees if you like while you prepare the rest.
- Serve warm with sour cream and some additional chopped parsley.
———-
COLORFUL BROCCOLI SALAD
Takes 15 minutes
Makes 6 cups
1 large head broccoli
1/2 cup buttermilk
1/3 cup mayonnaise
2 tablespoons cider vinegar
1 tablespoon sugar
2 red frying peppers, diced
1/2 yellow onion, diced
1/3 cup dried cranberries
Kosher salt and freshly ground black pepper
- Bring a large pot of water to a boil over high heat.
- To prepare the broccoli, cut off the florets and roughly chop into bite-size pieces. Take the broccoli stems and cut into small matchsticks.
- Once the water is boiling, add just the broccoli florets (not the stems) and blanche for 3 minutes then strain and rinse under cold water.
- Combine buttermilk, mayonnaise, cider vinegar, and sugar in a large bowl. Whisk until smooth. Add broccoli, broccoli stems, peppers, yellow onions and cranberries to bowl and stir with a spatula until dressing coats salad.
- Season with salt and pepper.
———-
LOCAL THYME RECIPES
Comforting Classics
Broccoli Almondine
Buttered Romano Beans with Leeks
Italian Rice Stuffed Peppers
Pot Roast or Portabello Pot Roast
Outside the Box Recipes
Roasted Broccoli Persillade
Romano Bean, Potato and Meatball Stew
Sweet Italian Pepper Sauce with Capellini
Carolina Cabbage and Carrot Slaw
Quick and Easy Meal
Roasted Chicken Dinner with Gravy
Sweet potatoes are up, squash is down
- On: September 21, 2016
- 0

Steve pulls up a beautiful hill of sweet potatoes. Steve undercuts the rows to lift the roots to the surface, then we pick them up by hand. It’s not a fancy method but gets the job done.
We dug our first sweet potato harvest last Friday. This is a preliminary harvest, enough for one CSA delivery. The roots are curing in a hot, steamy room, and will be ready in a week or two. Based on this early sampling, looks to be a good sweet potato year. This surprised us, considering how rainy it’s been. Sweet potatoes grow well in dry, thin soils and (supposedly) dislike wet soil. We did not find any rot as we dug on Friday, which was a relief. If the rest of the fields are as good, we might have enough sweet potatoes for an extra delivery.
Sweet potatoes and winter squash seem to cycle opposite each other. If one crop does poorly, then the other does well. Overall, this is a middling winter squash year. The butternuts look as sturdy and prolific as usual but other types like delicata and acorn squash did not do well. They got really close to harvest, then rotted before ripening. Chalk it up to the wet year. Winter squash is one of “my” crops so I gnashed my teeth a lot as the plants went downhill. However, it was an excellent year to test new varieties! If a variety thrived and produced tasty squash, then it’s probably a keeper. We will send the most promising types to a few sites this week. We’d love to hear what you think of them. Follow the link in the newsletter to give us your feedback.
I have mentioned the wet weather frequently this summer but we remain grateful that the spring weather was dry. Our biggest problem now is that weeds are overtaking our farm. Steve and Jeremy cultivated repeatedly but the weeds re-root each time it rains. I’ve talked with a few farmer friends over the past weeks and all expressed impatience to get this season finished. We’ve heard difficult stories from friends in western Wisconsin and Minnesota where it has rained all season. Here’s a piece written by a farmer friend struggling to grow vegetables in Minnesota, and wondering if our climate is suited to vegetable production at all.
Beth
Willy Street Parade
The highlight of our week was our annual trip to the Willy Street parade. As usual, we were fueled by our crew’s enthusiasm and creativity. Maggie printed a new Tipi t-shirt, based on Karen’s artwork. It is so lovely. We handed out Oranos peppers and Romano beans. The peppers got a much more enthusiastic response!
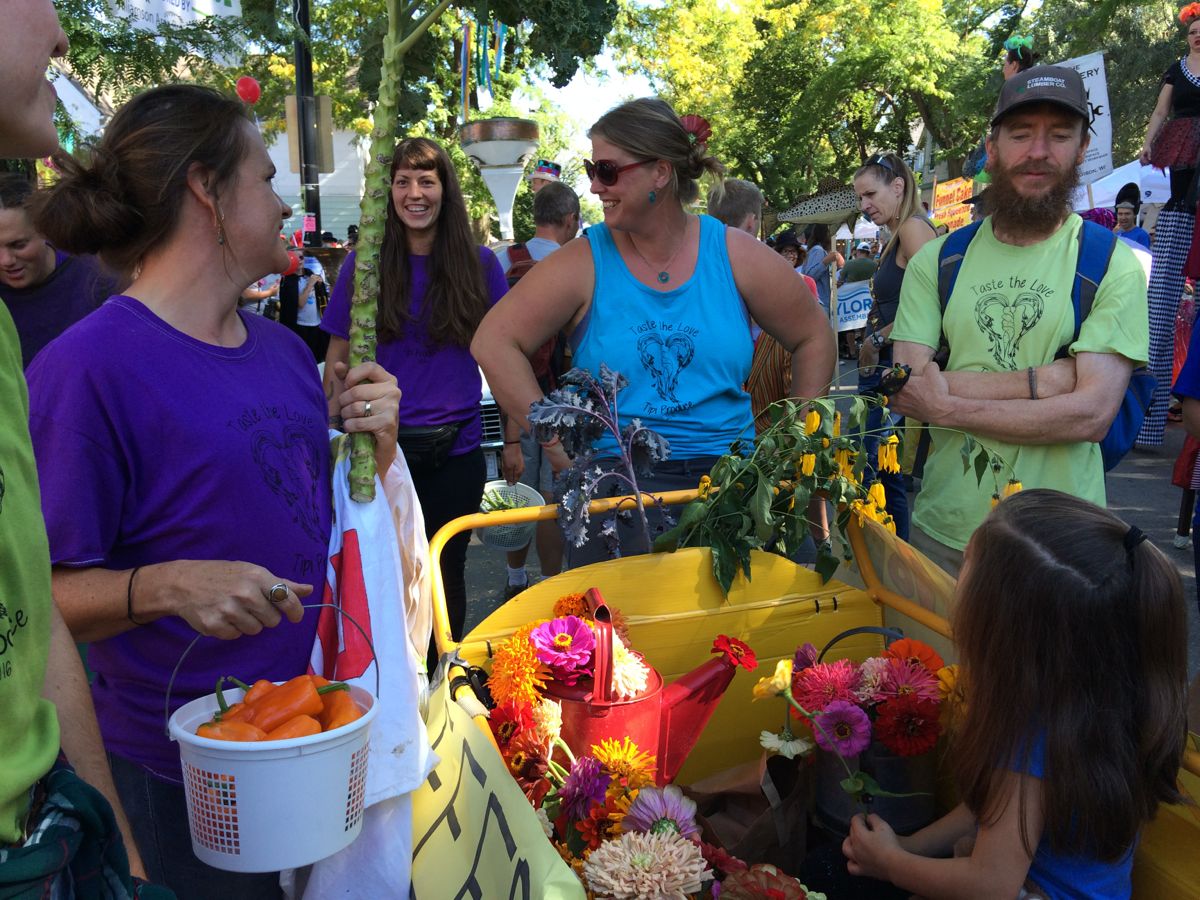
Karen, Charlotte, Maggie, Ken (Tipi alumnus) and Charlotte’s daughter prepare for the parade. Maggie loaded her new pedi-cab with flowers to toss to the crowd.

James hands out beans, wearing a mosquito net. They are our uniform these days.

James, Charlotte, Jory, Kelsie, Jim and Madeleine.

Our tallest fan enjoys a pepper.
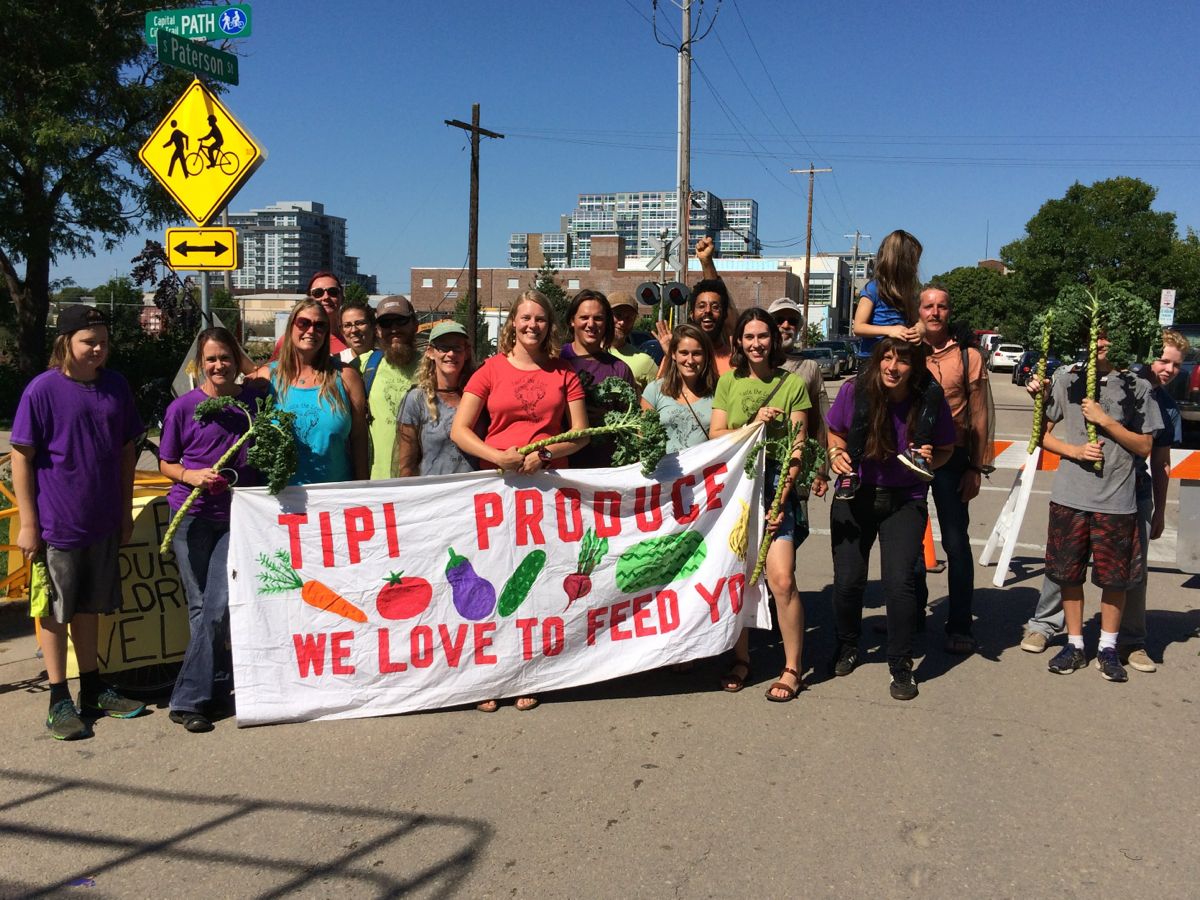
The parade crew assembled. It’s not the entire Tipi crew but was a good turnout.
Veggie list and veggie notes (Sept 22/23, 2016, week #19, green EOW)
Hey folks, we were going to pack a few final plum tomatoes in this week but decided against it. They just weren’t good enough.
Green cabbage
Broccoli
Carrots, 2 lb
Leeks, 1 lb
Lacinato or red kale, 1 bunch
Yellow onions
Red or yellow frying peppers, ~5
Snack peppers (Oranos or Lunchbox)
Basil (Italian or Thai)
Garlic
Some sites get a small winter squash.
Some sites get larger portions of cabbage &/or broccoli.
Some sites get an extra bell pepper or two.
Next week’s box will probably contain potatoes, leeks, broccoli, carrots, peppers and more.
Leeks (look like big scallions) – These alliums have a milder flavor than onions. Nonetheless, they can be used in recipes that call for onions. To wash, split the leek lengthwise, from the green tops about halfway to the base, leaving the base intact. Rinse well under running water, separating the layers to flush. If necessary, split the leek further if soil has penetrated more than halfway down the leek. Shake dry. Leeks are generally eaten cooked. They can be sauteed, steamed or roasted. Intact leeks will store 2 to 3 weeks if covered loosely and refrigerated. The outer leaves will yellow. Just peel them off and discard. The inner leek layers will be fine.
Lacinato (dark green) or red kale – The kale needs to be fully cooked until tender. It is not tender enough for light wilting or a rubbed salad.
Frying peppers – Good grief, the frying peppers are abundant right now. We’ve sent enough this time for you to make a batch of stuffed peppers. These peppers are very ripe. They are full-flavored but will not store for long.
Plum tomatoes – We’ve sent just a few last tomatoes. It’s hard to let go. Use for cooking rather than fresh use – it’s that time of year.
Basil – This is the last basil for the year.
Garlic – This garlic is from John Hendrickson of Stone Circle Farm.
Winter squash – Some sites will receive a small winter squash. Many are new varieties we tried for the first time this year. Much of the interesting breeding work for flavor has focussed on small single-portion squash so these are small varieties. Most types are on the delicata to acorn spectrum. That means … (1) they are ripe and ready to eat, and (2) these are not designed for storage. Eat soon.
Storage: Store at room temperature, uncovered.
Preparation: Winter squash are easily roasted in a 400F oven. Split in half with a sharp knife. Scoop out and discard seeds. Run the squash under running water, shake off the excess and place cavity-side-down on a baking sheet. The little bit of moisture helps seal the squash to your roasting pan. The water soon evaporates, allowing the squash to brown and caramelize. Roast at 400F until easily pierced with a fork, 20 – 40 minutes depending on size.
To make squash easier to cut, microwave on high from 30 seconds to a minute, depending on the size of the squash, soften the rind and flesh.
RECIPES FROM LAUREN
CURRIED CARROT SOUP
Adapted from Bon Appetit
I use a combination of butter and oil because I love the way butter tastes in soup when cooked low and slow with veggies for a while, but if you are vegan, feel free to use all olive oil. It really won’t impact the flavor much. Also,† you can use a tablespoon of any curry powder you have laying around. We have these really nice hot and sweet variations from The Spice House and have discovered the perfect ratio of each to yield a sweet soup with a subtle degree of heat.
Takes 1 hour, 20 minutes
Makes 6 cups
2 tablespoons butter
2 tablespoons olive oil
1 pound of leeks, diced
4 garlic cloves, minced
Kosher salt
Freshly ground black pepper
1 pound carrots, peeled and roughly chopped
2 teaspoons sweet curry powder
1 teaspoon hot curry powder
1 teaspoon siracha hot sauce
13.5-ounce can coconut milk
4 cups chicken (or vegetable) stock
Add butter and oil to a large stock pot. Melt butter over medium-low heat. Add the leeks and garlic as well as a sprinkling of salt and pepper. Cook until leeks are translucent and fragrant, about 10 minutes. Add the carrots and hot sauce and turn the heat up to medium. Cook for 20 minutes, stirring occasionally. Add the spices, coconut milk and stock. Bring to a boil, reduce to a simmer and cook for 30 minutes until carrots are tender and liquid is nicely reduced.
Let cool and puree with an immersion blender. We don’t puree until completely smooth. We like some small chunks of carrot in there, but that is up to you. Taste and adjust seasoning. Top with chickpeas if you are feeling extra fun!
CUMIN ROASTED CHICKPEAS (optional)
15-ounce can chickpeas, drained and rinsed
2 tablespoons olive oil
2 teaspoons ground cumin
1-2 teaspoons Kosher salt
Freshly ground black pepper
Preheat oven to 400 degrees. Toss chickpeas with oil, cumin, salt and pepper. I use 1 teaspoon of salt if I’m making these chickpeas for my carrot soup (because it’s already a little salty) and 2 teaspoons of salt if I’m making these chickpeas as a non-soup-addition, generally-delicious snack. Roast for 20 minutes or until crunchy. Take out the pan and shake it occasionally for more even crisping.
———-
SEPTEMBER VEGGIE, SHRIMP & SOBA NOODLE SALAD WITH PEANUT DRESSING
Adapted from Gourmet MD
Takes 1 hour, 30 minutes inactive
Serves 4-6
8 ounce package buckwheat (soba) noodles
1 tablespoon toasted sesame oil (regular oil will do just fine in a pinch), divided
1 pound medium or large shrimp, peeled and deveined
Kosher salt and freshly ground black pepper, to taste
1 head broccoli
1 cup shredded cabbage
1 red frying pepper, thinly sliced
1 yellow frying pepper, thinly sliced
2 carrots, cut into matchsticks
1 onion, very thinly sliced
1/2 cup roasted peanuts
thinly sliced basil, to taste
Peanut dressing:
6 tablespoons peanut butter (I love to use any YumButters I have on hand for these kind of sauces)
1/4 cup brown sugar
1/4 cup soy sauce or tamari
3 tablespoons toasted sesame oil
1 tablespoon Sriracha
Zest and juice of 2 limes
Splash hot water if too thick
- Cook soba noodles according to package directions. Drain and rinse with cold water for about a minute to cool the noodles and stop the cooking process. Place in a large bowl and drizzle with 1/2 tablespoon sesame oil. Put in fridge until ready to use.
- Heat remaining sesame oil in a large frying pan over high heat. Add spring, season with a good amount of salt and pepper. Saute 60-90 seconds until shrimp is opaque and begins to curl. Remove from skillet and allow to cool.
- Stir together all dressing ingredients in a small bowl until smooth. Add hot water if it’s too thick.
- Cut off broccoli florets and roughly chop into bite-size pieces. Save stem and cut into small matchsticks (similar size to carrots). Add broccoli along with cabbage, peppers, carrots and shrimp to noodle bowl.
- Add dressing and toss to coat. Return to fridge for at least 30 minutes to cool and let flavors come together.
- Add onion, peanuts, and basil just before serving.
———-
LOCAL THYME RECIPES
Comforting Classics
Creamy White Bean Soup with Kale Pesto
Roasted Red Pepper Pesto
Garlicky Braised Leeks and Cabbage
Zabar’s of New York “Health Salad”
Outside the Box Recipes
Thai Braised Kale
Fajitas Rice Bowl
Bacon, Leek and Gruyere Strata
Carolina Cabbage and Carrot Slaw
Quick and Easy Meal
Cabbage, Beef or Tofu, and Carrot Stir Fry
Insightful visitors
- On: September 14, 2016
- 0
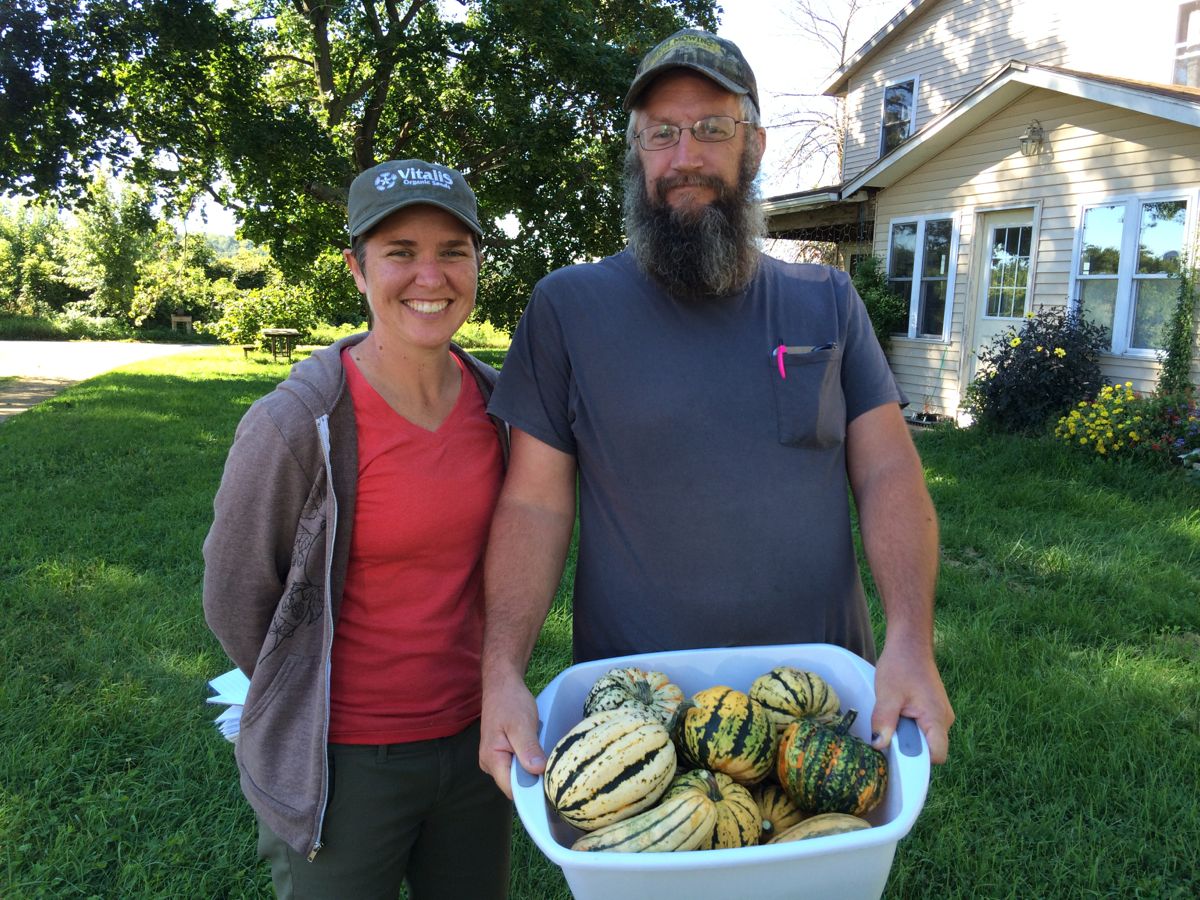
Adrienne Shelton and Paul Betz with a tub of winter squash samples I gathered to discuss with Paul.
We snagged a morning farm visit with two interesting people from seed companies. Adrienne Shelton is a plant breeder for Vitalis Seeds and Paul Betz works for High Mowing Seeds of Vermont. We buy from both companies, as well as from other companies specializing in organic seeds. Adrienne and Paul were in Wisconsin to attend the Organic Vegetable Research Showcase hosted by UW-Madison. Adrienne came to our farm to visit the trials we planted with her basil breeding lines. She is selecting for resistance to basil downy mildew, our most difficult basil disease. We’re glad to evaluate her lines under our conditions. She has some lines with good resistance. The more difficult issue is developing basil varieties that are both disease resistance and taste good.
Paul has run his own farm in Vermont for many years and is a fountain of knowledge about winter squash, my favorite crop. I was glad to swap notes with Paul about varieties and growing practices. (I think Steve is a little sick of talking with me about winter squash.) Paul and I found that we like many of the same varieties, despite our different growing environments. He had a few interesting suggestions that we will try next year. I was glad to walk our fields with Paul to get his insight about harvesting a few of the varieties we buy from High Mowing.
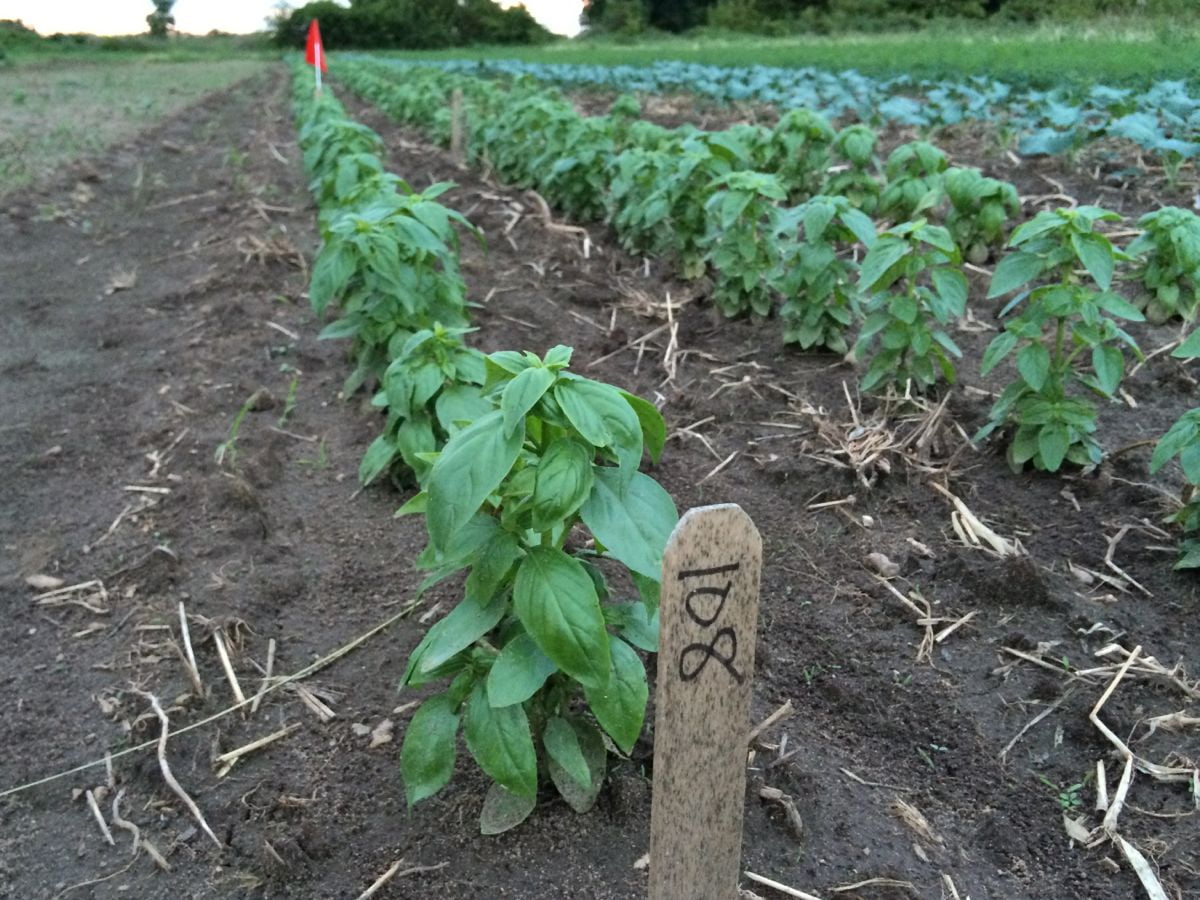
We planted Adrienne’s lines in the midst of our third and fourth basil plantings. Her company developed the disease-tolerant variety that we rely on in summer, called ‘Eleonora’. Some of her lines show improvement over Eleonora but there’s still work to be done with regard to flavor.
Farm News
Summer crops are giving way to fall crops. This delivery contains the last melons and cucumbers. This is the last burst of tomatoes. By next week, we’ll pack just a few in each box. Other summer crops will continue (beans, peppers) but now we are looking ahead to our fall crops. Steve began sampling from the sweet potato fields. If the weather forecast holds, we’ll get the first roots out within a week so they can start curing.
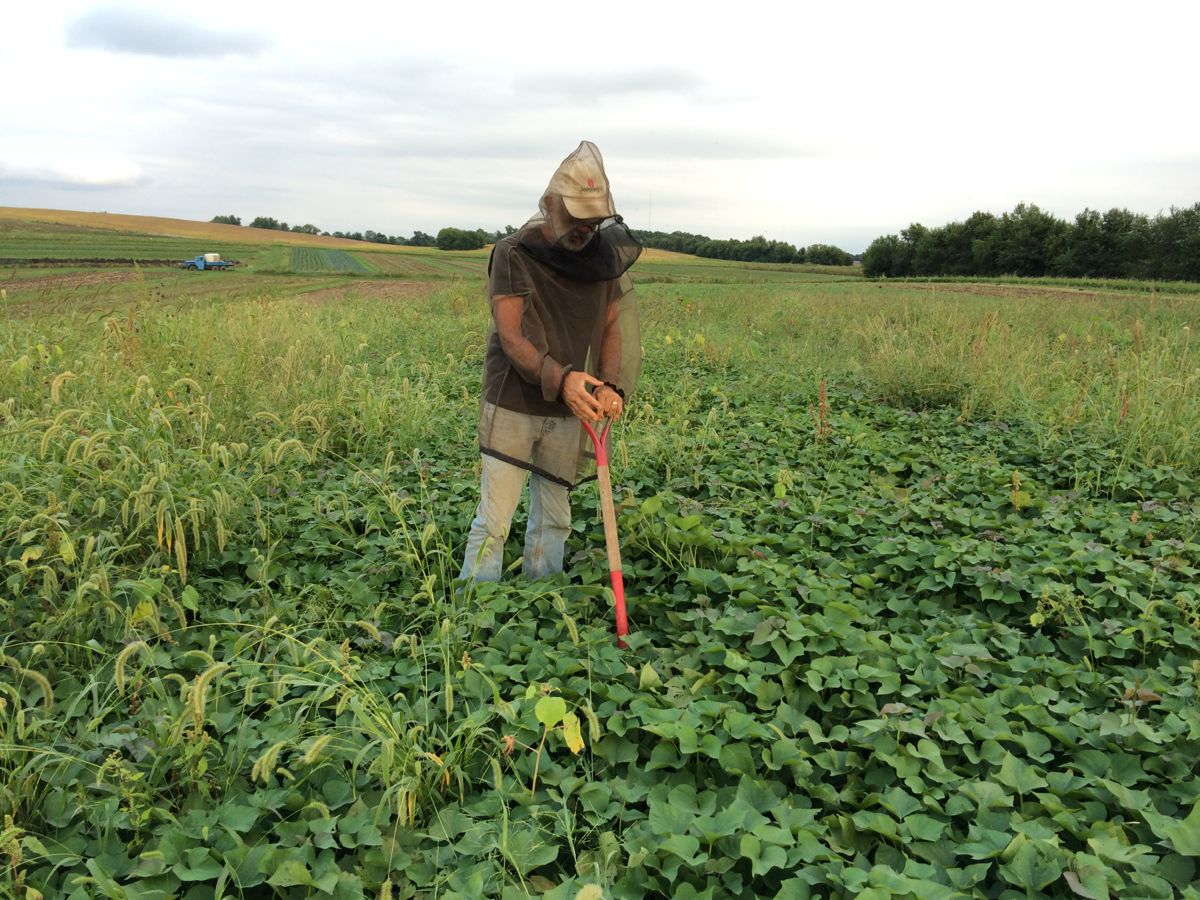
Steve digs a few sweet potato plants from our mysterious field. The vines look terrific but that doesn’t tell us much about what is happening underground.
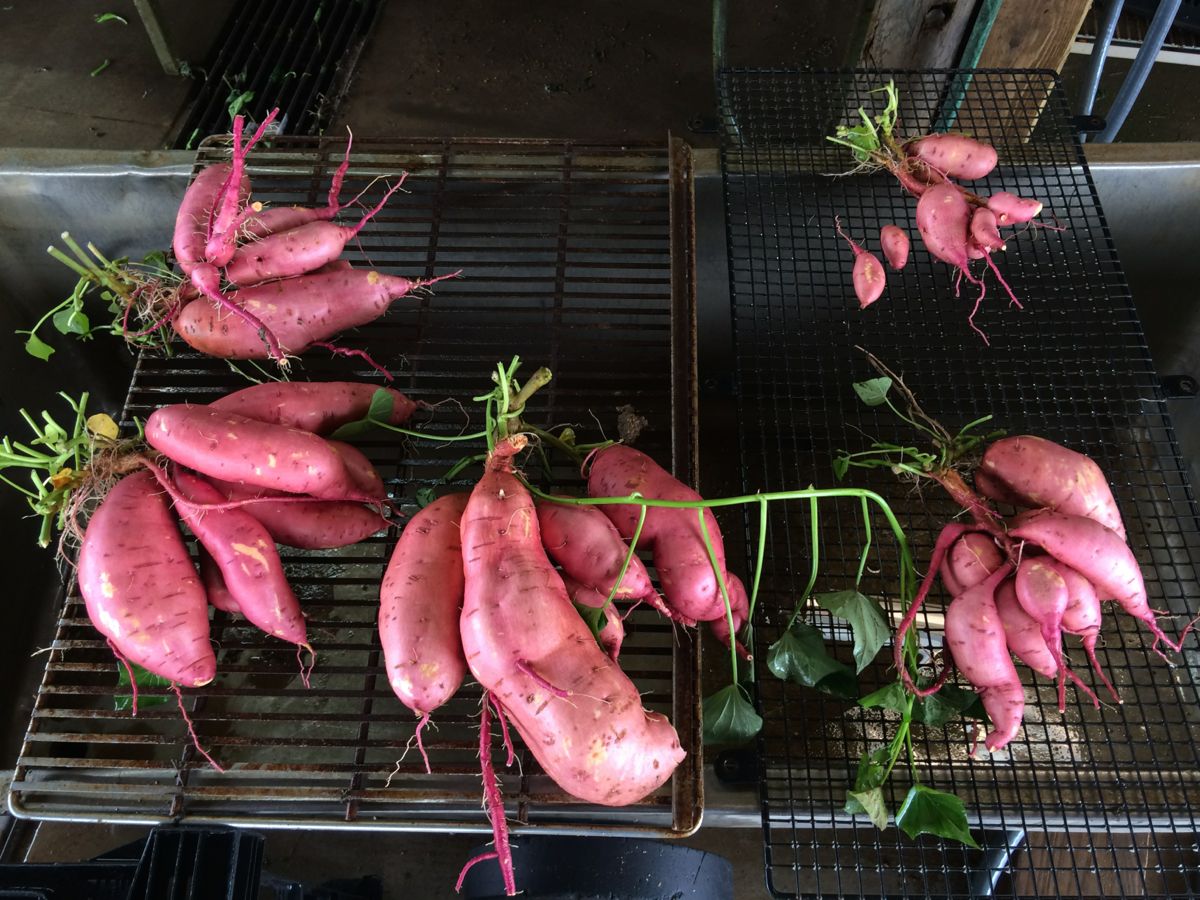
Here are the tubers from five plants. The three in the middle and on the left look unusually good for this time of year. The two on the right? Well, they could use a little more growing time.
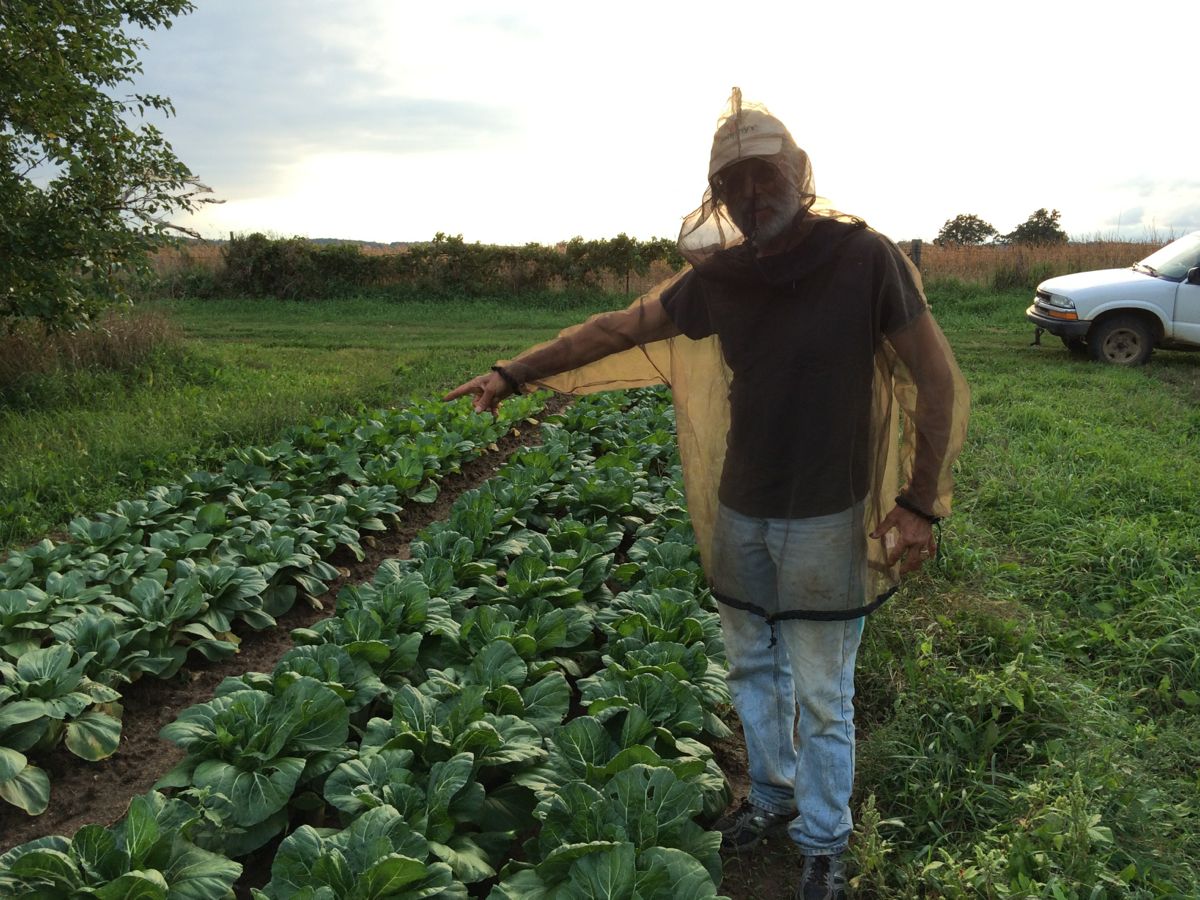
Steve chooses the bok choy for this week. We are still loving our mosquito shirts. We wear them all the time, and don’t have to use bug spray. The shirts are hot on sunny days but the relief from mosquitos is worth it.
#2 Grade Red Bell Peppers
I write about pepper grading every year. Returning members can say “yeah, yeah” and skip ahead. New members, please read. So far this year, you have received a mix and #1 and #2 grade peppers from us.
Many of the red, orange and yellow bell peppers we send in the CSA boxes will be our #2 grade. We do this to avoid waste and to deliver good value to our CSA members. The #2 grade peppers are excellent eating quality, but are not quite pretty enough to sell to stores. As a result, we place a much lower value on these peppers. This allows us to provide generous amounts of colored bell peppers over the course of the season, about three times the amount we could provide if we only gave #1 grade. We feel this is a good exchange, even if it means you occasionally open a pepper and find that it needs trimming. Here are the reasons that peppers are downgraded from #1 grade to #2 grade:
1. They may have a minor blemish, or
2. They may have minor insect damage, or
3. They may be very ripe and beginning to wrinkle. (These are especially sweet and delicious as they are fully ripe. These cannot be sold to stores because their shelf life is short. The texture is less crisp than a #1 grade pepper, but the flavor more than makes up for it.)
4. They might be partially red (or orange or yellow) and partially green.
5. Others are just too small.
The eating quality is fine (or excellent) for all these #2 peppers. We throw away all peppers that we suspect have rot inside (although one may occasionally slip through in either #1 or #2 grade.) Today’s peppers are a mix of #1 and #2 grades.
Veggie list and veggie notes (Sept. 15/16, 2016, week #18, purple EOW)
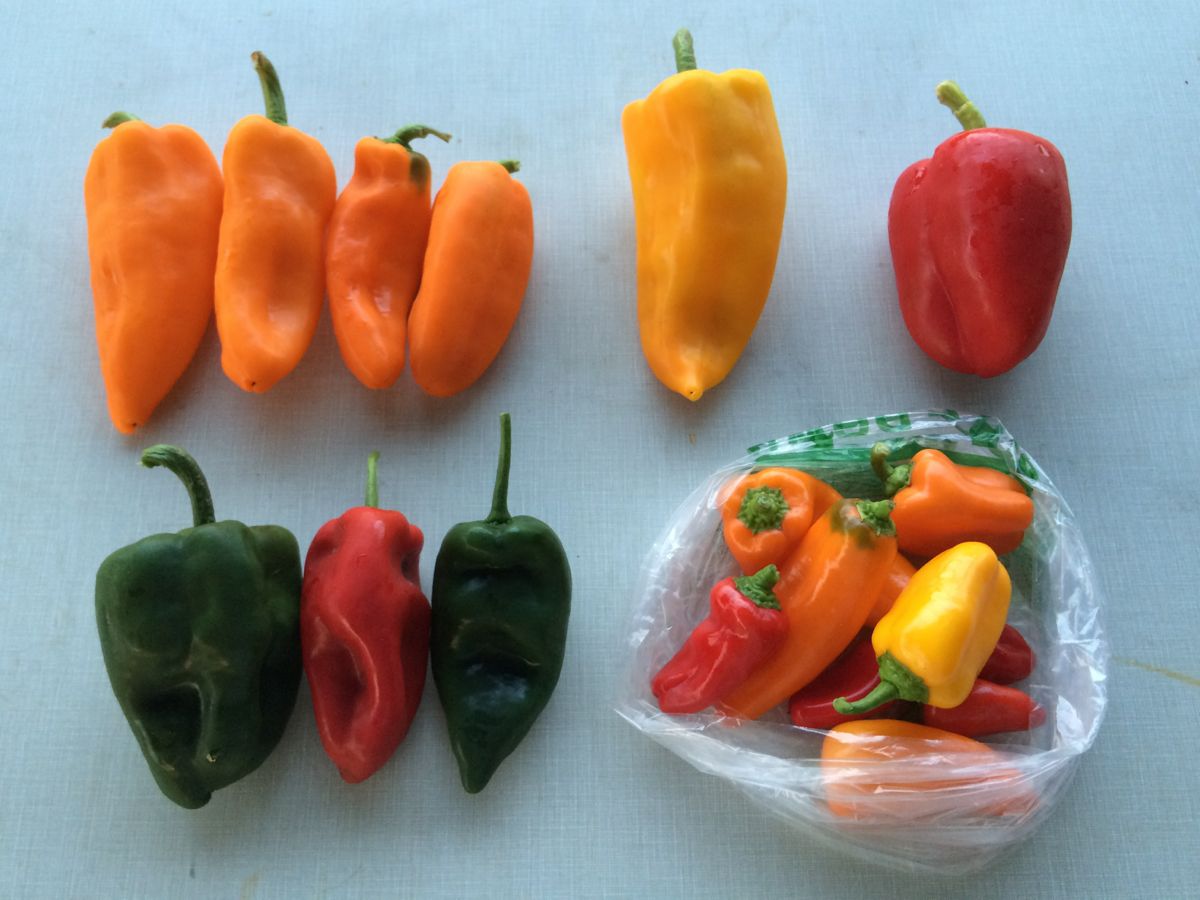
You will receive SOME of these peppers in your box. The poblano chiles are medium heat. All others are sweet peppers. Clockwise from top left; Oranos (sweet, orange), frying pepper (sweet, long, pointed, yellow or red), colored bell pepper (blocky, red or orange or yellow), Lunchbox peppers (sweet, multicolored, packed in a bag), poblano chiles (hot, triangular shape with pointed tip, can be green or red)
Bok choy
Plum tomatoes, 3 lb
(with 1 slicing tomato included)
Romano beans, 3/4 lb
Poblano peppers, 3
Yellow frying or colored bell pepper, 1
Oranos or Lunchbox peppers
Daikon radish, 1.25+ lb
Yellow onion(s)
Fresh fennel seeds & flowers
Garlic
By site, members get Sugar Cube muskmelon (plus broccoli) OR red watermelon
By site, members get Japanese eggplant OR a cucumber OR an extra bell pepper
Bok choy (large rosette with thick white stems and green leaves) – This Asian green is good for stir-frying or sautéing or in soup. You can think of the stems and leaves as two separate vegetables. The stems require longer cooking. The leaves will cook almost as quickly as spinach. Bok choy stores well, so feel free to pull off leaves as you need them, or use the whole head at once. Refrigerate in a plastic bag.
Plum tomatoes – We are nearing the end of our tomato harvests. This week’s tomatoes are still flavorful but will not store as long as usual. Plan to use them quickly.
Poblano chiles (triangular, shiny, green or red) – These are mildly hot. Poblanos are the creme de la creme of chiles. They have lots of great flavor in combination with manageable heat. Roast and add to soup or casseroles. For our household, they are emblematic of fall cooking.
Daikon radish (slender white roots) – These Asian radishes are good cooked or raw. We often make a sliced radish salad, with Asian-style dressing (rice vinegar, mirin, sesame oil, soy sauce, minced garlic). Even a brief marination mellows the radish’s sharpness.
Fresh fennel seeds & flowers (round clusters) – This anise-flavored herb can be used to season tomato sauce and other dishes. Both the yellow flowers and the tender green seeds are quite flavorful. Strip the seeds from their cluster, then crush with the flat of a knife to release their flavor. I think you could add intact seed clusters to your cooking sauce, then remove the cluster when you wish. You will still want to crush the seeds with the flat of a knife. The seeds can be added early in cooking, the flowers are better added at the end. If you shake a flower over your hand, it will release a yellow dust. This is fennel pollen, and it gives the flowers their intense flavor.
Garlic – This week’s garlic is from John Hendrickson of Stone Circle Farm.
Next week’s box will probably contain cabbage, peppers, carrots, onions, an herb and more.
Recipes from Lauren
TOMATO, ONION & FENNEL SALAD
Simple, fresh and delicious, this light tomato salad is the perfect way to say goodbye to tomato season. I’m tempted to make these gluten-free roasted poblano waffles and top them with some sour cream and this tomato salad, but you see my other recipe. I didn’t want to throw much at you this week 😉
Takes 15 minutes
Serves 4-6
8-10 plum tomatoes, cored, halved and thinly sliced
1 sweet onion, thinly sliced
All the fennel flowers you’ve got, flowers removed from stalks and roughly chopped
1/4 cup olive oil
2 tablespoons lemon juice
1 teaspoon Kosher salt
1/4 teaspoon freshly ground black pepper
Toss all ingredients together in a large bowl and stir to combine. Enjoy!
————

CRISPY KOREAN RICE BOWL
Now this recipe is similar to last week’s chickpea and tomato flatbreads due to the fact that it also has a lot of components (and obviously a very long list of ingredients), but I promise it really is not so difficult. Just follow along and allow enough time. Take a weekend day or evening and have a bunch of fun with your family in the kitchen making your own kimchi, crispy rice and toppings.
And if that doesn’t sound enjoyable, you could also simplify things considerably. †The kimchi can be made ahead of time and stored in your fridge for weeks. The rice doesn’t need to be crispy. It could just be ordinary rice. You technically could leave out the mushrooms (but I wouldn’t!).
As for that kimchi. All the ingredients should be regular things you can find in your kitchen with the exception of the gochujang and possibly the rice wine vinegar. You could use white wine or cider vinegar instead of the rice wine vinegar in a pinch, but the gochujung is an essential ingredient. It will be available in the ethnic food aisle of most grocery stores near the Thai or other Asian ingredients. It may also be called Korean red pepper paste.
Takes 2 hours
Serves 4-6
1-1/2 cups white rice
3 cups water, divided
1-1/2 teaspoon Kosher salt, divided
3-5 tablespoons olive oil (use peanut oil if you’ve got it, don’t worry if you don’t), divided
4 garlic cloves, minced
1 head bok choy, leaves and stems separated; leaves roughly chopped, stems thinnly sliced
13.66-ounce can coconut milk
2 tablespoons butter (use olive oil or peanut oil if vegan)
1 pound cremini mushrooms, sliced
1/2 cup soy sauce
2 tablespoons brown sugar
Daikon & Romano Bean Quick Kimchi (below), for serving
- Put rice in a fine-mesh strainer and rinse until water runs clear.
- Add rice to large sauce pan along with 2-1/2 cups water and 1/2 teaspoon Kosher salt. Bring to a boil over high heat. Once boiling, reduce to low and cover. Cook for 12 minutes then remove from heat but keep the lid on for 15 minutes.
- Heat 1 tablespoon olive oil in a large saute pan over medium low heat. Add garlic and 1/2 teaspoon Kosher salt and cook for 5 minutes. Add thinly sliced bok choy stems and additional 1/2 teaspoon Kosher salt. Bring heat up to medium. Cook 5 minutes and then add coconut milk. Bring coconut milk to a boil over high heat and then add bok choy leaves. Reduce to a simmer and cook 10 minutes until bok choy leaves are wilted.
- In a separate large saute pan, melt butter over medium heat. Add mushrooms and cook for 5 minutes just until starting to soften. Add soy sauce, 1/2 cup water and brown sugar. Let simmer gently for 15 minutes until sauce has reduced to a thick syrup.
- Keep bok choy and mushrooms on low while you crisp up the rice. Get a cast-iron skillet really hot over medium high heat. Add 1 tablespoon oil followed by rice. Press it all down and let it sit in the pan for 5 minutes until it begins to brown. Stir up the rice every 5 minutes or so, adding more oil as needed and pressing it flat after you stir it. It should take about 20 minutes total to get crispy rice. I used about 4 tablespoons of oil to get there.
- Scoop crispy rice into the bottom of a large bowl. Use a ladle to add bok choy (with sauce), followed by mushrooms with any remaining sauce and a few spoonfuls of kimchi.
.
Daikon & Romano Bean Quick Kimchi:
1 large daikon, peeled and cut into cubes
3/4 pound romano beans, ends trimmed and cut into bite-size pieces
2 tablespoons Kosher salt
2 tablespoons sugar
1/4 cup rice wine vinegar
3 tablespoons gochujang (also known as Korean red pepper paste)
1 tablespoons minced garlic
1/2 teaspoon ground ginger
1/2 teaspoon cayenne pepper, divided
1/4 teaspoon red pepper flakes
1/2 onion, very thinly sliced
- Add daikon and romano beans to a large bowl. Add salt and sugar and stir to coat evenly. Let sit for an hour at room temperature.(This is a perfect time to start the other components of your meal if making it all at once).
- Meanwhile, prepare the sauce. Combine rice wine vinegar, gochujang, garlic, ginger, 1/4 teaspoon cayenne pepper, and red pepper flakes. Whisk until smooth.
- After an hour has passed, rinse daikon and romano beans with cold water. Let drain for 5 minutes then return to bowl and toss with raw onion and additional 1/4 teaspoon cayenne pepper. (This will help you get that beautiful red color associated with kimchi).
- Add sauce and stir to combine. Use immediately or place into a sealed container (mason jars work great) and leave on the counter for 24 hours. After 24 hours, pace in your†fridge and store up to a month.
.
This makes A LOT of kimchi. About five cups. You will likely only use 1/6 of it during this meal but keep it around, it’s good on EVERYTHING!
————
Local Thyme Recipes
Comforting Classics
Roasted Garlic Hummus with Peppers
Insalata de Riso
Bibimbap with Radish, Bok Choy, Peppers and Ground Pork (vegetarian notes in recipe)
Pasta Puttanesca
Outside the Box Recipes
Bagna Cauda
Coconut Braised Romano Beans
Wakame and Daikon Tsukemono
Couscous with Tomato and Onion
Quick and Easy Meal
Scrambled Eggs with Poblano Tomato Sauce
Gallinippers
- On: September 07, 2016
- 0
We live in a cloud of mosquitos, worse than we have ever experienced. The marsh adjacent to our farm is a likely breeding ground, plus all the patches of standing water. I bought mosquito shirts for our entire crew. Averaging $13 per shirt, they are worth the money. It is more difficult (and hotter) working in the shirts but they have saved us.
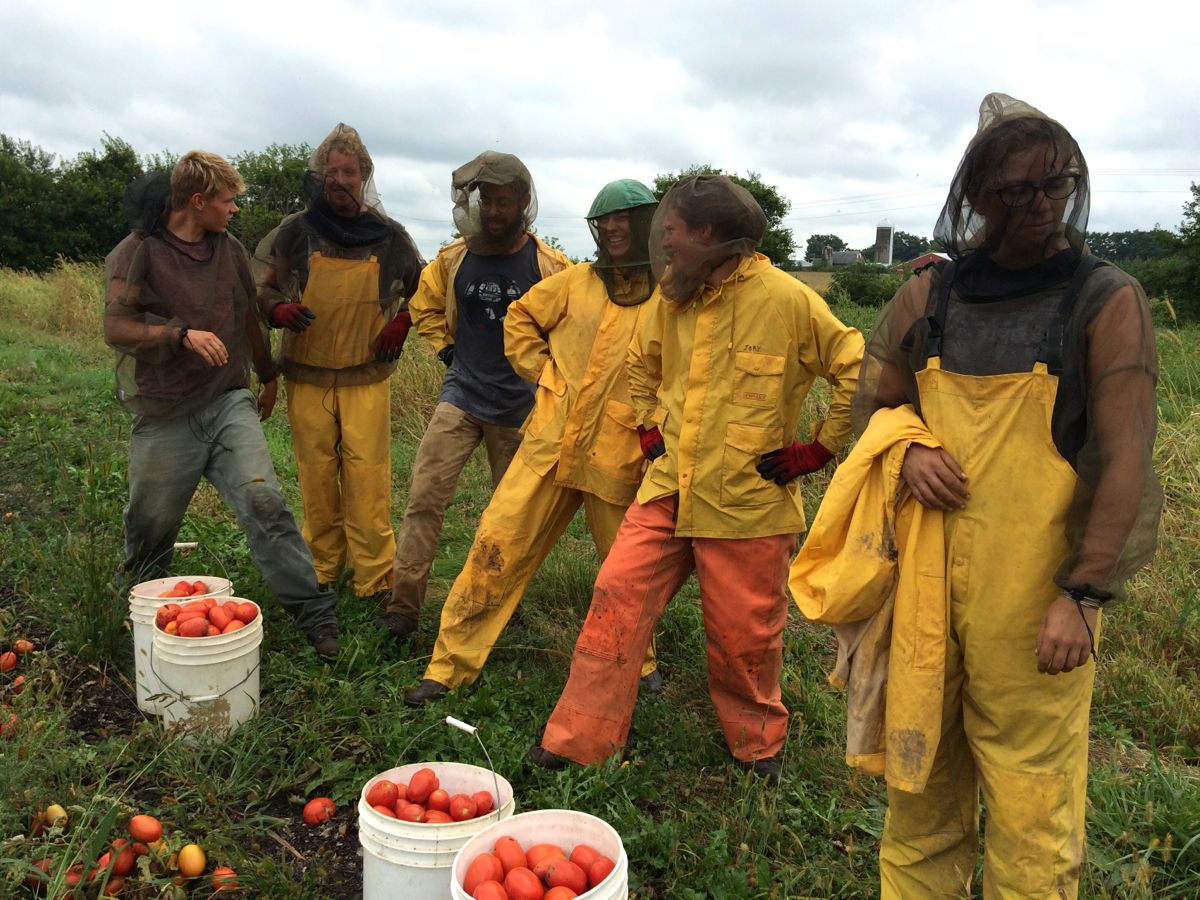
The mosquitos still swarm around us but can only bite where the netting touches bare skin. From left, Michio, James, Sean, Charlotte, Jory and Kelsie show off their farm outfits.

This is a telling photo. It was a sunny, breezy day but the mosquitos still swarmed us. From left, Charlotte and Jackie weed beets.

Squashed gallinipper.
For the first time, we are seeing gallinipper mosquitos, known for their enormous size and painful bite. They draw a lot of blood, leaving substantial splats when you catch one. Dr. Susan Paskewitz of UW-Madison identified a live sample for me. She says they are not that common in Wisconsin but they show up in unusually wet years, particularly south of Madison. Fortunately, they do not transmit any human pathogens.
About those beans …
Veggie list and veggie notes (Sept. 8/9, 2016; week #17, green EOW)
Red potatoes, 3 – 3.5 lb
Slicing &/or plum tomatoes, ~4 lb
Broccoli, ~1.5 lb
Romano beans, 1.6 lb
Frying &/or bell peppers, ~3
Orano or lunchbox peppers
Yellow onions, 1 – 2
Garlic, 1 bulb
Spearmint, 1+ sprigs
Some sites will get yellow watermelon.
Some sites will get a small muskmelon plus a cucumber
Red potatoes – These potatoes were grown for us by John Hall at his farm near East Troy.
Slicing tomatoes – The yellow slicing tomatoes are the ripest and should be eaten first.
Yellow onions – These are more pungent and better for frying than the Walla Walla onions we sent over the last weeks.
Spearmint – This is from our brand-new mint garden, planted this spring. It is a variety called “Kentucky Colonel Mint”. The plants are establishing nicely. We will pack just a large sprig or two. I don’t want to harvest heavily while the plants are young. Some sprigs have flowers or buds because we delayed harvests so the plants could get well established. Our old mint garden gradually faded away as the surrounding trees grew and shaded the area. It’s nice to have a new plot established.
Melons – Everone gets either a Yellow Doll watermelon or a small muskmelon called “Sugar Cube.” This is a new variety for us but very tasty.
RECIPES FROM LAUREN
FALAFEL-SPICED TOMATOES & CHICKPEAS ON FLATBREAD
Inspired by one of my favorite Bon Appetit recipes
Now this is what we call a weekend recipe. It doesn’t take too long (unless you make the flatbreads from scratch, then things start to drag out a bit), but it does create many dirty dishes. It isn’t necessarily a quick recipe, but it is simple and the end result is a food adventure I think you will enjoy taking. I find the spices and herbs of this dish endlessly interesting. I’ve adapted the original recipe to simplify it a bit, but maintained all the yummy flavors! Flatbread can certainly be store-bought instead of homemade to save one step.
Also, if you can’t find sumac, za’atar is a yummy spice blend of sumac and thyme. That will absolutely work. If you can’t find either, paprika will make a fine substitution.
Takes 1 hour (plus 40 minutes if making flatbread from scratch)
Serves 4
2 garlic cloves, minced
1 teaspoon sumac (see note above)
1/2 teaspoon crushed red pepper flakes
1/2 teaspoon ground coriander
1/2 teaspoon ground cumin
1 teaspoon Kosher salt, plus more
1 pound tomatoes, preferably mixed colors, thinly sliced
15.5-ounce can chickpeas, rinsed
2 tablespoons red wine vinegar
Freshly ground black pepper
1/2 sweet onion, very thinly sliced
3 tablespoons olive oil
Yogurt Sauce:
1 cucumber, if you’ve got it, peeled and diced
1/2 cup plain Greek yogurt (preferably full fat)
Mint, coarsely chopped, all you’ve got (up to 1/2 cup)
Kosher salt and freshly ground black pepper, to taste
Assembly:
Olive oil
4 flatbreads (Or make your own! Recipe below)
Hot sauce
- Combine garlic, sumac, red pepper flakes, coriander, cumin and 1 teaspoon salt in a small bowl. Arrange tomato slices in a single layer on a baking sheet (or two) and sprinkle evenly with sumac seasoning. Let sit at room temperature for about half an hour.
- Combine chickpeas and vinegar in a medium bowl. Season with a generous amount of salt and pepper. Mash with a fork until†its consistent in texture. Add onion and oil and stir to combine. Taste and adjust salt and pepper as needed.
- Prepare yogurt sauce by combining yogurt and mint (and the cucumber if you have one lying around). Season to taste with salt and pepper. Cover and place in the fridge until ready to use.
- Drizzle olive oil in a large skillet over medium heat. Add flatbreads and cook for about 30 seconds on each side until warmed.
- Top flatbreads with mashed chickpeas followed by sliced tomatoes and then drizzle with yogurt sauce and a drizzle of olive oil (and hot sauce if desired).
.
Flatbreads:
3/4 teaspoon baking powder
1/2 teaspoon sugar
2 cups all-purpose flour, plus more for counter
2 teaspoons Kosher salt
1 cup plain Greek yogurt
4 tablespoons olive oil
Freshly ground black pepper
- Combine baking powder, sugar, flour and salt in a large bowl. Add yogurt and stir to combine. Transfer dough to a lightly floured surface and knead until smooth. Divide into 4 pieces and cover with plastic wrap. Let rest 15 minutes.
- Roll each piece out into a 8-inch circle. Heat oil in a large pan over medium heat. Working one at a time, cook flatbreads until underside is golden brown and it has begun to puff (about 2 minutes). Flip and cook on the other side for 1 minute. If using immediately, no need to reheat on a skillet (as in step 4).
————
WHITE CHEDDAR BROCCOLI SOUP
Cheddar broccoli soup is a fall favorite. I know we’re not quite to cool temperatures yet, but I know we are going to get there soon! Our house is already embracing soup season. I love to spruce up plain old cheddar broccoli soup with some potatoes for extra creaminess and peppers for color and interest. The cayenne really doesn’t add a touch of heat to the final product (I promise!), but will make the flavors pop! This soup is nice and light with just enough richness from the cheese. Feel free to sub in cream or half and half for some of the milk if you like a thicker, creamier soup.
Takes 45 minutes
Serve 6-8
.
- Melt butter over low heat. Add onion along with 1/2 teaspoon salt and 1/4 teaspoon pepper and turn up to medium. Cook 5 minutes until fragrant. Add peppers and cook 5 minutes longer. Reduce to low, add garlic and sautÈ 5 minutes more.
- Add potatoes, broccoli, remaining salt, remaining pepper and cayenne. Bring heat back up to medium and saute for a couple minutes until well combined and lightly coated with butter.
- Add flour and stir until it coats vegetable mixture. Cook, stirring occasionally for 3-5 minutes until butter begins to turn golden brown. Once it has begun to brown, add 2 cups whole milk and quickly stir. Wait for it to simmer for a moment and then add chicken or vegetable stock. Stir to combine.
- Bring to a boil, reduce to a simmer and cook for 15 minutes.
- Add cheese and stir until melted. Puree with an immersion blender or food processor until soup reaches desired consistency. I don’t like mine to be totally chunky or totally smooth, but somewhere in between.
————
LOCAL THYME RECIPES

Comforting Classics
Marcella Hazan’s Tomato Sauce with Butter and Onion
Romano Bean and Tomato Salad
Herb Roasted Potatoes
Terrific Broccoli Sesame Salad
Outside the Box Recipes
Spanish Roasted Tomatoes and Peppers with Jamon
Lemony Braised Romano Beans
Lemon Dijon Potato and Broccoli Salad
Blue Cheese Broccoli Pie
Quick and Easy Meal
Wholegrain Mustard Roasted Potatoes with Salmon and Tomatoes

Blue cheese broccoli pie

