
Yearly Archives: 2022
Week #16, Final sweet corn
- On: September 07, 2022
 0
0
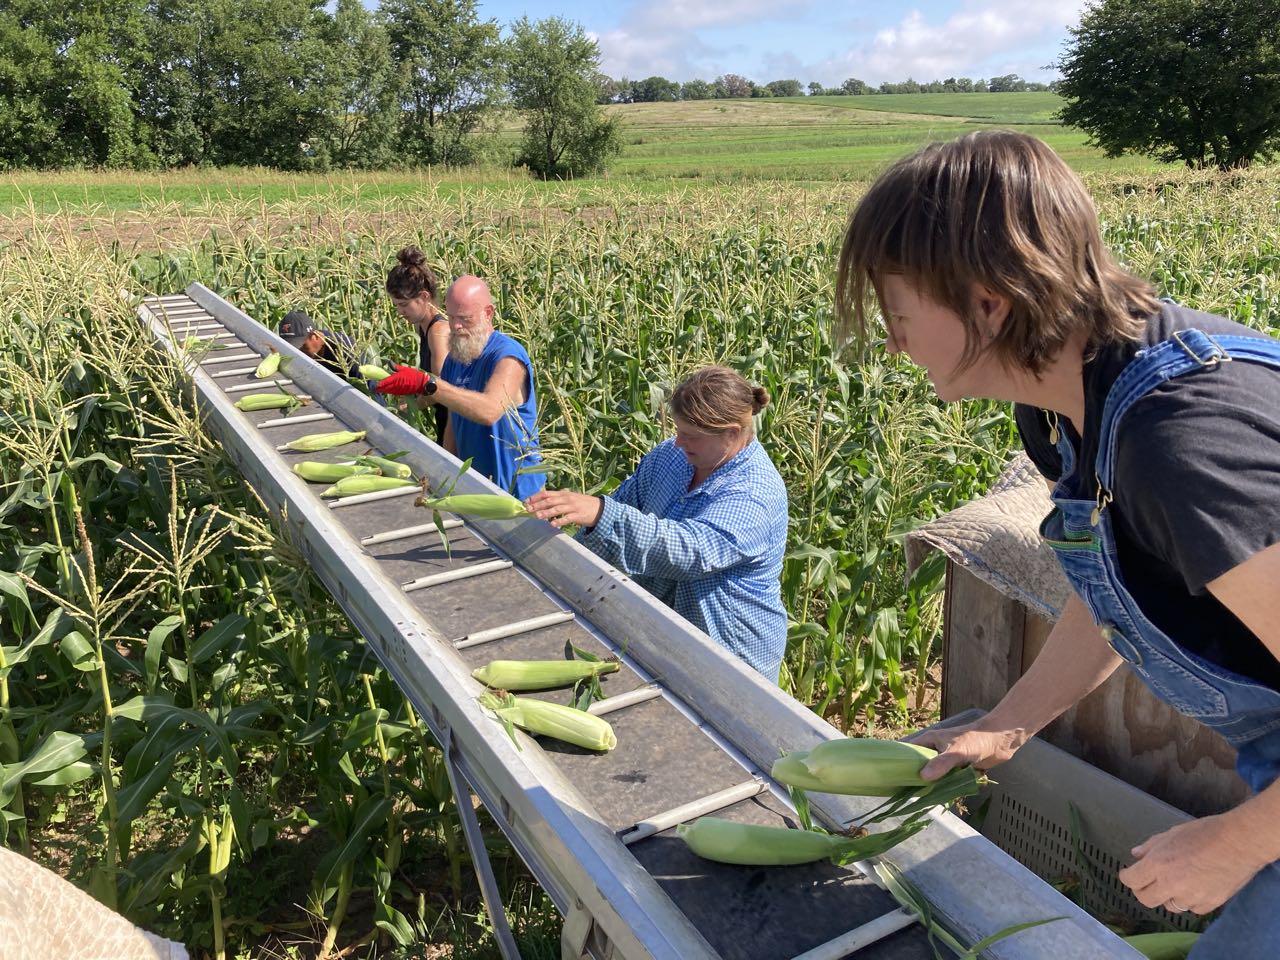
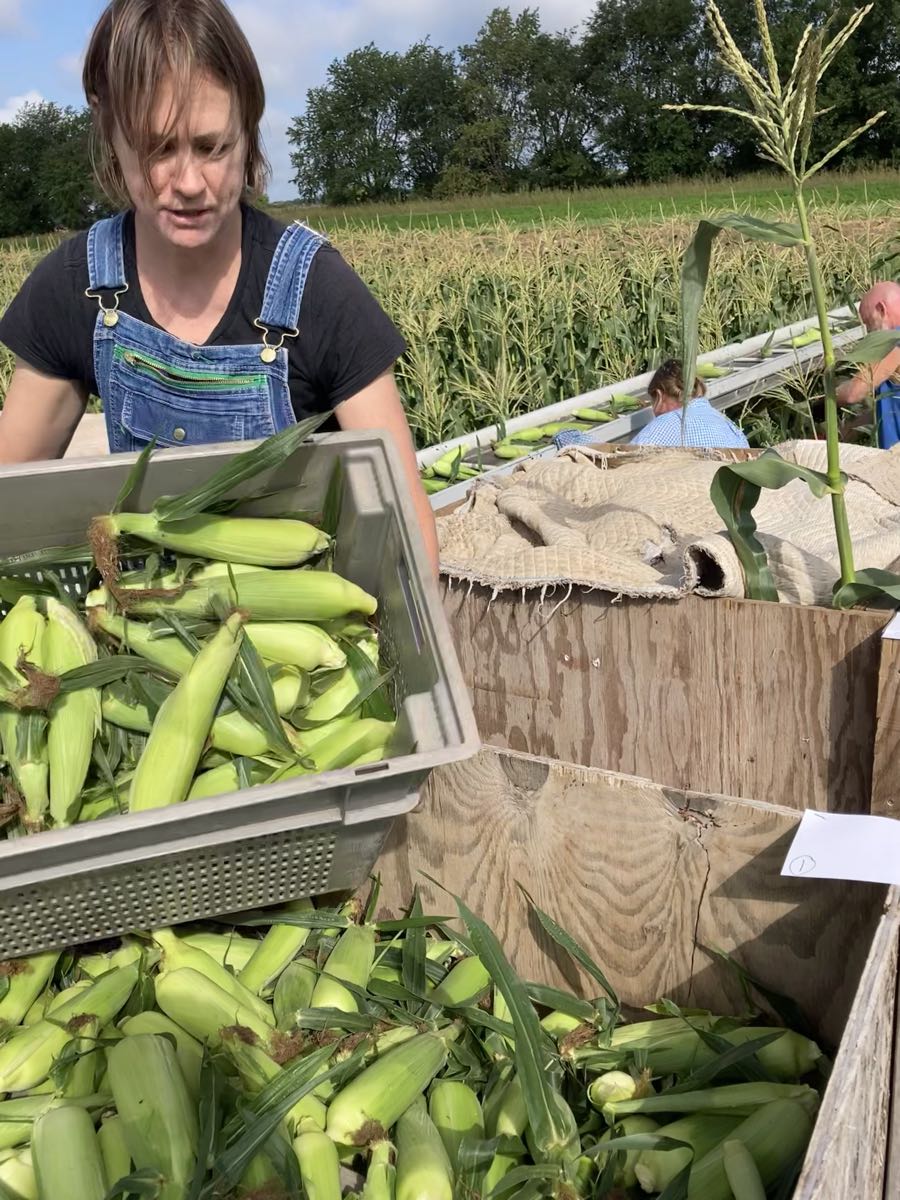
We’ve had a good run of sweet corn and hope you enjoyed it. This is our seventh and final delivery. Don’t worry – soon there will be new fall veggies to replace it.
Veggie List & Veggie Notes
Week #16, September 8/9, 2022
– Weekly shares
– EOW/ purple
– Sampler/ moon
Sweet corn, 8 ears
Kale, 1 bunch
Carrots, 2 lb
Slicing & plum tomatoes, ~4 lb
Red & yellow peppers, mixed bell & frying, ~4
Zucchini &/or Zephyr squash, 1 – 2 squash
Yellow onion
Jalapeño chile (HOT), 1
Basil, 1 bunch
Next week’s box will probably contain peppers, tomatoes, onions, greens, basil and more.
RECIPES by DEB
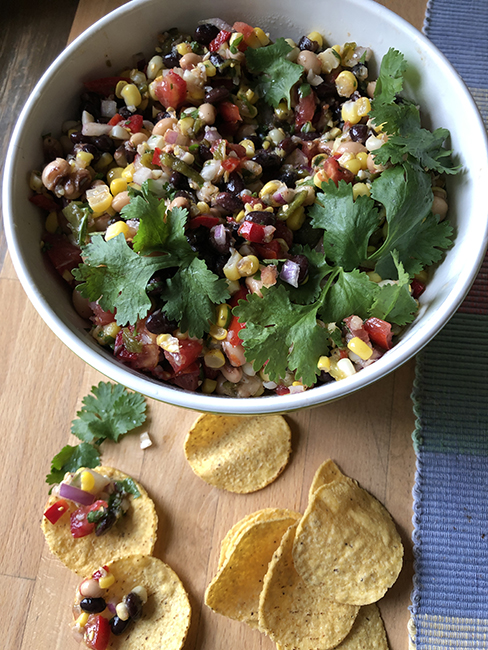
Photo by debslunch
Cowboy Caviar a.k.a. Black Bean & Corn Salad
Cowboy Caviar is a great recipe for this time of summer, when tomatoes, corn, and peppers abound, and it’s easily adaptable to whatever vegetables you have on hand. You can serve it as an appetizer with a big pile of corn chips, or as a salad – especially nice with sliced avocado added. You can make this with either cooked-from-dry, or canned beans.
Takes about 30 minutes to assemble, plus chilling time, and allow extra time if you are cooking beans from dried
Makes about 8 cups = many appetizer servings or 8-10 as a salad
Dressing:
1/3 cup olive oil
1/3 cup lime juice
3-4 garlic cloves, minced or put thru a press
1 teaspoon white sugar
a few sprinkles of chili powder or Penzey’s Pico Fruta
Kosher salt and black pepper
Salad
2 cups fresh corn kernels (from 3 to 4 cobs)
1 1/2 cups cored, seeded if desired, and chopped tomatoes (either slicing or plum is fine here)
3/4 cups red or white onion, finely chopped
1 1/4 cups or one 15-ounce can black beans, rinsed and drained
1 1/4 cups or one 15-ounce can black-eyed peas, rinsed and drained
1 cup of seeded and finely chopped red or yellow frying pepper
1 jalapeño, seeded and finely diced
Optional: 1/2 cup chopped cilantro leaves and tender stems, plus more for garnish
Optional: 1 scallion, white and green parts, thinly sliced, for garnish (optional)
Tortilla chips or avocado – or both! – for serving
- Make the dressing: Whisk all the ingredients together in a spouted measuring cup – 2 cups is a good size for this. Set aside while you prepare the rest.
- Husk the corn, and boil it in ample salted water for about 10 minutes, until tender. Let cool and cut the kernels from the cobs. Save the cobs for stock if desired.
- Combine the tomatoes, onion, beans and black-eyed peas, peppers, and jalapeño in a large bowl. Note: Seeding the tomatoes is optional, but will make the dish less juicy, which can be helpful if you’re using slicing tomatoes. To seed the tomatoes, core them and flatten them in the sink under the palm of your hand, squeezing out the seeds. For slicers you might want to cut them in half, first.
- Pour in the dressing, and mix well. Toss in the cilantro if using, and taste for seasoning. Chill for at least 30 minutes or up to overnight, top with sliced scallions if using, and serve.
.
.
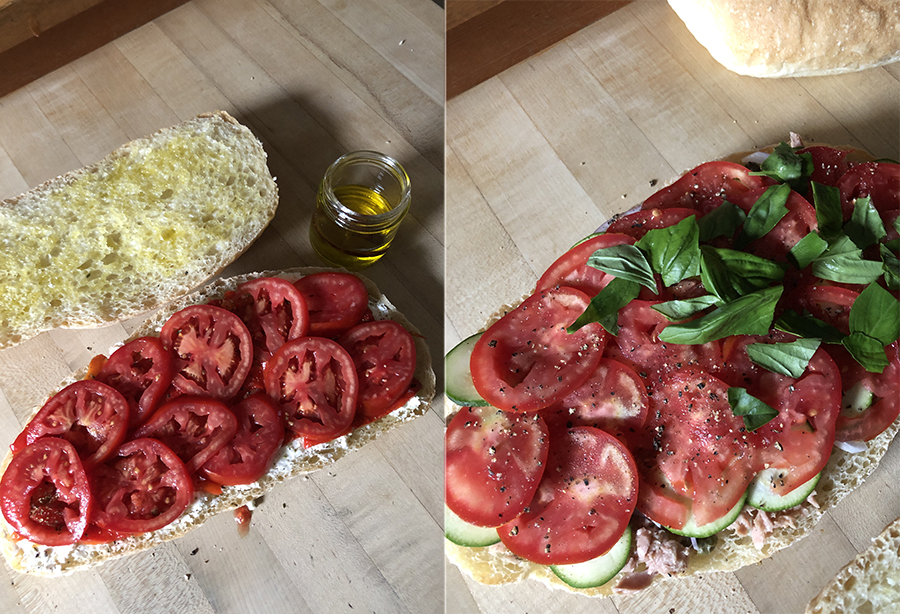
Photo by debslunch
Mediterranean pressed sandwiches
These sandwiches are what we ate for a picnic on Labor Day: The one on the right is a version of Pan Bagnat, kind of a Nicoise salad featuring tuna and tomatoes, on bread, and the sandwich on the left is a vegetarian version with goat cheese, tomatoes, and roasted peppers. Both sandwiches are brushed with olive oil, and spread with oil-poached garlic. If you are a New York Times subscriber you can watch a video by Melissa Clark (it might play for non-subscribers …) that shows her using her 7-year-old daughter to press the sandwich; if you do not have a 7-yo available, you can use a few heavy cans or jars of food. Like the Cowboy Caviar, feel free to adapt to the vegetables you have on hand.
Takes about 30 minutes to assemble, plus one or two hours to press, and optional chilling time
Serves 4-6
For one sandwich/4-6 servings:
1 ciabatta bread* or 4 crusty Kaiser rolls
1-2 whole bulbs of garlic, depending on size
1/4 to 1/2 cup olive oil
1 dried hot chile
1 red bell pepper, sliced into strips
thin slices of red or other onion
2 medium tomatoes, thinly sliced
a handful of basil leaves, torn into pieces
For the tomato-goat cheese variant:
3-4 four ounces goat cheese, softened
1/4 cup roasted red peppers, homemade or from a jar
For Pan Bagnat:
one 6 oz. can oil packed tuna
2 tablespoons capers, drained
1/2 zucchini or summer squash, thinly sliced – about 1/2 cup slices
*If you want to try making the ciabatta, this King Arthur recipe works well. Otherwise Madison Sourdough makes a nice ciabatta and you’ll also find it in any grocery store with a good-sized bakery department.
- Make the oil-poached garlic: separate the garlic cloves, peel them, and place them in a small saucepan with the dried chile. Pour in olive oil to cover the cloves and cook over medium heat for 10-15 minutes, until the cloves are very soft, checking by poking with a fork. Watch closely so it doesn’t brown or burn. Cool, and fish the cloves of garlic out of the oil and mash them with a fork. Reserve the mashed garlic and oil separately.
- Assemble the sandwich(es): Split the bread or rolls. For either variation, start by spreading a good portion of the mashed garlic on the bottoms of the bread. Brush more poaching oil over the garlic, and also brush the tops with oil. For the tomato version, spread goat cheese on the bottom of the sandwich, then layer on the sliced peppers, onion, and roasted peppers. Top with sliced tomatoes and torn basil. For the pan bagnat version, mix the un-drained tuna with the capers, and distribute evenly on the bottom of the sandwich. Shingle the sliced squash over the tuna, layer on the sliced peppers, onion, and top with sliced tomatoes and torn basil.
- Press the sandwiches: put the tops on, and wrap in plastic wrap or waxed paper. Place the sandwiches between two cutting boards (or under one cutting board on the counter, if you don’t have two) and top with a few heavy cans – like 28-ounce canned tomatoes – and press for 1-2 hours. After pressing you can serve immediately or chill for several hours or overnight.
.
.
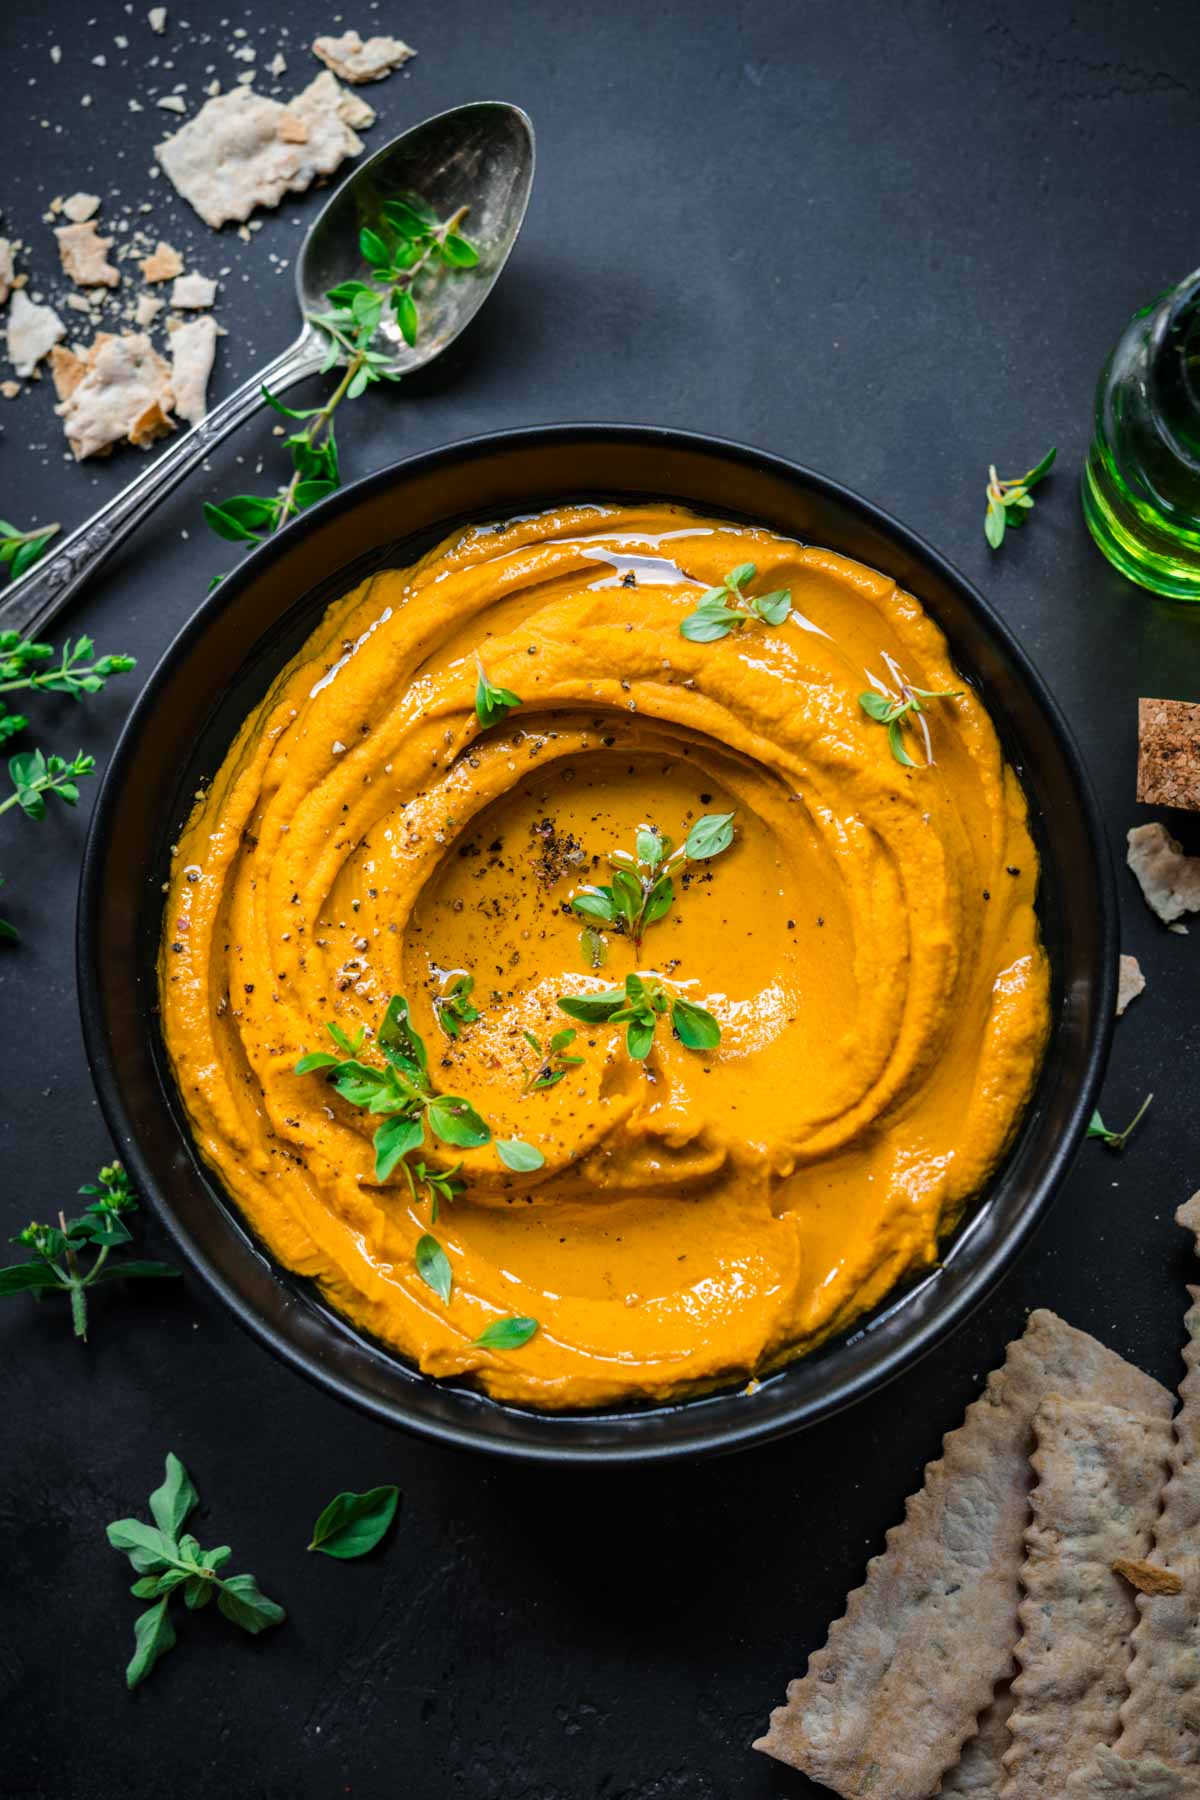
Photo by Crowded Kitchen
Roasted Carrot Dip (Easy Recipe)
From Crowded Kitchen
Here’s a fun way to use one pound of our carrots from this week, turning them into a vegan dip that can be enjoyed with bread of crackers.
.
.
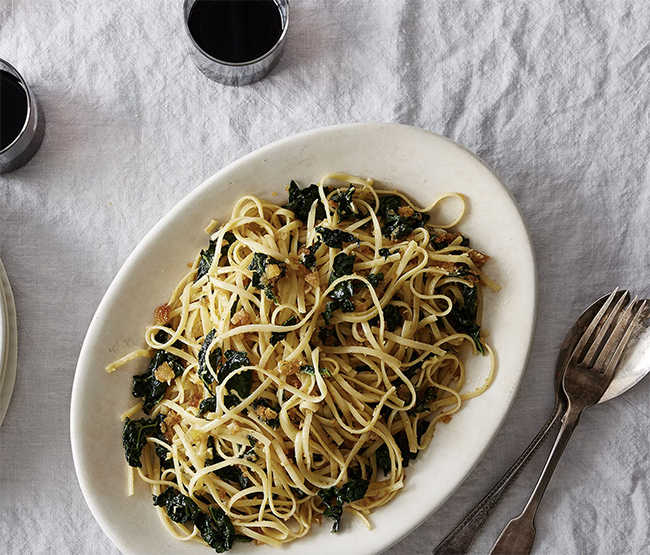
Photo by Bobbi Lin
Linguine with Breadcrumbs and Kale
From Food52
Turn this week’s kale into an elegant-looking pasta that is nonetheless simple to prepare. This dish was an entry in a 5-ingredients or less contest that Food52 ran in 2017.
.
.
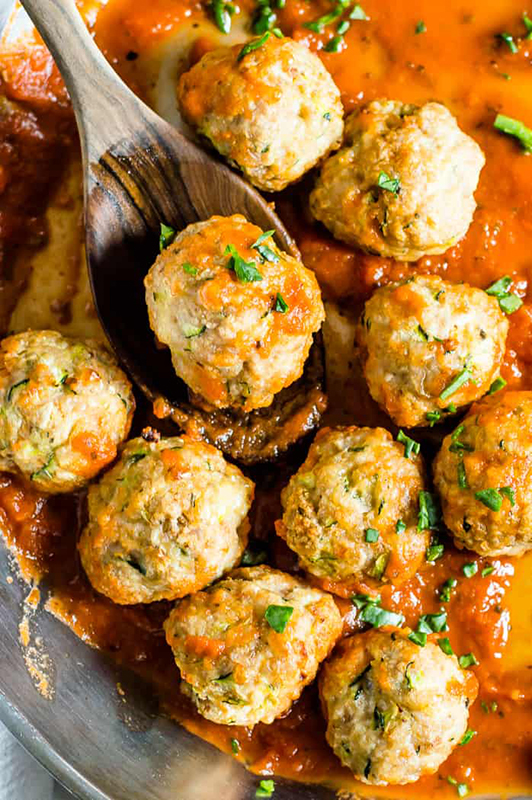
Photo by Natural Nurturer
Oven Baked Turkey Zucchini Meatballs
From The Natural Nurturer
When I tested these meatballs I transferred them into a pot of simmering tomato sauce after baking, where they fell apart a bit in the sauce. They were still tasty over buttered noodles the first night, and I turned the leftovers, broken meatballs and all, into an even tastier bow-tie pasta bake, dolloped with ricotta cheese and topped with bread crumbs.
.
.
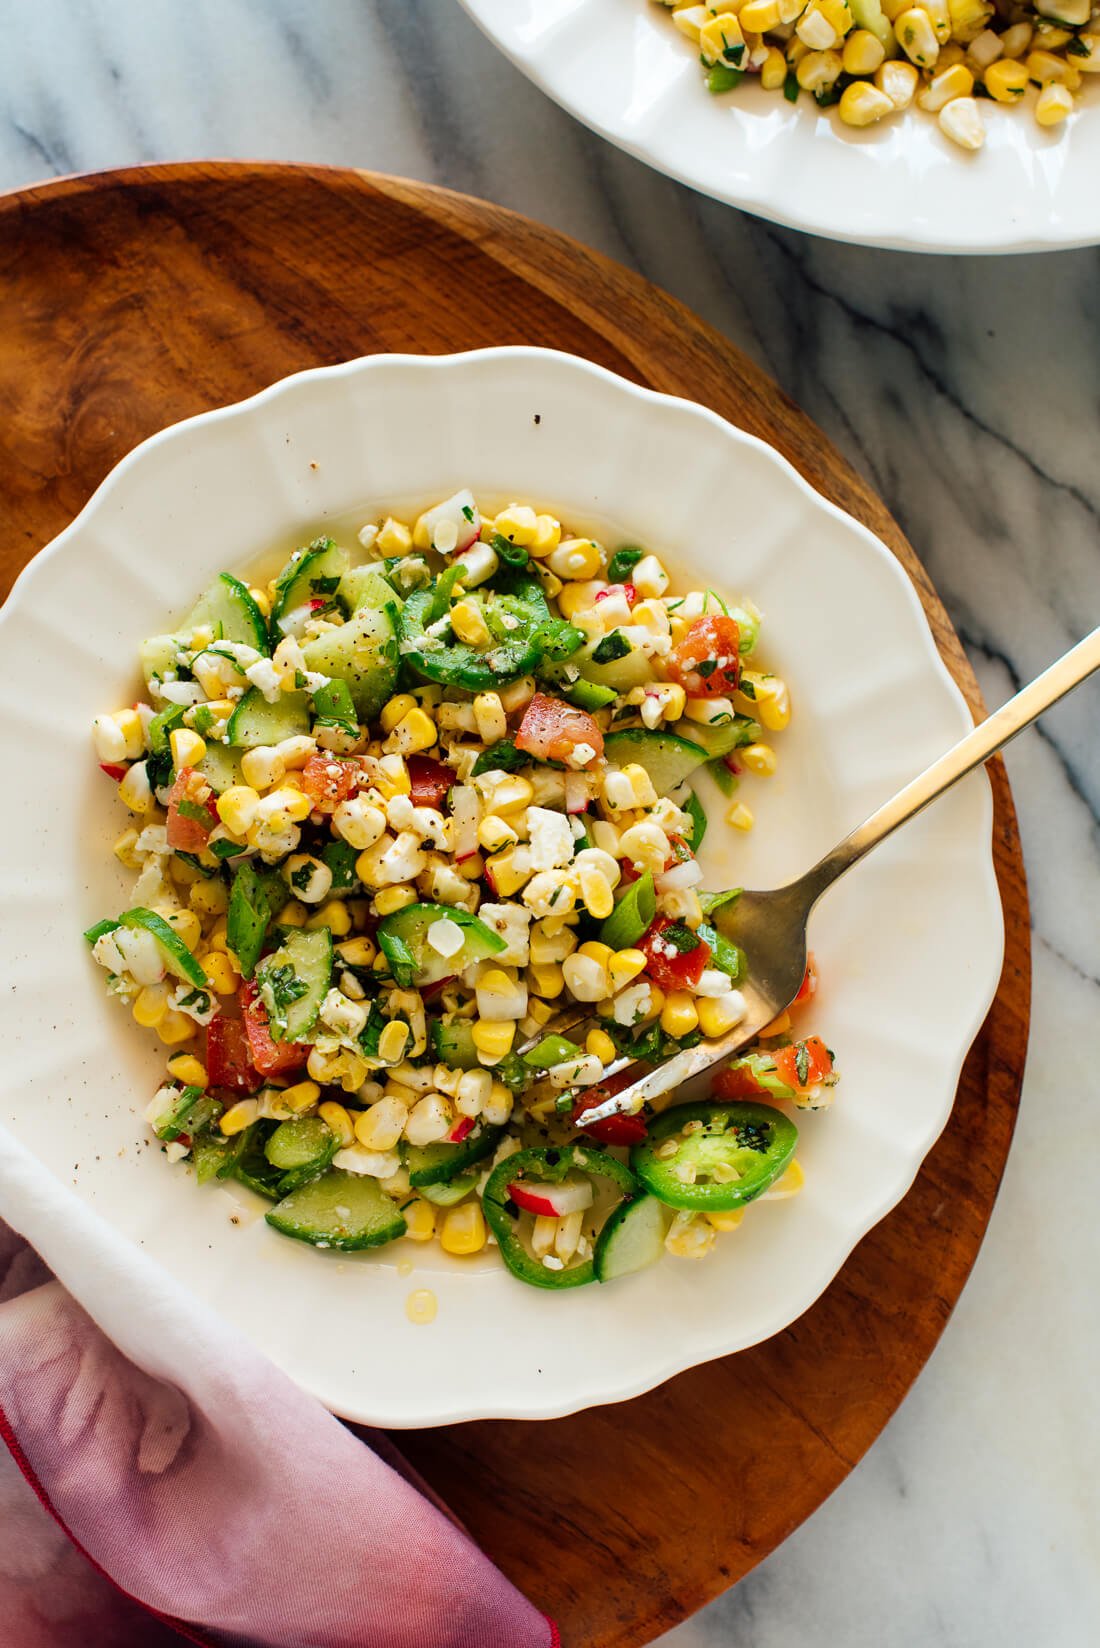
Photo by Kate
Garden-Fresh Corn Salad
From Cookie & Kate
This fresh corn salad calls for radishes and cucumbers – sliced summer squash is a good substitute.
.
.

Photo by Petrina Tinslay
Happiness Soup
From Nigella Lawson
Made with summer squash and turmeric, Nigella calls this a “a yellow soup to banish the blues” – and it will be yellow made with Zephyr squash. If made with zucchini, the color won’t be quite as sunny, but should still make you happy while eating it.
.
.
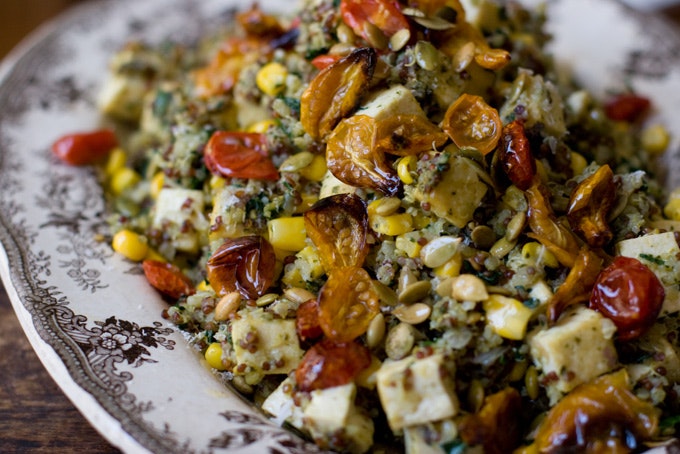
Photo by Heidi Swanson
Heather’s Quinoa Recipe
From 101 Cookbooks
The recipe from Heidi Swanson’s long-running vegetarian recipe blog 101 Cookbooks calls for either roasted cherry tomatoes or sun-dried tomatoes, but you coould roast our plum or slicing tomatoes to sub in. The recipe also includes basil pesto, that you can get from a jar, but it includes a recipe for pesto that you can make using the basil in this week’s box.

Week #15, September 1/2, 2022
- On: August 31, 2022
- 0
I am back to work part-time now and still catching up. Thank you for all the well wishes! Here more photos our son Ari took before returning to college. He has worked on the farm crew for years and knows all the ins and outs of the farm. I like that he photographs different things than I do.
Beth

Plum tomatoes being washed in our brusher washer. Plums are firm enough to wash this way. Slicing tomatoes are too delicate, so we send those to you unwashed or lightly wiped.

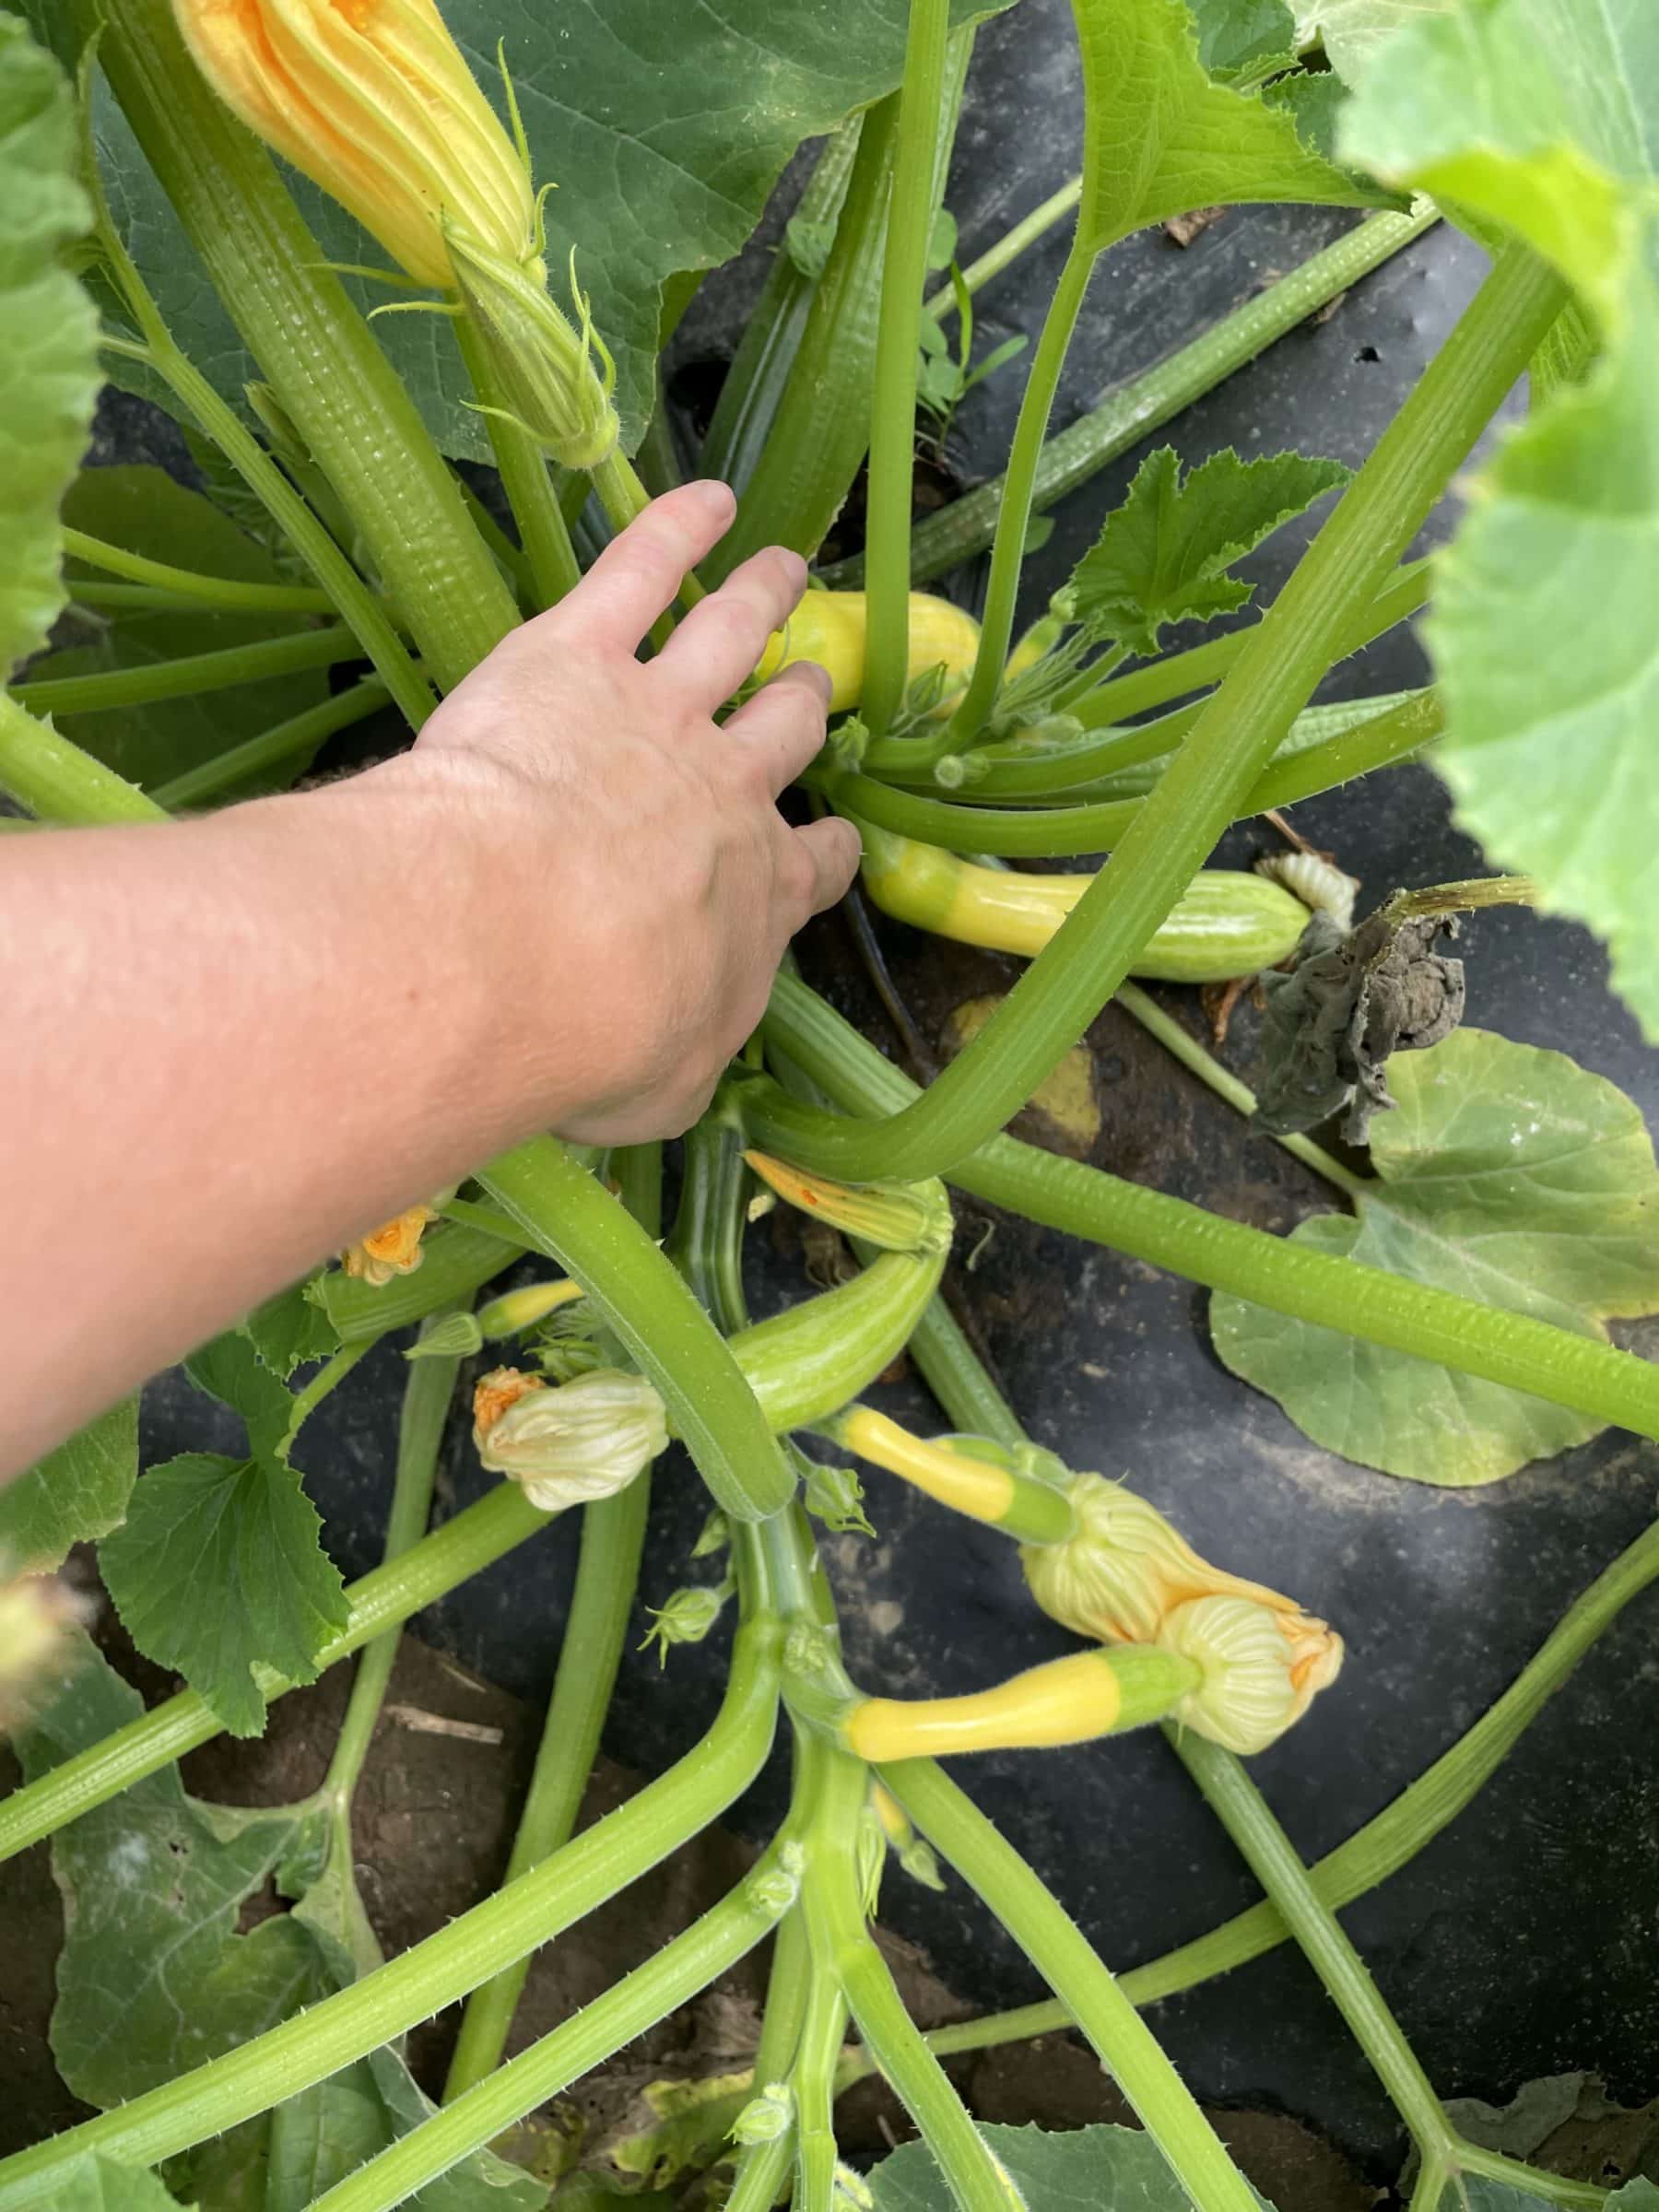
Our crew spends many hours harvesting zucchini or yellow ‘Zephyr’ squash. We sweep the field three days per week, diving into the spiny plants to find squash big enough to cut free. Your squash this week comes from our second planting which is quite a bit smaller than the first field. By this time of year, we know there will be many other vegetables to harvest, and will only want a few squash per CSA box, so we plant a smaller field.
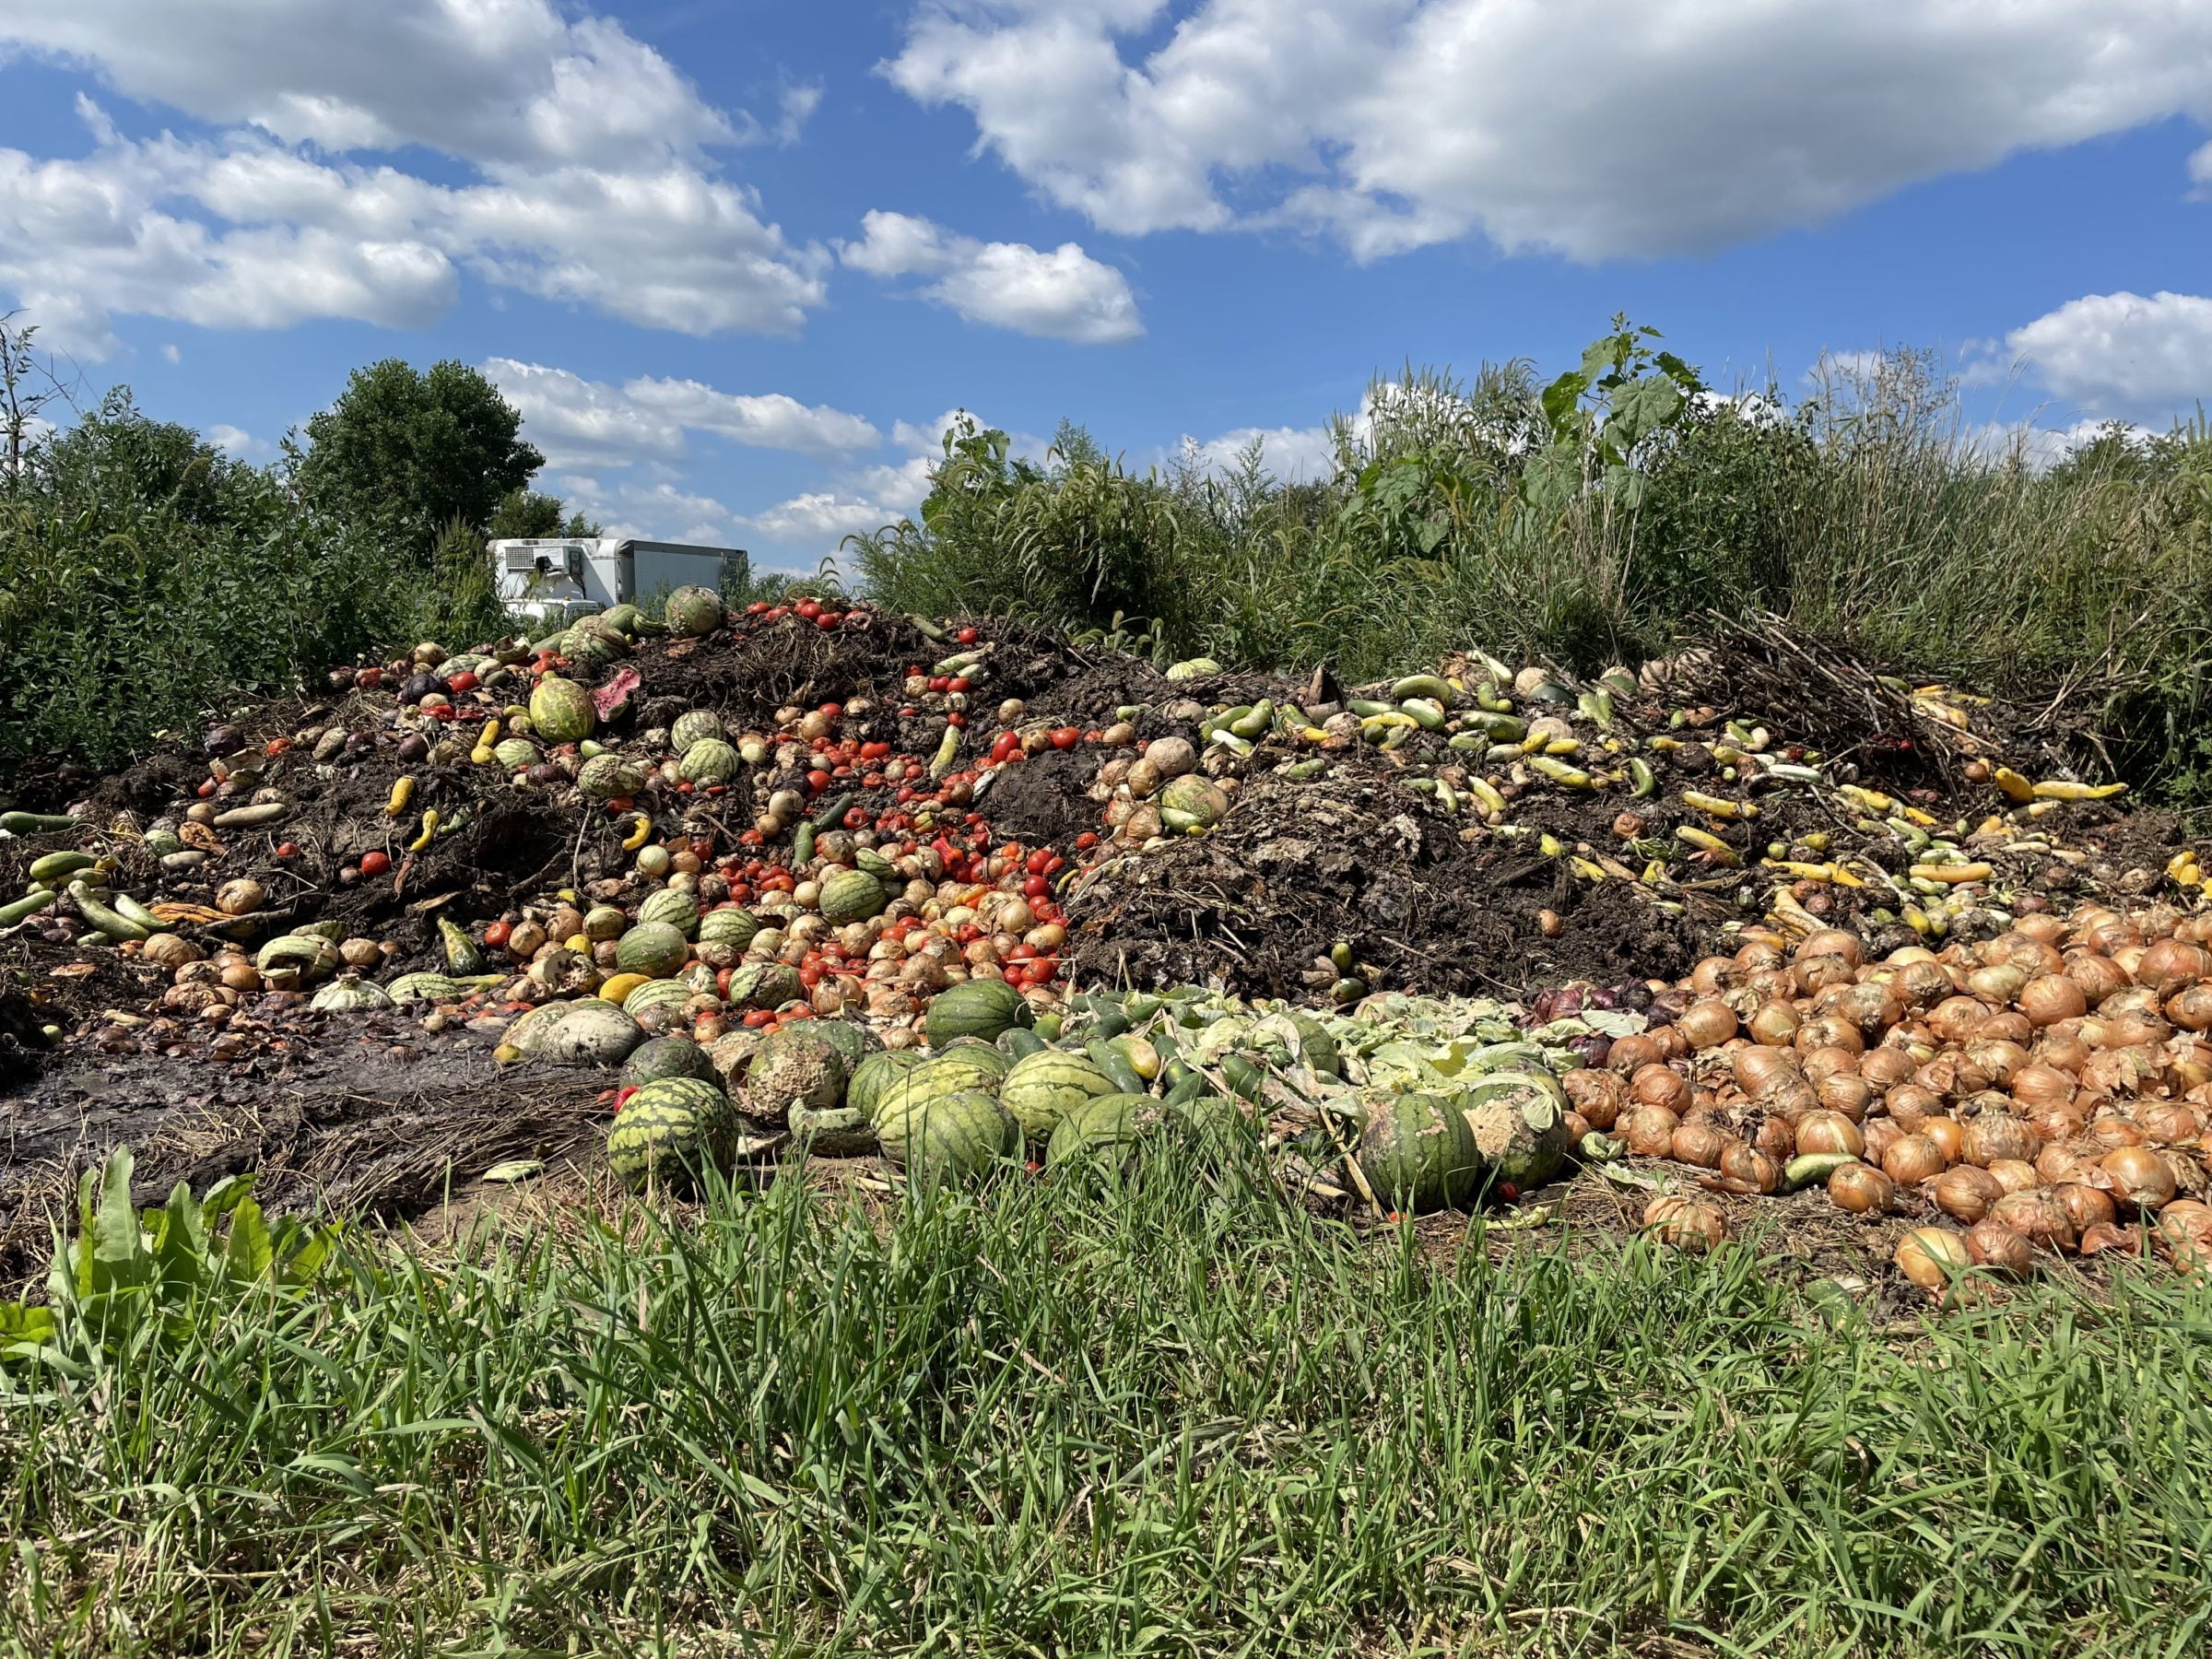
So … have I ever showed you our cull pile? Apparently Ari wants you to see it! This is where we dump problematic produce, mostly flawed vegetables we find at washing. Don’t worry – none of it is worth saving or donating to Second Harvest Food Bank. The pile rots undisturbed at the edge of our fields. Every few years, we’ll load it in a spreader and spread it on grasslands at the edge of the farm. I’ll be blunt – it smells pretty bad.
Veggie List & Veggie Notes
Week #15, September 1/2, 2022
– Weekly shares
– EOW/ green
Sweet corn, 9 ears
Carrots, 2 lb
Slicing & plum tomatoes, 4 lb total
Cherry tomatoes, 1 pint
Red bell peppers, 2 (mixed #1, #2)
Colored frying peppers, 2 (mixed #1, #2)
Zucchini or yellow summer squash, 2 to 3 squash
Yellow onion
Jalapeno chile (HOT), 1
Basil, 1 husky branch
Next week’s box will probably contain sweet corn, carrots, tomatoes, peppers, zucchini, onions and more.
Sweet corn ‘Vision’ – This batch is especially tasty, perhaps because of steady recent rains. Bug report: There are a few bugs at the tips at low frequency.
Basil – Look at the beautiful basil! We have begun harvesting our second planting. We were able to protect these plants from Japanese beetles so this batch of basil is in good shape.
RECIPES by PHOEBE

Black Bean Tacos with Smoky Sweet Corn Sauce
These veggie tacos use sweet corn 2 ways (technically 3, if you serve them in corn tortillas)! I mix some whole kernels into the black bean and bell pepper filling and blend the rest into a creamy, sweet, and tangy sauce. Top them with quick-pickled jalapeños for a bright pop of flavor and a kick of heat. I like to char the corn and peppers in a hot skillet because I don’t have an outdoor grill, but if you do, feel free to use it. Grilling the veggies works just as well here.
Makes 12 tacos
Prep time: 20 minutes
Cook time: 20 minutes
For the quick-pickled jalapeños
1 jalapeño pepper, thinly sliced
2 tablespoons fresh lime juice
Pinch sea salt
Pinch sugar
For the tacos
1 red bell pepper
4 ears sweet corn, husked
⅓ cup raw cashews*
3 tablespoons fresh lime juice
2 tablespoons avocado oil
1 tablespoon rice vinegar
¼ teaspoon smoked paprika
⅛ teaspoon cayenne pepper
⅛ teaspoon garlic powder
⅛ teaspoon onion powder
1½ cups cooked black beans, drained and rinsed
1 teaspoon chili powder
1 garlic clove, grated
½ teaspoon ground cumin
12 tortillas, warmed
Fresh cilantro, for garnish (optional)
Sea salt and freshly ground black pepper
- Make the quick-pickled jalapeños: In a small lidded container or jar, place the jalapeño slices, lime juice, salt, and sugar. Shake to combine and chill until ready to use.
- Heat a large, dry cast-iron skillet over medium-high heat. When the pan is hot, add the whole red bell pepper and as many ears of corn as you can fit. Cook, rotating the vegetables every few minutes, until the pepper is blackened and blistering on all sides and the corn is tender, bright yellow, and lightly charred all around. Repeat as necessary with the remaining ears of corn.
- Place the charred pepper in a large bowl and cover with a lid or dish towel. Set aside for 10 minutes to steam and soften, then use your hands to peel away the loose, charred skin. Slice the pepper in half and remove the stem, seeds, and membranes. Dice the pepper.
- Slice the kernels off the corncobs and transfer 1 cup to a high-speed blender with the cashews, 1 tablespoon of the lime juice, 1 tablespoon of the avocado oil, the rice vinegar, paprika, cayenne, garlic powder, onion powder, and a heaping ¼ teaspoon sea salt. Blend until smooth and creamy and season to taste.
- Place the remaining corn kernels in a large bowl. Add the diced red pepper, black beans, chili powder, grated garlic, cumin, the remaining 2 tablespoons lime juice, and the remaining 1 tablespoon avocado oil. Stir well to combine, then season with ½ teaspoon sea salt and several grinds of pepper and stir again. Season to taste.
- Assemble tacos in the tortillas with a dollop of the smoky sweet corn sauce, the corn and black bean mixture, the quick-pickled jalalepeños, and fresh cilantro, if using.
*If you do not have a high-speed blender, soak the cashews for at least 4 hours, or overnight, before making the sauce.
.
.

Sweet Corn Grits with Roasted Tomatoes and Fried Eggs
Enjoy this recipe for any meal of the day: breakfast, lunch, dinner, or even brunch. It’s another corn-2-ways dish, made with fresh sweet corn as well as stone-ground grits. I puree most of the fresh corn kernels, stirring them into the grits to make them sweeter and creamier. The remaining kernels I leave whole for texture. The exact cooking time will vary here depending on the grits you’re using. Be sure to use stone-ground grits, not quick-cooking or instant ones, and cook until they’re thick, creamy, and have just a slight bite. Top with a fried egg and roasted tomatoes for a delicious balance of sweet and savory flavors.
Serves 6
Prep time: 15 minutes
Cook time: 45 minutes
2 pounds tomatoes (about 4 large)
4 cups water
½ teaspoon sea salt, plus more for sprinkling
5 ears sweet corn, husked
1 cup dry stone-ground grits (not instant)
½ cup freshly grated Parmesan cheese
1 tablespoon extra-virgin olive oil, plus more for drizzling
1 garlic clove, grated
6 large eggs
Freshly ground black pepper
- Preheat the oven to 350°F and line a baking sheet with parchment paper.
- Cut the tomatoes into ½-inch wedges, then cut the wedges in half crosswise. Place the tomato chunks on the baking sheet, skin side down. Drizzle with olive oil, sprinkle with salt, and roast until shriveled and lightly browned around the edges, about 40 minutes.
- Place 3½ cups of the water and the salt in a medium pot and bring to a boil. Slice the kernels off the corncobs. Set aside the kernels from 1 ear of corn and add the remaining corn to the boiling water. Cook for 3 minutes, or until tender and bright yellow, then use a slotted spoon to scoop the kernels out of the water and into a blender, leaving behind as much water as you can. (It’s ok if you leave behind a few corn kernels too.)
- Slowly pour the grits into the boiling water, stirring constantly. Reduce the heat to low, cover, and simmer, stirring often, until the grits are thick and creamy, about 20 minutes.
- Meanwhile, blend the boiled corn kernels into a smooth puree. When the grits are thick and creamy, stir the puree into the pot along with the remaining ½ cup water and the raw corn kernels. Cover and cook, stirring often, until the mixture thickens and the grits are tender, about 15 minutes.
- Turn off the heat and stir in the Parmesan, olive oil, and garlic. Cover and let stand for 10 minutes while you fry the eggs.
- Heat a large nonstick skillet over medium-low heat and brush it with olive oil. Crack in the eggs, cover, and cook until the yolks are just set, 2 to 4 minutes. Work in batches if necessary.
- Portion the grits onto plates and top with the fried eggs and roasted tomatoes. Season with salt and black pepper to taste.
.
.

Photo by The Modern Proper
Sheet Pan Italian Sausage Heros with Honey Mustard
From The Modern Proper
Fit for a Labor Day celebration or an easy weeknight meal, these hearty sandwiches are packed with roasted Italian sausages, sweet peppers and onions, and a creamy, 4-ingredient honey mustard sauce.
.
.
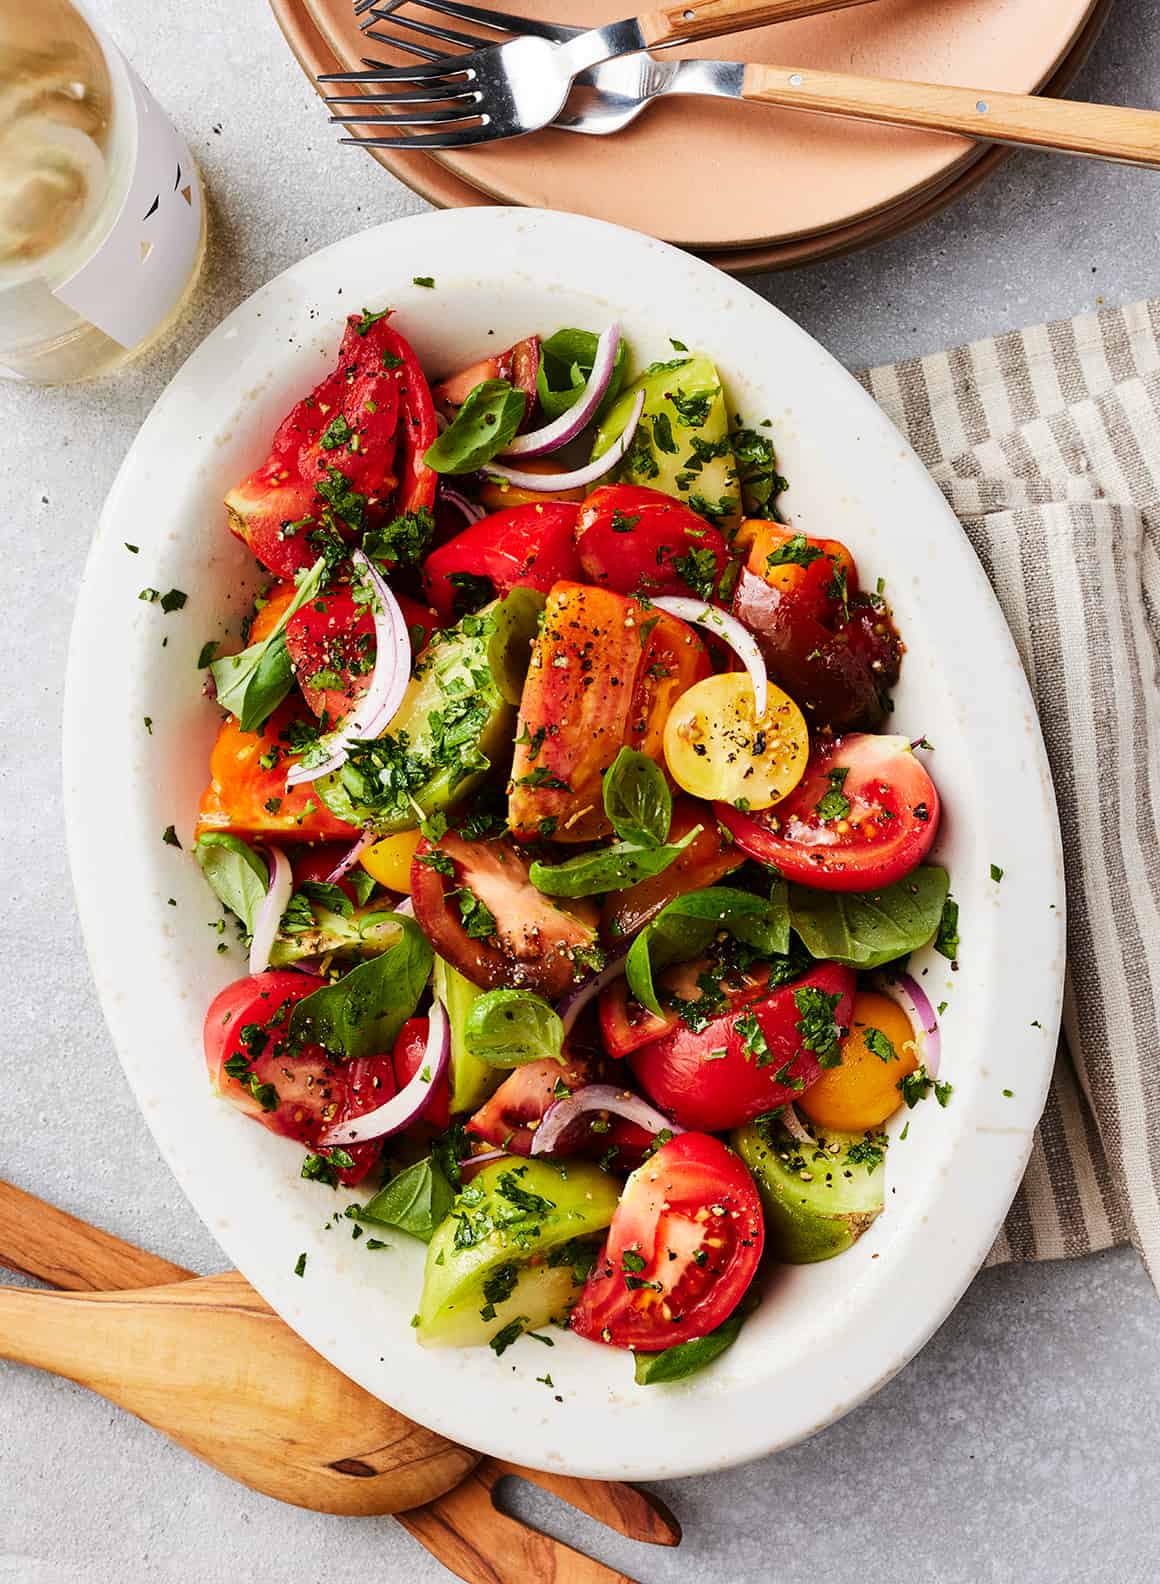
Photo by Eva Kolenko
Tomato Salad
From Love & Lemons
This tomato salad is as simple as they come, designed to highlight peak-season summer tomatoes. If you don’t have parsley, feel free to skip it. Just toss the salad with lemon zest and grated garlic instead of the gremolata.
.
.

Photo by Erin Alderson
Cumin Braised Carrots and Chickpeas
From Naturally Ella
This recipe is one of my favorite pantry meals. It’s so simple, calling for under 10 ingredients, but it’s still full of delicious sweet and earthy flavor. As written, the recipe serves 2, but you can easily scale it up to feed a larger group.
.
.
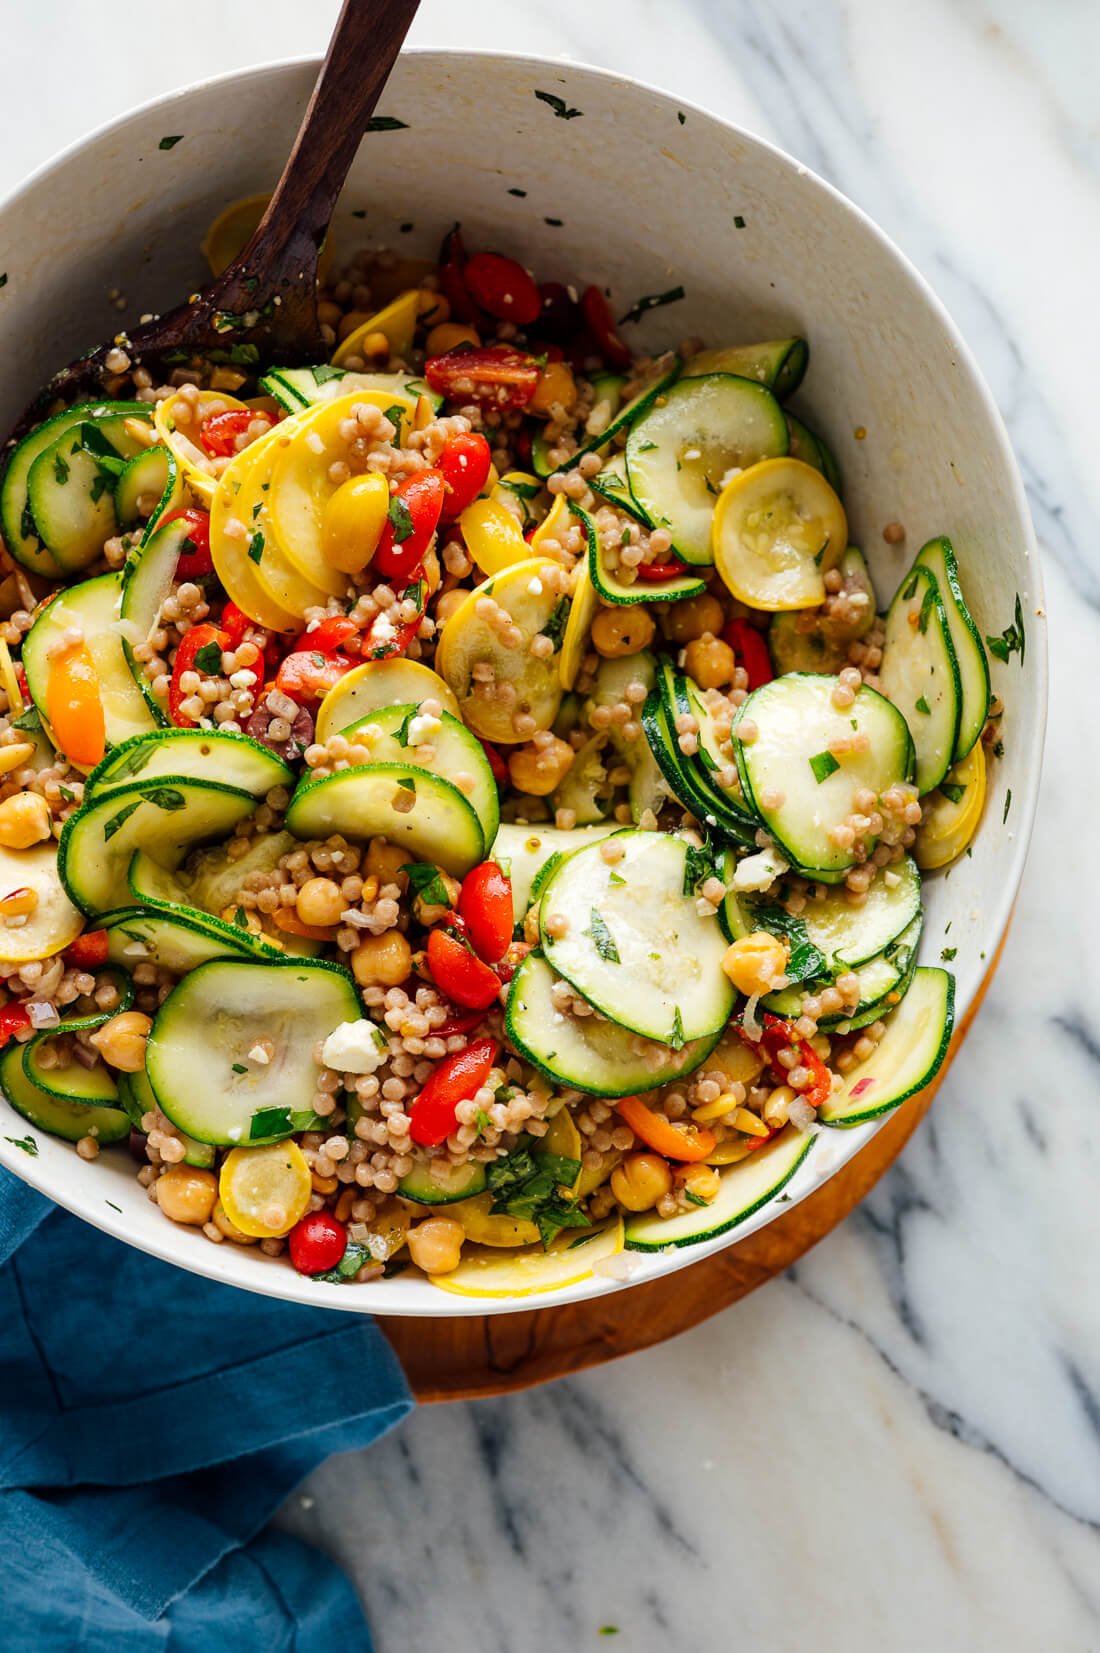
Photo by Cookie+Kate
Mediterranean Couscous Salad with Raw Squash and Feta
From Cookie+Kate
This summery couscous salad would be great for picnics this weekend or lunches next week. If you don’t have a shallot on hand for the dressing, feel free to skip it, or replace it with half the amount of finely chopped yellow onion. You’ll find the rest of the fresh ingredients–zucchini, cherry tomatoes, and basil–in your box.
.
.

Photo by Jeanine Donofrio and Phoebe Moore
Tomato Basil Soup
From Love & Lemons
This roasted tomato soup freezes perfectly, so if you want to preserve some of your summer tomatoes to enjoy later this fall, I highly recommend making and freezing a batch. Of course, it’s great hot off the stove too.
.
.
Photo by The First Mess
Vegan Barley Risotto with Roasted Carrots
From The First Mess
This unconventional risotto calls for pearled barley instead of arborio rice, giving it a more complex texture and flavor. If you can’t find pearled barley, Laura says that pearled farro would work nicely too. Sub onion for the shallot, and top the creamy, savory risotto with roasted carrots from your box.
Week #14, Photos from Ari
- On: August 24, 2022
- 0
Beth’s surgery went very well. She is recovering without trouble and glad that it is over. She’ll be back to work full time next week. In the meantime, our son Ari took farm photos to share this week. He is home from college this summer, working on the farm crew, and knows our farm well.
Steve
Maggie grades and weighs slicing tomatoes.
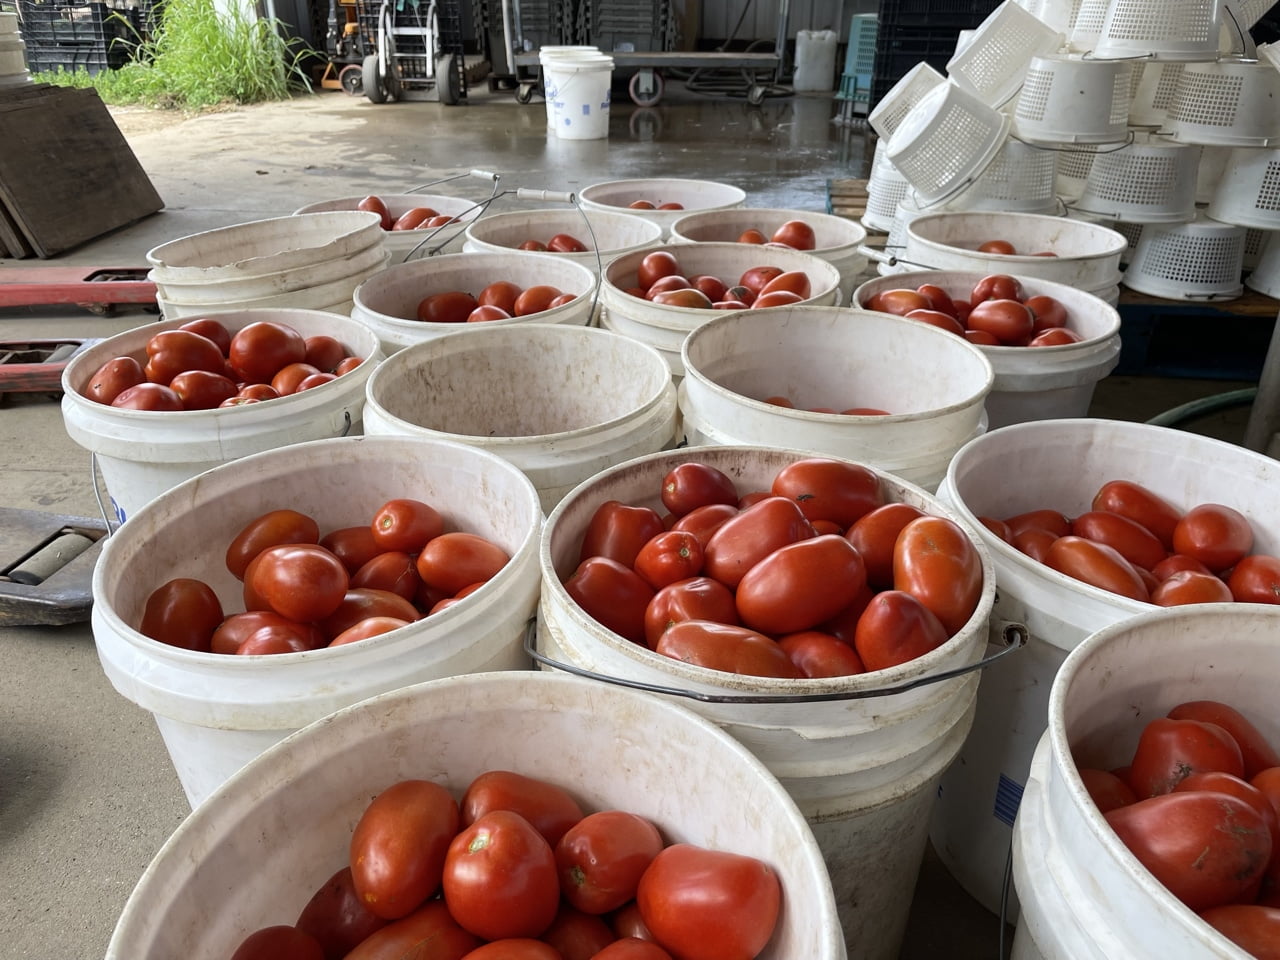
Plum tomatoes, straight from the field

A blue sky day.

Muddy tractor
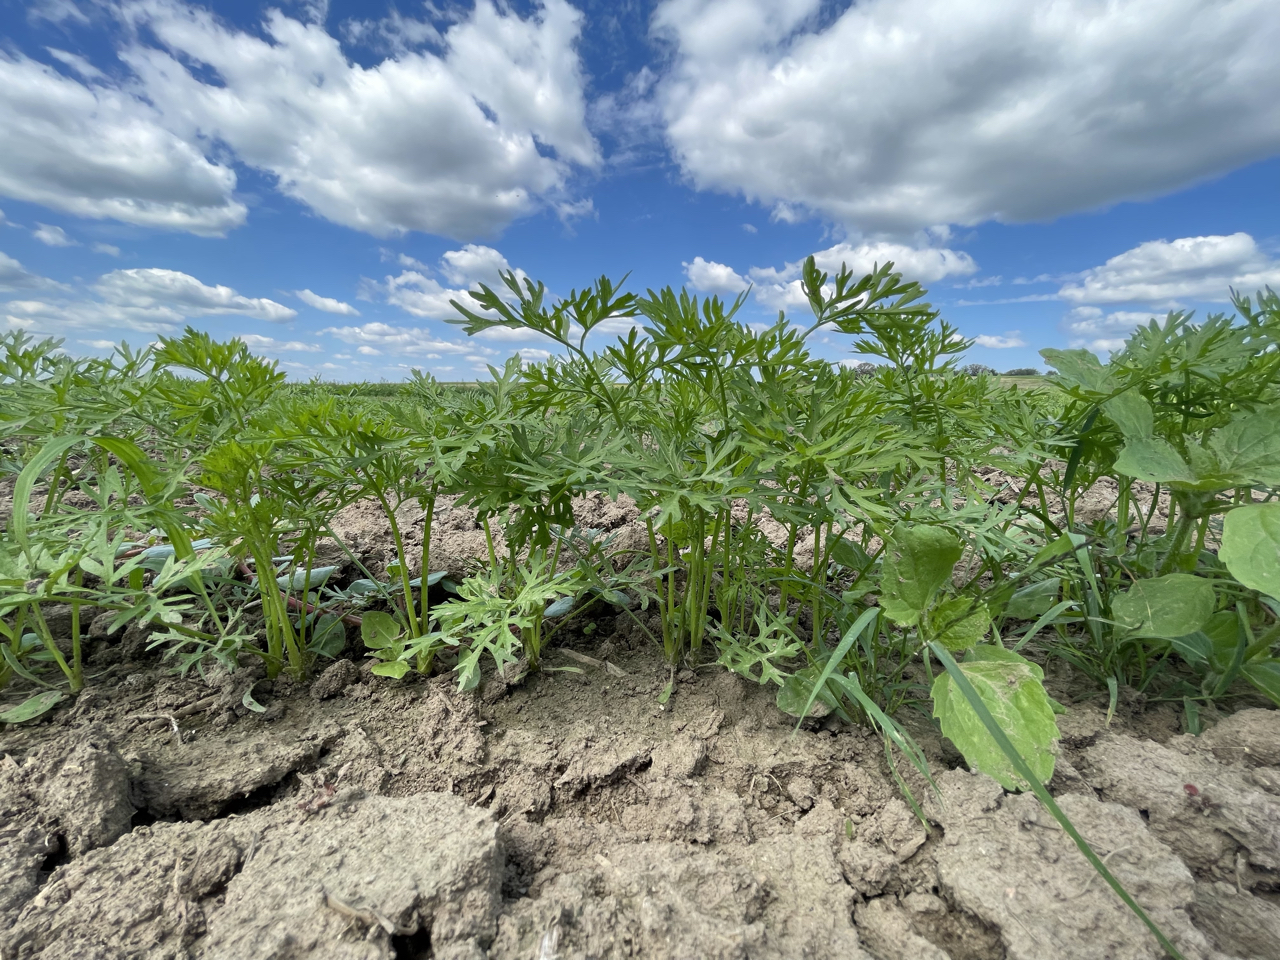
A row of carrot seedlings, before being weeded by hand.

And after weeding! Our crew spends many, many hours weeding carrot fields.
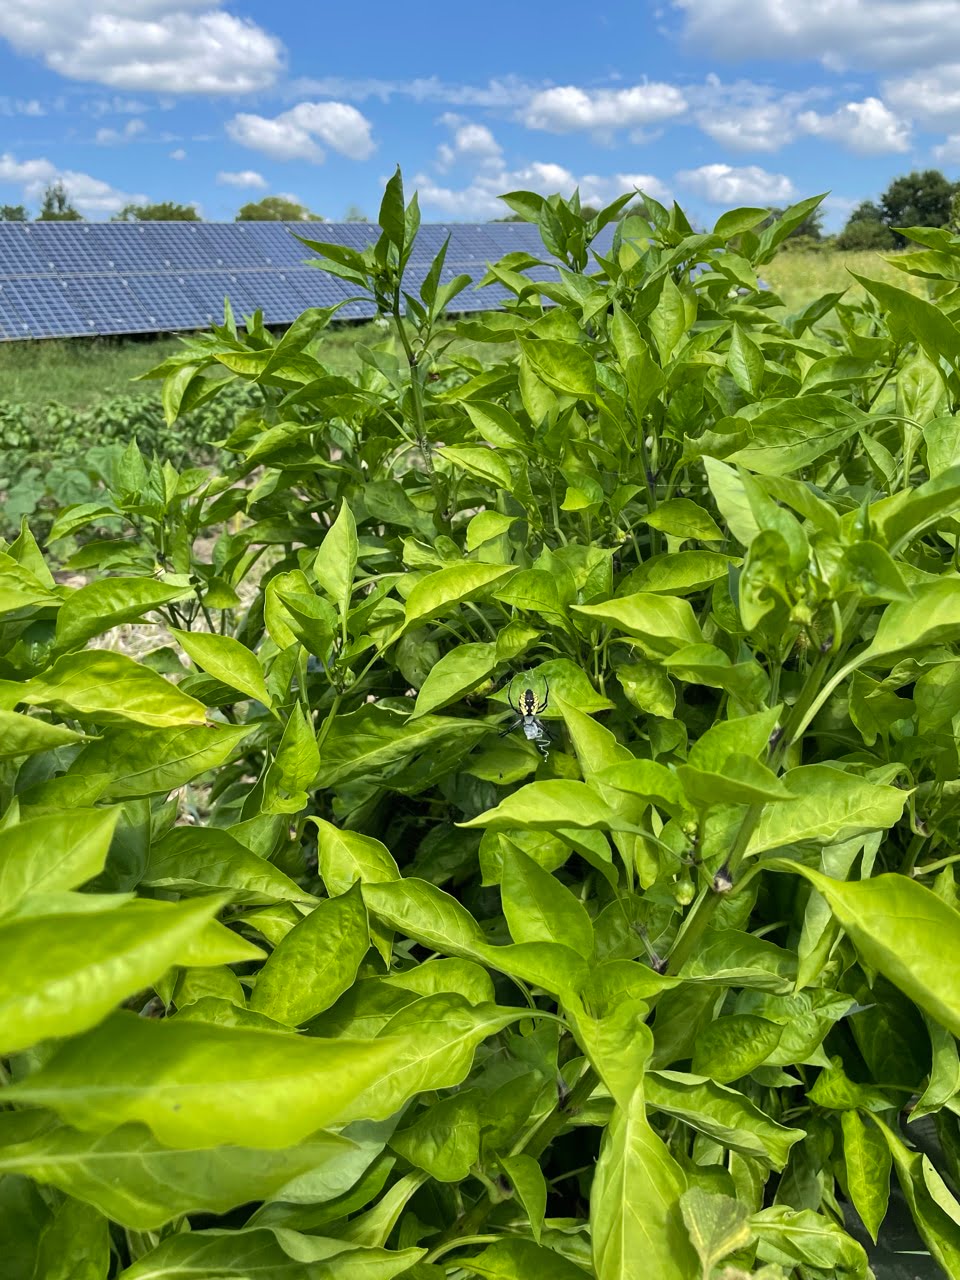

Yellow garden spiders are abundant in the pepper and tomato fields this year, spinning their webs and protecting us from flies and pests.

The peppers have something to tell you.
Veggie List & Veggie Notes
Week #14, August 25/26, 2022
– Weekly shares
– EOW/ purple
– Sampler/ sun
Sweet corn, 9 or 10 ears
Slicing & plum tomatoes, ~4 lb
Cherry tomatoes, 1 pint
Red beets, 2 lb
Leeks, ~1.25 lb
Red peppers (bell &/or frying), 2 or 3
Zucchini or yellow summer squash, ~2 lb
Yellow onion
Jalapeno, 1
Basil, 1 husky sprig
Next week’s box will probably contain sweet corn, tomatoes, peppers, carrots and other summer veggies.
Sweet corn – We are back to our favorite ‘Vision’ variety. There is almost no bug damage this week. Yeah!
Beets – Storage: Cover and refrigerate. Beet roots will store for months. Wash well to remove leaf fragments. For all the cooking methods below, wash and scrub the beets but do not peel. The skins slip off easily once the beets are cooked and cooled.
Cooking beet roots on the stovetop: Slice or quarter, cover with water in a pot, and simmer until tender. This will take from 25 to 45 minutes depending on how large the beet pieces are. Drain.
Roasting beets in oven: Wash beets, but do not peel. On a sheet of aluminum foil, put beets (halved or quartered if large), salt, pepper and a few sprinklings of water. Seal the foil packet, and roast at 400 oF until tender, about 45 minutes to 1 hour. Slip off skins once cool.
Microwave: Slice beets in half and place in a large microwave-proof bowl. Add ¾ inch water and cover with a plate. Microwave on high until tender, about 9-20 minutes, depending on your microwave’s power. Drain and slip off skins.
Uses: Use cooked beets in cold salads, or dress simply with vinaigrette, onions, salt and pepper. Beets are also good tossed with sour cream, minced onion, fresh herbs and walnuts.
Leeks (look like big scallions) – These alliums have a milder flavor than onions. Nonetheless, they can be used in recipes that call for onions. To wash, split the leek lengthwise, from the green tops about halfway to the base, leaving the base intact. Rinse well under running water, separating the layers to flush. If necessary, split the leek further if soil has penetrated more than halfway down the leek. Shake dry. Leeks are generally eaten cooked. They can be sauteed, steamed or roasted. Intact leeks will store 2 to 3 weeks if covered loosely and refrigerated. The outer leaves will yellow. Just peel off and discard those yellow leaves. The inner layers will be fine.
RECIPES by DEB

Photo by debslunch
Tomato-Feta Galette with Parmesan Crust
Every summer has to have its edition of tomato pie. (see the newsletter for prior pies, e.g. tomato handpies from 2021, or Smitten Kitchen’s burst tomato galette, that has corn & summer squash in the filling) What makes this pie so appealing is that it avoids sogginess by keeping things simple: the filling is sliced tomatoes, feta, herbs, and shallots – that’s it!
Takes about 45 minutes to assemble and bake, plus 30 minutes to overnight to chill the crust.
Serves 6
Crust:
1 1/2 cups flour
good pinch salt, unless you’re using salted butter
2 teaspoons sugar
1/2 cup butter, either salted or un- (1 stick, 8 tablespoons)
1 tablespoon vegetable shortening or lard
1/2 cup grated Parmesan cheese
2-4 tablespoons cold water
Filling:
4-5 ounces feta cheese (a heaping cup), crumbled
1 medium shallot, finely chopped – about 3 tablespoons
1-2 tablespoon soft fresh herbs, such as basil, parsley, or thyme; or 1 teaspoon dried thyme
1 pound of tomatoes, your choice of variety, sliced about 1/4-inch thick. If you include cherry tomatoes in your mix, cut them in half
freshly ground black pepper and kosher or coarse salt for sprinkling
- Make the crust: measure the flour, salt (if using), and sugar into the bowl of your stand mixer (my favorite method), your food processor, or a mixing bowl. Slice the butter and shortening over the top and combine with the flour mixture, using the paddle attachment of the mixer, by pulsing the processor, or using a pastry blender, 2 knives or your fingers, until you have a crumbly mixture with no butter lumps bigger than currants. Add the Parmesan. With the mixer or processor running, or while stirring with a fork, drizzle in the water by tablespoons, until the mixture just starts to come together in clumps. Stop before you have one big ball. Turn the crust out onto a floured surface and knead lightly to bring it together. Gather it into a ball, flatten into a disk, wrap (in plastic, wax paper, one of your reusable snack/sandwich bags), and chill for about 30 minutes, and up to 2 days.
- When you’re ready to bake, place a rack in the lower middle of your oven and heat to 400°. Line a baking sheet or pizza pan with parchment paper.
- On a lightly floured work surface, roll out the crust to a rough 12-inch or larger round. It’s okay if the dough isn’t perfectly round. Flop the crust in half and transfer to your parchment-lined pan – some people like to roll the dough around the rolling pin, and unroll it onto the pan. Once you have the crust in the pan, spread the feta in an even layer leaving a 2-3 inch border – think a 9-inch circle in the middle of your pan. Scatter the chopped shallot over the cheese, and add half of the chopped herbs, some salt and pepper, and lay the tomatoes on top. If you’re using cherry tomatoes, try to put the halves cut side up.
- Gently fold the edges of the crust over the tomatoes, covering about 2 inches of the filling and pleating the crust as you go. Top with the rest of the herbs, and a little more salt.
- Bake until the crust is golden-brown and the tomatoes are soft, about 30-45 minutes – watch that the bottom does not get too dark, and move the baking tray to a higher position in the oven if you think that’s starting to happen. Cool on the baking sheet for 5 minutes, then transfer to a wire rack to cool for 10 minutes more. Serve warm or at room temperature.
.
.
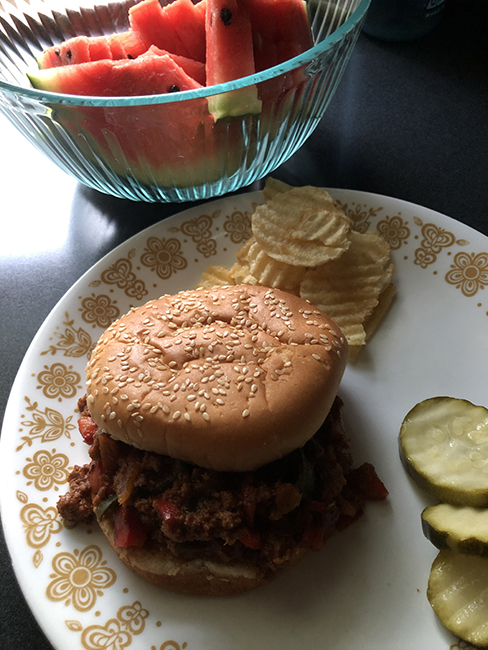
Photo by debslunch
Beef & Sausage Sloppy Joes with Peppers
This quick dinner-as-a-sandwich can be prepared with any variety of peppers, sweet or hot. I tested it with one large red frying pepper and one medium poblano, but you can adjust based on your tastes, and desire for hotness.
Takes about 30 minutes
Serves 6-8
1 tablespoon olive oil
1 cup diced onions or leeks
1 to 1 1/2 cups chopped peppers, any variety
1 cup peeled, seeded, and diced tomatoes, preferably plum
1 tablespoon fresh garlic, minced or put through a press
1 pound ground beef
1/2 pound bulk Italian sausage, sweet or hot (I used sweet)
1 tablespoon brown sugar
2 teaspoons chili powder
2 tablespoons tomato paste
8 ounces light or dark beer, or chicken broth
2 tablespoons – or more, to taste – ketchup
2 tablespoons – or more, to taste – Worcestershire sauce
Salt and freshly ground black pepper
Hamburger buns, potato chips, and pickles for serving
- Heat the oil in a skillet or wide pot over medum heat and add the onions, peppers, tomatoes, and garlic, and cook until softened, about 5 minutes.
- Add the meats and continue to cook, breaking the meat up with a spoon, until browned, 6-8 minutes. Season with salt and pepper, and add the brown sugar, chili powder, and tomato paste. Cook for about a minute, and add the beer (or broth), ketchup, and Worcestershire sauce. Bring to a boil then reduce the heat and simmer until thickened and to cook off the alcohol in the beer, at least 8-10 minutes.
- Taste and adjust seasoning to see if it needs more ketchup or salt & pepper. Serve on buns with pickled zucchini and slices of Tipi watermelon for a perfect summer meal.
.
.
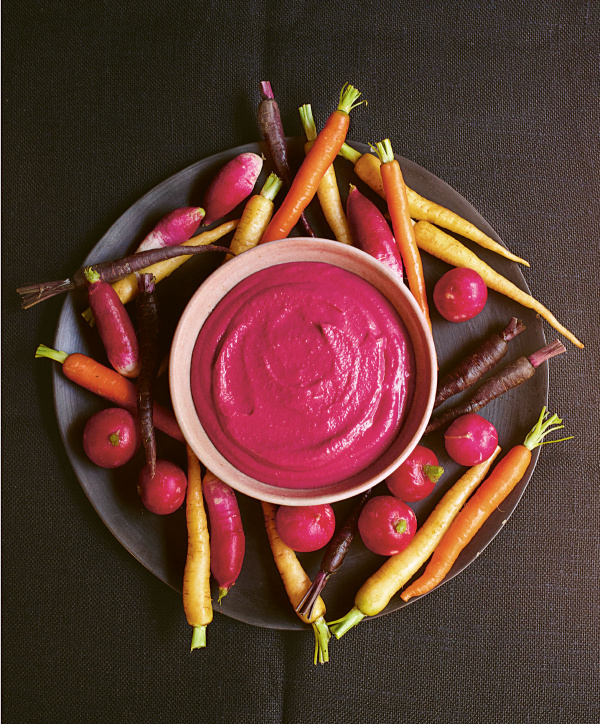
Photo by Jonathan Lovekin
Beetroot and Chickpea Dip
From Nigella Lawson
Nigella is hesitant to call this hummus, not wanting offend hummus purists, although it does include chickpeas and tahini, but says you can eat in the same way you’d enjoy hummus, spread thickly on bread or toast, or scooped up with pita or veggies as shown. And even a hummus purist would agree that the beets turn the chickpeas a lovely shade of pink.
.
.
 Photo by Julie
Sweet Corn and Bacon Fritters
From the Healthy Epicurean
This recipe calls for three cups of cooked corn, so cut the kernels off 3-4 ears of corn. You can husk the corn and cut off the kernels while it’s raw – be sure to run the knife down the cob to get all the juice; OR cook the corn on the cob first, then cool and slice off the kernels for a less-splatter-y procedure. The added bacon sets these fritters apart!
.
.
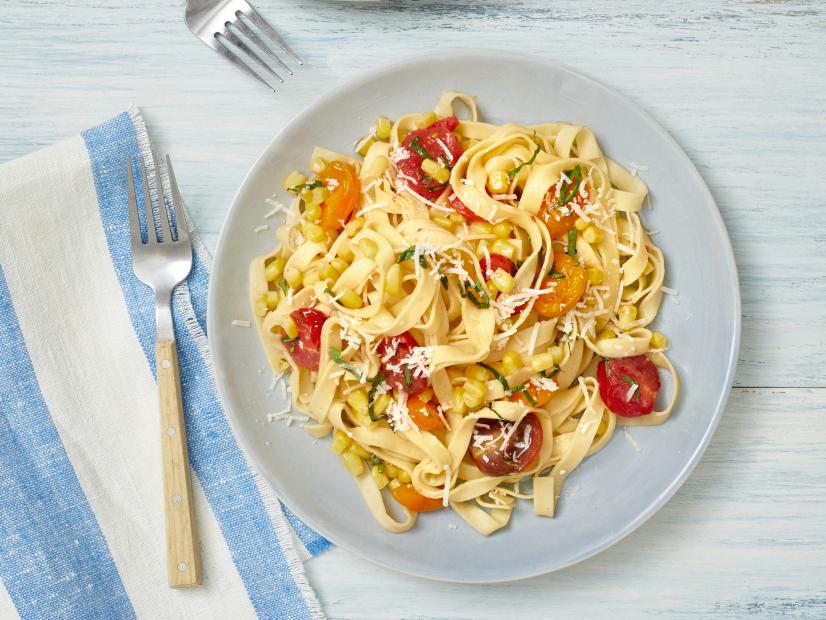
Tagliatelle with Corn and Cherry Tomatoes
By Anne Burrell for Food Network
Here’s a quick pasta with cherry tomatoes, corn, and fresh basil, all featured in this week’s box.
.
.
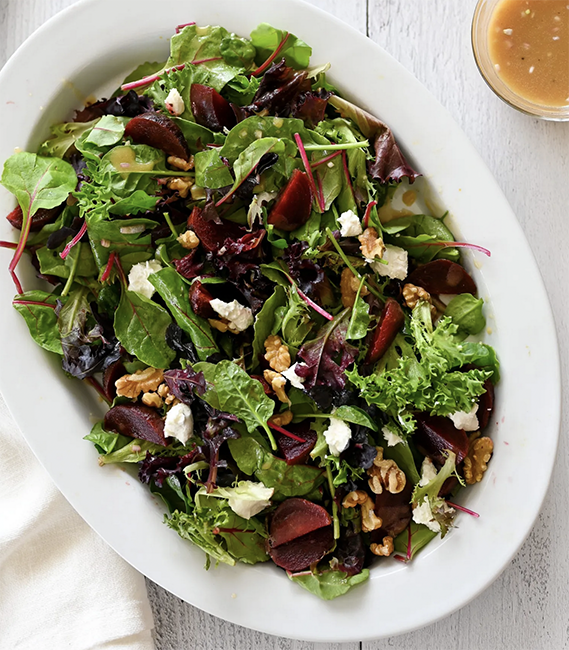
Photo by Jenn Segal
Roasted Beet Salad with Goat Cheese, Walnuts & Honey-Dijon Vinaigrette
From Once Upon a Chef
This recipe suggests buying pre-roasted beets, which you don’t have to do, given the fresh ones in the box! And Nigella’s recipe for Beetroot and Chickpea Dip provides roasting instructions.
.
.

Bruschetta with Leeks, Goat Cheese, and Bacon
By Ree Drummond for Pioneer Woman
I was a little hesitant to put another recipe in that also called for bacon and goat cheese, but these bruschetta look so good, and are a fine way to use this week’s leeks.
.
.
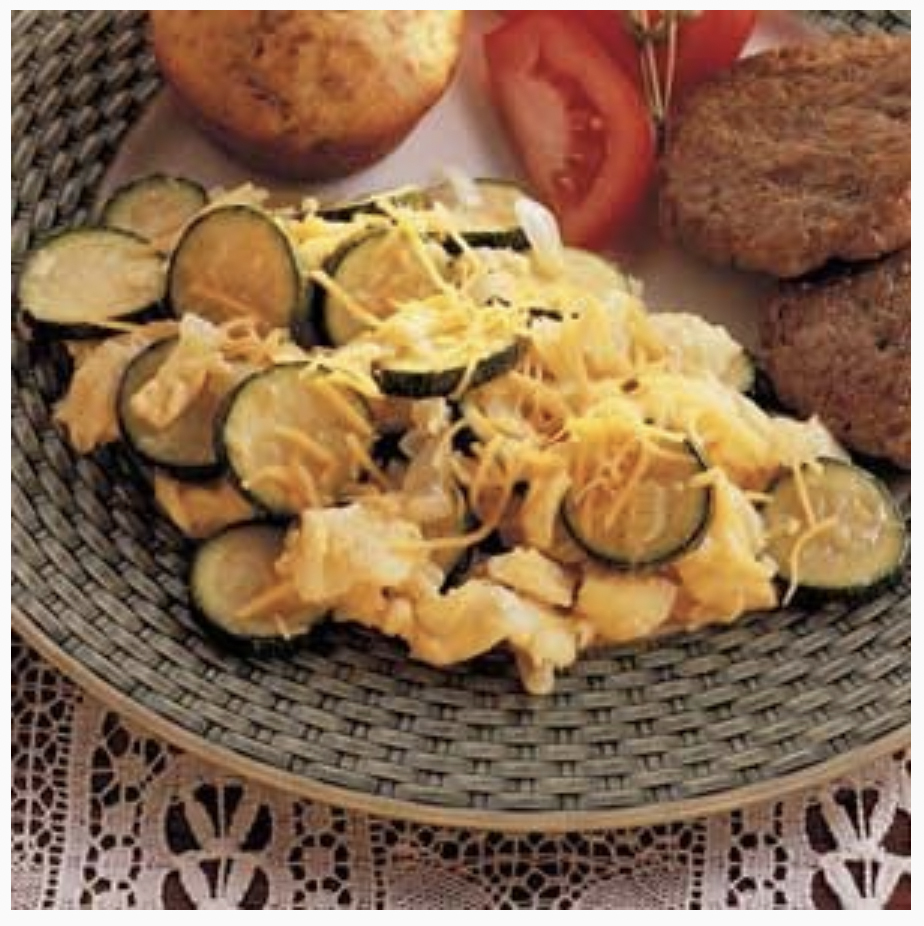
Photo by Taste of Home
Zucchini Scramble
From Taste of Home
Here’s an easy way to use the zucchini or summer squash in this weeks box – serve with sliced tomato as shown to make a pretty plate.
Week #13, August 18/19, 2022
- On: August 17, 2022
- 0
Summer of surgeries
Our family has had a series of health issues (broken ankle, hernia) and now it’s my turn. I am scheduled for skin cancer removal tomorrow and Friday, followed by a few weeks recovery. It’s a slow-growing tumor but is close to my eye, which complicates removal. The recovery restrictions limit what I can do on the farm but our crew and Steve will take care of what needs to be done, as usual. I might be slow to respond to emails but I will get to them all. We are not used to this! We are used to being hale and hardy! Fortunately, Steve has recovered from hernia surgery and Sophie’s broken ankle is healing well.
Please, no special CSA requests this week or next week. Thank you – if something is a little off, just cut us some slack.
Beth
Tomato Care
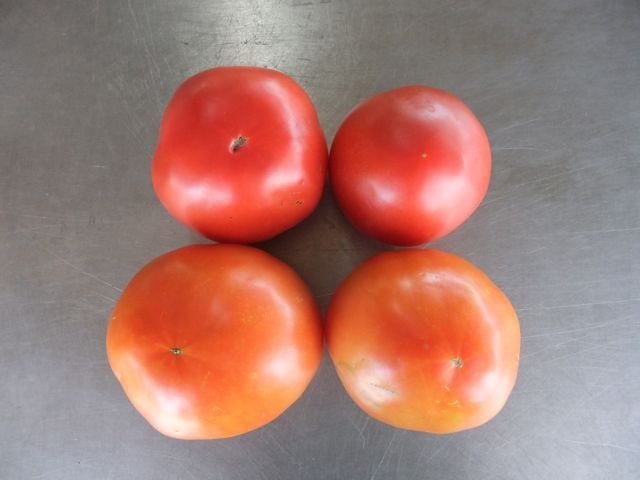
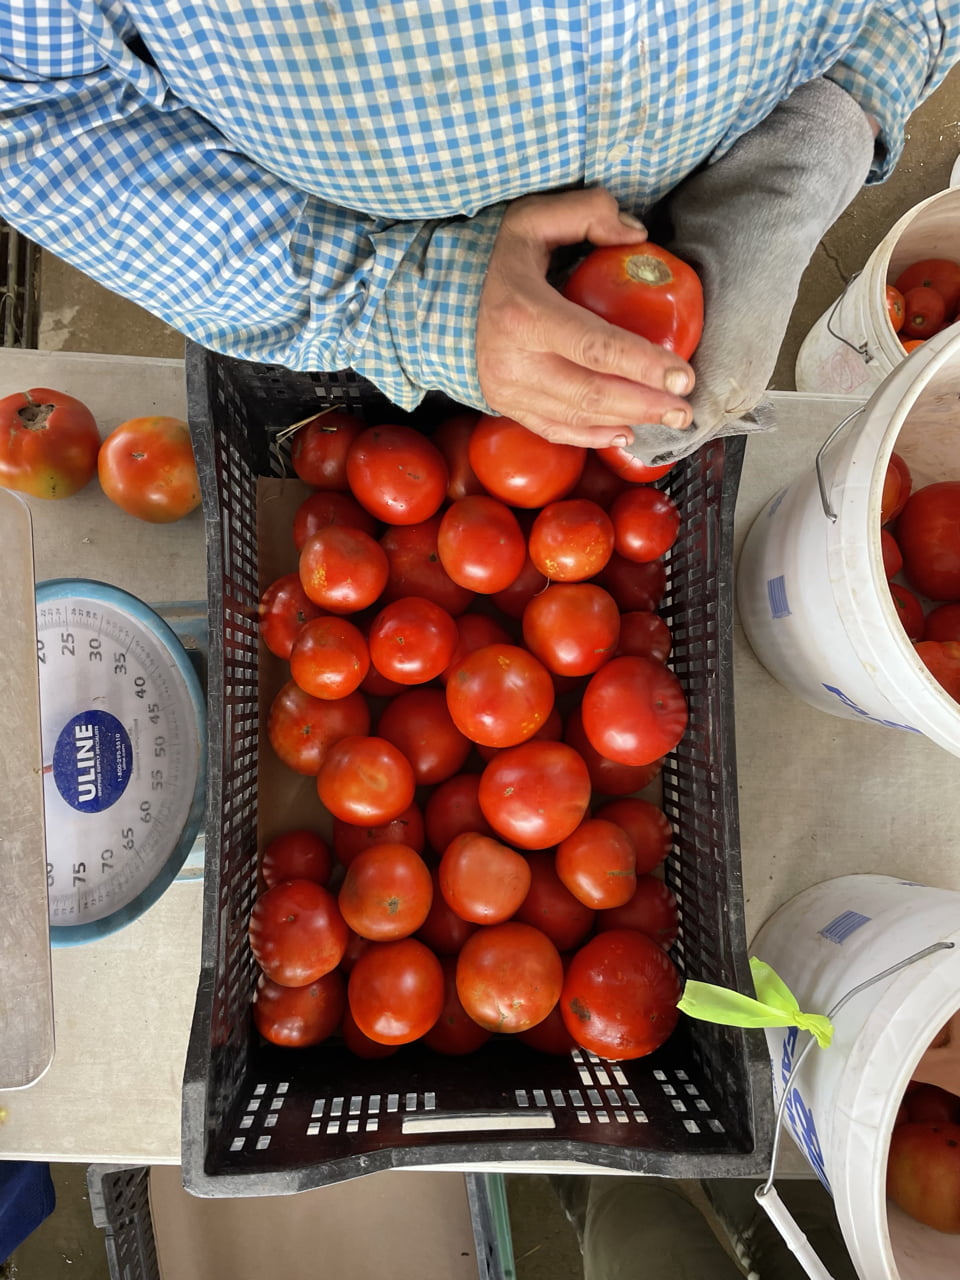
Ripe (top) and less ripe tomatoes (bottom).
We are heading into peak tomato season. Ripe tomatoes are delicious but highly perishable so let’s talk about their care.
Ripeness: Each delivery, we pack a mix of ripe and less-ripe tomatoes so you can stretch them through the week. In the photo above, the top tomatoes are ready to eat. The bottom tomatoes can ripen at room temperature for a few days.
Storage: Tomatoes retain their best flavor and texture when stored at room temperature, no lower than 55 F. I encourage you to spread your tomatoes on plates so you can watch them. Eat first the ripest ones or any showing flaws.
However, you should refrigerate your tomatoes if they are fully ripe and you don’t expect to eat them right away. It is better to sacrifice a little flavor and texture than to let your tomatoes spoil. Also, fully ripe tomatoes are less sensitive to chilling injury.
They might need washing: We handle the ripe tomatoes as little as possible to avoid bruising.
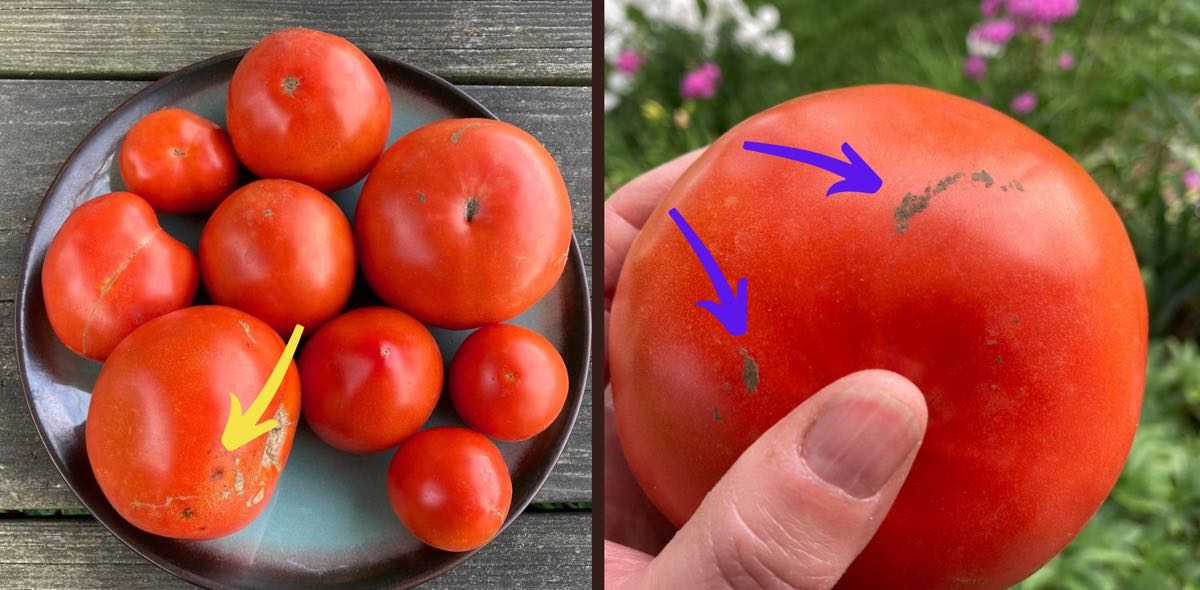
(Left) The yellow arrow shows small inconsequential flaws that will grow with time. Eat now.
(Right) The purple arrows show leaf residue bits stuck to the tomato. Wet the tomato and the residue will come right off.
Veggie List & Veggie Notes
Week #13, August 18/19, 2022
– Weekly shares
– EOW/ green
Sweet corn, 8 or 9 ears
Slicing & plum tomatoes, ~3 lb
Cherry tomatoes, 1 pint
Red peppers (bell or frying; mixed #1/#2 grades), 2
Cucumbers, 2 or 3
Zucchini or yellow squash, 1 or 2 pieces
White or yellow onion
Basil, 1 small sprig
By site: a small green leaf lettuce OR a green bell pepper.
By site: watermelon (red or yellow or orange) OR muskmelon
Next week’s box will probably contain corn, tomatoes, peppers, and more.
Sweet corn – Good news! There are almost no bugs this week! These beautiful ears are a variety called “Fantastic”.
Cucumbers – These might be the final cucumbers of the season.
White onions OR yellow onions (by site) – As we harvest, we continue to move from sweet onions to storage onions. Pungency increases as well as the ability to fry or brown in hot oil. Some sites get white onions which are intermediate between sweet and storage onions. Some sites get a yellow onion named “Elyse” which is more pungent.
Melons – Our melons have been stricken with a serious disease problem. We’ve seen this before but always as a minor, late-season issue. Every melon has small, sunken surface blemishes. The melons are good to eat – they formed and ripened before the disease hit. However, eat your melon promptly (ie this weekend) because those spots will spread. They haven’t reached the melon cavity yet, but they will. If you have the room, it’s a good idea to refrigerate your melon this week.
RECIPES by PHOEBE
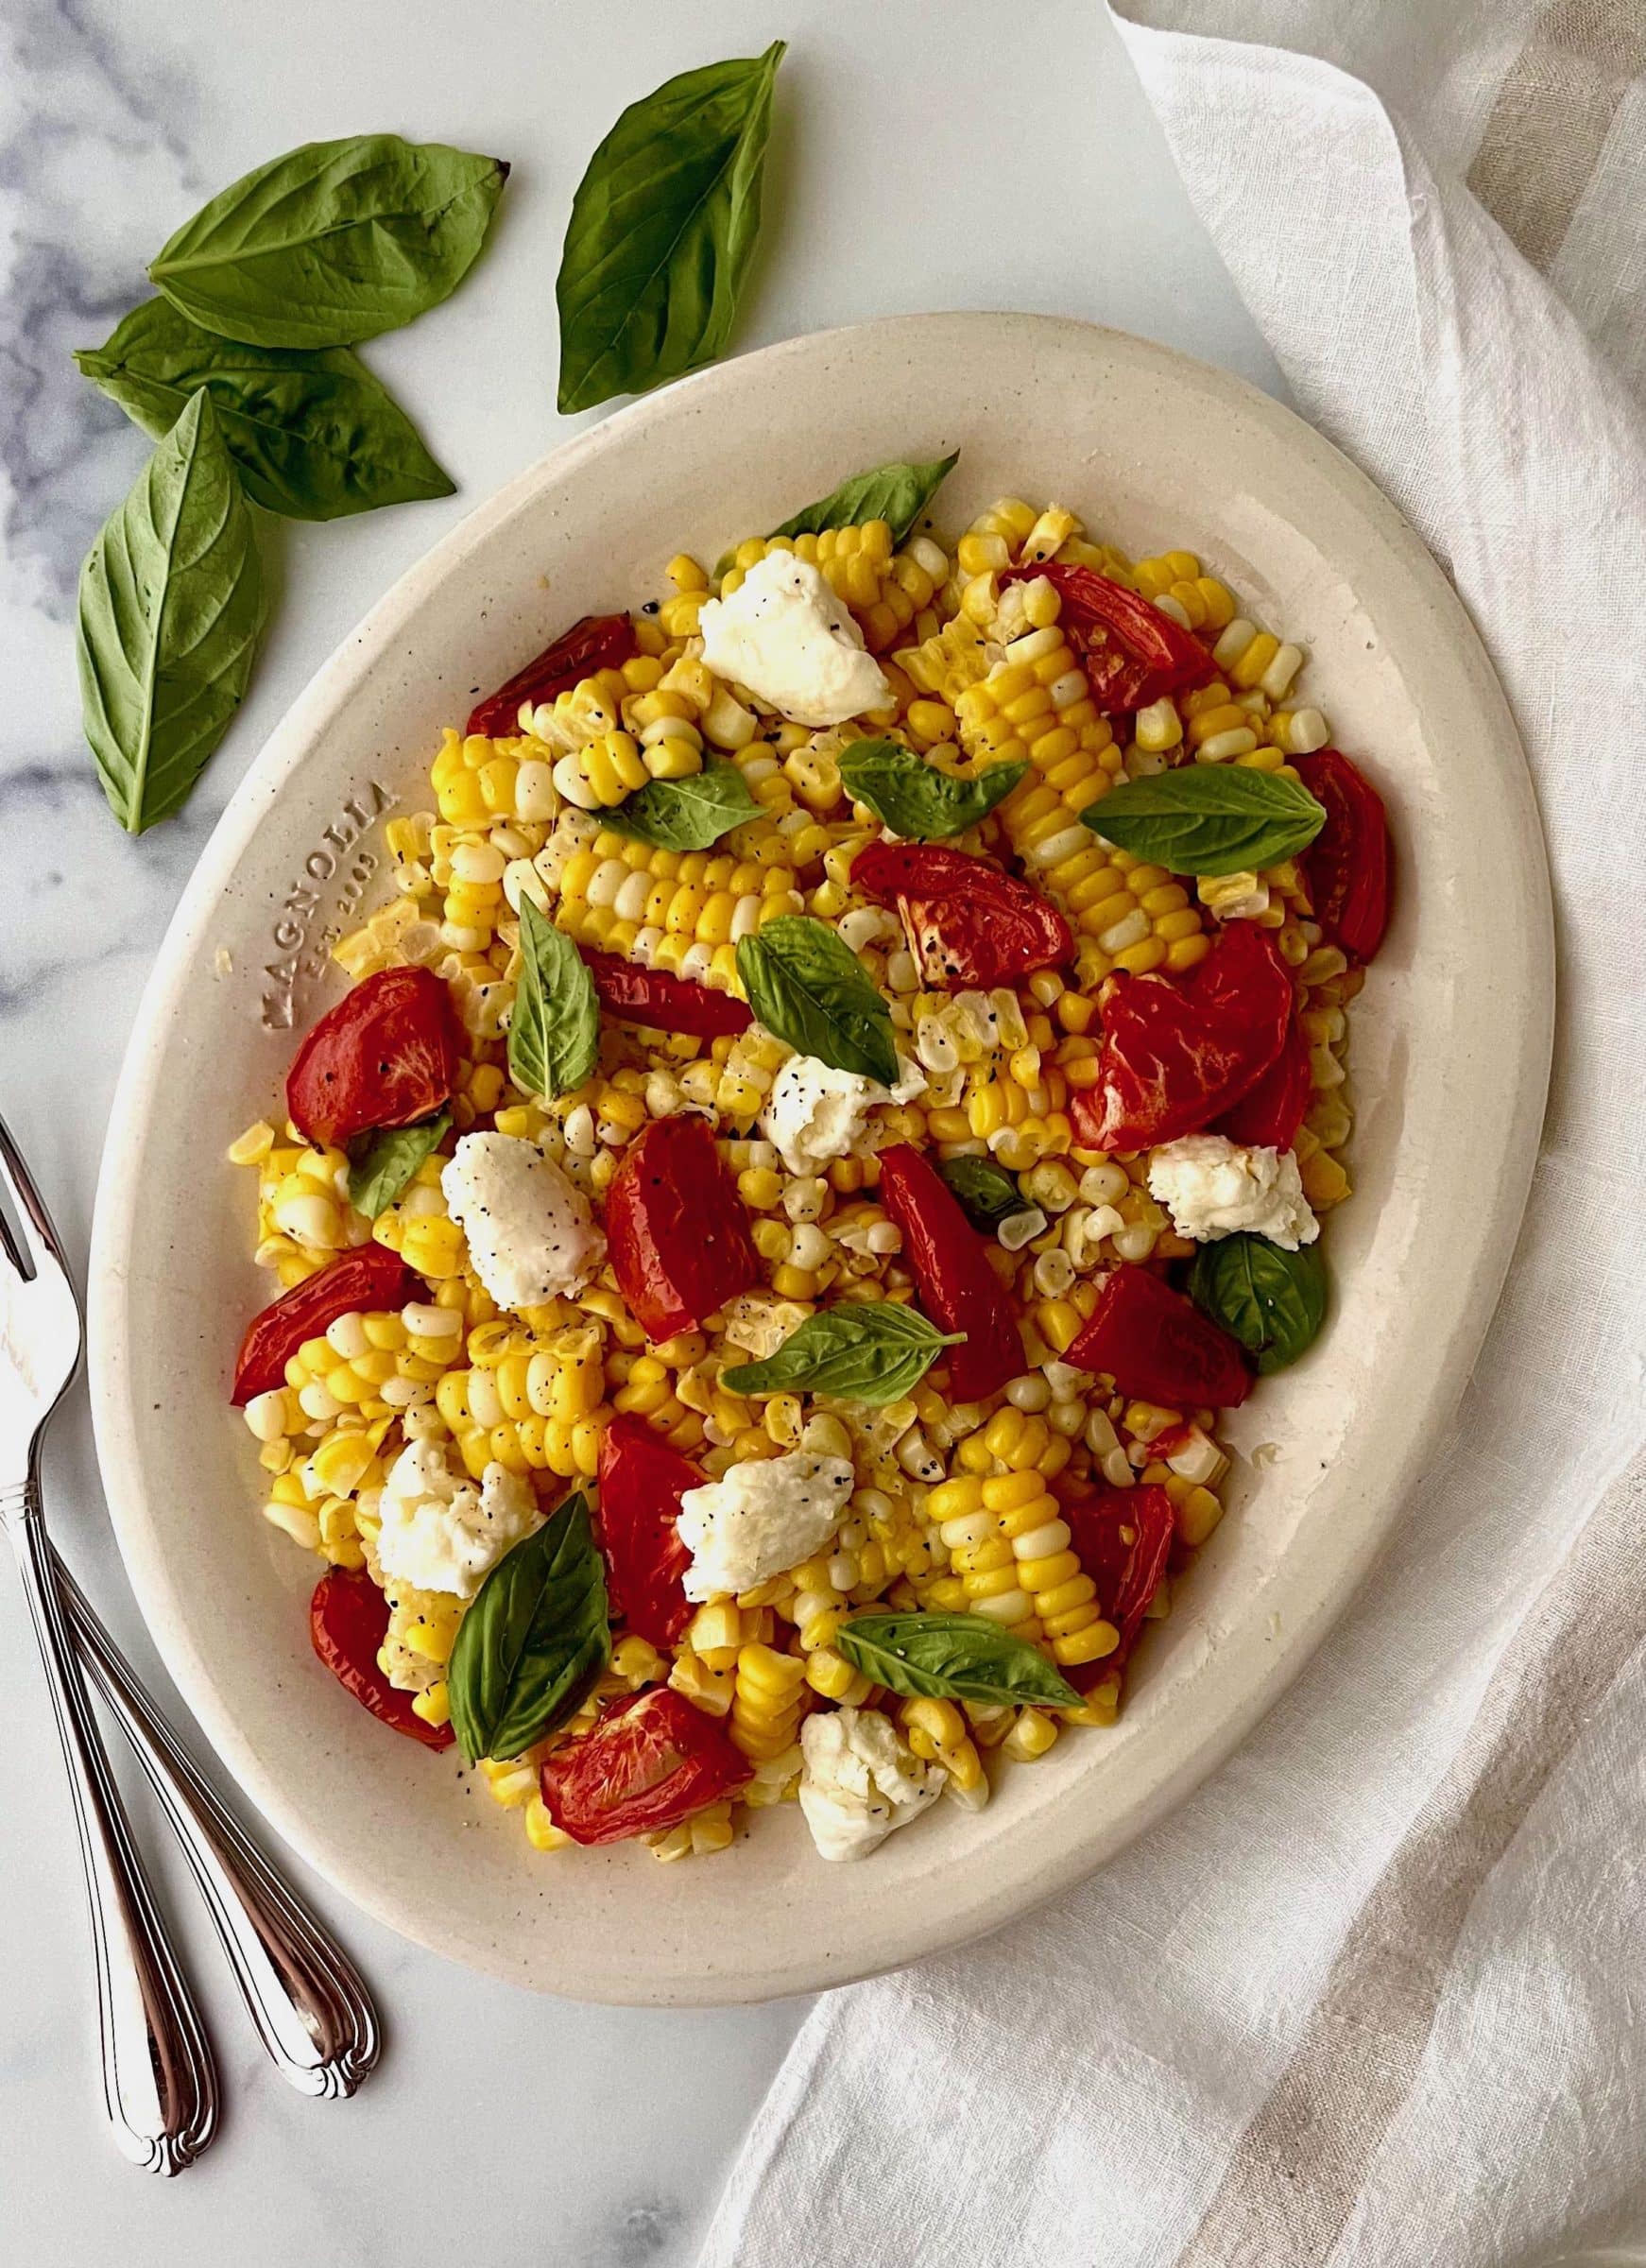
Roasted Tomato and Sweet Corn Salad
Roasted tomato wedges add delicious savory flavor to this vibrant summer salad. Serve it with good bread for sopping up the rich juices that they’ll leave behind on your plate. I like to steam the corn for this salad, though if you want to save yourself a step, it’s just as good raw.
Serves 3 to 4
Prep time: 10 minutes
Cook time: 40 minutes
1 pound tomatoes (about 2 large)
4 ears sweet corn, husked
2 tablespoons fresh lemon juice
1 tablespoon extra-virgin olive oil, plus more for drizzling
1 teaspoon lemon zest
1 garlic clove, grated
½ teaspoon sea salt, plus more for sprinkling
Freshly ground black pepper
4 ounces fresh mozzarella cheese, torn into bite-size pieces
1 cup fresh basil leaves, torn if large
- Preheat the oven to 350°F and line a baking sheet with parchment paper.
- Cut the tomatoes into ½-inch wedges, then cut the wedges in half crosswise. Place the tomato chunks on the baking sheet, skin side down. Drizzle with olive oil, sprinkle with salt, and roast until shriveled and lightly browned around the edges, about 40 minutes.
- Meanwhile, cook the corn. Fill a large pot with 1 inch of water and bring to a simmer. Stand the corncobs in the pot, cover, and steam for 4 to 6 minutes, or until tender and bright yellow. Remove the corn from the pot, allow to cool slightly, and cut the kernels off the cobs.
- In a large bowl, whisk together the lemon juice, olive oil, lemon zest, garlic, salt, and several grinds of pepper. Add the corn kernels and stir to coat. Add the mozzarella and roasted tomatoes and gently stir to combine. Fold in the basil, season to taste, and serve.
.
.
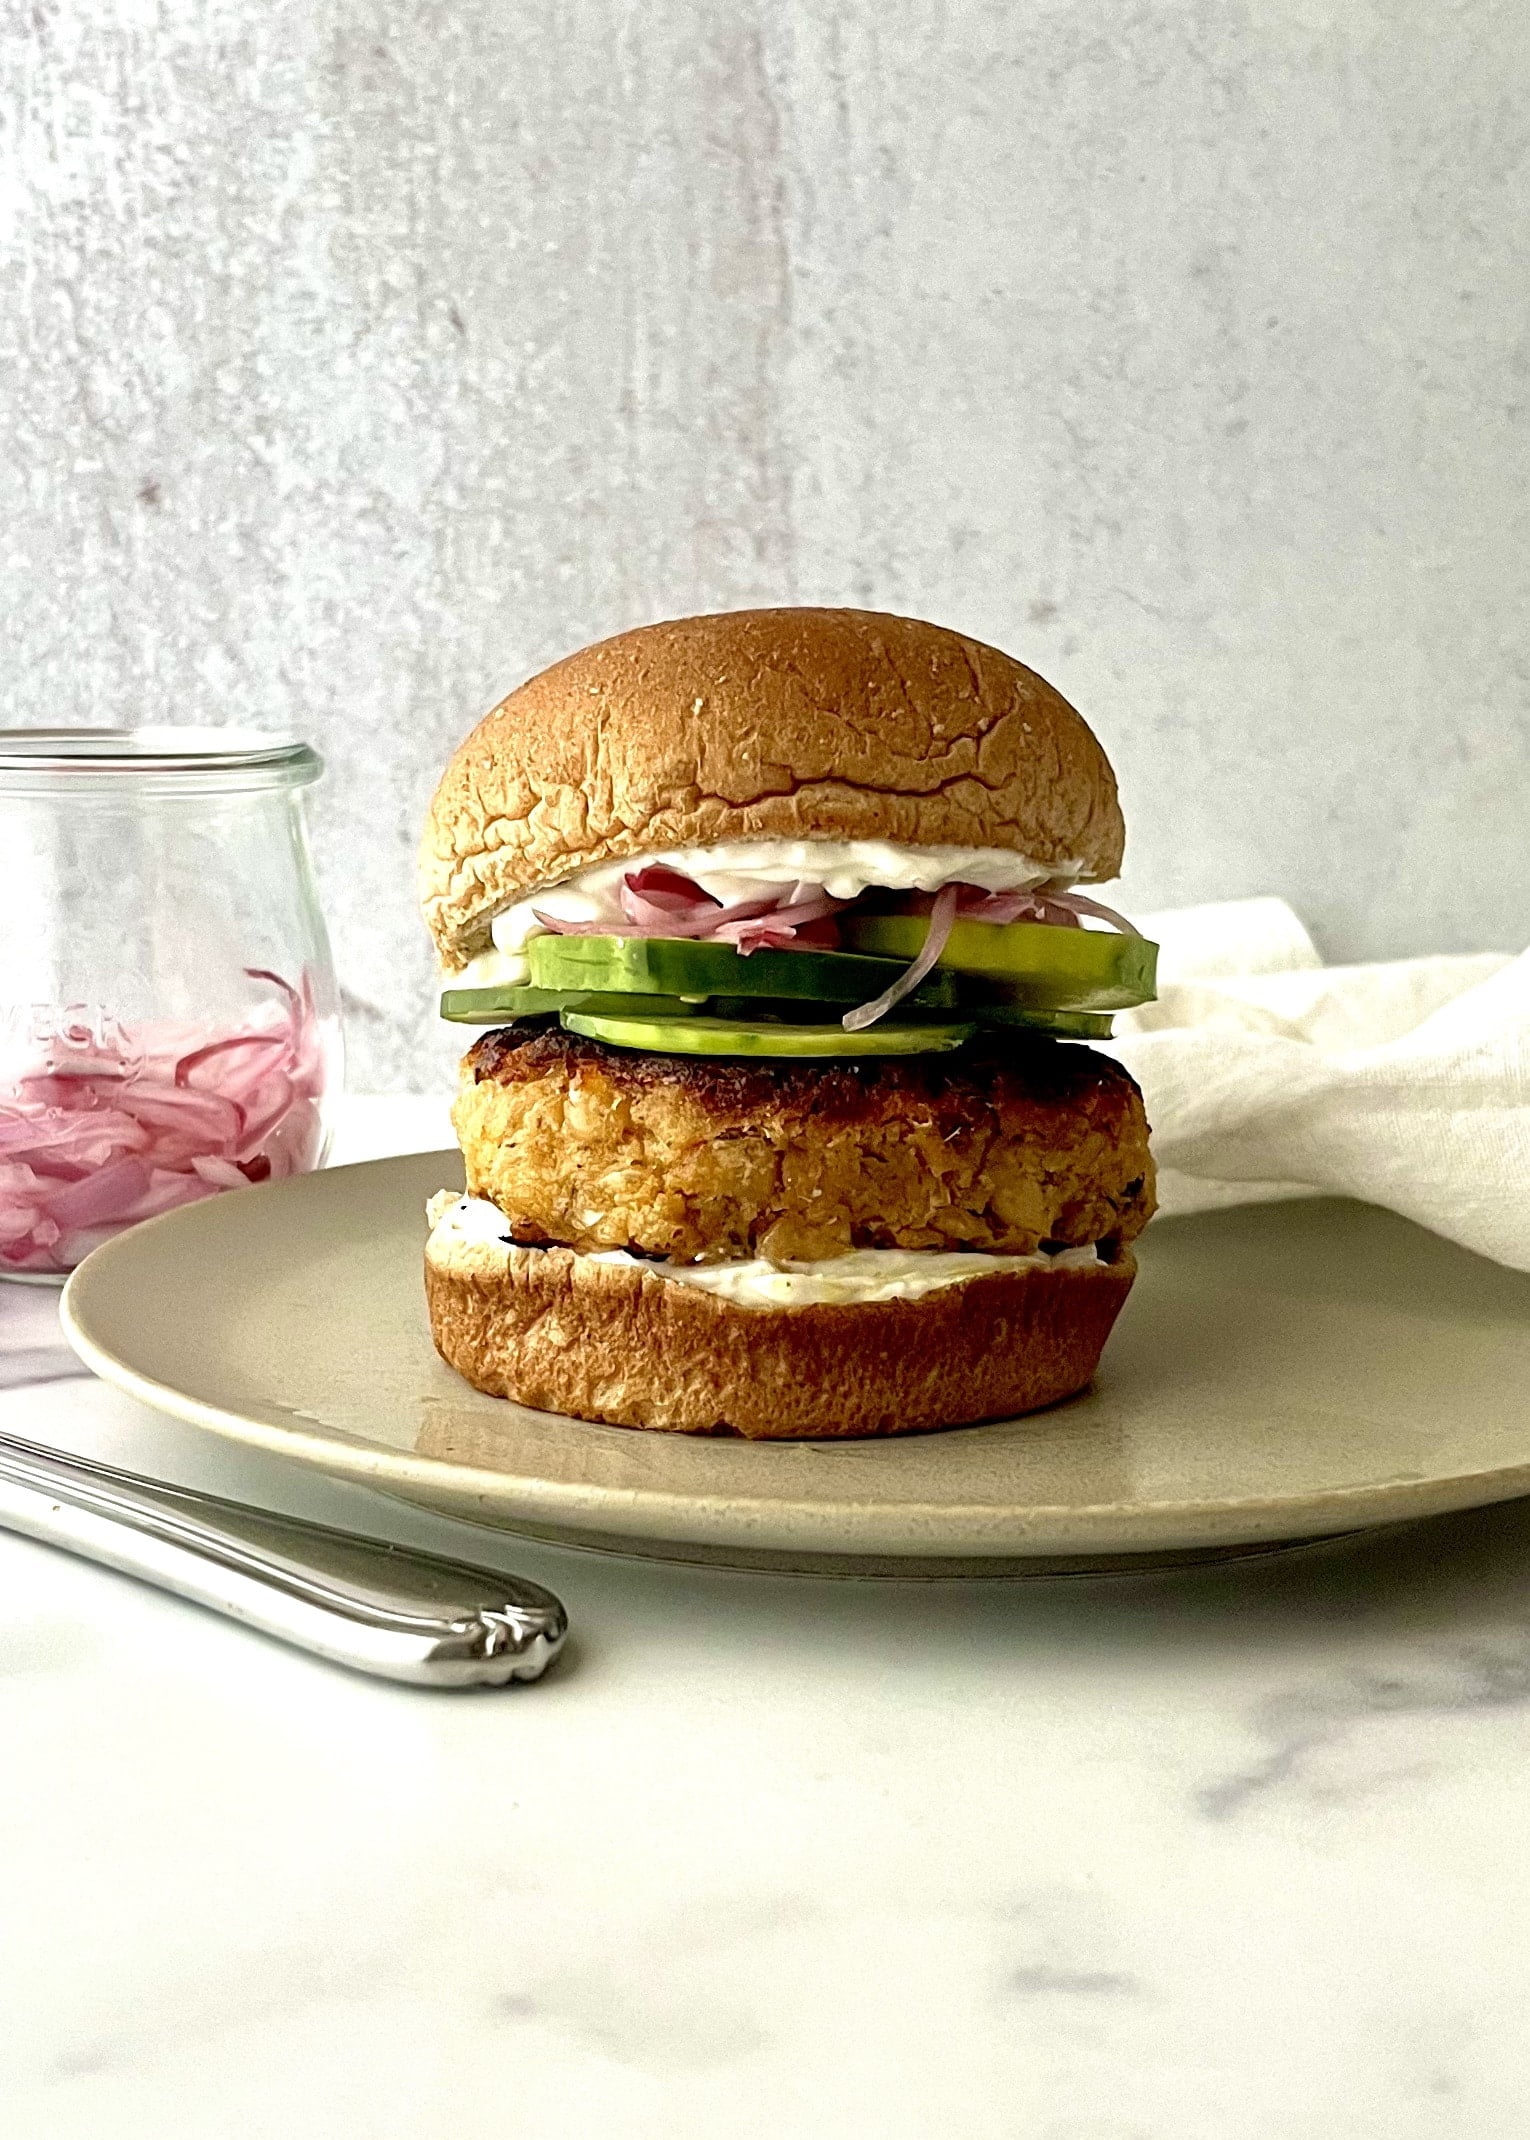
White Bean Burgers with Roasted Peppers and Feta Yogurt Sauce
If you’re someone who likes to get ahead on dinner, you’ll love this veggie burger recipe. The patties can chill in the fridge for up to 24 hours before you cook them, so you can easily prep them the morning or day before you plan to serve them and just cook them off when you’re ready to eat. Dress them up with a lemony feta yogurt sauce, quick-pickled onions, and fresh fixings like sliced cucumbers, tomatoes, or lettuce.
Serves 6
Prep time: 1 hour
Cook time: 40 minutes
1 red bell or frying pepper
1 medium onion
1 tablespoon fresh lemon juice
3 cups cannellini beans, drained and rinsed
2 tablespoons whole milk Greek yogurt
3 garlic cloves, grated
2 teaspoons lemon zest
1½ teaspoons dried oregano
1½ teaspoons minced capers
½ teaspoon sea salt, plus more for the onions
¼ teaspoon cayenne pepper
Freshly ground black pepper
1 cup panko bread crumbs
1 large egg
Avocado oil, for the pan
6 hamburger buns
Desired fixings
For the Feta Yogurt Sauce
½ cup whole milk Greek yogurt
2 tablespoons crumbled feta cheese
1 teaspoon extra-virgin olive oil, plus more for brushing
1 teaspoon fresh lemon juice
¼ teaspoon sea salt
Water, as needed, to thin
- Preheat the oven broiler and place the whole pepper on a baking sheet. Broil until the pepper is blackened and blistering all over, 15 to 20 minutes total, turning every 5 to 10 minutes to expose each side of the pepper to the heat. Remove from the oven and transfer the pepper to a large bowl. Cover the bowl with a kitchen towel and set aside to allow the pepper to steam and soften for 10 minutes.
- Meanwhile, prep the onion. Slice it in half and thinly slice one of the halves. Place the thinly sliced onion in a small container and toss with the lemon juice and a pinch of salt. Cover and chill until ready to serve. Grate the remaining onion half on the large holes of a box grater.
- When the pepper is cool enough to handle, peel off the blistered skin and remove and discard the stem, seeds, and membranes. Dice the soft roasted pepper flesh.
- In a large bowl, place the cannellini beans, grated onion, Greek yogurt, garlic, lemon zest, oregano, capers, salt, cayenne, and several grinds of pepper. Use a potato masher to mash until the mixture is thick and creamy with a few large bean pieces still intact. Fold in the diced pepper, panko, and egg.
- Form the mixture into 6 equal patties. It will be wet and sticky, but it should be firm enough to handle. If it feels too wet, place it in the fridge to chill for 10 minutes before forming the patties. Once formed, place the patties on a plate and chill, uncovered, for at least 30 minutes and up to 24 hours. Preheat the oven to 400°F and line a baking sheet with parchment paper.
- Heat a cast-iron skillet over medium heat. Coat the bottom generously with oil. Add the patties and cook until charred on both sides, about 5 minutes per side. Work in batches as necessary. Transfer the charred patties to the prepared baking sheet and lightly brush the patties with olive oil. Bake for 15 minutes to help them firm up in the middle.
- While the burgers bake, make the feta yogurt. In a small bowl, stir together the yogurt, feta, olive oil, lemon juice, and salt. Add water, 1 teaspoon at a time, to reach a creamy, spreadable consistency.
- Assemble the burgers on the buns with the feta yogurt, lemony onions, and other desired fixings.
.
.

Photo by Eva Kolenko
Panzanella
From Love & Lemons
I never let summer pass by without making this Italian bread salad at least once. The cubes of crusty bread soak up the tomato juices and tangy vinaigrette, so each one is full of zingy summer flavor. We call for red onion in this recipe, but yellow onion would work just as well.
.
.
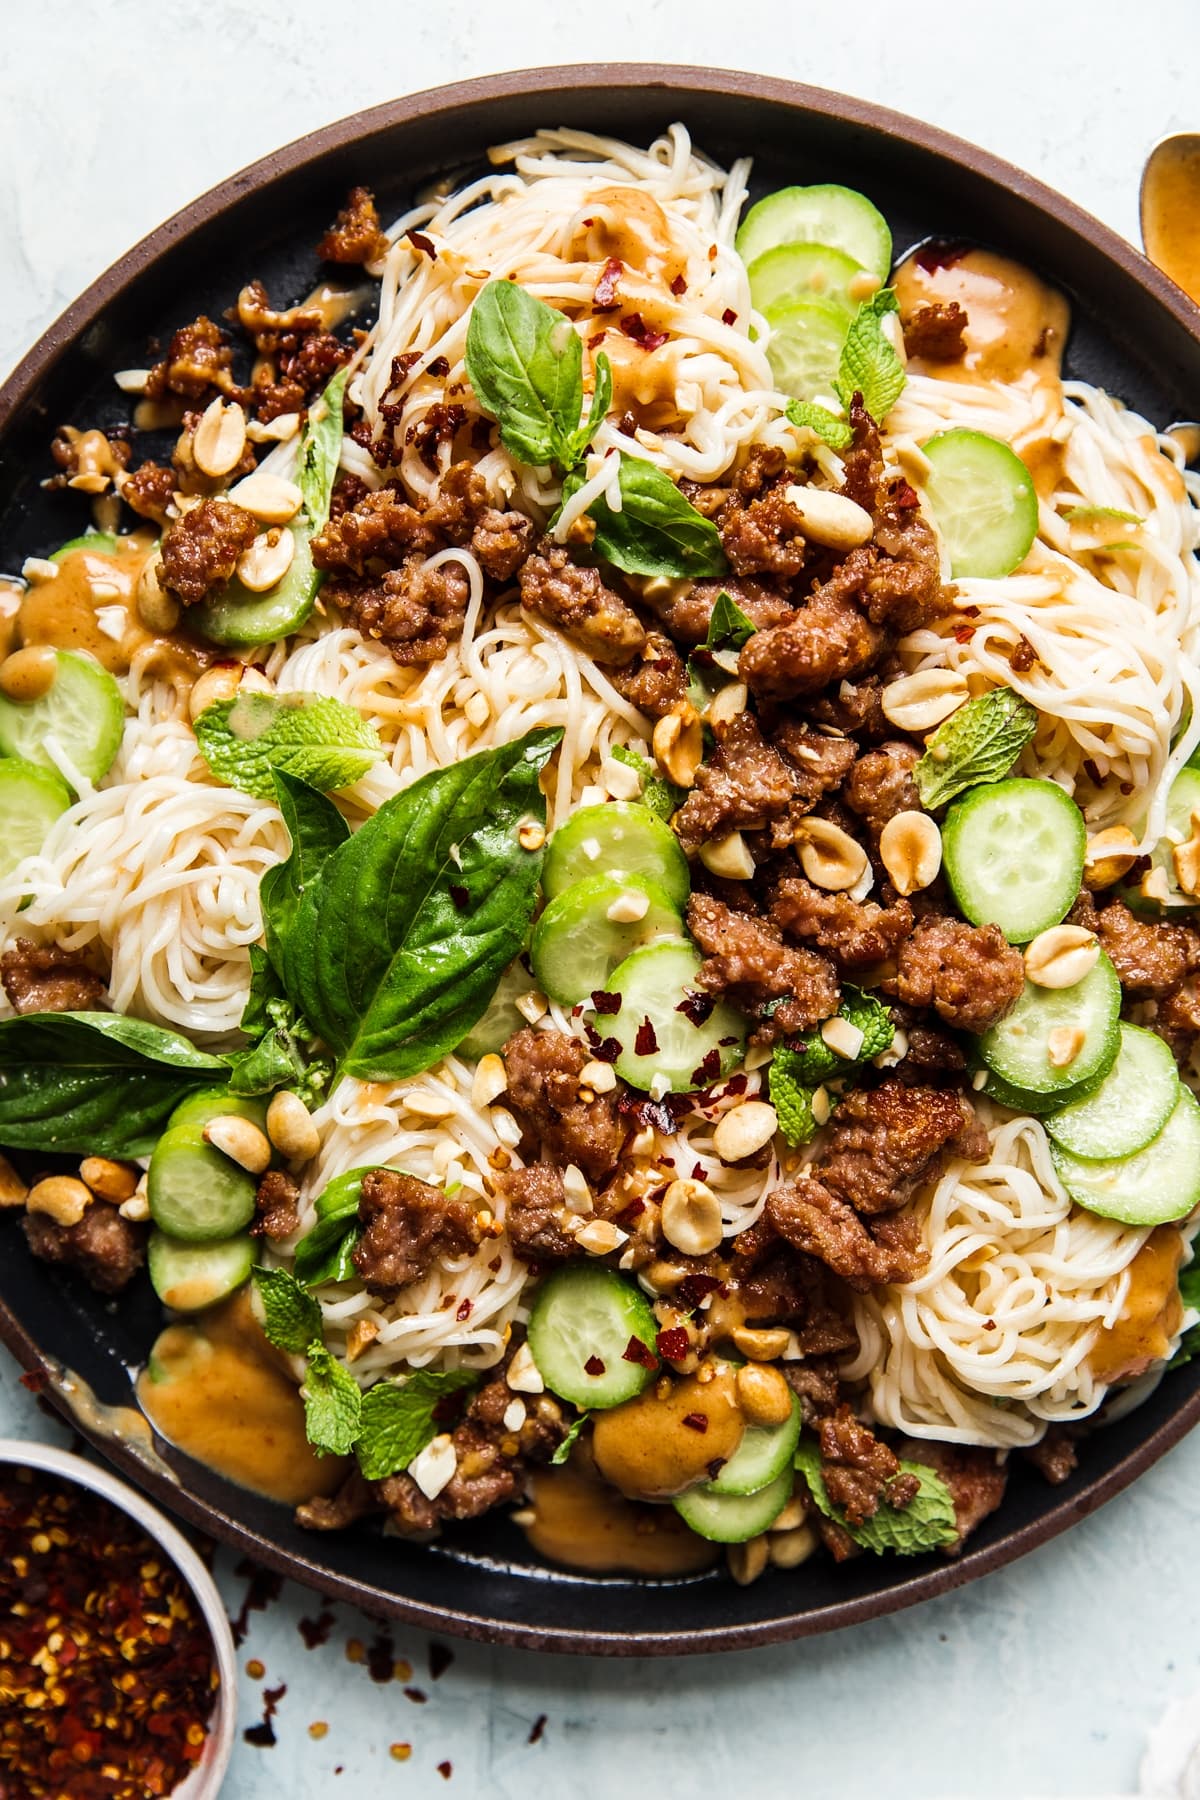
Photo by The Modern Proper
Cold Thai Noodle Salad
From The Modern Proper
Cold noodles are one of my favorite types of meals to enjoy on a hot day. These are dressed up with cooling cucumbers, fresh herbs, crispy pork, and a creamy peanut dressing. The recipe calls for both basil and mint, but it’ll taste great with just basil if you don’t have any mint on hand.
.
.
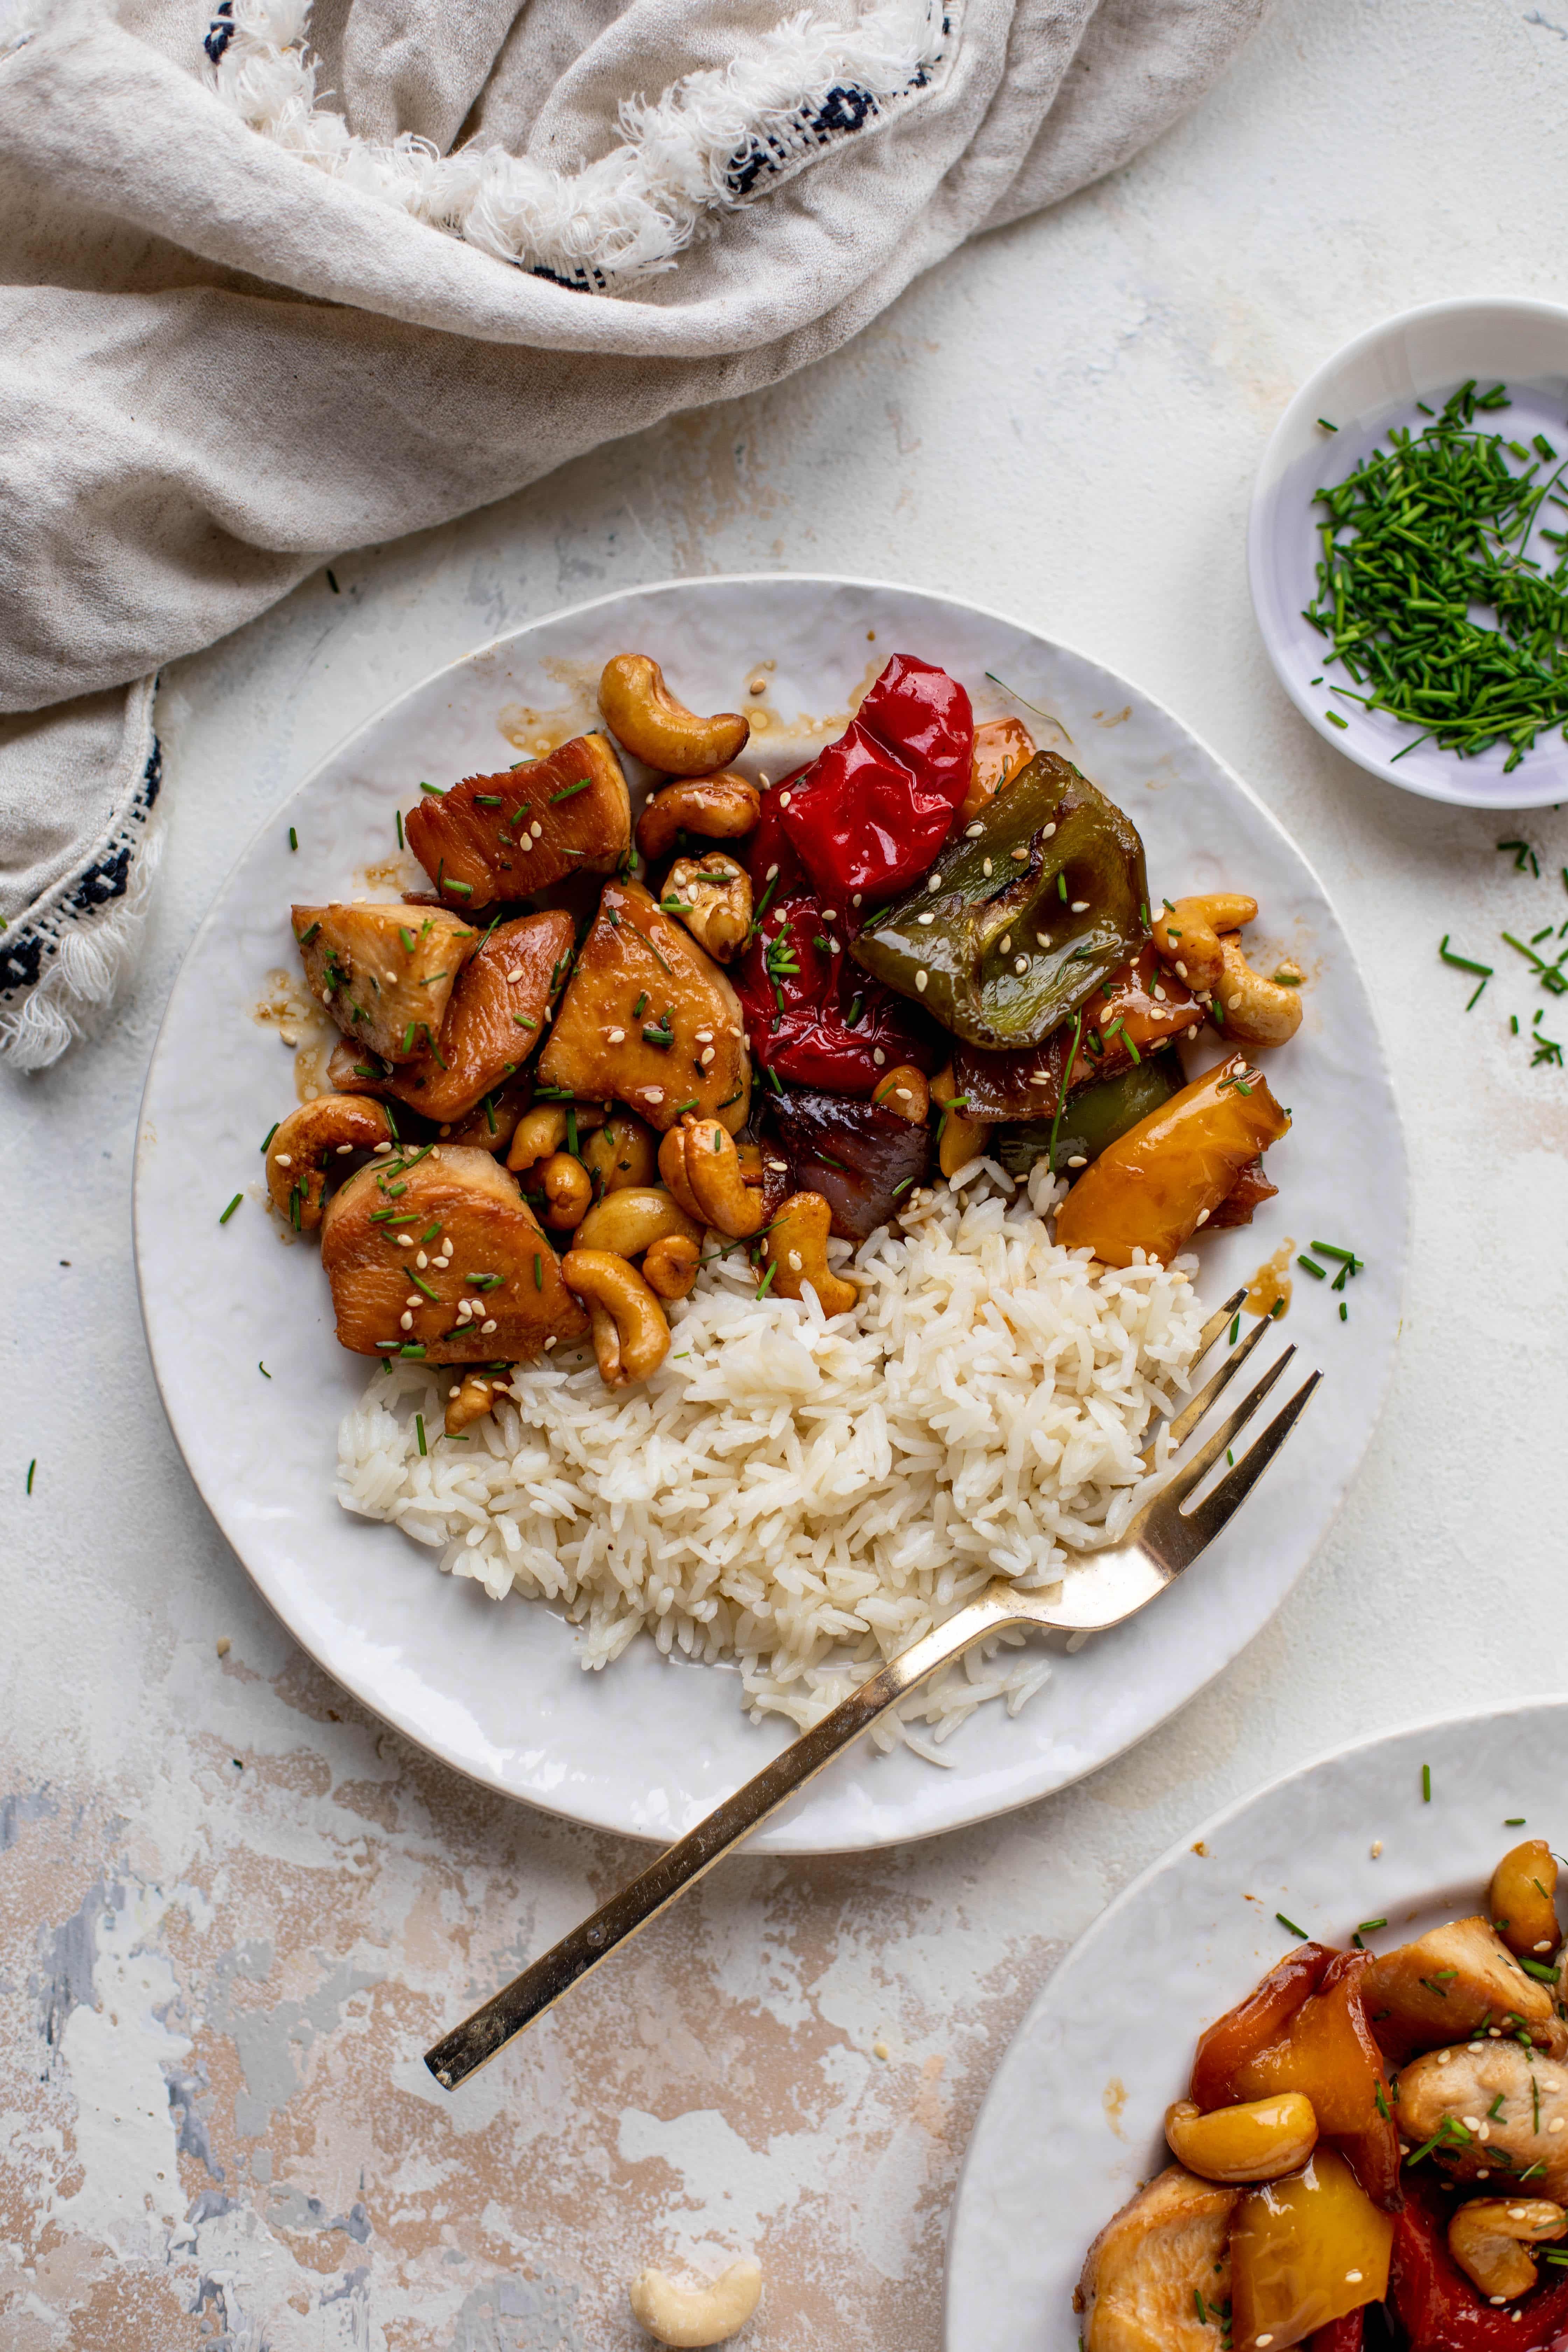
Photo by How Sweet Eats
Sheet Pan Cashew Chicken
From How Sweet Eats
In this 30-minute dinner, a sweet, gingery sauce coats tender roasted peppers, hearty chicken, and crunchy cashews. Pair it with rice for an easy weeknight meal.
.
.

Photo by Erin Alderson
Caramelized Zucchini Frittata
From Naturally Ella
A bubbly layer of cheddar cheese tops this fluffy zucchini and onion frittata. Make it for a simple dinner or a delicious weekend brunch.
.
.
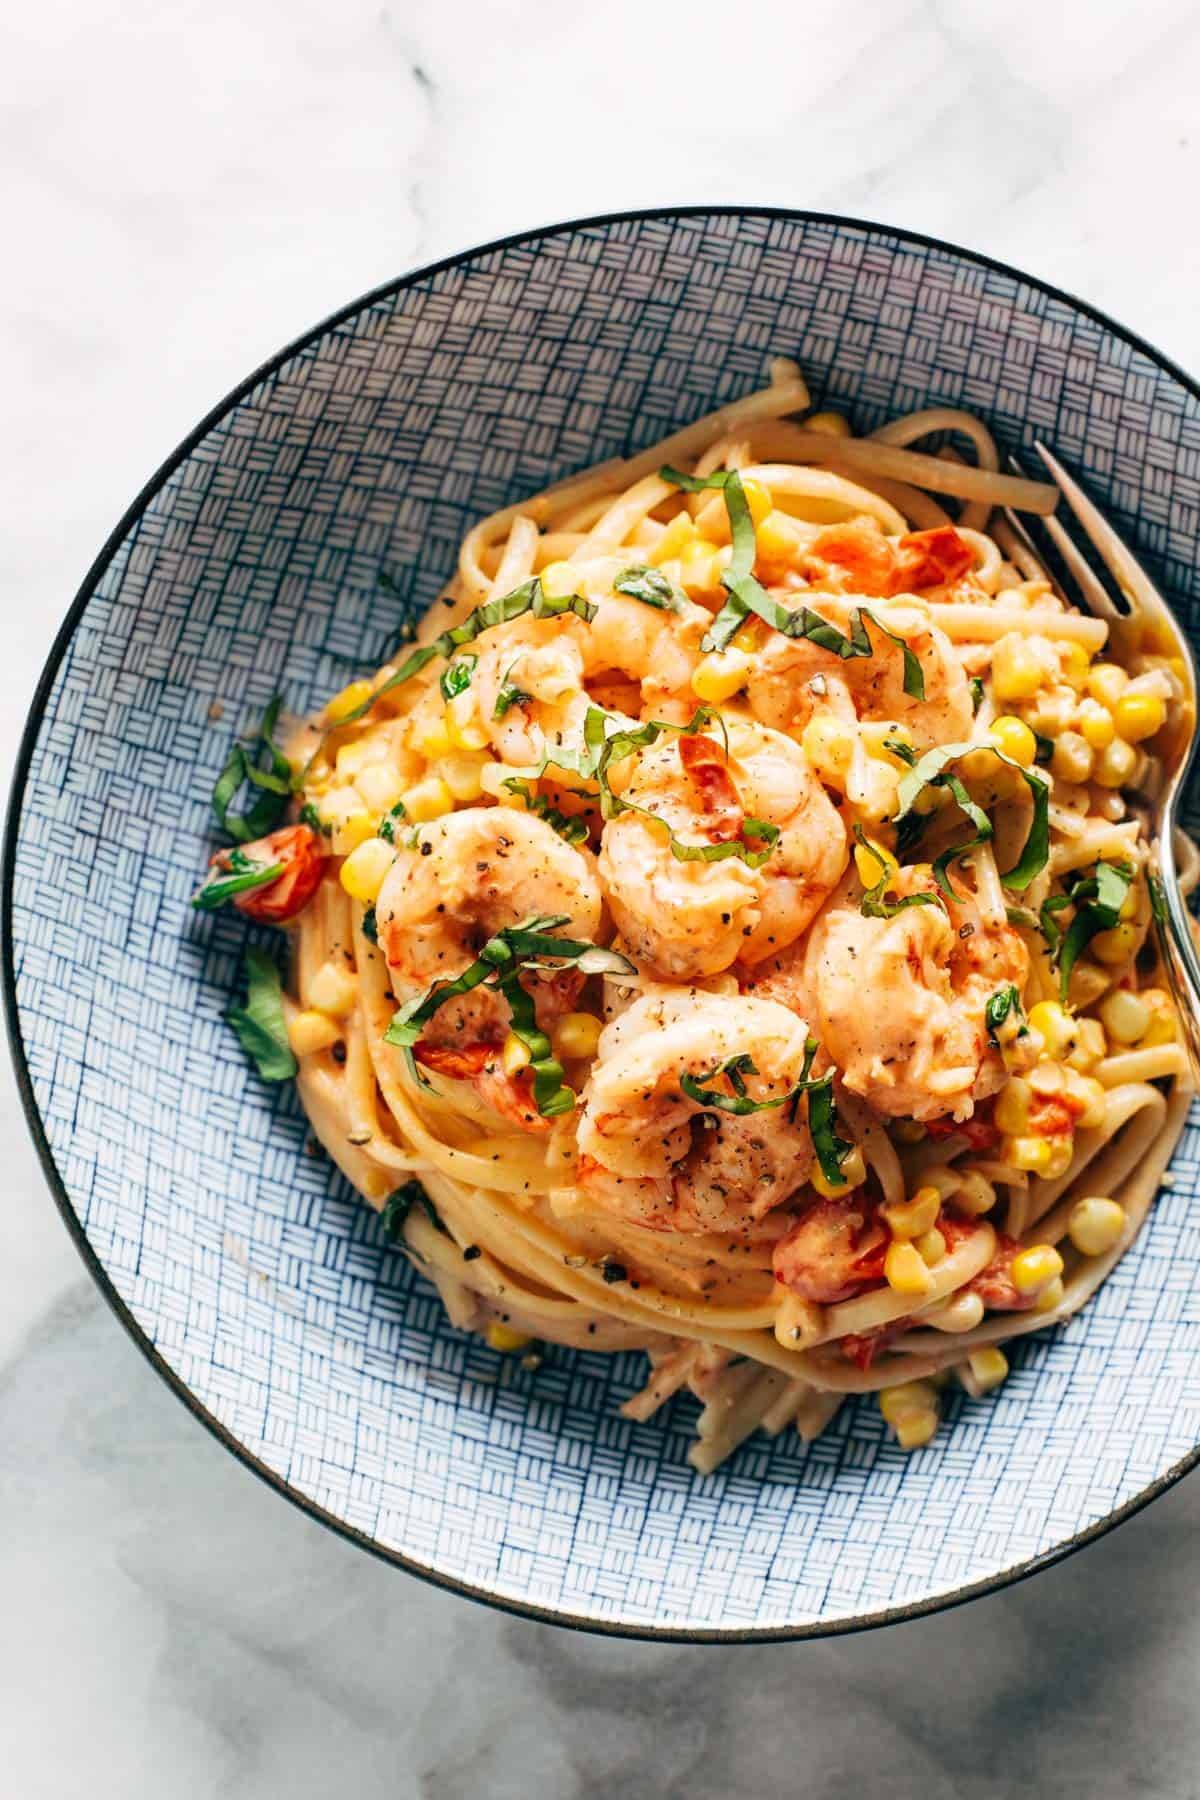
Photo by Pinch of Yum
Creamy Shrimp Pasta with Corn and Tomatoes
From Pinch of Yum
We’ve been sharing a corn pasta a week recently (see this newsletter or this one), which I think just goes to show how well corn and pasta go together. I love how the crisp kernels play off the chewy, al dente noodles. This recipe features tomatoes as well, filling it with fresh summer flavor. It also calls for spinach, but it’s such a small amount that you can feel free to skip it.
.
.
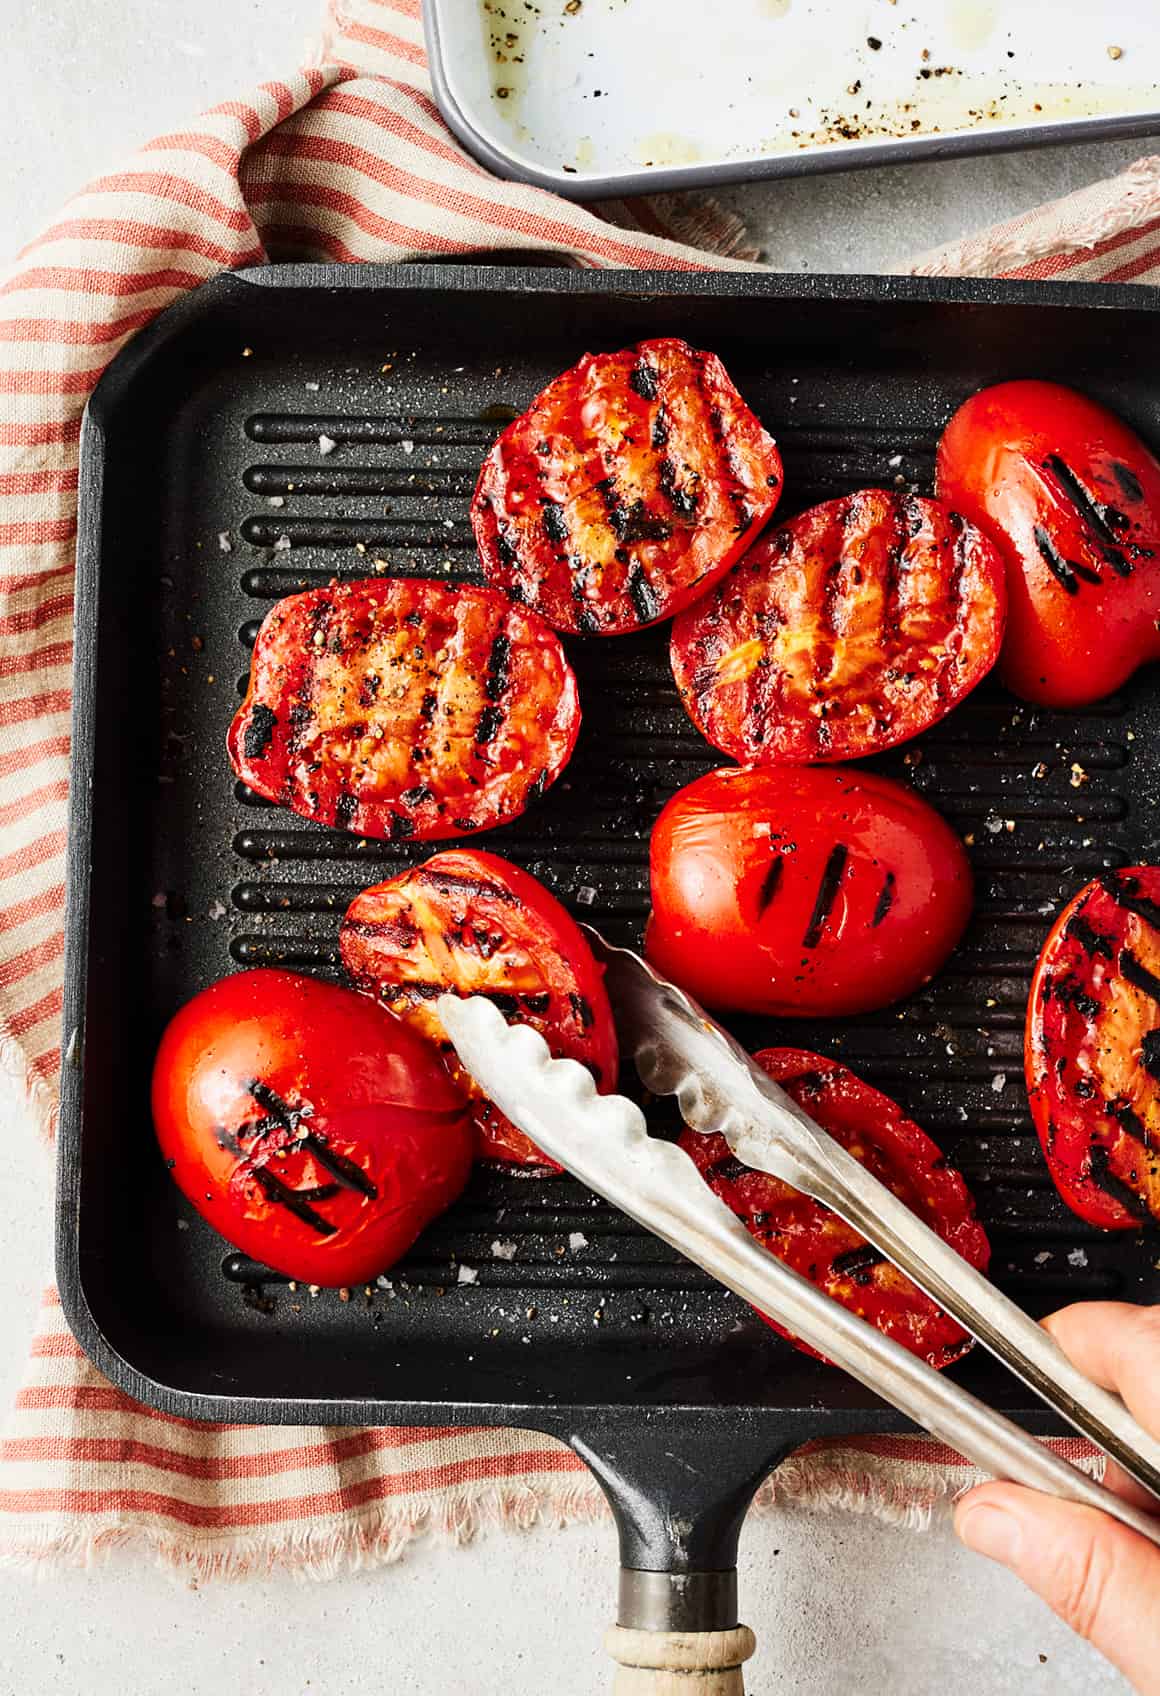
Photo by Eva Kolenko
Grilled Tomatoes
From Love & Lemons
Grilling is a great way to use the plum tomatoes that you’ll find in your box this week, as they hold their shape nicely over the hot grates. They’ll be charred and juicy when they come off the heat. Enjoy them a drizzle of olive oil, salt, and pepper, or dress them up more with Italian dressing, Parmesan, and a shower of fresh herbs.
Week #12. Melons on the way
- On: August 10, 2022
- 0
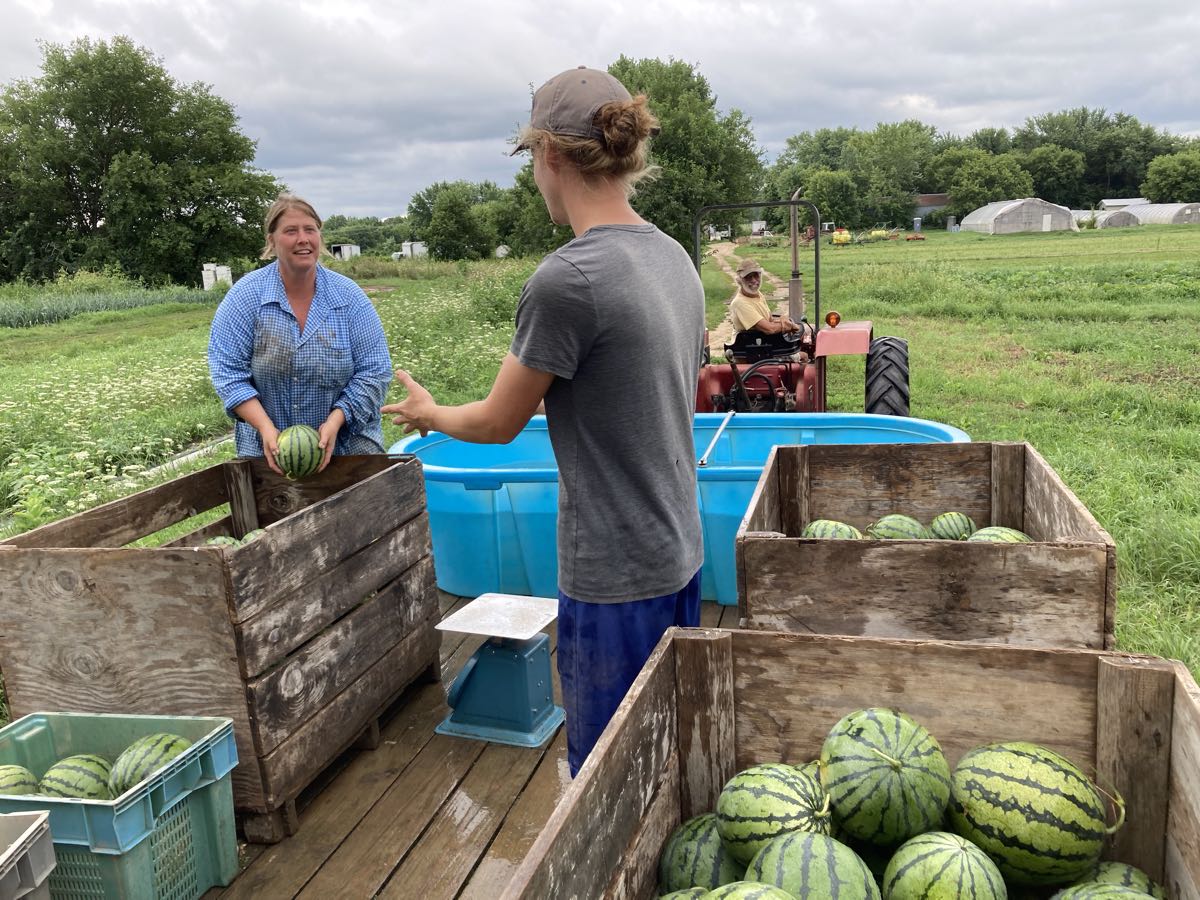
Watermelon harvest is everyone’s favorite job but you have to be able to catch and throw and not mind getting splashed. We are deeply enjoying the beautiful summer days. This is one of the best ways to spend them.

Photo by Maggie Schley
Steve picks the ripe melons and makes piles in the field. Ari tosses melons to Mat, who washes them in the blue tank. It’s great to wash right at the edge of the field. Melon harvest almost always coincides with warm weather, so no one cares if they get wet.
After washing, we toss again and place (gently!) in wooden bins. Back at the farmyard, we can move the full bins with a forklift and pallet jacks. That means we do not have to lift them again until we pack them in your CSA boxes.
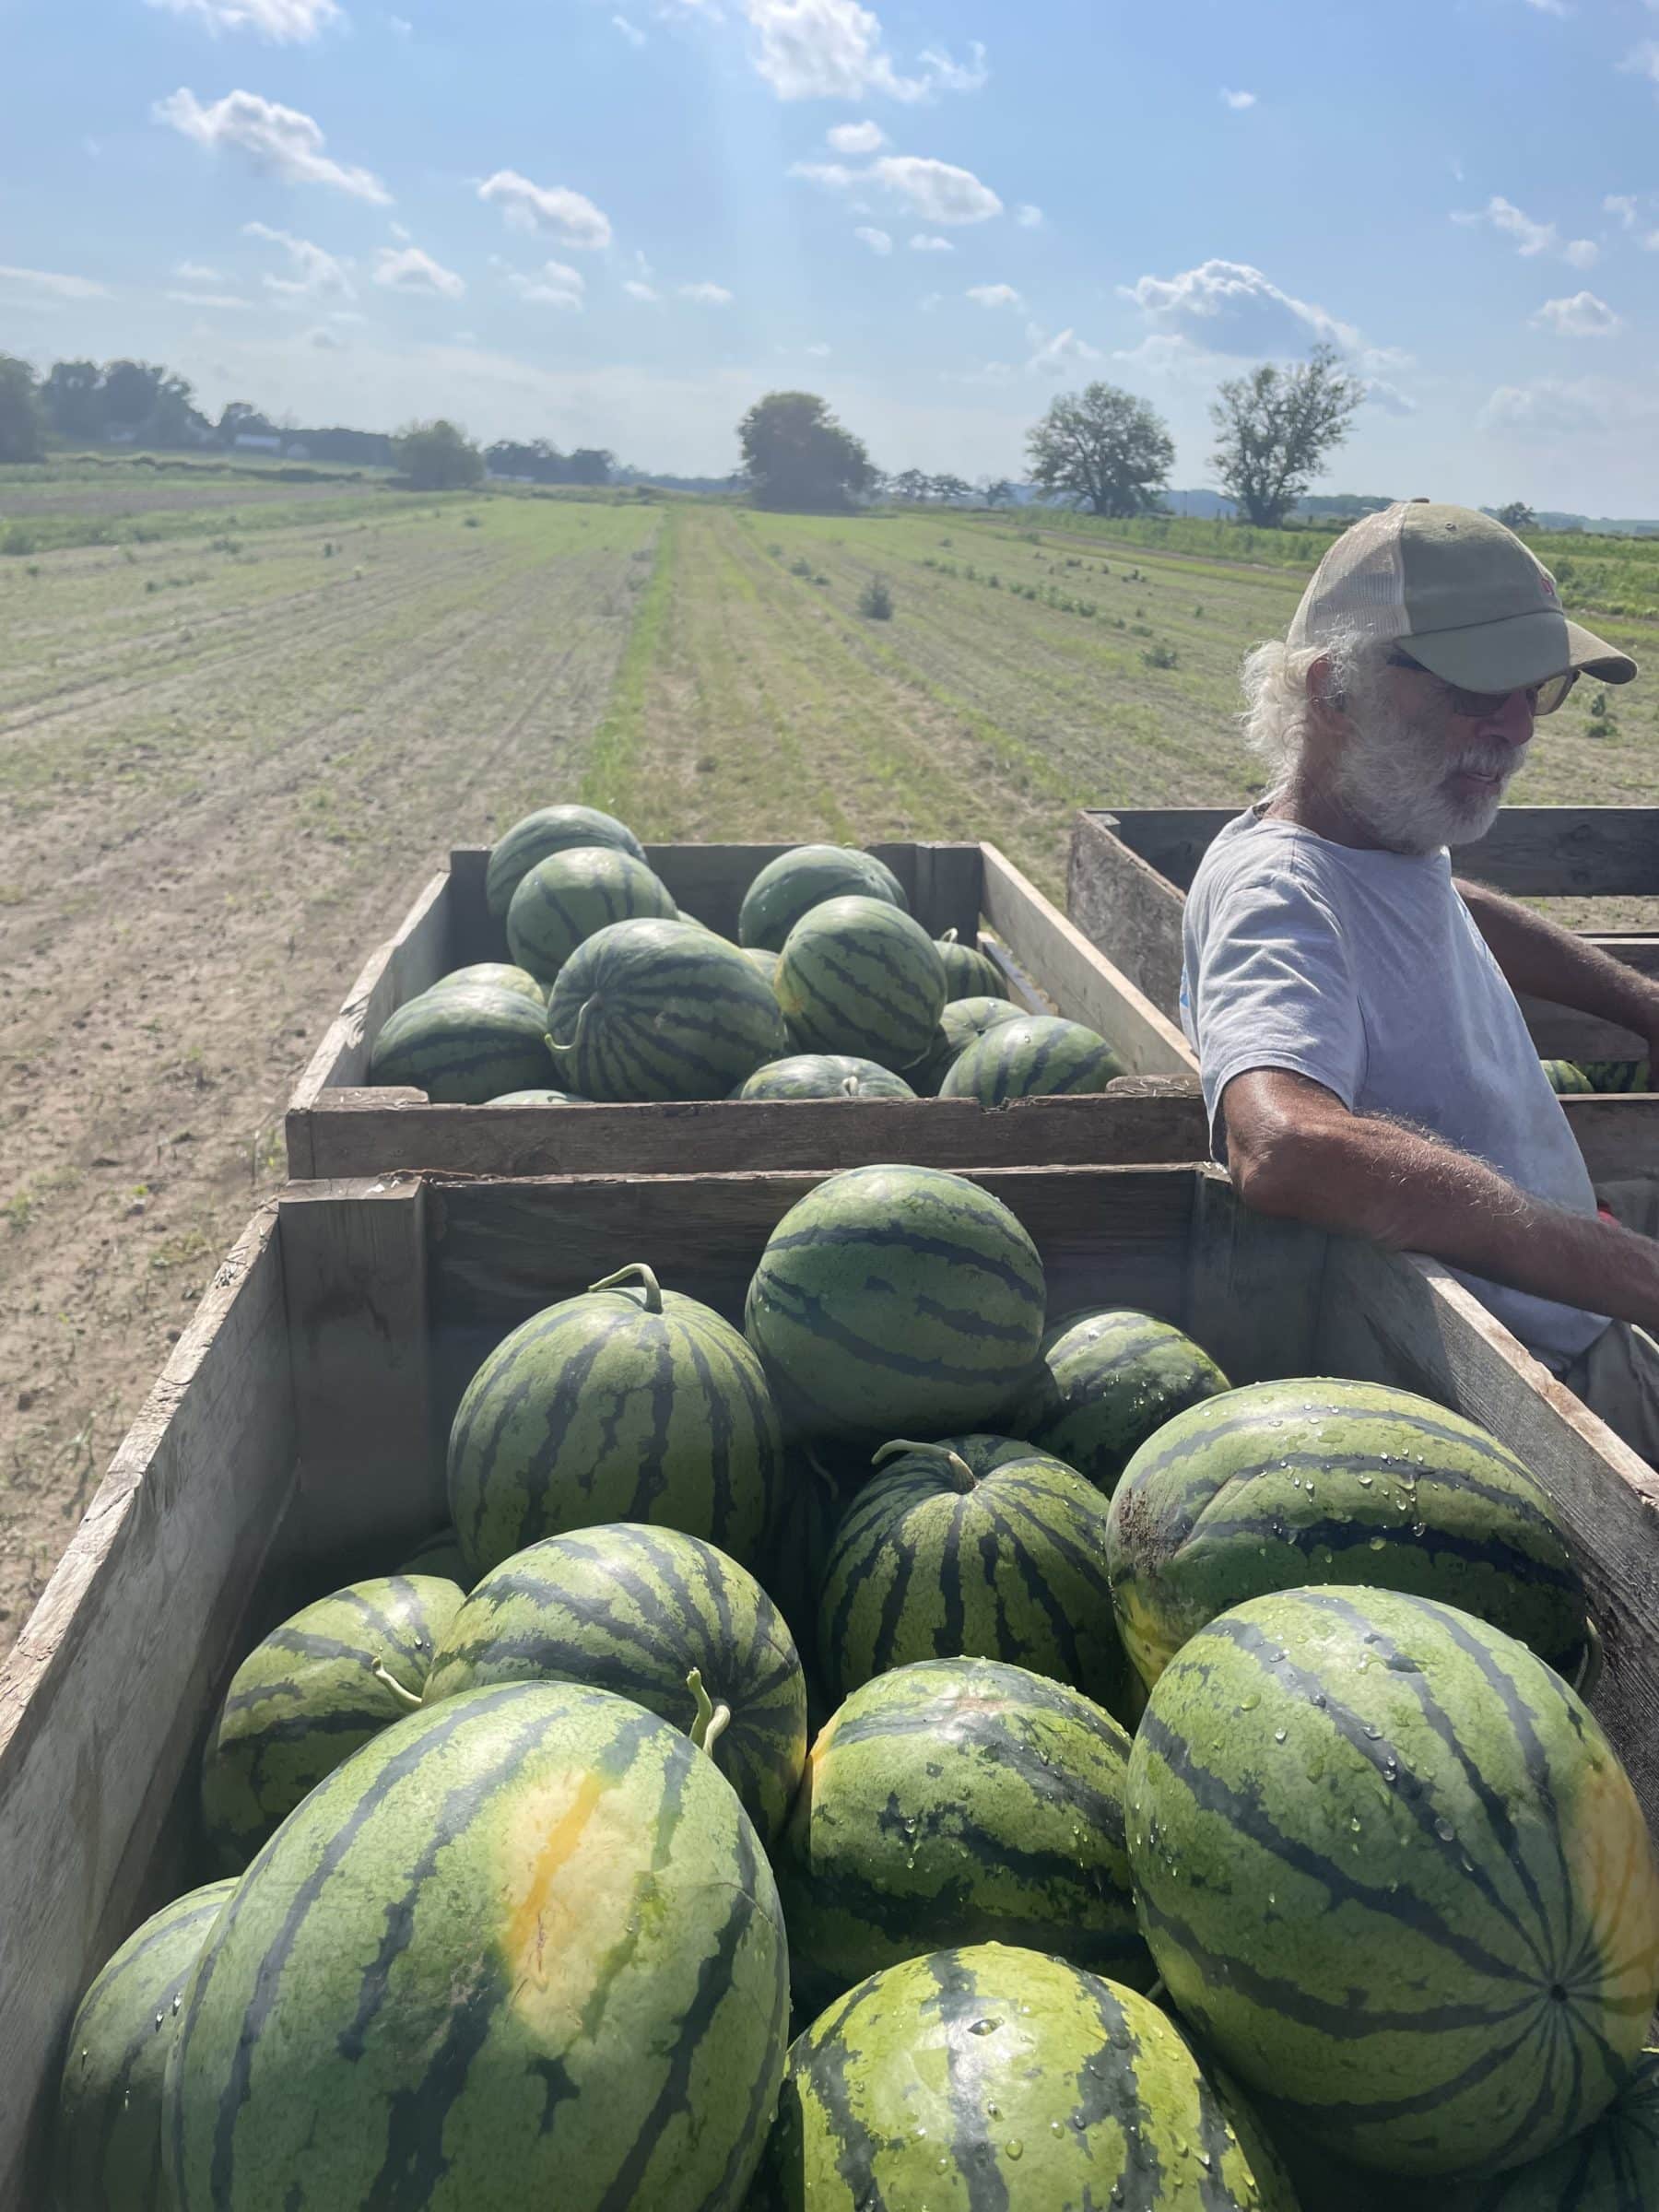
Photo by Mat Salbego
Then we rest and eat cracked melons.
Garlic crop looks good.
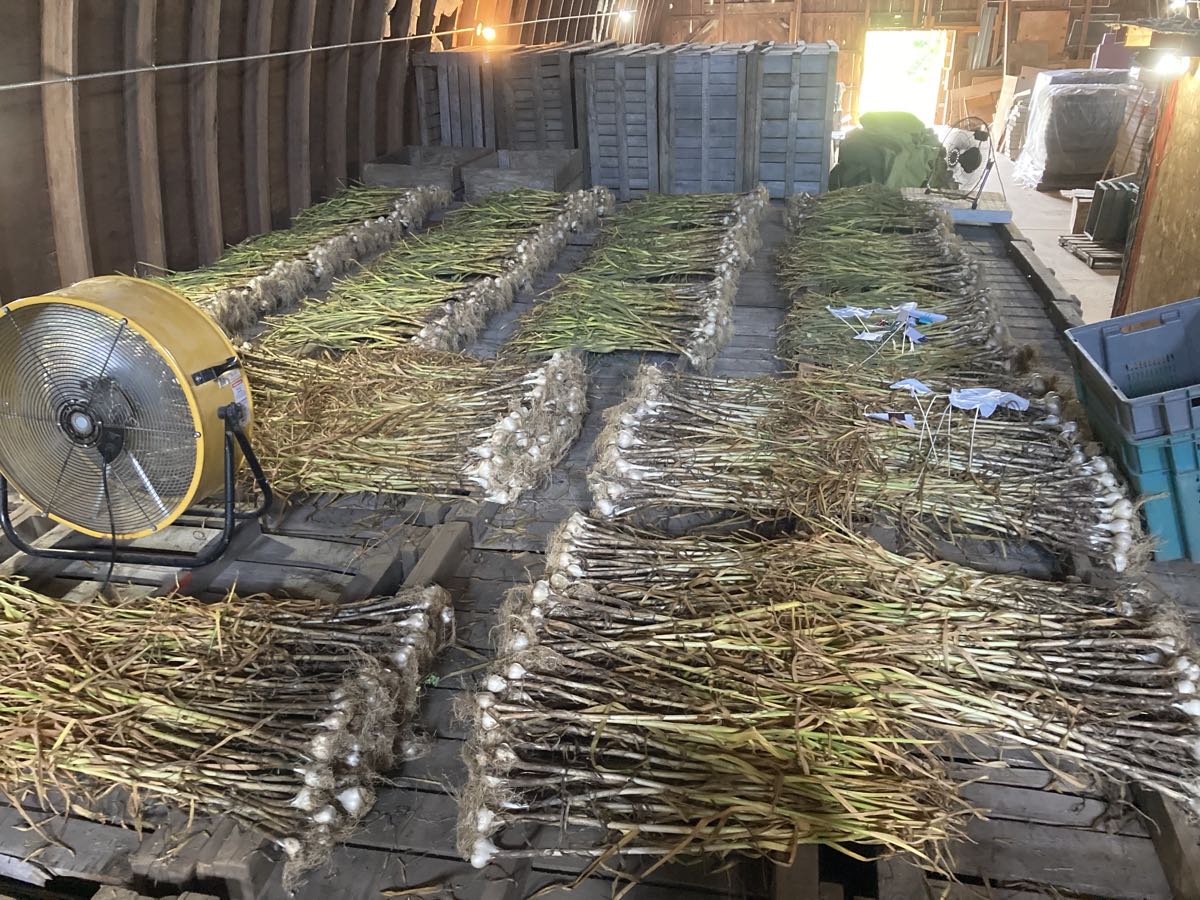
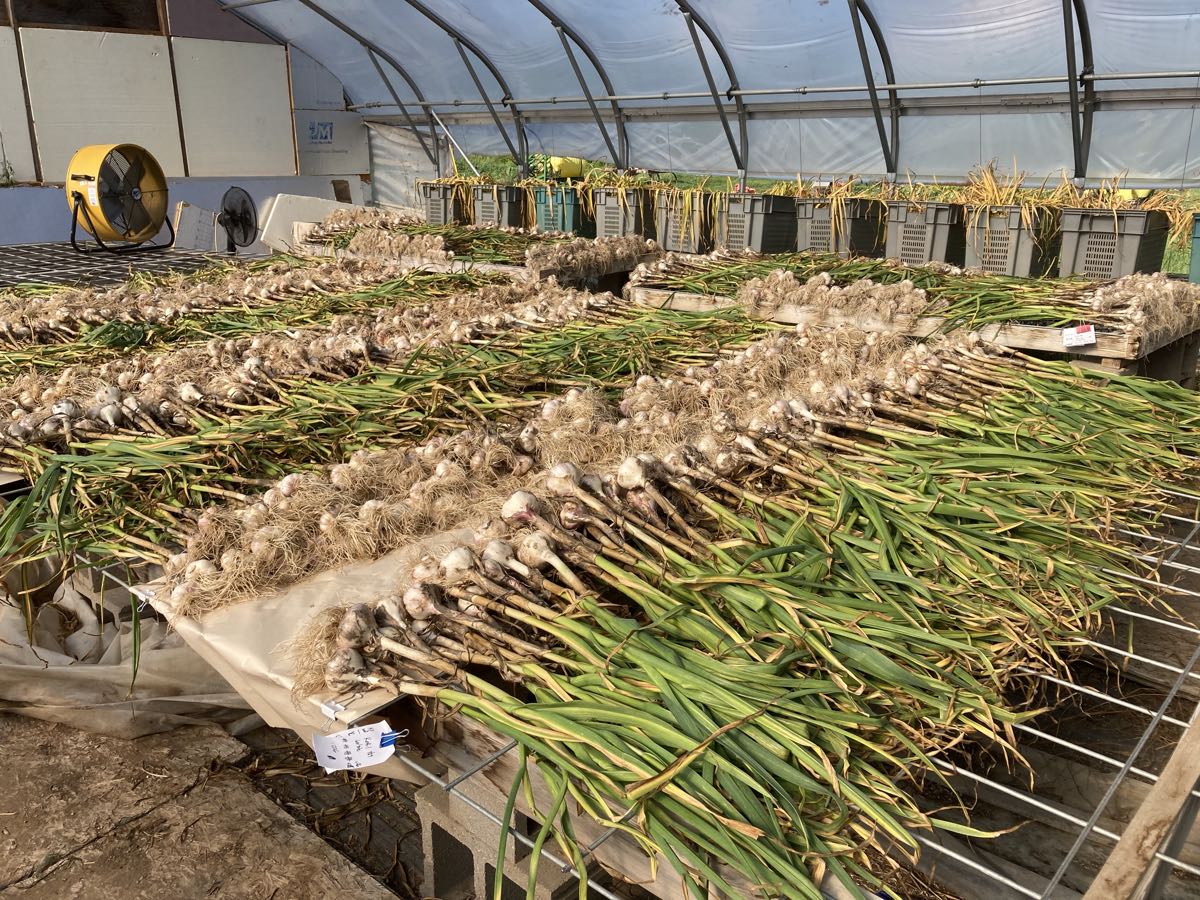
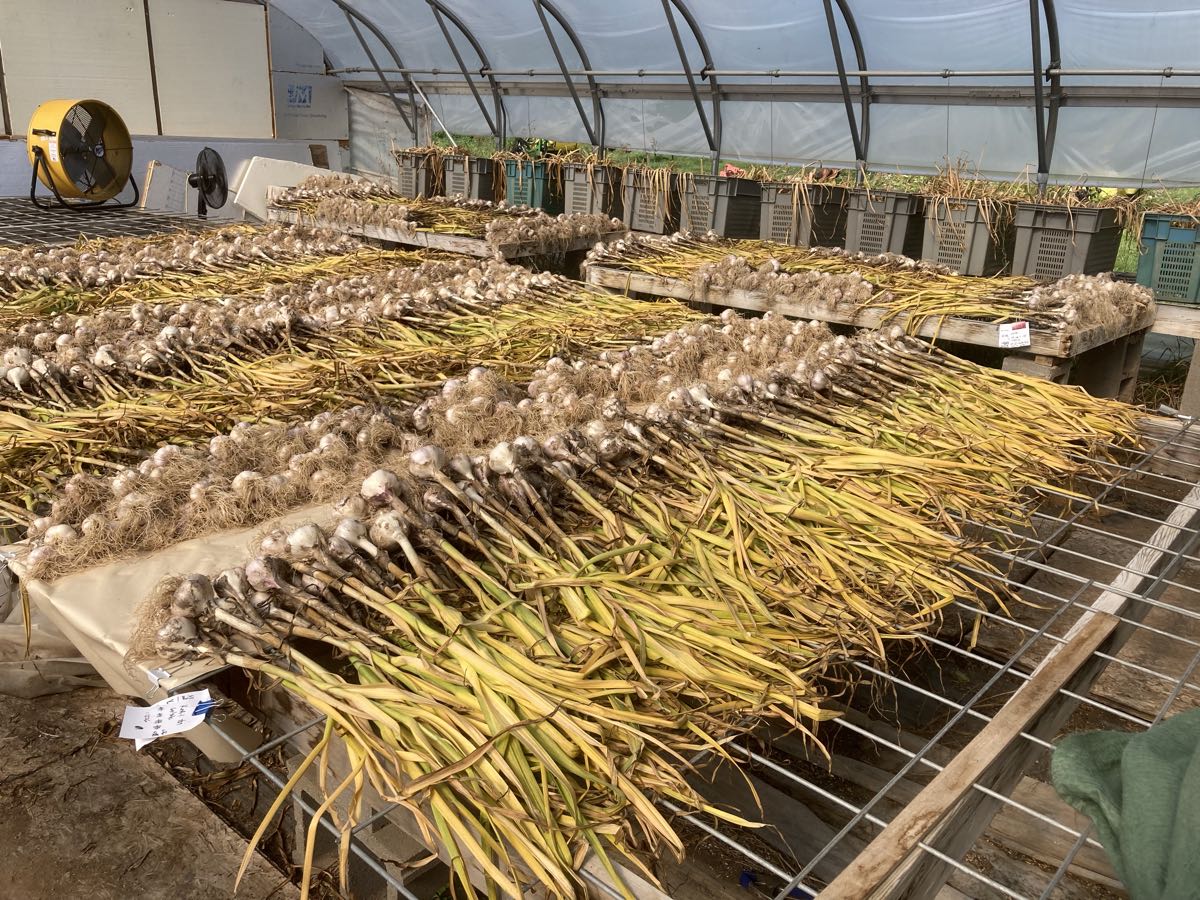
The crop is in and drying nicely. The top photo shows garlic laid to dry in our barn loft. The bottom two photos show garlic laid in the greenhouse on July 29 and July 30. You can see how quickly it’s drying. I do not love having the garlic in the sun but we cannot fit it all in the loft, so we need to use the greenhouse too. Once it’s dry enough, we’ll move it into the barn.
Veggie List & Veggie Notes
Week #12, August 11/12, 2022
– Weekly shares
– EOW/ purple
– Sampler/ moon
Sweet corn, 8 ears
Green beans, ~1.5 lb
Cherry tomatoes, 1 quart
Slicing tomatoes, ~2.2 lb
Red peppers, 2, either red bell or red frying
Cucumbers, 3 or 4
White or yellow onion, 1 large
Basil, 1 small sprig
By site: red watermelon OR muskmelon
Next week’s box will probably contain sweet corn, melons, tomatoes, peppers, beans, cucumbers and more.
Sweet corn report – There are very few bugs this week. It’s the next delicious batch of ‘Vision’ corn.
Cucumbers – This field is so productive! Usually I wouldn’t send cucumber so many weeks in a row but this field is going to end quickly, so let’s enjoy them while we have them.
White onions – These are more pungent onions than the Walla Wallas that we’ve sent in recent weeks. We consider them intermediate between Wallas and yellow storage onions in both pungency and ability to be fried. In other words, these will fry better than Wallas but not as well as a yellow onion.
RECIPES by DEB
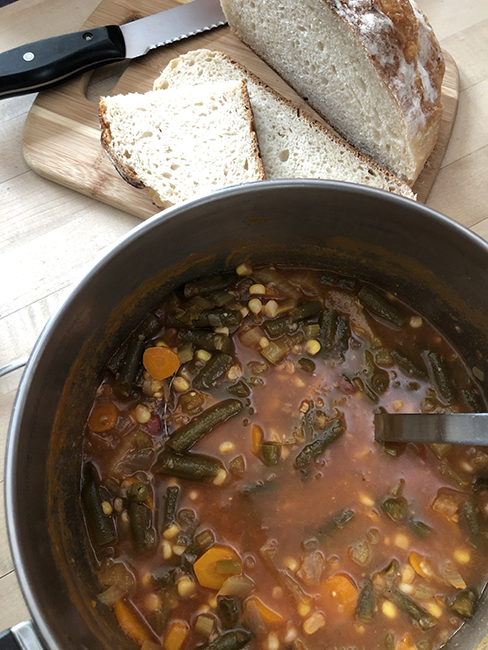
Photo by debslunch
All-the-vegetables Vegetable Soup
We don’t think of summer time as soup season, but fresh summer produce is so tasty in soup. This quick and easy vegetable soup can be thrown together in 3O minutes in the morning and reheated for dinner without overly heating up your kitchen. And it can turn a sandwich into a real meal! I’ve used Tipi green beans, carrots, corn, and bell pepper in this batch, as well as my last pint of Tipi tomato juice, but feel free to sub in what you have – zucchini, summer squash, tomatoes.
Takes about 30 minutes
Serves 6
1 tablespoon butter
3/4 cup chopped onion
3 stalks of celery, well-rinsed and chopped, with some of the leaves if possible
3 smallish carrots, sliced into rounds (a generous cup)
1 bell pepper, chopped
kernels from two ears of corn
1 1/2 – 2 cups green beans, cut into 1 to 2-inch lengths
2 cups of tomato juice
2-3 cups chicken or vegetable broth, or a mix of broth and water
1 to 1 /2 cups cooked beans or small pasta like macaroni or small shells
salt and freshly ground pepper
one tablespoon of honey, or to taste
- Melt the butter in a large pot that holds about 4 quarts. Add the longer cooking vegetable first – onion, celery, carrots, and toss with the butter. Season with salt and pepper. Cook for about 5 minutes until the onion starts to soften and turn translucent, then add the peppers, green beans and corn. Continue to cook for about 10 more minutes.
- Add the broth and tomato juice and water of necessary, and raise the heat to bring the soup to a boil. Reduce the heat and simmer for about 20 minutes. (If you’re making this in the morning, you can go and change out of your pajamas into regular clothes while the soup simmers)
- Add the beans or pasta – I used small red beans from Rancho Gordo, but garbanzos would be good, too. Stir in the honey. Cook a few minutes to make sure everything is blended. Dip out a spoonful and let it cool slightly, and taste to see if it needs more salt, or anything else.
- You can eat the soup immediately or cool it, and refrigerate and reheat when you’re ready. Serve with crusty bread or grilled cheese sandwiches.
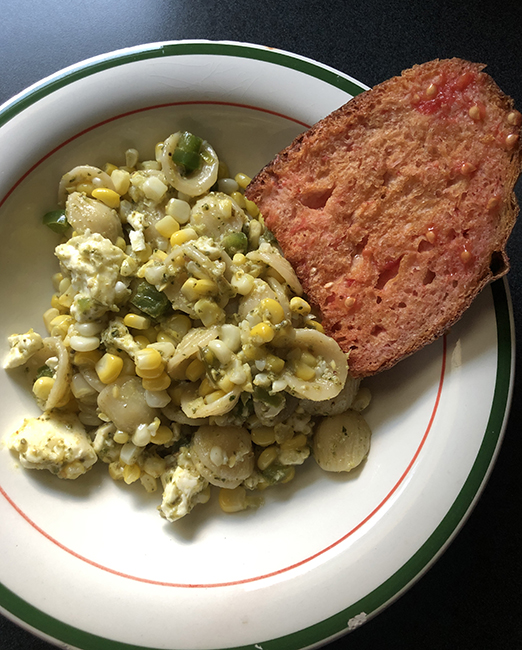
Photo by debslunch
Pasta with Oven-roasted Corn, Feta, and Jalapeño
This remarkably flavorful pasta only has a few main ingredients: pasta, corn, feta, and jalapeño. I tested the recipe with a large, very mild jalapeño – feel free to sub bell pepper or whatever you have. Sliced cherry tomatoes would also be delicious in this recipe. Serve with pan con tomate, Catalan tomato bread – see recipe below.
1 pound orecchiette – the orecchiette cradle the corn kernels, but bow ties or penne would also work
4 tablespoons unsalted butter
1 large jalapeño, or about 1/2 cup chopped bell or frying pepper, finely chopped
kernels from 4-5 ears of oven-roasted corn, 3-4 cups
Kosher salt
1-2 tablespoons basil pesto, purchased or homemade
8 ounces feta cheese, crumbled
Flaky salt and chopped fresh basil leaves, for serving (optional)
- Prepare the oven roasted corn: heat the oven to 400°, and place a rack in the top third. Pull the silk off the corn, and partially shuck it – leave at least one layer of husks on. Arrange the corn directly on the oven rack, or on a tray that will hold all the ears on one layer. Roast for 30 minutes, flipping after about 15, until the cobs have some color on the outside. Cool and peel the corn, and cut the kernels off the cobs. Save the cobs for stock if you like.
- Cook the orecchiette in a large pot of well-salted water; optionally, drop a corn cob in for extra corny-y flavor, until the pasta is just a little less cooked then you like it. Drain, saving a cup of the pasta water.
- Melt the butter in a wide deep skillet and cook the jalapeño or bell pepper in the butter till softened. Add the corn and 1/4 cup pasta water, and cook until slightly reduced, 2-3 minutes. Add the pasta, pesto, and feta, and another 1/4 cup pasta water, and toss until the pasta is well coated with the sauce. If it seems too dry, add more pasta water as necessary.
- Top with the flaky salt and basil, if using, and serve immediately with pan con tomate

Photo by Johnny Miller for The New York Times
Roasted Chicken with Cucumber-Yogurt Sauce
Takes about 40 minutes
Serves 4-6
This recipe is based on a recipe by Melissa Clark, in the New York Times. I’ve adjusted some of the ingredients to match what we’ve got in the box.
Two to two-and-a-half pounds boneless, skinless chicken thighs
Salt and freshly ground black pepper
4 garlic cloves, minced or put through a press
1 tablespoon finely chopped fresh herbs such as basil or parsley, or 1 teaspoon dried oregano
A good-sized pinch of red pepper flakes
3 tablespoons olive oil, plus more as needed
One lemon, one half cut into thin wedges
1/2 cup plain Greek yogurt or other thick yogurt (or sour cream)
1 medium cucumber, peeled, seeded, and grated about 2/3-3/4 cups
Optional: 2 tablespoons chopped herbs, such as basil or parsley for sprinkling on top
- Heat oven to 425°. Combine the chicken, 3 of the garlic cloves, the 1 tablespoon basil or other chopped fresh herbs, or teaspoon of dried oregano, red pepper flakes, and lemon wedges. Season with salt and pepper. Pour in the olive oil and toss until well coated. The chicken can be refrigerated at this point for up to 12 hours before roasting.
- Line a sheet pan with parchment or foil, and spread the chicken mixture on it in a single layer. Drizzle with a little more oil and roast until the chicken is cooked through, 25-35 minutes. For a little more color on your chicken, run the pan under the broiler for 1 to 2 minutes.
- While the chicken is cooking, stir together the yogurt, grated cucumber, and remaining garlic clove in a small bowl. Season to taste with salt and pepper. Cover and refrigerate until ready to serve.
- When the chicken is done, arrange it on a serving platter and squeeze the half lemon over the top. Sprinkle on the chopped basil if using. Serve with the cucumber-yogurt sauce and an extra drizzle of olive oil.
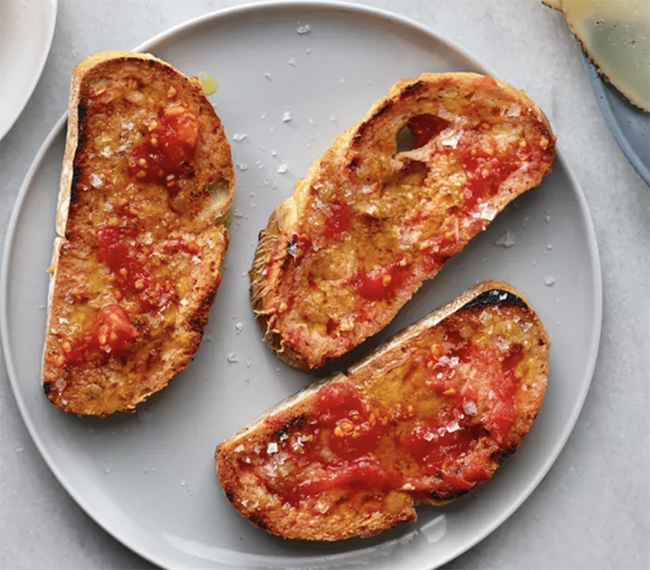
Photo by The Spruce
Catalan Tomato Bread
From The Spruce Eats, by Lisa & Tony Sierra
Pan con tomate or Catalan Tomato Bread, a tapa, flavors toasted bread with garlic and tomato. Toast the bread until it’s nice and crispy to avoid sogginess after the bread is rubbed with the tomato – but even soggy, it will still taste great!

Photo by Nagi
Cold Corn Soup for Summer
From RecipeTinEats
Another soup this week – this one is cool, creamy, and full of fresh corn.
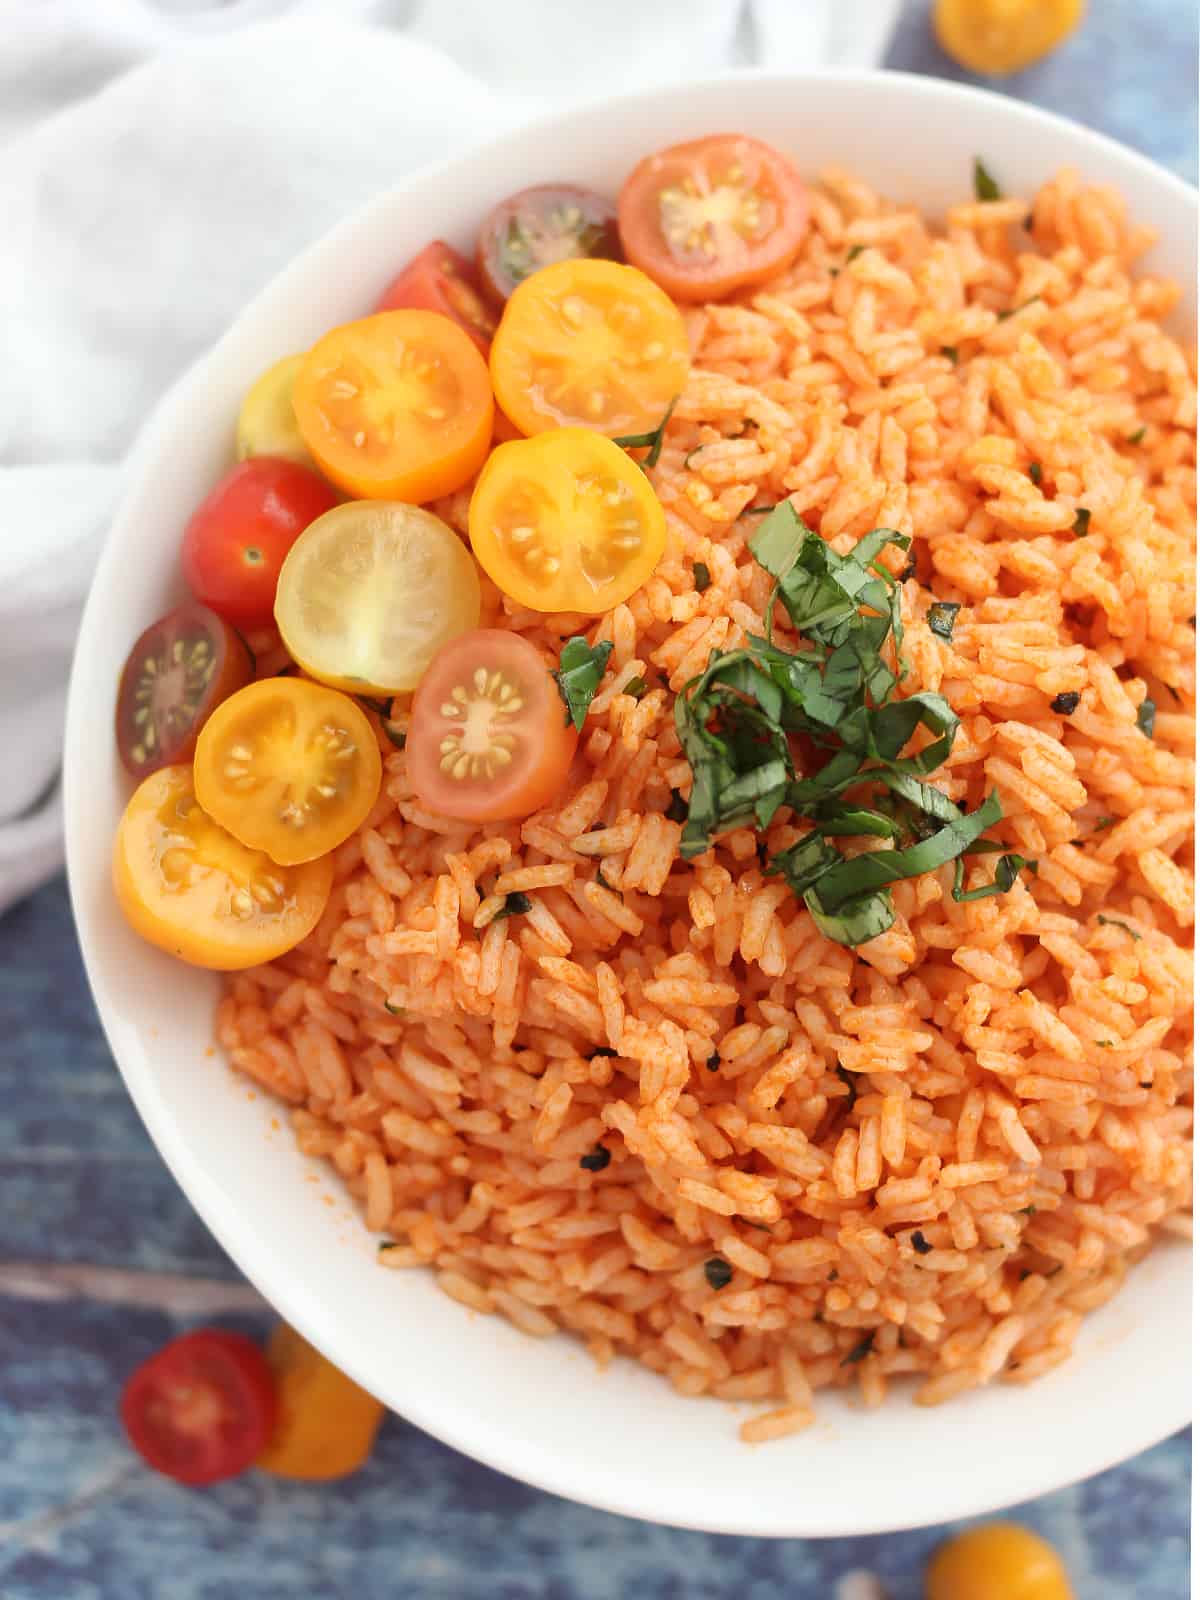
Photo by Bite On The Side
Tomato Basil Rice
From Bite On The Side
Serve this rice garnished with cherry tomatoes and chopped fresh basil as shown, or chunks of slicing tomato. You can omit the basil if we don’t get any in the box; you might want to add oregano or another dried herb, and call it tomato-herb rice!
And finally, two recipes for salads with green beans and corn, one creamy, and one with tomatoes.
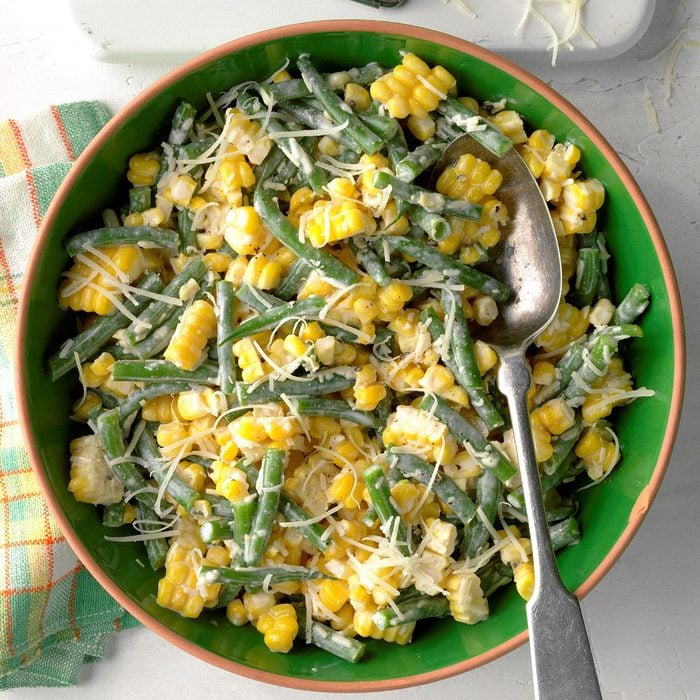
Photo by Taste of Home
Corn and Green Bean Salad
From Taste of Home
This recipe calls for reduced fat mayonnaise – I am not a fan! Feel free to use your favorite mayo.
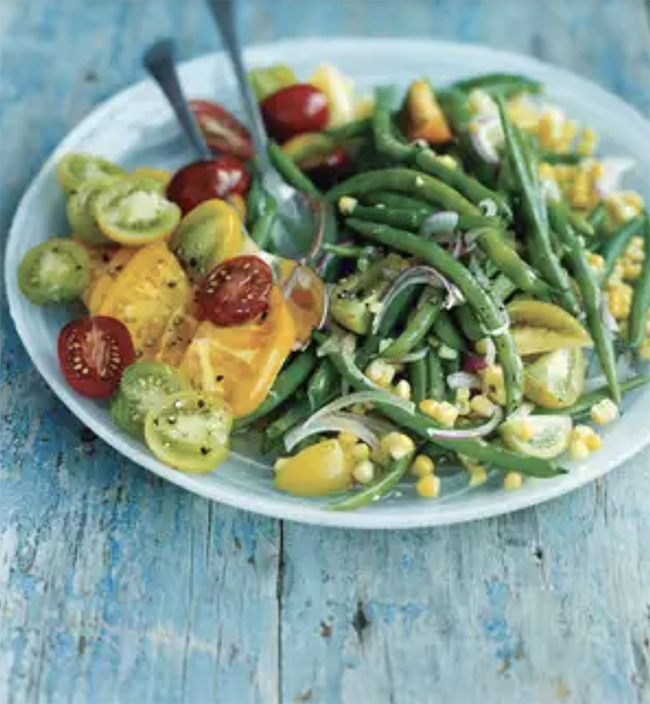
Photo by John Kernick
Corn, Green Bean, and Tomato Salad
From Martha Stewart
Martha calls for yellow tomatoes and heirloom tomatoes in this salad – a combination of our slicing and cherry tomatoes will work just great in this recipe.
Week #11; Let’s talk peppers.
- On: August 03, 2022
- 0
Our pepper season begins. We have two or three peppers for each share this week. Most people will get a mix of red bell and red frying peppers. (Some boxes will have all bells this week.) Let’s review the differences.
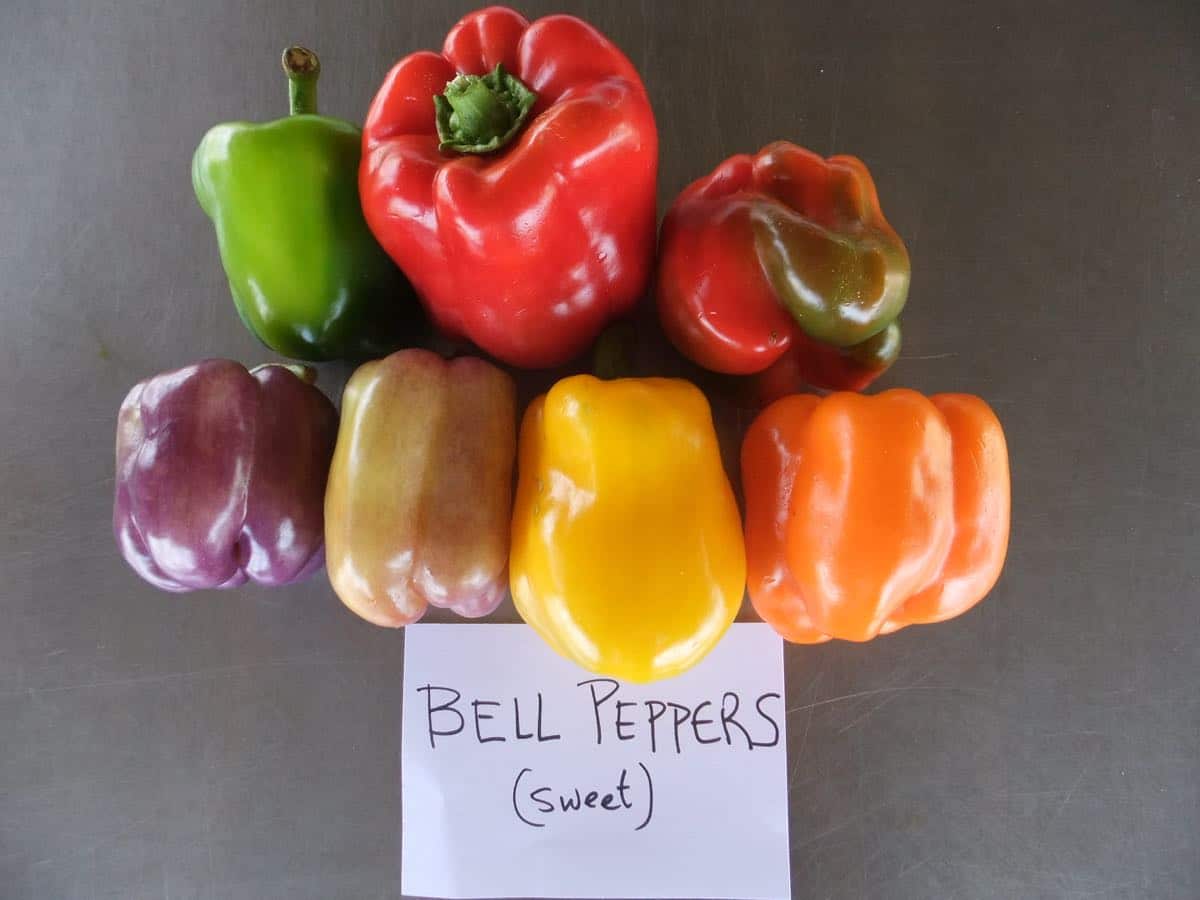
Bell peppers are sweet, not spicy. They are blocky and thick walled. These are great for salads, stuffing, grilling, and roasting, where their thick walls are an advantage. This week’s bell peppers are red or green, but we grow red, yellow, orange, purple and green bell peppers. All are sweet.
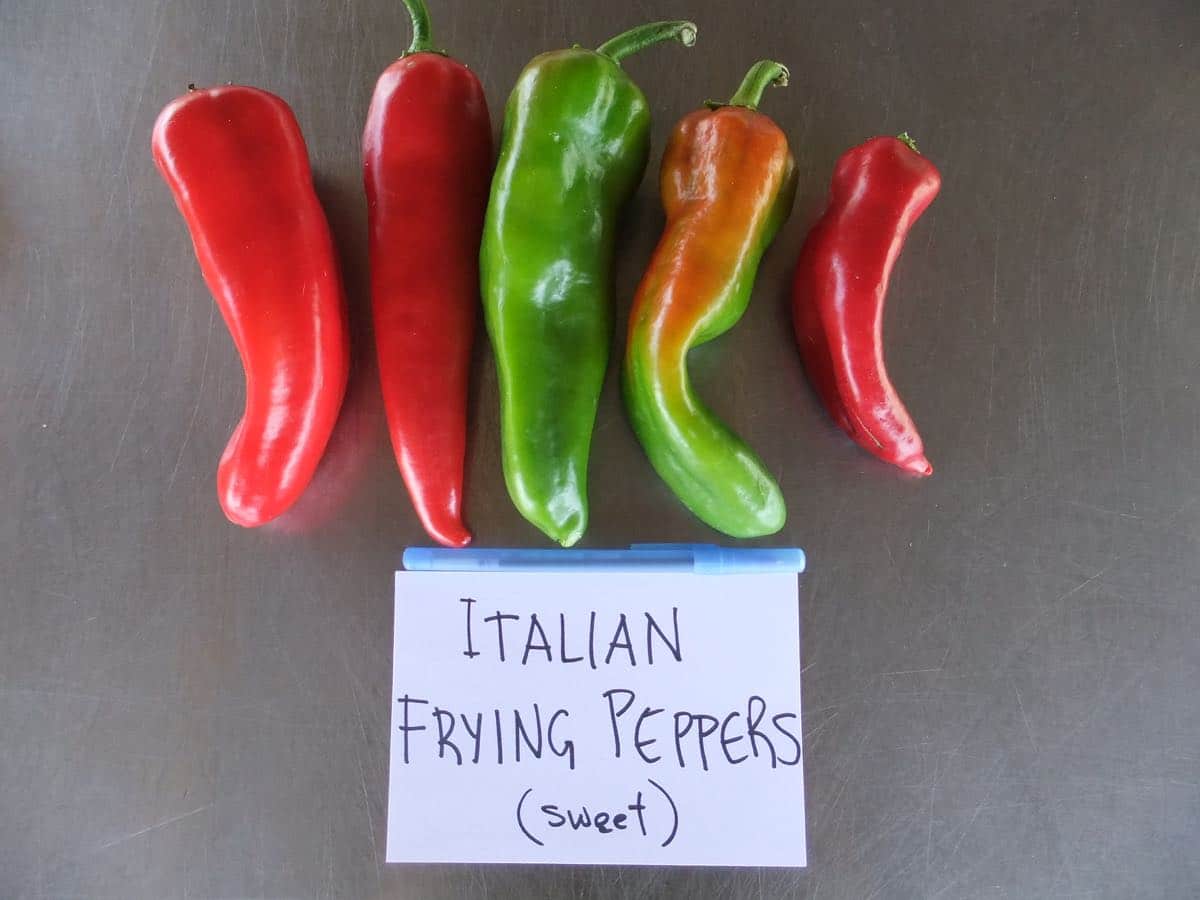
Frying peppers are also sweet, not spicy. They have a pointed tip and are thinner walled. These peppers are great for frying. They have lower moisture, which allows them to fry and brown in hot oil. Frying peppers can also be stuffed or used for salads. They are less useful for roasting, because of their thinner walls, and lower yield after roasting. We grow red and green frying peppers.
#2 Grade Red Peppers
I write about pepper grading every year. Returning members can say “yeah, yeah” and skip ahead. New members, please read.
Some of the red bell peppers we send in the CSA boxes will be our #2 grade. We do this to avoid waste and to deliver good value to our CSA members. The #2 grade peppers are excellent eating quality, but are not quite pretty enough to sell to our coop store customers. As a result, we place a much lower value on these peppers. This allows us to provide generous amounts of peppers over the course of the season. We feel this is a good exchange, even if it means you occasionally open a pepper and find that it needs trimming. Here are the reasons that peppers are downgraded from #1 grade to #2 grade:
- They may have a minor blemish, or
- They may have minor insect damage, or
- They may be very ripe and beginning to wrinkle. (These are especially sweet and delicious as they are fully ripe. These cannot be sold to stores because their shelf life is short. You will find that the texture is less crisp than a #1 grade pepper, but the flavor more than makes up for it.)
- They might be partially red and partially green.
- Others are just too small.
- Eating quality is fine (or excellent) for all the #2 peppers.
.
We throw away ALL peppers that we suspect have rot inside (although one may occasionally slip through in either #1 or #2 grade.). Enjoy this week’s peppers. As amounts increase, we’ll share favorite pepper recipes.
Zucchini News

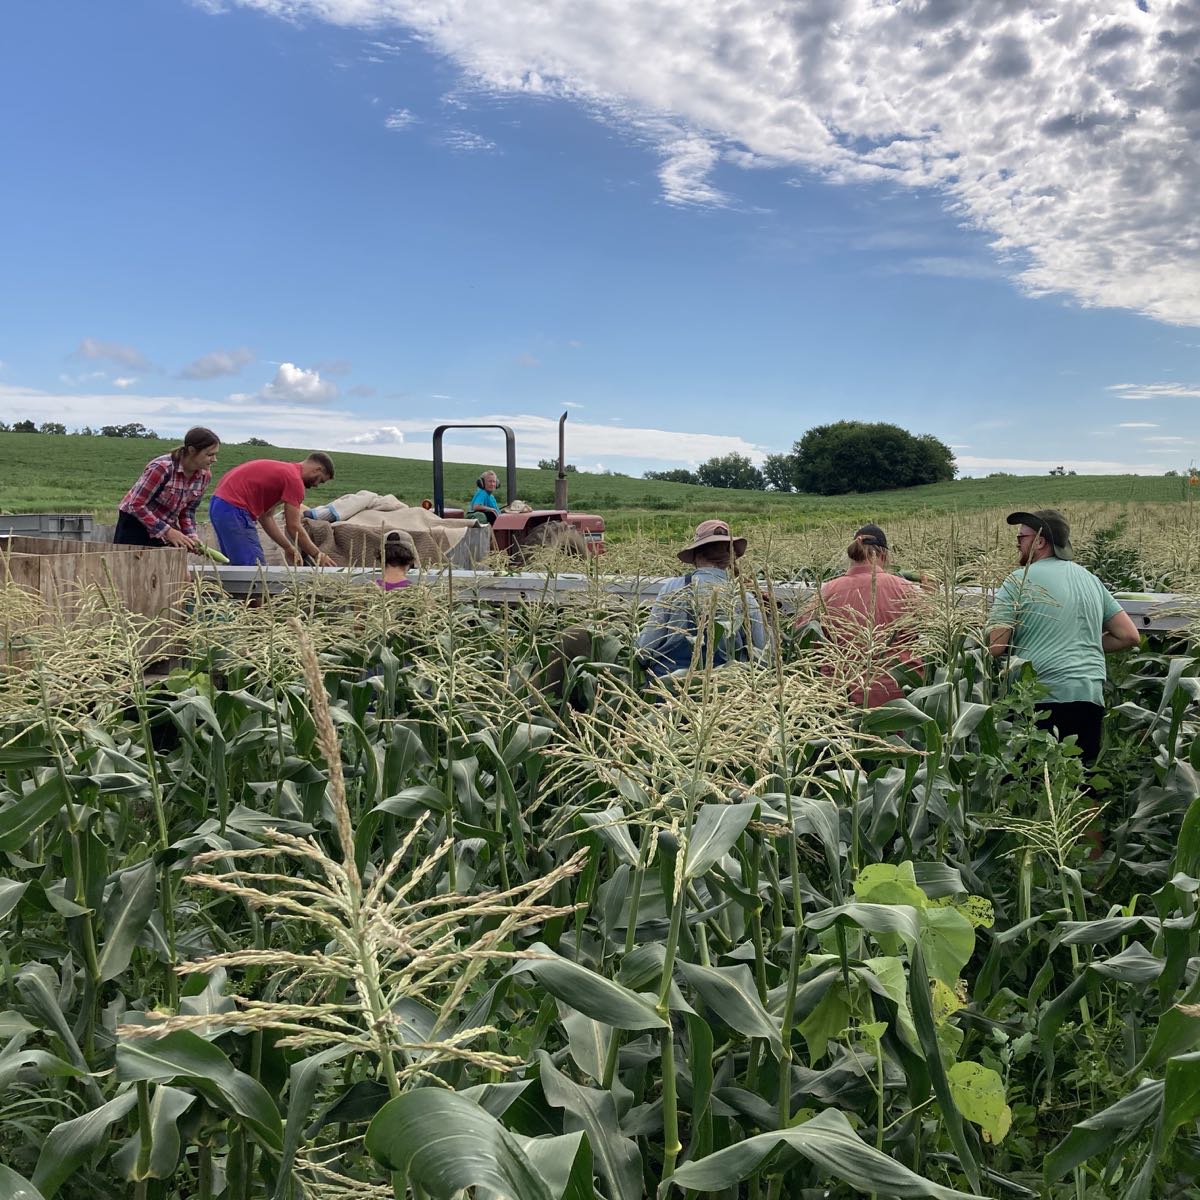
The crew on the way to harvest zucchini.
After this week, you (and we) will get a vacation from zucchini. Our next field will be ready to harvest in late August. This is good timing from our perspective, as we have many great things for the CSA boxes this month. Melons, corn, beans, peppers and tomatoes are all hitting their stride.
Veggie List & Veggie Notes
Week #11, August 4/5, 2022
– Weekly shares
– EOW/ green
Sweet corn, 7 or 8 ears
Carrots, 2 lb
Red peppers (frying or bell), 2 or 3
These will be a mix of #1 and #2 grades.
Cherry tomatoes, 1 quart
Slicing tomatoes, 1 or 2
Cucumbers, ~4
Zucchini &/or Zephyr squash, ~2 pieces
Walla Walla onion
Fresh garlic, 1 bulb
By site: a small muskmelon OR red watermelon
Next week’s box will probably contain sweet corn, tomatoes, red cabbage, melons, and more.
Sweet corn – This week’s batch has fewer bugs. However, I still suggest that you cut off the tips before shucking. Then you do not even see any bugs. We expect to have seven deliveries of corn for you this year and I’ll post bug info here each week so you know what to expect. The corn is delicious. Just cut off the tips before shucking – you’ll be happier.
Carrots – This is a really nice batch of carrots, a variety called ‘Romance’. Steve has experimented for years to find the best carrot varieties to plant each season. Summer carrots can be disappointing, eg too bitter, but this ‘Romance’ variety does great. Of course, we have to water and tend them for success, but they are worth the effort.
Red peppers – Storage: Refrigerate
Cucumbers – We just began harvesting our second cucumber field and the quality and abundance are great! We have four cucumbers for you this week. Enjoy the bounty – soon the field will calm down and production will slow.
Storage: Refrigerate in a warmer part of your fridge, or even leave at room temperature.
Cherry tomatoes (mixed orange and red) – Everyone gets a quart this week but they are not quite full. We divvied up what we have!
Fresh garlic – We are sending German Extra Hardy garlic this time. Storage: I suggest that you refrigerate this bulb of garlic, so it remains easy to peel. The garlic is fine if you leave it at room temperature but the cloves will become difficult to peel as the bulb dries.
Muskmelon (some sites) – Some are ripe and ready to eat. Some appear greenish and need to ripen a day or two on your kitchen counter. Keep at room temperature but refrigerate if not eaten within 2 days.
Red watermelon (some sites) – We have watermelons for just two sites.
Storage: Store at room temperature and refrigerate once cut.
RECIPES by PHOEBE
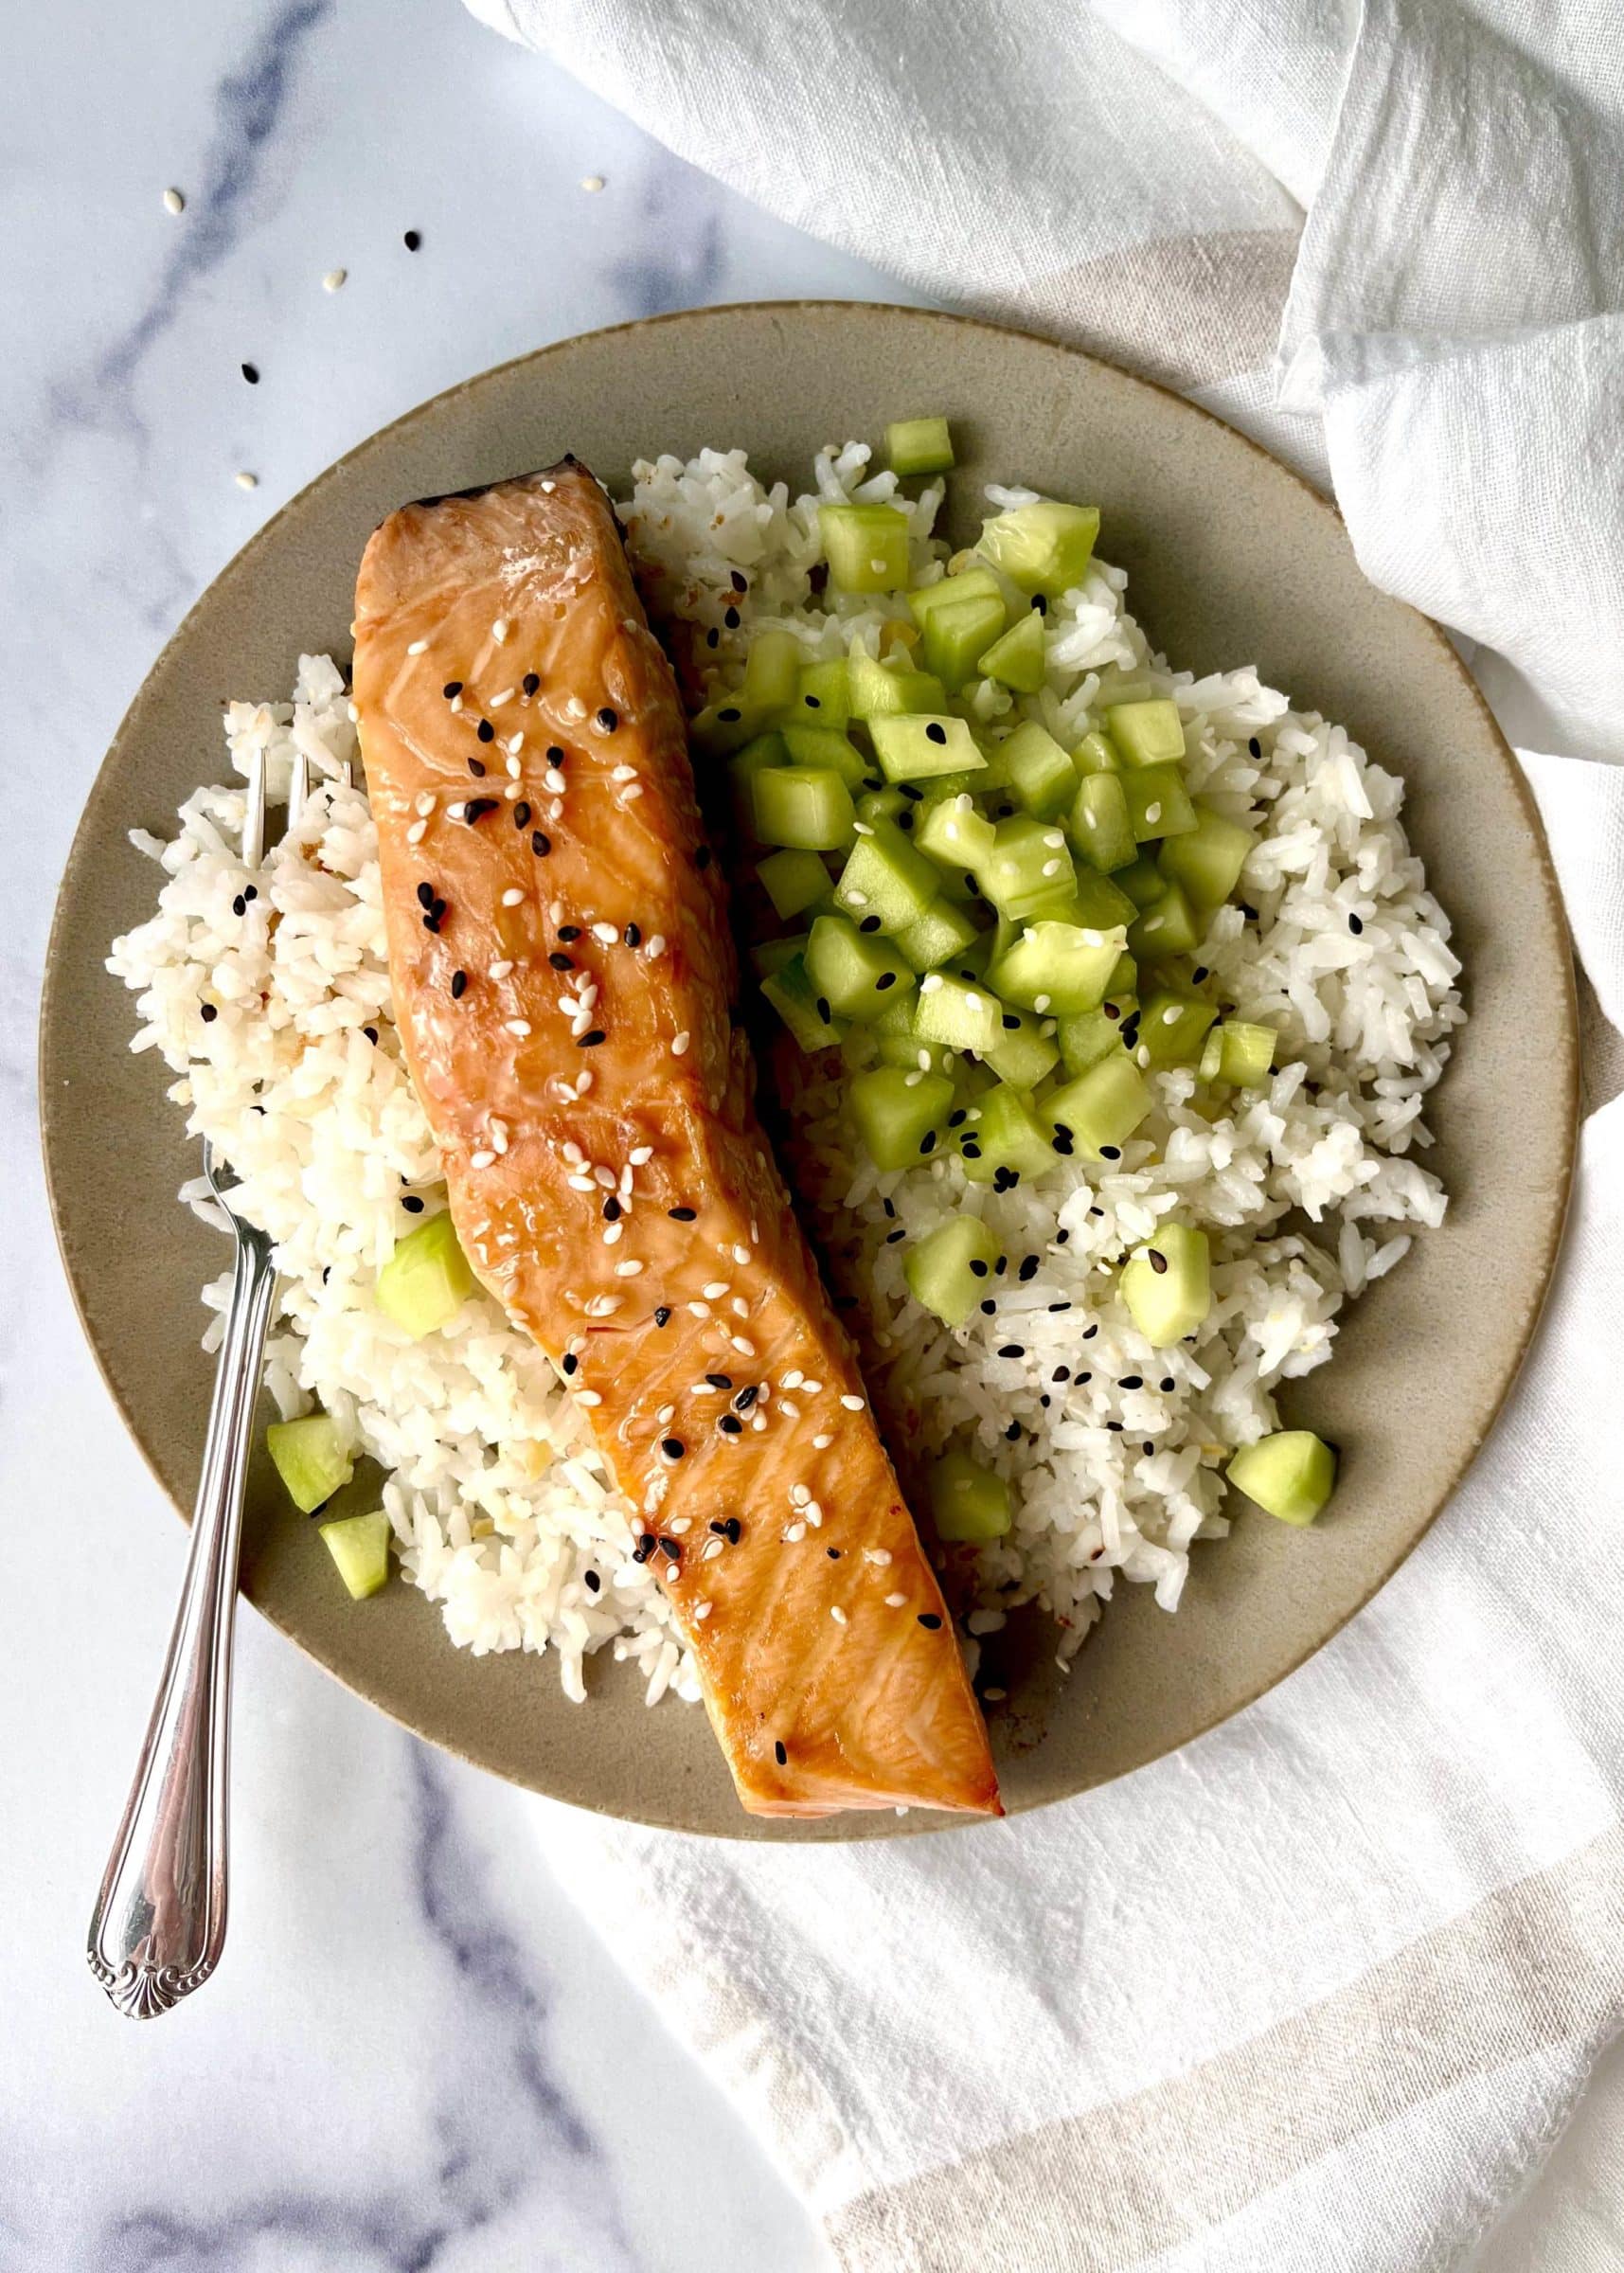
Roasted Salmon with Marinated Cucumbers and Ginger Rice
Sweet and tangy marinated cucumbers add a cooling crunch to this gingery salmon and rice bowl. Serve it with a sprinkle of sesame seeds and drizzles of toasted sesame oil for a nutty finishing touch.
Serves 4
Prep time: 15 minutes
Cook time: 30 minutes
1 large cucumber (about 10 ounces), peeled, seeded, and diced
¾ teaspoon sea salt
2 teaspoons extra-virgin olive oil
1 garlic clove, minced
1 teaspoon minced fresh ginger
1 cup jasmine rice, rinsed
1½ cups water
2 tablespoons rice vinegar
1 teaspoon cane sugar
4 (4-ounce) salmon filets
1 tablespoon tamari or soy sauce
2 teaspoons brown sugar
Sesame seeds, for garnish
Toasted sesame oil, for serving
- Preheat the oven to 400°F and line a baking sheet with parchment paper.
- Place the cucumbers in a medium bowl and toss with ½ teaspoon of the sea salt. Set aside while you start the rice.
- Heat the olive oil in a medium saucepan over medium heat. Add the garlic and ginger and cook, stirring, until fragrant, about 30 seconds. Add the rice and stir to coat in the oil. Add the water and the remaining ¼ teaspoon sea salt and bring to a boil. Reduce the heat, cover, and simmer until the water is absorbed, about 15 minutes. Turn off the heat and allow the rice to steam in the covered pot until you’re ready to serve.
- Meanwhile, prepare the cucumbers. Add the rice vinegar and the sugar to the bowl with the cucumbers and toss until the sugar dissolves. Chill in the fridge until you’re ready to serve.
- Pat the salmon filets dry and place them on the prepared baking sheet, skin side down. In a small bowl, stir together the tamari and brown sugar until the sugar dissolves. Brush the mixture onto the salmon filets, then bake until the salmon is just opaque and flakes easily, about 12 minutes.
- Assemble plates with a scoop of the ginger rice, a salmon filet, and spoonfuls of the marinated cucumbers. Garnish with sesame seeds and serve with drizzles of toasted sesame oil.

Chocolate Chip Zucchini Bread Pancakes
Warmly spiced with cinnamon and nutmeg and packed with shredded zucchini, these moist and fluffy pancakes taste just like zucchini bread! Serve them with maple syrup for a delicious breakfast or brunch. Tip: If you have lots of squash to use up, you can increase the zucchini to 1½ cups. The pancakes are great both ways.
Makes about 10 pancakes
Prep time: 15 minutes
Cook time: 20 minutes
1 cup all-purpose flour
½ cup whole wheat flour
2 teaspoons baking powder
½ teaspoon baking soda
Heaping 1 teaspoon cinnamon
Heaping ¼ teaspoon sea salt
¼ teaspoon nutmeg
1 cup almond milk, or any milk
¼ cup whole milk Greek yogurt
1 large egg
2 tablespoons neutral oil or melted butter, plus more for the pan
1 tablespoon maple syrup, plus more for serving
1½ teaspoons vanilla extract
1 cup shredded zucchini
½ cup chocolate chips
- In a large bowl, whisk together the all-purpose and whole wheat flours, baking powder, baking soda, cinnamon, salt, and nutmeg.
- In a medium bowl, whisk together the almond milk, Greek yogurt, egg, oil, maple syrup, and vanilla. Stir in the zucchini. Add the wet ingredients to the dry ingredients and mix until just combined. Fold in the chocolate chips.
- Heat a nonstick skillet over medium-low heat and brush lightly with oil. Use a ⅓-cup scoop to pour the batter into the skillet. Cook the pancakes until they’re puffed, cooked through, and golden brown on both sides, 2 to 3 minutes per side. Reduce the heat as needed if the outsides of the pancakes brown before they’re fully cooked in the middle. Serve with maple syrup.

Photo by The Modern Proper
Corn Fritters
From The Modern Proper
Crispy, buttery, savory, and sweet, these pan-fried fritters are a fun way to use sweet corn! This recipe calls for green onions, but you could easily sub in a couple tablespoons of minced Walla Walla onion.
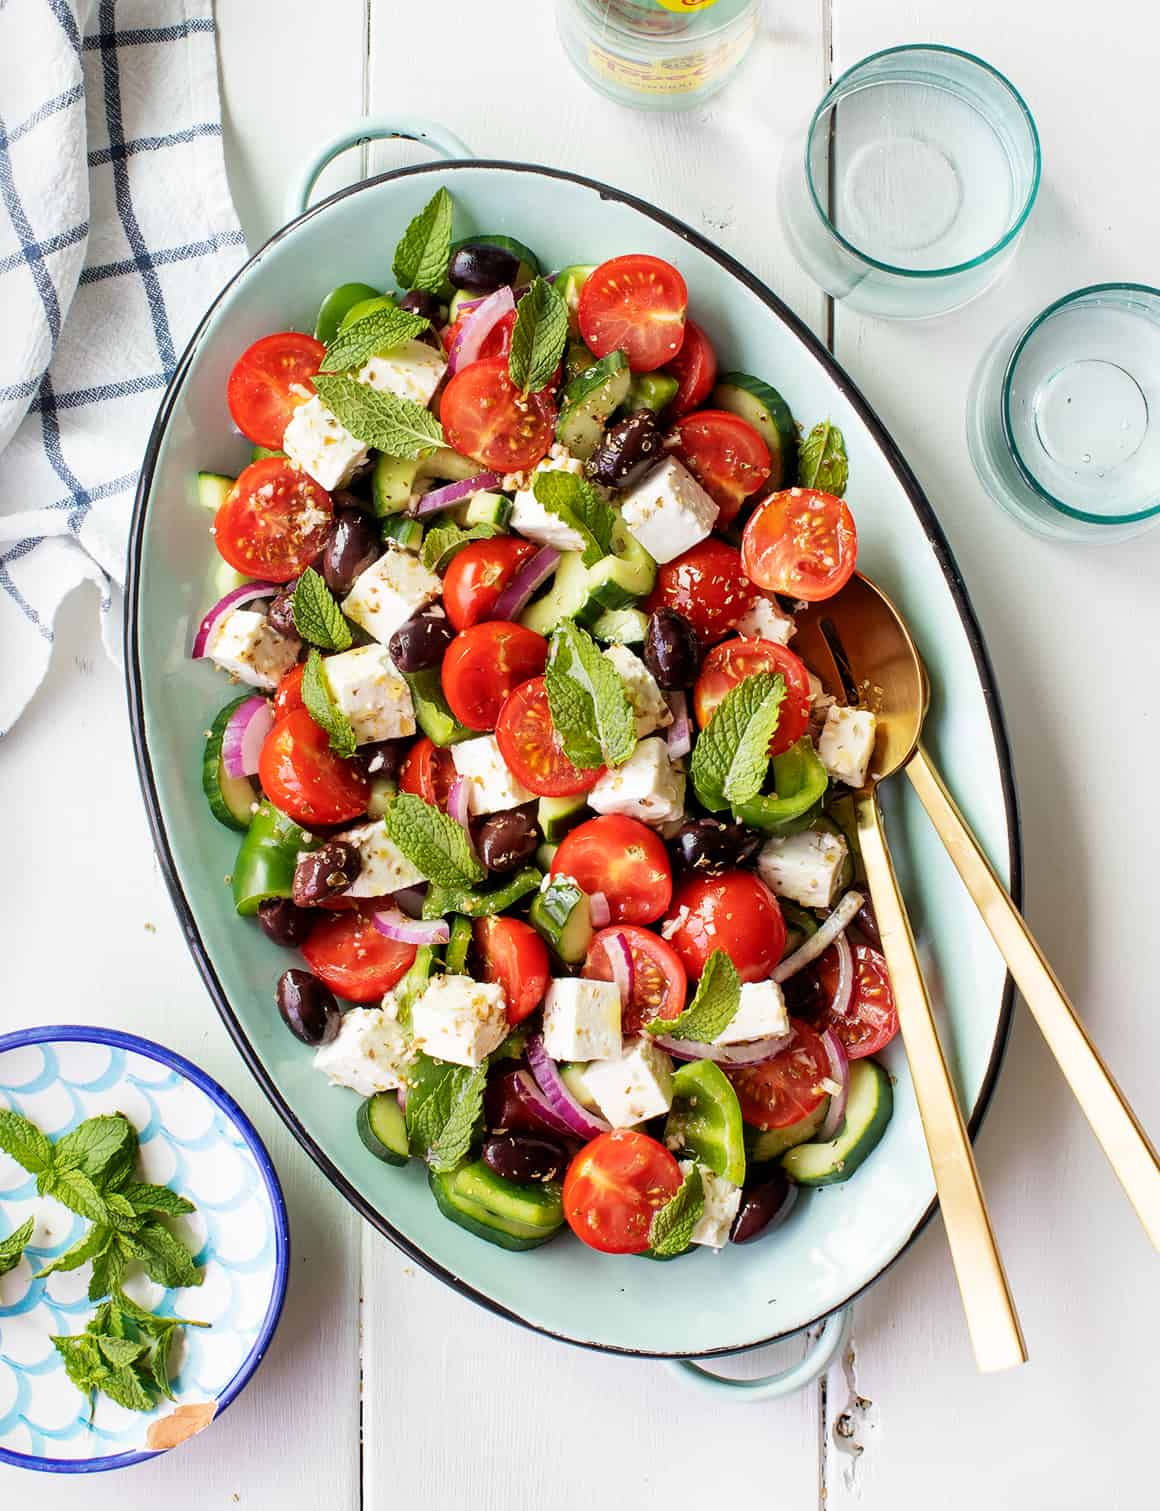
Photo by Jeanine Donofrio and Jack Mathews
Greek Salad
From Love & Lemons
This simple salad is a refreshing summer side dish, and it’d be a perfect way to use the cucumbers, peppers, onion, and cherry tomatoes in your box this week. Feel free to skip the mint. Thanks to the fresh veggies and punchy dressing, the salad has plenty of flavor without it.

Photo by Pinch of Yum
Sheet Pan Chicken Pitas with Tzatziki
From Pinch of Yum
Here’s another great way to use the peppers and cucumbers in this week’s box! In this easy sheet pan dinner, you’ll roast thinly sliced peppers and spiced-up chicken breast and serve them in pitas with diced cucumber, onion, and creamy cucumber tzatziki.
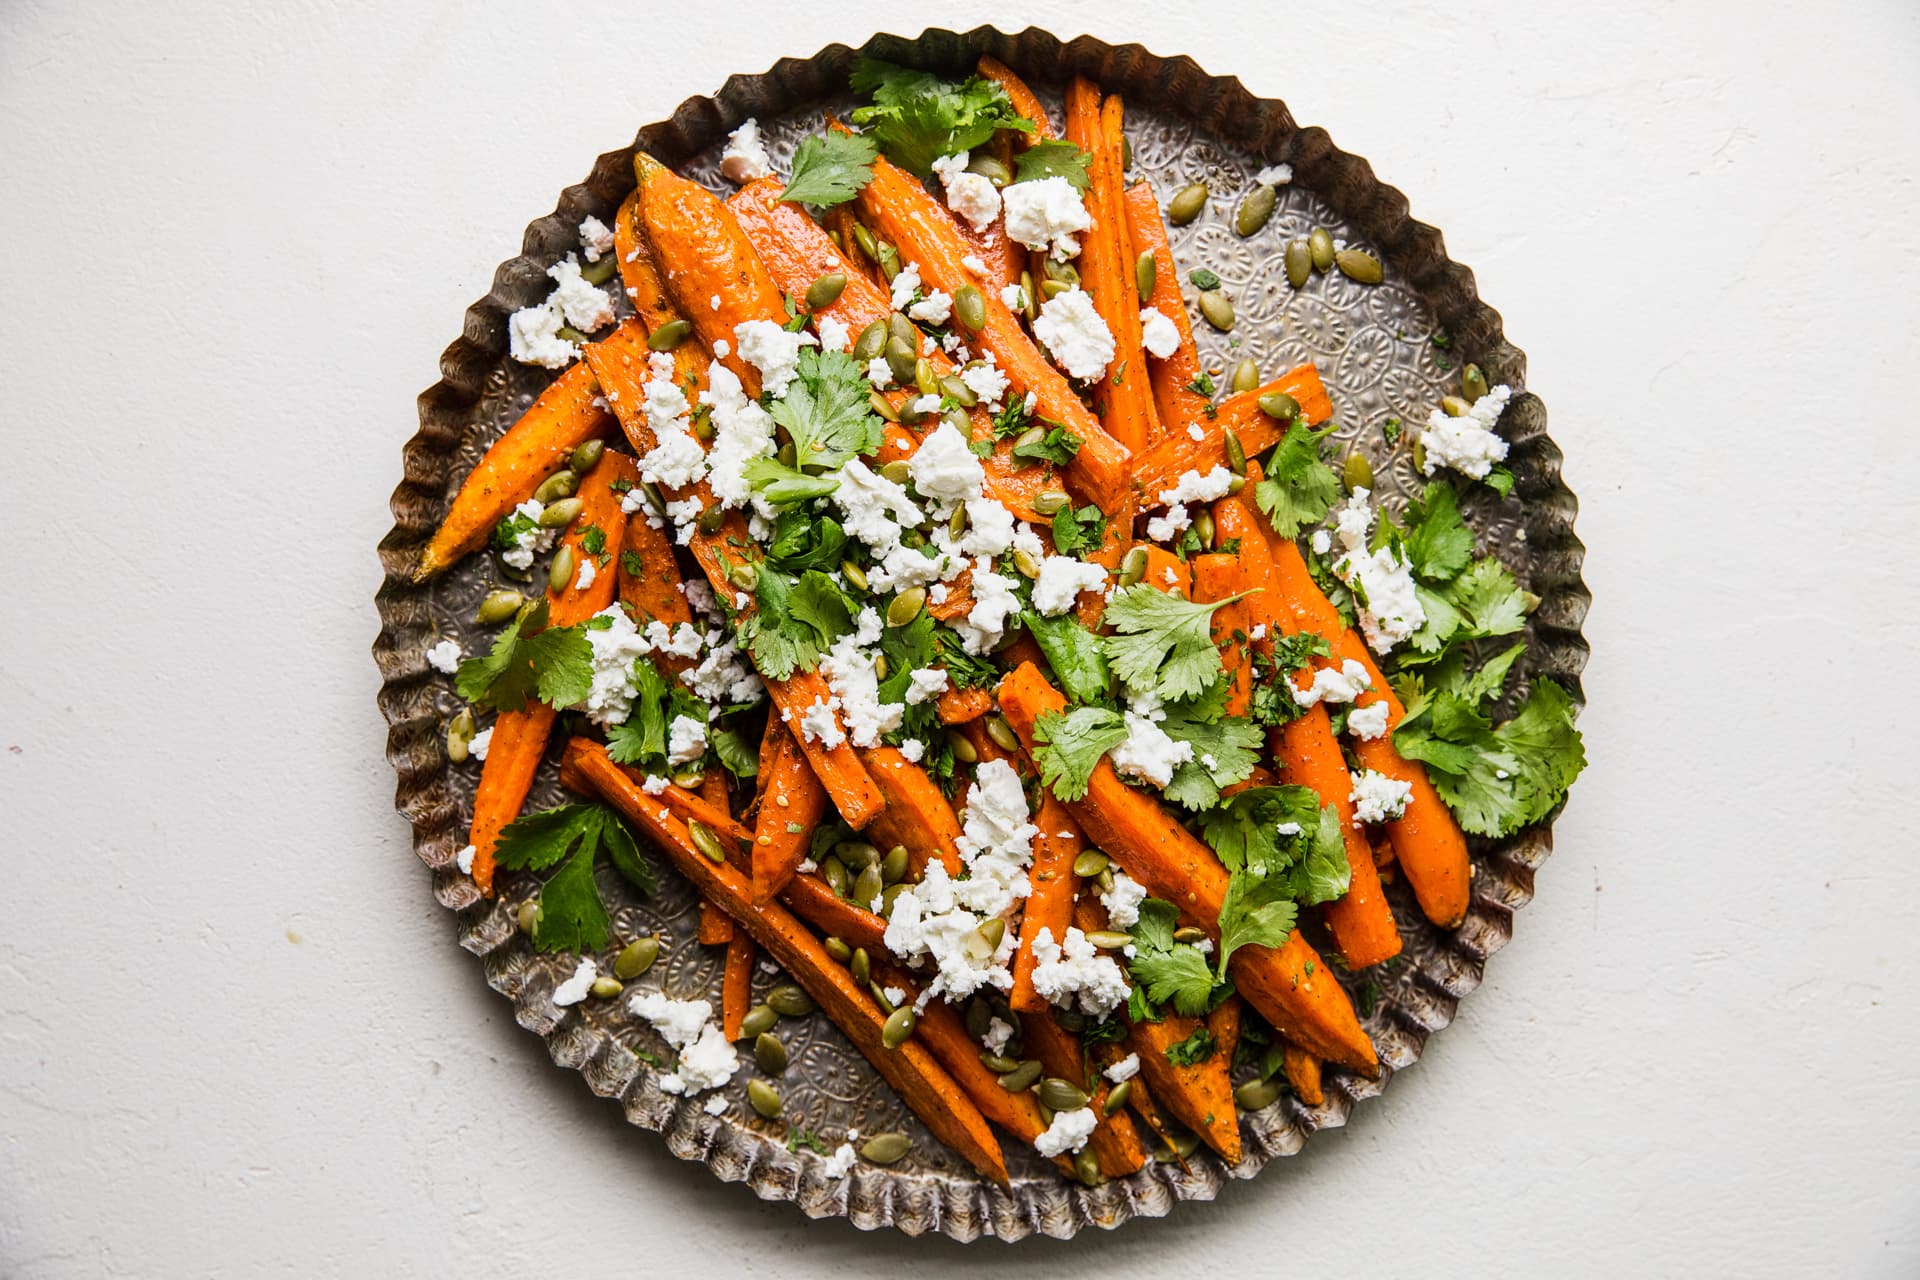
Photo by The Modern Proper
Za’atar Roasted Carrots with Feta and Pumpkin Seeds
From The Modern Proper
Za’atar, a Middle Eastern spice blend, adds bright, earthy flavor to these simple roasted carrots. Dress them up with feta and toasted pumpkin seeds for tang and crunch.
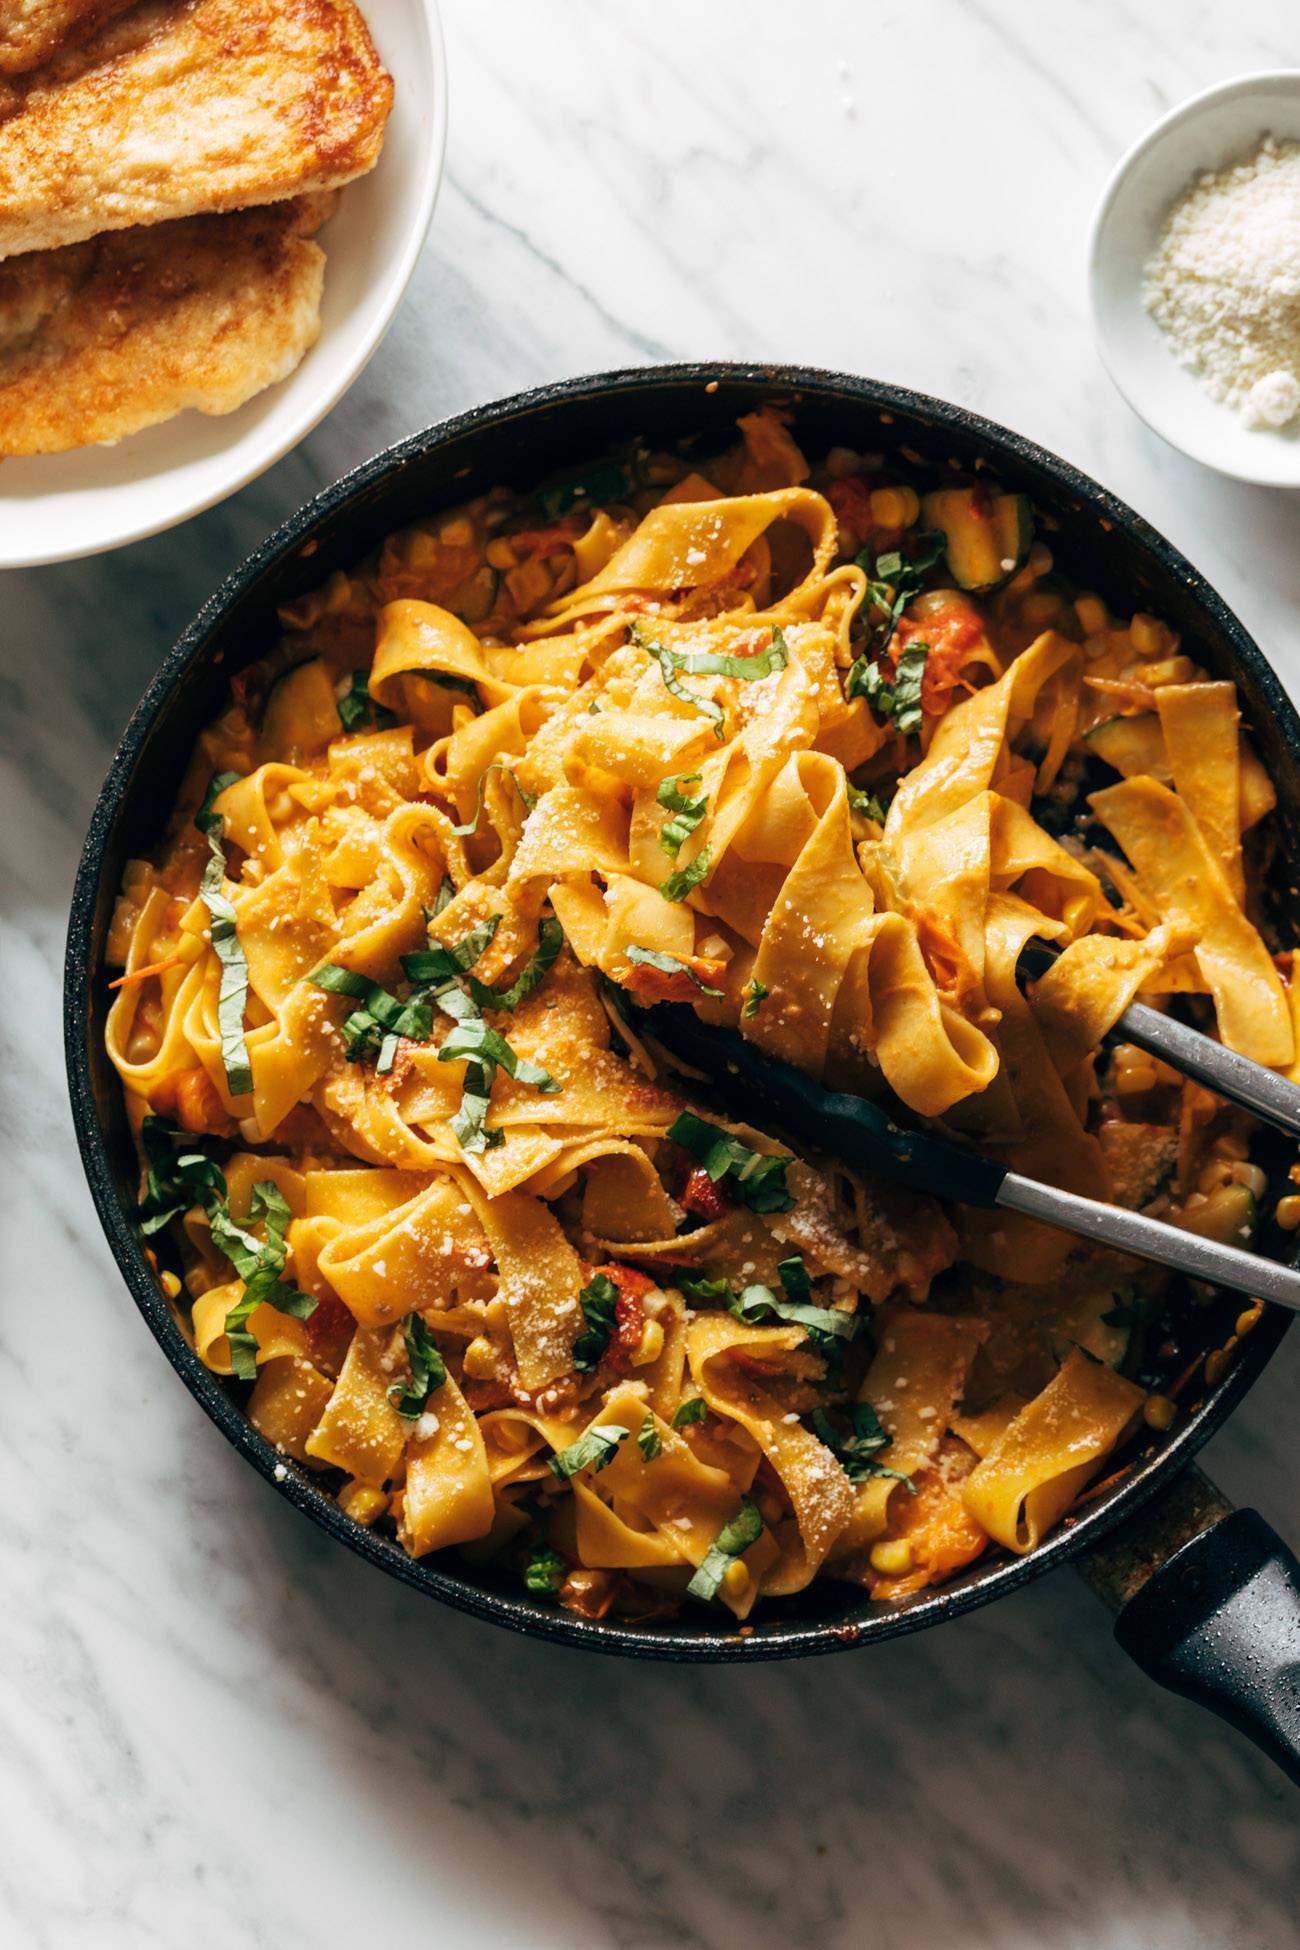
Photo by Pinch of Yum
Burst Tomato Pappardelle with Zucchini, Sweet Corn, and Pan-Fried Chicken
From Pinch of Yum
Burst cherry tomatoes, lemon, and a touch of cream create a light, flavorful sauce for this summery veggie pasta. The chicken here is totally optional – for a vegetarian take on this recipe, feel free to skip it!

Photo by Jeanine Donofrio and Phoebe Moore
Carrot Ginger Dressing
From Love & Lemons
Potentially my all-time favorite salad dressing! Made with roasted carrots, fresh ginger, and rice vinegar, it’s creamy, zingy, and super refreshing. Toss it with salads, drizzle it over a grain bowl, or use it as a dipping sauce for spring rolls, sushi, or grilled or roasted veggies.
Week #10; Sweet corn!
- On: July 27, 2022
- 0
We are enjoying the cooler weather which arrived just in time for the first sweet corn harvest. When picking corn on hot days, it’s like a sauna between the rows. This week’s harvest was straightforward, a good training experience for our newer crew members. See my notes on this week’s corn in the Veggie List & Notes section below. Many ears have bugs or bug damage at the tip so I advise cutting off the tips before you shuck the corn. That way, you never even see the bugs or damage. Check our Veggie List & Notes section each week, and I’ll give you an update for that week’s batch of corn.
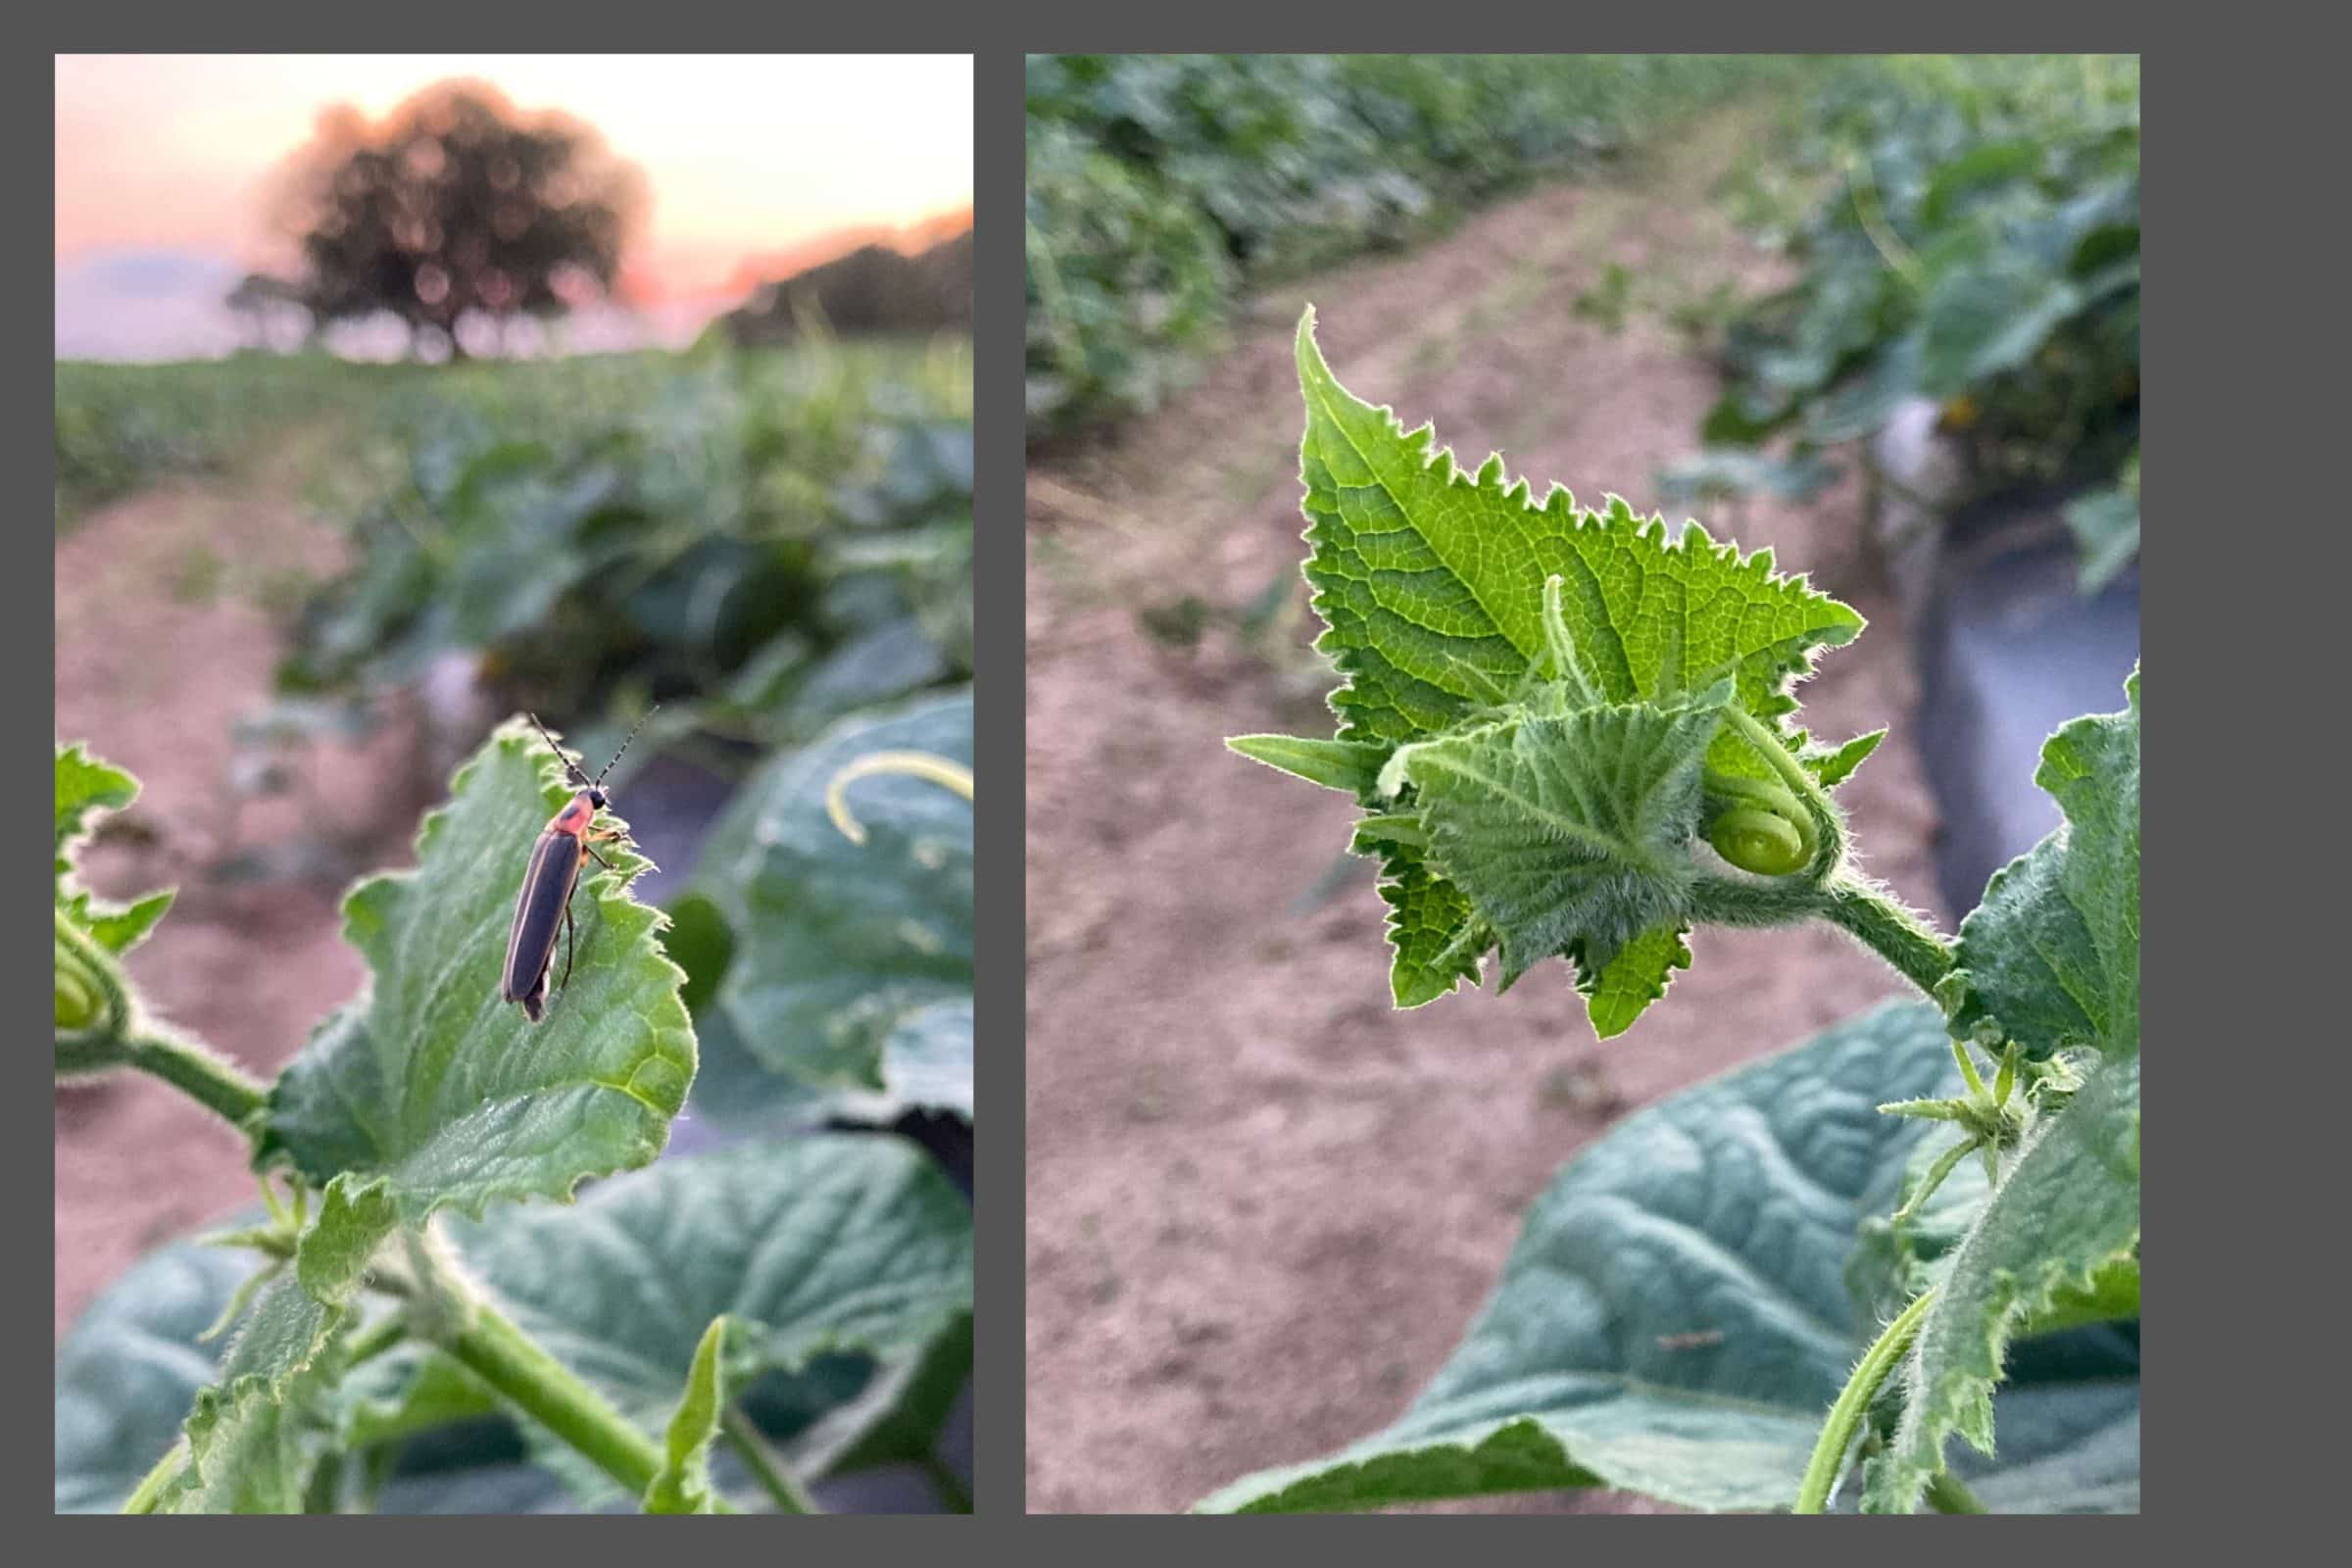 I took an evening walk to our current cucumber field and sat among the rows as the sun set. It’s a beautiful spot, open to the west and the setting sun. As I sat quietly, lightning beetles crawled to the top of the leaves, preparing for their evening show. It was a lovely moment.
Steve’s surgery
Two weeks ago, Steve had hernia-repair surgery. The surgery went well but he ended up with a ‘paralyzed intestine’ (paralytic ileum) which has made recovery more complicated and prolonged than expected. He is improving now but it’s been a rough two weeks. Everyone pitched in so he could rest and recover. Haha, that is not in his nature.
We are hiring
We have several openings for farmhands to replace crew members who are returning to school. We offer valuable work in a safe, friendly, outdoor environment, and send you home with lots of healthy produce! Please help us spread the word. Learn more and apply at our employment page .
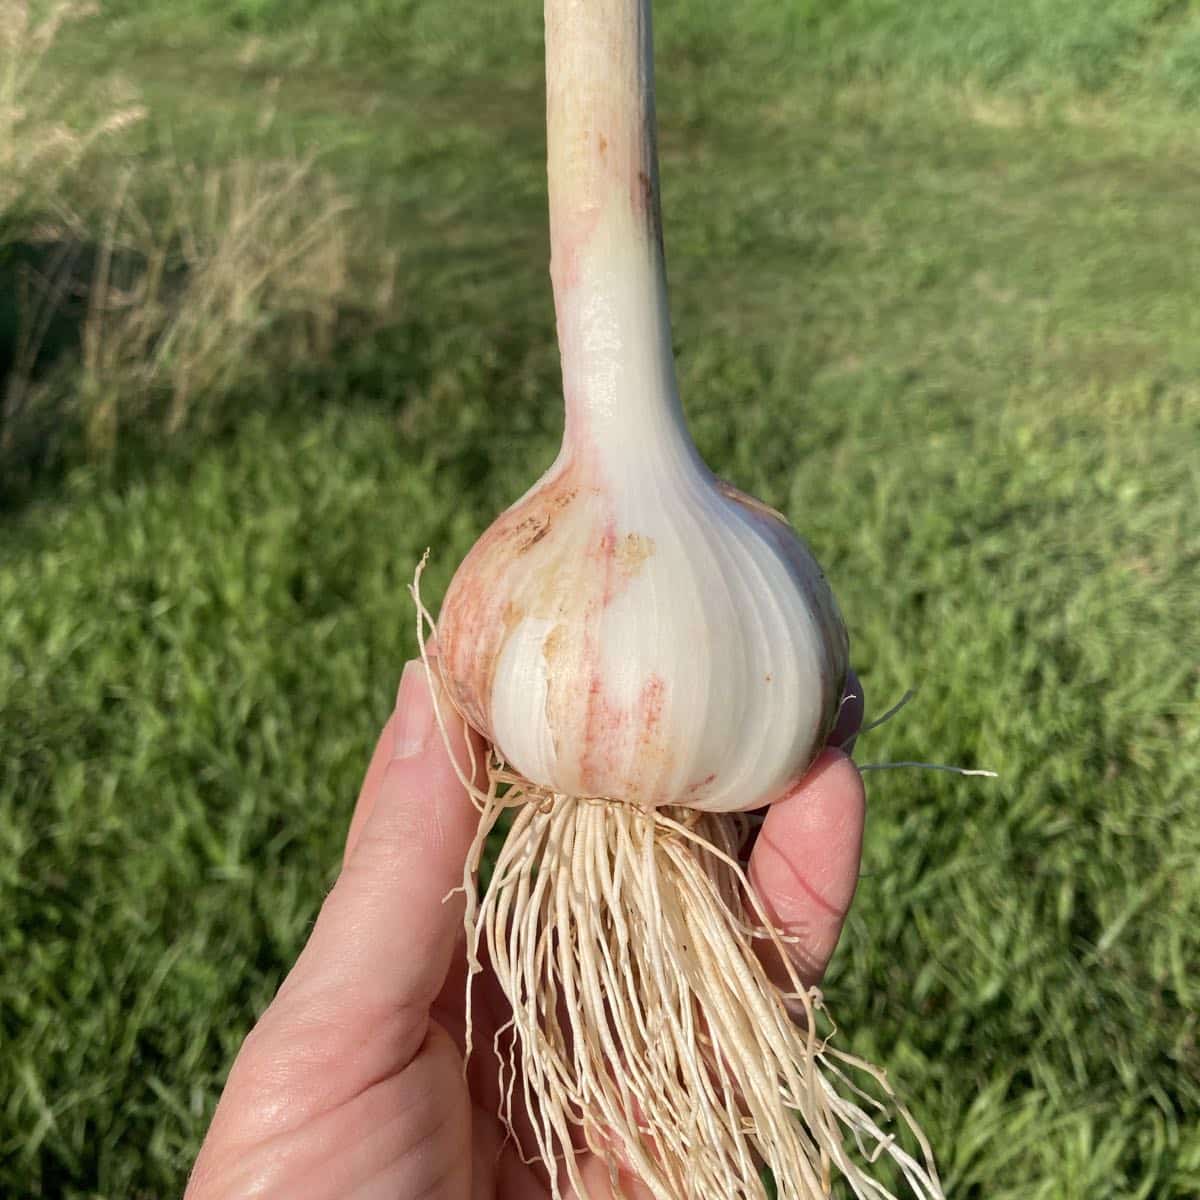
Fresh garlic
Everyone gets a bulb of freshly dug ‘Korean Red’ garlic. We are in the midst of harvesting garlic to cure for later boxes but paused to harvest and clean enough for this week’s delivery. Fresh garlic is special: crunchy and strongly flavored. I advise refrigerating this fresh bulb for easy peeling. You can leave it at room temperature, but the cloves become difficult to peel as the garlic dries and cures. In about one month, they loosen enough to peel but for now it’s best to refrigerate and eat it soon.
Beth
Veggie List & Veggie Notes
Week #10, July 28/29, 2022
– Weekly shares
– EOW/ purple
– Sampler/ sun
Sweet corn, 8 ears?
Muskmelon, 1 large or 2 small
Carrots, 2 lb
Green beans, 0.9 lb
Zucchini &/or Zephyr squash, ~ 2 to 3 pieces
Cucumbers, ~3
Walla Walla onion
Fresh garlic, 1 bulb
By site: A box of cherry tomatoes OR a small bag of slicing tomatoes.
Next week’s box will probably contain sweet corn, carrots, tomatoes, sweet onions, etc.
Sweet corn – Now it’s summer! This is a very tasty batch of corn.
Advice about bugs. This is organic sweet corn. Many ears have bugs or bug damage at the tip. I suggest cutting off the tips before shucking the corn. Sweep the trimmed tips into the compost and you will never see the bugs.
Storage. Sweet corn is best when fresh, so we encourage you to eat it asap. Store in the refrigerator, in the husks if you have the room, or husked in a plastic bag.
Cooking. It is quicker to steam sweet corn than to boil it.
1.) Stand ears of corn upright in a tall pot. Put one inch of water in the pot.
2.) Bring the water to a boil. If the corn is cold when you begin cooking, steam for 5 – 6 minutes. If the corn starts at room temperature, steam for 4 – 5 minutes. The cooking time will vary somewhat depending on how many ears are in the pot. Pay attention to how the corn smells. The scent changes once the corn is ready. Another clue: water will bead on the corn until it is cooked. Don’t overcook it.
Muskmelon – Some are ripe and ready to eat. Some need to ripen a day or two on your kitchen counter. Keep at room temperature but refrigerate if not eaten within 2 days.
Green beans – Storage: Store in the warmest part of your refrigerator.
These beans are a little past their prime maturity. You may find a few that are overripe and need to be tossed. Look for beans that are bulging or floppy or puffy with larger beans inside. Throw those away and keep the rest. We’ve looked them over carefully but now it’s your turn. With last week’s heat, we just could not keep up with the speed of bean growth.
Carrots – Refrigerate in the bag.
RECIPES by DEB
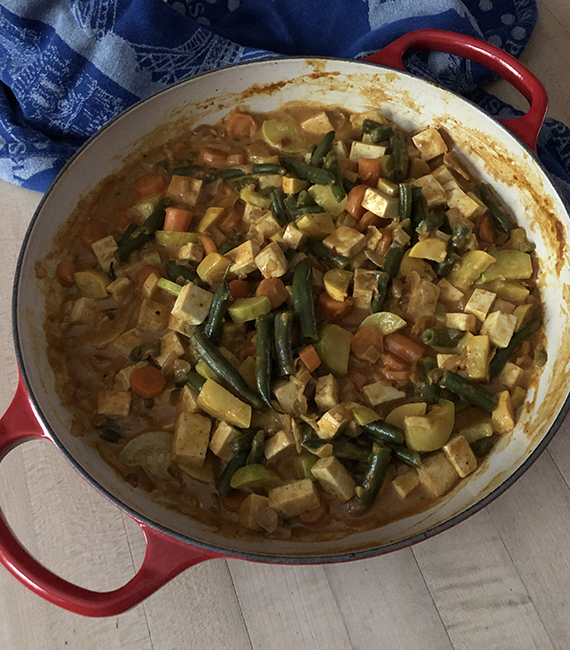
Photo by debslunch
Summertime Vegetable Curry
This recipe uses green beans, carrots, and yellow squash from this week’s box, but feel free to adapt to what you have – you will need approximately 6 cups of chopped vegetables altogether, not counting the onions.
Takes about 45 minutes
Serves 6
4 tablespoons coconut oil or olive oil, divided
1 (14-oz.) package firm or extra-firm tofu, patted dry, cut into cubes
a few generous pinches of kosher salt, and freshly ground black pepper
2 cups of chopped onions
a 2-3 inch piece of fresh ginger, peeled and grated
2-3 cloves of garlic, smashed and chopped
2 teaspoons curry powder
1 teaspoon garam masala
1/2 teaspoon each: ground cumin, turmeric, and coriander
1/4 cup tomato paste
1/4-1/3 cups water
a heaping cup of peeled and sliced carrots
8-12 ounces green beans, rinsed, trimmed, and cut into 2 inch pieces – heaping 2 cups
1 (13.5-ounce) can of unsweetened coconut milk – full fat preferred, but lite works
2 large summer squash or zucchini, rinsed, quartered longwise, and cut into chunks – heaping 2 cups
More salt & pepper to taste
Optional garnishes: Lime wedges, cilantro leaves, and coarsely chopped, salted, roasted peanuts
Optional: serve with white or brown rice, chutney, and plain yogurt
- If you’re serving the curry with rice, start the rice first.
- Heat 2 tablespoons of the coconut oil in a wide deep skillet or braiser with a lid. Add the tofu cubes, season with salt and pepper, and fry for about 10 minutes over medium heat, flipping the cubes a few times, trying not to break them up too much, until they’ve gt a little color. Remove to a paper towel lined plate to drain.
- Wipe out the pan if necessary (I didn’t) and add the remaining 2 tablespoons of the coconut oil. Over medium high heat, add the onions and another couple of pinches of salt, and stir to coat with oil. Cook the onions for 2-3 minutes, then add the ginger and garlic, curry powder, garam masal, ground cumin, turmeric, and coriander. Continue to cook until the spices are fragrant and the onions, ginger, and garlic are softened, 5-10 minutes. If things start sticking add two tablespoons of the water.
- Add the tomato paste and the water, and stir until saucy. Add the carrots and the green beans, cover, reduce the heat, and simmer until softened, about 10 minutes. Again, add a little more water if things start to stick.
- Add the coconut milk and mix well. Add the squash, stir and cover and cook for another 10 minutes, until the squash are cooked but not mushy. Taste for salt and serve with the optional garnishes and rice.
.
.

Photo by debslunch
Corn, summer squash, and chorizo tacos
Leftover taco filling can be combined with rice to make a tasty casserole, and could also be used in stuffed squash or zucchini boats.
Takes about 30 minutes
Serves 6-8
1-2 tablespoons vegetable oil
1 pound chorizo, bulk or removed from casings, or turkey chorizo
1/2 cup chopped onion
4 cloves garlic, smashed and chopped or put through a press
One large or two smaller yellow summer squash, cut into 1-inch chunks
2 cups fresh corn kernels, cut from 2-4 ears of corn
1/2 teaspoon ground cumin
1/2 teaspoon dried oregano
Optional: 1/2 cup chopped cilantro
salt to taste
Corn or flour tortillas, warned in the oven or microwave
Optional toppings:
Grated cheddar cheese, or pepper jack, or mozzarella
avocado, pitted and sliced
Salsa or pickled jalapeños – or both!
Quick pickled purple onions (here’s one recipe)
Coleslaw or sliced cabbage
Sour cream
- Heat 1 tablespoon of the oil on medium-low heat in a large skillet. Add the chorizo and cook until it’s no longer pink and starting to brown, crumbling with a spoon or spatula, about 7-10 minutes. If you’re using pork chorizo, remove the meat to drain and wipe out the skillet. Less-fatty turkey chorizo can stay in the skillet.
- If you have an empty skillet add another tablespoon of oil, and then the onions, garlic, squash, and corn. If you’re using turkey, simply add the veggies to the meat. Either way, cook until the veggies are softened.
- Add the meat back into the pan (if necessary). Add the cumin, organo, and salt to taste. Cook until the meat is browned. Transfer the filling into a serving dish, and arrange the tortillas and topping around it on the table, so everyone can roll up their own tacos.
.
.
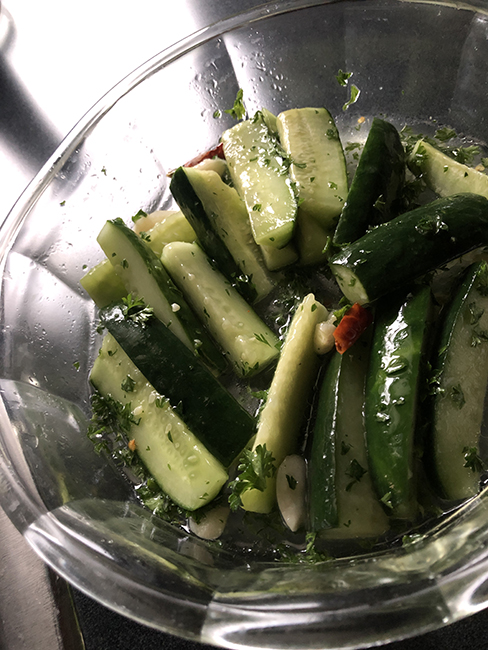
Photo by debslunch
Quick cucumber pickle spears – or salad
This recipe based on one from Olia Hercules’ Mamushka only uses one to two cucumbers at a time – but is easily doubled. I was amazed at how quickly this procedure transforms cucumbers into pickles and then found myself adding them to all type of sandwiches – including peanut butter! – and packing them in my lunch for a side.
10 ounces slicing cucumbers – about 1 large or two small
1 teaspoon fine sea salt
2 teaspoons sugar
4 teaspoons cider or white wine vinegar – about 1 slightly overflowed tablespoon
1 dried red chile
2 cloves garlic, smashed and peeled
2 tablespoons vegetable oil
1 tablespoon chopped parsley or dill
- Trim the cucumber and slice lengthwise into long wedges. Arrange the wedges in a shallow dish. If you’d like more of a salad, chop the cucumber into bite size chunks.
- Sprinkle the cucumbers with the salt and sugar, and pour in the vinegar. Add the chile, toss, and cover and refrigerate for 30 minutes.
- Toss the wedges with the oil and chopped herbs and serve.
.
.
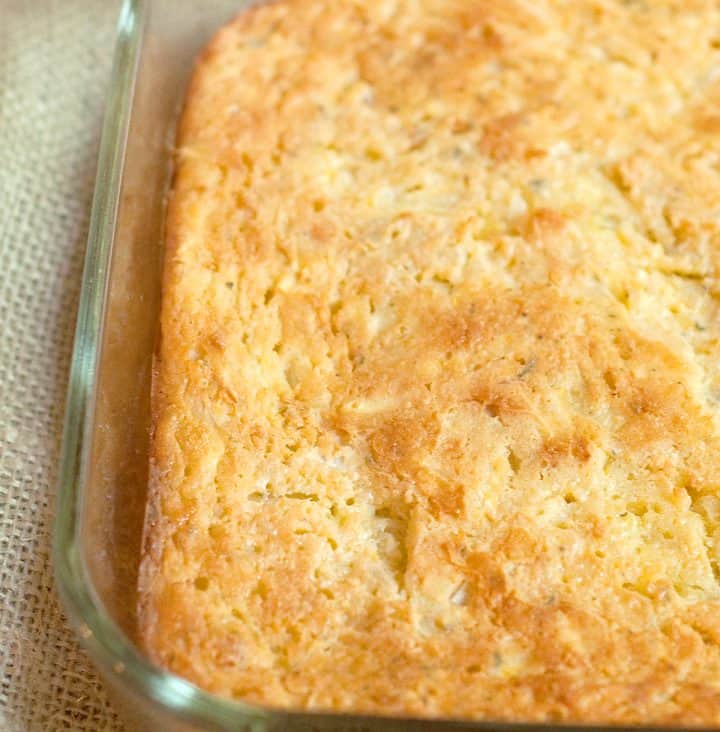
Photo by Lana
Summer Squash Cornbread Casserole
From Lana’s Cooking
This recipe produces a cornbread that is really moist – not quite a spoonbread, but close. When I tested it, I reduced the cooking time to about 45 minutes. I tried the cheddar and jalapeño variation, and it’s delicious. If you don’t want to use cornbread mix, sub 2/3 cup flour, 1/2 cup cornmeal, 3 tablespoons sugar, and 2 teaspoons baking powder.
.
.
 Photo by Deb Perelman
Corn Salad with Chile and Lime
From Smitten Kitchen
Deb Perelman, a.k.a. Smitten, describes this salad as inhale-able. Try it out and see if that’s an exaggeration! The recipe calls for Tajín seasoning – you can substitute chili powder.
.
.
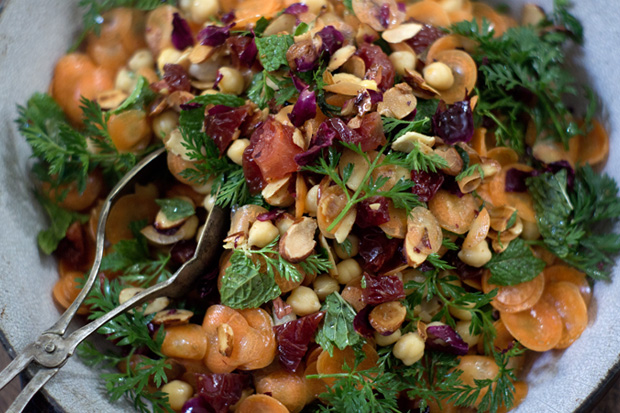
Photo by Heidi Swanson
Moroccan Carrot and Chickpea Salad Recipe
From 101 Cookbooks
If you, like me, don’t have fresh mint, but still have lots of parsley from prior week’s boxes, feel free to sub it for the mint.
.
.
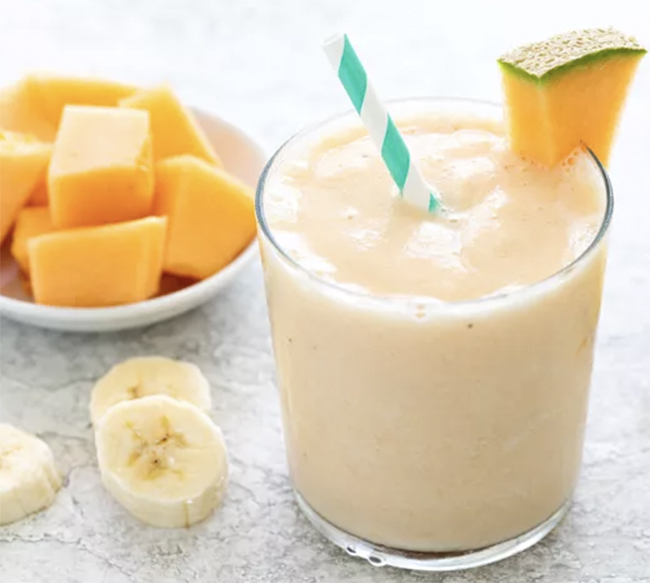
Photo by Jessica Gavin
Cantaloupe (or muskmelon) Smoothie
From Simply Recipes
This creamy melon smoothie uses 1 cup of melon chunks to make one smoothie – so there’ll still be plenty to eat plain!
Week #9; Lingering pandemic cr@p
- On: July 20, 2022
- 0
Here’s a pandemic wrinkle. After years of bottling our tomatoes into juice at a local processor, we can no longer find anyone to do that for us. Our old processor has dropped their small accounts, including us. Our tomato juice project is too small for most processors to deal with. Even if we could get on a new shop’s schedule, costs have risen to an unsustainable high, eg $15 per bottle! The cost of glass bottles went up dramatically, as well as labor, fuel, etc. This is a familiar story by now.
We have enough juice for about half the sites. The remaining sites get a muskmelon plus a half pint of cherry tomatoes. I call that a pretty even deal.
We remain short-handed (our biggest pandemic issue) but have chosen to be super-strategic with our time, and feel we are pulling off our usual nice boxes. This week’s basil has more insect damage than usual, mixed in among undamaged leaves. I leave it to you folks to trim off and discard the damaged leaves.
For years, I have walked our basil fields each morning, carrying pails of soapy water to drown Japanese beetles. Ari reminds me that I used to pay him 50 cents to help. (Those days are over.) If we do this every morning, the beetles do not congregate in the basil field and the basil is protected. Obviously, I do not have time for that any more. Really. Instead, we planted an overabundance of basil, some for the beetles and some for us. Unfortunately, I think every Japanese beetle in the county is in that basil field right now.
Anyway, my new strategy is staggered pruning. The beetles do most of their damage to older plants, so keeping parts of the fields in fresh growth should help. I will outwit these pests.
Let’s forget all that and focus on this week’s produce! Look at that summer list! Green beans, broccoli, zucchini and cucumbers, sweet onions, early peppers, basil, the first melons, etc etc. Surely, summer is everyone’s favorite garden season. Soon there will be sweet corn and the first tomatoes.
This is a lovely box and I hope you enjoy it.
Beth
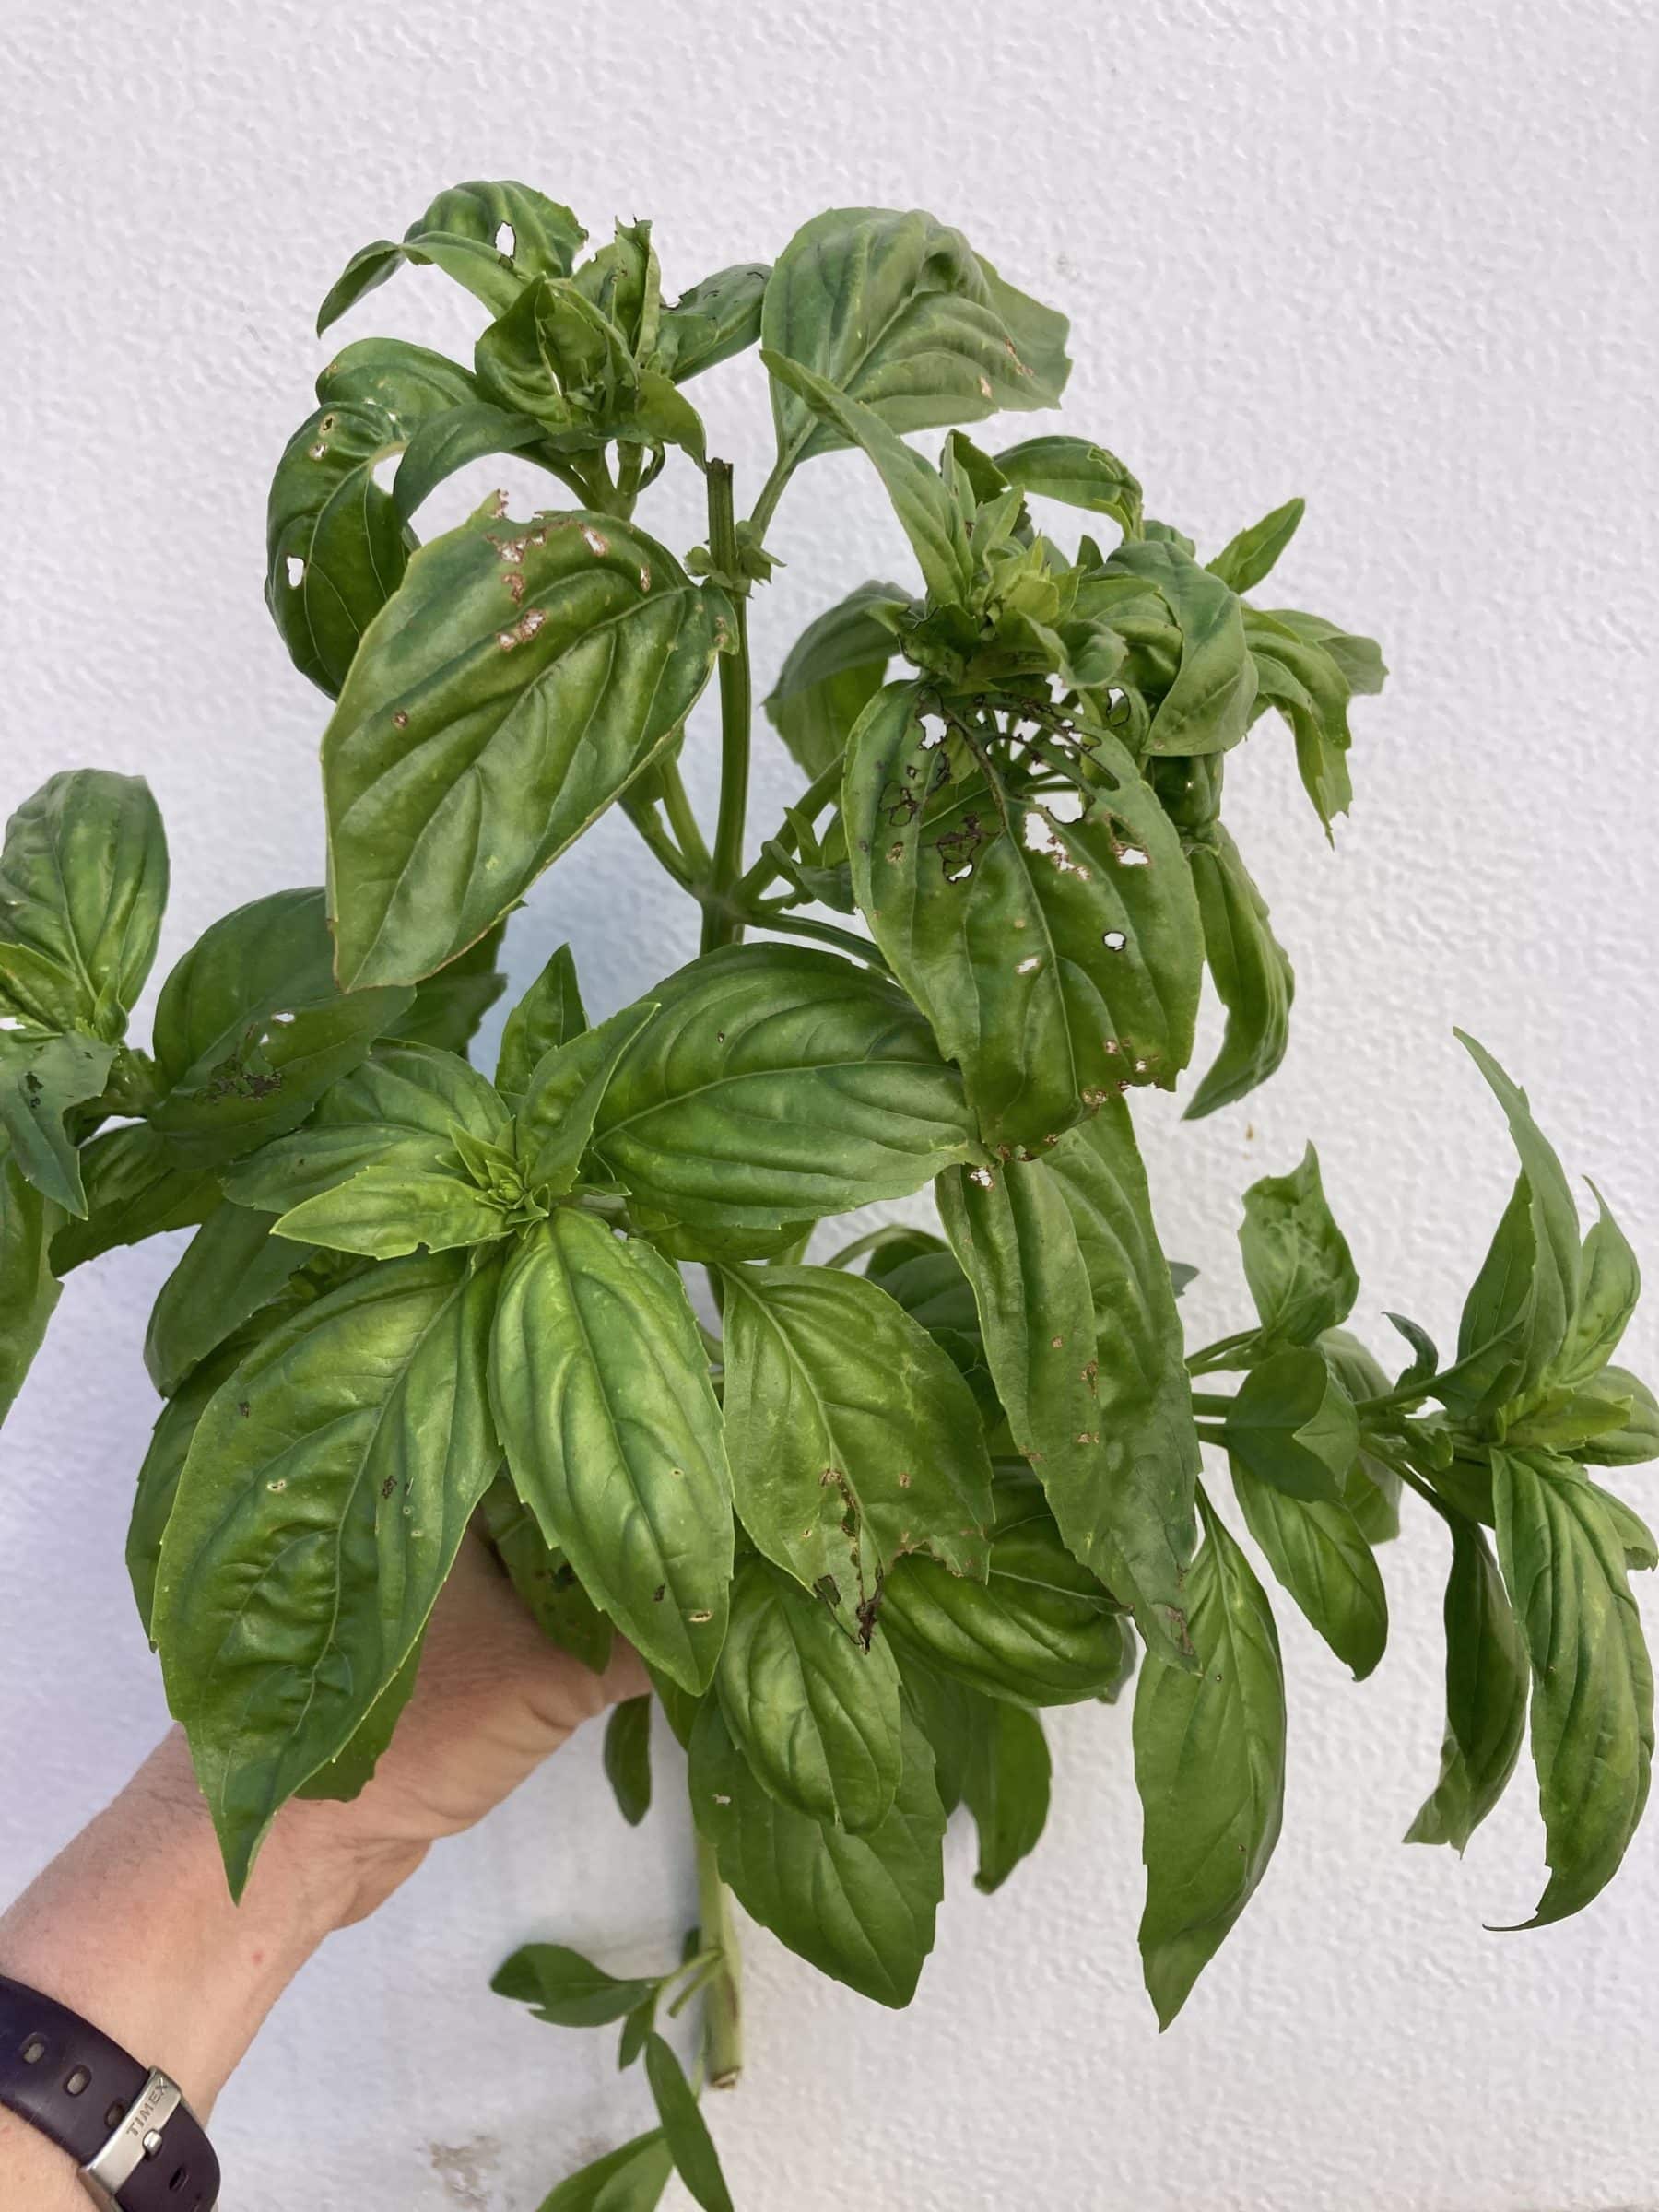
Most of this basil is very nice. Just pluck off the beetle-damaged leaves, the ones with holes. They tend to feed at the top of the plant, leaving the tender side shoots alone.
Veggie List & Veggie Notes
Week #9, July 21/22, 2022
– Weekly shares
– EOW/ green
Green beans, 1.5 lb
Broccoli, ~1.8 lb
Green bell pepper, 1
Zucchini &/or yellow squash, ~2.5 lb
Cucumbers, 3 or 4
Walla Walla onion, 1 or 2
Basil
By site, a small red bibb lettuce OR small parsley bunch
By site, everyone gets something special:
Tipi tomato juice OR the first muskmelons + a half pint cherry tomatoes
Next week’s box will probably contain sweet corn, melon, cabbage and other summer favorites.
Green beans – Storage: Store in the warmest part of your refrigerator.
Broccoli – This broccoli field is doing great! It’s difficult to grow spring broccoli on our sandy soils, so we’re glad for the nice harvests. If your broccoli appears wilted, submerge in cold water for 15 minutes and it will perk up. Hot weather is hard on broccoli so sometimes they need that cold water soak. Storage: Refrigerate.
Cucumbers are still abundant and quality remains very high. What a beautiful, amazing field.
Tipi tomato juice – Drink the juice or try making an easy soup with vegetables from your CSA box, with zucchini, Walla Walla onion and basil.
Storage: Store the juice out of sunlight at room temperature when unopened. Refrigerate after opening. The juice is already seasoned so do not add salt if you cook with it.
Ingredients: organic tomatoes from Tipi Produce, salt, organic garlic, organic onion, organic black pepper. Nutritional information is posted here.
Muskmelon – Most are ripe and ready to eat. Some need to ripen a day or two on your kitchen counter. Keep at room temperature but refrigerate if not eaten within 2 – 3 days.
RECIPES by DEB
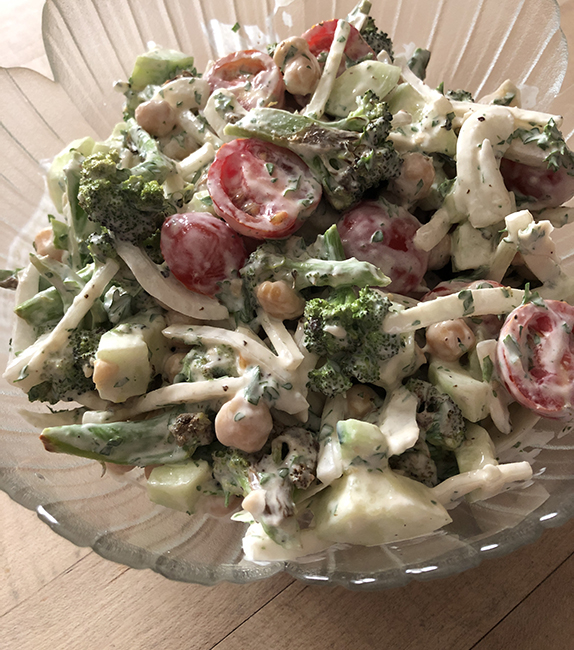
Photo by Deb Shapiro
Creamy Roasted Broccoli and Cucumber Salad
I’ve added cherry tomatoes to this salad, even though we haven’t gotten any in the box this week, because they’re coming into season at farmers markets right now – feel free to omit the tomatoes if you don’t have any – I’m sure we’ll be enjoying them in future boxes!
Takes about 30 minutes
Serves 4 as a side dish
one large stalk of broccoli cut into florets, including some stem slices – about 2 1/2 cups
1-2 cloves of garlic, separated from the head but not peeled
1 tablespoon olive oil
1/2 cup thinly sliced sweet onion, such as Walla Walla
one cucumber, peeled, seeded and cut into chunks – about 1 1/2 cups
1 cup garbanzo beans, drained and rinsed
12 cherry tomatoes, halved
1/3 cup sour cream
1/4 cup mayonnaise
1 tablespoon tahini
2 tablespoons lemon juice, plus more to taste
1 teaspoon sugar
1/4 cup chopped fresh herbs, such as basil or parsley
salt and freshly ground black pepper
- Heat the oven to 400°. Place the onion in a small bowl and cover with cold water, and let it soak while you prepare the other veggies.
- Arrange the broccoli on a baking sheet, drizzle with oil, and season with salt and pepper. Add the garlics and toss well. Roast for 15-18 minutes until the broccoli is tender and starting to show some char, and the garlic is soft. Set aside to cool.
- Combine the cucumber, garbanzo beans, and cherry tomatoes in a bowl large enough to allow for mixing.
- Measure the sour cream, mayonnaise, and tahini into a small bowl or spouted glass measuring cup. Squeeze in the garlics, add the lemon juice and sugar, and whisk well. Season to taste with salt and pepper.
- Add the cooled broccoli to the bowl, pour in the drssing, add the herbs, and mix well. Taste to see if it needs more lemon or salt. Serve right away or chilled.
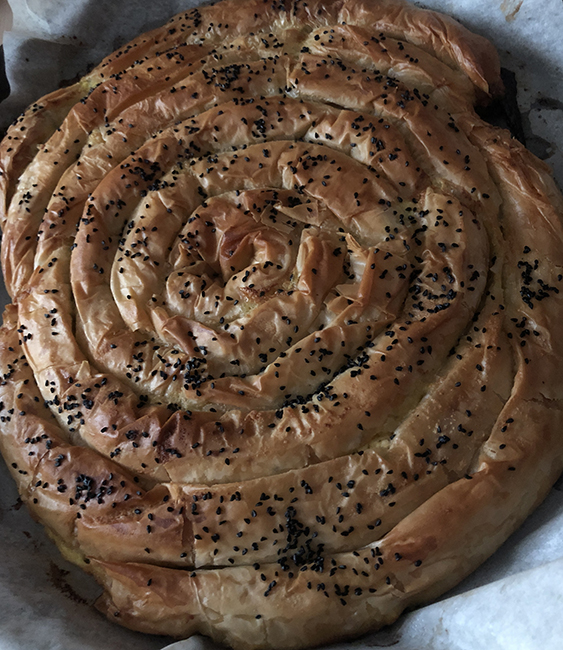
Photo by Deb Shapiro
Spiral Zucchini Pie
Working with fillo (or phyllo) can be a bit tricky, but the results are worth it. You can make the pie as one big spiral as shown, or as individual spirals – you will get about a dozen that way. The pie can be eaten hot or at room temperature, and it uses a lot of zucchini! You can serve the pie with tzatziki, a cucumber yogurt sauce, if you like.
Takes about an hour
Serves – many!
One 1-pound box of fillo dough, thawed and at room temperature. The box has two packs inside and you’ll use about 24 sheets, or all of pack and part of the other.
8 ounces (one stick) salted butter, melted
1 1/2 pounds zucchini, grated
1 teaspoon kosher salt
3 large eggs, beaten
8 ounces feta cheese, crumbled
6 ounces Gouda or cheddar cheese, shredded (about 1 1/2 cups)
1 cup of finely diced onion (or 4-6 scallions)
1/4 cup chopped fresh herbs, such as basil or parsley or dill, or 2 teaspoons dried dill
1-2 tablespoons of sesame seeds or charnushka
Optional tzatziki sauce
1/2 cup plain Greek yogurt
1 small to medium cucumber, peeled, seeded, and finely diced
1 teaspoon salt
1 tablespoon lemon juice
1 tablespoon olive oil
2 teaspoons minced garlic, mashed to a paste or put through a press.
- Place the grated zucchini in a colander or strainer and sprinkle with the kosher salt. Toss to coat. Place the strainer over a large bowl or in the sink to catch the liquid and leave for at least 30 minutes.
- Optional tzatziki sauce: Combine all ingredients and chill.
- Heat the oven to 400°. Take handfuls of the zucchini and squeeze to remove as much of the liquid as possible, and transfer the zucchini to a large bowl.
- Add all of the eggs, cheeses, onion, and herbs, and mix well.
- Place one sheet of fillo on a clean work surface (I like to use a cutting board) and brush lightly with melted butter. Place another fillo sheet on top and brush again. Spread 1/3 cup of the zucchini filling on one long side of the fillo and roll it up.
- Place the log on a parchment lined baking sheet, shape it into a coil. Continue to form the zucchini rolls, and for one large pie, wrap them around your first coil. For individual coils, space them barely touching on the baking sheet.
- Brush the spiral(s) with the remaining melted butter and sprinkle a small amount of salt and the sesame or charnushka seeds on top. Bake the spirals until golden and crisp, about 40 minutes.
- Serve with tzatziki sauce if desired.
.
.
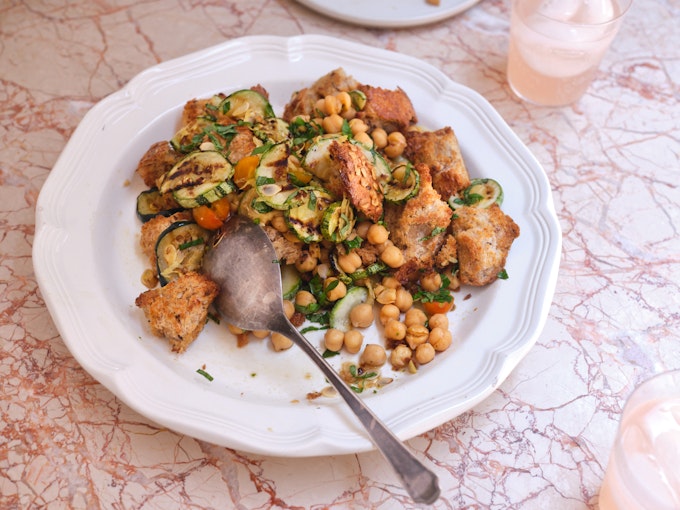
Photo by Heidi Swanson
Grilled Zucchini and Bread Salad
From 101 Cookbooks
This recipe from Heidi Swanson, who specializes in vegetarian and natural foods recipes, uses 1/3 cup ponzu in the dressing. Ponzu is a Japanese sauce that’s found near the soy sauce at the grocery store. You can make a quick substitute by combining 1/4 cup soy sauce, juice of half a lemon, and a few tablespoons of Mirin (Japanese sweet wine) or a teaspoon of sugar. Heidi says the only zucchini recipes that have her attention at this time in the summer use pounds of zucchini – this recipe uses two!
.
.
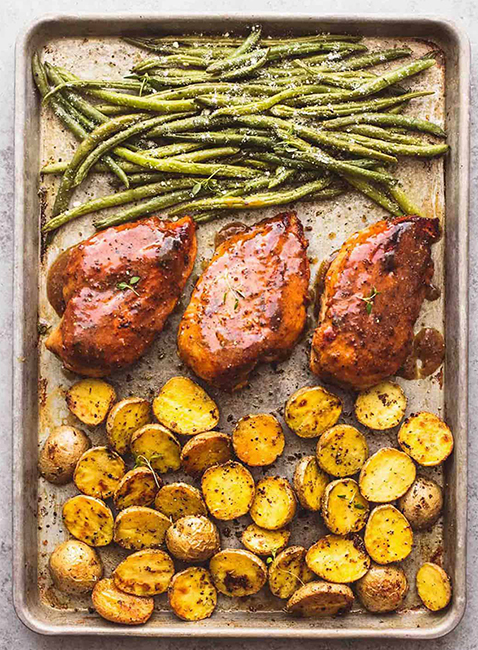
Photo by Tiffany
Sheet Pan Chicken, Potatoes and Green Beans
From Creme de la Crumb
This sheet pan dinner uses dried herbs, but subbing fresh would be delicious.
.
.
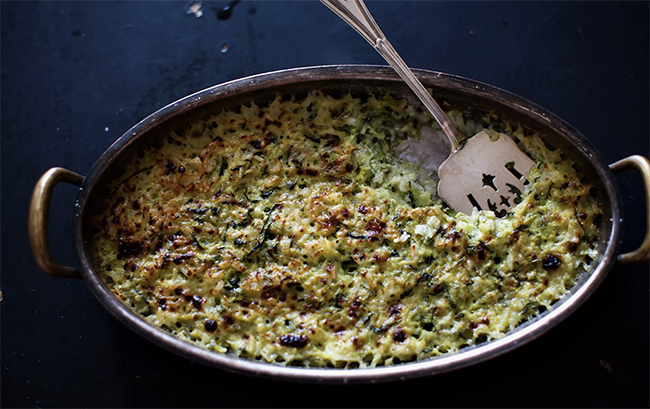
Photo by Karen Mordechai
Julia Child’s Tian de Courgettes au Riz (Zucchini Tian)
From DebsLunch
This recipe from Julia Child is all over the Internet in various versions – and has previously appeared in Tipi’s recipes too! It’s a great recipe for the over-abundance-of-zucchini time of year. Here’s my version, where I’ve tried to make the directions more straightforward.
.
.
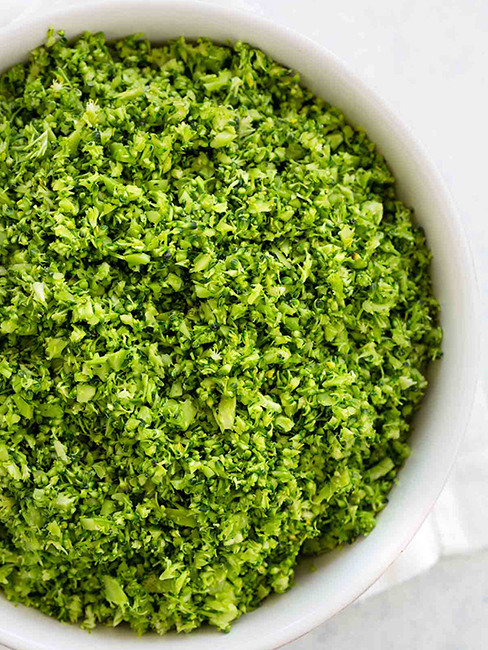
Photo by Jessica Gavin
How to make broccoli rice
From Jessica Gavin
Step through 3 methods of making broccoli rice – chop with a knife, food processor, or blender – provided by Jessica Gavin, a cookbook author and teacher. There’re also choices of how to cook your broccoli rice – my favorites are food processor and sauté, and I also like to add a little coconut milk to the pan if I have an opened can.
.
.
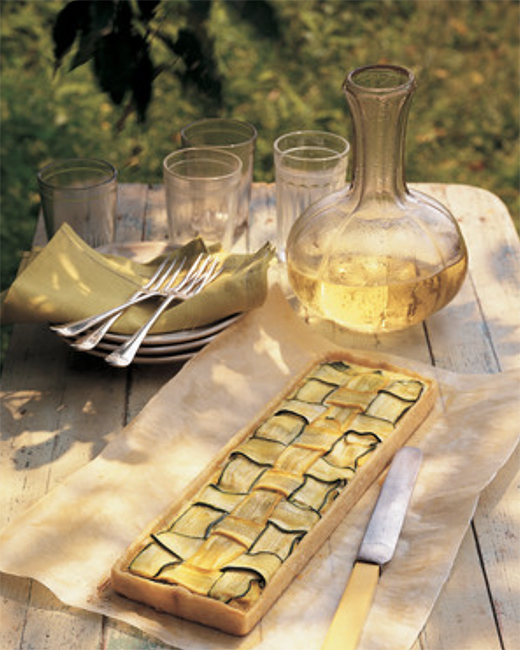
Summer Squash Lattice Tart
From Martha Stewart
I have made this tart from Martha Stewart many times, and I strongly suggest that rather than weaving the lattice on top of the tart and then lifting it up to add the egg custard to your tart, pour the egg in first, then top with the lattice! You can use the crust recipe linked to (Pate Brisee), or mine, or store bought!
.
.
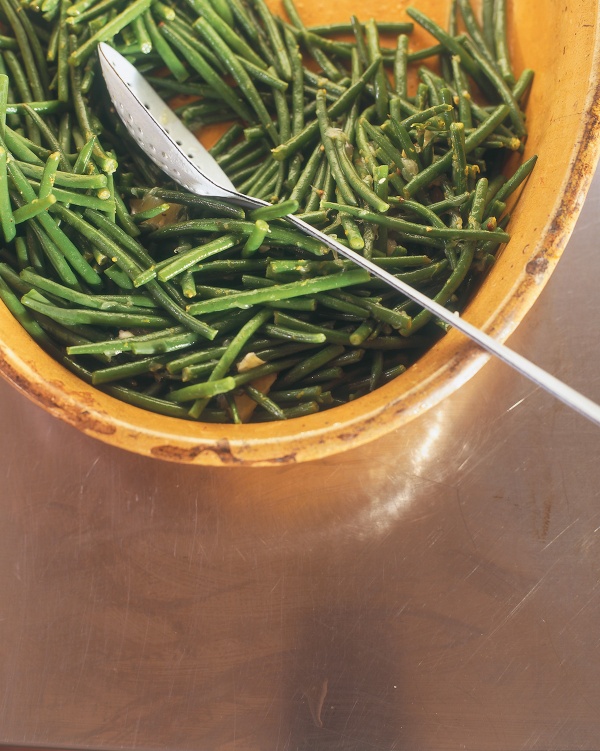
Green Bean and Lemon Casserole
From Nigella Lawson
Since we’ve got about a pound and a half of green beans, try halving this recipe from Nigella Lawson, that melts whole lemon into the green beans, to arrive at a comforting dish that’s somewhere between lightly cooked, crunchy beans and meltingly tender slow-cooked beans. Use half a large lemon and 6 tablespoons of butter.
Week #8; Cucumber bounty
- On: July 13, 2022
- 0
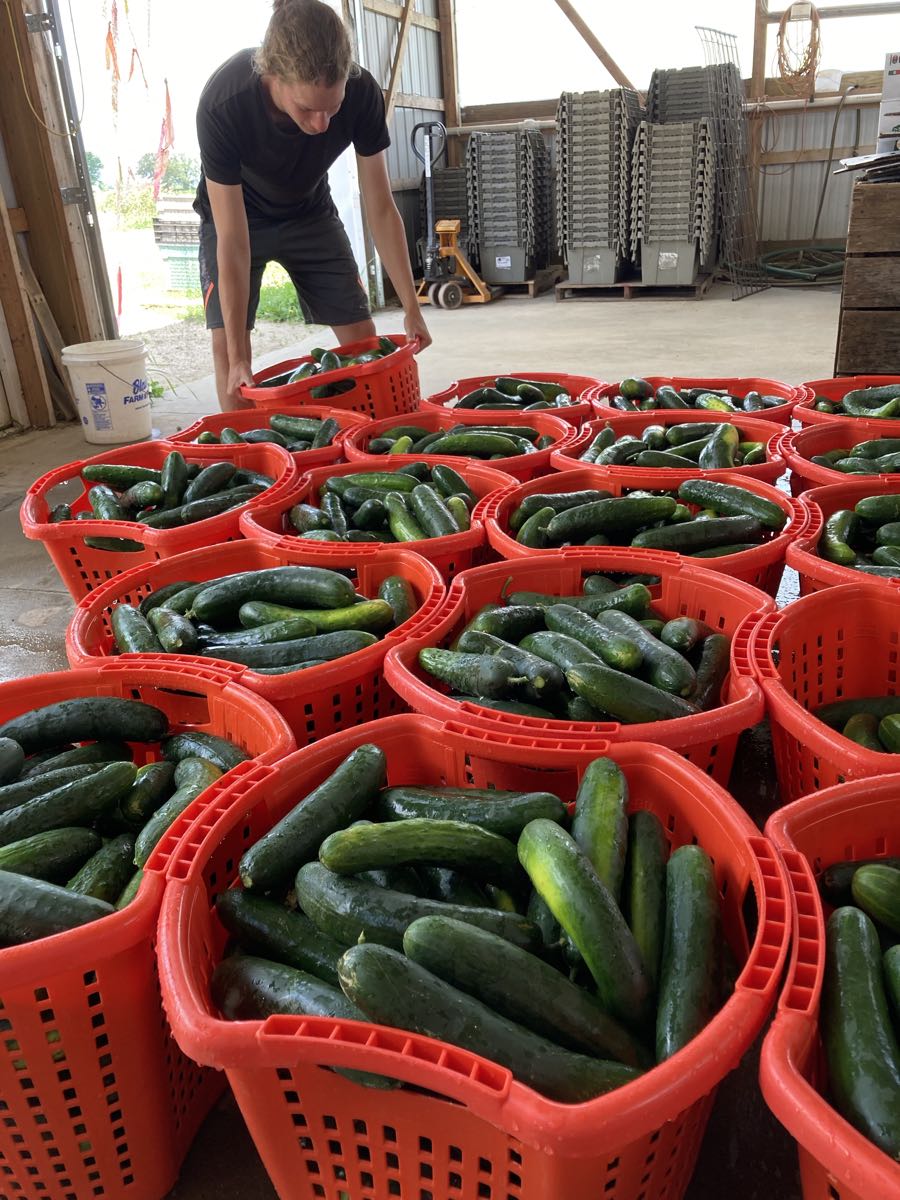
Ari readies cucumbers for washing.
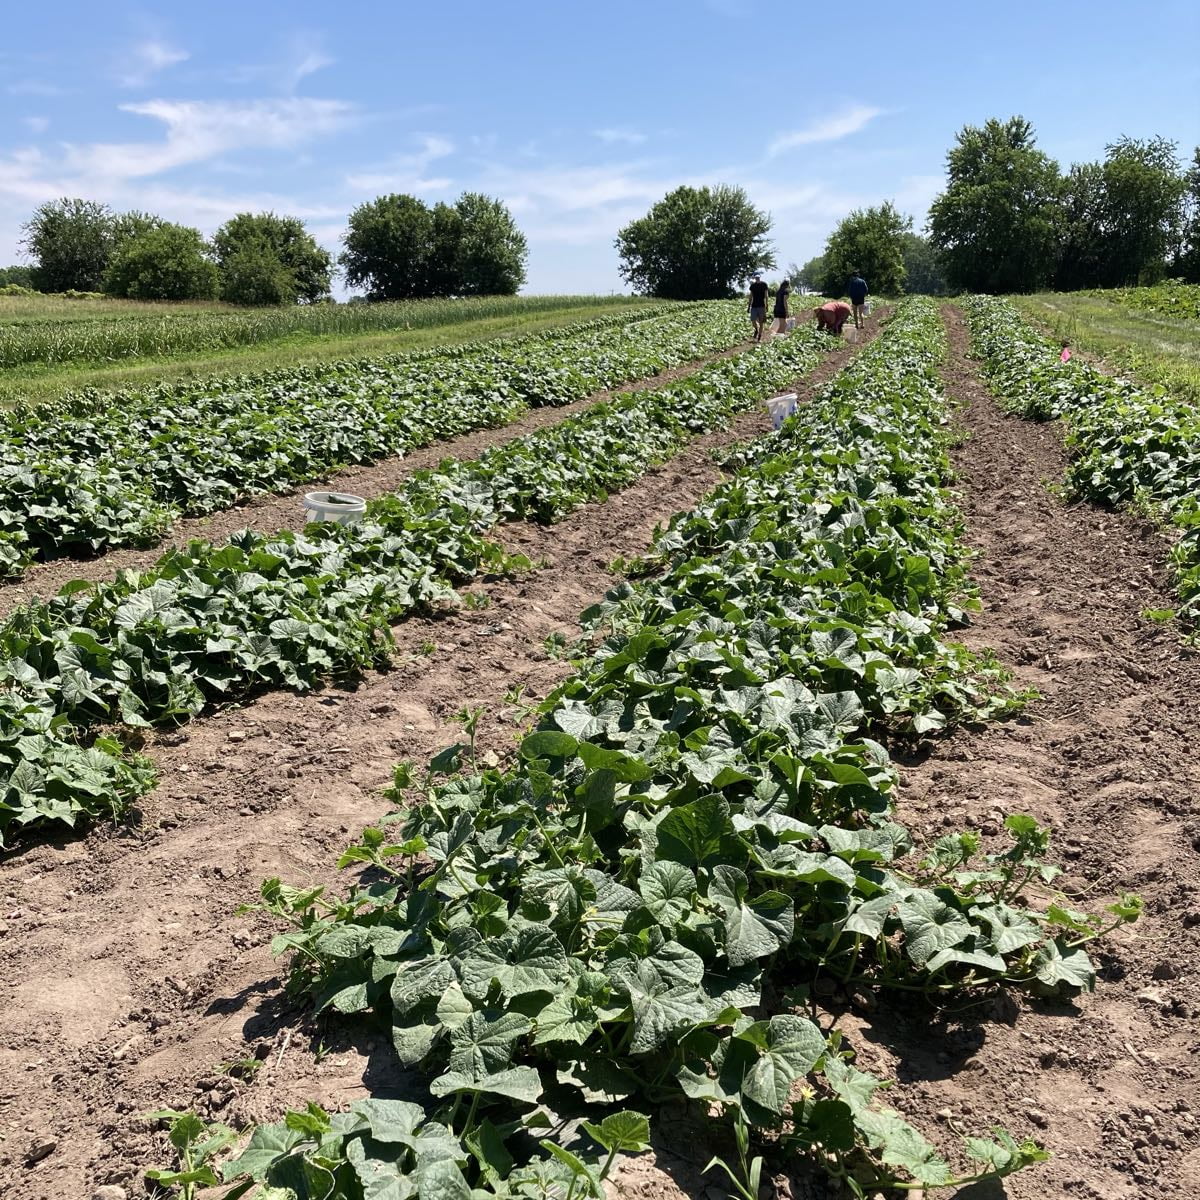
Look at this beautiful cucumber field, with strong vines and few gaps. From the left in the distance, Ari, Karen, Maggie and Chelsea. Every cucumber team includes Maggie and Ari, our greatest cucumber enthusiasts. They compete to find the first cucumber but then share what they find.
Let’s talk about the cukes and zuccs.
Hello all! We are sending four cucumbers this week, on the heels of five last week. The cucumber field started with unusually big harvests. Enjoy the bounty now, knowing that both the zucchini and cucumber fields will settle into smaller harvests. We are lucky that both plantings established so well this spring. Cucumber seedlings are fragile and we sometimes lose one third of them soon after planting. Not this year! Our crew was very attentive during transplanting. Rough handling leaves invisible damage that leads to dead plants. Our experienced crew knows this well, but our newest employees did a great job too. That’s what happens when you hire UW/Horticulture students and gardeners and people with prior farming experience! This spring we covered each cucumber bed with its own narrow piece of floating row cover, using extra care to secure the covers snugly. Loose covers flap in the wind and beat down on the seedlings. Some crops can handle that but cucumbers cannot. We certainly had a lot of strong winds this spring (good grief!) so the effort paid off.
Soon the cucumber and squash harvests will slow and we’ll send smaller amounts. Enjoy them now!
Strategies
Cucumbers – We routinely make cucumber salads with five cucumbers. That’s a big batch but they hold well in the fridge and improve over a few days. Think about using half your Walla Walla onion portion in whatever cucumber salad you choose. They are a great combo.
Zucchini – If you are undecided what to do with your zucchini and Zephyr squash, grill it then add to whatever you cook this week. Grilled squash s a great topping for pasta dishes (cold or hot), etc. Here’s my usual method.
- Thinly slice squash lengthwise, about 1/4 inch thick or whatever thickness works for your squash.
- Marinate in a light dressing of rice vinegar, sesame oil, soy sauce and garlic.
- Grill the squash until tender.
- Return to the marinade – now it will soak up more flavor.
Thanks for reading.
Beth
Veggie List & Veggie Notes
Week #8, July 14/15, 2022
– Weekly shares
– EOW/ purple
– Sampler/ moon
Broccoli, 1.5 to 2 lb
Swiss chard, 1 bunch
Green leaf lettuce
Snap peas, 0.4 lb
Zucchini &/or Zephyr squash, 2.5 – 3 lb
Cucumbers, 4
Green bell pepper, 1
Walla Walla onion
Curly parsley, 1 nice bunch
For a few sites; 1 sunflower
Next week’s box will probably contain lots of summer veggies.
Broccoli – If your broccoli seems wilted, soak in cold water for fifteen minutes and it will plump back up.
Storage: Cover and refrigerate.
Swiss chard – Cover and refrigerate. Now that spinach is done for the year, it’s time to re-purpose your spinach recipes to Swiss chard. They are closely related. Chard has a thicker leaf and requires a few minutes more cooking to achieve tenderness, unlike spinach which wilts quickly.
Walla Walla onion – These fat onions are sweet, crisp and very mild. Wonderful raw or lightly cooked. Try cutting into wedges, threading on a skewer and grilling. Do not try to fry these onions – it doesn’t work because of their high water content.
Storage: It’s OK to store at room temperature for up to one week. Otherwise, refrigerate.
Parsley – The herb of the week! A great addition to salad dressing, tomato dishes or casseroles. Tabouli is a great use for tender parsley
Storage: Cover and refrigerate.
Sunflowers – We will send sunflowers to one or two sites at a time, as they are ready to harvest. Trim the stem and put in fresh water. If you re-trim the stem and change the water, it will last a little longer.
Snap peas – Storage: Refrigerate. String the pods as usual.
Please be alert to occasional off-type pods. Sometimes there will be shell peas mixed in. Those peas are edible but the fibrous pods are not. If you find shell peas mixed in, it will be a very small amount.
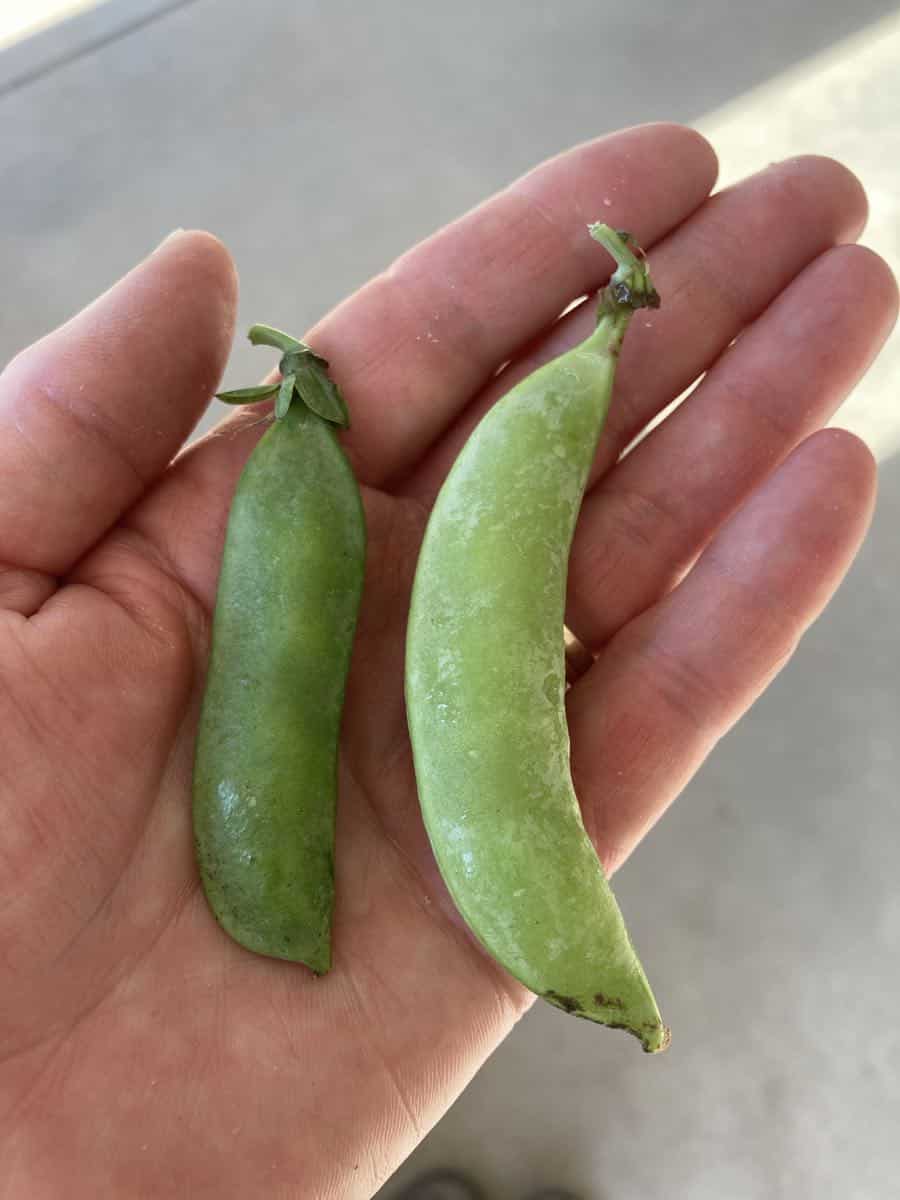
Shell pea (left) and snap pea pods (right). Shell pea pods are darker green and often less waxy. When in doubt, try eating it. Snap pea pods are crunchy and edible. Shell pea pods are fibrous.
RECIPES by PHOEBE
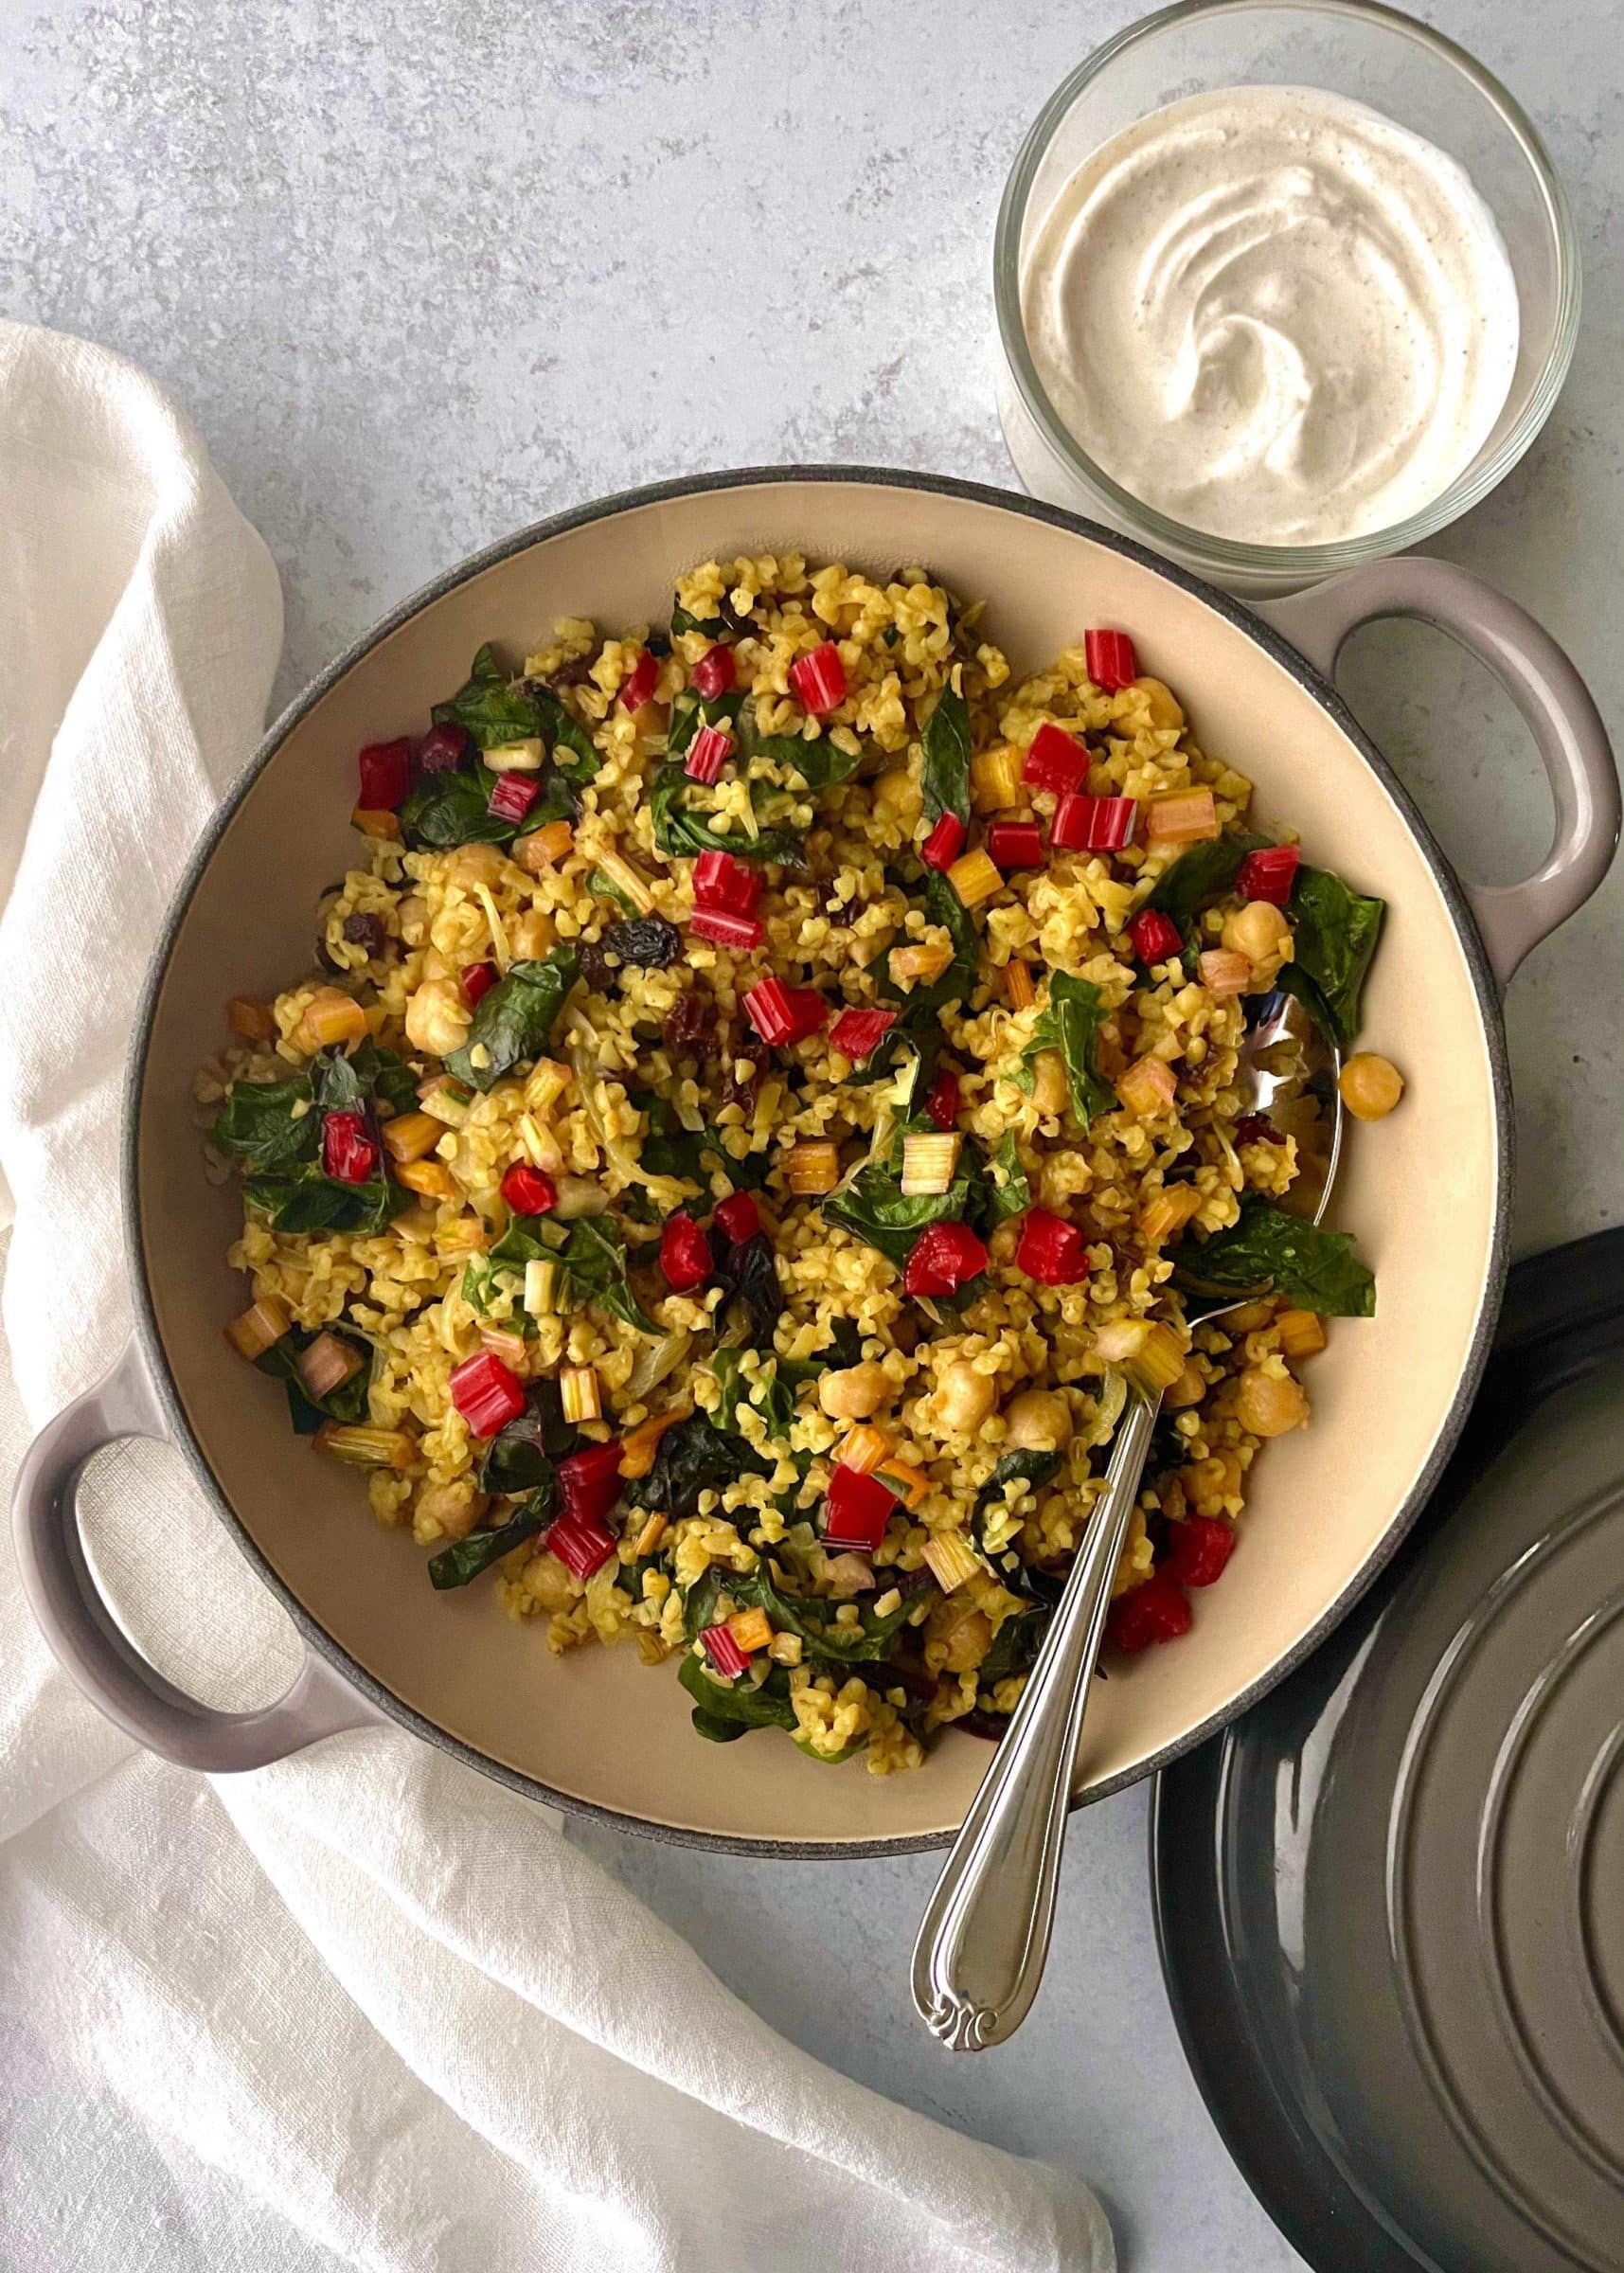
Photo by Phoebe Moore.
Bulgur, Chickpeas & Chard with Lemony Chard Stems & Coriander Yogurt
This recipe is very loosely adapted from the bulgur mejadra recipe in Sami Tamimi and Tara Wigley’s cookbook Falastin. A tangy coriander yogurt sauce and lemony marinated chard stems brighten the earthy bulgur and chickpea pilaf. Enjoy this dish as a vegetarian main, or serve it as a side with any protein you like.
Serves 4 to 6
Prep time: 15 minutes
Cook time: 35 minutes
1 bunch Swiss chard
2 tablespoons plus 2 teaspoons fresh lemon juice
1 cup whole milk Greek yogurt
1 teaspoon ground coriander
2 tablespoons extra-virgin olive oil
1 medium onion, thinly sliced
2 teaspoons ground cumin
½ teaspoon ground turmeric
1½ cups dry coarse bulgur
1½ cups cooked chickpeas, drained and rinsed
2¾ cups water
¼ cup raisins
Sea salt and freshly ground black pepper
- Remove the stems from the chard. Roughly chop the leaves and set aside, then dice the stems. In a small bowl or jar, toss the diced chard stems with 2 tablespoons of the lemon juice and ½ teaspoon sea salt. Set aside to marinate while you prepare the rest of the dish.
- Make the coriander yogurt. In a small bowl, stir together the yogurt, coriander, the remaining 2 teaspoons lemon juice, and ½ teaspoon sea salt. If the yogurt is very thick, add water, 1 teaspoon at a time, until it has a creamy, dollop-able consistency. Set aside.
- Heat the olive oil in a large, deep lidded skillet over medium heat. Add the onion and ½ teaspoon sea salt and cook, stirring occasionally, until soft and browned, about 10 minutes. Stir in the cumin, turmeric, another ½ teaspoon sea salt, and several grinds of pepper. Add the bulgur and chickpeas and stir to coat in the oil and spices. Add the water and bring to a boil. Reduce the heat to low, cover, and simmer until all the liquid is absorbed, about 15 minutes.
- Remove the pan from the heat, uncover it, and quickly add the chard leaves and raisins. Cover the pan with a clean dish towel, then firmly place the lid back on the pan and set aside to steam for 10 minutes.
- Remove the lid and dish towel from the pan and gently toss the wilted chard leaves and raisins with the bulgur mixture. Season to taste, portion onto plates, and serve with dollops of the coriander yogurt and the pickled chard stems on top.
.
.
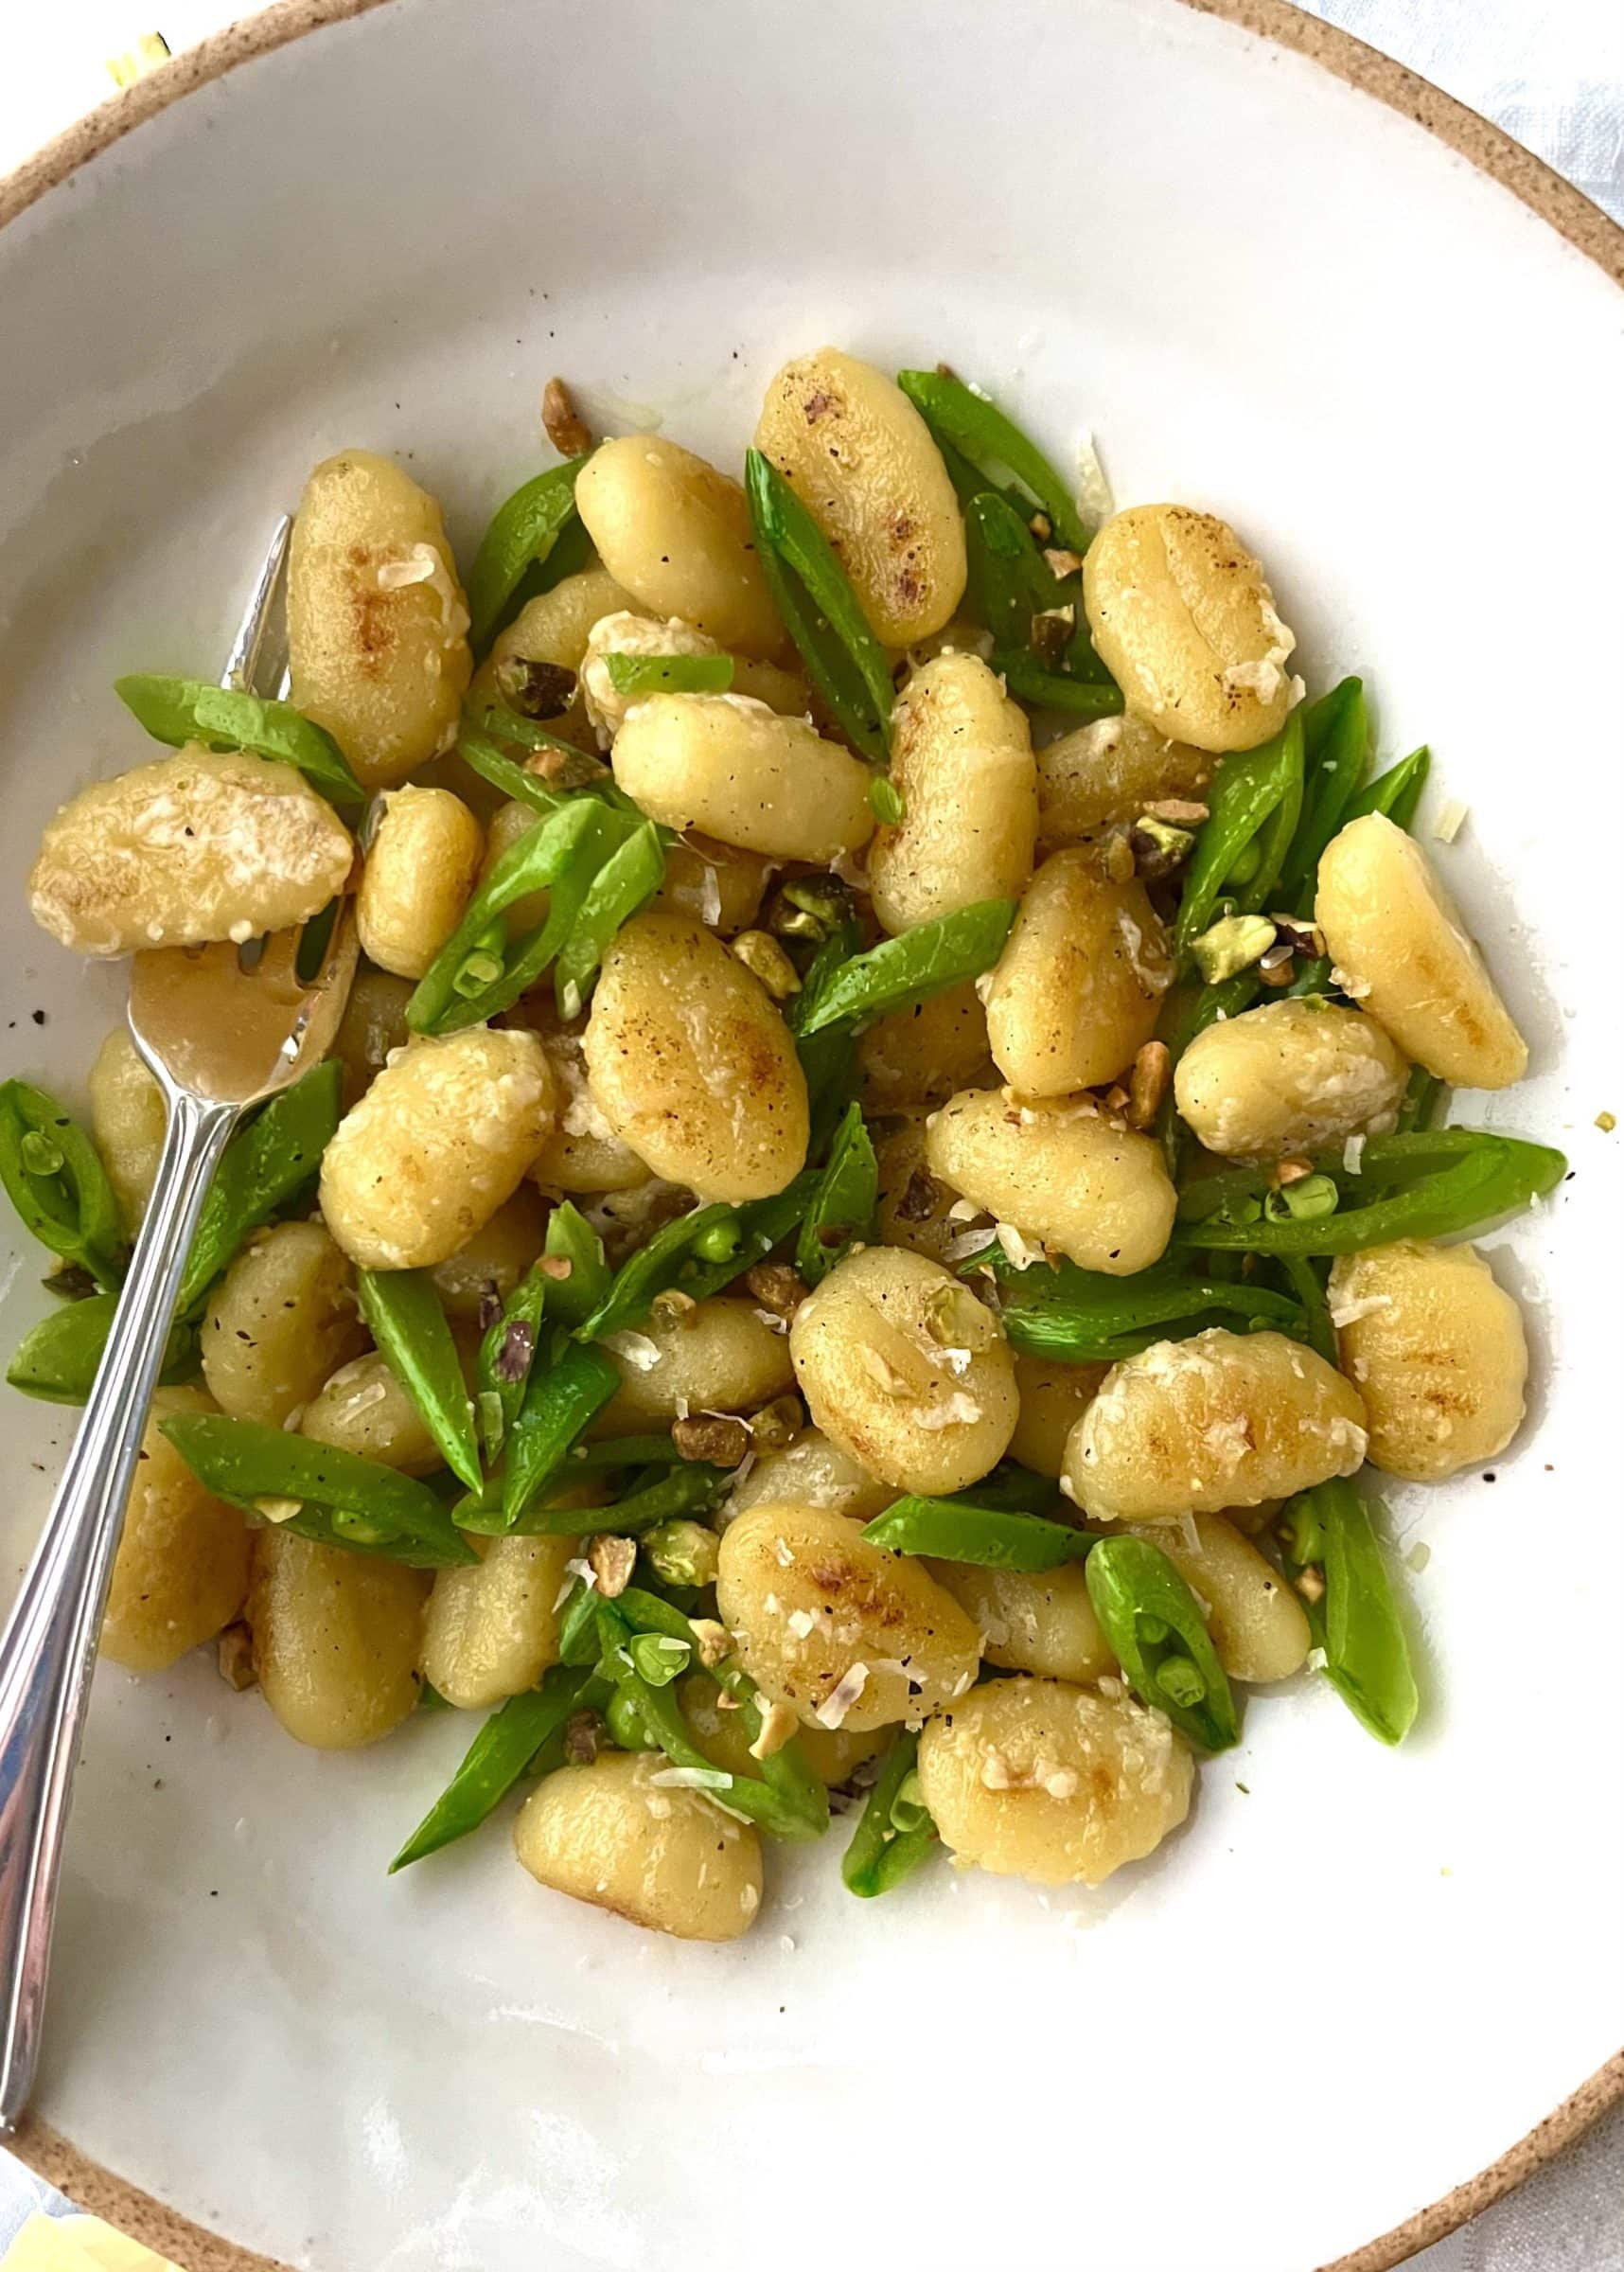
Photo by Phoebe Moore.
Skillet Gnocchi with Snap Peas and Lemon Butter
In this quick, one-pan recipe, crisp snap peas and crunchy pistachios offer a delicious contrast to chewy pan-seared gnocchi. Shelf-stable and refrigerated gnocchi both work well here – no need to boil them first.
Serves 2 generously or 4 modestly
Prep time: 10 minutes
Cook time: 15 minutes
2 tablespoons unsalted butter, at room temperature
1 tablespoon lemon zest
1 garlic clove, grated
½ teaspoon sea salt, plus more to taste
3 teaspoons extra-virgin olive oil
6 ounces snap peas, strings removed, peas thinly sliced on the bias
1 (17-ounce) package refrigerated or shelf-stable store-bought gnocchi
1 tablespoon fresh lemon juice, plus more to taste
¼ cup freshly grated Parmesan cheese
Freshly ground black pepper
1 tablespoon crushed toasted pistachios
- In a small bowl, place the butter, lemon zest, garlic, and salt. Use a fork or spatula to cream them together. Set aside.
- Heat 1 teaspoon of the olive oil in a large nonstick skillet over medium heat. Add the snap peas and a pinch of salt and cook, stirring occasionally, until the peas are crisp-tender and bright green, 2 to 3 minutes. Remove from the pan and set aside.
- Return the skillet to medium heat and add the remaining 2 teaspoons olive oil. Add the gnocchi and spread it in a single layer. Cook without stirring until it becomes golden and lightly crisp on the bottom, about 3 minutes. Toss and cook for another 3 minutes without stirring, then toss and cook for another 2 to 3 minutes without stirring, until the gnocchi is crisp and golden on all sides.
- Stir in the snap peas and turn off the heat. Add the lemon juice and lemon butter and stir until the butter melts and coats the gnocchi and peas. Stir in the cheese and several grinds of pepper. Season to taste with more salt, pepper, and/or lemon juice, if desired. Garnish with the pistachios, and serve.
.
.

Photo by Jeanine Donofrio and Jack Mathews
Spaghetti Aglio e Olio
From Love & Lemons
Spaghetti aglio e olio (spaghetti with garlic and oil) is a wonderful dish to make when you have lots of fresh parsley on hand. This recipe also calls for kale, which isn’t traditional, though you could easily leave it out or replace it with the Swiss chard from this week’s box.
.
.
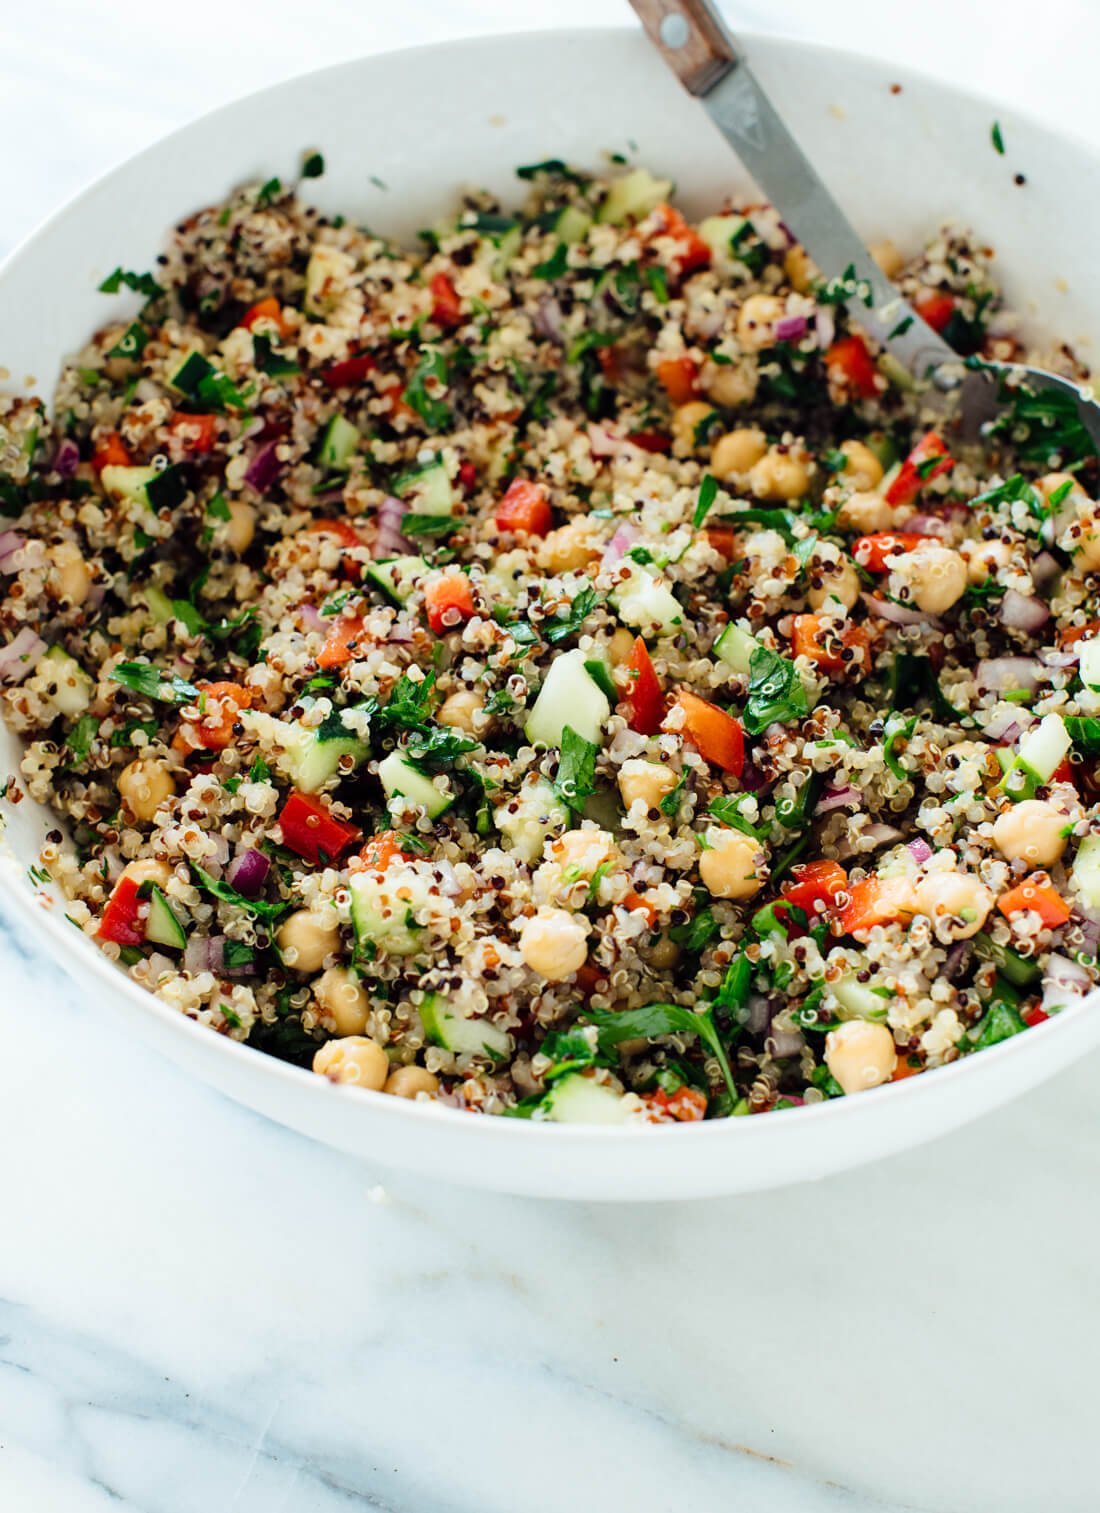
Photo by Cookie + Kate
Favorite Quinoa Salad
From Cookie + Kate
Packed with fresh parsley, this quinoa salad is like a twist on Lebanese tabbouleh. It would be a great salad to make ahead for a picnic or cookout or to pack for lunch. The recipe calls for red onion and red bell pepper. Feel free to swap in Walla Walla onion and the green bell pepper from your box.
.
.
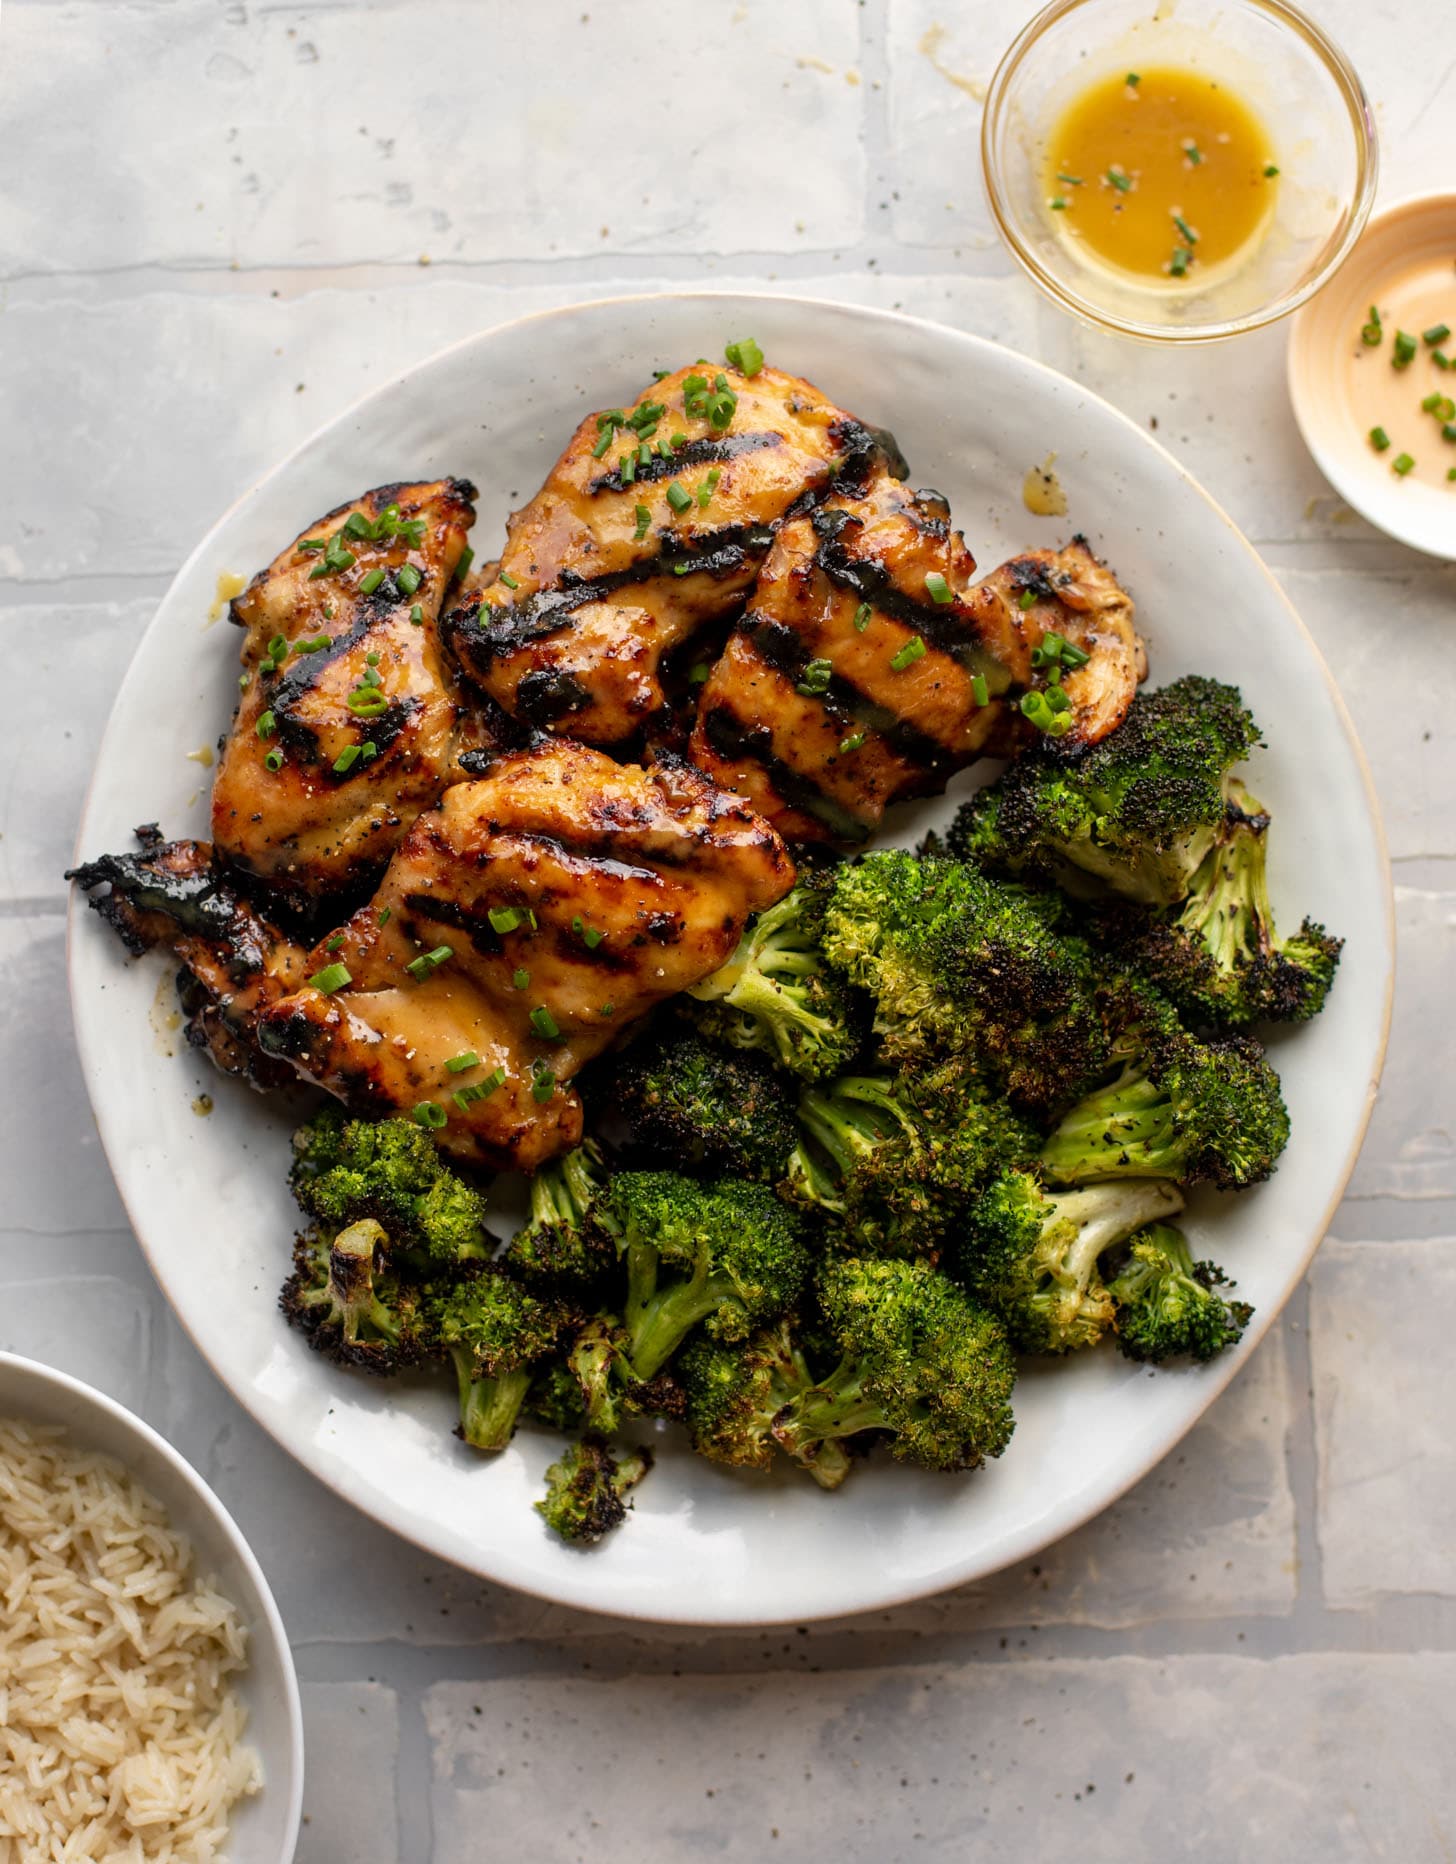
Photo by How Sweet Eats
Honey Mustard Grilled Chicken
From How Sweet Eats
Have you tried grilled broccoli? The florets become lightly crisp, and they take on a delicious charred, smoky flavor. While you’re grilling, cook this honey mustard chicken alongside the broccoli to make a complete meal.
.
.

Photo by Jeanine Donofrio and Phoebe Moore
Sautéed Yellow Squash
From Love & Lemons
This recipe is a simple, flavorful veggie side dish that you could serve alongside almost any summer meal. A bright parsley oil coats tender slices of summer squash (or zucchini), and a quick bread crumb topping adds crunch. We call for Love & Lemons’ vegan Parmesan in the topping, which is a nutty, savory blend of lemon zest, cashews, and nutritional yeast. If you don’t keep these ingredients on hand, you could swap in regular Parmesan cheese instead.
.
.
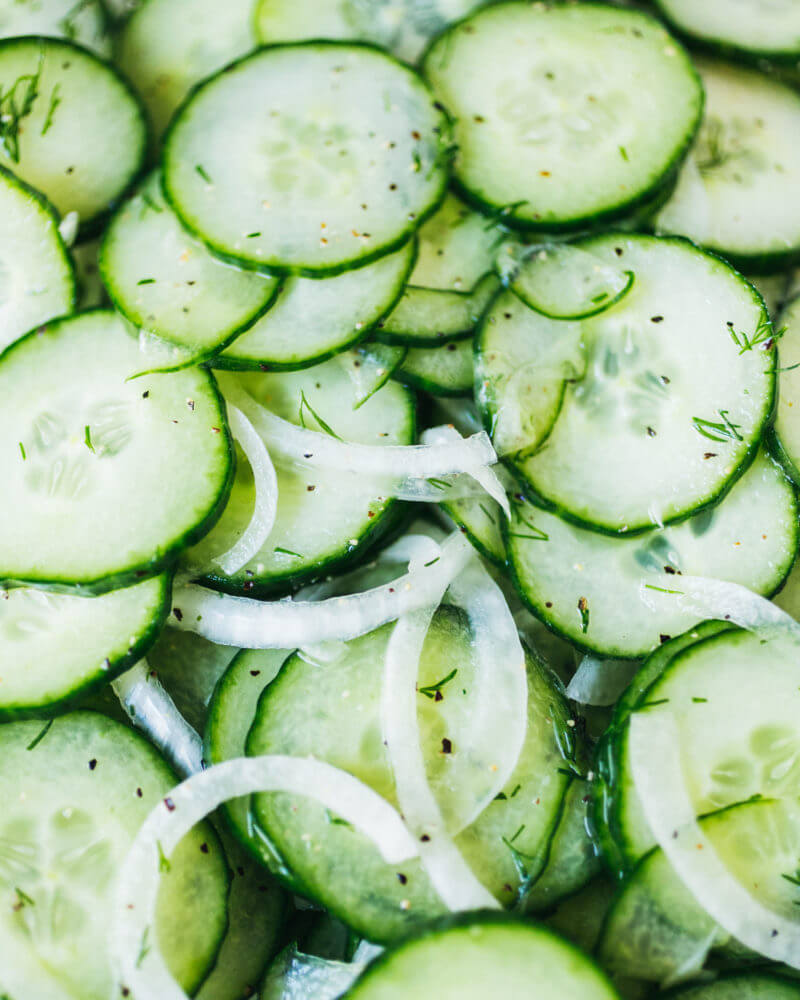
Photo by A Couple Cooks
Cucumber Salad with Vinegar
From A Couple Cooks
This type of vinegary cucumber salad is one of my favorite summer side dishes. It’s salty, tangy, lightly sweet, and super refreshing. I recommend slicing the cucumbers in half lengthwise and removing the seeds with a spoon before preparing this recipe.
.
.
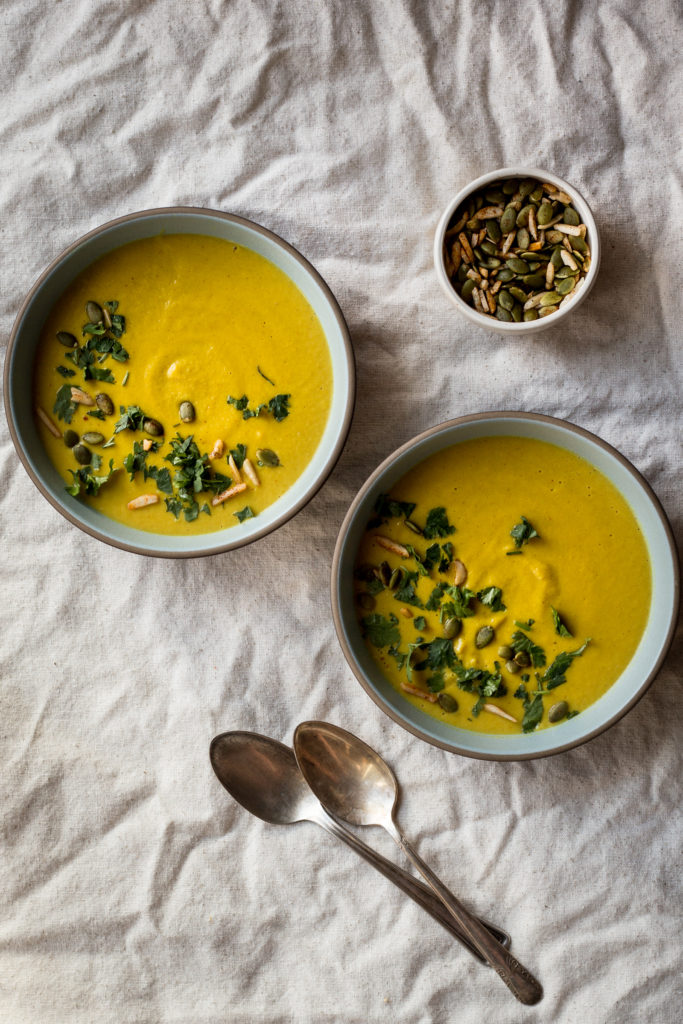
Photo by Andrea Bemis
Spiced Summer Squash & Chickpea Bisque
From Dishing Up The Dirt
This thick, creamy, and aromatic soup would be a delicious way to use the summer squash (or zucchini) in your box this week. Blended chickpeas and a can of coconut milk create its luscious texture.
Week #7; That was a soaker.
- On: July 06, 2022
- 0

That was a soaking storm last night! Those of you in Madison probably did not get much rain. That storm front slid over our farm for hours yesterday. For reference, we are located south of Madison, within Wisconsin and above the “o” in Rockford in the photo. It made for a muddy and steamy day.
Our farm was getting very dry, so the 4 inches that fell Monday through yesterday was welcome, even though it complicated today’s harvests. The fields were able to soak up most of it. By the end of the today, it was still muddy but easier to get around.


U-pick wrap-up
We are glad that many of you came to the farm for strawberry u-picks this year. We had open reservation slots for both events. I interpret that to mean that everyone who wanted a reservation got one. Well, the berries were more abundant than we realized, so folks were pretty happy with how much they picked. We were lucky with the weather. It was beautiful both days. Thanks for coming out!
Veggie List & Veggie Notes
Week #7, July 7/8, 2022
– Weekly shares
– EOW/ green
‘Caraflex’ or ‘Farao’ cabbage (1 or 2), ~2.5 lb total
Cucumbers, ~5
Collards OR lacinato kale (by site)
Snap peas, ~1/2 lb
Snow peas, ~1/4 lb
(Both types peas are in same bag.)
Broccoli, 1 medium head
Zucchini &/or Zephyr squash, ~3 lb
Fennel OR a sunflower (by site)
Basil, 1 husky branch
Garlic scapes, a handful
Next week’s box will probably contain broccoli, Swiss chard, Walla Walla onion, and more.
‘Caraflex’ or ‘Farao’ cabbage – These are nice salad-types that we grow in summer. Don’t you love the pointy shape? They have thinner, more tender leaves than typical green cabbage. Great in salads and slaws but can also be cooked. Here’s the Caraflex description from the seed catalogue: “Inner leaves are tender, crunchy, and have an excellent, sweet and mild cabbage flavor. Perfect for summer salads, slaws, or cooked dishes.”
Cucumbers – Our cucumber field is doing great so we’re sending enough to be creative. Make a big batch of cucumber salad or raita or smoothies, etc.
Storage: Store at room temperature for a few days or refrigerate in the warmest part of your fridge. Cucumbers get chilling injury if stored too cold.
Snap & snow peas – As usual, both types are in one bag. We really like this new snap pea variety, PLS140. Long pods, sturdy plants and good flavor despite the heat. Hot weather is always a challenge for peas. Enjoy this batch.
Basil (branched, leafy stalk) – Everyone gets a husky sprig, the first cutting of the season.
Storage: Basil deteriorates if stored in the refrigerator. It is best stored at room temperature with the cut ends in water, for example in a jar or vase. Treat it like a flower. Give the stem a fresh trim and change the water every day or two.
Garlic scapes (curly green things) – Garlic scapes grow at the top of garlic plants. They look like flower buds but are actually clusters of tiny bulblets. We snap off the young scapes to direct the plants’ energy into forming garlic bulbs underground. Use scapes as a substitute for garlic cloves. They can be minced, mixed with olive oil, and added to stir fries or simple pasta dishes. The scapes can be sautéed, but will not brown like garlic cloves. Expect them to retain their crunch even when cooked, and to be milder than garlic cloves, closer in pungency to the green garlic we’ve sent.
Sunflower (for 1 or 2 sites this week) – We continue experimenting with sunflowers as they are one of the few flowers that we can send in the CSA boxes. This cheerful variety ‘Vincent’s Choice’ does not produce pollen, making it an excellent choice to pack with vegetables. The sunflowers are for beauty and joy, not to eat!
Storage: Trim the stem and place in water. If you re-trim the stem and change the water a few times, the flower should last about one week. Do not put in the same water as your basil.
RECIPES by DEB
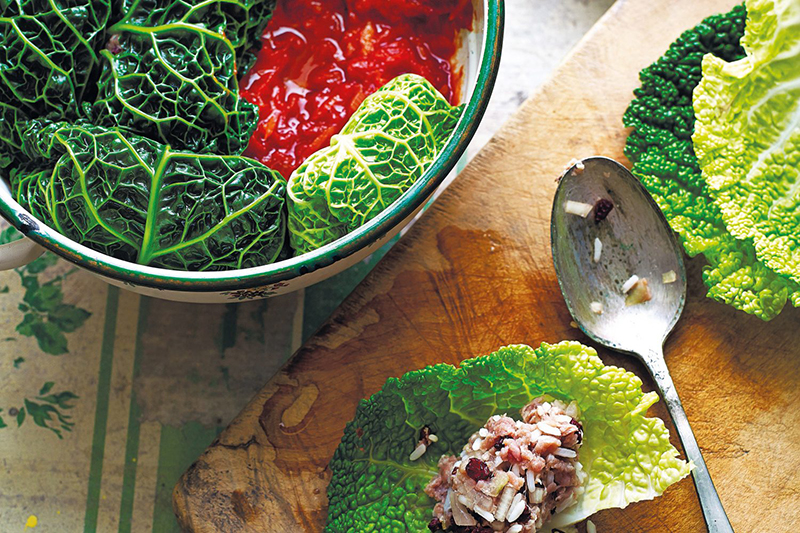
Photo by Kris Kirkham
Olia Hercules’ Stuffed Cabbage Rolls
This dish is based on a recipe from Ukrainian chef Olia Hercules’ lovely cookbook, Mamushka, that has lots of interesting vegetable preparations. The book is currently out of print, but available at libraries, and as an ebook, and there are a lot of recipes on Olia’s website.
Serves: 6 generously (makes about 12 rolls)
Takes: about 40 minutes to assemble, and 45 minutes to bake.
Tomato Sauce
2 tbsp vegetable oil
1/2 cup finely chopped onion
1 carrot, grated
1 tablespoon sugar
1 tablespoon tomato paste
1 bay leaf
1 14-ounce can whole or chopped tomatoes
14 fluid ounces (400 ml) water
juice of one half lemon
salt and freshly ground pepper
Rolls
12 large leaves of cabbage, separated from one or two heads
2/3 cups white rice, parboiled for 5 minutes, and drained and rinsed
1 pound of ground meat, your choice, or a mixture – beef and pork are traditional, turkey or chicken are also good!
1/2 cup grated onion
1/2 teaspoon ground or freshly gated nutmeg
salt and freshly ground black pepper
for serving: fresh dill and sour cream
- Make the sauce: Heat the oil in a Dutch oven or skillet with a lid that can go in the oven. Cook the onion and the grated carrot over medium heat for 5-10 minutes until soft but not browned. Add the sugar and the tomato paste and cook for another minute. Add the bay leaf, tomatoes – break them up with your hands if you use whole – and water and bring to a boil. Reduce the heat and simmer for about 10 minutes until slightly thickened. Add the lemon juice, season with salt and pepper, and set aside.
- Make the rolls: Preheat the oven to 350°. Bring a large pot of water to a boil, and blanch the cabbage leaves for about 2 minutes, until pliable. Drain and rinse with cold water and drain again.
- Combine the meat, parboiled rice, grated onion, and nutmeg and salt and pepper. Place 2-3 generous tablespoons of filling on each cabbage leaf and roll.
- Nestle the rolls in the sauce, folded side down, snugly so they do not unravel. Cover the Dutch oven and bring to a boil on the stove, then transfer to the preheated oven and bake for about 45 minutes, until cooked through.
- Serve with chopped dill, sourdough bread, and a dollop of sour cream on the side.
.
.
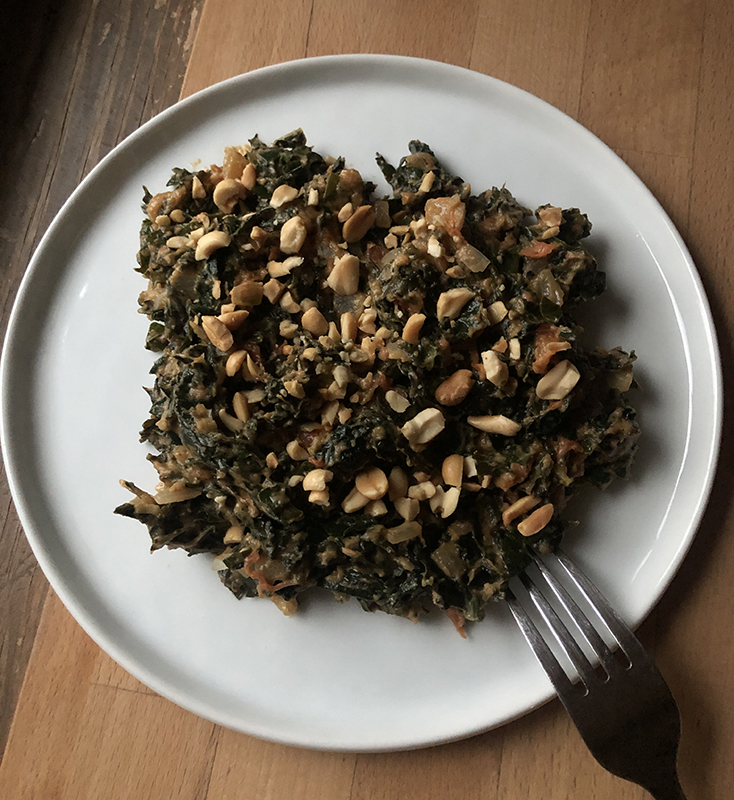
Greens with peanut sauce
This dish has African roots and is an example of how foodways migrated involuntarily with enslaved Africans and became American Southern cooking. You’ll find this dish served as a side in BBQ joints throughout the South, especially in Georgia and Louisiana.
Serves: 2-3, easily doubled or tripled
Takes: about 30 minutes
1/2 pound kale or collard greens (spinach also works but you will need more spinach since it will cook down more then the tougher greens)
2 tablespoons vegetable oil, olive oil, or butter
1/2 cup chopped onion
2 cloves of garlic, minced or put through a press
1 medium tomato, peeled and chopped, or about 1/2 cup canned diced tomatoes
1 teaspoon cumin
1/2 teaspoon coriander
salt and freshly ground black pepper
1/3 cup peanut butter, preferably natural but whatever you’ve got will work
2-3 tablespoons of chopped salted peanuts
-
- Rinse the greens and cut or pull off the large stems. Bring a large pot of water to a boil, add the greens, and cook for 3-5 minutes, until starting to get tender. Drain, reserving about 1 cup of the cooking water.
- Heat the oil in a pot – you can use the same one that you cooked the greens in, no need to wash – and add the onion. Cook for 2-3 minutes until softened, and add the garlic, tomatoes, cumin, coriander and salt and pepper. Stir well and cook for another 5 minutes or so.
- Take handfuls of the greens and squeeze out as much liquid as you can, and transfer them to a cutting board. Chop into bite-sized pieces, and add to the cooking pot. Add about 1/4 cup of the reserved greens-cooking liquid, cover the pot and cook for about 10 minutes, until the greens are really getting soft.
- Add the peanut butter and another 1/4 cup of the reserved greens-cooking liquid, mix well, cover and cook over a low heat for 15 minutes. Check periodically to see if it’s sticking and add a little more of the greens-cooking liquid as necessary. Garnish with the chopped peanuts and serve. Any leftovers are delicious tucked into a pita bread for a sandwich the next day.
.
.
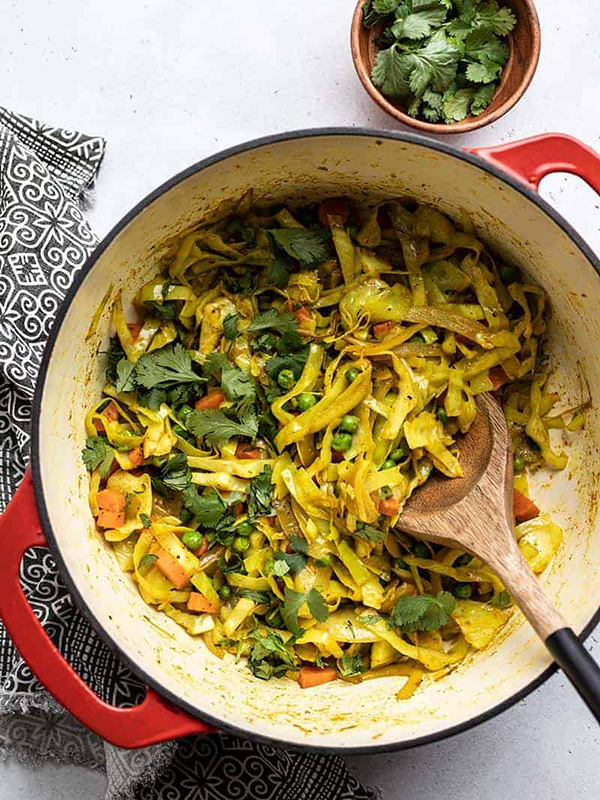
Curried Cabbage
From Budget Bytes
In addition to cabbage we have cucumbers in this week’s box, so serve this curried cabbage with cucumber raita. Combine 1 cup plain yogurt; 1/2 cup peeled, seeded, and diced cucumber; juice of 1/2 lemon or lime, 1 clove garlic, minced; and if available, 2 tablespoons minced fresh herbs, like mint or basil.
.
.
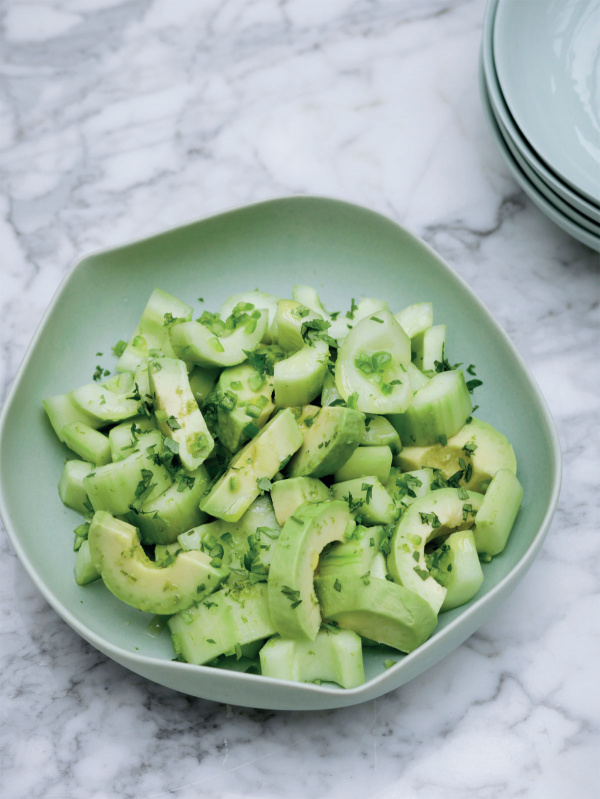
Cucumber, Chilli And Avocado Salad, by Nigella Lawson
Photo by Keiko Oikawa
From nigella.com
This mostly cooling salad, perfect for hot weather, has a bit of zip from the chiles – that you can adjust to your taste.
.
.
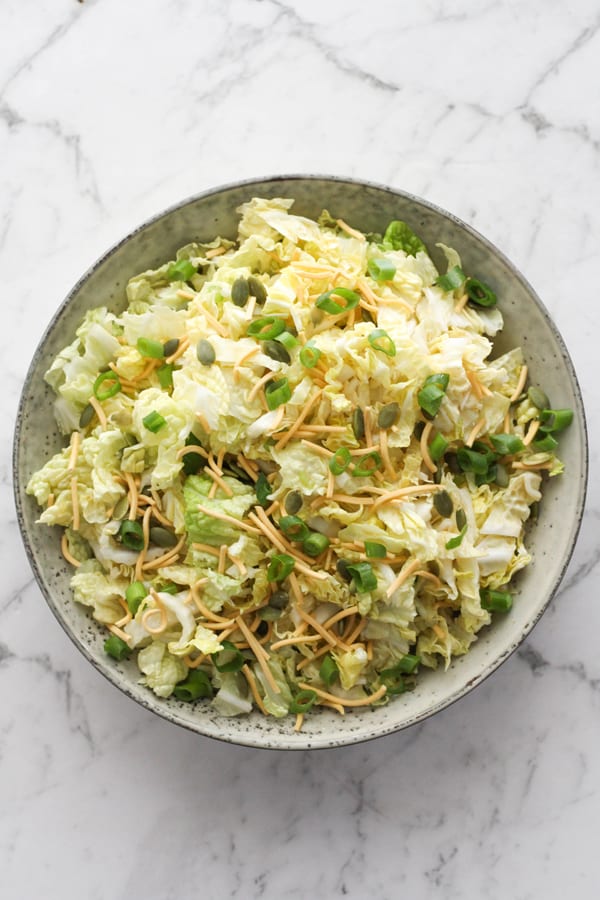
Cabbage and Crunchy Noodle Salad
From Cook it Real Good
This salad from down under combines a few common pantry ingredients: olive and sesame oil, soy sauce, and sugar – with fresh cabbage from the box to make a quick side dish. You can substitute regular onion for the green onions and toss in a few of the snow or snap peas from the box, thinly sliced, for color.
.
.
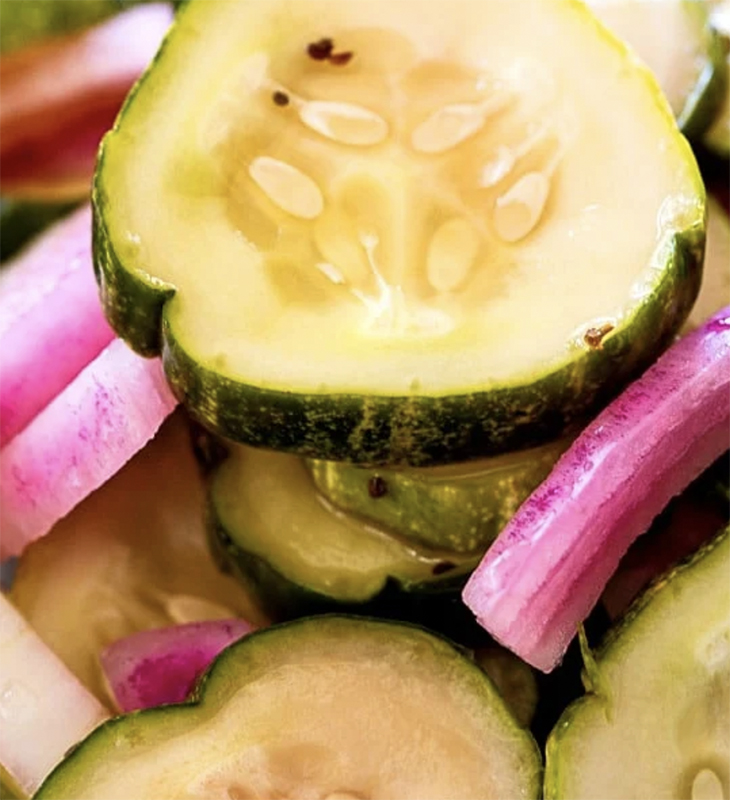
Pickled Cucumbers and Onions
Photo by Christin
From Spicy Southern Kitchen
Here are some quick pickles with a bit of spice. To change it up try slicing the cucumbers into wedges or sticks instead of rounds as shown.
.
.
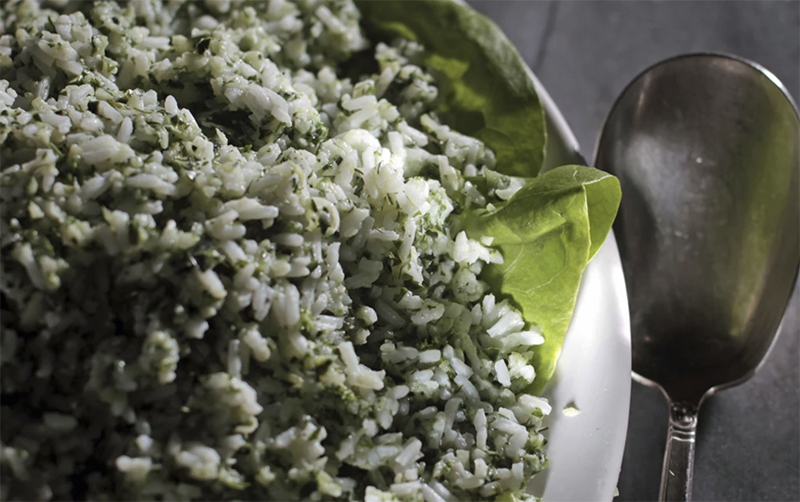
Photo by Bob Chamberlin
Cool rice and cucumber salad
From the Los Angeles Times
LA Times food writer Russ Parsons says rice salads don’t get no respect – deli cases are full of pasta-based salads, but almost none with rice. To improve the status of the rice salad, Parson provides this recipe that includes a healthy amount of chopped cucumber and fresh herbs.

