
Monthly Archives: September 2019
Week #19, Winter squash primer
- On: September 25, 2019
 0
0
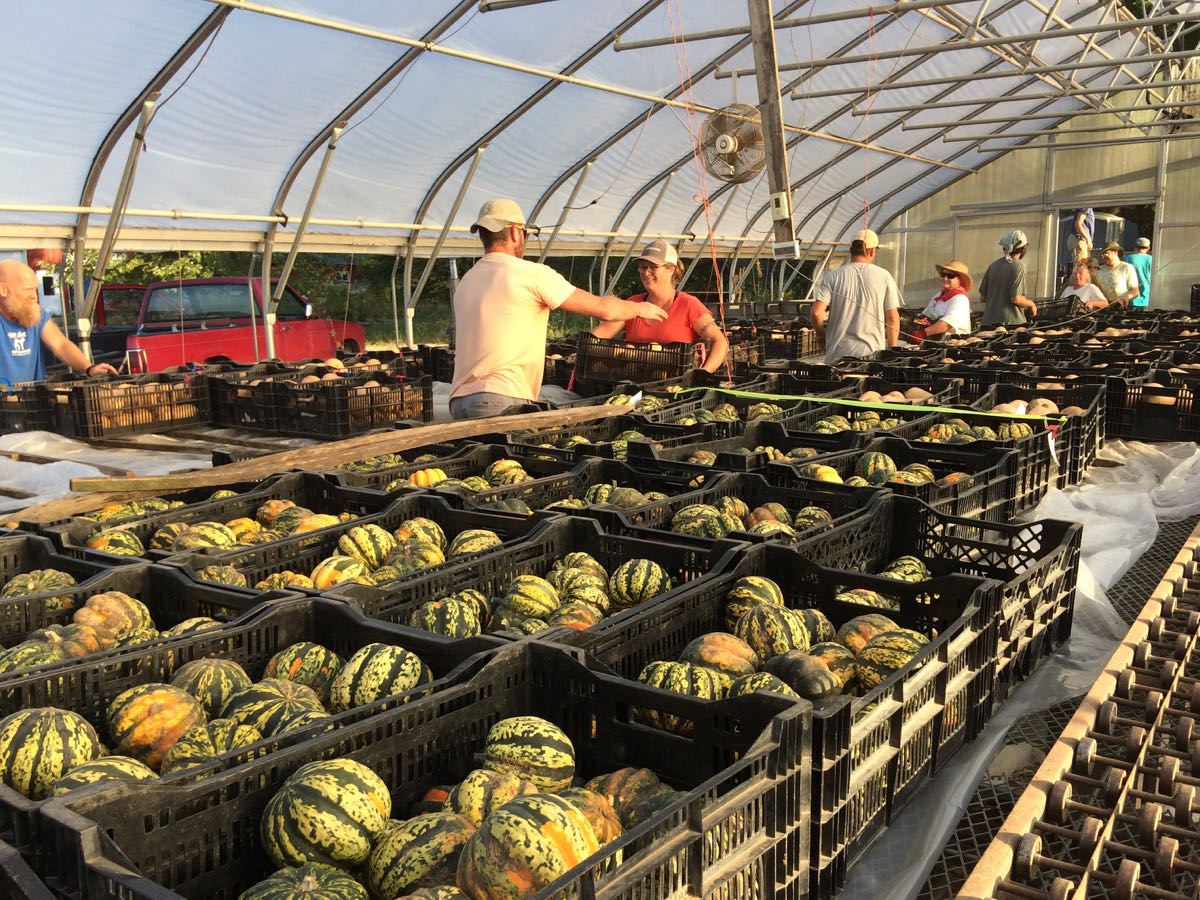
We are pushing hard this week to gather all our winter squash and sweet potatoes. There has been so much rain, and more is coming. We have to get these crops harvested and safe in warm storage before the next storm. Our squash and sweet potato crops look great now, but will decline if left outside in wet, chilly weather. From left, Ben, Billy, Kristin, Jory, Linda, Smitty, Simone, John, Michio, Karen and Monika bring ‘Metro’ butternut harvest into the greenhouse. In front, ‘Carnival’ acorn squash.

THIS WEEK’S ACORN SQUASH; ‘Festival’ (left) OR ‘Heart of Gold’ (right)
These are distractingly beautiful, with stripes and patterns in yellow, green, orange and white. We used to grow green acorn squash but switched to the newer striped varieties because they taste better and the plants are more vigorous. You’ll get one or two squash, of one of these types.
Winter Squash Primer
We expect to have a steady supply of squash or sweet potatoes over the coming weeks. Let’s review some basics about winter squash.
Expected life: Some winter squash varieties are ready to eat soon after harvest, others store deep into winter. This week’s acorns are cured and ready to eat. Plan to eat these early varieties within two weeks of delivery. Check the newsletter each week for storage information about that week’s delivery.
Storage: Winter squash store best at room temperature with good air circulation. No cooler than 50 degrees. On your kitchen counter works. Do not cover.
To make squash easier to cut: Microwave on high for 30 to 60 seconds, depending on size of the squash. This will soften the rind and flesh, making it much easier to cut.
Beth’s favorite simple preparation (acorn or butternut): Winter squash are easily roasted in a 400F oven. The goal is to get brown, caramelized edges.
– Split in half with a sharp knife.
– Scoop out and discard seeds.
– Run the squash briefly under running water, then shake off the excess water. Place cavity-side-down on an oiled baking sheet. The little bit of moisture seals the squash to your roasting pan. The water soon evaporates, allowing the squash to brown and caramelize. Caramelization really boosts the flavor.
– Roast at 400F until easily pierced with a fork, 30 – 45 minutes depending on size. Flip over while hot. Add a little butter to melt and some seasoned salt. Cut into wedges and eat.
Stuffed squash
Acorn squash have a central cavity perfect for stuffing. Prepare your favorite fully-cooked stuffing, e.g. a rice or quinoa mixture. Roast your squash as described below. Preheat the stuffing. Fill the cooked squash with stuffing, top with grated cheese and return to the oven until everything is hot.
Can you eat the rind? Last week’s ‘Jester’ had an edible rind. Rinds for acorns and butternuts are thicker. It’s your choice whether to eat them or not. Steve eats them. I don’t.

Carmelized acorn squash.
Veggie List and Veggie Notes
Week #19, September 26, 2019
– Weekly shares
– EOW/ purple
– Sampler/ sun
‘Festival’ or ‘Heart of Gold’ acorn squash, 1 or 2
Broccoli, 1 or 2 heads
Carrots, 1.6 lb
Tat soi OR Swiss chard (by site)
Slicing tomatoes, ~3 lb
Orange grape tomatoes, ~1 pint
Bell pepper, 1, green, purple or yellow
Orano snack pepper, 1 or 2
Walla Walla onion
Yellow onion
Jalapeno chile (HOT)
Basil, 1 sprig
Garlic
Next week’s box will probably contain potatoes, leeks, garlic, cauliflower (or broccoli), peppers and more.
Broccoli – Some heads may have small blackened areas. Just cut them out of the head. This is common after rainy weather.
Tatsoi (head with dark green leaves) – This bok choy relative has darker leaves and thinner stems. Easily substituted for bok choy in recipes.
Slicing tomatoes – This might be our final tomato delivery. At most, we’ll have a handful for you next week. The plants have exhausted themselves after setting a record crop. These tomatoes will not last long. Eat or cook soon.
Basil – This is probably our final sprig of basil for you. I wanted to send it with the (potentially) final bag of tomatoes. We’ve sent tomatoes, basil, onion, garlic and jalapeño so you can make a small pan of sauce.
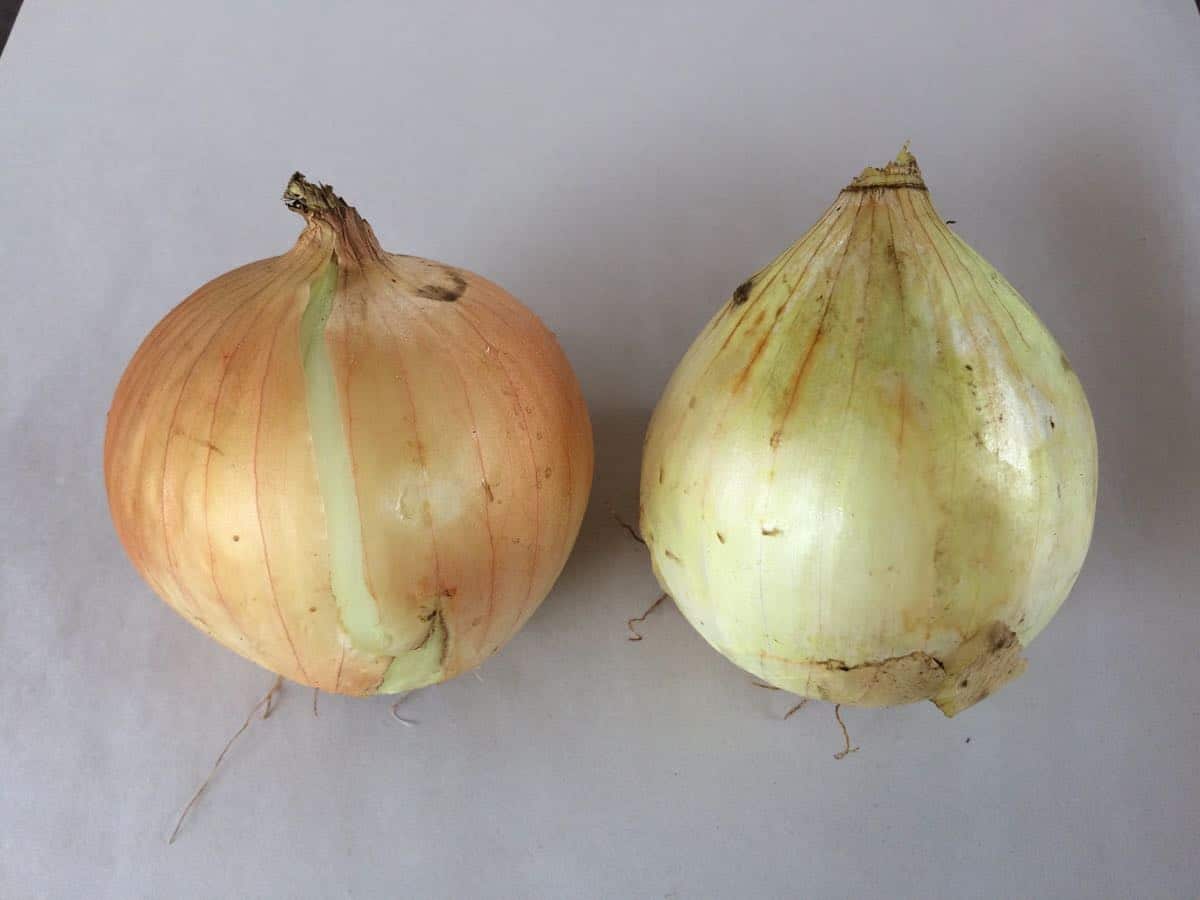
Yellow storage onion (left) versus sweet Walla Walla onion (right)
We have a bumper crop of onions this year, so we’re sending both a yellow storage onion, plus a Walla Walla again. Let’s repeat the information I shared a few weeks ago about their uses and how to tell them apart.
Yellow storage onions are pungent, and (unlike Wallas) will fry and sauté nicely. Their skins are tighter and darker yellow.
Walla Walla onions are sweet, wonderful in salad or for grilling. Because of their high moisture content, they do not fry well. Walla Wallas are a lighter shade of yellow, with sparse outer skins. They tend to look ‘messy’ because they have few outer layers to shed when we clean them up for you. In contrast, the outer skins of yellow onions flake off easily, taking all the soil with them, leaving clean, shiny skins.
RECIPES
Visit our 2019 Recipe Log or our 2018 Recipe Log or join our Facebook discussion group.
LOCAL THYME/ Comforting Classics or Cooking 101
Orecchiette with Tomatoes, Frozen Peas and Ricotta
Wilted Greens with Oyster Sauce
Acorn Squash with Cornbread Stuffing
Penne with Broccoli and Cherry Tomatoes
LOCAL THYME/ Outside the Box or Cooking 202
Pancetta, Beef, and Chorizo Chili with Sweet and Hot Peppers
Grilled Halibut with Wilting Greens and Chiles
Oven Fried Acorn Squash
Spiced Yogurt Roasted Broccoli
LOCAL THYME/ Quick & Easy Meal
Spicy Stir Fry with Broccoli, Greens and Tofu
????????????
RECIPES FROM LAUREN
SPICY MAPLE ROASTED SQUASH & BROCCOLI
Takes 45 minutes
Serves 2-4
3 tablespoons olive oil
1 or 2 acorn squash
1 or 2 heads broccoli, cut into bite size florets
1 teaspoon Kosher salt
1/2 teaspoon freshly ground black pepper
2 garlic cloves, minced
3 tablespoons maple syrup
1/2 – 1 teaspoon Kosher salt
- Preheat oven to 400 degrees.
- Drizzle olive oil over two baking sheets. Cut squash in half lengthwise and remove seeds. Cut into 1/2-inch wide slices and divide evenly onto baking sheets. Add broccoli florets to each tray and toss the mixture gently with your hands to coat. Sprinkle everything with salt and pepper. Roast for 30 minutes, removing half way through and tossing everything for even browning. After thirty minutes, add garlic, syrup and red pepper flakes. Roast 10 minutes further. Remove from oven, allow to cool, and try not to devour immediately.
.
????????????
.
MOROCCAN FALL STEW
Adapted ever so slightly from Dishing up the Dirt
Takes 1 hour
Serves 6
2 tablespoons coconut oil (or olive oil)
1 medium onion, diced
1 pound pork sausage
1 bunch chard or tatsoi (stems and leaves), thinly sliced, divided
3 garlic cloves, minced
1 jalapeno, minced
1 teaspoon ground cinnamon
1 teaspoon ground cumin
1/2 teaspoon ground allspice
2 teaspoons Kosher salt
4 cups diced tomatoes (either cored slicers or grape tomatoes would be fine)
15-ounce can chickpeas, rinsed
1 pound carrots, cut into 1/2 inch thick rounds
1/2 cup roughly chopped dried apricots
2 cups beef broth or water
2 teaspoons red wine vinegar
Greek yogurt, for serving
- In a large stock pot or Dutch oven, warm the oil over medium heat. Add onions and cook until soft, about 5 minutes. Add the pork, cooking it by breaking it apart with a wooden spoon until all the edges brown nicely (about 10 minutes). Add chard or tatsoi stems, garlic, jalapeno, and spices. Cook for a minute or two until the spices are fragrant. Add tomatoes and simmer, scrapping up any brown bits at the bottom of the pan, until the liquid has reduced a bit (about 15 minutes).
- Add the chickpeas, carrots, apricots and brother or water. Bring to a boil, reduce to a simmer and cook uncovered for 20 minutes until the carrots are tender and the stew has thickened. Remove from heat and stir in tatsoi or chard greens and vinegar. Stir several times to wilt the greens. Taste and adjust seasonings as desired.
- Serve the stew with yogurt and sprinkle with additional salt and pepper as needed.
.

Week #18; So many tomatoes
- On: September 18, 2019
- 0

So many tomatoes.
Tomato Gossip
Tomatoes have completely dominated our week.
– We took thousands of pounds of slicing tomatoes to our small-batch processor in East Troy, to make into juice for next year. Yeah! Those tomatoes were of very good flavor so we expect the juice to be really good.
– Members visited during the past two weekends for plum tomato u-picks. You’ve asked for more chances to visit the farm, so we created this new event and planted extra tomatoes to accommodate it. The tomatoes were abundant and everyone went home happy, with plans to make sauce, salsa, dried tomatoes, etc. For the record, people harvested twice as many tomatoes as they thought when placing their reservation. The picking was easy! We consider the u-picks a success and plan to repeat them next year.
– The tomatoes we picked for your CSA boxes are still good quality, good enough for fresh salads. Soon, we will recommend that you cook your tomatoes instead of eating raw.
– We have another 5 lb bag for you this week. Don’t worry, we will taper down the quantities soon.
Veggie List and Veggie Notes
Week #18, September 19/20, 2019
– Weekly shares
– EOW/ green
‘Jester’ winter squash, 1
Tomatoes, ~5 lb, mixed slicing (~2 lb) & plum (~3 lb)
Bok choy, 1
Carrots, 1.6 lb
Broccoli, 1 medium head
Celery, 1 bunch
Poblano chiles (medium heat), 3
A few peppers, maybe 1 bell + 1 fryer + 1 Orano
Shishito peppers (no heat), 3 or 4
Walla Walla onion
Yellow onion
Basil, 1 or 2 sprigs
Next week’s box will probably contain carrots, winter squash, tomatoes, peppers, broccoli, onions, and more.
‘Jester’ winter squash – This is my favorite squash. It’s a hybrid between sweet dumpling and acorn squash. It’s the size of an acorn but with the speckling and delicious taste of sweet dumpling. ‘Jesters’ do not store for long. They are prima donnas. Eat within two weeks, or sooner if you see problems developing. Storage: At room temperature, on your kitchen counter where you can keep an eye on them.
Tomatoes – Tomatoes remain in good shape but their storage life is diminishing. Store on your kitchen counter. Watch carefully and eat soon.
Carrots – These are “summer carrots,” meaning that they were harvested during summer weather. They tend to be more strongly flavored than our “fall carrots” which mature under cold nights. We’ll have “summer carrots” for you this week and next week. There will be a gap and then our fall harvests will begin.
Celery – Our celery is more strongly flavored and more fibrous than typical grocery store celery. Taste it raw then decide how you want to use it, raw or cooked. This is one of our better batches of celery, which we pack in the CSA boxes just once per year. We’ve pushed the planting date later. We want to avoid summer harvests because the celery is tough if it matures during hot weather. Harvest too late in the fall and insect problems accumulate. Who knew celery is so finicky to grow?
Broccoli – The first fall broccoli!
Bok choy (large rosette with thick white stems and green leaves) – This Asian green is good for stir-frying or sautéing or in soup. You can think of the stems and leaves as two separate vegetables. The stems require longer cooking. The leaves will cook almost as quickly as spinach. Bok choy stores well, so feel free to pull off leaves as you need them, or use the whole head at once. Refrigerate in a plastic bag or other container.
Basil – We remain happy with the new ‘Prospero’ variety, the one I wrote about a few weeks ago. It’s holding up well against downy mildew.
Pepper ID
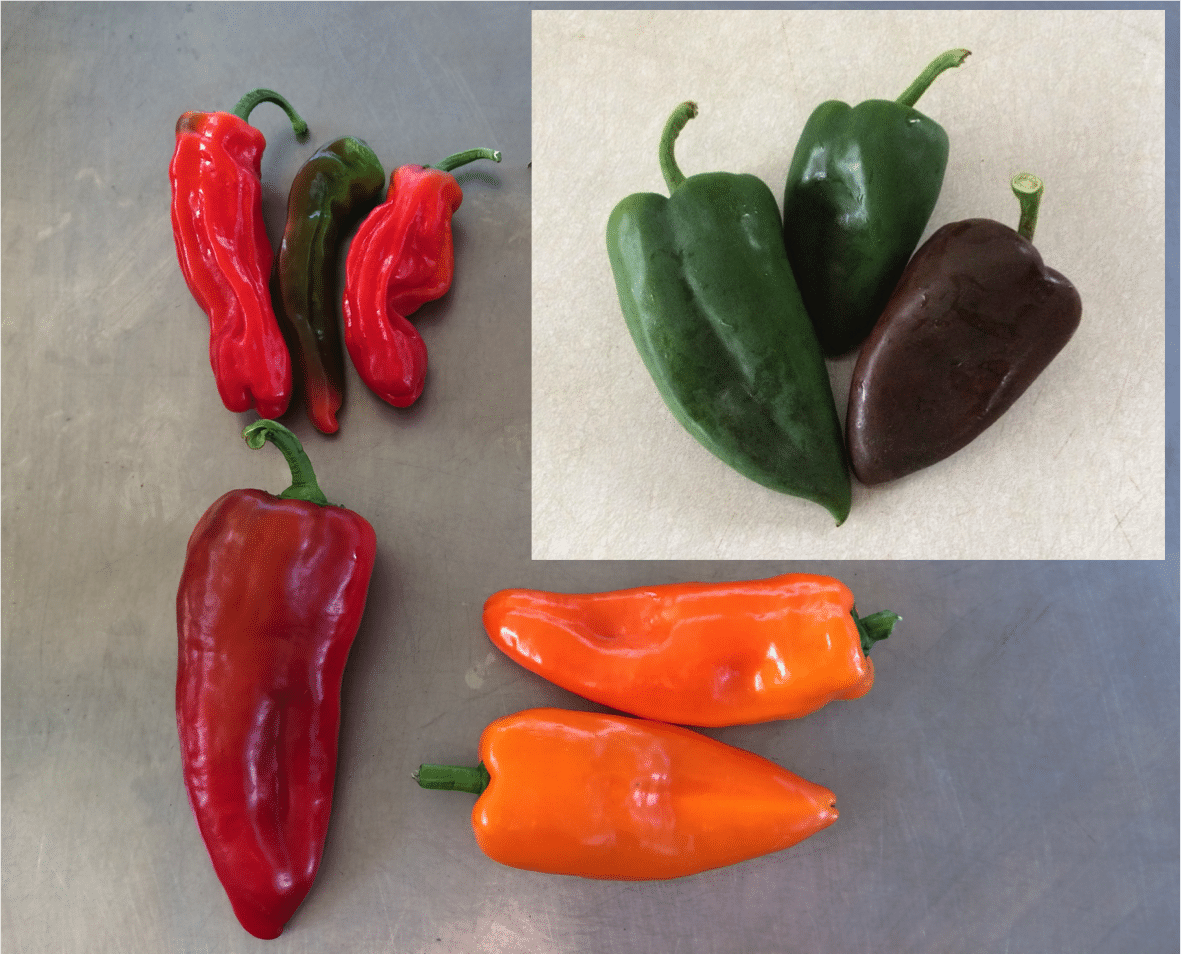
Clockwise from top left;
Shishito peppers (sweet) – From the Johnnys Seed catalogue: “Heavily wrinkled fruits are thin walled, mild (no heat) when green and slightly sweet when red. Popular in Japan where its thin walls make it particularly suitable for tempura. Also very good in stir fries or sautés. In Asia, fruits are always cooked green but they also may be used red. Thinly sliced, the red fruits are excellent in salads and coleslaw.”
Poblano chiles (triangular, shiny; green or brown; MILDLY HOT) – Poblanos are the creme de la creme of chiles. They have lots of great flavor in combination with manageable heat. Roast and add to soup or casseroles. To reduce heat, remove the seeds and midveins. These will go nicely in a stir-fry with the bok choy and red peppers.
Oranos (sweet) – Crisp, zesty snack pepper that can be used like a frying pepper too.
Red frying pepper (sweet) – So fragrant and sweet when roasted or pan-fried, try slicing thinly and adding to a stir-fry. Excellent raw too.
NOT PICTURED; Bell pepper (sweet) – Most of you know how to recognize bell peppers.
RECIPES
Visit our 2019 Recipe Log or our 2018 Recipe Log or join our Facebook discussion group.
LOCAL THYME/ Comforting Classics
Roast Beef and Blue Cheese Sandwiches with Quick Pickled Onions
Cream of Winter Squash and Tomato Soup
Bok Choy and Carrot Slaw
Carrot Squash Puree with Sage Butter
LOCAL THYME/ Outside the Box Recipes
Winter Squash and Caramelized Onion Flatbread
Tomato and Pepper Shakshuka with Eggs
Bok Choy Sauerkraut
Beer, Ham and Cheese Chowder
LOCAL THYME/ Quick & Easy Meal
Chicken Chow Mein
????
RECIPES FROM LAUREN
TAKE OUT STYLE NOODLES WITH BOK CHOY
Adapted from Half Baked Harvest
Takes 30 minutes
Serve 4-6
1/4 cup peanut oil
1 head bok choy, stems and greens thinly sliced, divided
1 orano pepper, seeded and diced
1 frying pepper, seeded and diced
1 inch fresh ginger, peeled and grated
1/2 teaspoon red pepper flakes
2 tablespoons sesame seeds
8 ounces Chinese style egg noodles
1/2 cup tamari
1/4 cup rice wine vinegar
2 tablespoons maple syrup
1-2 tablespoons sambal oelek (or other favorite garlic chili paste)
1/3 cup water
1 pound ground chicken or pork (optional)
1 Walla Walla onion, thinly sliced
Thinly sliced basil, optional
- In a large skillet over medium high heat, heat peanut oil. Add bok choy stems, peppers, ginger, and red pepper flakes. Cook until ginger is fragrant and peppers are just beginning to brown, about 8 minutes. Stir in sesame seeds and cook 1 minute more. Remove from heat, pour into a small bowl, and set aside. Don’t worry about wiping out the skillet. You’ll use it again later.
- Cook noodles according to package directions.
- In medium bowl, combine tamari, vinegar, maple syrup, chili paste, and water. Whisk to combine.
- Return skillet you used earlier to stove. Add ground chicken or pork and cook over medium high heat, breaking up and stirring often, until fully browned. It will take about 5 minutes. Add the sliced onion and cook just 2-3 minutes more. Slowly pour in tamari mixture and add the bok choy leaves. Bring to a simmer and cook until the sauce coats the meat, about 5 minutes. Stir in the noodles and half of the ginger pepper oil. Remove from heat. Serve the noodles warm with additional pepper oil. Stir in some fresh basil if you like right before serving.
.
????
.
AFRICAN PEANUT STEW
Serves 4-6
Takes 45 minutes
2 tablespoons butter, olive oil or coconut oil
1 yellow onion, diced
2 or 3 poblanos (as many as you received), diced
1-2 shishitos, diced
1-2 carrots, diced
1 teaspoon ground cumin
1/2 teaspoon Kosher salt
1/4 teaspoon freshly ground black pepper
2 cup diced tomatoes
1 tablespoon maple syrup
1 Jester squash, seeded and cut into bite-size pieces
4 cups chicken or vegetable broth
1/2 cup peanut butter
Bok choy greens, thinly sliced, optional
2 cups cooked rice
Sriracha, optional
- In a large stock pot, warm butter or oil over medium heat. Add onions, peppers, carrots, cumin, salt and pepper. Saute for 10-15 minutes until well softened. Add tomatoes and maple syrup. Cook for 5 minutes until reduced slightly then add squash, broth and peanut butter. Bring to a boil, reduce to a simmer and cook gently for 15-20 minutes until squash is tender. If using bok choy greens, add them at the very end and cook 2-3 minutes longer until wilted.
- Meanwhile, prepare your rice. Serve stew over rice with sriracha or other hot sauce.
Week #17; A big good-bye
- On: September 11, 2019
- 0
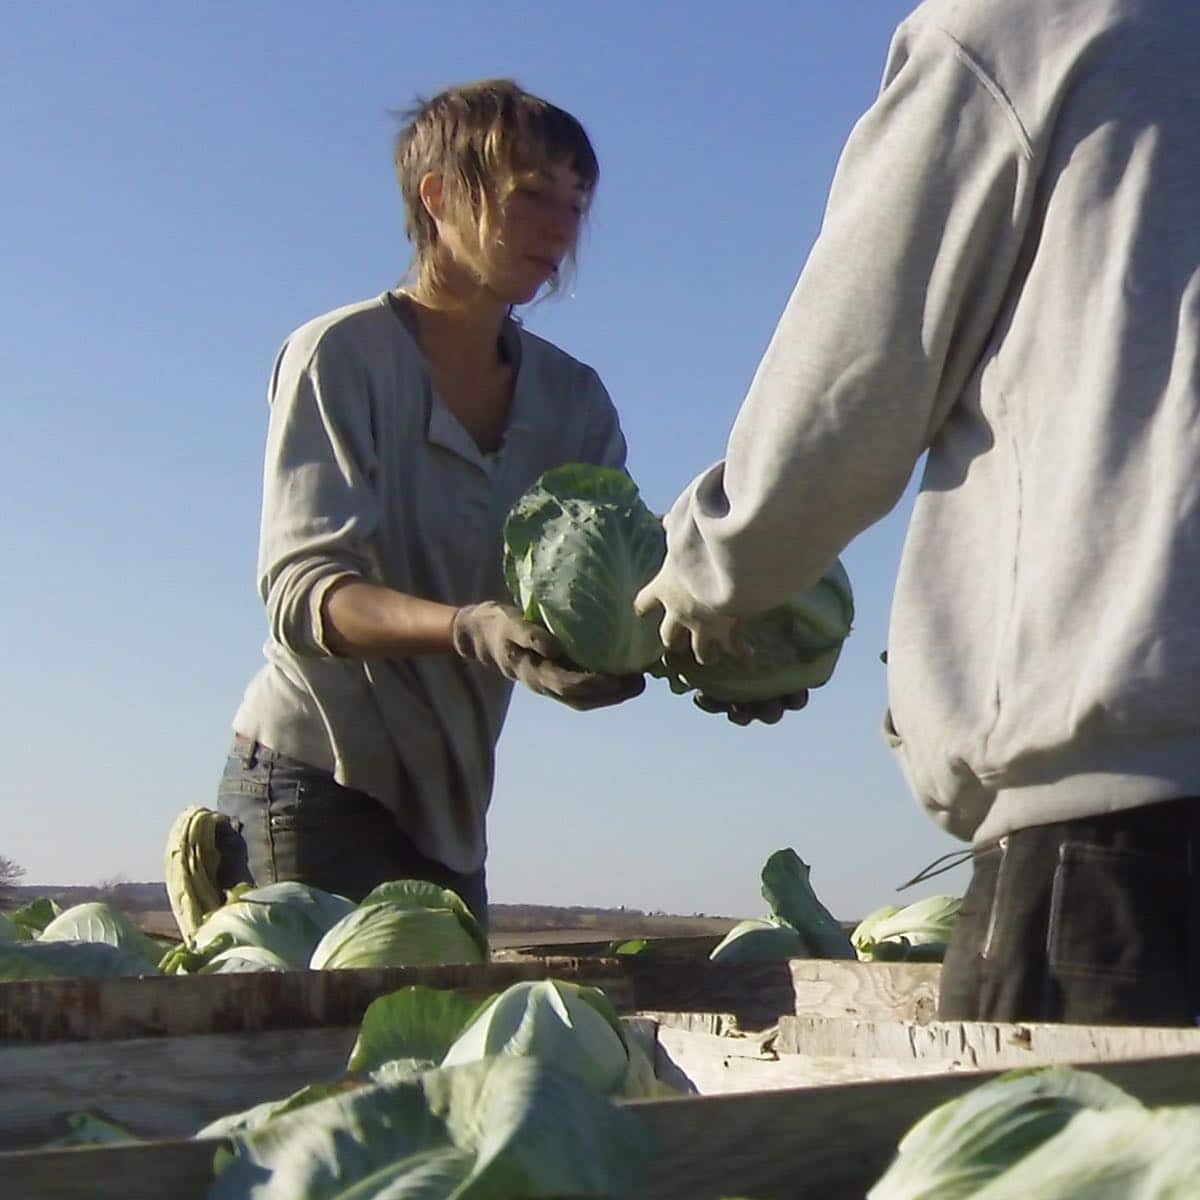
Kerry sorts cabbage at harvest. 2010.
Kerry
Longterm employee/ manager/ righthand woman Kerry Devlin has moved on to the next phase of her life. After working for us since 2006, she has returned to school to study Construction & Remodeling, leaving a big gap at our farm. In her 14 years with us, Kerry grew into being a manager, able to juggle employee crews, machinery and all the fine details of the 40 crops we grow. We call it the ‘split brain’ ability – the capacity to problem-solve and manage many, many details at once.
Kerry grew up while working for us. Hired at age 22, she developed along with the farm during her 20s and 30s. She was at my side as we grew the CSA from “Beth’s hobby” into over half of our farm’s sales. Her quiet steadiness drew her coworkers’ respect and allowed her to develop into an effective leader. She did not expect this. As a shy person, she was nervous about managing people. She grew into the job, gaining confidence as the years progressed.
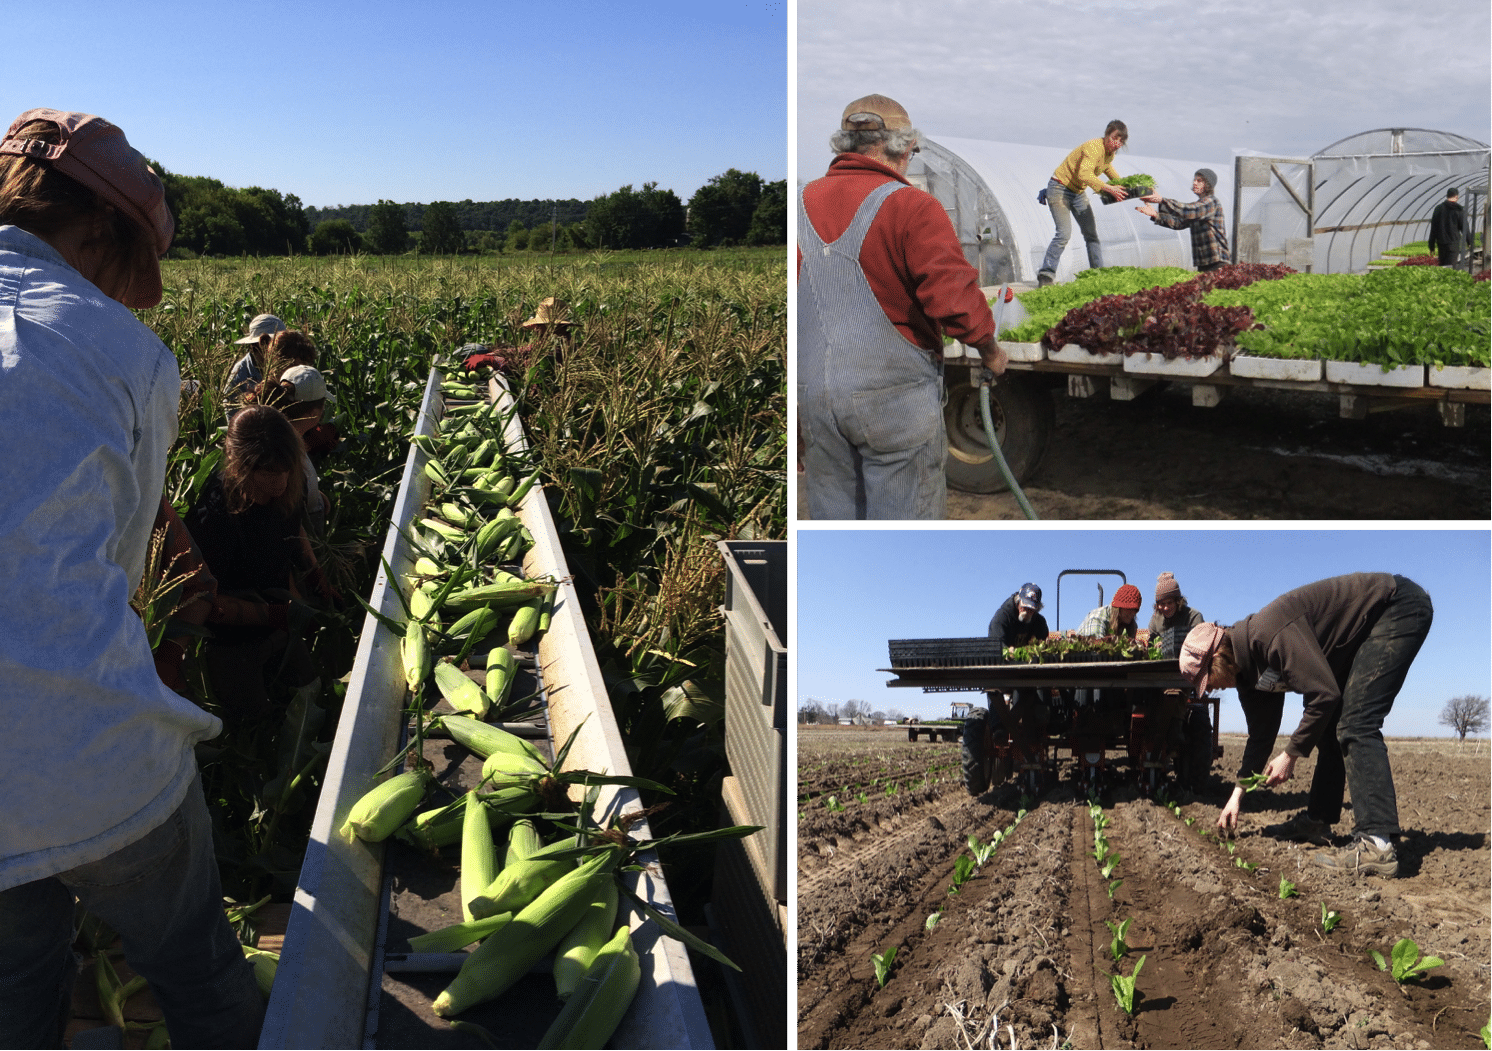
Left; Kerry (foreground, on wagon) sorts and counts sweet corn at harvest. The crew harvests the corn and places it on a conveyer belt for transport to the wagon. 2017.
Top right; Kerry (in yellow) arranges seedlings on the wagon in the correct order for transplanting. 2013.
Bottom right; Kerry (foreground) checks seedling depth and watering during transplanting. 2014.
What do you notice about Kerry in the photos above?
1. She is camera-shy.
2. In each job, she has positioned herself for maximum responsibility. During transplanting, everyone wants to ride the transplanter. It’s easier and more social. Kerry recognized that the person walking behind the transplanter is doing the most important job, even though the work is harder and grubbier, crawling or crouching to be sure the plants are properly set. Are the plants at the right depth? Is the water working? Are the rows at an even depth? Has the transplanter clogged with an old broccoli stem from last year? You can see these complications while walking, but not while riding.
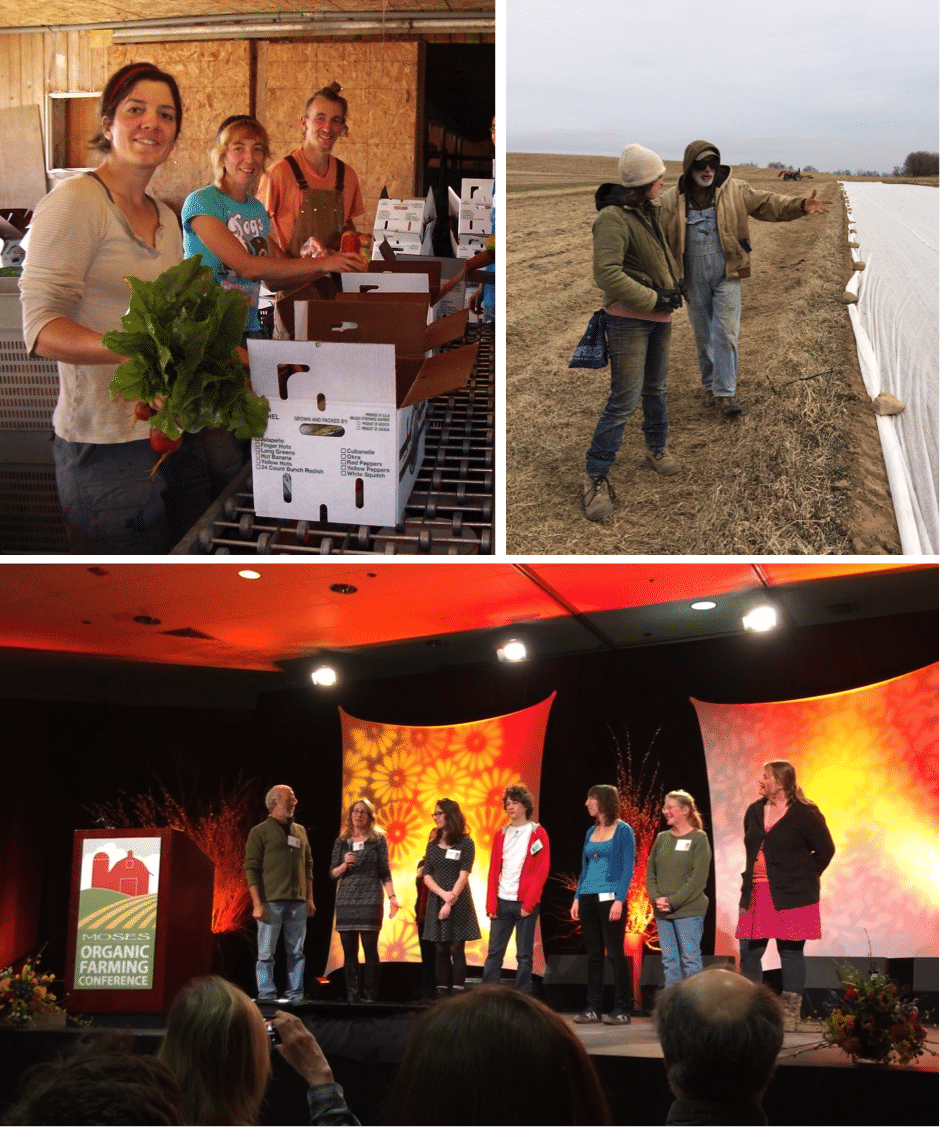
Top left; CSA packing crew (Georgia, Kerry, Noah, 2011.) Kerry has been my righthand woman in running the CSA. There are so many details and a lot of math and problem solving. Together, we got all the details right.
Top right; Steve relied on Kerry’s judgement too. In this photo, they strategize about laying row cover on spring lettuce, 2015.
Bottom; We were thrilled that all three of our Tipi managers could be with us when we were honored as the 2016 Organic Farmers of the Year, for the midwest. From left, Steve, Beth, daughter Sophie, son Ari, Kerry, Simone O’Donahue and Maggie Schley.
Now, what do we do? Panic? Of course not. There’s a lot of talent on the farm right now. We have many capable, longterm employees and managers. Let’s recognize the experience and knowledge of Maggie Schley (22 years), Simone O’Donahue (20 years), Smitty Bietila (9 years), Billy Frain (7 years), Karen Nicholson (7 years), Jory Carlin (5 years) and Kristin Knoener (5 years). They know so much. That’s not everyone, and doesn’t include the people who came and went over the years. Kerry gave us six months notice, plenty of time to train replacements for each of her specialized jobs. For example, we have a wonderful vacuum seeder for greenhouse flats that requires many fine adjustments. Maggie is taking over that important spring job, adding it to her other responsibilities. Our crew has stepped up. By the time Kerry left last week, all her work was covered. We hope!
During her final week on the farm, Kerry asked if she could take a crew to clean weeds out of our biggest greenhouse. I said ‘Sure.’ Weeds grow under the benches, creating a nuisance and sowing a new generation of weeds inside the greenhouse. I swung by later and found Kerry exiting the greenhouse hauling a huge pile of weeds. “This is great. Now the greenhouse is ready for spring,” she said. Even in her final days, she’s thinking about how to help the farm run better.
Kerry, thank you so much. We were lucky to have you as part of our farm for so many years. You are going to be a wonderful carpenter. Beth & Steve
#2 Grade Red Peppers
I write about pepper grading every year. Returning members can say “yeah, yeah” and skip ahead. New members, please read.
Many of the red bell peppers we send in the CSA boxes will be our #2 grade. We’ve sent a mix of #1 and #2 grade so far this year. We do this to avoid waste and to deliver good value to our CSA members. The #2 grade peppers are excellent eating quality, but are not quite pretty enough to sell to our coop store customers. As a result, we place a much lower value on these peppers. This allows us to provide generous amounts of peppers over the course of the season. We feel this is a good exchange, even if it means you occasionally open a pepper and find that it needs trimming. Here are the reasons that peppers are downgraded from #1 grade to #2 grade:
- They may have a minor blemish, or
- They may have minor insect damage, or
- They may be very ripe and beginning to wrinkle. (These are especially sweet and delicious as they are fully ripe. These cannot be sold to stores because their shelf life is short. You will find that the texture is less crisp than a #1 grade pepper, but the flavor more than makes up for it.)
- They might be partially red and partially green.
- Others are just too small.
.
Eating quality is fine (or excellent) for the #2 peppers. We throw away ALL peppers that we suspect have rot inside (although one may occasionally slip through in either #1 or #2 grade.)
Veggie List and Veggie Notes
Week #17, September 12/13, 2019
– Weekly shares
– EOW/ purple
– Sampler/ moon
Tomatoes, 5 lb total, plum (>4 lb) & slicing (<1 lb)
Red potatoes, 3.5 lb
Red frying peppers, ~3
Maybe 1 Jimmy Nardello frying pepper
Red or green bell pepper, 1
Red OR yellow watermelon, 1 small
Romano beans, 1 lb
Zucchini OR cucumber, 1 – 2
Edamame soybeans, 1 medium bundle
Walla Walla onion
Yellow onion
‘Roulette’ OR ‘Habanada’ not-hot habanero chiles, 2
Next week’s box will probably contain carrots, tomatoes, peppers, onions, winter squash and more.
Tomatoes – You will get mostly plum tomatoes this week. They are in good shape. Store at room temperature (e.g. your kitchen counter) but keep an eye on them. If you see signs of spoilage, use quickly. They are ripe.
Red potatoes – These beautiful red potatoes are from our friends at Driftless Organics.
Watermelon – This is the last melon of the season!
Romano beans – Take a look at last week’s newsletter for a description and cooking ideas. This week’s beans are more mature than last week, making them perfect for braising recipes.
Edamame soybeans – See last week’s newsletter for information. The edamame are more mature than last week, and will need longer cooking. Don’t be concerned about yellow leaves. It’s normal at this stage, as the plants divert resources from the leaves into the pods.
‘Habanada’ OR ‘Roulette’ chiles – You will receive one type. Both are new varieties bred to have the aromatic taste of habanero chiles, with almost no heat. Lo and behold, habaneros have a wonderful fruity flavor. No one knew because the blazing heat of a traditional habanero sears your taste buds and you cannot taste the chile itself. Snack on them to enjoy the flavor, or add them to any dish. To reduce all chances of spiciness, remove the seeds and midveins. ‘Habanada’ was developed through a collaboration between chefs and plant breeders. Read more about its background story.
Your ‘Roulette’ or ‘Habanada’ chiles are packed in your bag of beans, to help you identify them.
Yellow storage onion (left) versus sweet Walla Walla onion (right)
You will receive two onions from us this week, with different purposes. Here are their uses and how to tell them apart.
Yellow storage onions are pungent, and (unlike Wallas) will fry and sauté nicely. Their skins are tighter and darker yellow.
Walla Walla onions are sweet, wonderful in salad or for grilling. Because of their high moisture content, they do not fry well. Walla Wallas are a lighter shade of yellow, with sparse outer skins. They tend to look ‘messy’ because they have few outer layers to shed when we clean them up for you. In contrast, the outer skins of yellow onions flake off easily, taking all the soil with them, leaving clean, shiny skins.
RECIPES
Visit our 2019 Recipe Log or our 2018 Recipe Log or join our Facebook discussion group.
LOCAL THYME/ Comforting Classics aka Cooking 101
Tomato and Pepper Braised Romano Beans with Herb and Garlic Goat Cheese
Sweet Red Pepper Sauce with Capellini
Wholegrain Mustard Roasted New Potatoes with Salmon and Tomatoes
Tomato Bruschetta with Thyme
LOCAL THYME/ Outside the Box Recipes
Romano Bean, Potato and Meatball Stew
North African Roasted Vegetable Salad
Curried Chana Dal with Potato, Peppers and Romano Beans
Spanish Roasted Tomatoes and Peppers with Jamon
LOCAL THYME/ Quick & Easy Meal
Shrimp Edamame and Pepper Stir Fry
????
RECIPES FROM LAUREN
SKILLET SAUSAGES WITH ROMANO BEANS & TOMATO CREAM
Takes 45 minutes.
Serves 4-6 (or more if served over rice).
3 tablespoons vegetable oil
1 pound favorite sausage, preferably a pre-cooked variety (I used Klement’s smoked sausage)
1 Walla Walla onion, diced
2 habanada or roulette chiles, diced
1 teaspoon Kosher salt, divided
1/4 teaspoon freshly ground black pepper
3 cups chopped tomatoes
1 cup chicken or vegetarian broth
1 pound romano beans, cut into 1-inch pieces on the diagonal
1/4 cup heavy cream
Cooked white rice, optional
- In a large heavy skillet or Dutch oven, heat oil over medium high heat. Add sausages and cook for 5-7 minutes until charred on both sides. Remove to a cutting board and slice into 1-inch pieces.
- Turn skillet or Dutch oven heat down to low. Add onions and peppers along with 1/2 teaspoon Kosher salt and pepper. Saute for 10 minutes until softened. Add tomatoes and broth. Bring to a boil, reduce to a simmer and cook for 5 minutes. Add romano beans along with remaining salt. Partially cover and continue simmering for 10 minutes. Remove from heat and stir in cream. Add sausages back in. Taste and adjust seasonings as deserved. Serve in bowls or over rice!
.
????
.
FALL FAJITAS WITH AVOCADO EDAMAME MASH
Takes 30 minutes.
Serves 4-6.
1/4 cup olive oil, divided
1-2 green bell peppers, seeded and cut into thin strips
2 colored peppers, seeded and cut into thin strips
1 yellow onion, cut in half and thinly sliced
3 garlic cloves, minced
1 teaspoon Kosher salt, divided
1/2 teaspoon freshly ground black pepper
1 pound flank steak, cut into thin strips
2 teaspoons cumin
2 teaspoon chili powder
1 pinch cayenne powder
2 avocados
1 cup shelled edamame (pods boiled for 4 minutes and then removed from shells)
1 lime, juiced
Tortillas
Sour cream or Greek yogurt, optional
Hot sauce, optional
- In a large heavy skillet, heat 2 tablespoons olive oil over medium heat. Add peppers, onions, and garlic with 1/2 teaspoon each salt and pepper. Cook for 15 minutes, stirring occasionally. You want the veggies to be softened and just beginning to char in places. Add steak along with cumin, chili powder, and cayenne. Saute 5 minutes longer, just until steak is cooked through.
- Combine avocado and edamame in a small bowl. Smash with a potato masher, pastry cutter or two forms until the two come together. Add lime juice from half a lime and remaining 1/2 teaspoon salt. Taste and adjust flavors as desired. I used the juice from a whole lime but you may not want to.
- Warm tortillas on a skillet or in microwave and serve with a generous portion of both avocado edamame mash and fajita mixture. Top with sour cream or Greek yogurt and hot sauce if desired. Enjoy!
.
????
.
EASY OVEN FREEZER TOMATOES
Takes 1 hour, 15 minutes (almost all inactive)
1/4 cup olive oil
5 pounds tomatoes, cored and cut into quarters or eighths depending on size
1 Walla Walla, cut into quarters
1 colored bell pepper, cut into large chunks
4 garlic cloves, peeled
1/2 teaspoon Kosher salt
1/4 teaspoon freshly ground black pepper
- Preheat oven to 450 degrees.
- Pour olive oil into a 9 x 13-inch pan. Add tomatoes, skin side down if possible. Nestle onion (it’s good if the layers fall apart a bit), pepper chunks, and garlic into between the tomatoes so they are even distributed throughout the pan. Sprinkle with salt and pepper.
- Roast for 45-60 minutes until their is less juice remaining and the tomatoes even have a little browning on their edges. Let cool and then pack into freezer-proof mason jars or freezer bags for chunky tomatoes to use in winter soups, stews, or chilis. Or puree in your food processor or blender before freezing for a quick pizza or pasta sauce.
.
Week #16, Farm landscape vernacular
- On: September 04, 2019
- 0


We had our house re-roofed this year. The material choice was easy. Metal roofs last for a long time, and avoid landfill-clogging asphalt shingles. The color required thought. Red, to harmonize with our cream yellow siding? No, we have plenty of red farm buildings. Golden brown? Too dull. Deep purple? I would love that but we couldn’t get metal roofing in purple. We settled on forest green, a look that I treasure, maybe because the first farmhouse Steve and I shared was white with a green roof.
I didn’t think about the emotional tug of this color combination until making this decision. There’s a “vernacular” in the Wisconsin farm landscape. The classic look is a light-colored farmhouse with a green roof, paired with red barns. That’s what we have! We’re not comformists, we’re not bound by tradition. We just love this class Midwestern look. It’s nice in the summer when surrounded by green fields but really stands out in winter. In a white snow-covered landscape, the colorful buildings beckon as ‘home.’
We hired the Amish carpenters who built our pack shed. I asked Raymond if they could re-roof our house. He said, “Oh Beth, it’s going to be a year.” We waited. They’re in demand because they do a good job. This younger crew did not sing as they worked. The older crew who built our pack shed sang while they worked, and their music changed as they built the building around themselves. It was a delight. Beth

Our big red barn. We couldn’t reach the peak with our lift and paint wand. Drives me nuts.
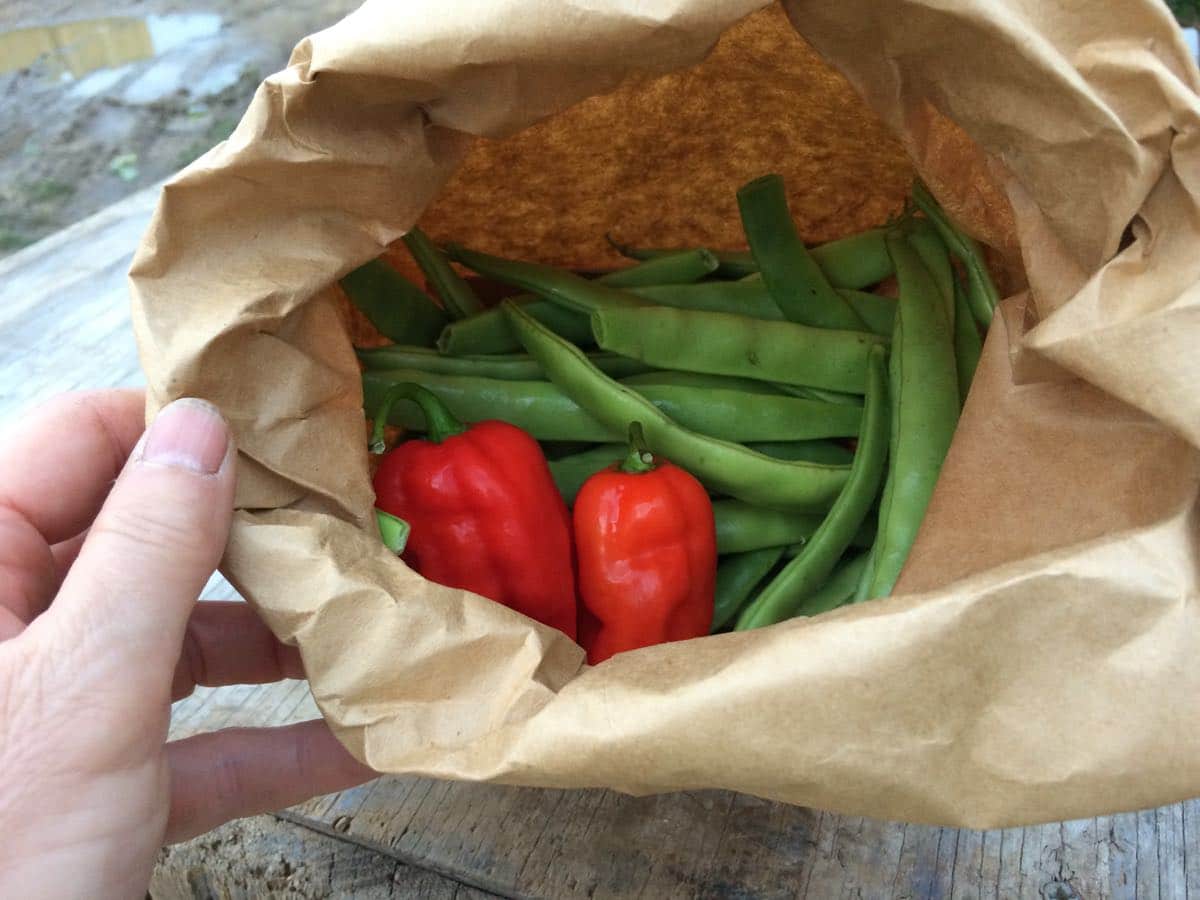
Grape tomatoes in paper bags
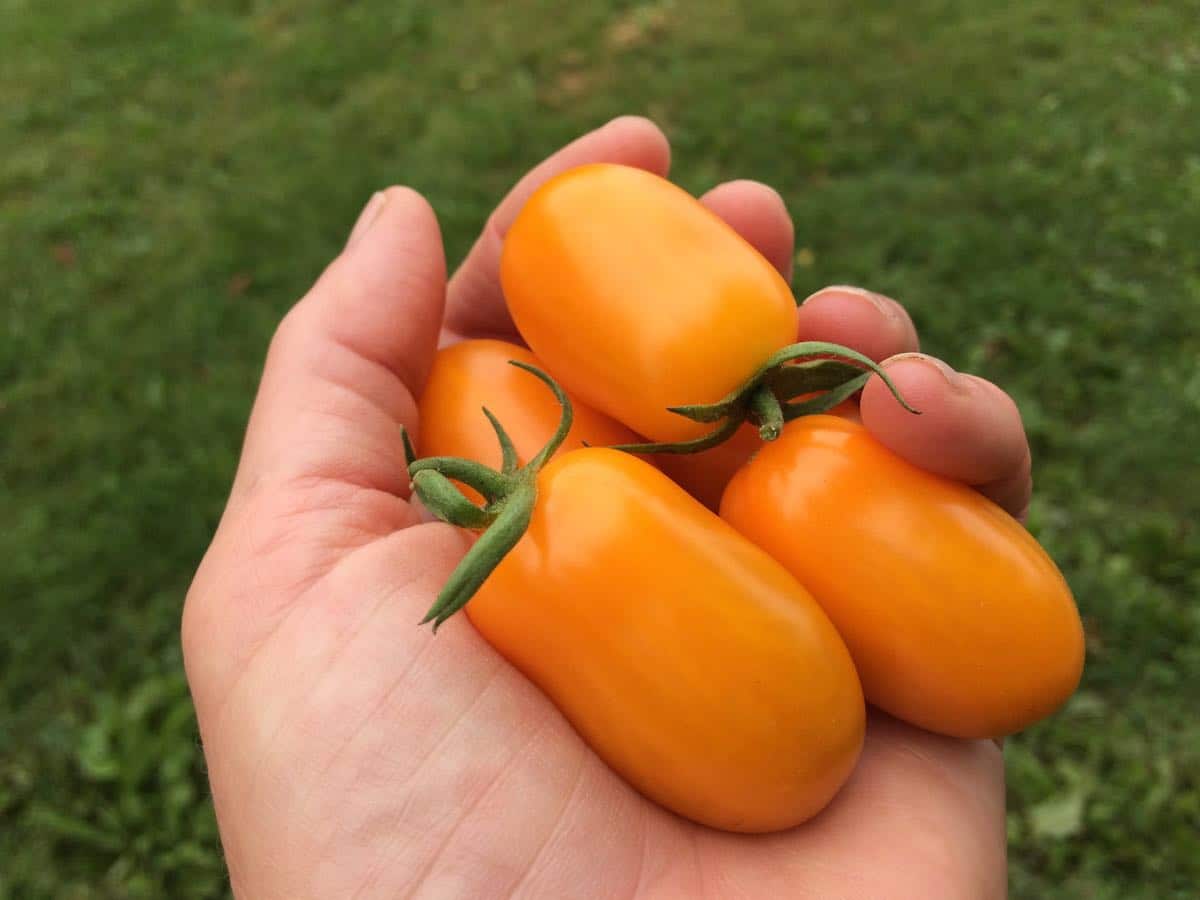
The ‘Nova’ orange grape tomatoes are really, really good.
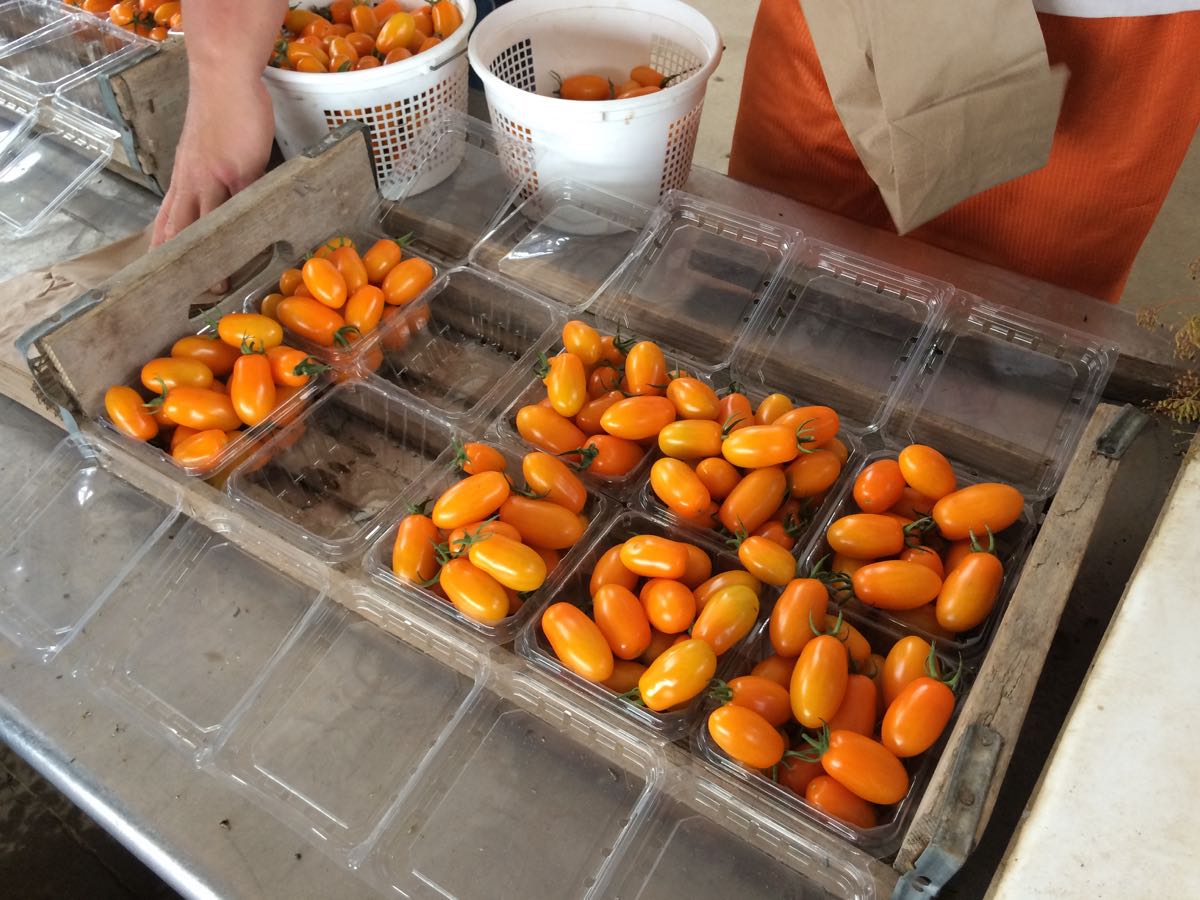
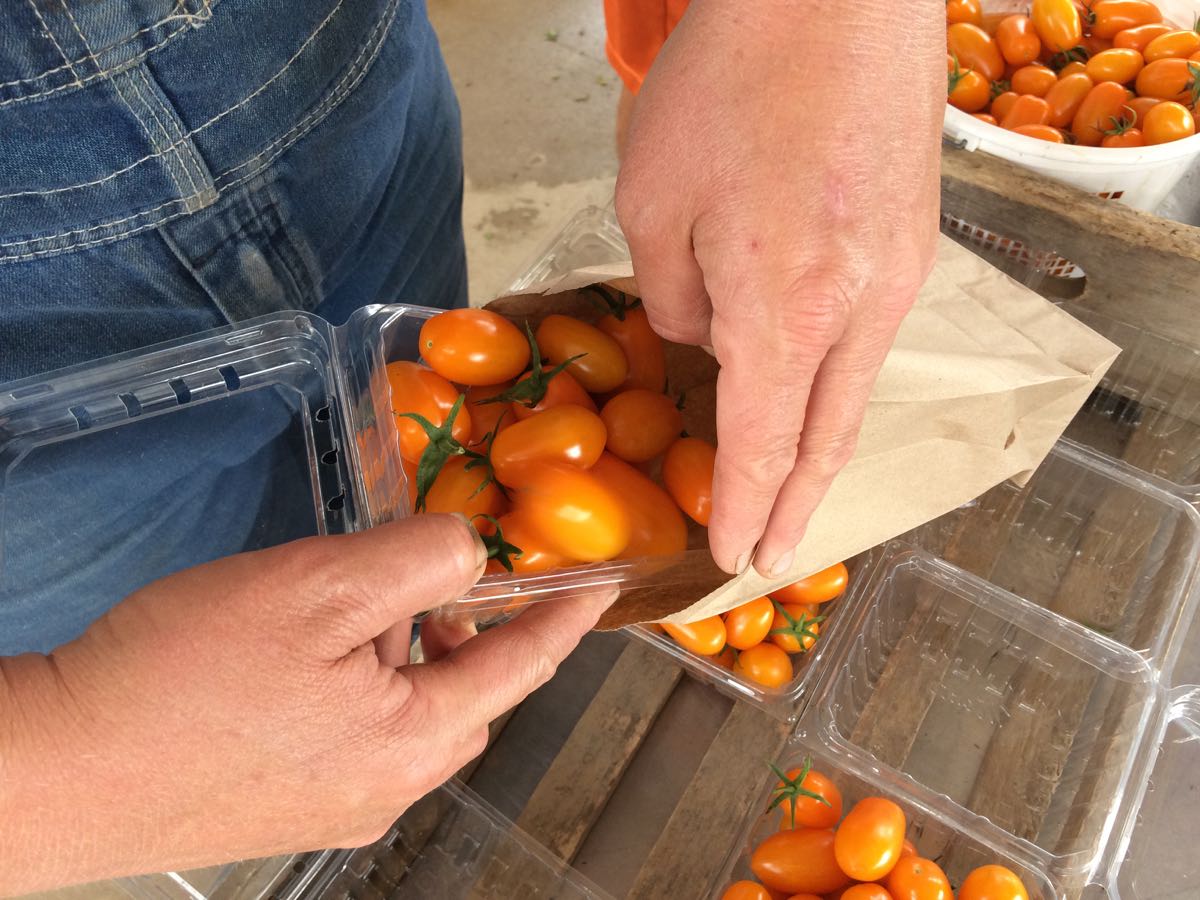
We continue trying to reduce plastic use, so we’re sending your grape tomatoes in a paper bag. Why use a plastic clamshell if we can use a paper bag instead? Watch out, these small bags are thin. You’ll probably want to transfer the tomatoes to a container once home. The Romano beans are in a paper bag again too.
I asked a few weeks ago if beans in paper bags worked OK, and only got positive replies. It’s been an easy switch. We will have to return to plastic bags for heavy root crops (carrots, beets, etc) that will blow out the bottom of a paper bag. In the meantime, we’ll keep using paper bags whenever we can. Could you all let me know if they are problematic with any of the crops? Beth
Veggie List and Veggie Notes
Week #16, Sept 5/6, 2019
– Weekly shares
– EOW/ green
Red watermelon
Slicing tomatoes, ~5 lb total
Romano beans, 1.7 lb
Edamame soybeans, 1 bundle
Kale, 1 medium bunch
Orange grape tomatoes, 1 pt in paper bag
Green bell pepper, 1
Colored bell pepper, 1
Orano snack pepper or yellow pepper, 1
Cucumber, 1 – 2
Walla Walla onion
Garlic, 1 bulb
Fresh dill seed
Next week’s box will probably contain tomatoes, peppers, onions, carrots, edamame and more.
Slicing tomatoes – The plants are mostly healthy, so the tomatoes should be OK stored on your kitchen counter. Take them out of the bag so you can keep an eye on them. Be strategic; use the ripest tomatoes first, or any that develop flaws. Store slicing tomatoes resting on their shoulders, with the stem side down. Plum tomatoes can be stored in any direction.
Romano beans – Romano beans are more robust and meaty than green beans. They are excellent raw but really shine when gently cooked for a long time. Pat has some good recipes below. I notice that most people who love Romano beans are dedicated to a particular recipe. Here are a few recommendations:
– Lauren asked me to remind you about last year’s African Peanut Stew recipe, which is easily adapted for this week’s veggies. It’s an excellent dish for this time of year.
– Former Tipi crew member Jon Fagan raves about Braised Green Beans with Tomato and Fennel Seeds (in previous newsletter, scroll down).
– My favorite Romano bean recipe (which I recommend every year but also look forward to every year!) is Sausages and Summer Beans with Tomatoes & Caramelized Onions.
– Finally, here’s a 2017 quote from Tipi member Steve Rankin:
“You have finally sold me. I have never been a fan of Romano beans. This week I have been sautéing them with various peppers and garlic, as well as the oregano from earlier this season. They are especially tasty with poblanos. Lots of black pepper and some soy sauce, which make the pan sticky. I deglaze the pan with wine and braise them in the wine. I’m sold!”
Edamame soybeans (bundle of green stems with pods attached) – These edible soybeans are a treat. Pull the pods from the stem and wash well. It helps to submerge the pods and rub them together. Boil in water until the pods have split and the beans are quite tender. Season with salt and pop the beans out of the pods into your mouth.
Storage: Remove the pods from the stems promptly and refrigerate.
Fresh dill seed – We’re sending the dill to use with the Romano beans. They are dill seed umbels. The seeds are young, not dried. You can use them to make a batch of refrigerator pickled beans or in a different bean dish. Dill is also good in tomato soup.
Preparation: Use the intact head when making pickles. When cooking, strip the seeds from the umbel. Lay on a cutting board. Crush with the flat side of a large knife, to release the flavor.
Storage: Refrigerate.
RECIPES
Visit our 2019 Recipe Log or our 2018 Recipe Log or join our Facebook discussion group.
LOCAL THYME/ Comforting Classics
Romano Beans with Walnuts and Dijon Dressing
Summer Wind Roasted Tomato Sauce
Garlicky Greens and Cranberry Beans
Niçoise Salad Chickpea Bowl
LOCAL THYME/ Outside the Box Recipes
Dilly Beans
Kale, Tomato, Three Cheese Galette
Tomato Cucumber Salad with Watermelon Vinaigrette
Watermelon and Pepper Salsa with Sriracha
LOCAL THYME/ Quick & Easy Meal
Watermelon Gazpacho
????????????
RECIPES FROM LAUREN
KALE SESAME GRAIN BOWL
Takes 40 minutes.
Serves 4-6.
1 cup salted water
1/4 cup quiona
1/4 cup favorite quick cooking rice (can also use a full 1/2 cup of either if you prefer)
1 bundle edamame soybeans, pods removed from stalks
1 pound romano beans, ends trimmed and cut into 1-inch pieces
5 garlic cloves, minced
1 orano pepper, minced
2 tablespoons rice wine vinegar
2 tablespoons peanut butter
2 tablespoons soy sauce or tamari
1 tablespoon maple syrup
3 tablespoons olive oi
1 tablespoon toasted sesame oil
1 bunch kale, stems removed and thinly sliced
1 cucumber, seeds removed and cut into small pieces
1 cup peanuts, roughly chopped
2 tablespoons white and/or black sesame seeds
- Bring 1 cup salted water to a boil in a small stock pot. Once boiling, add quinoa and rice. Reduce to a simmer, cover and cook for 18 minutes. After that remove from heat, cover the pot with a thin towel and then re-cover for 10 minutes.
- Bring a large pot of water to a boil over high heat. Once boiling, add edamame . Cook for 5 minutes and then rinse under cold water. Once cool enough to handle, remove the edamame from the shells. Set aside.
- Bring the pot back up to boiling and then add romano beans. Cook for 4 minutes and then rinse under cold water.
- In a small bowl, whisk together garlic, orano, vinegar, peanut butter, soy sauce, and maple syrup until smooth. Gently whisk in olive and sesame oils until dressing comes together. Taste and adjust flavors as desired.
- Toss kale, cucumber, quinoa, rice, edamame and romano beans together in a large bowl with half the dressing. Serve in smaller bowls topped with peanuts and sesame seeds.
.

