
Monthly Archives: June 2017
Week #7, June 29 2017
- On: June 29, 2017
 0
0

Steve sunk a tractor in the ground on Monday. Before plowing a wet bottom field, he attempted to set the plow to a shallower depth but accidentally set it deeper. He plowed a furrow that was too deep and got stuck. Steve came moping back to the house, worried that we would need help extracting the embedded tractor and plow. That’s expensive (if we hire a rig) or embarrassing (if we ask a neighbor for help). It’s difficult and risky when the tractor and implement are still hitched together. He didn’t sleep well at all that night. By morning, Steve and Roger had a plan that worked, using other tractors and a front-end loader. All was well but it was an unsettling moment for Steve. Beth
Veggie List and Veggie Notes
(June 29/30, 2017; week #7, purple EOW, moon Sampler)
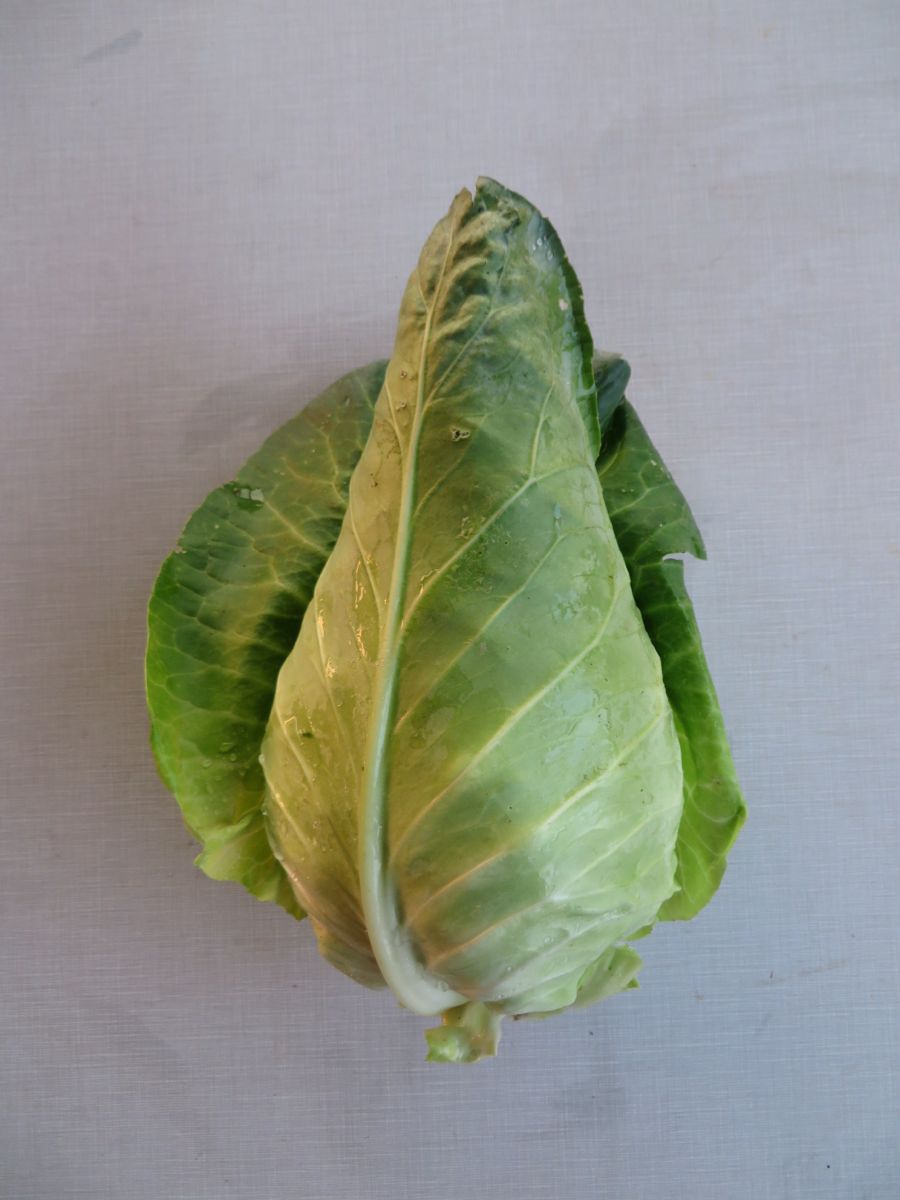
‘Caraflex’ cabbage
Beth’s Box Logic: We planned this delivery with your July 4th celebrations in mind. You’ve got ingredients for …
– cole slaw (cabbage, scallions),
– cold salads (Romaine, peas, parsley),
– grilling (zucchini),
– pasta salad, our go-to meal for picnics (grilled zucchini, peas, Swiss chard, scallions, parsley) and
– cocktails (tomato juice)
You will find something festive to prepare. Have a great 4th of July!
Box Contents
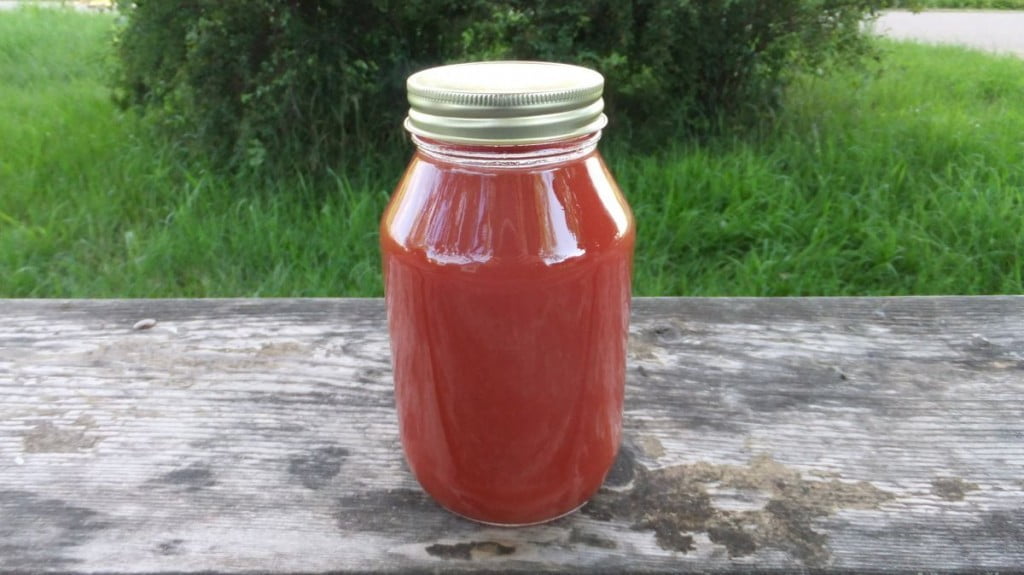
Tipi tomato juice, 1 quart
‘Caraflex’ cabbage
Sugar snap peas, ~1.2 lb
Swiss chard, 1 big bunch
Zucchini & yellow summer squash, ~3 lb
Romaine lettuce
Scallions, 1 bunch
Curly parsley, 1 bunch
Next week’s box will probably contain sugar snap peas, beets with greens, zucchini, broccoli, sweet Walla Walla onion, basil and more.
‘Caraflex’ cabbage – This is a nice salad-type that we grow in summer. Don’t you love the pointy shape? It has thinner, more tender leaves than the usual green cabbage. Great in salads and slaws but can also be cooked. Here’s the description from the seed catalogue: “Inner leaves are tender, crunchy, and have an excellent, sweet and mild cabbage flavor. Perfect for summer salads, slaws, or cooked dishes.”
Swiss chard (pretty bundle of green leaves) – Our crew did a nice job mixing colors for pretty bunches. Swiss chard is a close relative of spinach, but requires a bit more cooking. Use as a substitute in any recipe that calls for spinach, just cook the chard a little longer. Both stems and leaves are delicious. The stems requite longer cooking, so cut them free from the leaves when preparing. That allows you to cook the stems longer.
Parsley – This is the most versatile, widely-used herb that we grow. This week, I plan to make a tabouleh-style salad with snap peas, grilled zucchini, scallions and lots of parsley.
Tipi tomato juice – We had this juice bottled from our tomatoes last summer. It’s a great way to capture ripe tomatoes at peak season, at a moment when we are swimming in tomatoes. Drink it or try making an easy soup. Simmer diced zucchini and Swiss chard in the juice. Add minced scallions and parsley near the end of cooking. Voila! Soup!
Storage: Store the juice out of sunlight at room temperature when unopened. Refrigerate after opening. The juice is already seasoned so do not add salt if you cook with it.
Ingredients: organic tomatoes from Tipi Produce, salt, organic garlic, organic onion, organic black pepper. I’ve posted the nutritional information here.
LOCAL THYME RECIPES
Comforting Classics
Greek Swiss Chard and Zucchini Soup
Pan Fried Tofu on Cabbage and Snap Pea Salad
Zucchini Scallion Fritters
Classic Coleslaw
Outside the Box Recipes
Zucchini and Swiss Chard Tart
Vietnamese Snap Pea Stir Fry
Orzo Salad with Grilled Summer Squash
Swedish Cabbage Soup
Quick and Easy Meal
Turkey, Bacon and Parsley Pesto Mayo Sandwich with Romaine
RECIPES FROM LAUREN
GRILLED CABBAGE, SNAP PEA & SCALLION SALAD
There’s little I enjoy more than bringing home a huge tote of vegetables and tossing them on the grill for a simple but amazing dinner. This week’s creation involves grilling a lot of things not commonly thought of as grillable but you’ll have to trust me that grilled cabbage and snap peas are a real thing of beauty. If you don’t have a grill or equipment good enough to keep veggies from falling through the grates you could broil your vegetables on a sheet pan for 15-20 minutes until very well charred in places. That was my go to “grilling” technique before we purchased an awesome grill last summer. And still my technique when summer storms keep me inside. Lauren.
Takes 30 minutes
Serves 4-6 as a side to some hearty cut of meat also done on the grill or 2 as a main dish
1/4 cup olive oil, divided
1 cabbage, cut it half lengthwise and cut in half
1 pound snap peas (or as many as you can spare), ends trimmed
1 bunch scallions, ends trimmed
Kosher salt and pepper
2 tablespoons rice wine vinegar
1 tablespoon toasted sesame oil
2 tablespoons brown sugar
1 tablespoon tamari or soy sauce
1 teaspoon fish sauce
1/2 teaspoon red pepper flakes
2 tablespoons toasted sesame seeds
- Drizzle one tablespoon of olive oil on a baking sheet. Add cabbage, snap peas and scallions. Drizzle with additional tablespoon of olive oil and then sprinkle generously with salt and pepper. Toss gently with your hands to coat veggies evenly with oil.
- Get your grill ready. The hotter the better. Grill veggies directly over heat (one of these fancy grill pans or baskets that keeps the veggies from falling through might be helpful) flipping so both sides get blackened in spots. This takes about 5-6 minutes for the scallions and peas and closer to 10 minutes for the cabbage. A little char is a great thing, especially for the cabbage. If you are broiling, just keep them on the baking sheet and put them RIGHT under the broiler for 20 minutes, flipping the veggies after 10 minutes.
- Remove veggies, allow to cool briefly. Add peas to a medium bowl. Slice cabbage and scallions thinly (as best you can) and add to the same bowl.
- Whisk rice wine vinegar, remaining olive oil, sesame oil, brown sugar, tamari, fish sauce and red pepper flakes together in a small bowl. Pour dressing over veggies. Add sesame seeds and stir to combine. Serve warm or cold.
.
ZUCCHINI & SWISS CHARD TART
Recipe adapted from New York Times
I make pie crust in my food processor following Smitten Kitchen’s basic guidelines for “all butter, really flaky pie dough” every single time I need a pie crust regardless of what the recipe calls for and I am NEVER disappointed. It’s simple, quick and incredibly flaky. Do note that this makes a double batch (aka two pie crusts) so either make half the Smitten Kitchen portion (which is a little more difficult in your food processor) or two tarts! Lauren.
Makes 1 tart
Serves 4-6
Takes 1 hour, 45 minutes (much of it inactive), a little longer if you make the dough from scratch
1 store-bought pie crust or follow instructions for my favorite pie crust (see note above)
2 tablespoons olive oil
2-3 scallions, white and pale green parts, diced
1 teaspoon Kosher salt, divided
1/2 teaspoon freshly ground black pepper, divided
1 bunch Swiss chard, stems removed and diced, leaves roughly chopped
2 pounds zucchini and/or summer squash, diced
1/4 cup minced curly parsley
3 eggs, beaten
3/4 cup Gruyere (or Swiss if you can’t find that) cheese
- If making pie crust from scratch, do this first so it has time to chill in the fridge for 20 minutes.
- Preheat the oven to 375 degrees.
- In a large saute pan, add olive oil, scallions and chard stems. Season with 1/2 teaspoon salt and 1/4 teaspoon pepper. Cook over medium heat for five minutes until fragrant. Add zucchini and chard leaves, stir often for 10 minutes. Zucchini should be tender but still bright green and greens should be wilted. Add parsley, cook about 1 minute longer just to combine flavors. Remove from heat and set aside.
- Beat the eggs in a large bowl. Stir in remaining salt and pepper. Add zucchini chard mixture and cheese. Mix everything together and then add remaining pepper.
- If making your own pie crust, roll it out into a circle and line a 9 or 9.5-inch pie pan. †If not, just grab your store-bought crust. Fill pie crust with zucchini chard mixture. Bake for 50 minutes or until center is set and top is golden brown. Allow to set for 15 minutes before serving. It’s fine to serve this warm or at room temperature.

U-pick re-cap
- On: June 21, 2017
- 0
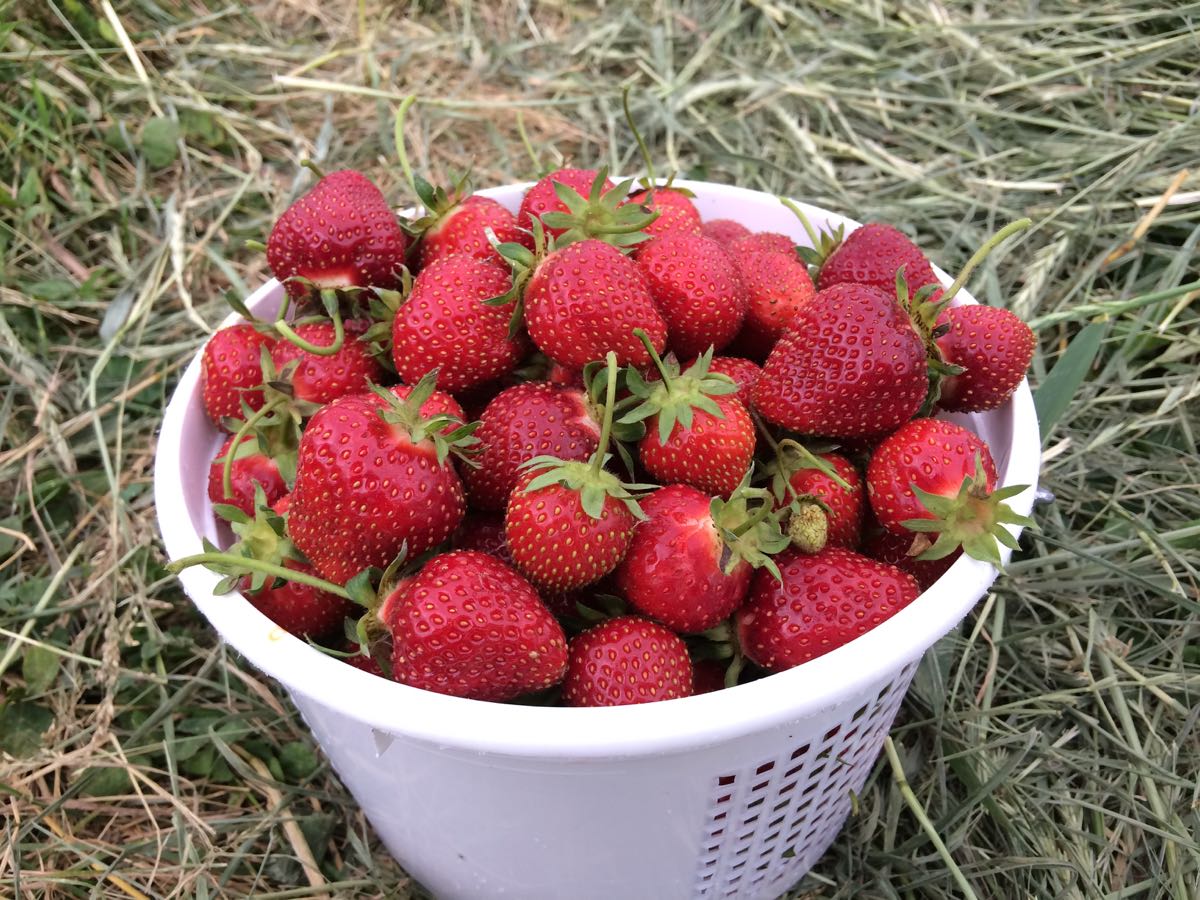
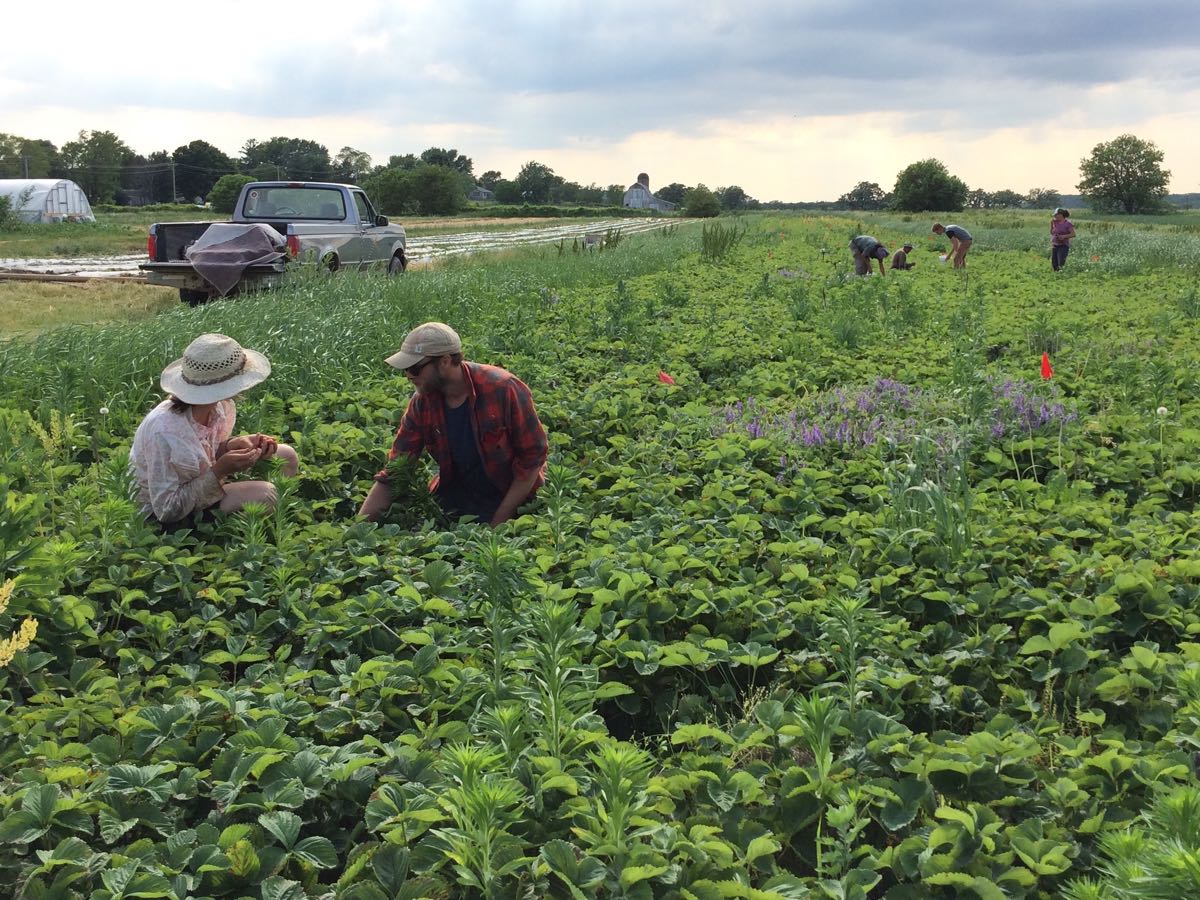
I cannot tell you how much how much Steve and I enjoy the u-picks, mostly because you folks enjoy them so much. Ripe strawberries straight from the plant are spectacular. Most fruit sold in the grocery store is mediocre by comparison. The weather on Saturday was unexpectedly perfect and mild; warm with a gentle breeze and some cloud cover. It was a picture perfect day. Beth
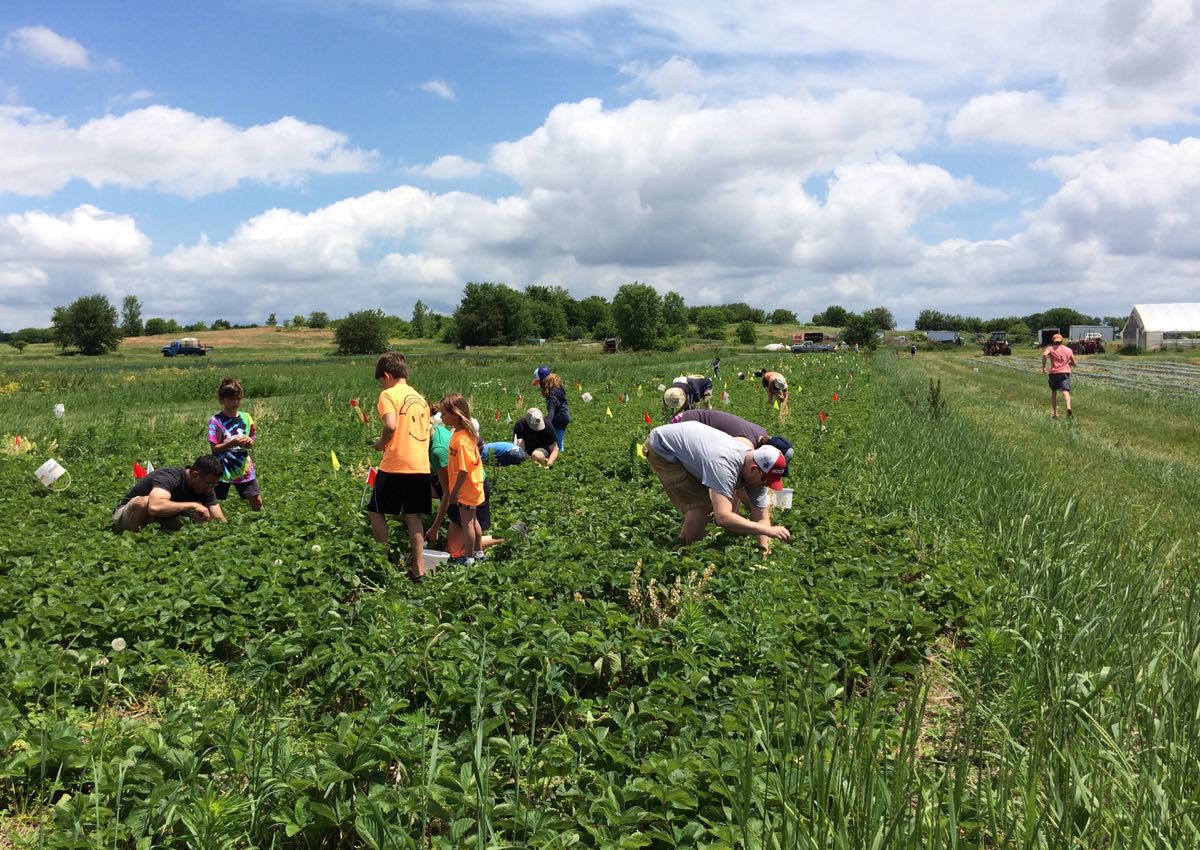
Steve, Ari and Billy staffed the berry field, showing people where and how to pick. You can see Billy at right in an orange shirt, running to greet the next group of members.
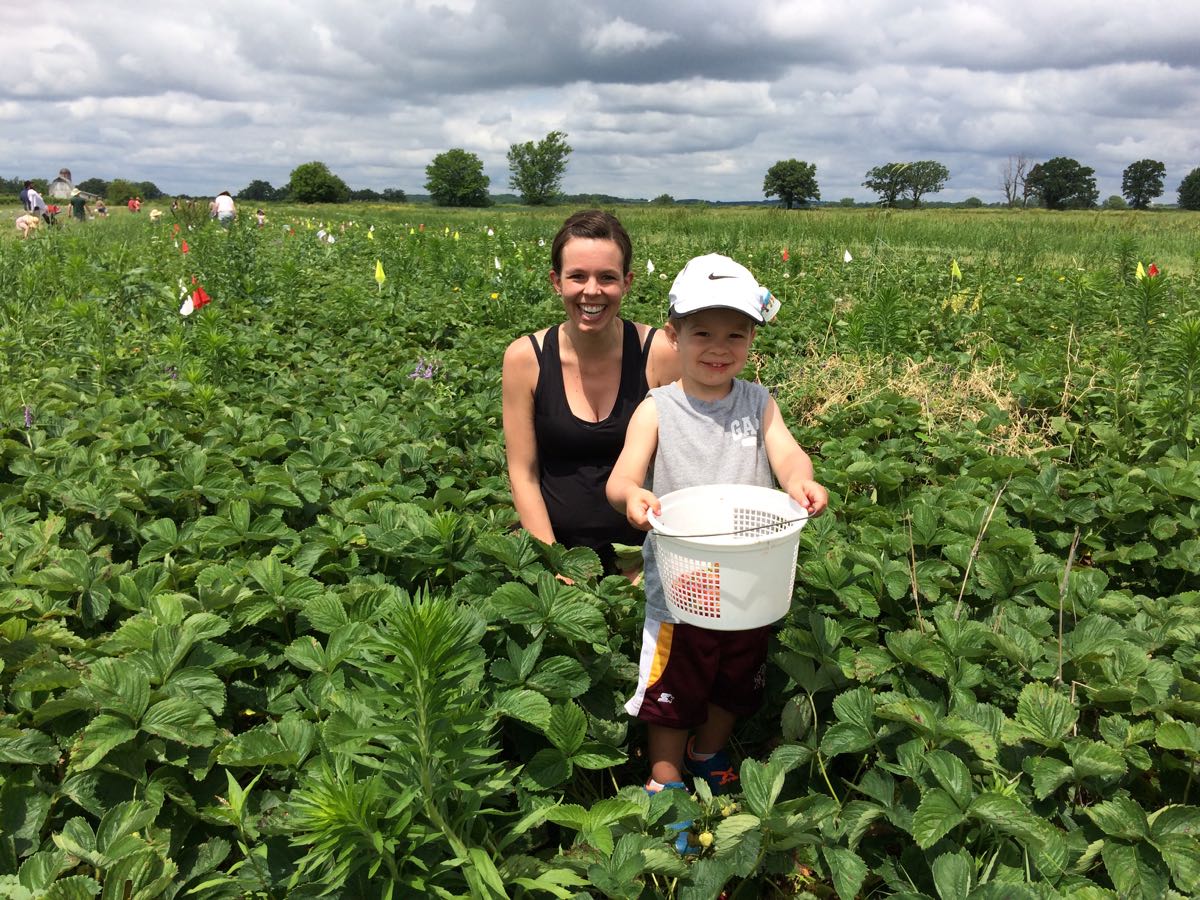
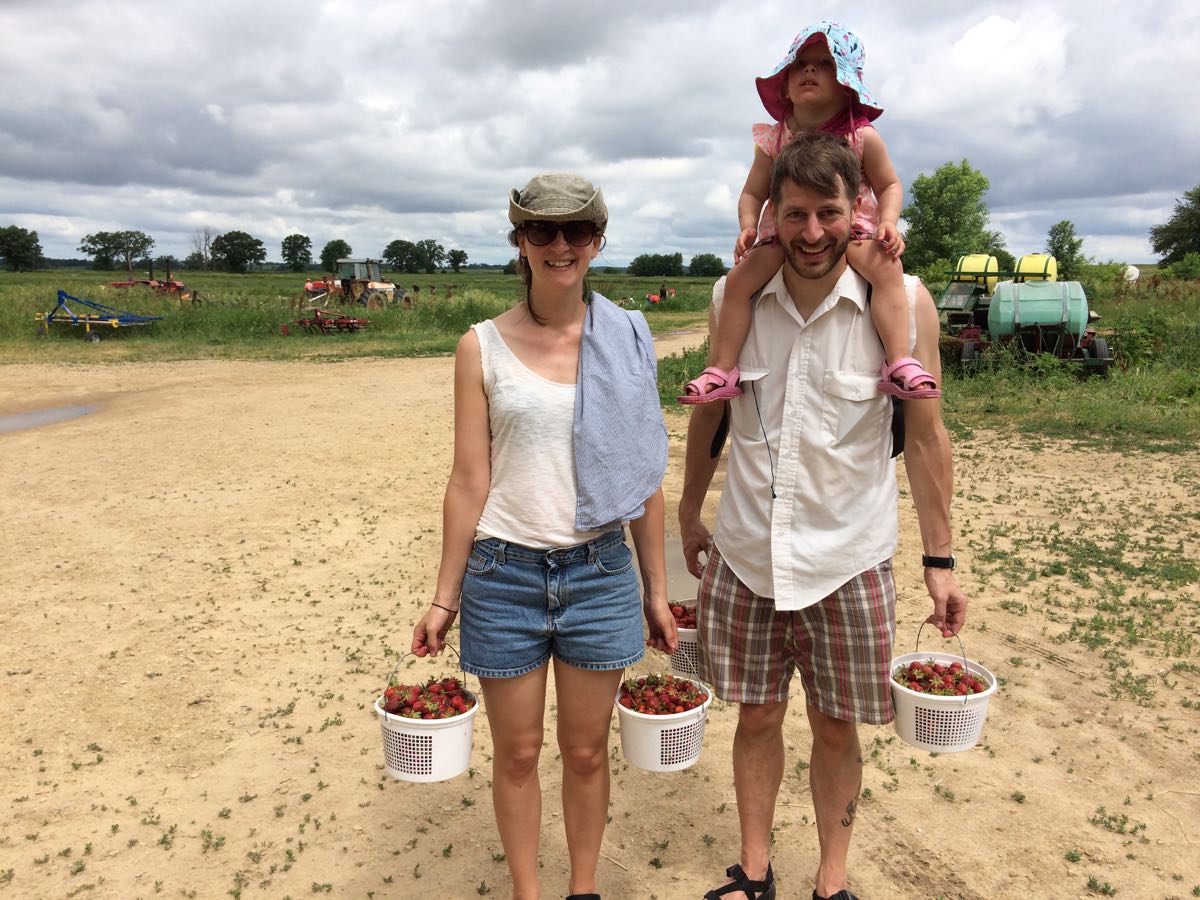
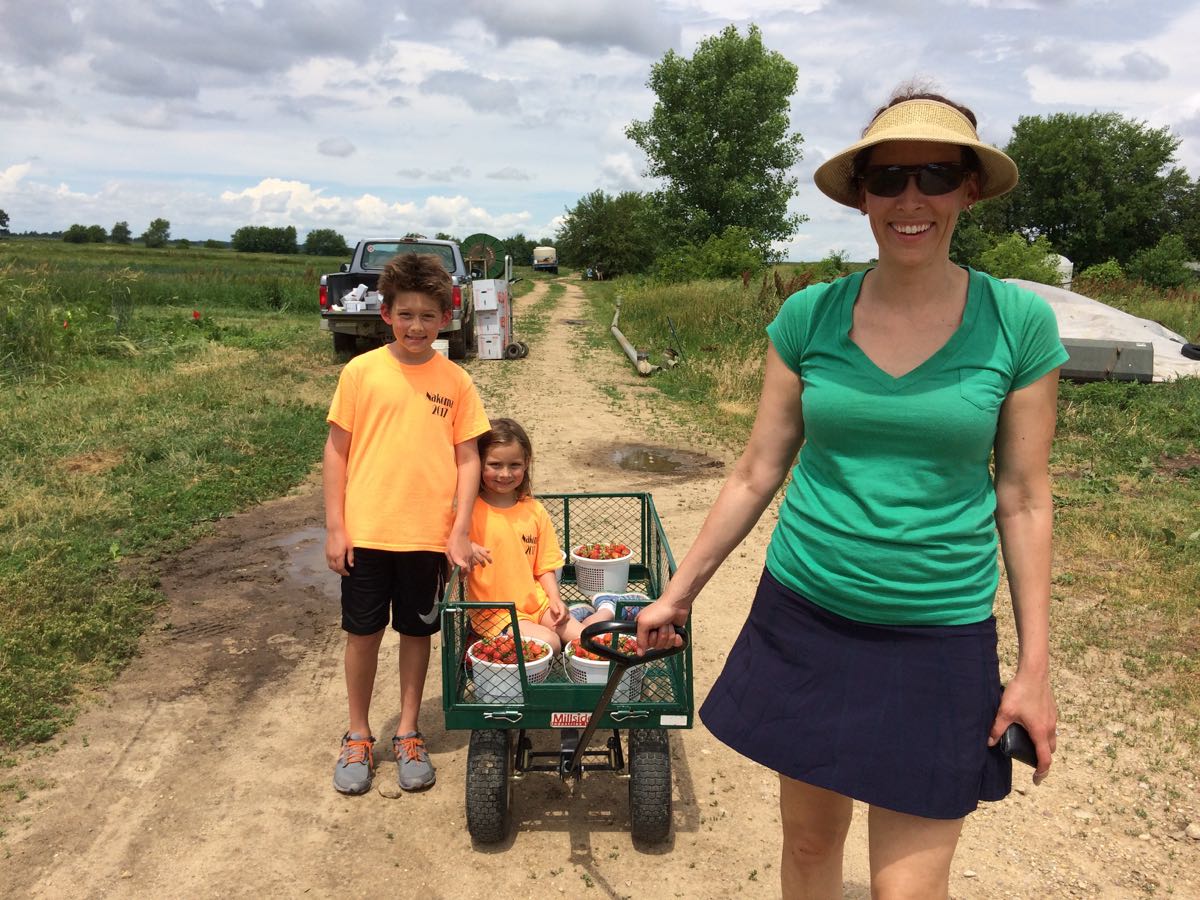
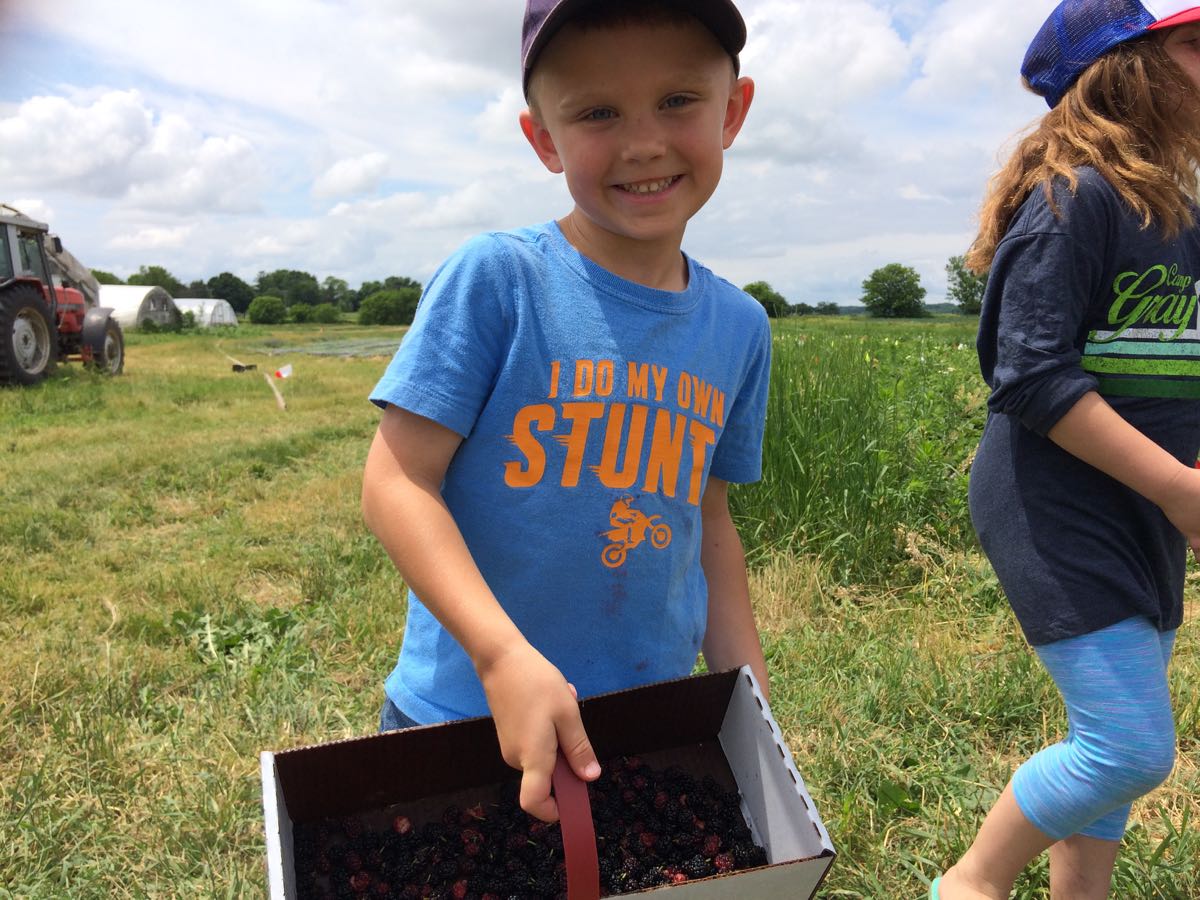
Happy berry pickers. Almost everyone picked more than they planned because the berries were abundant.

This young lady wore her special strawberry sunglasses!
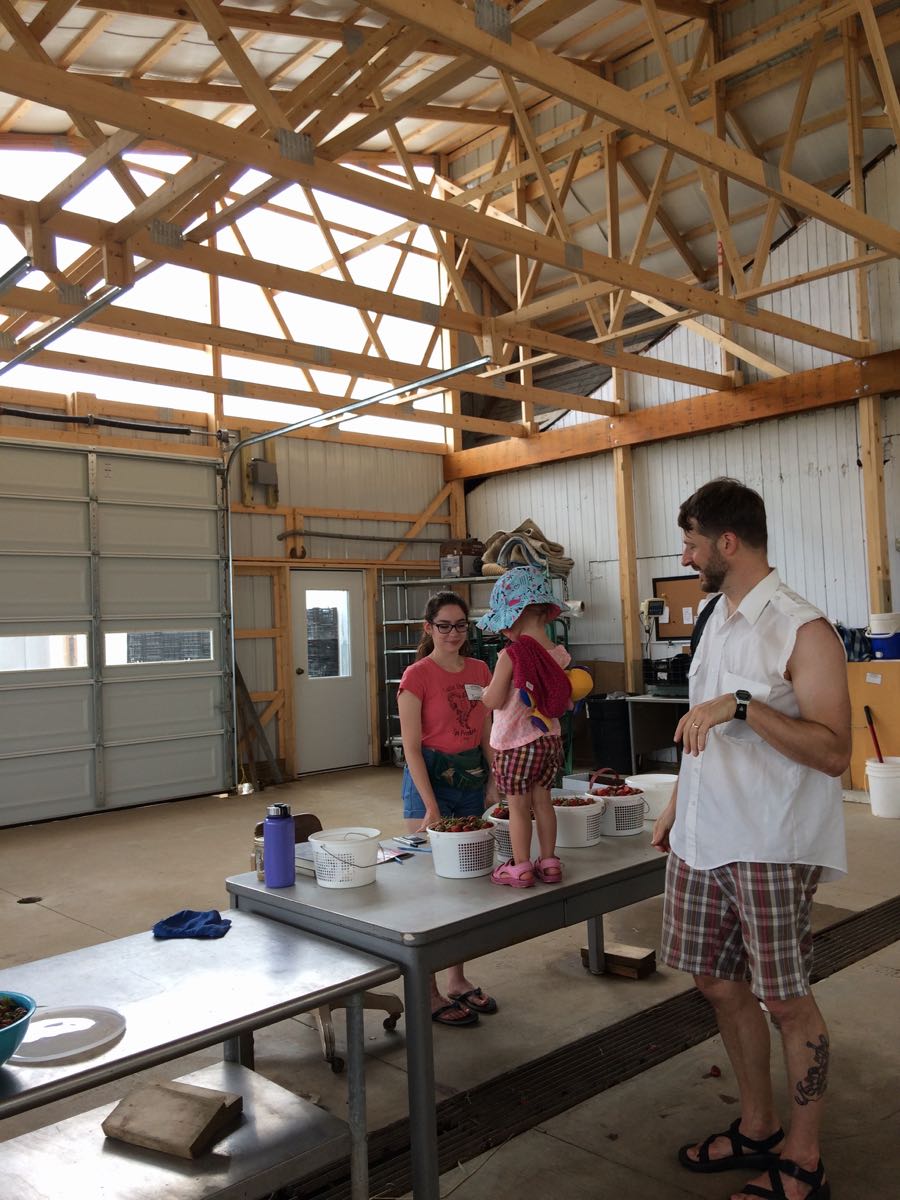
Everyone got to see our new pack shed when it was time to weigh their berries.
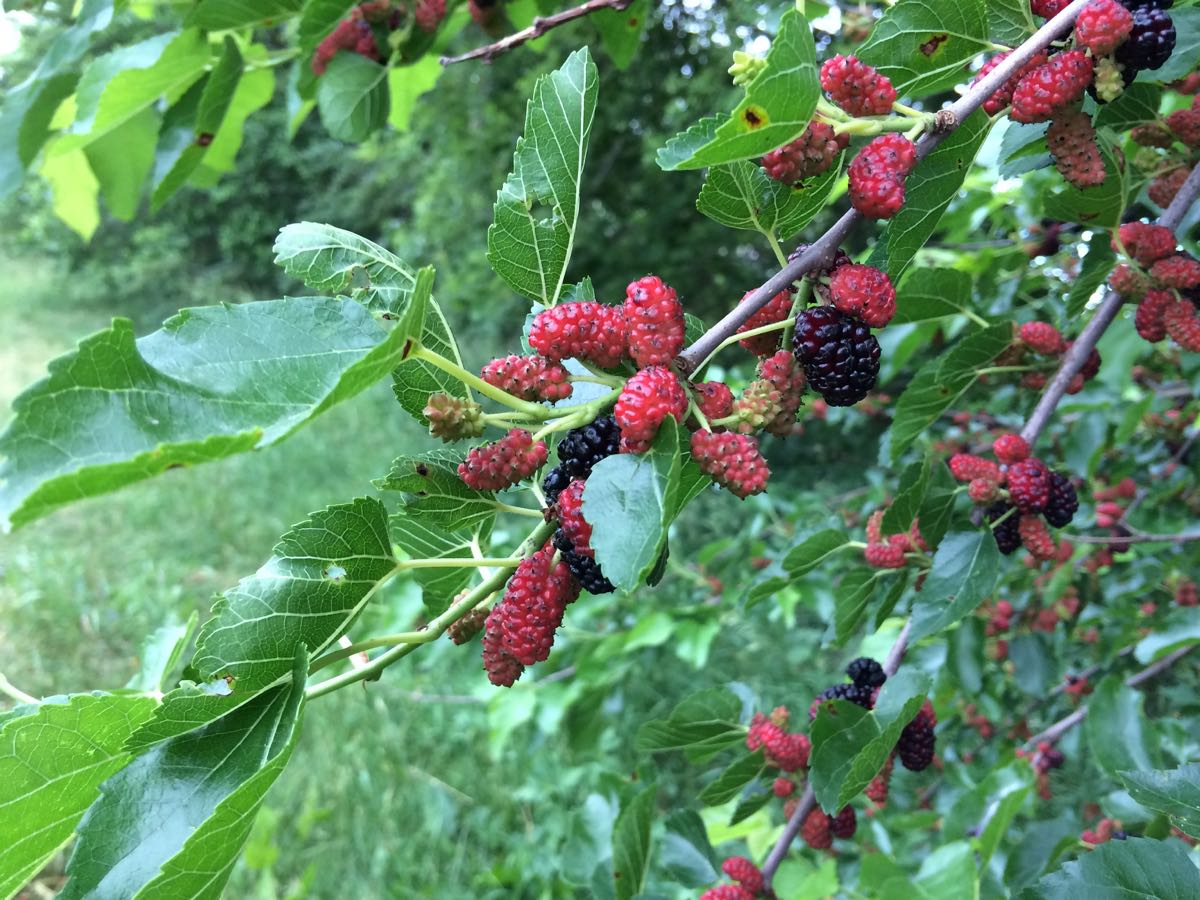
The mulberries are just beginning to ripen.

Mulberry pickings and a special one to share with Billy.
Veggie List and Veggie Notes, June 22/23, 2017, week #6, green EOW
Strawberries, 1 qt
Snow peas &/or snap peas, 1.1 lb
(In same bag, snap peas on bottom, snow peas on top.)
Zucchini &/or summer squash ~3 lb
Broccoli, 2/3 – 3/4 lb
Red bibb lettuce
Kale, 1 bunch
(Some sites get lacinto, some get Red Russian.)
Daikon, white
Daikon, purple
(2 – 4 daikon total; 1.5 – 2 lb)
Greek oregano, 1 bunch
Garlic scapes, a handful
Next week’s box will probably contain ‘Caraflex’ cabbage, snow peas, zucchini, Swiss chard, scallions and more.
Strawberries – These are ripe. Eat soon.
Snap peas and snow peas. These will be together in one bag.
– Snap peas (plump pea pods) – These peas should be eaten pod and all. They are delicious raw, or very lightly cooked or stir-fried. Preparation: They will need a quick rinse to remove faded gray blossoms. This is a new stringless variety, so there is no need to remove any strings. Remove the stem and they are ready to eat. Storage: Refrigerate.
– Snow peas (flat pea pods) – These are excellent stir fried or in raw salads. Preparation: Snow peas have strings. Here’s how to remove them. Snap off the stem end and pull the string down the concave side of the pod (the inward-curing side). Throw away the string and eat the pod. The thicker pea pods will usually have a string along both edges. Remove them when you snap off the stem.
Kale – Each site gets either Red Russian kale (green leaves, pink midveins) or lacinato kale (dark green, pebbled texture). They can be used interchangeably. Super nutritious, this first picking of the year is great cooked or used in raw salads. Storage: Cover and refrigerate.
Daikon radish – For the first time, we grew Korean instead of Japanese daikon. Korean daikon are sweeter and less harsh than the long Japanese types. The Korean daikon can be recognized by their fat, stubby shape. Look at the beautiful purple variety! Everyone gets both purple and white radishes this week. These Asian radishes are good cooked or raw. We often make a sliced radish salad, with Asian-style dressing (rice vinegar, mirin, sesame oil, soy sauce, minced garlic). Even a brief marination mellows the radish’s sharpness, although it’s less necessary with these Korean types. Both Pat and Lauren have given us interesting daikon ideas this week. Storage: Cover and refrigerate.
Greek oregano – We timed the oregano to go with zucchini and garlic scapes. Seems like a good combination! To store your oregano, you can …
– Keep at room temperature in a jar with the cut stems in shallow water. This is good for short-term storage as the flavor fades after a few days. OR
– Wrap in a cloth or paper towel, place in a plastic bag and refrigerate. OR
– Alternatively, you can wash it well then hang it up to dry in a place with good air movement.
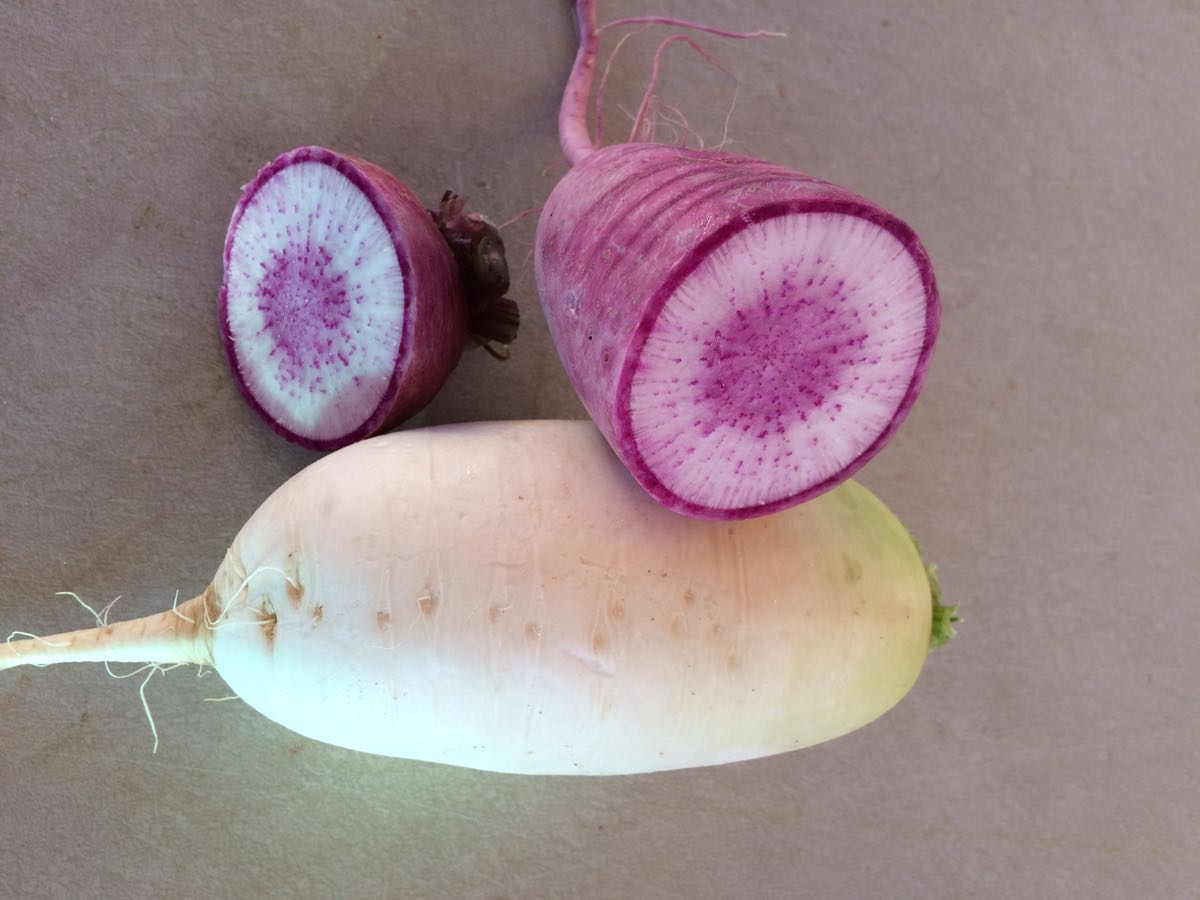
These Korean daikon are beautiful AND milder than usual!
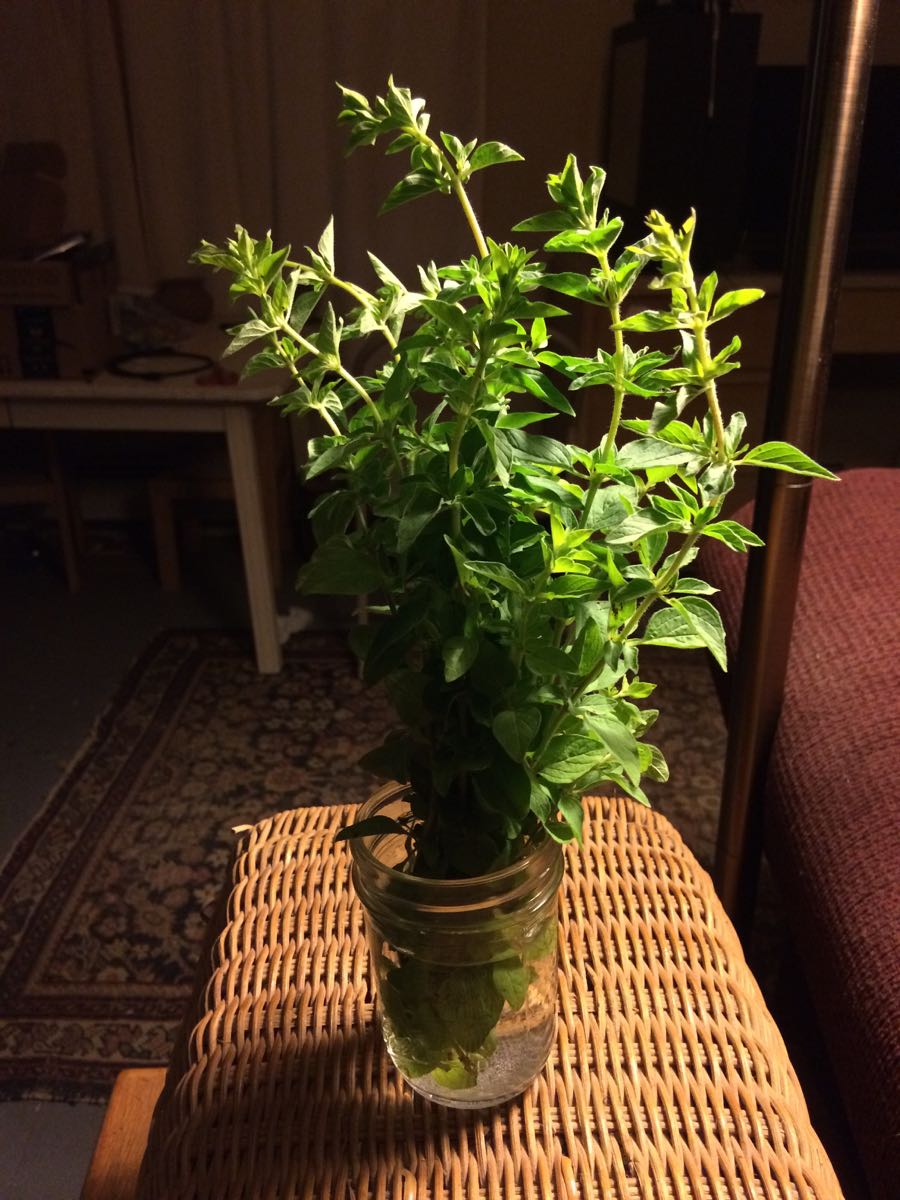
You can store your oregano at room temperature with the cut stems in water. See notes above for other options.
LOCAL THYME RECIPES
Comforting Classics
.
Outside the Box Recipes
.
Quick and Easy Meal
RECIPES FROM LAUREN
PORK, BROCCOLI & SNOW PEA LETTUCE WRAPS WITH PICKLED DAIKON
When I run out of ideas for lettuce, which always happens by late June, I have to get creative. Lettuce wraps are a great solution for when I’m sick of salads but the lettuce is still ultra beautiful and I desperately want to find a way to enjoy it. It’s especially fun if I can fill my lettuce wraps with a bunch of other veggies and top them with pickled veggies. That’s a CSA dream meal! Hope you enjoy! Lauren.
Serves 6-8
Takes 1 hour
2-1/4 cups water
1 cup brown rice
1 tablespoon toasted sesame oil
1 tablespoon olive oil
1 pound ground pork
3 garlic scapes, sliced
1/4 teaspoon Kosher salt
1/4 teaspoon freshly ground black pepper
2/3-3/4# broccoli, stems and florets, roughly chopped into bite-size pieces
1/4 cup tablespoons soy sauce or tamari
2 teaspoons fish sauce (or add more soy sauce or tamari if you don’t have fish sauce)
2 tablespoons maple syrup
1-2 tablespoon sriracha or favorite hot sauce, we used 2 but base it on your own heat tolerance
1 cup cashews
2/3 cup snow peas, stems removed and slicedRed bibb lettuce leaves, for serving
Pickled Daikon:
1/4 cup white sugar
1/2 cup rice wine vinegar
1 tablespoon toasted sesame oil
1 teaspoon Kosher salt
1-1/2# daikon, cut into matchsticks (no need to peel)
- Bring water to a boil over high heat. Add rice, reduce to a simmer, cover and cook for 45 minutes. Turn off heat after 45 minutes but leave the lid on for †an additional 15 minutes.
- Meanwhile, prepare the rest of the meal. To make the pickled daikon, whisk together sugar, rice wine vinegar, sesame oil and salt in a large bowl. Once sugar is dissolved, add daikon. It likely won’t be enough liquid to cover the daikon at first, but give it a good stir anyways. The daikon will release water as they sit there and you’ll wind up with plenty of pickling liquid. Allow to sit for 30-60 minutes, stirring occasionally.
- In a large saute pan (I used my cast-iron skillet), heat sesame and olive oils over medium heat. Add ground pork, garlic scapes, salt and pepper. Cook for 10 minutes until pork is browned. Add broccoli, soy sauce, fish sauce, maple syrup and sriracha to skillet. Cook until broccoli looks tender, about 5-8 minutes. Add snow peas and cashews and cook just for a couple minutes to allow flavors to combine. Add fully cooked rice just before serving.
- Serve a scoop of the rice mixture in a lettuce leaf and top with pickled daikon.
.
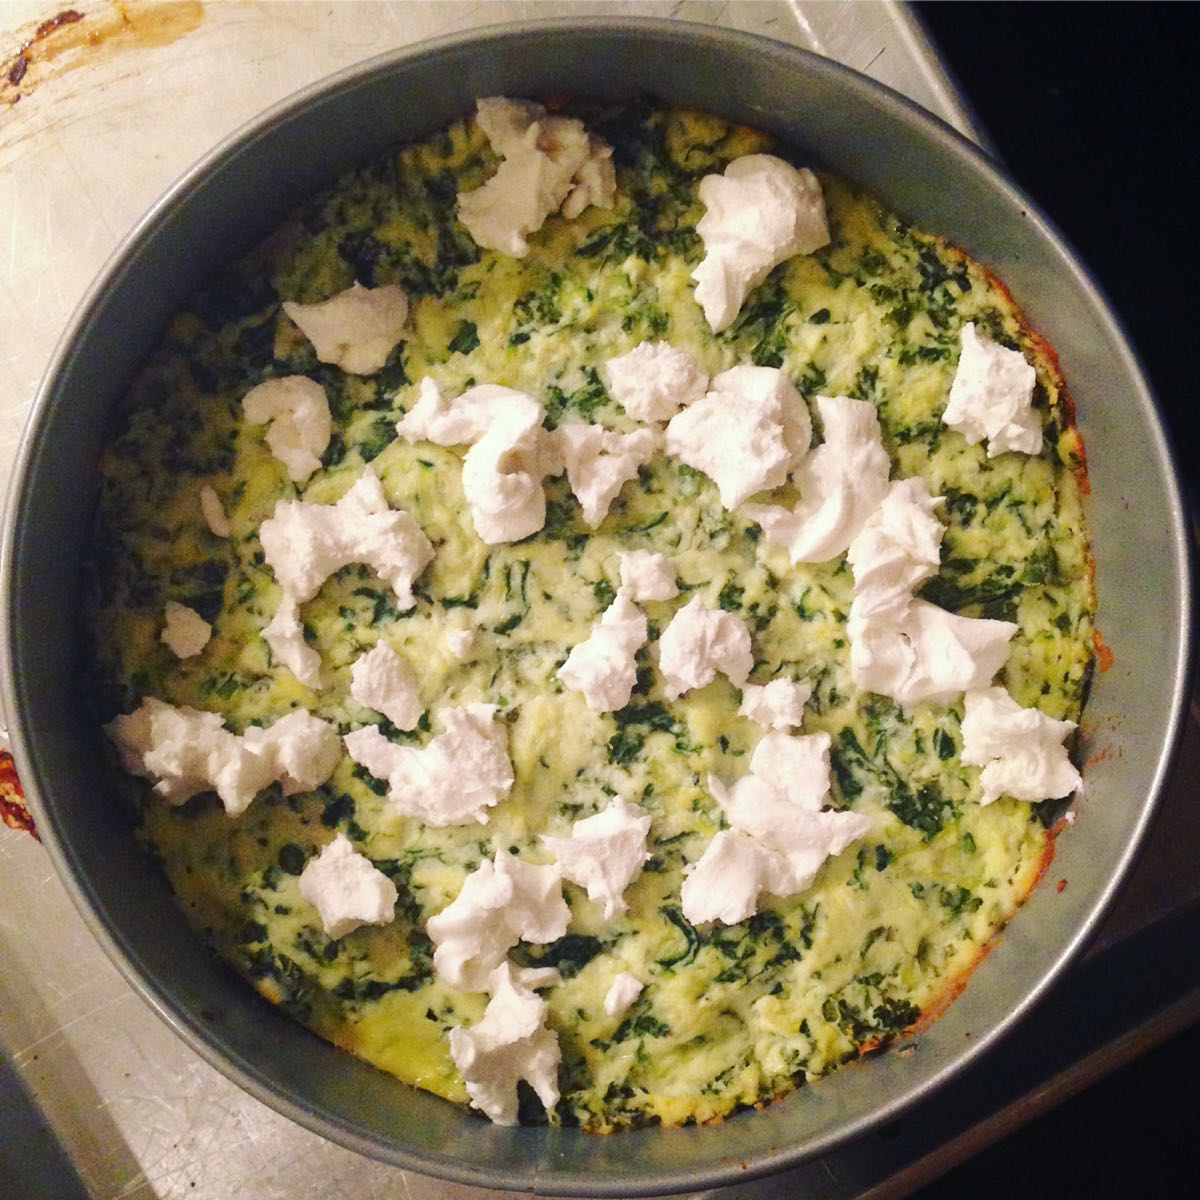
ZUCCHINI & KALE CHEESECAKE
Inspired by 101 Cookbooks
When I came across a recipe for zucchini cheesecake, I couldn’t quite believe it. A savory cheesecake that I can toss veggies and herbs into and serve warm or cold?! A rich hearty dish that’s packed with all my favorite cheeses and can be easily packed up for lunch or for a picnic?! This is a great simple, elegant meal that will surely impress any crowd. Make it for dinner. Make it for brunch. Whatever you do, just make it! Lauren.
Makes an 8-inch cheesecake
Serves 4-6
Takes 2 hours, most of it inactive
2 heaping cups unpeeled zucchini (about 1 large or 2 smaller)
1 teaspoon Kosher salt
3 cups whole-milk ricotta
1/2 cup finely shredded parmesan
2 green garlic, sliced
3 leaves kale, stems removed and torn into bite size pieces
1/4 cup greek oregano, leaves removed and roughly chopped
2 eggs
1/3 cup goat cheese
- Preheat the oven to 325 degrees. Grease an 8-inch spring-form pan. If you don’t have one, a 9-inch pie pan will work fine as well.
- Shred zucchini, toss with salt and place in a colander or fine-mesh strainer or colander. Leave here to drain while you do the next step.
- In a large bowl (or the bowl of your stand mixer), combine ricotta, parmesan, green garlic, kale and oregano. Don’t worry, it should seem like A LOT of kale. Don’t worry, it will cook down while it bakes. Stir to combine. Add eggs and stir until incorporated.
- By now your zucchini should have been draining for 10-15 minutes. Remove from colander and squeeze the water out until about half the original size. You can do this several ways (with cheesecloth, with towels, with a firm spatula in the fine mesh stainer), but I just put it in a ball in my hands and squeezed for about a minute. You don’t have to remove all the liquid. Just a lot of it.
- Add the squeezed zucchini to your ricotta mixture and stir to combine.
- Dump the mixture into your prepared pan and place the pan on a baking sheet (to prevent dripping). Bake for 60 minutes. Remove from oven and dab away any water that has formed on the surface with a paper towel (for me this wasn’t much). Add the goat cheese in crumbles to the top and bake for 35 minutes longer until cooked through.
- Remove from oven, allow to cool slightly and enjoy!
Resilient crew
- On: June 14, 2017
- 0
Our crew deserves a round of applause for their efforts during this hot, hot week. They persevered in good spirits. As one crew member said, “I am so glad to work with people who take their work seriously, and work hard, and enjoy each others’ company.” All this while picking strawberries on a 94o day.
Basically, we have to forge ahead with our farm work during any weather. We try to be strategic, finishing tough jobs early and saving indoor work (like bundling asparagus) until afternoon. More often, the vegetables dictate the work sequence. Delicate crops like lettuce and spinach have to be harvested in the morning while it’s still cool. Here are just a few of the many things the crew accomplished this week.
![]()
They transplanted sweet potato slips, using our 70’s era strawberry planter. We use it twice per year, once for strawberry seedlings, once for sweet potatoes. From left, Kelsie, Kristin, Karen, Michio, Jim, Smitty and Simone (on tractor).
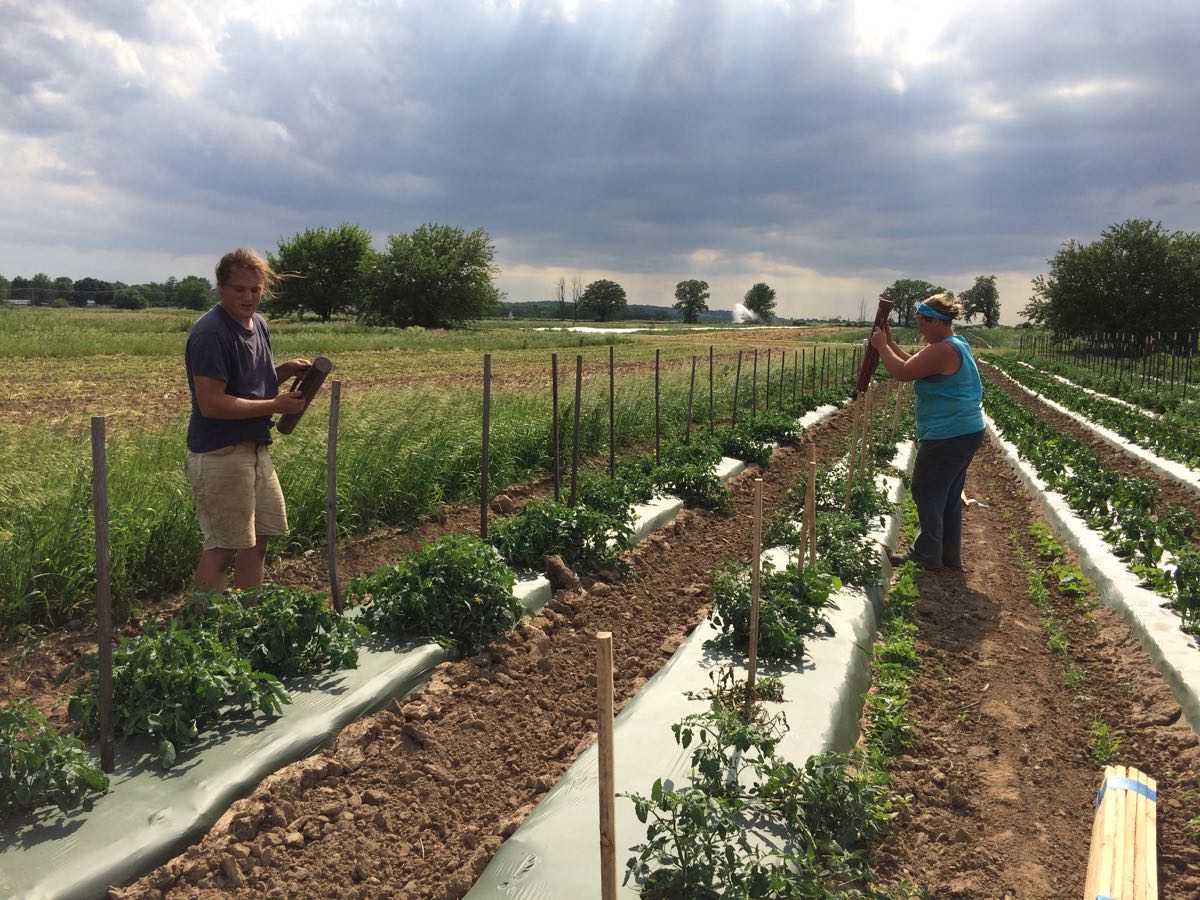
Jory and Maggie (and Billy off-camera) pound wooden stakes in the tomato field. We’ll intertwine string along the posts to support the tomato plants and keep the tomatoes off the ground. This is a very demanding job in the heat but they got it done. You can just see the irrigation running in the distance. Look for a white spurt at the horizon left of Maggie.
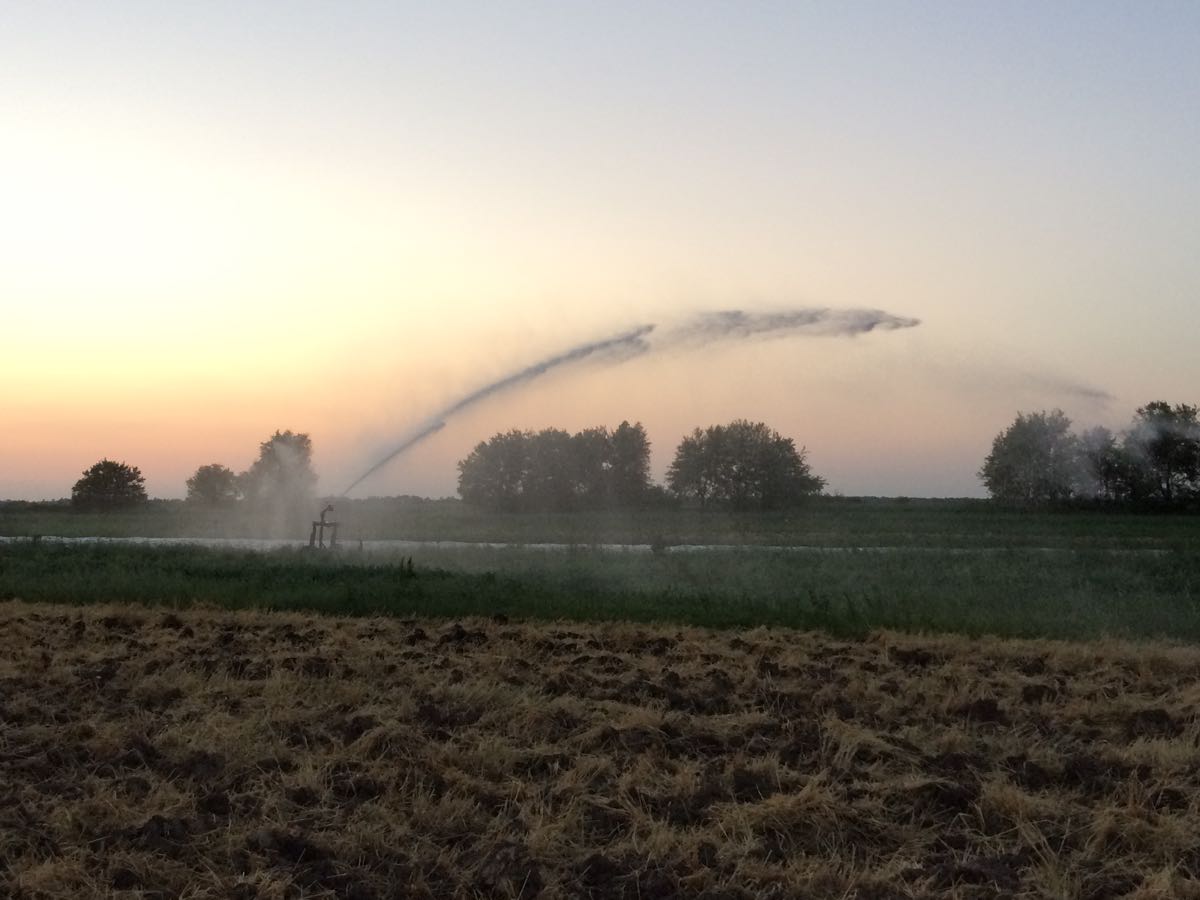
Steve ran the irrigation gun every day this week. All the storms sweeping through the area skipped our farm. We hope for rain but will continue to make our own.
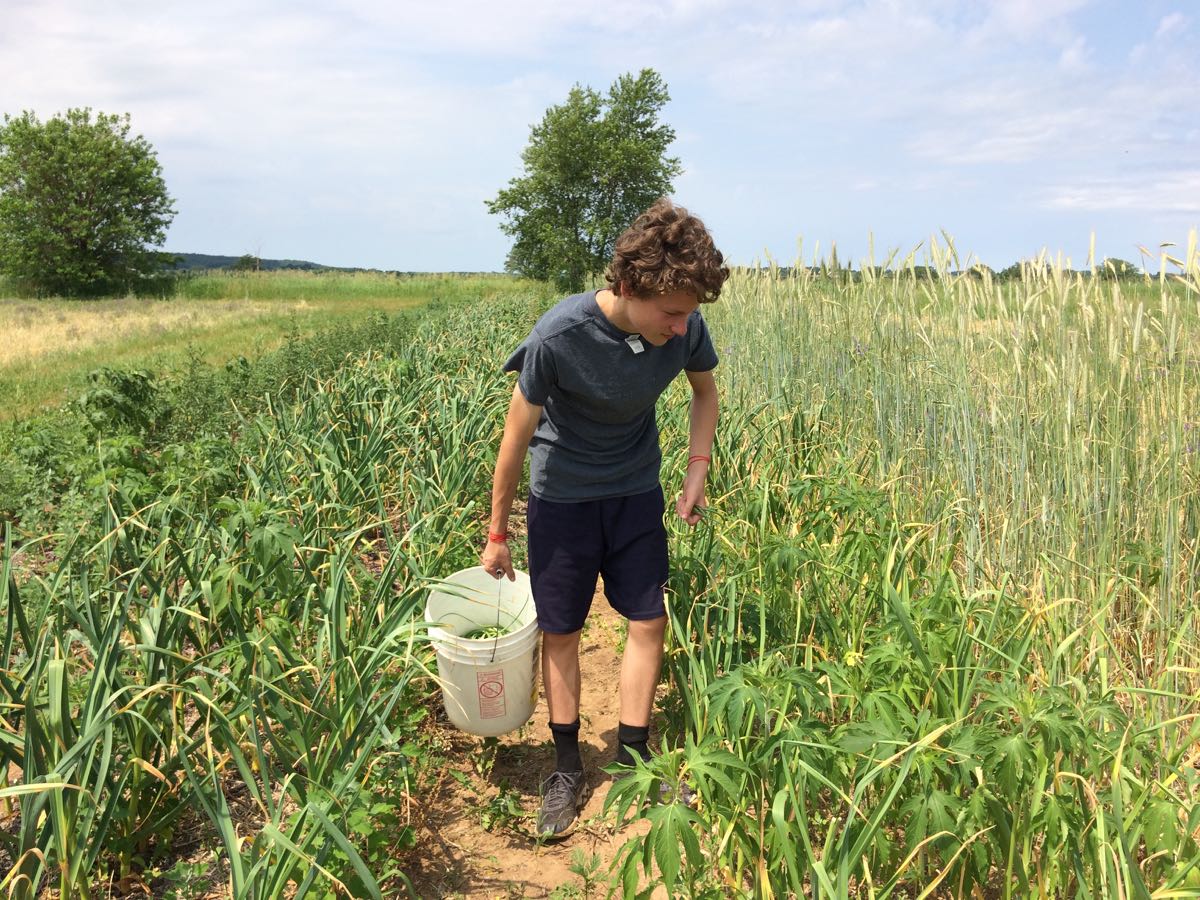
Ari picks garlic scapes, one by one. We count each scape, even though we put the scapes in the CSA boxes by the un-counted handful. The scape count is a good predictor of how many garlic heads we’ll harvest in July so it’s worth the extra effort.
We picked a zillion strawberries this week. They ripened quickly in the heat.
Resilient strawberries
We have beautiful, ripe berries for you this week. Quality and flavor are excellent because of the dry weather. (For strawberries, wet weather = rot.) Eat your berries soon; they are ripe and will not store for long.
Strawberries are not resilient plants. This field appears to be the exception. Throughout it’s life, we repeated thought the planting might be lost. Remember how much it rained last summer and early fall? We couldn’t control the weeds in this field. Steve cultivated and the weeds re-rooted in the next rain. The strawberries re-rooted too, erasing the aisles which delineate the varieties. We mulched and headed into winter not knowing if the plants were strong enough to set flower buds. Come February, freakishly warm weather risked breaking the plants’ dormancy. In spring, we irrigated to protect on frosty nights, as usual. By June, we had a mass of berry plants, long wandered out of their rows but bearing excellent quality berries. It is a happy outcome.
Veggie List and Veggie Notes
(June 15/16, 2017, Week #5, purple EOW & sun sampler)
Strawberries, 1 pt + 1 qt
Asparagus, about 3/4 lb
Broccoli, 1.25 – 1.75 lb
Zucchini, 2+ lb
Kohlrabi, 1 large
Spinach, 1 medium bunch
Red bibb lettuce
Some sites will get …
Garlic scapes, a handful
Scallions, 1 small bunch
Some sites will get …
A larger amount of garlic scapes
Next week’s box will probably contain strawberries, peas, broccoli, zucchini, garlic scapes and more.
Strawberries! – We’ve been waiting for these.
♦ Ripe strawberries are perishable. Ripe berries should be eaten immediately, or stored in the refrigerator. Most berries are quite clean. If you want to clean your berries, rinse gently. Don’t soak them, just rinse.
♦ You will receive two containers of strawberries. Compare the containers, judge which berries are softer and more ripe, and eat those first.
♦ Please recycle your strawberry containers. We no longer collect them for re-use. Please don’t return them to your pick-up site.
Asparagus – This is the final delivery. It’s time to let the plants grow and replenish their enormous underground storage roots, accumulating energy to fuel next spring’s harvests.
Broccoli – Refrigerate in a plastic bag.
Zucchini & summer squash – First pick of the season! Zucchini needs refrigeration but does not do well at very cold temperatures, as it will soften and form pits in its surface. Keep these squash in a plastic bag in the warmest part of your fridge.
Kohlrabi (pale green, round vegetable with thick skin) – Crunchy and sweet, kohlrabi is a great addition to salads.
Storage: Kohlrabi bulbs will store for a month in the refrigerator.
Uses: Kohlrabi are good peeled and eaten out of hand, or added to sandwiches. Mix into lettuce or spinach salads, or prepare as a salad on it’s own. You can grate it, slice it, or cut it into matchsticks. It’s also good cooked. If you have it, the Asparagus to Zucchini cookbook has a long list of kohlrabi suggestions.
Red bibb lettuce – This delicate lettuce came through the hot weather beautifully.
Garlic scapes (curly green things) – Garlic scapes grow at the top of garlic plants. They look like flower buds but are actually clusters of tiny bulblets. We snap off the young scapes to direct the plants’ energy into forming garlic bulbs underground. Use scapes as a substitute for garlic cloves. They can be minced, mixed with olive oil, and added to stir fries or simple pasta dishes. If you have a larger amount, puree with oil to form a pesto to add to pasta or line a pizza. The scapes can be sautéed, but will not brown like garlic cloves. Expect them to retain their crunch even when cooked, and to be milder than garlic cloves, closer in pungency to the green garlic we’ve sent. This week’s scapes are from our friend John Hendrickson of Stone Circle Farm who grows organic garlic bulbs for our CSA. Next week, we’ll deliver scapes from our farm and from John.
LOCAL THYME RECIPES
Comforting Classics
Paprika and Oregano Roasted Kohlrabi
Strawberry Buttermilk Pancakes
Rice Noodle Stir Fry with Broccoli, Spinach and Kohlrabi
Shaved Zucchini Salad with Parmesan Dressing
Outside the Box Recipes
Grilled Zucchini and Kohlrabi Sandwich
Red Bibb and Strawberry Salad
Mediterranean Farro with White Beans and Broccoli
Spinach Salad with Dates and Almonds
Quick and Easy Meal
RECIPES FROM LAUREN
ROASTED ASPARAGUS & GREEN GARLIC FARRO SALAD
My instructions as written are best on a day that is less than 90 degrees (a.k.a. requires you to turn on your oven) which lately seems impossible. If you are wanting to make this right away, you could roast the asparagus and green garlic in the toaster oven (as I did) or just saute them gently for 10-15 minutes until tender. I for one love the texture of roasted asparagus (and green garlic). It will always be my technique of choice, even when not weather appropriate. Lauren.
Serves 4 as a side or 2-4 as a hearty breakfast with a fried egg on top
Takes 45 minutes
2 tablespoons olive oil
3/4 pound asparagus
3 garlic scapes
1-1/2 teaspoons Kosher salt, divided
1/4 teaspoon freshly chopped black pepper
1/4 teaspoon red pepper flakes
1 cup farro
2 cups chopped spinach
Fried eggs, for serving
1. Preheat your oven to 400 degrees.
2. Once preheated, drizzle baking sheet with olive oil. Add asparagus and garlic scapes, along with 1/2 teaspoon of the salt and all of the pepper and red pepper flakes. Roast for 20 minutes, tossing after 10 minutes to cook evenly.
3. While the asparagus and scapes roast, bring a large saucepan of water and 1 teaspoon Kosher salt to a boil.
4. Meanwhile toast your farro in a large saute pan for 5 minutes until it browns slightly and begins to smell nutty. Add the farro to your boiling water and simmer gently for 12 minutes. I always cook farro like pasta for the best success. It will be perfect and tender everytime (without getting mushy). Drain after 12 minutes and return to pot. Stir in spinach while farro is still warm and stir just to wilt.
5. Remove asparagus and scapes from oven and preheat to 500 degrees. Roast 5-10 minutes longer until charred and a little crispy in spots. Remove from oven and dice asparagus into bite-size pieces. Slice scapes into little coins. Toss asparagus and garlic scapes with farro to combine.
6. Eat the farro and veggies as is or serve with fried eggs for a more complete meal.
.
THE BEST BROCCOLI SALAD
I love broccoli salad. I didn’t grow up liking it very much (or even understanding it really), but man oh man, do I love it now. It is the first thing I make every year when I receive the first broccoli of the season. This recipe uses other items in your box but can be easily customized with onions, shallots, regular garlic, green garlic or any other allium you have on hand if you don’t have scallions in your box. The addition of kohlrabi also isn’t required (but I love it!). My mom used to make it with pieces of bacon (which you should totally try if you aren’t vegetarian and have never had it that way!). You can use Greek Yogurt instead of the mayo or buttermilk (or both!). You can change up the nuts. Leave out the dried fruit if that isn’t your thing. This is a very versatile salad so feel free to play around with it. Hope you enjoy! Lauren.
1/2 cup diced pecans
1 head broccoli, stem removed, florets cut into bite-sized pieces
1 large kohlrabi, peeled and diced
1 bunch scallions, sliced (you can use all of it, white and dark green parts)
1/2 cup dried cranberries
Dressing:
1/2 cup buttermilk
1/2 cup mayonnaise
2 tablespoons apple cider vinegar
1 tablespoon sugar
1/2 teaspoon Kosher salt
1/4 teaspoon freshly ground pepper
1. In a large saute pan, toast pecans (or whatever nut you decide to use) for 5-10 minutes until browned and smelling really delicious.
2. In a large bowl, combine broccoli, kohlrabi, scallions, dried cranberries and toasted nuts.
3. In a small bowl (or Mason jar with a lid that will be shaken) combine all dressing ingredients and whisk (or shake) until well-combined. Pour over veggies and stir to combine. It takes the veggies a little while to soak up the dressing so try to make it an hour ahead or the day before.
Week #4, June 8 2017
- On: June 07, 2017
- 0
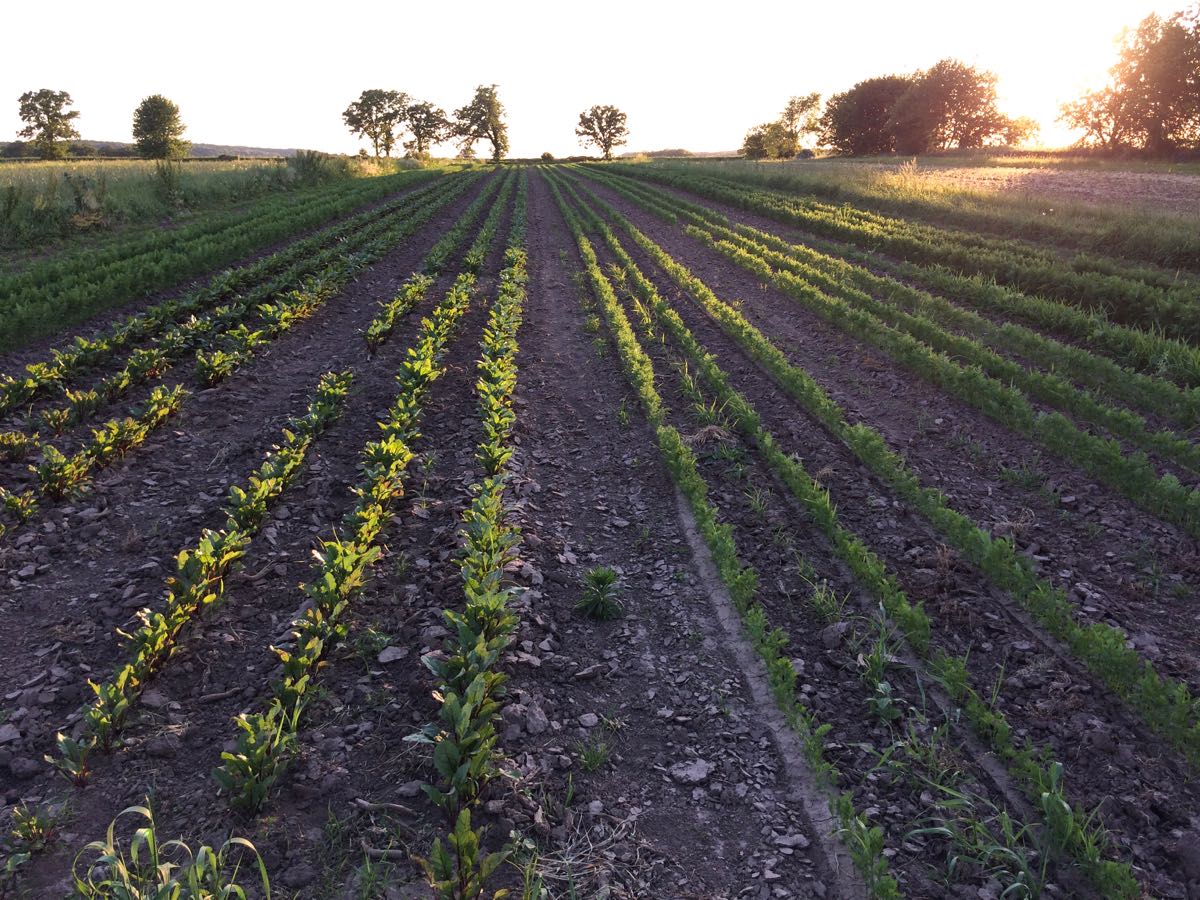
A beet and carrot field in the evening sun.
Steve is committed to better weed control this spring. Weeding tends to get neglected during the spring hustle to get crops in the ground. This year, we’ve got new cultivating tools, more employees with tractor cultivation experience, and a stronger commitment to putting the weeding first on the schedule. If left to the end of the day, it doesn’t get done. We’ve even got a new Dutch harrow on the way to the farm. We’ve had mixed experiences importing machinery from Europe so let’s all keep our fingers crossed here are no hitches.
Beginning last year, we stopped growing spring lettuce for our wholesale customers (Willy Street, Outpost, Basics, etc) in hopes the change would free up more time to get our spring crops established. We plant most of your CSA vegetables during the months of May and June, so it’s a very important period. Blink and you can lose a field to weeds. The change did not go as planned last year. Steve was still recovering from a bike accident the previous fall. His energy was low and he didn’t keep the farm organized and running on a schedule. He’s much improved this spring and our whole farm is functioning better. The result is pretty fields like in the photo. Beth
Veggie List and Veggie Notes (week#4, June 8/9, 2017)
Napa cabbage
Spinach, 1st big bunch
Spinach, 2nd big bunch
Asparagus, about 1 lb
Red Romaine lettuce (some sites get red bibb)
White salad turnips, 1 bunch
Radishes, 1 bunch
Red scallions, 1 bunch
Next week’s box will probably contain strawberries, asparagus, spinach, lettuce, scallions, garlic scapes and more.
Napa cabbage (large, pale green cabbage with crinkled leaves) – This week’s napa average 2.75 lb in size. This is an interesting vegetable, useful for both fresh, raw salads and for cooking. Napa’s most famous use is fermented kimchi. I like to prepare a fresh, unfermented kimchi. Same seasonings, but it’s ready to eat right away. You will be amazed at how much shredded napa cabbage shrinks when prepared this way. See here for an example, but cut the salt in half: Grilled Flank Steak with Kimchi-style Coleslaw.
Storage: Napa stores very well. Cut off wedges as needed and keep the rest covered and refrigerated, and it will keep for several weeks. Peel off the outer layer and it will be ready to use. Here are a few preparation ideas from the ‘Asparagus to Zucchini’ cookbook.
– Chop raw napa into green salads.
– Substitute napa in traditional coleslaw.
– Chinese cabbage cooks quickly. Steam 3-5 minutes, or until leaves are wilted down but remain slightly crisp.
– Substitute napa cabbage for common cabbage in recipes, but reduce the cooking time by 2 minutes.
– Napa cabbage is the main ingredient in egg rolls. Try making an egg roll mixture to eat as a cooked side dish instead of preparing time-consuming egg rolls.
Spinach – That’s not a typo; you will receive two bunches of spinach this week. We are sharing lots this week while it is lush and abundant. Total combined weight for the 2 bunches will be about 2 lb. This is a good week to try cooked recipes, as spinach shrinks substantially when cooked.
To freeze; Frozen spinach is so useful – add to lasagne, casseroles, quiches, soups. Spinach needs blanching before freezing. Wash well, chop coarsely, and place in a large pot with 1 inch of water in the bottom. Steam until the color changes, stirring a few times. Turn off heat, return cover to the pot, wait a few minutes and stir again. The residual heat will finish the cooking. The spinach should be completely collapsed. Cool, then pack into containers. Choose a container sized to the amount you will want to thaw later.
Asparagus – Some of you will get very short asparagus this week. The asparagus field needs weeding midway through the harvest season. We pick the field very short, then mow down the weeds. It’s a quick fix that lets us keep picking for another week or so. Once the weeds get too tall we can’t find the asparagus spears. We’ll do a more thorough weeding once the harvests are finished.
Salad radishes – Uses: Traditionally, radishes are sliced thinly and added to salads. If you dislike radish spiciness, slice and toss with salt in a bowl. Let sit for 10 minutes, then rinse. Radish sandwiches on buttered bread are surprisingly good. I first enjoyed them as part of an appetizer platter at the Coopers Tavern. This recipe uses too much butter but you’ll get the idea. All you need are good quality radishes, good quality bread and good quality butter. Don’t forget the salt.
Storage: To store, cover and refrigerate. To maximize the life of your radishes, remove and discard the greens.
Red scallions – Steve tried this variety just because they are pretty. Use like normal scallions. We don’t know yet if the color will change with cooking but we’ll find out soon with a batch of scallion biscuits. That’s a spring favorite in our household.
RECIPES
See the RECIPE LOG for recipes from previous weeks. There are dishes for asparagus, spinach, lettuce, scallions, turnips, and radishes that might be useful with this week’s produce.
Local Thyme Recipes
Comforting Classics
Turkey or Hummus and Radish Wraps with Spinach Pesto
Seared Sesame Asparagus
Chinese Cabbage Salad with Radish and Crispy Ramen Noodles
Marcella’s Slow Cooker Stuffed Cabbage Rolls
Outside the Box Recipes
Chicken Valdostana Over Braised Lentils
Grilled Pizza with Fig, Asparagus and Scallions
Warm Napa Cabbage Slaw with Dill
Chinese Tofu or Chicken and Cabbage Noodle Soup
Quick and Easy Meal
Salmon with Shaved Asparagus and Radish Salad
Recipes from Lauren
CRUNCHY NAPA CABBAGE & PEANUT RICE BOWL
Adapted from Bon Appetit magazine
Now this, this dish serves a crowd. It’s a great vegan, gluten-free (if you use the tamari instead of the soy sauce) dish to bring to a party or to make on a Sunday to have in your fridge for lunches all week long. Napa cabbage and peanut sauce is one of my absolute favorite combinations. I hope you enjoy!
Takes 1 hour
Serves 8-12 (even more if eaten as a side dish only)
4-1/2 cups water
2 cups brown rice
1 teaspoon Kosher salt
1 head Napa cabbage, cleaned and thinly sliced (I slice the white stem and green leafy portion together)
1 bunch radish, greens removed, cut in half and thinly sliced
1 bunch turnips, greens removed, cut in half and thinly sliced
1 bunch scallions, sliced (you can use all of the scallion, whites, pale green and dark green portions)
Roasted peanuts, chopped, optional
Warm Peanut Sauce:
1 cup creamy peanut butter
3/4 cup coconut milk
2 tablespoons brown sugar
2 tablespoon soy sauce or tamari
Juice from 1 lime (or 2 tablespoons lime juice)
1 tablespoon fish sauce
1/2 teaspoon red pepper flakes
Kosher salt
1/4 cup water
- Bring water to a boil in a large saucepan on the stove top over high heat. Once boiling, add rice and salt and reduce heat to low. Cover and cook for 50 minutes (or less, depending on your type of rice; read the package directions).
- While the rice cooks, prepare your veggies. In a (seriously really) large bowl, toss napa cabbage, radishes, turnips, and scallions together. Add a pinch or two of sauce and toss veggies so evenly distributed. Set aside.
- When the rice has about 10 minutes left to cook, begin the sauce. Combine peanut butter, coconut milk, brown sugar, soy sauce or tamari, lime juice, fish sauce and red pepper flakes in a large saucepan. Whisk together until smooth. Place on stove and turn heat to medium. Add a pinch of salt and water. Whisk until smooth and hot. You will want the dressing to be warm to wilt the greens.
- Serve in a bowl with the ratio of about a 1/2 cup of rice and 2 cups of veggies. Pour 2-3 tablespoons of peanut sauce over the greens and toss gently to coat. Add peanuts if you like. (I didn’t use them but could see how they’d add a great crunch).
.
SHAVED ASPARAGUS & SPINACH CAESAR SALAD
If you have never before shaved asparagus you are in for a real treat. The thin ribbons can be tossed into things like pasta or quiches. I also love it on pizza ala Smitten Kitchen. But I especially love shaved asparagus raw. It has a wonderful texture and adds a lot to simple salads. With the red romaine, this salad will be a vibrant and beautiful dish to serve alongside any meal.
Please note for this recipe, you will be making Caesar dressing from scratch. If that’s not your thing and the word emulsify scares you, feel free to buy a high quality Caesar (it will likely be in the refrigerator section of your grocery store) and use that instead. If you plan to make the dressing, but are freaked out by raw egg yolk, you can substitute 2 tablespoons of mayonnaise instead. Lauren.
Beth’s note. We don’t eat raw eggs in our house. Use bottled dressing, or Lauren’s mayo substitute, or buy pasteurized eggs at the grocery store. If you hunt around online, you can find food scientist Harold McGee’s method to pasteurize egg yolks in the microwave.
Takes 30 minutes
Serves 4-6
1 pound asparagus
1 pound spinach, chopped
1 head red romaine, roughly chopped
1/2 cup finely grated Parmesan
4 cups croutons, store-bought or made from scratch
Caesar Dressing:
Juice of 1 lemon (or 2-3 tablespoons)
1/2 teaspoon garlic powder (or 2 teaspoons minced green garlic if you have some leftover)
1 teaspoon Kosher salt
1/2 teaspoon Worcestershire sauce
2 large egg yolks
5 tablespoons vegetable oil
5 teaspoons extra-virgin olive oil
1/2 cup finely grated Parmesan cheese
1/2 teaspoon freshly ground black pepper
- Shave your asparagus! You will do this with a standard vegetable peeler. It works best for me when I lay the asparagus close to the edge of the counter. One hand holds the crown of the asparagus to keep it from moving and the other holds the peeler shaving off ribbons until about half of the asparagus is gone. Then I flip over the asparagus and continue until the peeler can’t go any further. You will have uneven pieces but that’s totally fine. Feel free to snap any larger pieces in half. This process is a little tedious so once you get the hang of it, you can do two or three pieces of asparagus at a time to speed things up.
- Toss the asparagus into a bowl with the lettuce and spinach.
- Now prepare you dressing. Whisk two tablespoons of lemon juice and garlic together in a large bowl. Let sit for 5 minutes. Add Worcestershire, salt and egg yolks into lemon mixture. Slowly whisk in each batch of oil until well-incorporated. Start slow, drop by drop, then start adding more at a time, consistently whisking throughout the additions. You are looking to emulsify the dressing (this means the oil and vinegar will no longer be separate and the mixture will become thick, creamy and glossy as you whisk). Add the Parmesan cheese and pepper, whisking again to combine. Taste and adjust seasonings by adding more salt, pepper or lemon juice.
- Toss the asparagus and greens with the dressing. Or, if you don’t plan to eat it all tonight, toss just as much of the veggies with dressings as you plan to eat. Top with a dusting of Parmesan and the croutons. Feel free to add chicken breast or an egg to make it a complete meal.
.

