Yearly Archives: 2018
Storage share, November 15/16, 2018
- On: November 14, 2018
 0
0
We are ready to wrap up this season. Then we’ll enjoy the winter, with lots of cooking, ice skating and skiing (we hope!) before beginning to plot next year. Have a wonderful Thanksgiving! Beth & Steve
Storage Share this week
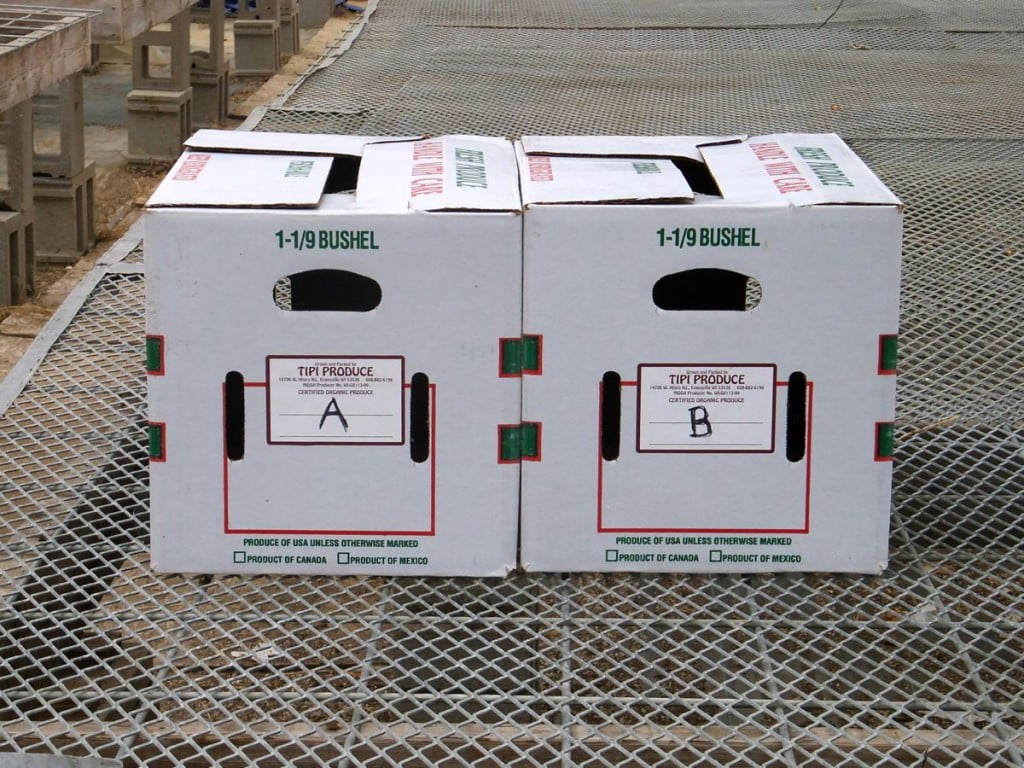
Take one box labelled “A” and one box labelled “B”.
Things you need to know about your winter share
* Your delivery will consist of two different boxes, labeled “A” and “B”. Take one “A” box and one “B” box. The boxes contain different vegetables.
* Please pick up your boxes on the day of delivery, during the normal hours for your site.
* Outpost members, pick up your boxes on Friday. This is the busiest weekend of the year for the Outpost staff, so they WILL NOT hold boxes past Friday, nor can they handle special requests.
* Members at unheated sites, please replace the blankets carefully. That keeps everyone’s produce in good shape.
* The boxes are heavy! Bring lots of bags to take your produce home.
Veggie List and Storage Info (Storage share, Nov. 15/16, 2018)
We hope you enjoy this shipment of veggies. Strategize to use them well, as some will last longer than others.
* These are the most perishable vegetables: kale, cauliflower, Romanesco.
* These are the next-most perishable: Brussels sprouts, cabbage, leeks, turnips and onions. Keep an eye on your butternut, potatoes and sweet potatoes. The last two are susceptible to drying out. Expect the largest butternuts to last the longest.
* These will last the longest: Beauty Heart radish, beets, carrots, celeriac, garlic, parsnips.
Box “A”
Refrigerate everything in this box.
Beauty Heart winter radishes, ~1.5 lb
Beets, 3 lb
Brussels sprouts, on stalk
Carrots, 6 lb total
….. orange ~4.6 lb
….. yellow ~1.5 lb
Celeriac, 1
Green cabbage, 1 medium
Kale
Leeks, ~1 lb
Parsnips, 2.5 lb
Turnips, a few
Mixed Romanesco and purple or green or white cauliflower, 3 – 4 lb total
Box “B”
The Brussels sprouts and onions need refrigeration. Everything else in this box can be stored cool or at room temperature. See notes below for more detail.
More Brussels sprouts stalks
Butternut squash, 6 – 7 lb
Garlic, 2 beautiful bulbs
Potatoes, Amarosa fingerlings, 2 lb
Potatoes, russet, 5 lb
Potatoes, Satina, 5 lb
Sweet potatoes, ~10 – 11 lb
Onions, 5 lb total
….. ~1.5 lb red
….. ~3.5 lb yellow
Beauty Heart radishes (round, white with pale green shoulders and bright pink interior) – Refrigerate. The interior color is lovely. Slice thinly and add to salads, cook lightly in mixed vegetable medleys or cut into matchsticks and add to pasta salads. We enjoy grated carrot and Beauty Heart salads all winter.
Beets – Refrigerate in a bag or container. Beets will store for two months or longer.
Brussels sprouts – Pluck from stalks and refrigerate in a bag or container. Do this the day you pick up your CSA boxes. Eat within 2 to 3 weeks.
Butternut winter squash – You will receive 6+ lbs of squash total. Store your butternut in a cool, dry place. 55 – 60 F is ideal. Do not put in a plastic bag. Expect the largest butternuts to store the longest. Inspect your squash frequently and cook promptly if you see any soft spots developing. You can cook, mash and freeze the squash for future use. I find that you can refrigerate cut raw squash for up to one week. This runs counter to the accepted way to store squash, but is useful if you want to cook just half a squash. Try microwaving your squash for one to two minutes before cutting or peeling. This softens the squash and makes a large butternut easier to handle.
Cabbage – Refrigerate.
Cauliflower (white, purple or green) – Refrigerate in a bag or container.
Carrots, orange. Refrigerate in a plastic bag. Will keep for several weeks.
Carrots, yellow. This variety is pretty AND they taste good.
Celeriac – Will store for months in your fridge. Cut off chunks as needed. Peel before using. I find it easiest to cut the celeriac into flat slices, then peel.
Garlic – Store at room temperature.
Kale – This mature kale is best cooked, rather than used in salads.
Leeks. Refrigerate and eat within three weeks. Leeks are not a long-storage crop. You may need to strip off one or two outer leaves to freshen the leeks before you cook them.
Onions: Refrigerate or store in a cool, dark spot and protect from light. Exposure to light stimulates sprouting. If you have the room, it’s safer to store the onions in the refrigerator. After the wet season, they might not last as long as usual.
Parsnips (These look like large white carrots.) – Refrigerate in a plastic bag. Parsnips will store for two months but will darken in color. That is a harmless change.
Potatoes, fingerlings, russets and Satinas – Can be stored at room temperature or in a cool spot, but must be kept in the dark so they do not turn green. A cloth or loose plastic bag draped over the paper bag will help avoid moisture loss, but do not close the plastic bag. All three types will store longer if kept cool. Around 40 – 50 F is ideal. The potatoes were grown by the Igl family near Antigo.
Amarosa fingerlings – This is a new addition to the Storage share for us. These fingerling potatoes have red skin, marbled red flesh and a creamy, velvety interior when cooked. They are delicious fried, baked, boiled, or steamed. Fingerlings really shine when simply roasted. Cut in half, oil well and roast at 400 F until soft. Don’t try to make mashed potatoes; they will turn gluey.
Russets– We got the big ‘baking’ grade so you have nice bakers for Thanksgiving. Excellent for baked or mashed potatoes.
Satinas– These are good all-purpose potatoes, everything from roasted to potato salad. I really like this variety of yellow potato because they oven-roast so well and because they are less sweet than other yellow varieties such as Yukon Golds.
Sweet potatoes – These are a mix of the Beauregard and Covington varieties. All types have developed excellent flavor and sweetness. Store at room temperature, no lower than 55 F, but 60+ F is better. Keep them on your kitchen counter where it’s easy to keep an eye on them. I like to keep ours in a paper bag so they don’t dehydrate. Cook promptly if they start to soften. The roots come in a wide ranges of sizes and all are good.
Turnips (white roots with purple shoulders and white interior) – Refrigerate. Scrub clean but do not peel. Excellent roasted, or mashed or scalloped with potatoes.
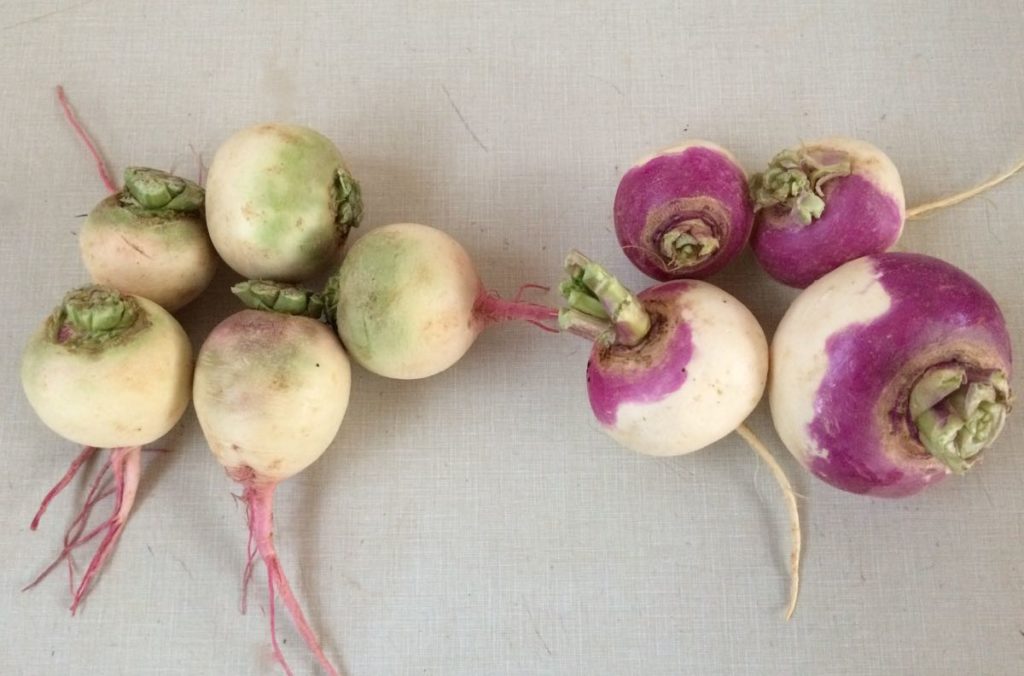
Beauty Heart winter radish (left) and turnips (right).
These roots look similar but are quite different. Beauty Hearts are winter radishes with a beautiful magenta interior. Their shoulders are green, white or blush pink. In contrast, turnips (right in photo), have purple shoulders and a white interior.
What are you cooking for Thanksgiving?
We are creatures of habit when it comes to Thanksgiving. Here are our plans so far:
– brined roast heritage turkey from our friends Jen and Bryce Riemer (Beth),
– Brussels sprouts with garlic-mustard vinaigrette (Steve),
– roasted sweet potatoes with garlicky yogurt sauce (Sophie),
– glazed butternut squash (Beth),
– crunchy carrot-Beauty Heart salad with sesame-seed dressing (Steve),
– some kind of slow roasted onion relish (Beth),
– homemade applesauce (Ari), and
– apple pie (Sophie).
I’ll probably make stuffing with lots of celeriac and onions but that might be overkill. Yeah, we tend to go overboard. We love celebrating Thanksgiving and the end of harvest season.
Menu Ideas
This is a great time of year to gather recipes to enjoy all winter. Online cooking sites post Thanksgiving menus and recipes, many suited to your Storage share vegetables. Peruse and bookmark the recipes soon; Thanksgiving collections are taken down quickly after the holiday.
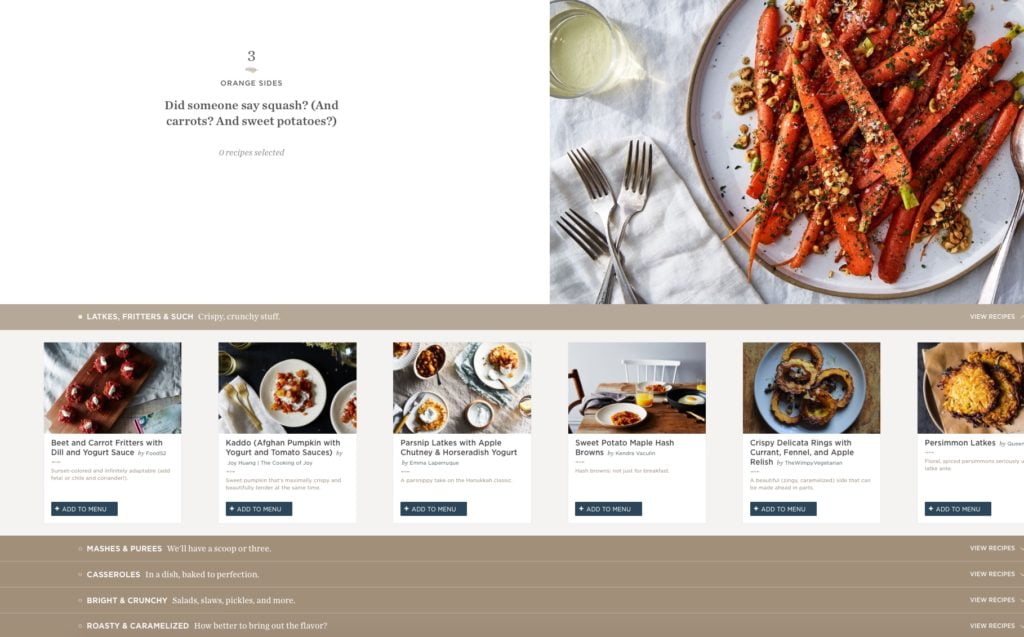
Food52’s Thanksgiving Menu Maker.
♦ IMHO, the lively Food52.com site has the best Thanksgiving recipe collection this year, possibly of all time. It’s titled AutoMagic Thanksgiving Menu Maker, and is beautifully organized by type of dish. Go straight to Section 3, “Orange Sides”, with multiple subheadings such as “Bright and Crunchy Salads” or “Roasty and Caramelized.” Move on to “Something Green” or “Gravies & More” or other tempting sections. I plan to gather a suite of recipes to try this winter.
♦ Smitten Kitchen is our go-to site for dessert recipes but has excellent veggie recipes too. Blogger Deb Perelman often posts her own plans for new Thanksgiving feast. This year, she has simply posted a collected list of Thanksgiving recipes from previous years. It is extensive!
♦ 101cookbooks. Always has good vegetarian and whole-grain recipes.
♦ The Dishing Up the Dirt site doesn’t have a specific Thanksgiving section, but many of her recipes are tailored to Storage share produce.
♦ Finally, remember that we can use Local Thyme recipes all winter. Check them out for Thanksgiving ideas.
Extension share, Nov. 8, 2018
- On: November 07, 2018
 0
0
Such a busy week
Temperatures are dropping sharply tonight, and tomorrow night, and every night for the next week. This brings a sudden end to our field season. We hustled all week to finish our field work. It has been a sprint.
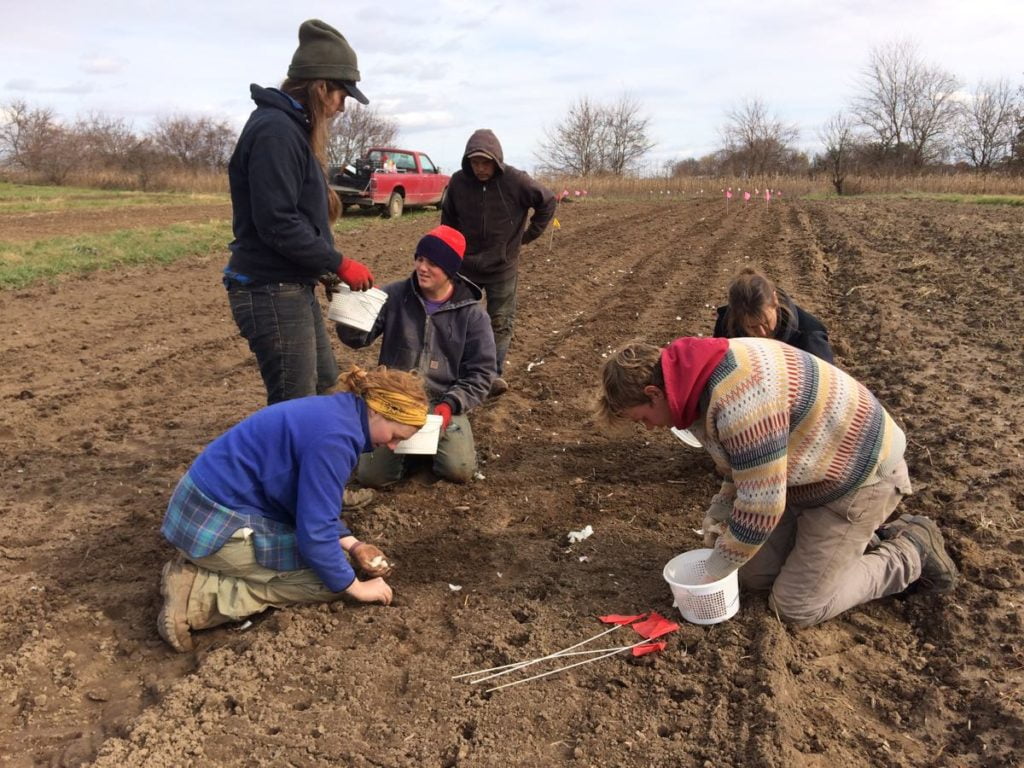
Garlic planting. We planted much more garlic than usual, with plans of having more garlic for the CSA boxes next year. First, I chose our best garlic bulbs. Then we cracked them into individual cloves. Each clove will grow into one bulb. We’ll mulch the field with straw soon, to protect the plants from fluctuating temperatures this winter.
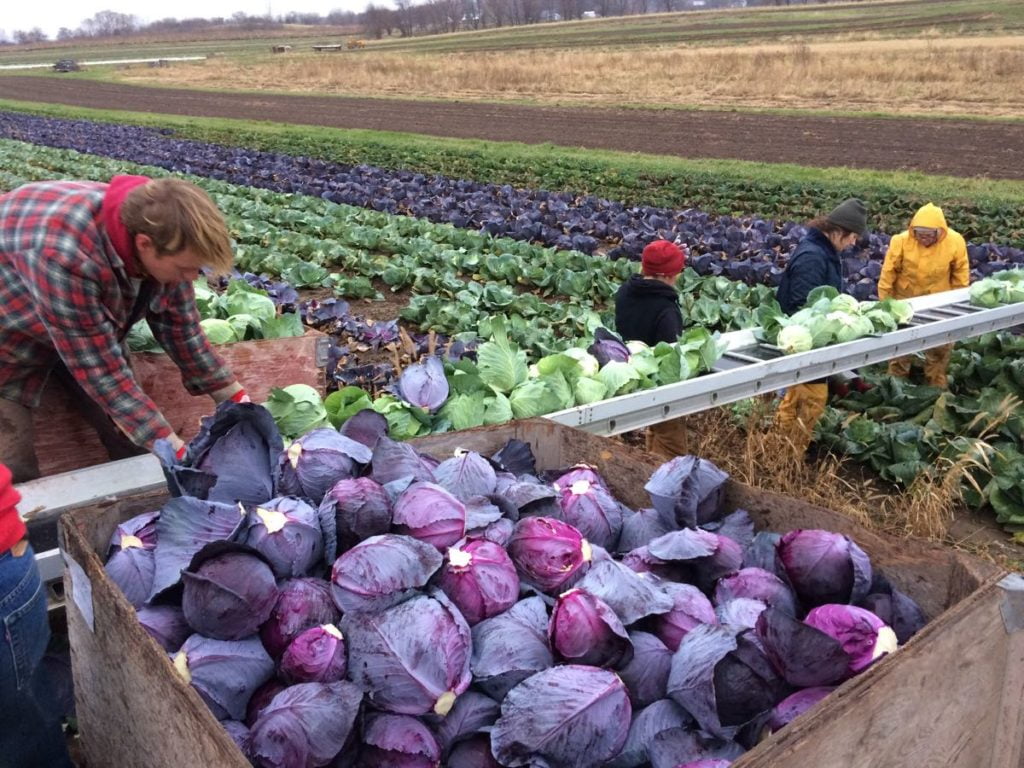
Cabbage harvest. The heads are small this year, but almost all are perfect. This is good news. After the rainy summer and fall, we worried there would be rot in the cabbages but it has not been a problem at all. We also harvested all the remaining broccoli, cauliflower and Romanesco. We’ve been waiting for these cool-loving crops to size up, but they are out of time.

Rutabagas were our final root harvest for the year. Steve cleaned the harvester thoroughly this afternoon. Tomorrow, he’ll take it to the neighbor’s shed for the winter.
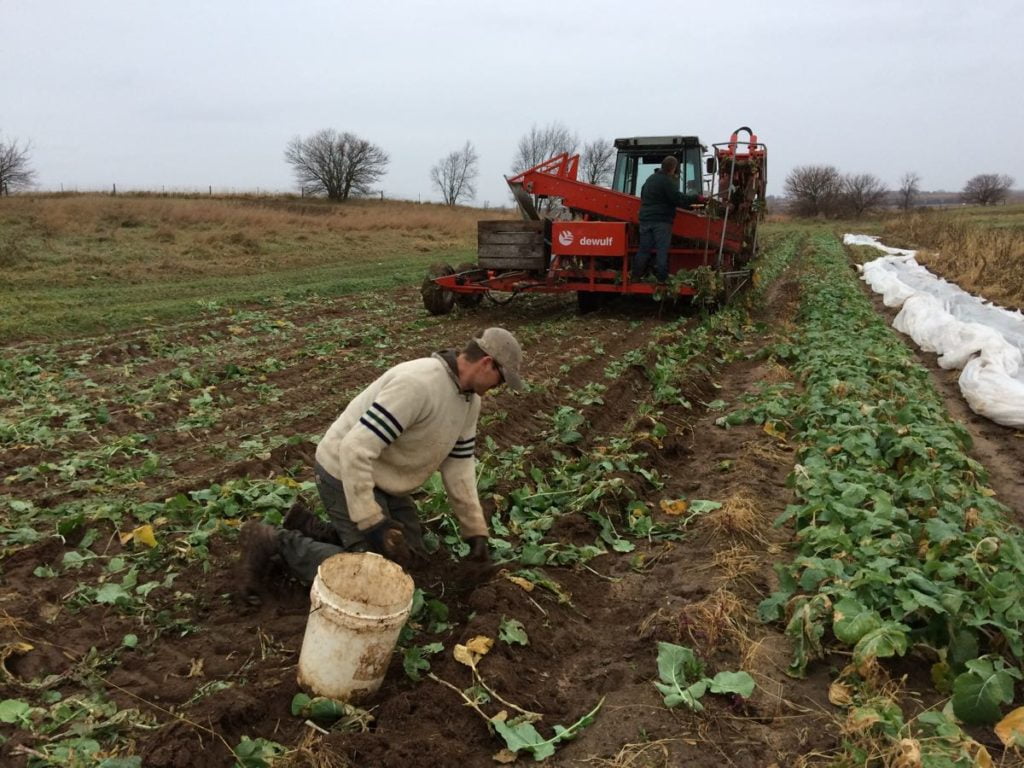
Even with a mechanical harvester, we still pick up dropped roots by hand. It’s worth our time.
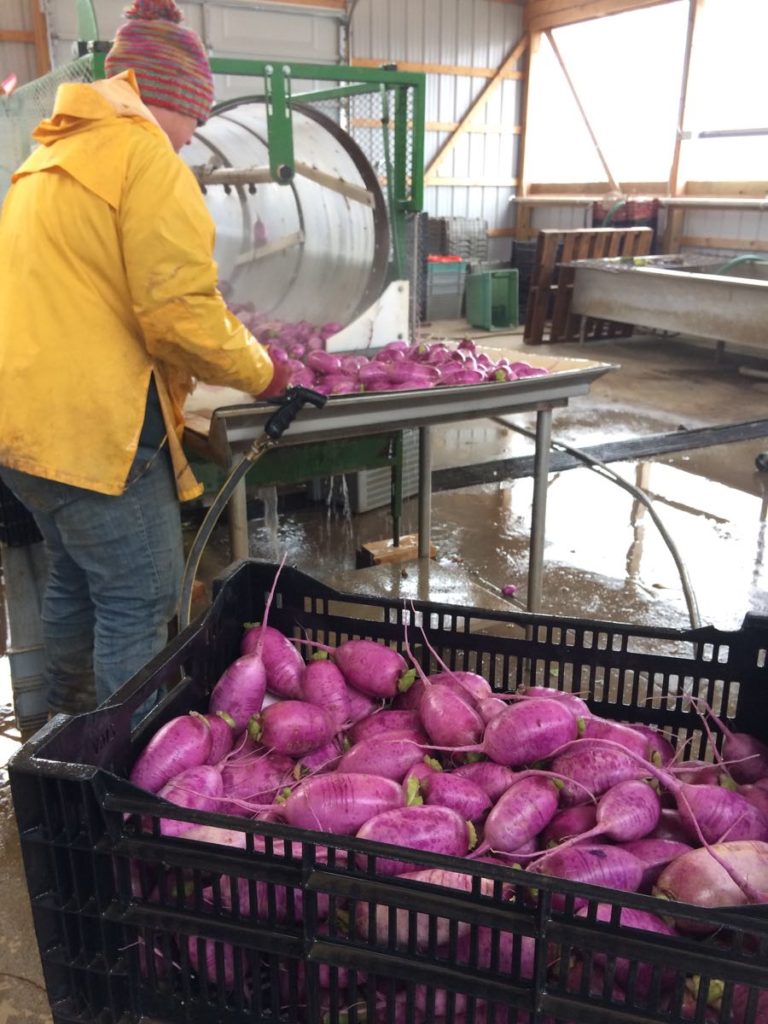
Maggie washes beautiful purple daikon for you.

Our farm cat Charlotte abandoned her kittens on Monday, leaving me to bottle-feed them during a very busy week. I don’t look too dismayed, do I? Charlotte evaded capture when we got cats neutered earlier this year but we’ll try again. Both kittens are available for adoption.

Daylight saving shortens our work days. We will finish a few harvests tomorrow, then our outdoor work in finished for the season! Beth
Veggie List and Veggie Notes
Extension Share, Nov 8/9, 2018
Sweet potatoes, ~2.5 lb
Butternut squash, 1 medium or 2 small
Portobello mushrooms, 2 – 3
Savoy cabbage, 1 medium
Carrots, 2 lb
Beets, 2 lb
Red mustard greens, 1 bunch
Purple daikon, a few
Broccoli OR cauliflower, about 1 lb total
Yellow onions, ~3
Portobello mushrooms – These beauties are from Mary at Hidden Valley Mushrooms in the Wisconsin Dells. We will pack them in brown paper bags. Mary says to store them in your fridge in the paper bag. Eat soon; they are fresh, lovely and perishable.
Purple daikon – These Korean radishes are so pretty. Slice or cut into matchsticks to add to cabbage or carrot salads.
RECIPES
Visit our 2018 Recipe Log or our 2017 Recipe Log or join our Facebook discussion group.
LOCAL THYME/ Comforting Classics
Moroccan Sweet Potato Soup
Braised Cabbage with Prosciutto
Chickpea Salad with Roasted Beet and Sunflower Seeds
Mustard Green Caesar with Chicken or Chickpeas
LOCAL THYME/ Outside the Box Recipes
Sunny Curried Sweet Potato Salad
Pasta with Cabbage and Meat Sauce
Beet and Cabbage Kraut
Mustard Greens and Turkey Salad
LOCAL THYME/ Quick & Easy Meal
Breakfast Bahn Mi Sandwich with Daikon and Carrot Pickles
LOCAL THYME/ Daikon recipes from July
Cabbage and Daikon Fried Rice
Curried Daikon
Fish and Cabbage Tacos with Quick Pickled Purple Daikon
RECIPES FROM LAUREN
BUTTERNUT SQUASH & BEET PIZZA
Adapted from Half Baked Harvest
I love love love the pizza dough recipe linked to below (by Pioneer Woman). It is my go to crust every single time I make pizza. I especially love it because it doesn’t only prefer to be made in advance, it actually gets better the longer you wait to use it. I am always making a batch on Sunday and waiting until Thursday or Friday to make a quick pizza. The way it slow ferments in the fridge makes a perfect crust every time (plus no kneading necessary!). If you don’t want to make a crust at least 24 hours in advance, than I recommend you use whatever recipe works for you quickly or getting a batch of store-bought dough instead. Lauren.
Serves 4-6
Takes 1 hour, 15 minutes
1/2 batch favorite pizza dough (see note above)
2 tablespoons olive oil
1 tablespoon maple syrup
1/2 teaspoon red pepper flakes
1/4 teaspoon cinnamon
3 cups cubed butternut squash
2 cups cubed beets
3 tablespoons butter, divided
2 yellow onions, thinly sliced
1 cup apple cider
1 tablespoon flour
1 cup warm whole milk
1/4 teaspoon Kosher salt
1/4 cup finely shredded Parmsean
1 apple, thinly sliced
1 ounce blue cheese
1 cup shredded Gouda cheese
- At least a day before you plan to make this pizza, make the pizza dough. Unless you have a quicker crust you prefer (see note above).
- Preheat the oven to 425 degrees.
- In a small bowl whisk together 2 tablespoons olive oil, maple syrup, cayenne, red pepper flakes and cinnamon.
- Spread the squash and beets out on a single layer and drizzle with olive oil mixture. Toss to coat. Roast in preheated oven for 25 minutes.
- Melt butter in a large skillet. Add onions, cook over medium heat for 10 minutes until softened. Add cider slowly (about 1/4 cup at a time) so that each addition soaks into the onions, caramelizing them slightly, before adding more. Cook onions until caramelized to your likely, about 20 minutes total.
- Meanwhile, prepare your sauce. Melt remaining butter in a small saucepan over medium heat. Add flour and whisk until incorporated. Let bubble and brown slightly for a minute. Reduce the heat to medium low and add the warm milk and salt. Stir consistently for the next 5-10 minutes until thickens into a thin sauce. Add Parmesan.
- Roll out dough into the size of your pan (round or rectangle will both work fine). Spread sauce over crust followed by half the roasted vegetables. Evenly distribute onions, apples and blue cheese over crust followed by the remaining roasted veggies and finally the shredded cheese.
- Bake for 30 minutes until crust is golden and crisp.
.
SWEET POTATO BIBIMBAP
Serves 4-6
Takes 1 hour
2 cups water
1 teaspoon Kosher salt, divided
1 cup brown rice
2 tablespoons white miso paste
2 tablespoons olive oil
4 cups cubed sweet potato
2 tablespoons butter
1/2 pound portabella mushrooms, sliced
3 cloves garlic, minced
1-inch ginger, peeled and minced
1 bunch mustard greens, ends trimmed and thinly sliced
2 tablespoons toasted sesame oil
2 tablespoons sesame seeds
1 daikon, cut into matchsticks
1-2 carrots, cut into matchsticks
Soft-boiled or fried eggs, optional
Sauce:
2 tablespoons tamari
1-2 tablespoons sriracha
1 tablespoon sugar
1 tablespoon water
1 tablespoon rice wine vinegar
1 tablespoon toasted sesame oil
- Preheat oven to 425 degrees.
- In a medium saucepan, bring water and 1/2 teaspoon salt to a boil over high heat. Once boiling, add the rice. Reduce to a simmer, cover, and cook for 45-50 minutes until rice has absorbed water.
- On a baking sheet, combine sweet potatoes, olive oil and white miso as best you can. There will likely be some small chunks of miso in places. Don’t worry about that too much. Roast in preheated oven for 25 minutes until browned.
- In a large heavy skillet, melt butter over medium heat. Add mushrooms and remaining 1/2 teaspoon Kosher salt. Saute for 10 minutes until softened but still maintaining some bite. Remove to a small bowl.
- Add garlic and ginger to the same pan you cooked the mushroom in. No need to wipe it out (you don’t want to lose any of those delicious mushroom juices). Saute for 2 minutes over medium low heat until fragrant. Add mustard greens. Wilt over medium heat for 2-3 minutes. Add toasted sesame oil and saute 3 minutes longer. Finish with sesame seeds and continue cooking until greens are as wilted as you like.
- In a small bowl, whisk together sauce ingredients. Use 1 tablespoon sriracha if you aren’t a big fan of spice. Use the full 2 tablespoons if like a bit of heat.
- Serve cooked rice with sweet potatoes, mushrooms, greens, raw radish, raw carrot, a drizzle or two of sauce, and a cooked egg if you please.
.
Final regular season delivery
- On: October 31, 2018
 0
0
Goodbye from the Tipi crew!
We took the photo in August, hence the shorts, mud boots and sandals. We’re a big group when we are all together, and this isn’t everyone.
Front row from left; Smitty, Mari, Simone, Kerry. Back row; Michio, Ellen, Sena, Taylor, Karen, Maggie, Kristin, Raul, Beth, Steve, Billy (in back) and Jose. MIA; Jory, Charlotte, Josh, Ben, Jon and high school students Ari, Chance, Tyler, Kevin and Shane.
Let’s review the season.
Folks, this was a poor season for us. If we did our jobs well, you might not have noticed. You are always our first commitment, so the CSA boxes were full and varied, but our wholesale trucks went out half empty. Why? Too much rain, for too long. This isn’t news; we all experienced the wet weather this summer. We couldn’t weed effectively. Crops grew slowly and poorly. All our planting schedules went out the window. Even our winter storage crops are coming up short, although the carrot crop looks OK. Whew. We’ll know more as we continue to harvest carrots and cabbage over the next few weeks.
What were the bright spots?
– Everything in the squash family was spectacular this year. Melons, cucumbers, winter squash were all abundant and good quality. We loved being able to share so many melons.
– Most of the rain fell at night! This allowed us at least a few rain-free hours each day. This is hugely important when you work outside. As Steve says, “most days we could stay dry above the knees.”
– We did not need to irrigate!
– Our resilient, professional crew was the season’s shining light. They stayed in good spirits despite the mud and rain. They bring so much energy to this farm. Let’s give them a round of applause.
We look forward to wrapping up our carrot and cabbage harvests, then enjoying a slower pace this winter. Have a great winter.
Beth and Steve
Extension and Storage Shares
Some of you have registered for these shares. You know who you are. We’ll be in touch as we get closer to delivery.
A few photos from the week
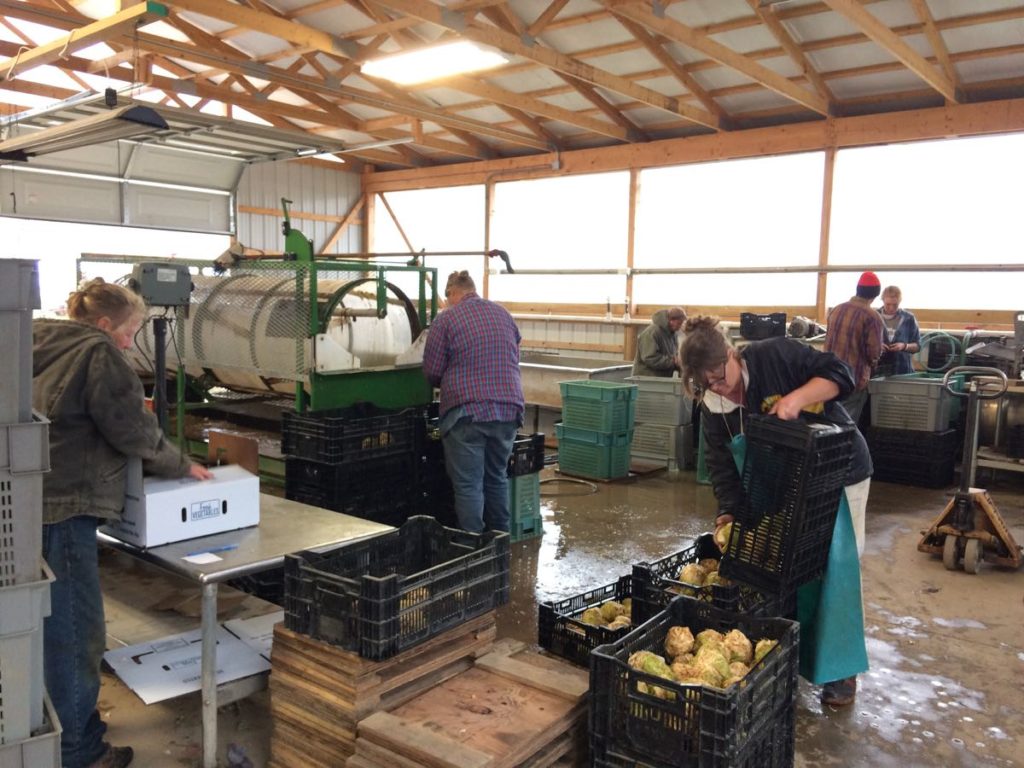
A busy moment in our summer pack shed. It’s been almost two years since we built this light-filled shed. It’s a great place to work but we appreciate it most in fall, when we can close the doors and protect ourselves from the wind. From the front, Simone folds boxes, Maggie and Kristin wash celeriac. In the back, Raul, Jory and Mari wash poblano peppers.
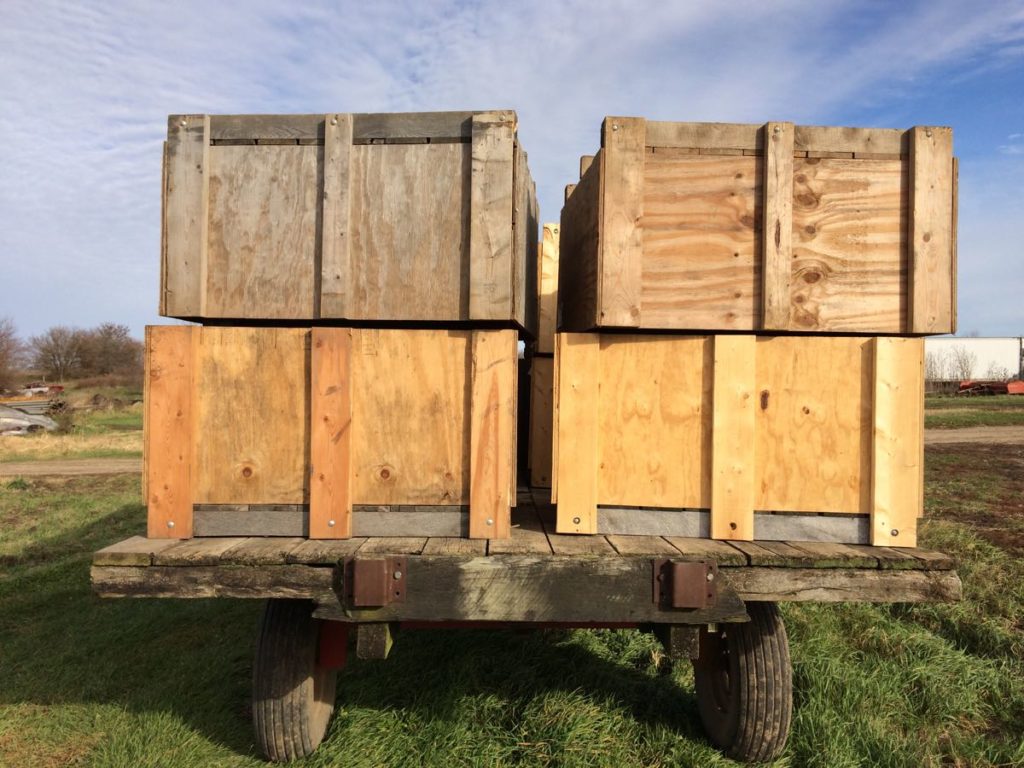
A load of storage bins ready to go the field. We’ll keep harvesting carrots for the next two weeks.
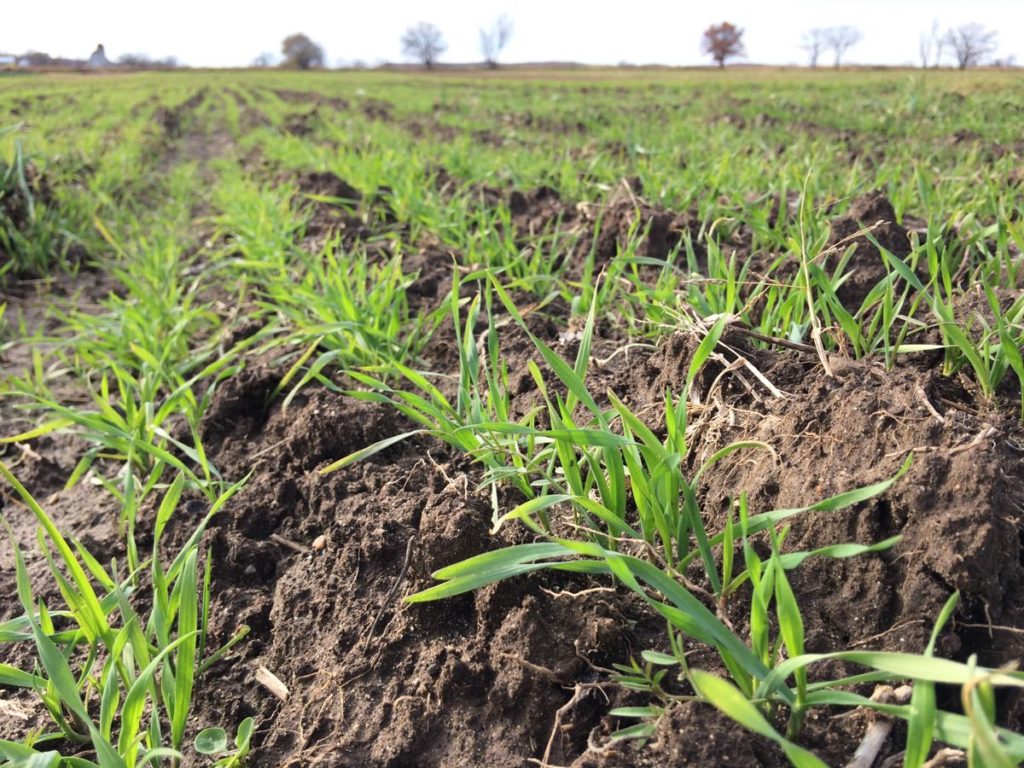
The cover crops are growing slowly. You can see how rough the ground is. The field was wet when Steve seeded the rye and vetch, leaving big ruts in the soil. It made the job difficult but doesn’t matter in the long run. By the time we’re done chopping and tilling this cover crop in June, the surface will be level again.
Veggie List and Veggie Notes
Week #24, November 1/2, 2018
– weekly shares (final box!)
– purple EOW (final box!)
– moon sampler (final box!)
Sweet potatoes, ~2.5 lb
Leeks, 1/2 lb
Brussels sprouts, ~0.8 lb
Parsnips, 1.1 lb
Celeriac, 1 or 2
Carrots, 2 lb
Fennel, 1 bulb with fronds
Red mizuna, 1 small bunch
Poblano chiles, 3 or 4
Flat parsley, 1 medium bunch
Garlic, 1 small
Sweet potatoes – This is a mix of Beauregard and Orleans varieties. We’ve grown Beauregard for many years. Orleans is a new variety for us this year and we like it very much. It’s as tasty as Beauregard but makes nicer clusters of roots.
Parsnips (tapered, cream colored roots. In bag with carrots) – Those long, white roots are not carrots, they are parsnips. The two vegetables are related. When cooked, parsnips are sweet and starchy. For the best flavor, brown them to caramelize the sugars. Here are a few ideas for parsnip preparation:
– Caramelize the parsnips by roasting them in a vegetable medley.
– Parsnip fries are delicious: cut like French fries, coat very lightly with oil, place on a cookie sheet and roast in a hot oven until brown and cooked through.
– Try substituting grated parsnips in a potato pancake recipe. They brown beautifully and are very tasty.
– Steve loves pan-fried parsnips with onions and garlic.
Celeriac (knobby, round, bizarre-looking vegetable which smells like celery) – Flavorful celeriac is good raw or cooked. It is excellent in mixed roasted veggies or in soup. It’s especially good in cream soups, alone or mixed with potatoes. Grated raw celeriac is a great starting point for winter salads. Celeriac will store in your refrigerator for months. Cut off chunks as you need them. Peel before using.
Fennel (large vegetable with a fat bulb and lacy fronds) – Fennel is a ‘swing vegetable’; it can be used raw or cooked. Clean well and slice as thinly as possible for use in raw salads. It is good simply prepared with olive oil, lime or lemon juice, salt and shaved parmesan cheese. Cooking softens and sweetens fennel, and mellows its anise flavor. Both the bulb and leaves are edible. Here are ideas from Alice Water of Chez Panisse about how to use fennel: ‘It’s strong anise characteristic seems to suit fish particularly well. … We use fennel all the time. We add the feathery leaves to marinades for fish and to numerous salads, sauces and soups and we use them as a garnish, too. … The bulbs are sliced and served raw in salads in various combinations with other vegetables, parboiled for pastas; caramelized and served as a side dish; braised whole; or cooked in vegetable broths & fish stocks.”
Red mizuna (red, frilly bundle of greens) – Mizuna is a type of mustard greens. Can be eaten raw or cooked.
Poblano chiles (dark green, shiny, triangular) – EAT SOON. We protected these plants with row cover outside for as long as we could. They’ve been exposed to cold nights which shortens their storage life. Eat this weekend OR chop and freeze for later. Just toss the frozen pieces into dishes at the end of cooking.
These chiles have low-to-medium heat and great flavor. Most I’ve cooked so far this year are milder than usual, but a few were corkers.
RECIPES
Visit our 2018 Recipe Log or our 2017 Recipe Log or join our Facebook discussion group.
LOCAL THYME/ Comforting Classics
Smoky Sweet Potato Gratin
Brisket with Root Vegetables
Apple Celeriac Salad with Tangy Dijon Dressing
Simple Cioppino
LOCAL THYME/ Outside the Box Recipes
Miso Braised Chicken with Sweet Potato and Mizuna
Parsnip Hummus Bruschetta
Autumn Roasted Vegetable Salad with Goat Cheese Croutes and Pumpkinseed Oil
Fennel with Gorgonzola Dressing
LOCAL THYME/ Quick & Easy Meal
Mizuna and Brussels Sprout Salad with Almonds
RECIPES FROM LAUREN
BRUSSELS SPROUTS & FENNEL PASTA
Adapted from Bon Appetit
Serves 4-6.
Takes 40 minutes.
3/4 pounds Brussels sprouts, ends trimmed and halved
1 tablespoon olive oil + more for drizzling
2 teaspoons Kosher salt, divided + more for serving
3/4 teaspoon freshly ground black pepper, divided + more for serving
1 pound rigatoni pasta, preferably high quality Italian pasta
3 tablespoons butter
1 leek, white and pale green part only, quartered and sliced
1 fennel bulb, cored and very thinly sliced
3 garlic cloves, minced
1 lemon
4 ounces Parmesan cheese
1/4 cup diced parsley
- Preheat oven to 400 degrees.
- On a baking sheet toss Brussels sprouts with olive oil, 1/2 teaspoon Kosher salt and 1/4 teaspoon freshly ground black pepper. Roast for 25 minutes. Toss halfway through for even browning.
- Bring a large pot of water to a boil. Add 1/2 teaspoon salt. Once boiling, add pasta and cook for 10 minutes– until al dente. Ladle out at least one cup of the water you cooked the pasta into a small bowl and then drain pasta.
- Melt butter in a large heavy skillet over medium heat. Add leek and fennel along with 1/2 teaspoon salt and 1/4 teaspoon freshly ground black pepper. Saute for 10 minutes. Add garlic and cook 5 minutes longer. While these veggies cook down, zest lemon. Add zest to skillet along with the juice of half of the lemon. Cook 5 minutes longer.
- Add drained pasta back to large pot. Add sauted vegetables and roasted Brussels sprouts and place over medium low heat. Season with remaining salt and pepper then add in 1/2 cup of reserved pasta water along with half the Parmesan. Stir until cheese has melted. Add additional 1/2 cup water and remaining cheese. Stir until melted. Taste and adjust seasonings as desired. If the mixture is too thick, add a bit more water. If it’s too thin, let it cook down for 2-3 minutes.
- Serve pasta into bowls. Sprinkle with parsley, drizzle with olive oil and squeeze a bit of the juice from the remaining lemon half. Sprinkle with salt and pepper.
.
ROOT VEGETABLE PORK CHILI
Takes 1 hour.
Serves 6-8.
1/4 cup olive oil
1 yellow onion, diced
2 garlic cloves, minced
1 pound ground pork
2 carrots, peeled and diced
1 pound parsnips, peeled and diced
3 poblanos, diced
1 tablespoon smoked paprika
1 teaspoon dried cayenne
2 teaspoons Kosher salt, divided
1/2 freshly ground black pepper
6 cups water
28-ounce can diced tomatoes (with juices)
1 tablespoon apple cider vinegar
4 cups sweet potatoes, peeled and diced
15-ounce can black beans, rinsed
15-ounce can chili beans, not rinsed
2 tablespoons chili powder
1 tablespoon cumin
1 tablespoon brown sugar
1/4 teaspoon cinnamon
Sour cream, optional
Cheddar cheese, optional
Raw diced onion, optional
Diced parsley, optional
- In a large stock pot, heat olive oil over medium low heat. Add onion, garlic, pork, carrots, parsnips, poblanos, paprika, cayenne, 1 teaspoon salt, and pepper. Saute for 15 minutes until meat is well browned and veggies are softened.
- Add water, tomatoes, vinegar, sweet potatoes, beans, remaining 1 teaspoon salt and spices. Bring to a boil, reduce to a simmer and cook for 30 minutes. If mixture is too thick, add a bit more water. If too thin, simmer a bit longer.
- Serve with sour cream, cheese, onion and parsley as desired.
.
Week #23, October 25, 2018
- On: October 24, 2018
 1
1
Fall Pleasures
This newsletter consists mostly of photos for a simple reason. I could not bear to stay indoors this week. This spell of dry, sunny weather is our reward after a wet summer.
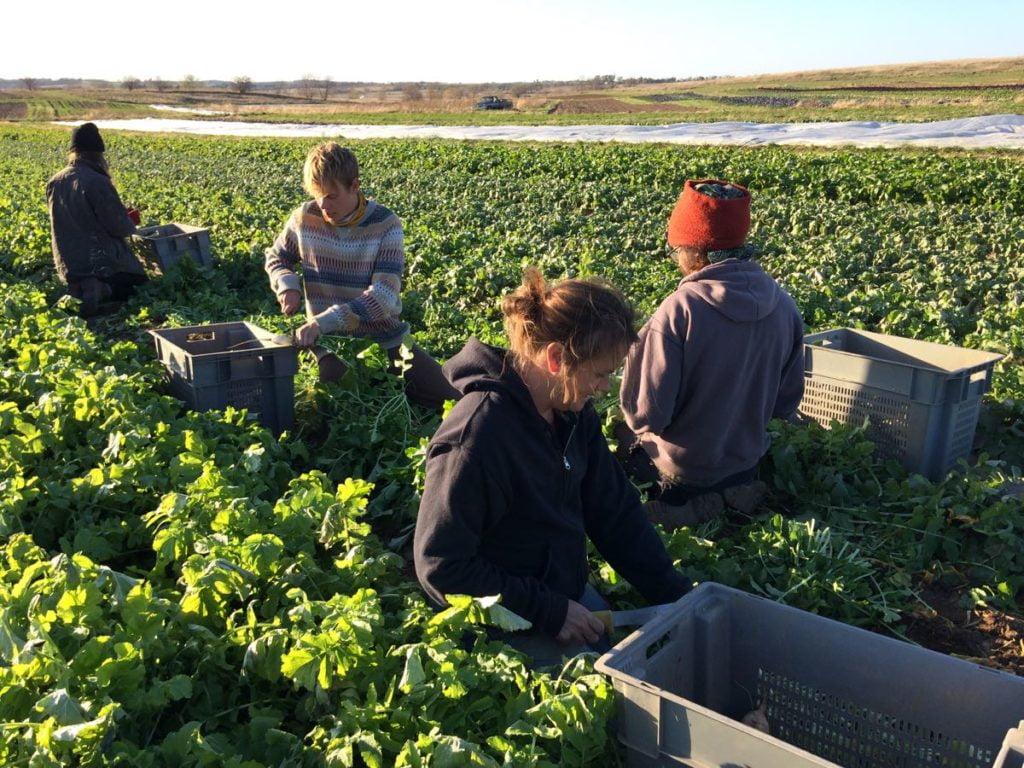
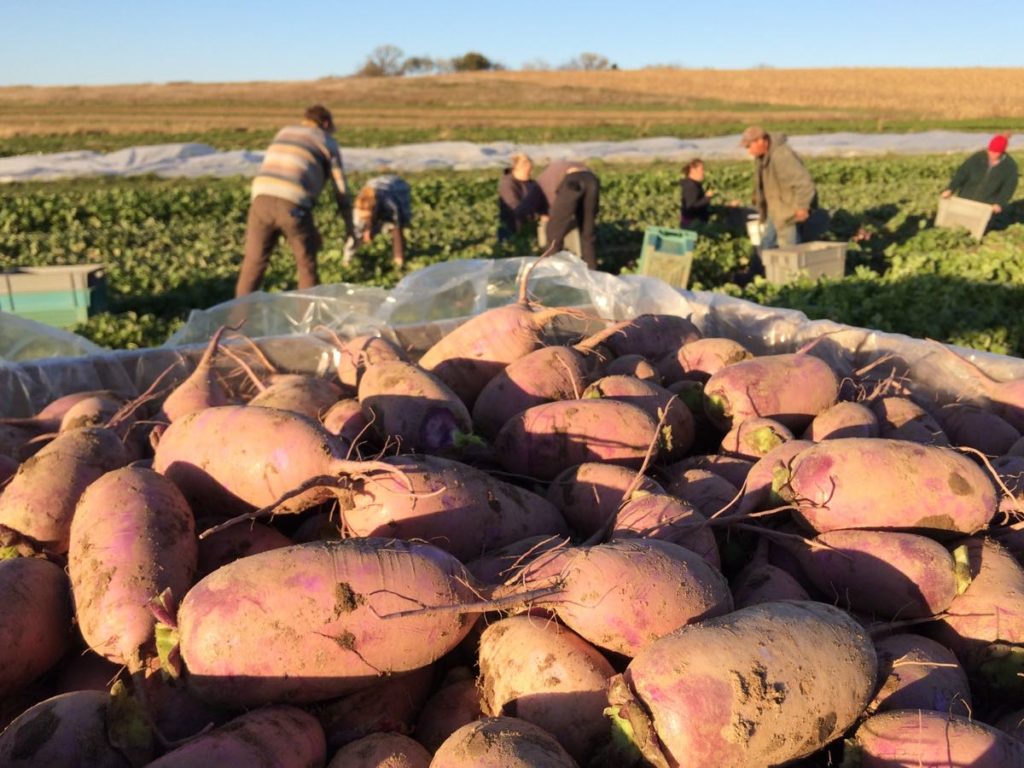
We spent Monday afternoon harvesting white and purple daikon to store for winter sales. The top photo is not adjusted; the leaves really are the brightest shade of green. We always harvest daikon by hand. It’s too fragile for machine harvest.
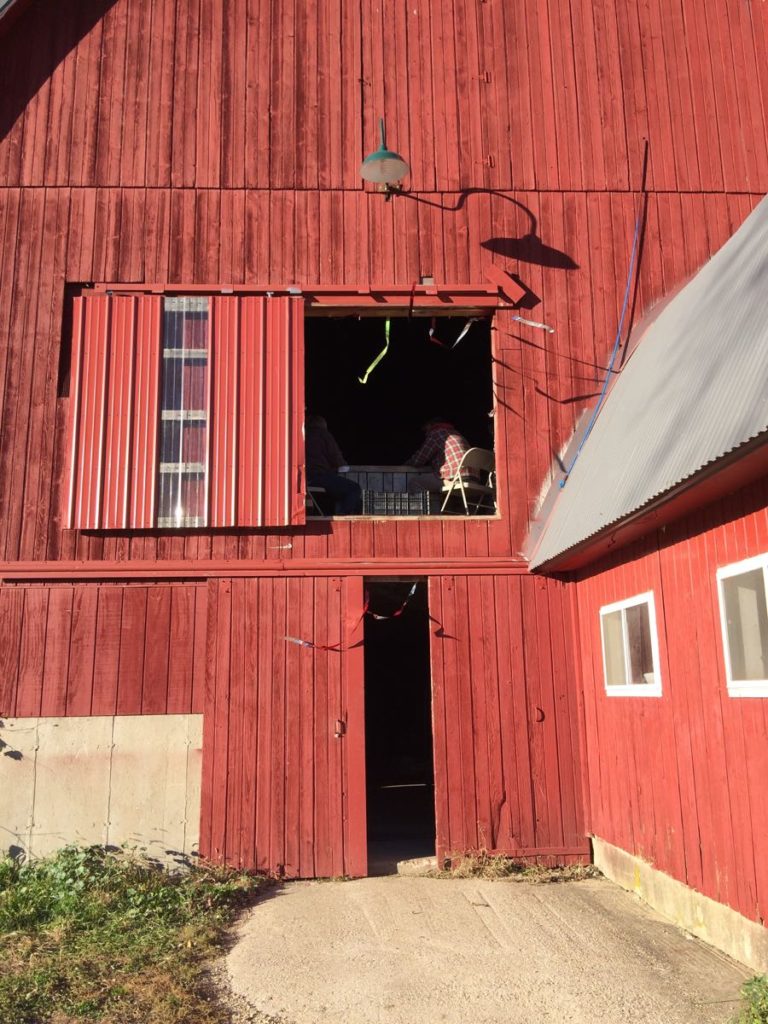
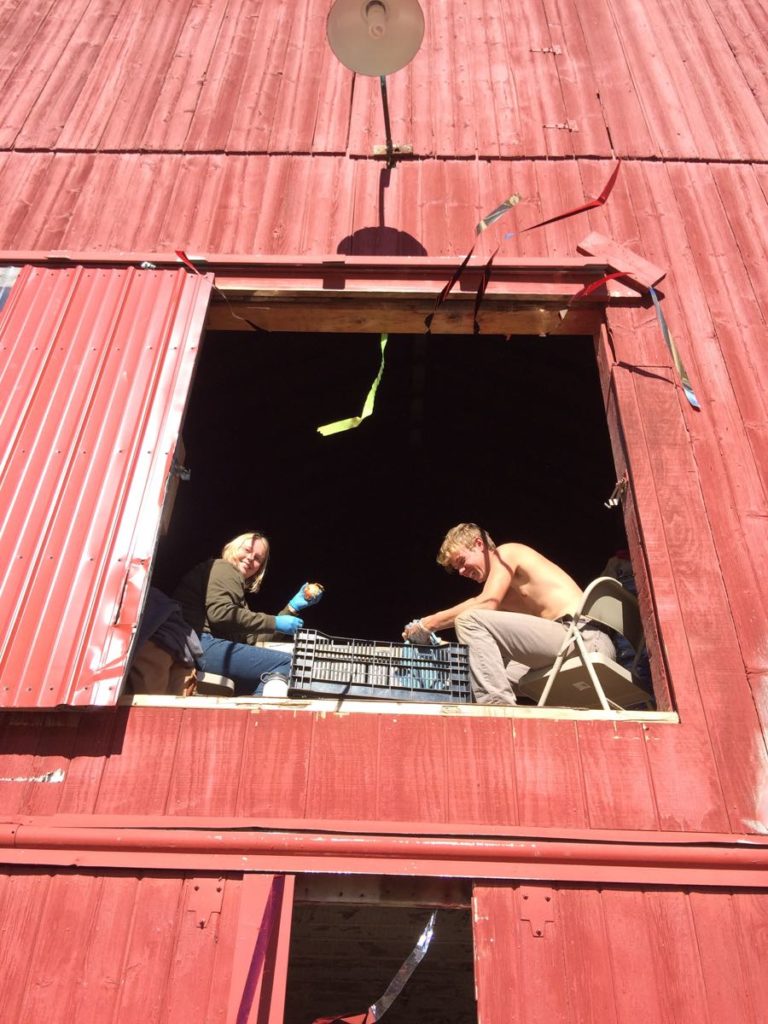
There are a few warm nooks to work. The barn loft is a favorite, sheltered place on a sunny day. Sister and brother Sena and Michio prep onions in the loft. The flying ribbons deter birds when the doors are open.
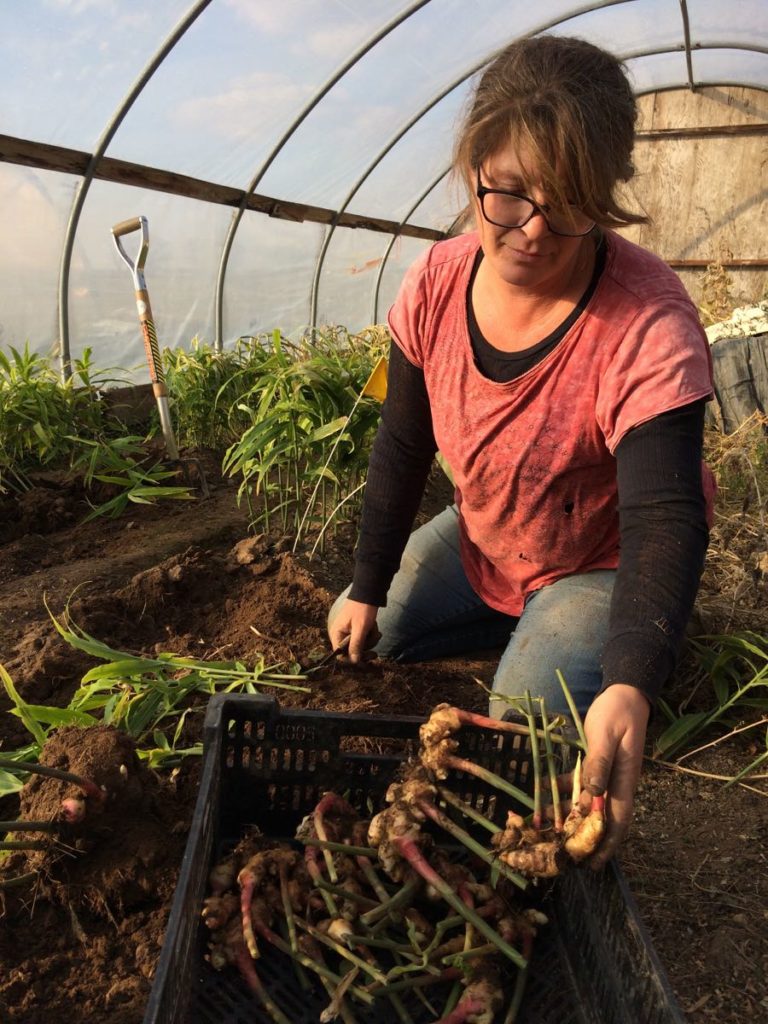
Our small ginger greenhouse is the warmest place we’ve got. You might need a winter coat outside but it’s t-shirt weather inside when the sun shines. Kristen digs and trims ginger that has grown all summer in this small greenhouse.
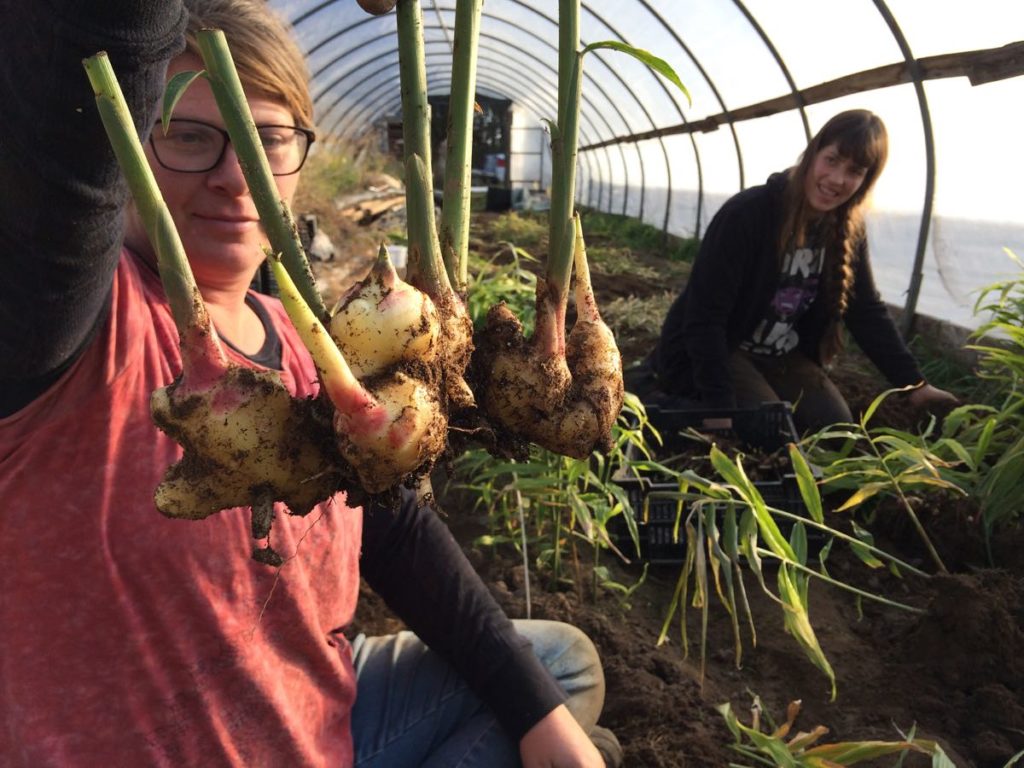
Kristen holds up an unusually robust ginger ‘hand.’ She and Charlotte did the digging.
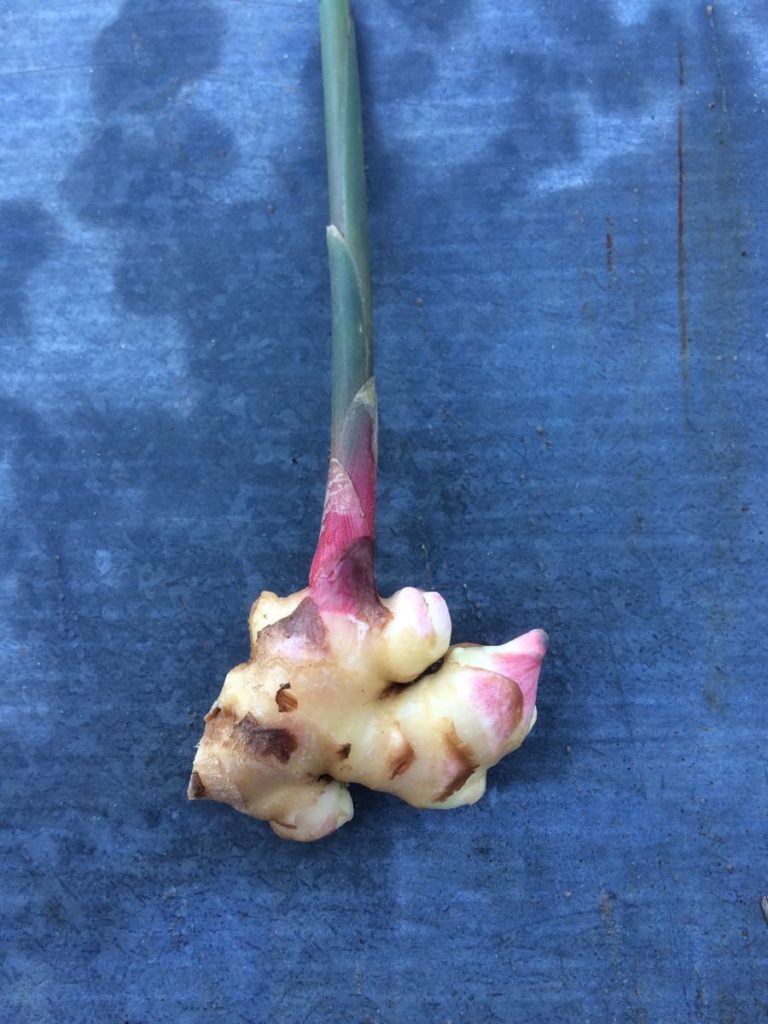
My job was to trim the hands into small pieces to share among the CSA boxes.
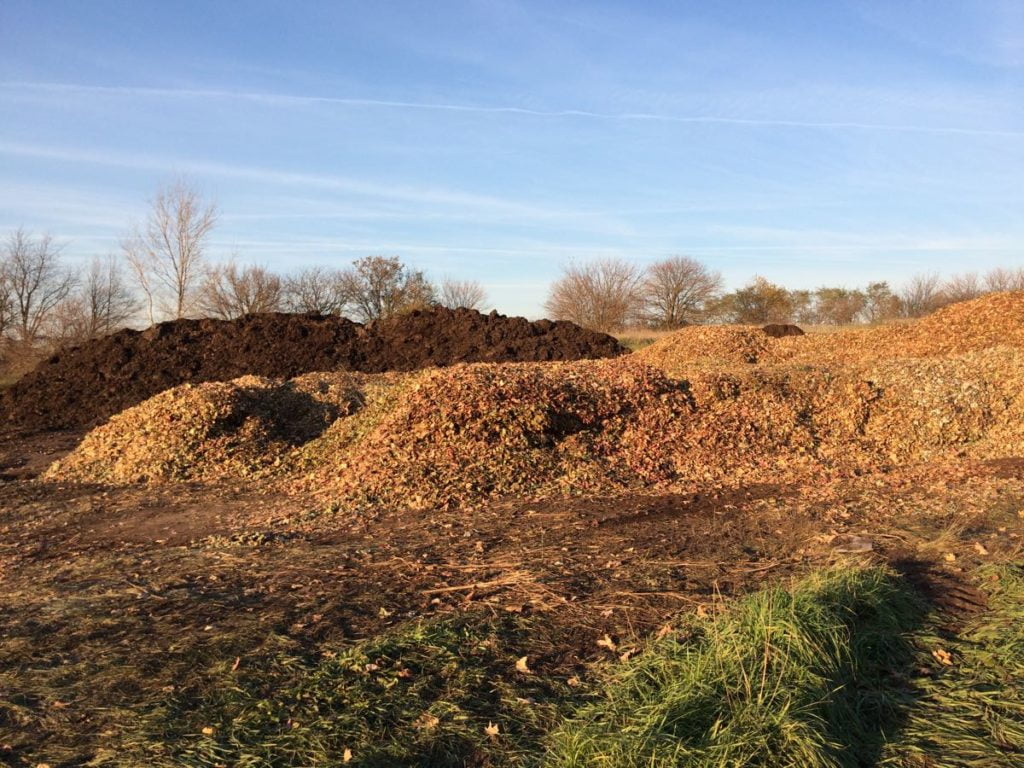
The nearby city of Evansville delivers their leaves to our farm each fall. Delivery began this week, with the fresh leaves in the foreground, and last year’s leaves in the darker pile behind. We let the leaves rot for six to twelve months, then add them to our soil to build organic matter. It’s a wonderful resource. The smell is incredible as the town crew heaps up the leaf piles. It’s a fruity smell similar to curing tobacco. You can smell it all over the farm. It’s a special part of fall for us.


The moon has been brilliant all week. Strong winds on Saturday ripped a large row cover laid over fennel. Steve and I couldn’t get the cover back in place until about 11 pm, after the winds died. By then, we’d been to dinner at friends’ house and drunk a bottle of wine together. Honestly, we were not excited to go back to work at that time of night. But we got out there and the moon was shining and the row cover rippling in the light. It was a lovely moment. The photo above is from daytime but you get the idea. Beth
Veggie List and Veggie Notes
Week #23, October 25/26, 2018
– weekly shares
– green EOW
Green EOW members, this is your final delivery of the regular CSA season.
Thank you for joining our farm this season!
Butternut squash, 1 small
Acorn squash OR a 2nd butternut
Satina potatoes, 3.5 lb
Brussels sprouts, 1/2 lb
Bok choy
Carrots, 2 lb
Bell peppers, green &/or red, 3 – 4
Yellow onions, ~2
Cilantro, 1 bunch
Jalapeno chile, 1
Garlic, 1 small
Fresh baby ginger, 1 knob
By site …
1 small cauliflower or 1 small Romanesco or 1 broccoli
Next week’s box will probably contain sweet potatoes, Brussels sprouts, carrots, parsnips, celeriac, onions, Beauty Heart radish and more.
‘Metro’ butternut – This is my favorite butternut. It is productive and tasty every year. These are small; average size <1.5 lb.
Acorn squash – You’ll receive Jester, Carnival, or Festival acorn or a second Metro butternut.
Satina potatoes – These are from Igl Farms.
Brussels sprouts – If you are a new CSA member, please approach Brussels sprouts with an open mind. Many of us grew up eating awful, overcooked Brussels sprouts. These Brussels sprouts are completely different. It’s only a small amount of sprouts this week. Cook and combine with other ingredients from the box to bulk up the sprouts to make a salad with one of the dressings listed below. Brussels sprouts are great with thinly sliced peppers and onions.
Here is our method to cook Brussels sprouts: Wash the sprouts and trim the cut ends. Cut an X in the stem end of large sprouts. Cut a single slit in small or medium sprouts. This does two things. It helps the Brussels sprouts cook evenly, plus it allows them to soak up any marinade or dressing. Place sprouts in a pot with one inch of water in the bottom and steam until tender, 7 to 10 minutes. If the sprouts are uneven in size, then set aside the smallest ones and add to the pot after the larger ones have cooked for a few minutes. Don’t overcook them! You can also oven-roast Brussels sprouts.
Here are a few dressing ideas for cooked sprouts:
– Sherry vinegar/olive oil/Dijon mustard/garlic/white wine/salt and pepper. This is our favorite, especially when you combine the Brussels sprouts with slivered peppers and thinly sliced onions. Delicious warm, cold, or at room temperature.
– Balsamic vinegar/olive oil/garlic/salt and pepper
– Lemon juice and zest/melted brown butter/poppy seeds/white wine/garlic/salt
Bok choy – We are sending the bok choy with cilantro, jalapeño, garlic and fresh ginger, a perfect combination for soup.
Bell peppers – Eat soon! These will not store for long.
Garlic – These small heads are from our friends Hans and Katie of PrairiErth Farm.
Baby ginger – This is baby ginger, bright white and pink because it hasn’t grown a brown epidermis yet. The ginger in stores grows for a long season in warm places like Hawaii. Baby ginger is special because it has the full ginger flavor and spiciness but almost no fibers. That’s why it’s used to make the pickled ginger served with sushi. I asked the crew to wash it lightly to avoid bruising. Expect to do a final wash before using it.
Storage: Eat soon; baby ginger is perishable. Wrap in a damp cloth or paper towel, and keep in the refrigerator in a plastic bag. You can also freeze your ginger, then grate as much as you need from the frozen knob.
RECIPES
Visit our 2018 Recipe Log or our 2017 Recipe Log or join our Facebook discussion group.
LOCAL THYME/ Comforting Classics
Umami Cod on Braised Bok Choy
Ginger Curried Carrot Soup
The Fluffiest Mashed Potatoes
Braised Brussels Sprouts and Carrots
LOCAL THYME/ Outside the Box Recipes
Ponzu Chicken and Bok Choy Salad
Sheet Pan Chicken and Fall Vegetable Roast
Southwestern Potato Salad with Pickled Onions
Creamy Sausage, Brussels Sprouts, Carrots and Potatoes
LOCAL THYME/ Quick & Easy Meal
Baked Potato Bar
Week #22, October 18/19, 2018
- On: October 17, 2018
 0
0
A few feet in elevation makes all the difference.
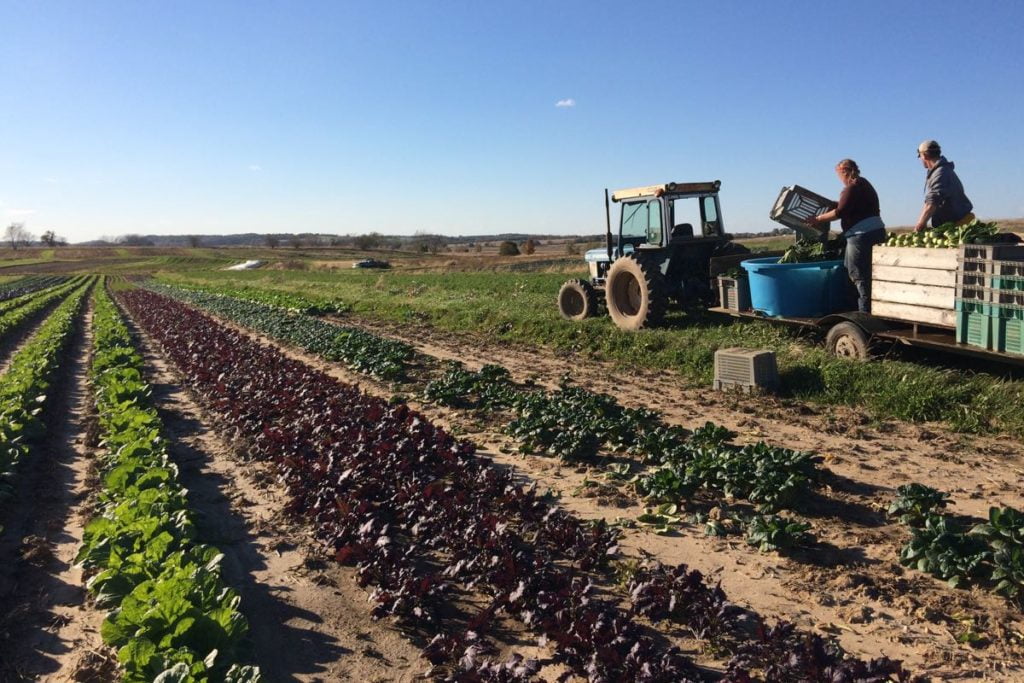
Maggie and Billy harvested your Koji greens on Tuesday.
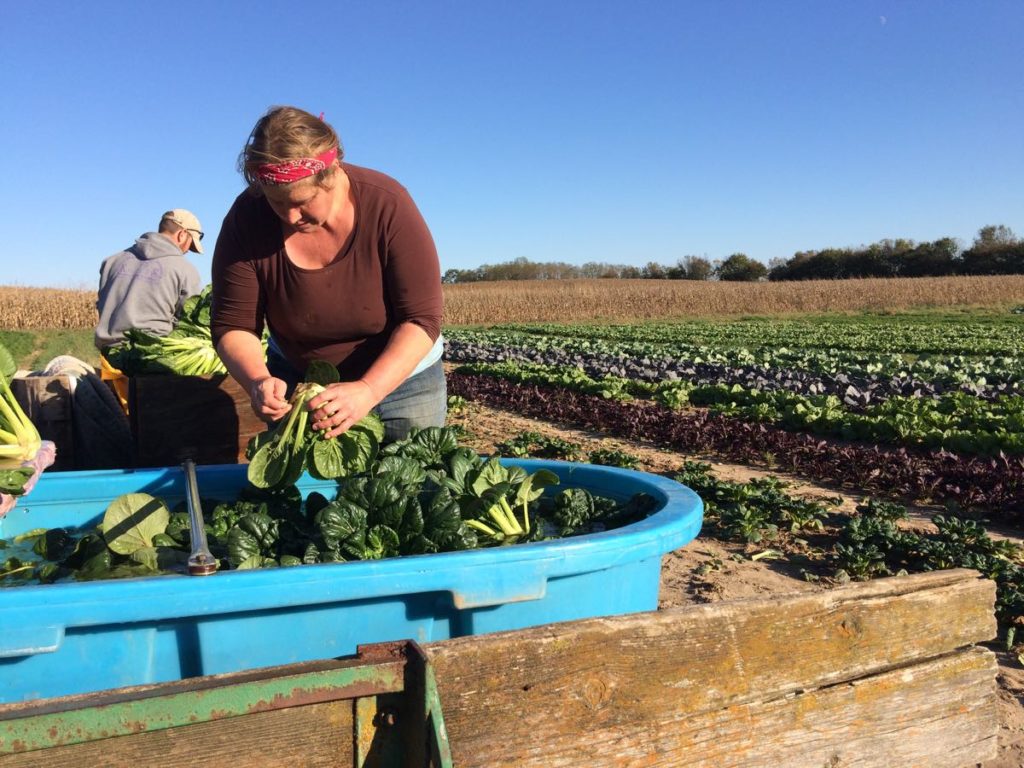
It was warm enough to wash the greens outside. Of course, Maggie is tough and would do this job in much colder weather.
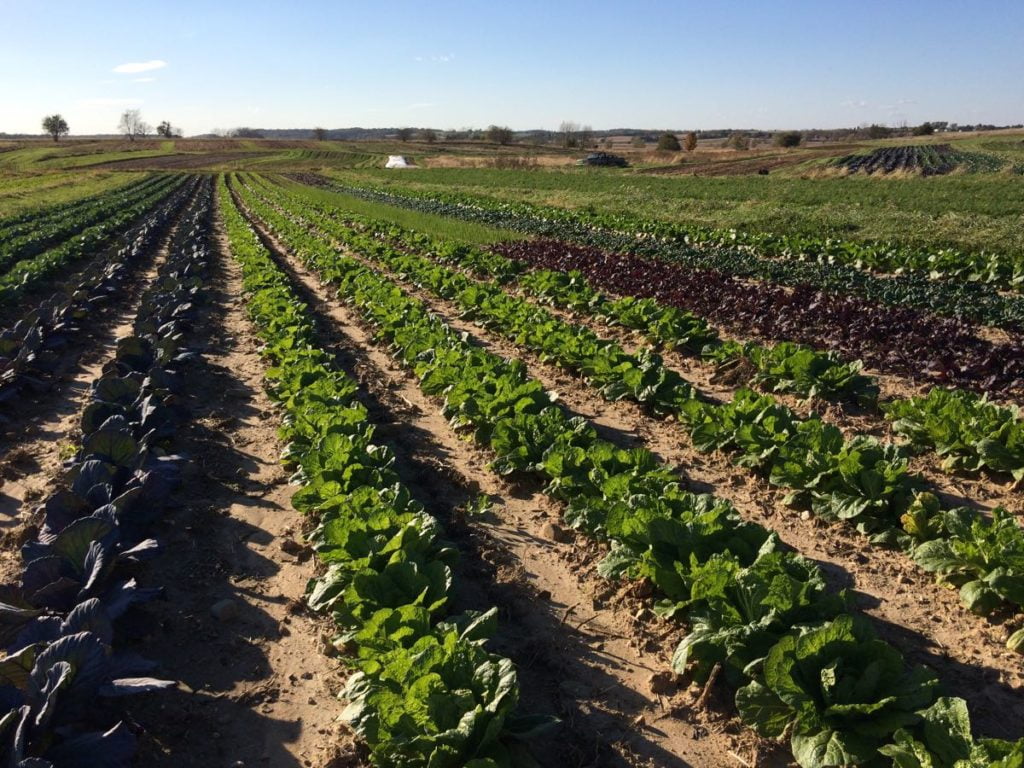
Let’s compare the Koji field (above) with the one we harvested your leeks from last week. See the pickup truck in the distance (to the right of the white row cover protecting fennel)? That’s the bottom of our farm, the lowest point before water drains into the neighboring wildlife area.

The tall brown grasses are not cover crops. Those are our leek and celeriac fields, buried in weeds. We cultivated several times by tractor but the weeds re-rooted after each rain. Eventually, it was too wet to take a tractor in those fields at all.
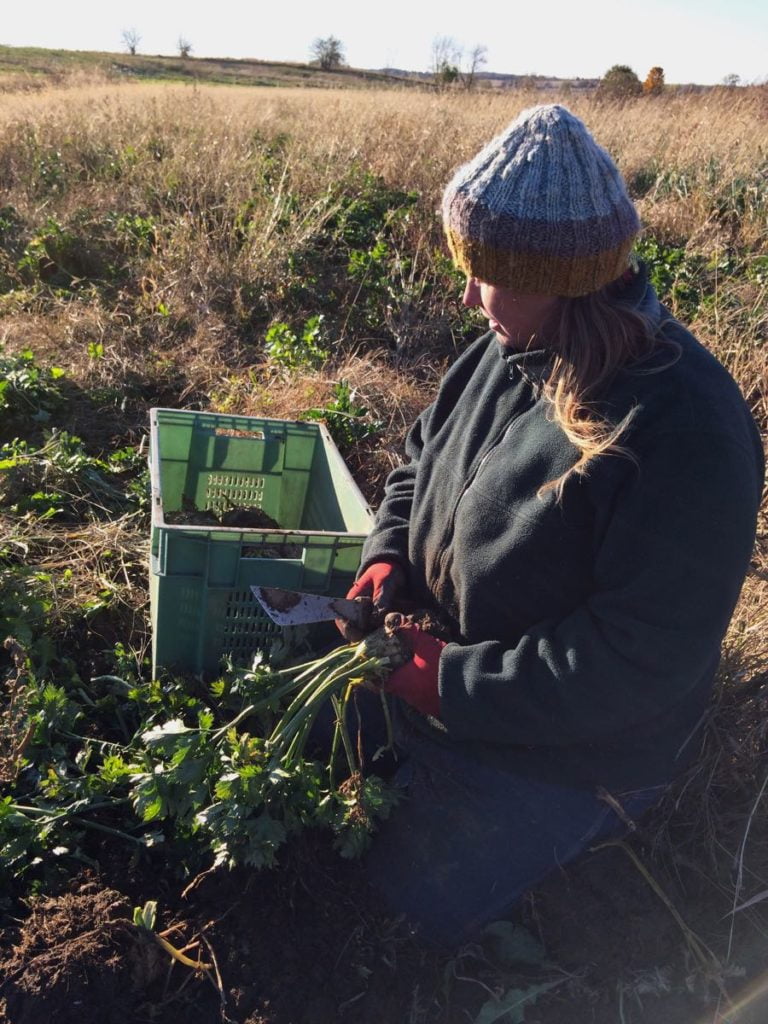
The leeks and celeriac are in there; we just have to dig them out. The celeriac did surprisingly well. The leeks are small.
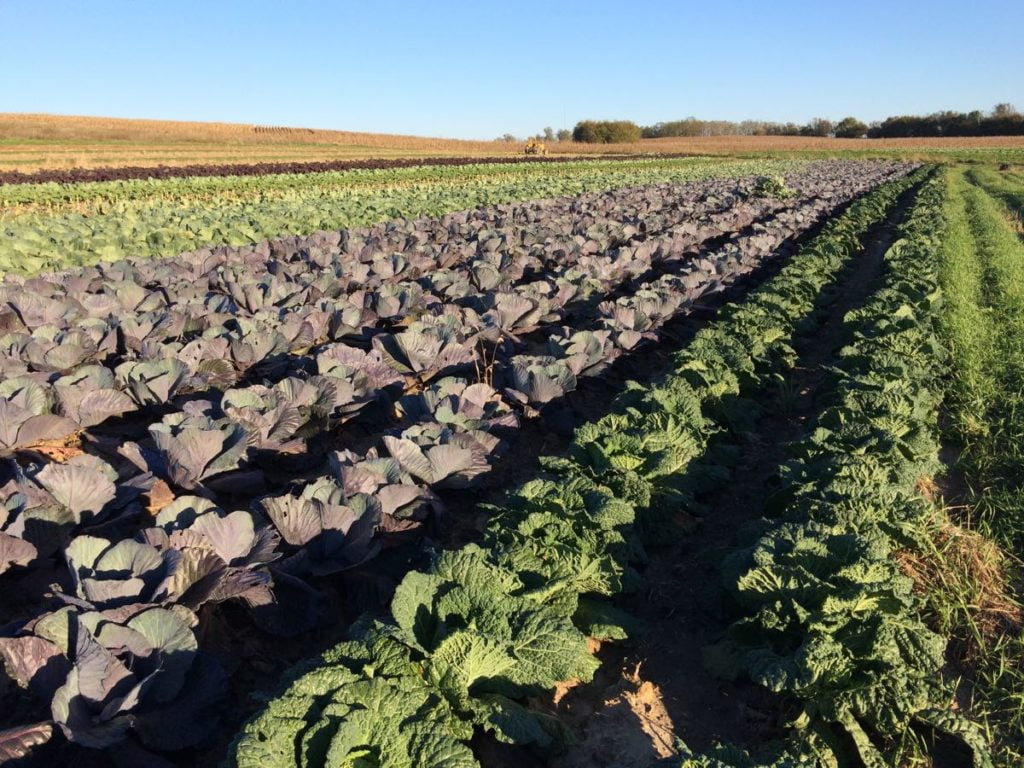
Turn and look up the hill and you find this pristine cabbage field. It’s just a few feet higher in elevation but that was enough for this field to drain and dry more quickly. We were able to successfully cultivate and weed this field and the Koji field shown above. We’re happy to have such nice fall crops. Beth
Veggie List and Veggie Notes
Week #22, Oct 18/19, 2018
– Weekly shares,
– Purple EOW,
– Sun Sampler.
This is the final Sun Sampler delivery.
Red cabbage
Butternut squash
Koji greens
Red beets, 2 lb
Frying peppers, mixed green & red, 6 – 7
Bell peppers, mostly green, ~3
Curly parsley, 1 big bunch
Yellow onion, 1
Red onion, 1
Garlic, 1 bulb
Each site gets one item from this list:
Cauliflower OR purple cauliflower OR Romanesco cauliflower OR broccoli
Next week’s box will probably contain winter squash, Satina potatoes, Brussels sprouts, carrots, celeriac, cauliflower/Romanesco, onions and more.
Red cabbage – This beautiful cabbage is great cooked or raw. We have a favorite winter salad that we make with red cabbage. I’ll include it below.
Butternut squash – This “Nutterbutter” variety is a favorite because it cures and sweetens quickly after harvest. These are golden-orange and delicious.
Storage: Store uncovered at room temperature or a bit cooler. Keep above 55 oF to avoid chilling injury.
Tips for cutting winter squash: Microwave your intact squash on high for one minute before cutting or peeling. That’s enough to warm and soften the squash, making it much easier to cut or peel.
Koji greens – Koji greens are a lot like Yukina if you know that one; dark green with a nice balance of bitter flavor but not too strong. Like tat soi but with larger, lusher leaves and not so many leaf stalks. Recipes that use mustard greens or bok choy will work with Koji.
Beets – Storage: Cover and refrigerate. Beet roots will store for months. Wash well to remove leaf fragments. For all the cooking methods below, wash and scrub the beets but do not peel. The skins slip off easily once the beets are cooked and cooled.
Cooking beet roots on the stovetop: Slice or quarter, cover with water in a pot, and simmer until tender. This will take from 25 to 45 minutes depending on how large the beet pieces are. Drain.
Roasting beets in oven: Wash beets, but do not peel. On a sheet of aluminum foil, put beets (halved or quartered if large), salt, pepper and a few sprinklings of water. Seal the foil packet, and roast at 400 oF until tender, about 45 minutes to 1 hour. Slip off skins once cool.
Microwave: Slice beets in half and place in a large microwave-proof bowl. Add ¾ inch water and cover with a plate. Microwave on high until tender, about 9-20 minutes, depending on your microwave’s power. Drain and slip off skins.
Uses: Use cooked beets in cold salads, or dress simply with vinaigrette, onions, salt and pepper. Beets are also good tossed with sour cream, minced onion, fresh herbs and walnuts.
Frying and bell peppers – These are the last frying peppers but we’ll have a few more bell peppers for you next week. Eat or freeze these soon. Some were picked last week, some were protected from cold under floating row cover. Either approach shortens the storage life. Remember, peppers are easily frozen. Chop raw peppers into bite-sized pieces. Put in a freezer bag or container and freeze. That’s it – there’s no need to blanch them. There’s no need to thaw the entire container at once; you can easily break off and thaw the amount you need. You will enjoy these come winter!
Curly parsley – This is a big bunch. If it’s more than you need, wash and drain well, then chop and freeze in a bag or container. Break off pieces and thaw directly in your dish near the end of cooking.
Garlic – Here’s another German Extra Hardy bulb, with nice fat cloves. We will continue growing this variety!
RECIPES
Visit our 2018 Recipe Log or our 2017 Recipe Log or join our Facebook discussion group.
Beth’s favorite Red Cabbage Slaw
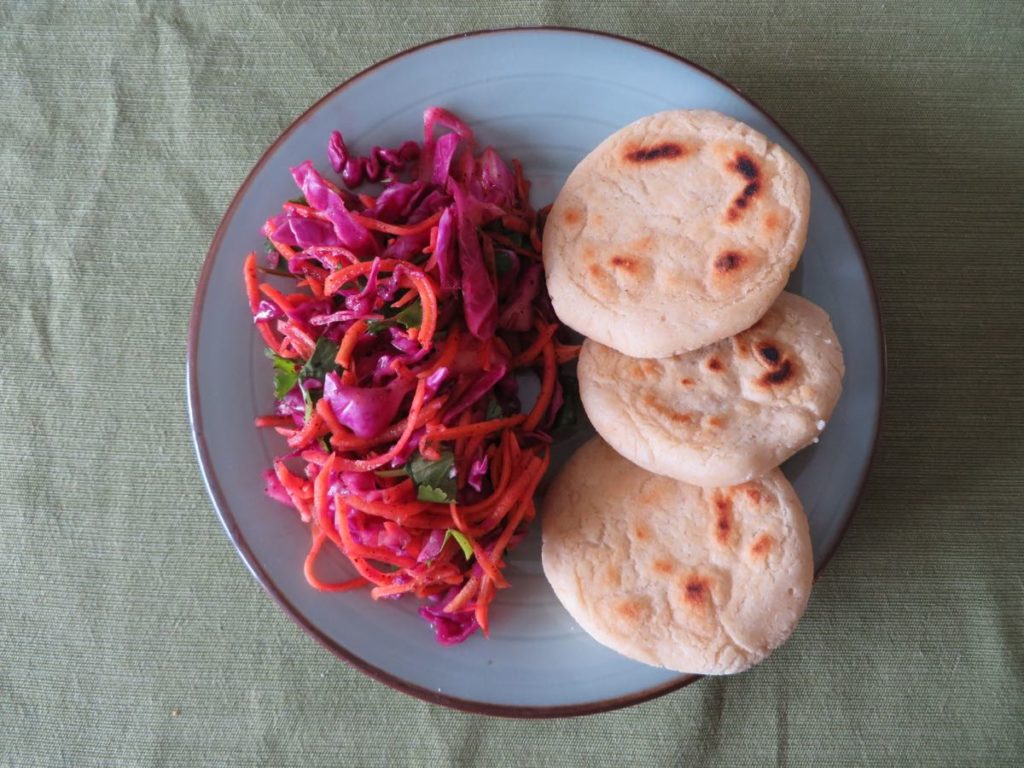
Red cabbage slaw with cheese-filled pupusas. If there’s interest, I can hunt up the pupusa recipe and post in the Facebook discussion group.
Adapted from Taqueria Gila Monster Restaurant’s recipe.
I’ve shared this recipe before but it’s worth sharing again; we seem to survive on this colorful, zesty salad in winter. There are no carrots in this week’s box, but maybe you have a few left over from last week. The slaw holds well, so it’s easy to prepare on Sunday then enjoy throughout the week. Can also be made with green cabbage. Beth
Makes 3 – 4 quarts
.
2-3 lb red cabbage (one small head or half a larger head)
1 lb. carrots
1/2 bunch parsley (good) or cilantro (even better)
1/3 cup freshly squeezed lime juice
1/3 cup apple cider vinegar
1 tsp. salt
1 Tbsp. ancho chili powder
1. Quarter and core the red cabbage. Slice thinly by hand.
2. Peel and grate the carrots.
3. Chop the parsley or cilantro.
4. Toss all ingredients together. Adjust the salt to taste. Let stand 30 minutes before serving. Toss again. Serve as a salad, or as a garnish for tacos or pupusas (pictured above).
LOCAL THYME/ Comforting Classics
Pickled Red Cabbage
Roasted Butternut Squash Puree
Quick Sesame Koji
Beet Salad with Parsley Pesto, Goat Cheese and Pistachios
LOCAL THYME/ Outside the Box Recipes
Black Bean Burrito with Chipotle Butternut Squash and Red Cabbage
Butternut and Ricotta Tart
Pan Seared Chicken Breasts with Curried Peppers and Koji
Beet Chips
LOCAL THYME/ Quick & Easy Meal
Laotian Mung Bean Noodles with Shredded Veggies
RECIPES FROM LAUREN
WARM RED CABBAGE SALAD WITH SQUASH & CHICKEN
Inspired by Epicurious
Takes 1 hour, most of it inactive.
Serves 4 as a meal (8 as a side).
1 tablespoon olive oil
1 teaspoon kosher salt
1/4 teaspoon freshly ground black pepper
1 butternut squash, peeled, halved and cut into 1/4-inch slices
2 pounds beets
1/2 head red cabbage, shredded
1/2 red onion, sliced=
1 grocery store rotisserie chicken (or roast your own chicken if you are feeling really ambitious), shredded (about 5 cups meat)
1 cups walnuts, toasted
4 ounces high quality blue cheese or gorgonzola, crumbled
Maple Balsamic Dressing:
2-3 large garlic cloves, minced
1/4 cup balsamic vinegar
1 tablespoon Dijon mustard
1 tablespoon maple syrup
3/4 cup olive oil
1/2 teaspoon kosher salt
1/4 teaspoon freshly ground black pepper
- Preheat oven to 425 degrees. Toss butternut squash with olive oil, salt and pepper. Roast for 45 minutes tossing once or twice for even browning. Wrap beets in foil and roast alongside the squash for 45 minutes or until they are well-softened (so the peel slips off easily).
- In a large bowl, combine red cabbage and onion.
- In a small bowl, preparing dressing by whisking together garlic, balsamic, mustard and syrup. Add olive oil and whisk until thick and creamy. Add salt and pepper. Taste and adjust seasonings as desired.
- When squash is finishing roasting add to bowl of cabbage along with chicken. Remove beets from foil, slide skins off and then slice thinly. Halve the circles if large. Add to salad.
- Dress as much of the salad as you plan to eat tonight and toss to coat. Sprinkle walnuts and blue cheese over salad and serve warm.
.
GENERAL TSO’S CAULIFLOWER
Adapted (barely) from Pinch of Yum
I can’t take any credit for this totally creative, totally genius way to make everyone’s favorite take-out Asian food at home (and a bit healthier!). I only take credit for sprucing it up with a couple more veggies. This recipe may look complicated with a lot of ingredients and steps but it really comes together pretty effortlessly and the payoff is way worth it. Enjoy! Lauren.
Serves 4 (generously).
Takes 45 minutes.
Rice:
1-3/4 cups water
1 teaspoon Kosher salt
1 cup white rice
General Tso’s Sauce:
1 tablespoon olive oil
1-inch ginger, peeled and minced
3 garlic cloves, minced
1/2 cup chicken (or vegetable) broth
1/2 cup soy sauce (or tamari)
1/3 cup rice vinegar
1/4 cup sugar
2 tablespoons cornstarch, dissolved in 2 tablespoons of cold water
1/2 teaspoon red pepper flakes
2-3 red and/or green Italian fryers, diced (about 2/3 cup)
Fried Cauliflower:
Vegetable oil
1 cup flour
2/3 cup cornmeal
1-1/2 teaspoons baking powder
1 tablespoon Kosher salt
4 eggs
Water as needed (about 1/3 cup)
1 head cauliflower (or purple cauliflower or romanesco cauliflower), cut into bite-size florets
For Serving:
1/2 yellow onion, thinly sliced
1/4 cup finely chopped curly parsley
1 tablespoon sesame seeds
- In a medium sauce pan, bring water for rice to a boil. Add rice and salt. Reduce heat to low, cover and cook for 18 minutes. Uncover and fluff with a fork.
- Heat olive oil in a small sauce pan over medium heat. Add ginger and garlic. Saute for a coupe minutes until fragrant. Add broth, soy sauce, rice vinegar, sugar and cornstarch slurry. Whisk to combine. Bring mixture to a boil, reduce to a simmer, stir in red pepper flakes and cook for 20 minutes until thickened. Stir in diced peppers and set aside.
- Meanwhile, prepare your fried cauliflower. Pour two inches of vegetable oil into a deep, heavy bottomed skillet. Heat over medium heat.
- Prepare your batter by combining flour, cornmeal, baking powder, salt, eggs and water. It should be thick enough to coat the cauliflower but thin enough to easily run off. Adjust this thickness with a little more water if needed. Dump in the cauliflower florets and stir until very well coated.
- Drop a bit of batter into the oil. If it floats to the top, it’s ready. If it sinks, the oil needs to be a little hotter. Once the oil comes up to temperature, fry a quarter of the cauliflower one batch at a time. Cook for 3-4 minutes until golden brown. Drain each batch on fresh paper towels.
- When ready to serve, toss fried cauliflower with General Tso’s sauce. Serve over rice and garnish with some onion, parsley and sesame seeds.
.
Week #21, October 11, 2018
- On: October 10, 2018
 0
0
Farm News

It’s likely to frost this week. Watch the sky as the cold front moves in. Sunsets can be spectacular. I took this photo on September 28, the night before our first, very light frost which barely nipped at the crops.
The upcoming cold weather will do more damage. Hey, it’s mid-October and time for this change. Look at the low temperatures predicted for next few days: 32, 29, (40), 30, 30 oF. We’ve started stripping peppers before they get damaged. You’ll get a bunch of bell peppers this week, many of them green. We plan to protect a few crops with lightweight row cover (fennel, other peppers) but everything else should be able to handle the cold. Cauliflower, Romanesco, root crops, and Brussels sprouts take these temperatures in stride. Tender crops like sweet potatoes and winter squash are tucked away in heated spaces.
Look at the precipitation forecast! There’s almost no rain coming. Steve asked that I tell you we got only 2 inches of rain this week. After this summer, he says “it doesn’t count as a wet week unless we get 4 inches.” For perspective, we’re happy to get 4 inches during a typical summer month.
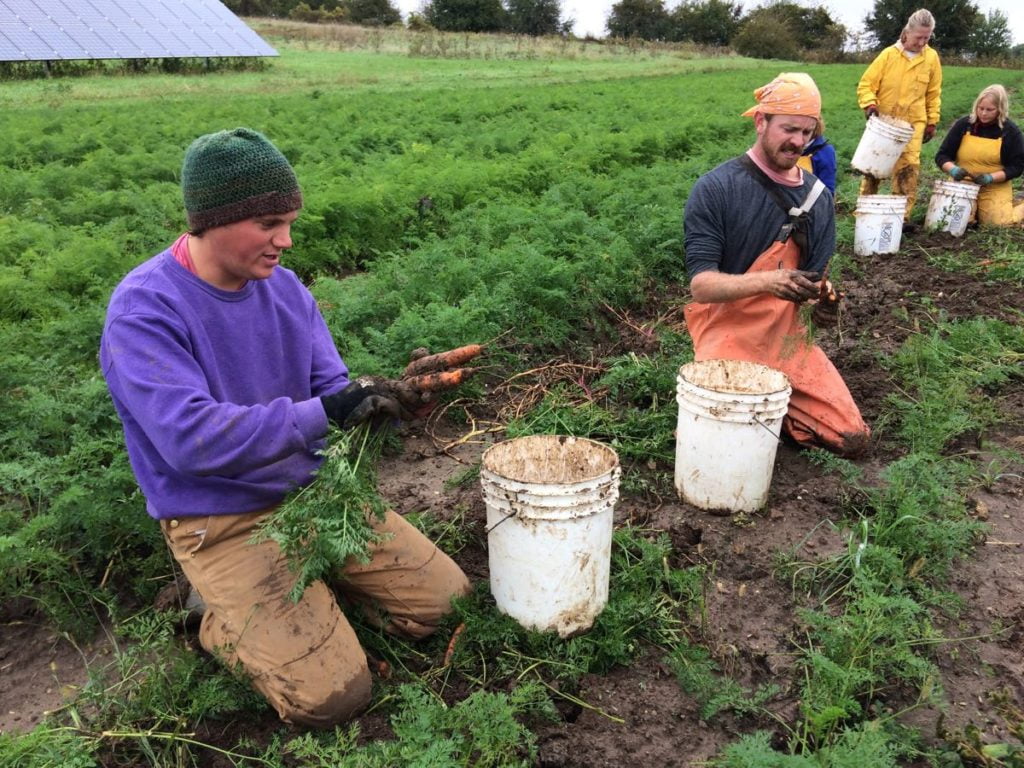
We harvested your carrots by hand again this week, grubbing them out of muddy ground. Jory and Billy might be exaggerating the difficulty of the job but not the mud.
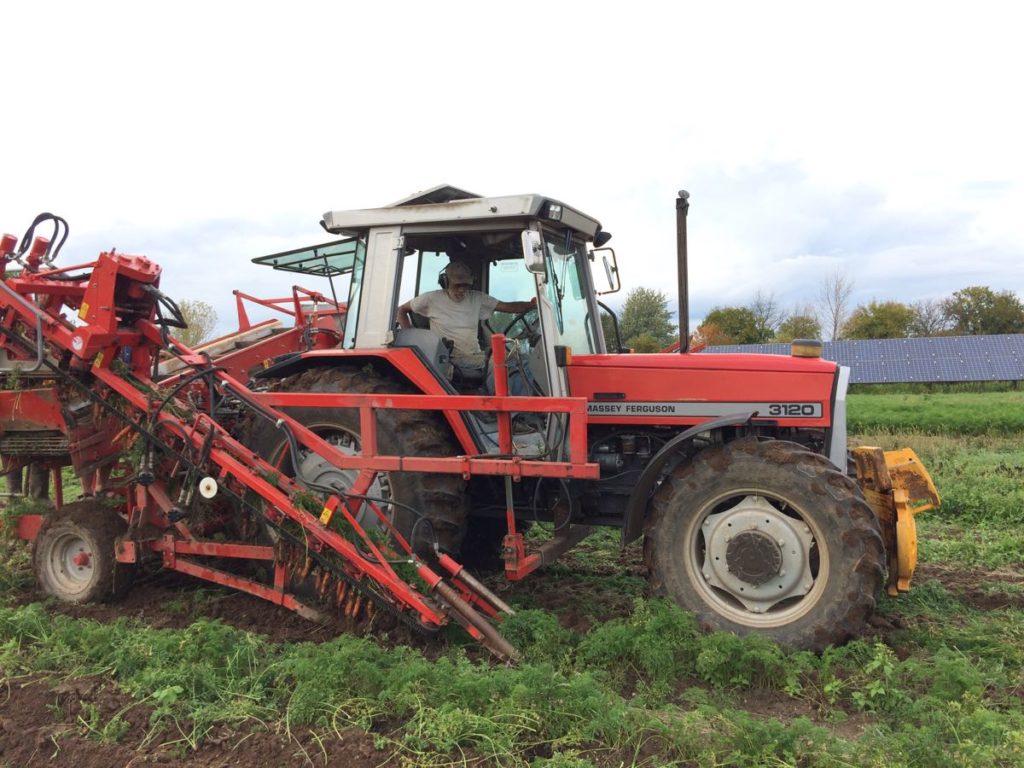
By mid-week, the ground was dry enough for Steve to use our mechanical carrot harvester. He considered trying earlier this week but we talked him out of it. If that tractor gets stuck in the mud, we don’t have anything powerful enough to pull it out. We’d have to call in a tow rig and that’s expensive and embarrassing. Beth
Garlic harvest
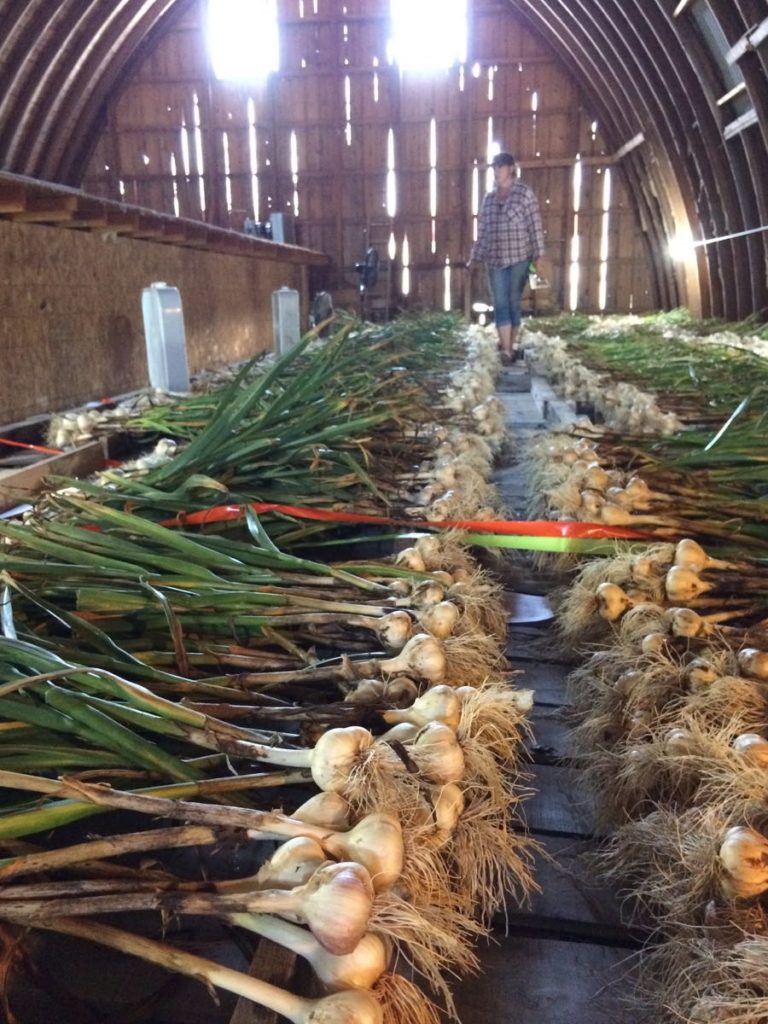
Garlic drying in our barn loft soon after harvest in July. Our barn is a good place for this, dry with good ventilation. We lay the garlic on overturned wooden bins, the same bins we will soon fill with carrots for winter.
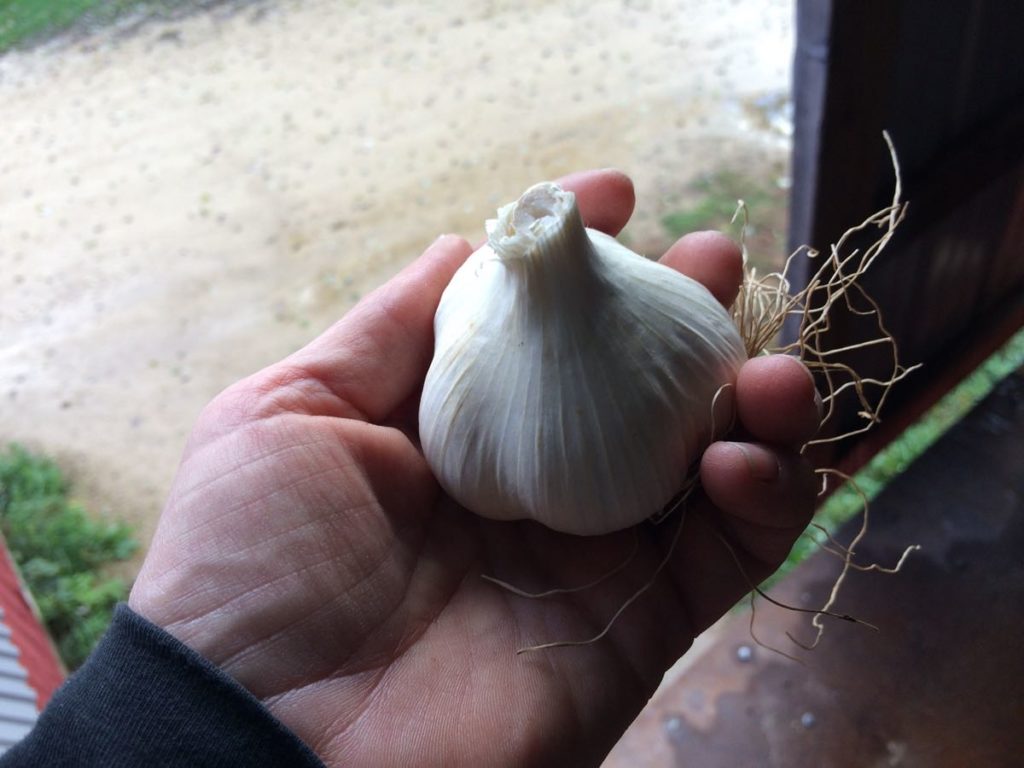
This year’s garlic has nice, plump cloves.
Our garlic crop is excellent this year, the best we’ve ever grown. Unfortunately, it was a terrible year for many garlic farmers in the midwest, including our friend John Hendrickson who lost his entire crop. He thinks his garlic was damaged during the warm spell in February. Snow melted, then froze again in sheets. That’s hard on garlic. John usually grows about half our CSA garlic, so this is a big loss. I’ve checked around and (not unexpectedly) there is little good-quality local garlic available for sale.
Fortunately, we scaled up our garlic planting last fall, with plans of packing more in the CSA boxes. We will use that larger harvest to plant an even bigger field this fall, so we can grow all your garlic and not rely on someone else. We were lucky in our field choice last year. We planted in a small, elevated field with good drainage and laid down an unusually thick mulch. I think that’s what saved our crop this winter: good drainage and a thick mulch. We’ll try to replicate those conditions when we plant this year. I’ve held off packing garlic in the CSA boxes while we had good herb options growing outside. We’ll deliver nice bulbs over the coming weeks. Beth
Veggie List and Veggie Notes
Week #21, October 11/12, 2018
– weekly shares
– green EOW
Sweet potatoes, ~2.5 lb
Carrots, 2 lb
Kale, Red Russian or lacinato or green
Celery
Leeks, 2 skinny, ~1/2 lb
Daikon radish, ~1 lb
Bell peppers, 5?, mostly green, maybe 1 fully or partially colored
Oranos snack pepper, 2 or 3
‘Habanada’ not-hot habanero, 2
(in bag with carrots to distinguish from the Oranos)
Yellow onion, 1
Garlic, 1
Each site gets an item from this list:
broccoli OR cauliflower OR Romanesco cauliflower OR purple cauliflower OR globe eggplant
Next week’s box will probably contain butternut squash, beets, peppers, onions, garlic and more.
‘Beauregard’ sweet potatoes – Here are a few things we’ve learned about sweet potatoes:
– For best flavor, cook your sweet potatoes so they brown and caramelize. We have a simple, favorite way to roast sweet potatoes. We used to prepare sweet potato fries in the oven. Now we just quarter the potatoes, rub with olive oil, dust with salt and place cut-side-down on a cookie sheet. Roast in a 450 F oven without turning until soft. The flavors will caramelize (like sweet potato fries) but preparation is simpler and the cooking time less exacting. Slender sweet potato fries go from undercooked to overcooked in the blink of an eye. Larger slices are less exacting, and therefore are easier. Small sweet potatoes can be cut just in half. Jumbos will need to be chopped into pieces. Otherwise, they will take a long time to cook.
– Store your sweet potatoes at room temperature. They suffer chilling injury below 50 F.
– The sweet potatoes we grow require slightly longer cooking than ones from the supermarket, perhaps because they contain higher moisture so soon after harvest.
– Sweet potatoes are good at any size. We have cooked everything from tiny to jumbo and consistently find that all sizes taste good.
Kale – You’ll receive either Red Russian (pink midveins) or lacinato (dark green and bumpy) or green kale (medium green, with wavy leaf edges). All are from fields in good shape. The kale is tender enough to use raw but can be cooked too.
Celery – Our celery is more strongly flavored and more fibrous than typical grocery store celery. Taste it raw then decide how you want to use it, raw or cooked. This is one of our better batches of celery, which we pack in the CSA boxes just once per year. We’ve pushed the planting date later. We want to avoid summer harvests because the celery is tough if it matures during hot weather. Harvest too late in the fall and insect problems accumulate. Who knew celery is so finicky to grow?
Leeks – Well, this is not our best leek crop. You will receive two spindly little leeks this week. They were in a wet field this year and we lost control of the weeds. They’ll be better next year.
Daikon radish (long white root(s)) – This is a Japanese radish, good cooked or raw.
Ideas: (i) We specifically send the daikon with carrots so you can make mixed grated carrot and daikon salad. Dress with a simple marinade of rice vinegar, mirin, soy sauce, sesame oil and a pinch of sugar. Even a brief marination mellows the radish’s sharpness.
(ii) I look forward to making Cubed Radish Kimchi. You can ferment it if you wish but I often just eat it fresh.
Storage: Cover and refrigerate.
Bell peppers – It has been a poor pepper year. We usually send many more peppers in the fall CSA boxes. Unfortunately, most large peppers rotted during the rain. Now that frost looms, we’ve begun stripping the pepper fields, and will have bell and frying peppers for another week or two. You’ll get more green peppers than red, yellow or orange.
To preserve, simply freeze your raw peppers. You can do this with bell or frying peppers of any color. Chop raw peppers into bite-sized pieces. Load into a freezer bag and freeze. No need to blanche.
‘Habanada’ peppers – These are an experiment, so we have only two small ones per CSA box but we want to share them because they are interesting. They are packed in the carrot bag, to avoid confusion with the Oranos peppers. These are habanero chiles with all the heat bred out of them. Lo and behold, habaneros have a wonderful fruity flavor. No one knew because the blazing heat of a traditional habanero sears your taste buds. I suggest you just eat them to enjoy the flavor. These were developed through a collaboration between chefs and plant breeders. Go here if you are interested in the background story.
RECIPES
Visit our 2018 Recipe Log or our 2017 Recipe Log or join our Facebook discussion group.
LOCAL THYME/ Comforting Classics
Creamy Chicken and Wild Rice Soup
Baked Beans
Grilled Maple Glazed Sweet Potato
Grilled Steak with Carrot Daikon Salad
LOCAL THYME/ Outside the Box Recipes
Shrimp or Bean Filé Gumbo
Rice Noodles with Chicken, Carrots and Peppers
Kale and Sweet Potato Salad with Roasted Garlic Dressing
Chinese Chicken Noodle Soup with Star Anise
LOCAL THYME/ Quick & Easy Meal
Kale Carrot Juice
RECIPES FROM LAUREN
ROASTED VEGETABLES WITH WHITE MISO TAHINI SAUCE
Adapted from Smitten Kitchen
Serves 4
Takes 1 hour
1/4 cup olive oil, divided
1-1/2 teaspoons Kosher salt, divided
1/2 teaspoon freshly ground black pepper
2 pounds sweet potatoes, peeled and cut into 1-inch cubes
1 head broccoli OR cauliflower OR romanesco, cut into florets
2 small leeks, cut into thick slices
1 bunch kale, stems removed and torn into bite-size pieces
1-2 cooks favorite cooked grain (wild rice is great here!), optional
White Miso Tahini Sauce
1 garlic clove
1/4 cup rice wine vinegar
2 tablespoons white miso
2 tablespoons tahini
2 tablespoons soy sauce
2 tablespoons olive oil
1 tablespoon honey
- Preheat oven to 400 degrees.
- Toss sweet potatoes with 2 tablespoons olive oil, 1/2 teaspoon Kosher salt and 1/4 teaspoon pepper on a large baking sheet. Place in oven while you cut broccoli (cauliflower or romanesco) and leeks. These will take 5-10 minutes longer than these other veggies.
- Toss broccoli and leeks with additional tablespoon olive oil, 1/2 teaspoon Kosher salt and 1/4 teaspoon pepper on a second large baking sheet. Add to oven and set timer for 30 minutes.
- Add kale to broccoli pan. Drizzle with remaining olive oil and sprinkle with remaining salt and toss gently with broccoli and leeks. Place in oven and roast (along with sweet potatoes) for 20 minutes more.
- Meanwhile, prepare you sauce by combining all ingredients in a blender or food processor and mix until smooth.
- Toss all roasted veggies together and drizzle with sauce immediately before eating. If you want to beef it up, toss veggies with a favorite grain right after they come out of the oven.
.
SESAME NOODLE BOWL WITH PORK MEATBALLS & PICKLED VEGGIES
Inspired by Dishing up the Dirt
Takes 1 hour
Serves 4-6
Pickled Veggies
1/2† cup rice wine vinegar
1/4 cup sugar
1 tablespoon toasted sesame oil
1 teaspoon Kosher salt
3 carrots, cut into matchsticks
1 pound daikon (all the daikon you got), cut into matchsticks
Pork Meatballs
3-4 stalk celery, with leaves, roughly chopped
2 habanada peppers, stems and seeds removed
3 garlic cloves, peeled
1/4 cup fish sauce
1 tablespoon sriracha
2 pounds ground pork
1 tablespoon peanut (or olive) oil
Noodles
1/2 pound Soba noodles
1/4 cup maple syrup
1/4 cup soy sauce (or tamari)
2 tablespoons rice wine vinegar
2 teaspoons toasted sesame oil
1 green pepper, finely chopped
1-inch ginger, peeled and minced
1 clove garlic, minced
1/4 cup peanut (or olive) oil
- In a medium bowl, combine vinegar, sugar, oil and salt for pickled veggies. Whisk until smooth and then stir in carrots and daikon. Let sit and pickle while you work on the rest of your meal.
- Preheat oven to 400 degrees.
- In the bowl of a food processor combine celery, habanada peppers, garlic, fish sauce and sriracha. Process until everything is finely chopped and well-combined. Add pork and process until all the beautiful celery mixture is incorporated into the pork.
- Shape pork mixture into meatballs about the size of a golf ball. My mixture yielded just under 40. The size doesn’t matter too much but go for no more than 45 and no less than 30 to ensure they cook all the way through.
- Drizzle baking sheet with 1 tablespoon oil and place meatballs on it. Bake for 30 minutes. Drain grease halfway through if you like. The meatballs are cooked through at this point. If you want them to have a little more browning (as I usually do), you can absolutely heat some more oil in a skillet and cook the meatballs on high heat for 2-3 minutes, turning as you go until browned on all sides.
- Bring a large pot of salted water to a boil. Add soba noodes and cook according to package directions.
- Meanwhile, combine maple syrup, soy sauce, vinegar, sesame oil, green pepper, ginger, garlic and olive oil in a large bowl. Whisk to combine. Once noodles are cooked (and drained), add to this mixture. Use a tongs to evenly coat.
- Serve a bowl of noodles with meatballs and drained pickled veggies. Add a bit of sriracha if you like a bit more heat.
.
Week #20, Oct. 4/5, 2018
- On: October 03, 2018
 0
0
Gleaning party
We had a wonderful gleaning day on Sunday. Hundreds of members showed up and it did not rain at all. What a gift, considering how much it rained the rest of the week. The fields were muddy but I think everyone enjoyed the chance to wander the farm and pick some vegetables. Let’s take a look.
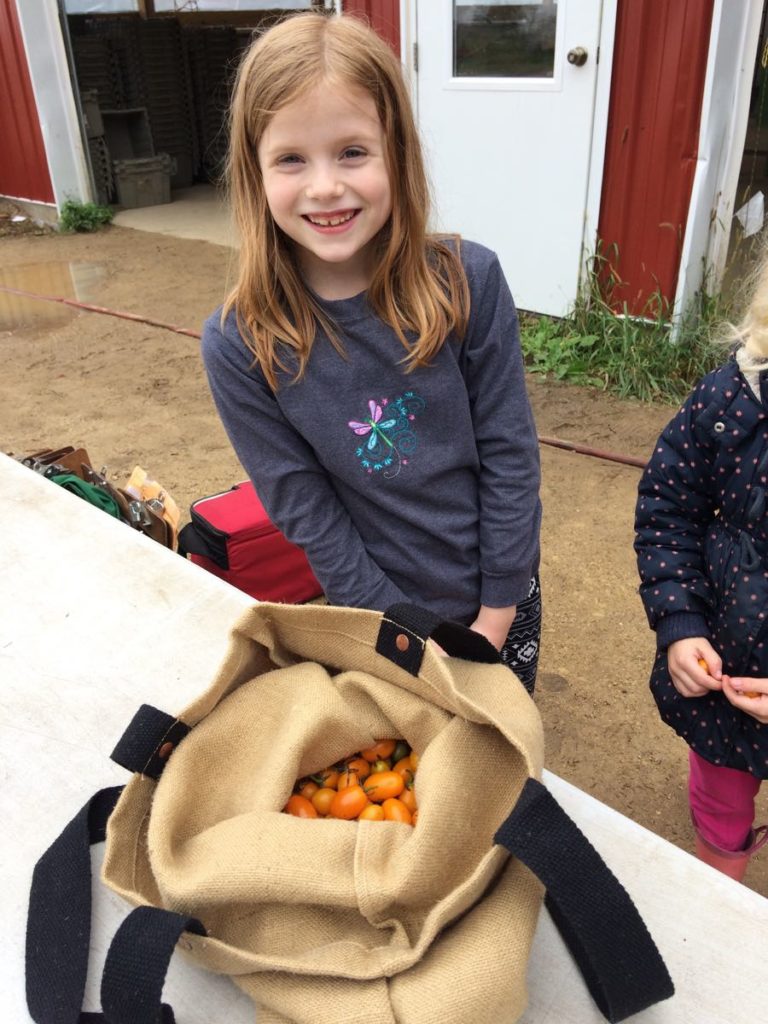
This young lady talked her family into walking to the furthest field to pick grape tomatoes. The walk was rewarded!


We offered sweet potatoes for gleaning. I think it was a first experience for everyone, and quite the treasure hunt.


Our field roads are riddled with puddles. They are a nuisance for us but a big hit with the kids. Parents patiently guide their toddlers through every irresistible puddle.


Digging carrots is a perennial favorite. Carrots are not a true gleaning crop (we could harvest and use them all) but we offer them each year because it’s a great experience for the kids.
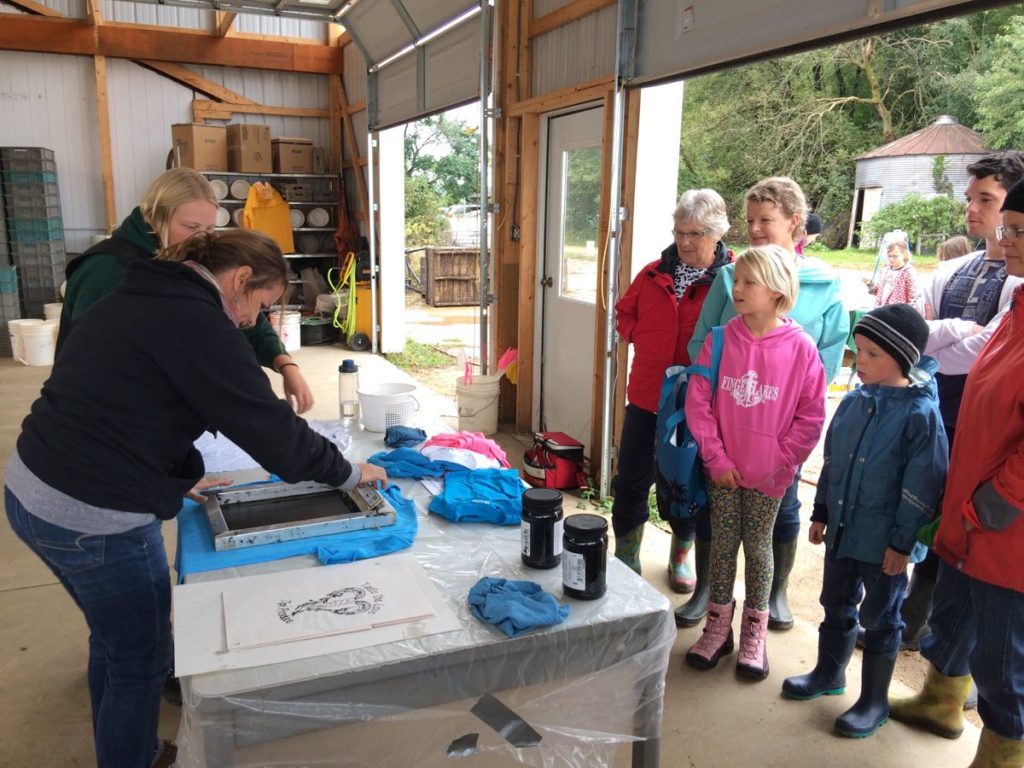
At left, Karen and Sena silkscreen t-shirts for an audience.

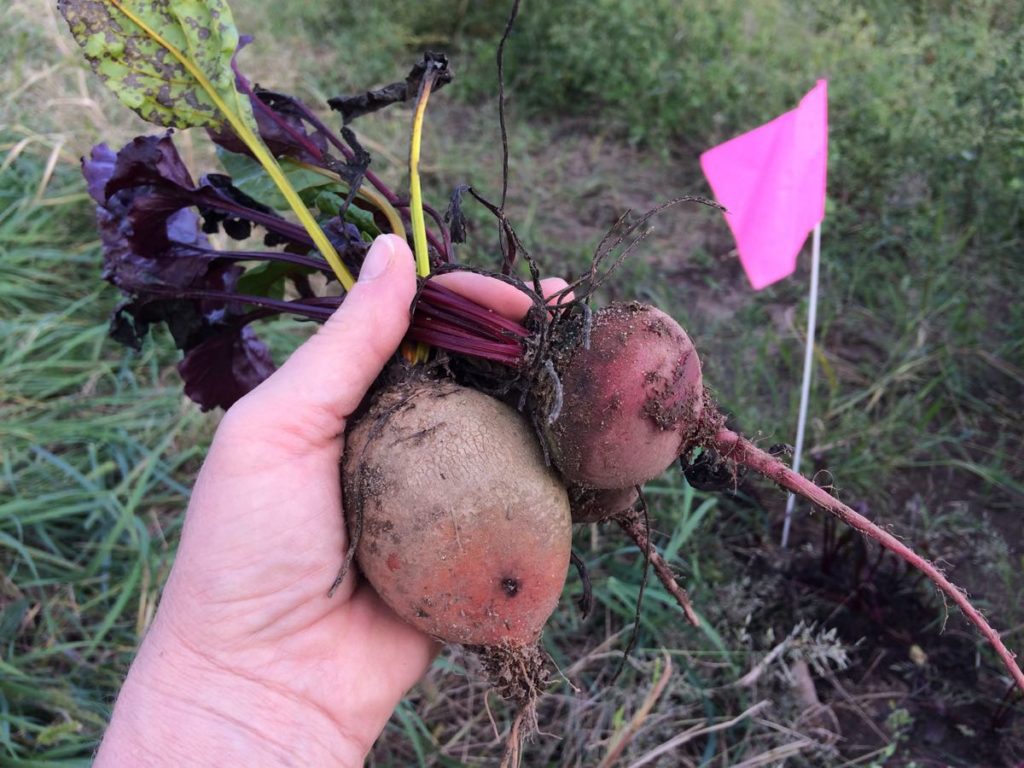
Solveig offered cooked beet samples from her PhD breeding project. After several years, we can taste the difference in her breeding lines. New this year, we offered the remnants of her beet field for gleaning. People stopped first at Solveig’s table to complete her tasting survey. Based on their survey preferences, she then directed them where to glean. “I think you’ll like the beets with pink flags best,” or white or red flags based on the breeding lines they preferred. I thought that was pretty darn cool. Beth
The rest of the week was complex & interesting.
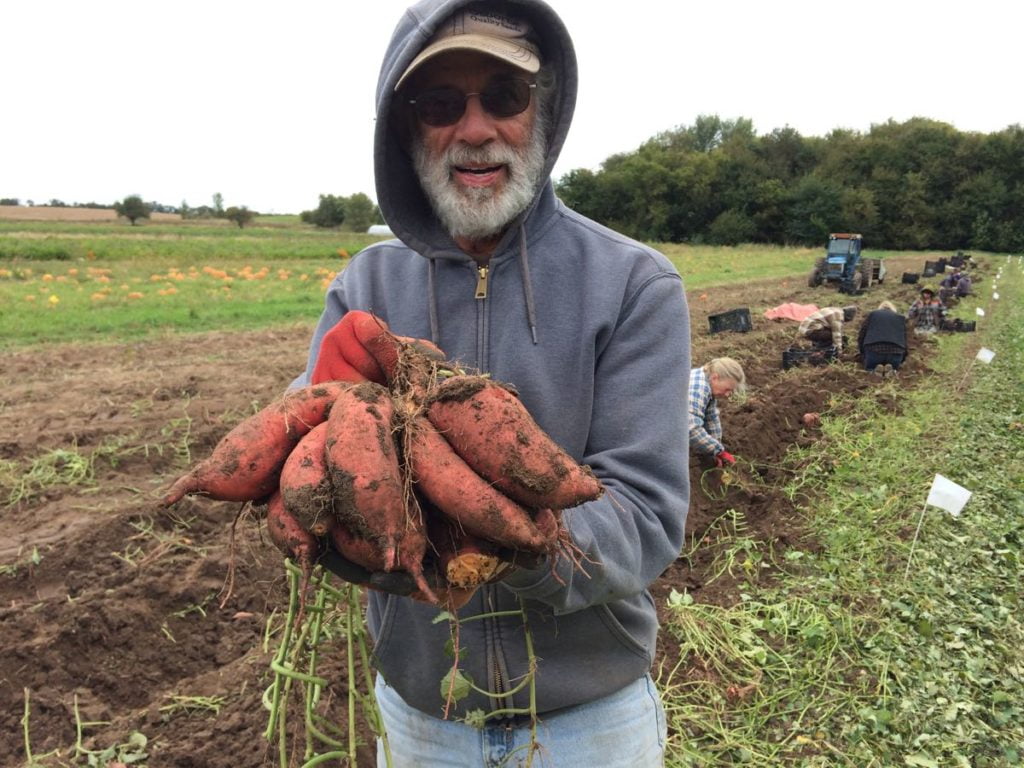
FRIDAY. Steve holds a freshly-dug cluster of sweet potatoes. That’s a very nice cluster, hence the smile and the photo. So many of our fall crops are heavy; sweet potatoes, winter squash, cabbage, roots. We undercut the sweet potatoes to life them out of the soil, but pick them up by hand. This year’s harvest is very, very nice. Sweet potatoes will be in the boxes next week. We began harvesting weeks ago to allow enough time for the roots to cure and sweeten.

SATURDAY. We prepared for the upick and moped about the rain. More than 4 inches of rain fell between Friday and Monday. This is getting tedious.
SUNDAY. Pumpkin u-pick and gleaning party!

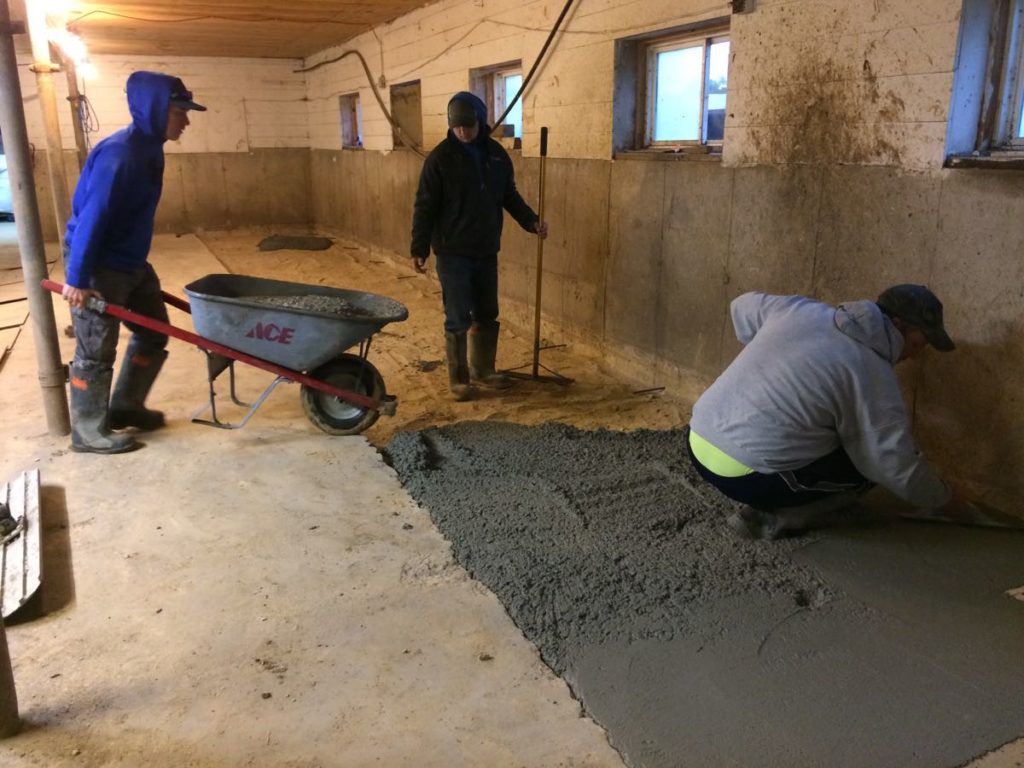
MONDAY. We hired our cement guy Kyle Allen to cast a new cement floor in our indoor washroom. The old floor was at two levels, with a high curb in the middle. We will appreciate the new, open working space once we begin working indoors next month. Work schedules are backed up for every contractor that works outside. Kyle was glad to have an indoor job for his crew.
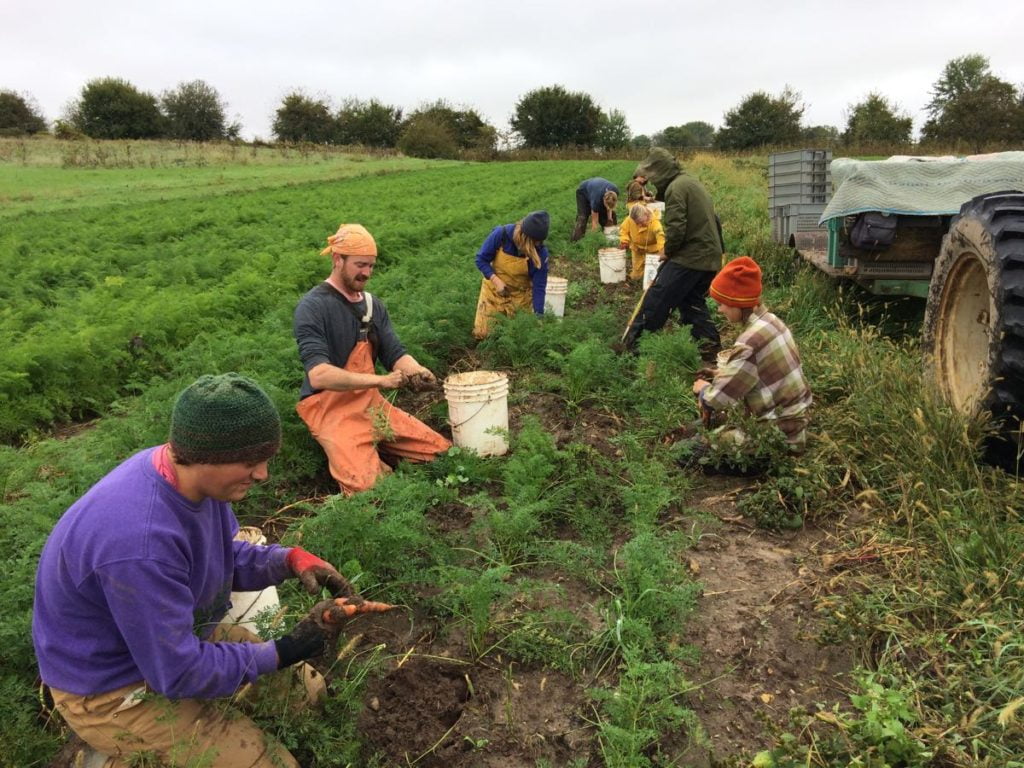
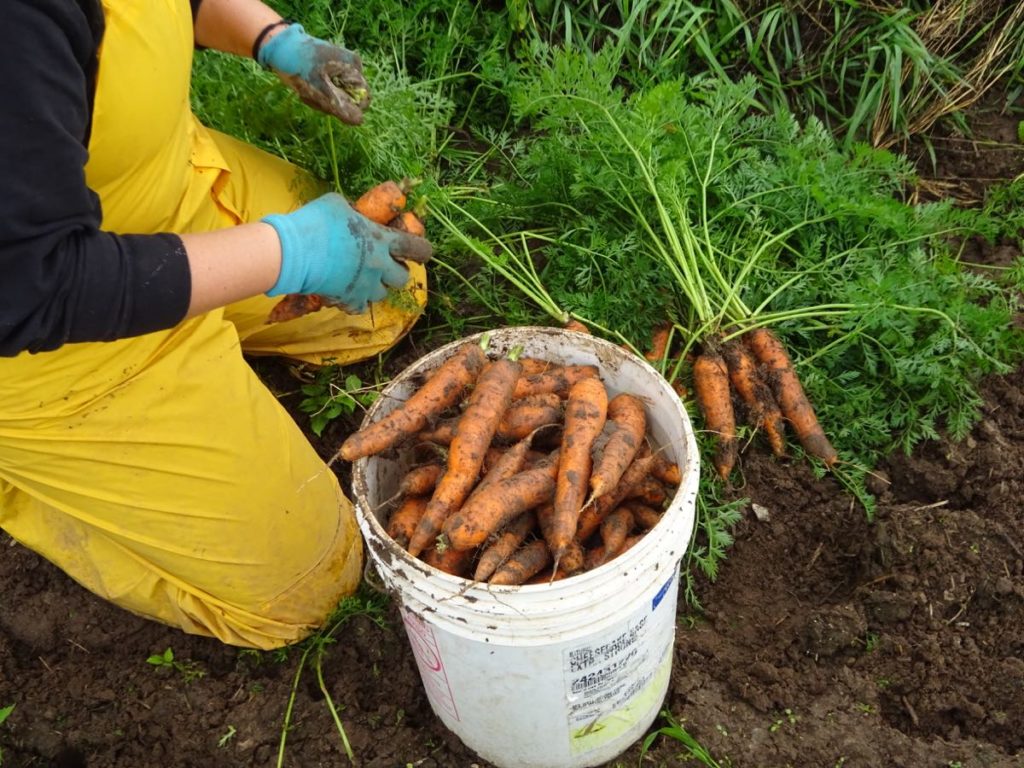
TUESDAY. It is too wet to use our carrot harvester. We wanted carrots for this week’s box and just pulled them out by hand. We joke that we are regressing to the stone age. We have a fortune invested in carrot harvesting equipment yet resorted to pulling them by hand. It was an easy job with a big crew and no rain. The soil is so moist that it gave no resistance.

WEDNESDAY. We had our annual inspection for our organic certification. We are organized and do this every year but it still feels like endless amounts of paperwork.
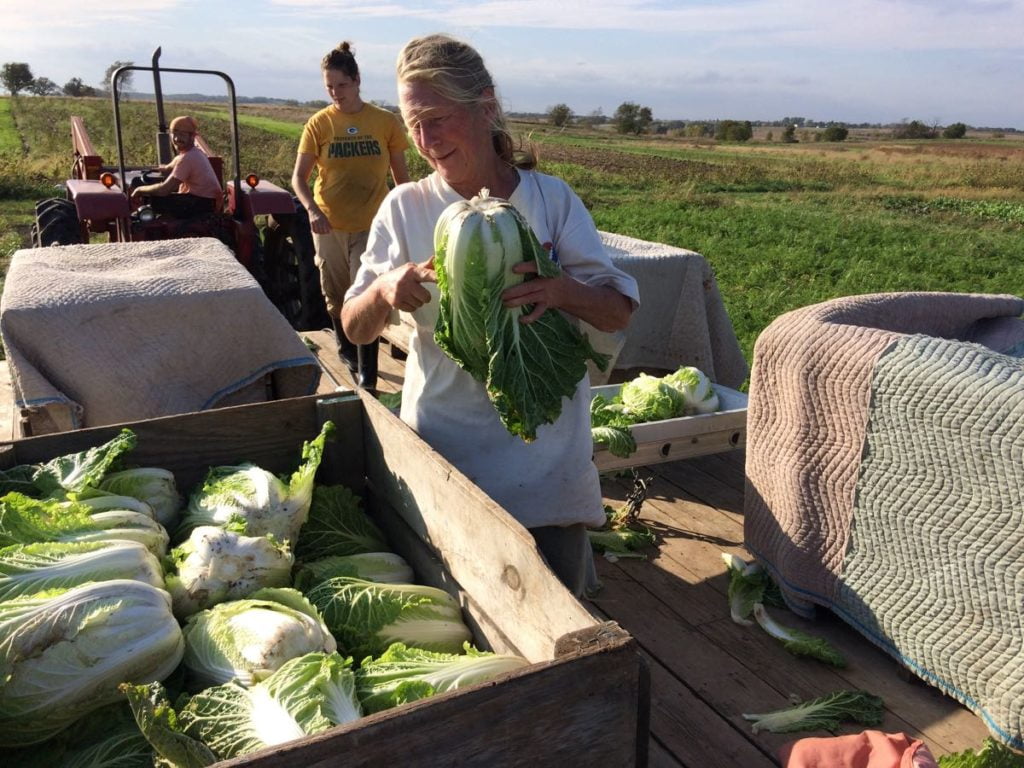
Finally, we got outside as much as we could today, to enjoy the sun and wind. Front to back, Simone, Taylor and Billy bring in the napa cabbage harvest. Ah, what a beautiful warm day. Beth
Veggie List and Veggie Notes
Week #20, October 4/5, 2018
Ethiopian kale, 1 bunch
‘Satina’ potatoes, 3.5 lb
‘Jester’ or acorn winter squash, 1 or 2
Carrots, ~2 lb
Green beans, 1.4 lb
Oranos peppers OR shishito peppers, ~1/3 lb
(in bag with beans)
Bell or frying peppers, ~2
(At least one will be tiny; it’s that time of year.)
Yellow onions, ~2
Each site gets 1 or 2 things from this list:
Cauliflower OR globe eggplant OR broccoli.
Next week’s box will probably contain sweet potatoes, greens, broccoli or cauliflower and more.
Ethiopian kale – This is a new variety for us. Here’s the seed catalog description: “While technically a mustard, Amara is known by several different names including Ethiopian kale, highland kale, Abyssinian mustard, and Texsel greens. The attractive, dark green leaves are tender, slightly savoyed with a wavy margin, and have an excellent rich flavor. Good in salads or as a cooked green.” This stuff is pretty interesting. It has the texture of kale but the spiciness of mustard. I’d say it’s about half as spicy as mustard greens. The flavor is strong once cooked but quite good.
Winter squash – Everyone gets at least one Jester. This is my favorite squash. It’s a hybrid between sweet dumpling and acorn squash. It’s got the size of an acorn but the speckling and delicious taste of sweet dumpling. These squash do not store for long. They are prima donnas. Eat within two weeks, or sooner if you see problems developing.
RECIPES
Visit our 2018 Recipe Log or our 2017 Recipe Log or join our Facebook discussion group.
LOCAL THYME/ Comforting Classics
Wilted Ethiopian Kale with Bacon and Vinegar
Shepherd’s Pie with Winter Squash and Broccoli
Maple Winter Squash Puree
Broccoli Cheddar Stuffed Potato
LOCAL THYME/ Outside the Box Recipes
Steamed Snapper with Wilted Greens and Ponzu
Broccoli Quinoa Salad
Cinnamon Brown Sugar Roasted Winter Squash with Honeyed Yogurt
BSK Breakfast Potatoes
LOCAL THYME/ Quick & Easy Meal
Spaghetti with Pancetta and Green Beans
SPICY PORK BOWL WITH FALL VEGGIES
Recipe inspired by Bon Appetit
1-1/2 pound pork tenderloin OR 4 pork chops, bones removed
2-3 cups cooked white rice
2 tablespoons hot chili paste (I used sambal nyonya; sambal oelek is pretty common in the ethnic aisle of your grocery store or you could always just use sriracha in a pinch)
2 tablespoons brown sugar
1″ piece ginger, peeled and minced (or finely grated)
4 garlic cloves, divided
4 tablespoons soy sauce (or gluten-free tamari), divided
3 teaspoons toasted sesame oil, divided
1 large (or 2 small) Jester squash, peeled and cut into 1-inch cubes
4 tablespoons peanut oil (or vegetable oil), divided
1/2 teaspoon Kosher salt + more for seasoning pork
1 pound carrots, peeled and thinly sliced
1 bunch Ethiopian kale
2 tablespoons rice wine vinegar
1-2 Oranos, cut into strips, optional
1 bell or Italian frying pepper, cut into strips, optional
1/2 onion, sliced, optional
- In a medium bowl, combine chili paste, brown sugar, ginger, 1 clove garlic, 2 tablespoons soy sauce, and 2 teaspoons sesame oil. Very thinly slice pork tenderloin or pork chops and add to marinade. Stir well to coat evenly. Place in fridge for at least 20 minutes or up to 2 hours.
- When you are about ready to get started, preheat oven to 400 degrees.
- On a roasting pan. combine squash with 1 tablespoon peanut oil and salt. Roast for 25 minutes turning occasionally to ensure even browning.
- Cook rice according to package directions. I always follow this easy rice guide.
- In a large heavy skillet (preferably cast-iron if you have one), heat 1 tablespoon peanut oil and heat over medium high heat. When oil is very hot, add pork. Season very lightly with salt. Cook, without moving for 2 minutes. This will help the sugars caramelize. Stir and then cook again for 2 minutes without moving. Stir and cook 2 minutes more. This should caramelize all edges and cook the pork through. Transfer to a plate. Wipe pan with a paper towel– if some sauce remains, don’t worry about it, just get it mostly clean.
- Add additional two tablespoons peanut oil to pan and allow it to get very hot over medium high heat. Add carrots, cook undisturbed for two minutes. Stir and then add kale. Cook for 5 minutes until kale begins to wilt, then add remaining 3 garlic cloves and roasted squash. Cook for 3 minutes more. Turn off heat.
- † In a small bowl, whisk together rice wine vinegar with remaining 2 tablespoons soy sauce and remaining 1 teaspoon toasted sesame oil.
- Serve rice with pork, carrot mixture, and raw peppers and onions (if using). Drizzle with rice wine vinegar.mixture.
.
SMASHED BROCCOLI & POTATOES WITH ASIAGO, OLIVE OIL & LEMON
Recipe inspired by Joshua McFadden’s Six Seasons cookbook
This combination of flavors is equal parts odd and delicious. And again, we have Joshua McFadden to think for the inspiration. I love the addition of broccoli to mashed potatoes. It adds a healthy note and complexity you don’t usually find. But what really makes this unique is the lack of the usual dairy suspects of butter and heavy cream for the heart-healthy substitution of olive oil and lemon. It’s a fun recipe that I’ll come back to again and again. I served it with baked white fish and thought it paired perfectly.
Takes 40 minutes
Serves 4-6 as a side
1 tablespoon + 1 teaspoon Kosher salt, divided
2 pounds white potatoes, peeled and cut into 1-inch cubes (about 5 cups)
6 tablespoons olive oil, divided
1 large yellow onion, diced
3 garlic cloves, minced
1 head broccoli, cut into bite-size chunks
1 cup finely shredded asiago cheese
Juice of 1 lemon
1/2 teaspoon freshly ground black pepper
- Add a tablespoon of salt to a large pot of water. Bring to a boil on the stove. Once boiling, add potatoes and cook for 15 minutes.
- While the potatoes cook, heat 1 tablespoon olive oil in a medium or large skillet over medium heat. Add onion and 1/2 teaspoon Kosher salt. Saute over 10 minutes then reduce to low and add garlic. Cook 5 minutes longer. Remove from heat and set to the side.
- By now your potatoes have likely cooked for 15 minutes, add broccoli to pot and boil for 5 minutes more.
- Drain potato mixture. Use a fine-mesh strainer if you have one (as opposed to a colander) to save some of the broccoli pieces from washing through. Return to pot.
- Add sauted onions and garlic to potato mixture. Smash mixture gently until crushed but still chunked. Add the asiago, lemon juice and remaining 1/2 teaspoon Kosher salt and stir with a wooden spoon until cheese is melted and ingredients appear well-incorporated. Add remaining olive oil. Stir to combine, taste and adjust ingredients as desired. If it’s too bright and lemony, add more olive oil. If the flavors aren’t popping add a little salt and maybe more lemon juice.
- Serve warm or reheat later using a bit of water to loosen the mixture.
.
Week #19, Sept 27, 2018
- On: September 26, 2018
 1
1

From left, Noah Engel (Driftless Organics), Mike Nolterwyss (Crossroads Community Farm), Hans Bishop (PrairErth Farm), Steve and Raul Casique Montes (our farm).
Steve left at 5:30 this morning for a field day at our friends Hans and Katie Bishop’s farm in Illinois. The topic was mechanical weed control. Steve was in seventh heaven, checking out specialized machinery imported from Europe and watching tool demonstrations. “I got to meet the engineers who designed these pieces!” We spend so much time managing weeds that even small improvements are exciting. Steve carpooled with farmer friends Noah Engel, Mike Nolterwyss and our assistant farmer Raul. They had a great time hanging out during the seven hour round-trip. Sounds like 90% of the discussion was about farming and the remaining 10% gossip about other farmers.
We hosted UW beet trials again
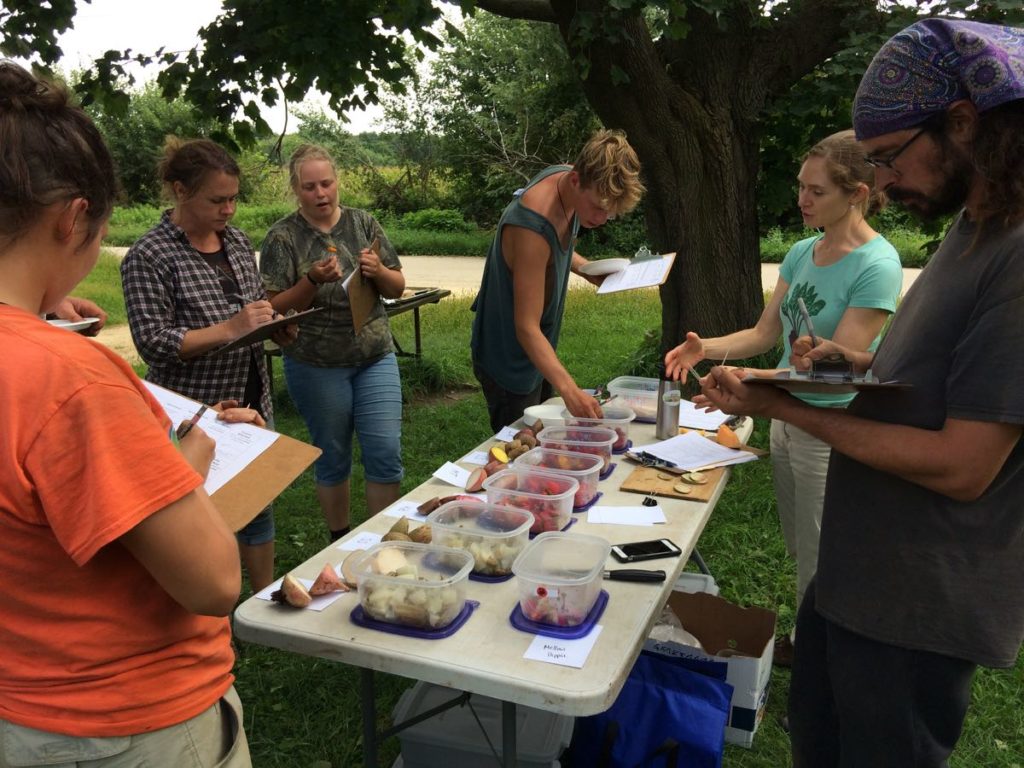
Tipi crew members evaluate beet breeding lines selected at our farm by UW grad student Solveig Hanson, second from right.
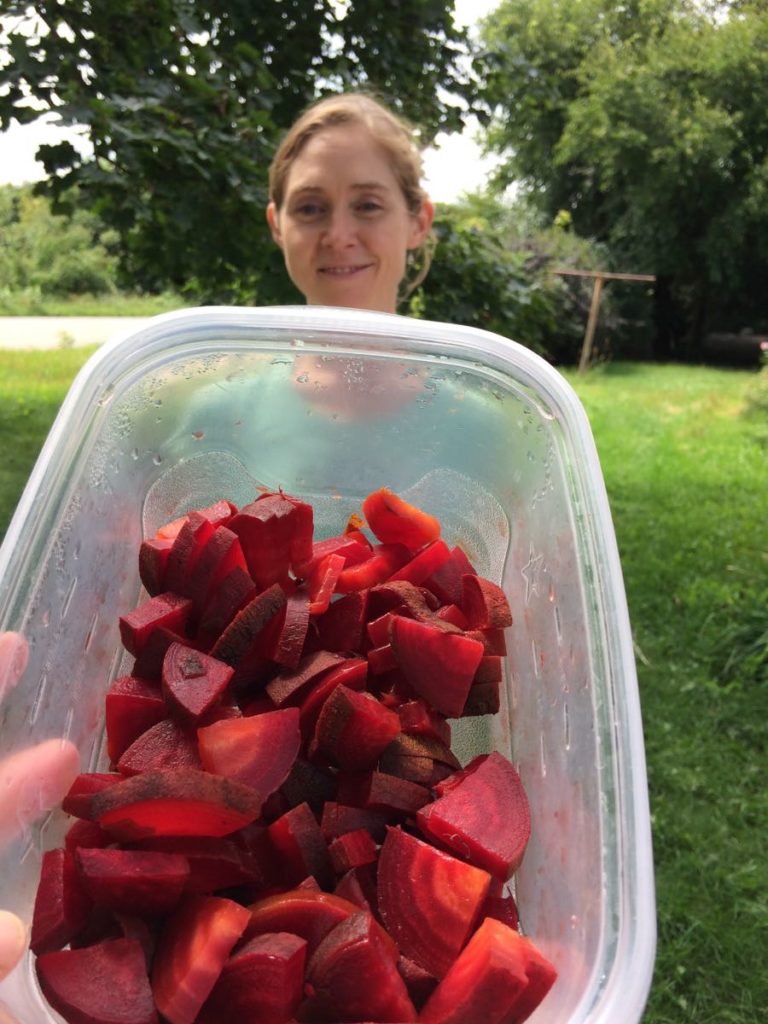
Solveig with a vivid orange-fuschia beet line.
Once again, we hosted research trials this summer for UW graduate student Solveig Hanson, who is breeding beets for specific flavor and color profiles. Many of you have given input on this project. At last year’s gleaning party, Solveig brought beet samples for Tipi CSA members to evaluate. She used your opinions (among others) to hone her lines. She is selecting beets for different levels of the ‘earthy’ flavor that some people like and some people don’t.
Solveig returned to the farm this fall so our work crew could evaluate the updated breeding lines. The range of flavors is quite interesting. As a group, we are a mix of beet-lovers, beet-haters and beet-ambivalent types. Almost everyone found a breeding line they found appealing. Solveig plans to sample beets again at our gleaning party this year.
Veggie List and Veggie Notes
Week #19, Sept 27/28, 2018
Weekly and green EOW
Green cabbage
Bok choy or tat soi, 1 medium
Acorn winter squash, 1 or 2
Frying &/or bell peppers, ~2
Oranos snack pepper, ~1
Poblano chiles, 3
Yellow onions, ~2
Basil, the last sprig of the year
Each site gets 1 or 2 of these:
Broccoli OR cauliflower OR eggplant OR zucchini OR orange snack peppers
Next week’s box will probably contain yellow potatoes, green beans, carrots, peppers, leeks and more.
Green cabbage – Here’s a crop that’s done very well. These are substantial. Storage: Refrigerate. It’s OK to cut off chunks as needed, then store the leftover head in your crisper drawer. If you plan to use again within a week, you don’t need to cover the cut head. Next time you use the cabbage, shave off and discard the cut surface.
Bok choy or tat soi – These nutritious greens are interchangeable in recipes. Bok choy has thicker white midveins, tat soi has smaller, darker, more abundant leaves.
Acorn winter squash – You’ll get one or two acorn squash. Most people get Festival, a very tasty variety. Some get one of the other types in the photo below. All are cured and ready to eat. Store on your kitchen counter and keep an eye on them. They look good now but might not last. Wet weather as the squash matured makes them unpredictable now. They sure taste good!
Poblano chiles (triangular, shiny, dark green) – This week’s poblano variety is spicier than the one we sent three weeks ago.

You’ll get one or two of these types. Clockwise from top left:
– Festival, a very tasty acorn squash.
– Celebration, a new type we’re trialling this year. Can you distinguish Celebration from Festival? Neither can we.
– Jester, a favorite acorn x sweet dumpling cross. This one is more oblong.
– Heart of Gold, another promising new acorn we’re trialling this year. This variety is green and white with a little orange but no yellow.
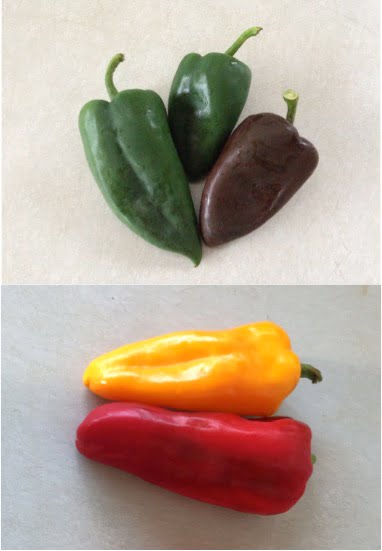
Poblano chiles (top) versus frying peppers (bottom). Poblanos are darker and triangular. They will be all green, or chocolate-brown, or green with a red tip. Frying peppers are longer, and will be red or yellow, some peppers mixed with green.
RECIPES
Visit our 2018 Recipe Log or our 2017 Recipe Log or join our Facebook discussion group.
LOCAL THYME/ Comforting Classics
Simple Sesame Soy Choy Pepper Sauté
Cabbage and Onions with Caraway
Chicken Tacos with Shredded Poblanos and Cabbage in Chipotle Crema
Honey Soy Glazed Winter Squash Rings
LOCAL THYME/ Outside the Box Recipes
Miso Grilled Tatsoi or Bok Choy
Sweet Salt-Pickled Cabbage
Rigatoni with Cabbage and Meat Sauce
Lasagna Stuffed Acorn Squash
LOCAL THYME/ Quick & Easy Meal
Winter Squash and Poblano Posole with Black Beans
RECIPES FROM LAUREN
CABBAGE & POBLANO RUNZA
What the heck is runza you ask? Well, officially, it is the state dish of Nebraska. But closer to home, it is a dish I grew up with when my mom had extra cabbage in her garden. It’s essentially a German-style calzone packed full of ground meat (traditionally beef, but here I used pork because it’s what I had on hand), cabbage, and onions. Poblanos are a fun addition and you could even throw more peppers in there if you wanted to. I know making your own dough can seem intimidating but give it a try. It’s easier than you think. Lauren.
Makes 8 runzas
Takes 2 hours
Dough:
3/4 cup lukewarm water
2-1/4 teaspoons active yeast
Pinch sugar + 3 tablespoons sugar, divided
4 eggs; 3 for dough, 1 for egg wash
4 cups all-purpose flour, divided + more for dusting counter
12 tablespoons butter, softened
2 teaspoons Kosher salt
Filling:
1 tablespoon olive oil
1 pound ground pork
1 teaspoon Kosher salt, divided
1/2 teaspoon black pepper
1 medium (or 1/2 large) yellow onion, sliced
2 poblanos, diced
2 tablespoons butter
1/2 head cabbage, shredded
1 teaspoon dried thyme
1/2 teaspoon dried sage
- In a large bowl, combine water (it should be warm but not hot), yeast and sugar. Whisk gently to combine. Let sit for 10 minutes until it bubbles, rises and smells yeasty. Add 3 eggs and whisk to combine. Add half the flour and beat with a spoon until totally incorporated. Add butter, remaining flour, sugar and salt. Stir until just combined and then let rest for 15 minutes.
- Once rested, dust counter with flour and knead dough for 5 minutes until tight and smooth. Transfer the dough to a clean, greased bowl. Cover with plastic wrap and let rise in a warm space for an hour (until doubled in size).
- When the dough is about 20 minutes from finished, preheat the oven to 375 degrees and start on the filling. In a large heavy skillet (or Dutch oven), heat olive oil over medium heat. Add ground pork, 1/2 teaspoon salt and the pepper. Break up meat with two forks, cooking for 5 minutes until browned. Add onion and pepper. Cook 5 minutes more. Add butter and remaining salt to skillet. Get it a stir so the butter coats all the meat and veggies. Add cabbage along with dried herbs and let wilt gently over medium low heat for 15 minutes.
- At this point, your dough should be risen. Grease two baking sheets. Divide into 8 pieces.
- Re-dust counter with flour and roll out dough into a rough 8×4-inch rectangle. Scoop 3/4 cup of cabbage mixture into the center. Fold in the two long sides of dough so they touch then pull the other edges into the center until you form a sealed dough pocket with the meat in the middle. Place, seal side down, on the greased baking sheet. Repeat with remaining dough and cabbage mixture.
- Beat last egg in a small bowl until smooth and brush runzas with egg mixture.
- Bake for 15 minutes. Rotate pans and bake 15 minutes longer until golden brown.
.
FALL SQUASH CURRY
I know a lot of you aren’t receiving eggplant this week. If you have some in your fridge from last week, use that! Otherwise, just skip the eggplant or feel free to substitute zucchini or cauliflower. This recipe is incredibly versatile so you can adjust the veggies a bit based on what you have on hand. Lauren.
Serves 6-8
Takes 50 minutes
2 tablespoons coconut oil (or olive oil or butter)
1 yellow onion, diced
1 medium head bok choy (if you got two small heads, use about 75% of them), leaves roughly chopped and stems sliced
1/2 teaspoon Kosher salt
1-2 acorn squash (whatever you received this week), halved, seeded and cut into 1-inch cubes
1 pound eggplant, cut into 1/2-inch cubes (optional)
1 colored bell pepper, diced
1 orano, diced
1-inch piece ginger, peeled and minced
5 tablespoons red curry paste
2 tablespoons brown sugar
1 tablespoon curry powder
2 cups chicken (or vegetable) broth
Two 13.5-ounce cans full-fat coconut milk
2 tablespoons fish sauce
5-6 cups cooked rice
Sriracha, optional
Lime wedges, optional
- In a large stock pot, heat oil over medium high heat. Add onion to pot followed by bok choy stems and salt. Cook, stirring occasionally for 10 minutes. Reduce heat to medium. Add squash, eggplant, if using, peppers, and ginger. Cook, stirring occasionally, for 10 minutes longer until squash is just beginning to soften.
- Add red curry paste, brown sugar and curry powder. Stir until it evenly coats the vegetables and cook 5 minutes longer until fragrant.
- Add broth and coconut milk to pot. Bring to a boil, reduce heat to medium low and cook for 15 minutes. Add bok choy greens and fish sauce. Cook until greens are just wilted, about 3 minutes. Taste and adjust seasonings as needed. This curry as written isn’t super spicy so you may want to add sriracha.
- Serve over rice with lime wedges.
.
Week #18, Sept 20, 2018
- On: September 19, 2018
 0
0
This week’s winter squash
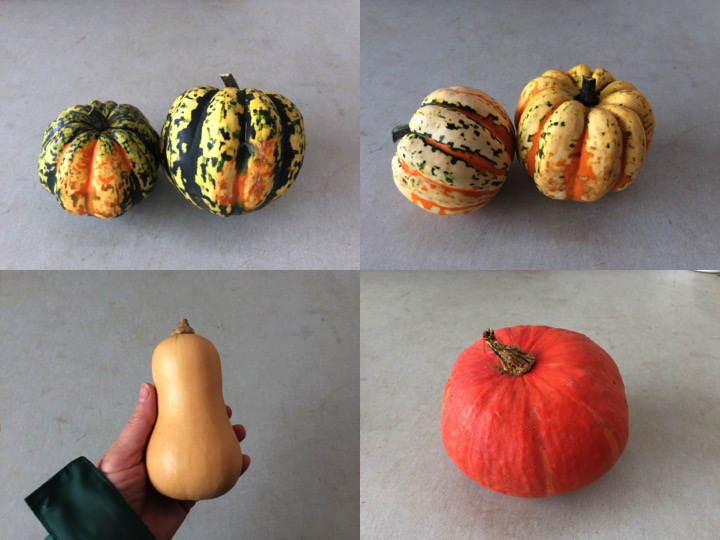
Clockwise from top left, ‘Carnival’ acorn, ‘Festival’ acorn, ‘Sunshine’ kabocha, ‘Butterscotch’ butternut
Almost everyone gets one or two acorn squash this week. One site gets Sunshine and another gets Butterscotch. All are cured and ready to eat.
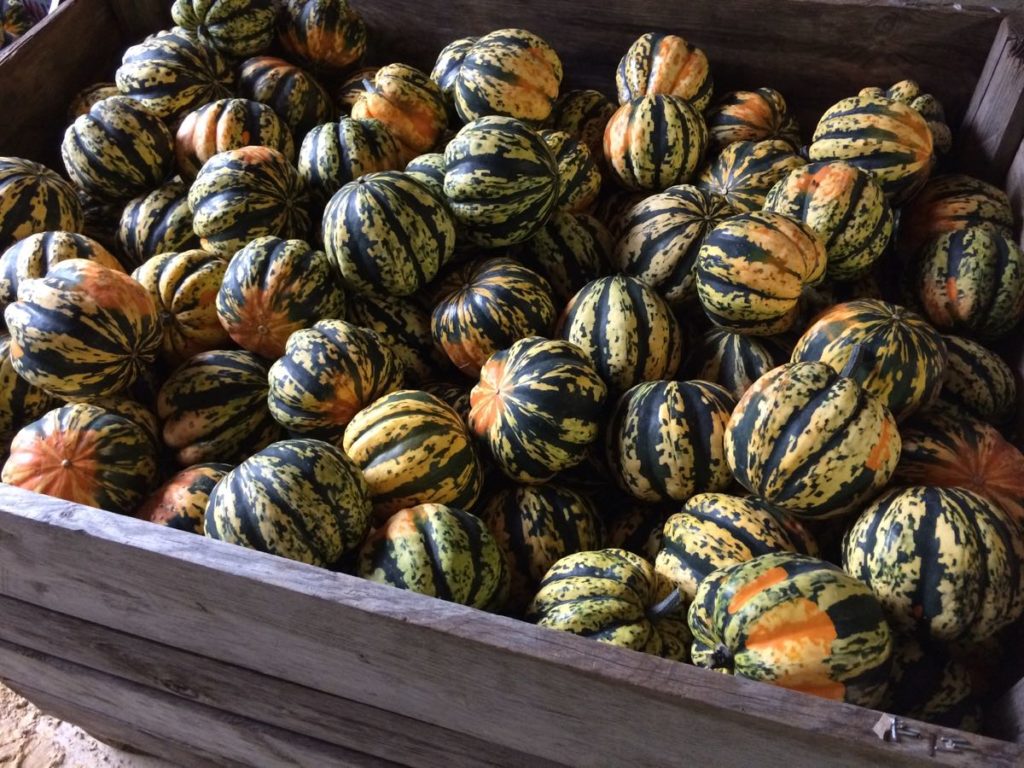
A wooden bin of Carnival squash
Acorn squash (Carnival, Festival this week) – These are distractingly beautiful, with stripes and patterns in yellow, green, orange and white. We used to grow all-green acorn squash but stopped because we think the newer striped varieties taste better and are the plants are more vigorous.
Preparation: Acorn squash have a central cavity perfect for stuffing. Prepare your favorite fully-cooked stuffing, e.g. a rice or quinoa mixture. Roast your squash as described below. Preheat the stuffing. Fill the cooked squash with stuffing, top with grated cheese and return to the oven until everything is hot.
Butterscotch butternut – These small (tiny?) squash are incredibly sweet and flavorful. We grew them as a test this year. We love the flavor, but are ambivalent about how small these ‘personal size’ squash are.
Preparation: Roast and eat with salt and pepper. They don’t need any embellishment.
Sunshine – Bright orange Sunshine have a mild, sweet flavor reminiscent of chestnuts. The skins are tender and edible. We find that Sunshine do not store well, because of the thin skins. Eat these soon.
Preparation: (i) Dry roasting brings out Sunshine’s delicate flavor. Cut into thick slices, toss with olive oil, and roast on a well-oiled cookie sheet at 425 oF until soft. The slices will fall apart if you overcook them but you have a fairly wide window to get them out of the oven successfully. Make sure to roast them until the cut surfaces are caramelized. Season with salt after they are out of the oven. Excellent with a yogurt-garlic-olive oil dip.
(ii) Sunshine have a central cavity amenable to stuffing. See acorn squash above.
Winter Squash Primer
This year’s winter squash crop is excellent. The dry spell was perfectly timed to bring in the squash without damage. We should have enough for a steady supply of squash or sweet potatoes over the coming weeks.
Expected life: Some winter squash varieties are ready to eat soon after harvest, others store deep into winter. This week’s varieties are cured and ready to eat. Plan to eat these early varieties within two to four weeks, on the shorter side for the kabocha.
Storage: Winter squash store best at room temperature with good air circulation. No cooler than 50 degrees. On your kitchen counter works. Do not cover.
To make squash easier to cut: Microwave on high for 30 to 60 seconds, depending on size of the squash. This will soften the rind and flesh, making it much easier to cut.
Beth’s favorite simple preparation (acorn or butternut): Winter squash are easily roasted in a 400F oven.
– Split in half with a sharp knife.
– Scoop out and discard seeds.
– Run the squash briefly under running water, then shake off the excess water. Place cavity-side-down on an oiled baking sheet. The little bit of moisture seals the squash to your roasting pan. The water soon evaporates, allowing the squash to brown and caramelize. Caramelization really boosts the flavor.
– Roast at 400F until easily pierced with a fork, 30 – 45 minutes depending on size. Flip over while hot. Add a little butter to melt and some seasoned salt. Cut into wedges and eat.
Can you eat the rind? Kabocha rind is thin and edible. Rinds for acorns and butternuts are thicker. It’s your choice whether to eat them or not. Steve eats them. I don’t.
Veggie List and Veggie Notes
Week #18; Sept. 20/21, 2018
Weekly, purple EOW, and sun SMP shares
Broccoli
Cauliflower
Winter squash, 1 or 2
Kale, 1 big bunch
Romano beans, 0.9 – 1 lb
Grape or cherry tomatoes, 1 pint
Bell or frying pepper, 1
Yellow onions, ~2
Jalapeno chile
– Some sites get 1 – 2 zucchini.
– Some sites get globe eggplant.
Next week’s box will probably contain green cabbage, winter squash, broccoli, bok choy, peppers, onions and more.
RECIPES
Visit our 2018 Recipe Log or our 2017 Recipe Log or join our Facebook discussion group.
ROMANO BEAN RECIPES
This week’s beans are suited to braising. Let’s gather and repeat last week’s recipe links, so you don’t have to hunt for them.
– Lauren’s favorite: African Peanut Stew .
– Former crew member Jon Fagan’s favorite: Braised Green Beans with Tomato and Fennel Seeds (in previous newsletter, scroll down).
– Beth’s favorite: Sausages and Summer Beans with Tomatoes & Caramelized Onions. (in previous newsletter, scroll down).
– Lemony Braised Romano Beans
– Romano Bean, Potato and Meatball Stew
LOCAL THYME/ Comforting Classics
Cheesey Cauliflower Pasta
Easy Pot Pie
Quick Honey Nut Acorn Squash
Garlic Parmesan Kale Chips
LOCAL THYME/ Outside the Box Recipes
Cauliflower Gallette Crust
Sweet Spicy Broccoli and Pepper Stir Fry
Acorn Squash and Caramelized Onion Pizza
Kale Broccoli Soup
LOCAL THYME/ Quick & Easy Meal
Fish Tacos with Cherry Tomato and Pepper Salsa
RECIPES FROM LAUREN
SLOW COOKER CARAMELIZED PORK RAMEN WITH CURRY ROASTED VEGETABLES
Adapted from Half Baked Harvest
If you aren’t a person who loves big, bold flavors, well then this recipe may not be for you. Ramen like this is certainly not for the faint of heart. It has a lot of spice, a lot of salt, and a lot of richness. It is also incredible. But if flavors that big aren’t you thing, well then maybe just make the slow cooker pork and make the roasted vegetables and eat them sans noodles and sans broth. The broth is where the big, bold flavors are hidden. Lauren.
Serves 8-10.
Takes a long time (because slow cooker), but I recommend estimating about an hour of active cooking time + 4 (or more) hours in the slow cooker.
2-3 pound pork shoulder roast, bone-in or out is fine
1 red pepper, seeded and cut into long, skinny strips
1 yellow onion, divided
6 cups water
1/2 cup soy sauce (or tamari) + 5 tablespoons, divided
1/4 cup rice wine vinegar + 2 tablespoons, divided
3 tablespoons fish sauce, divided
1 tablespoon sambal oelek or sambal nyonya (or other hot sauce that you happen to have on hand)
1 lime, juiced
1 tablespoon Kosher salt
1 teaspoon black pepper
5 tablespoons brown sugar, divided
3 tablespoons + 1 teaspoon curry powder, divided
1 teaspoon ground allspice
1 teaspoon ground ginger
1/2 teaspoon ground coriander
1/2 teaspoon ground cumin
1/2 teaspoon cinnamon
1/4 teaspoon ground cloves
4-5 cups chopped acorn squash, seeded first (1 large squash)
4 cups chopped cauliflower (1 medium head)
1 zucchini, halved and sliced
1/4 cup olive oil
2 tablespoons toasted sesame oil
6-8 ounces ramen noodles (real ones from the Asian market or plain old ramen packets with the flavor packets removed are both fine)
1 jalapeno, thinly sliced, optional
Soft-boiled eggs (if you’re feeling extra ambitious), optional
- Get your slow cooker going. Add the pork roast to the center. Cut onion in half. Set aside one half to thinly slice just before serving. Dice other half onion and nestle around pork in slow cooker along with peppers.
- Pour water, 1/2 cup soy sauce, 1/4 cup rice wine vinegar, 2 tablespoons fish sauce, sambal oelek (or hot sauce), and lime juice into slow cooker. Add salt, pepper, 1 tablespoon brown sugar, 1 teaspoon curry powder and the rest of the spices. Give things a quick stir.
- Cover the slow cooker and cook on high for 4-6 hours or low for 6-8 hours. If you have more time than that, just turn it to keep warm after the initial 8 hours. I tend to do the first cooking over night and then leave it on low all day while I’m at work. Extra steeping won’t hurt you here, I promise.
- About an hour before you are ready to serve your ramen, preheat the oven to 400 degrees.
- Toss acorn squash, cauliflower and zucchini with olive oil, 3 tablespoons brown sugar, 1 tablespoon soy sauce, and remaining curry powder (3 tablespoons) and fish sauce (1 tablespoon) in a large bowl. Lay out on two large baking sheets. Bake in preheated oven for 50-60 minutes, rotating pans and vegetables throughout cooking at least once.
- While that roasts, and once the pork is finished cooking, remove from slow cooker. Remove any bones and shred with two forks. Add ramen noodles and cook on high for 12 minutes. Once finished, add back half the shredded pork and reduce heat to “keep warm” setting.
- In a large skillet, heat sesame oil over medium heat. Add other half shredded pork followed by the remaining brown sugar (1 tablespoons), soy sauce (2 tablespoons) and rice wine vinegar (2 tablespoons). Cook for 10 minutes, stirring every couple minutes so the bottom layer of pork gets crispy and almost caramelized.
- Serve ramen soup with crispy pork, roasted veggies, and raw sliced onion as well as jalapeno and soft-boiled eggs (if using).
.
BROCCOLI & KALE SALAD WITH FRIED ONIONS & PEANUTS
The two recipes this week really pair wonderfully together using several similar ingredients so use this week’s box as an excuse to go out a buy bottles of rice wine vinegar and higher quality fish sauce! Lauren.
Takes 25 minutes.
Serves 2 as a meal or 4 as a side dish.
Vegetable oil
1 large onion, halved and sliced
1/2 cup flour
2 tablespoons Kosher salt
1 head broccoli
3-4 stems curly kale, stems removed and chopped small
1/4 cup peanut oil (don’t have peanut oil? use 1/4 cup of the oil you fried your onions in instead)
1/4 cup rice wine vinegar
1 tablespoon brown sugar
2 teaspoons fish sauce
3/4 cup roasted peanuts, roughly chopped
Pinch red pepper flakes, to taste
- In a large skillet heat 2 inches of vegetable oil over medium high heat.
- While the oil warms, prepare your onions. In a small bowl, toss onion with flour and salt until well coated.
- Once oil is just starting to glisten, it is at the right temperature. Add half the onions and use a fork to make sure all the onions are submerged. Fry until golden brown, about 4-5 minutes. Drain on paper towels. Fry second half of onions and drain as before. Leave onions while you prepare your salad.
- Cut your broccoli by removing 3-4 inches of the stem and then cutting the head in half. Slice the head thinly so you end up with long, elegant pieces of broccoli. Place in large bowl with the kale.
- In a small bowl, combine peanut oil, vinegar, brown sugar and fish sauce. Whisk until smooth. Pour over vegetables and massage until uniform and well-coated.
- Serve salads with fried onions, peanuts and red pepper flakes. Taste and season with salt and pepper as desired. If eating part of the salad later, store separate from peanuts and fried onions so they don’t lose their crunch.
.
Week #17, Sept 13, 2018
- On: September 12, 2018
 2
2
Farm News
This was a nice week. Sunny and mild, it was just what we needed. To follow up last week’s newsletter, no one quit, not even Steve. We thought about it during the incessant rain.
This has been a productive week. Too many jobs were impossible during the rain and we haven’t put a tractor in the fields for weeks. We were all quite motivated once the weather cleared. Steve, Raul and Roger focussed on field work, cultivating, mowing and even doing some tillage. The first winter squash are harvested and curing for next week’s boxes. The winter squash crop is my baby so the early harvest makes me happy. Beth
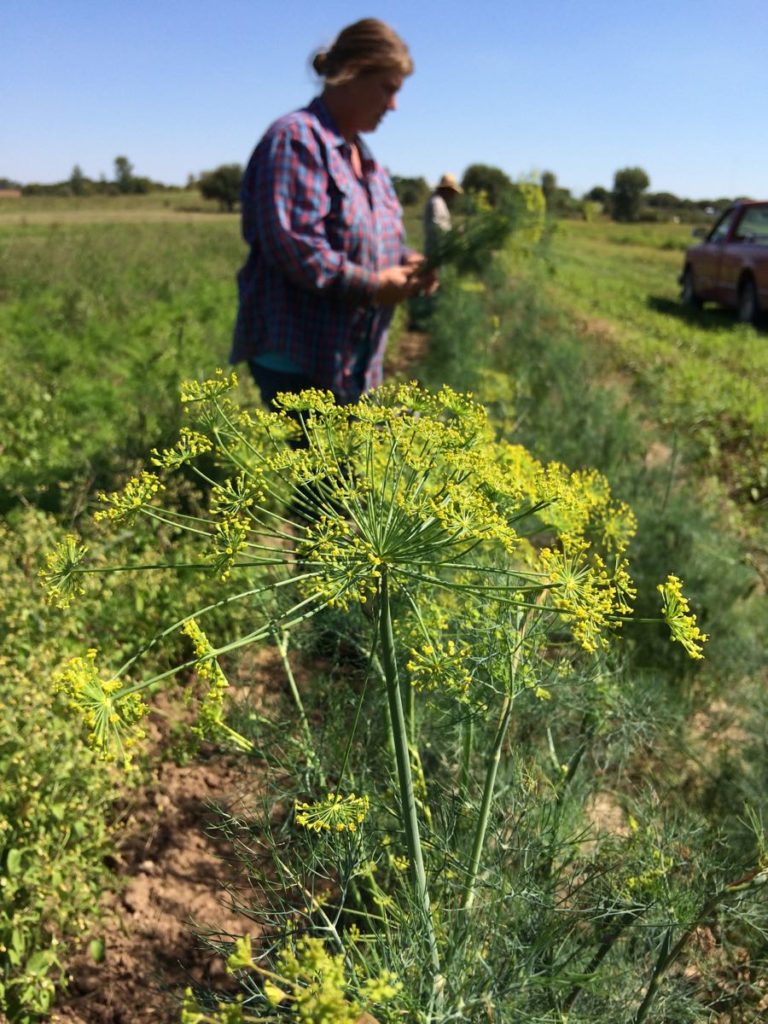
Maggie and Charlotte pick dill bunches. Maggie puts dill flower bouquets on her kids’ nightstands, to sooth nightmares and help them sleep.
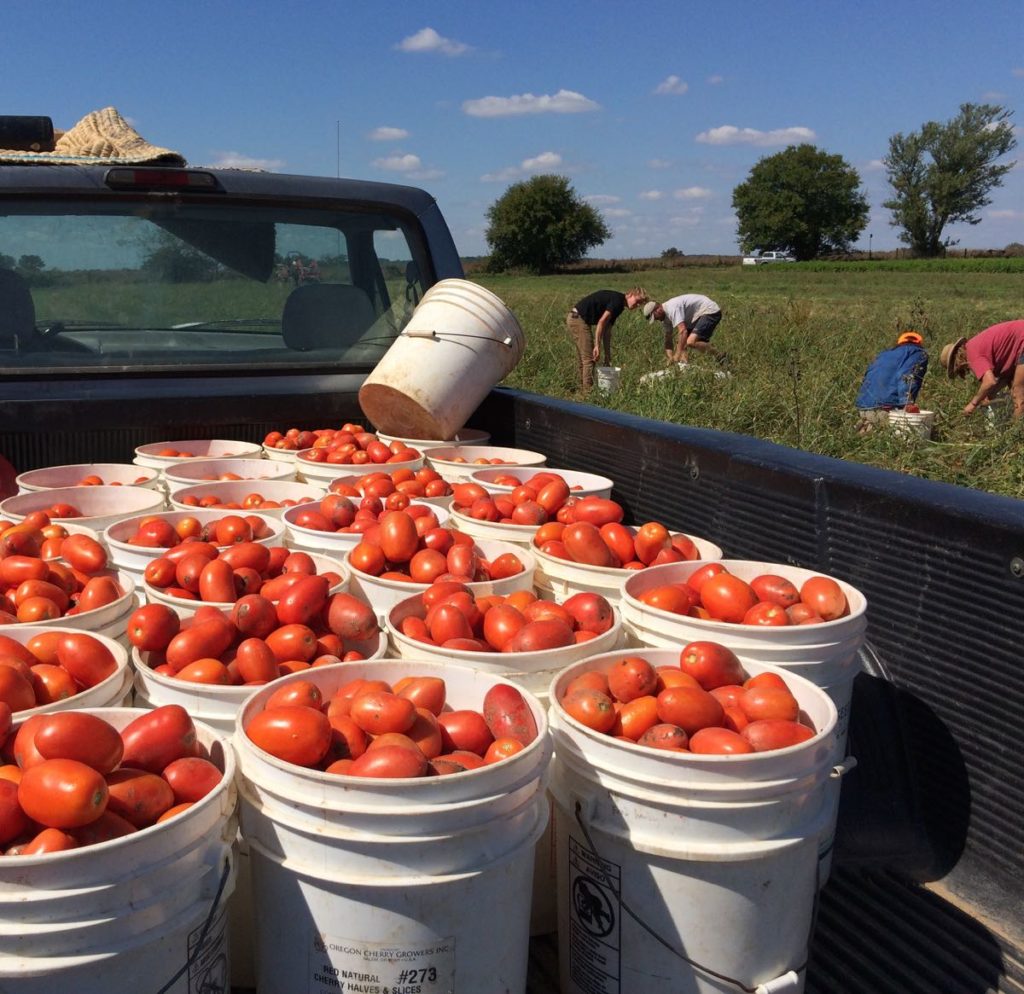
We are still harvesting good plum tomatoes from one variety in a field that was otherwise overwhelmed by rain. See the pail tilted at top?

The crew broadcasts music from their phones with this “speaker pail.” This is low-tech but it works!
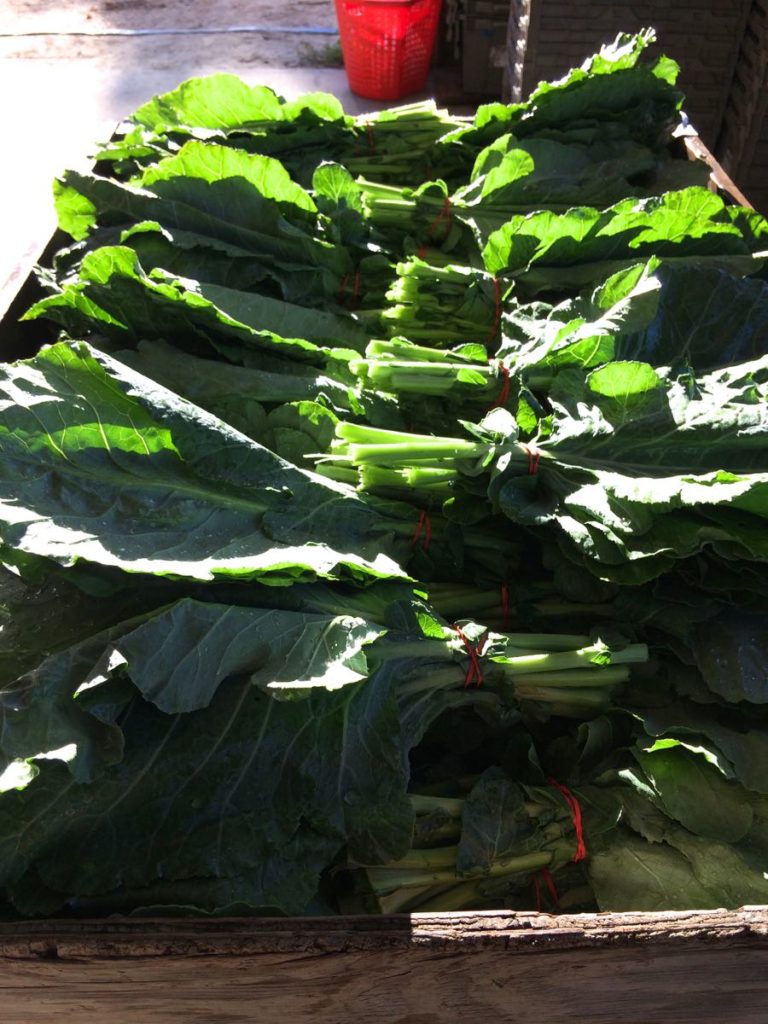
Collard greens glowing in the sun.
Let’s talk Romano beans.
Romano beans are more robust and meaty than green beans. They are excellent raw but really shine when gently cooked for a long time. Pat and Lauren both have good recipes below. I notice that most people who love Romano beans are dedicated to a particular recipe. There’s overlap between these recipes, but here goes:
– Lauren asked me to remind you about last year’s African Peanut Stew recipe, which is easily adapted for this week’s veggies. It’s an excellent recipe for this time of year.
– Former Tipi crew member Jon Fagan raves about Braised Green Beans with Tomato and Fennel Seeds (in previous newsletter, scroll down).
– My favorite Romano bean recipe (which I recommend every year but also look forward to every year!) is Sausages and Summer Beans with Tomatoes & Caramelized Onions.
– Finally, here’s a 2017 quote from Tipi member Steve Rankin:
“You have finally sold me. I have never been a fan of Romano beans. This week I have been sautéing them with various peppers and garlic, as well as the oregano from earlier this season. They are especially tasty with Poblanos. Lots of black pepper and some soy sauce, which make the pan sticky. I deglaze the pan with wine and braise them in the wine. I’m sold!”
Some of you might have poblanos from last week. Otherwise this week’s shishitos will be a good addition to Steve R’s approach. Beth.
Everything I know about shishito peppers
This is our first year growing shishito peppers. Look for a handful of shishitos in your bag of beans, where they are easy to find and recognize. I hesitate to spend a lot of time on such a small amount of food but these are new and interesting. We’ll send them again in a few weeks. You will receive green and/or red ones. Some of the most tasty ones are the soft, full-ripe red ones. They get leathery but are delicious. There are reports online that a low percentage of shishitos will be spicy. We have not encountered that yet. Here’s the lowdown from Johnny’s Seeds:
“Heavily wrinkled fruits are thin walled, mild (no heat) when green and slightly sweet when red. Popular in Japan where its thin walls make it particularly suitable for tempura. Also very good in stir fries or sautés. In Asia, fruits are always cooked green but they also may be used red. Thinly sliced, the red fruits are excellent in salads and coleslaw.”
Blistered shishitos. If you search “shishito recipe,” almost all results are for blistered shishitos. Here’s my version, courtesy of Lauren. She puts blistered shishitos on hamburgers, I add them to grilled cheese sandwiches, and you can use them to top any dish.
1. Cut the caps off your shishito peppers. Trim the core with the tip of a paring knife. Flick or shake out the seeds.
2. Heat a little grapeseed oil in a skillet until it’s hot but not smoking. Add peppers. Cook over medium-high heat, turning occasionally until they blister in a few places. They don’t need to be blackened, just a few charred spots. This is quick, about 3 – 6 minutes. Don’t peel – they are too thin-walled.
Alternatively, you can grill them or put your cast iron skillet under the broiler.
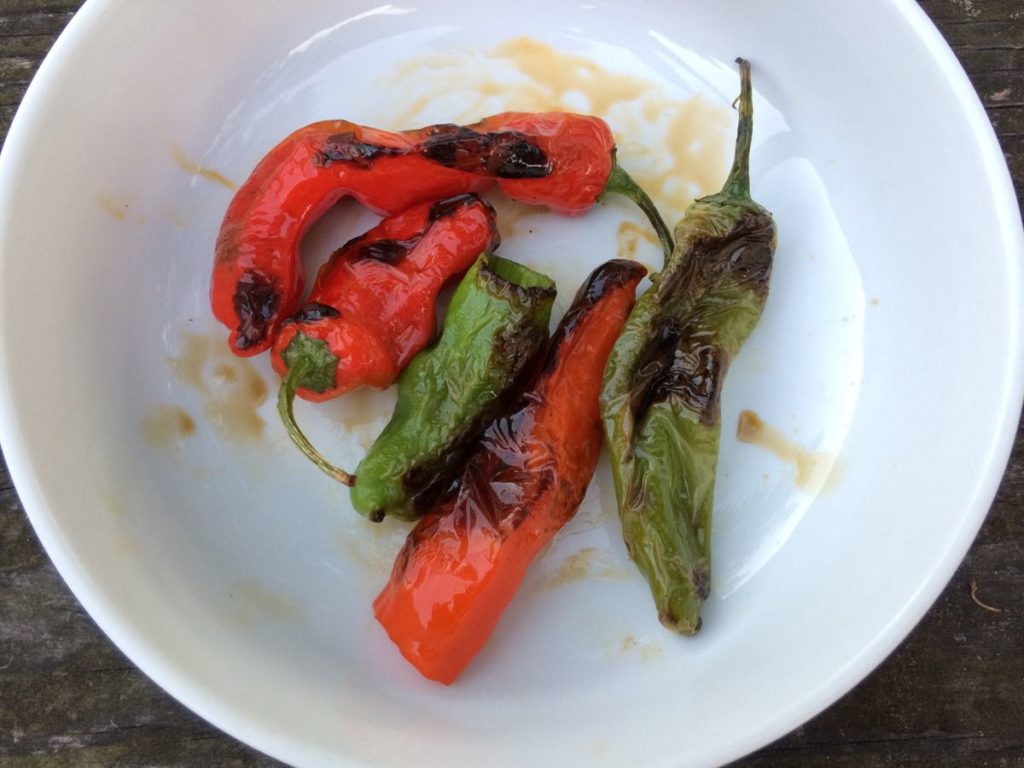
I tried cooking intact shishitos versus ones that were capped and seeds removed. I like the latter. Then the peppers are ready to use once blistered.
Veggie List and Veggie Notes
Week #17, Sept 13/14, 2018
Weekly and green EOW shares
Red potatoes, ~3.5 lb
Romano beans, 1.4 lb
Collard greens, 1 bunch
Bell or frying pepper, 1 – 2
Shishito peppers, a handful
(in bag with Romano beans)
Plum tomatoes, 2.9 lb
Yellow onions
Dillweed & flowers, 1 bunch
– By site, you’ll get broccoli OR cauliflower OR eggplant.
– By site, you’ll get 1 zucchini OR 1 frying pepper or Oranos peppers.
Next week’s box will probably contain cabbage, winter squash, peppers, (cauliflower or broccoli or eggplant), peppers and more.
Red potatoes – These were grown by our friends Josh and Noah Engel of Driftless Organics, or as Steve says “the Engel boys.” He knew them as kids when he farmed in the Driftless area and carpooled with the Engel family to Pleasant Ridge Waldorf school in Viroqua. Now they are all grown up with families of their own and a thriving farm.
Collard greens – This is the first picking from a fresh field, so quality and texture are excellent. Collards are as nutritious and versatile as their close relative, kale. Use interchangeably in kale recipes. Storage: Cover and refrigerate.
Plum tomatoes – This week’s plum tomatoes are good, better than the last few weeks. These are from a sturdy variety called “Granadero” which really shone this year. It kept healthy leaves despite all the rain. That’s how you get tasty tomatoes; you need healthy leaves to photosynthesize sugar and flavor in the tomatoes.
Dillweed – We’ve timed the dill for delivery with beans (e.g. for dilly beans) and the potatoes (e.g. for potato salad). Both leaves and flowers can be used as an herb. Storage: Refrigerate. Wash and freeze if you don’t plan to use within one week.
Cauliflower – Storage: Cover and refrigerate. Should store for up to two weeks.
Romano beans – See above.
Shishito peppers – See above.
RECIPES
Visit our 2018 Recipe Log or our 2017 Recipe Log or join our Facebook discussion group.
LOCAL THYME/ Comforting Classics
Lemony Braised Romano Beans
Lemon Dill Grilled Chicken, Zucchini and Potato Salad
Old Fashioned Southern Braised Collard Greens
Cauliflower or Broccoli Strata
LOCAL THYME/ Outside the Box Recipes
Romano Bean, Potato and Meatball Stew
Red Potato and Sweet Pepper “Shmash”
Polpetonne Stuffed with Collard Green Pesto
Cauliflower “CousCous” with Dried Fruit and Almonds
LOCAL THYME/ Quick and Easy Meal
Pasta Puttanesca
RECIPES FROM LAUREN
CROCKPOT ROMANO BEAN STEW
6-8 hours + 20 minutes (almost entirely inactive after the initial 20 minutes of dicing)
Serves 6-8,
2 tablespoons olive oil
1/2 yellow onion, diced
1 zucchini, diced
4 shishitos, seeded and diced
2 teaspoons kosher salt
2 teaspoons dried parsley
1-1/2 teaspoons dried basil
1 teaspoon red pepper flakes
1 teaspoon dried minced onion
1 teaspoon black pepper
1/2 teaspoon dried oregano
1/2 teaspoon dried rosemary
1/2 teaspoon dried thyme
1/2 teaspoon paprika
1/2 teaspoon dried fennel seed
1 pound romano beans, cut into 1-inch pieces
2 cups diced tomatoes
15.5-ounce cannellini beans, drained and rinsed
7 cups water
1 cup shredded parmesan
- In a crockpot, combine all ingredients except parmesan. I added the ingredients in the order they are listed so that the onions had a little extra time to cook and caramelize before everything else.
- Cover crockpot and heat on high for 2 hours. Reduce to low and cook for 4-6 hours more (or overnight).
- Alternatively, if you don’t have a crockpot, you could make this by cooking the mixture in a Dutch oven in a 350 degree oven for 4 hours.
- Sprinkle with parmesan. And serve with extra buttery garlic bread crostini.
.
COLLARD DETOX SALAD
Adapted from Well and Full
This is certainly the year of the grain salad. I’ve really fallen in love with roasting veggies, steaming veggies, and tossing them all together with a a bunch of greens, a bunch of grains and a yummy dressing. This recipe is inspired by a new favorite blogger. Her recipe is much smaller and uses a lot less greens, but I call for you to use your whole bunch of collard greens (and loved it!). That does mean a LOT of greens so feel free to start with less and see how you feel. Lauren.
Takes 80 minutes (mostly inactive).
Serves 4 as a meal or more as a side.
3 lb red potatoes, cut into 1-inch chunks
1/2 yellow onion, cut into 1-inch chunks
15.5-ounce can chickpeas or garbanzo beans
2 tablespoons olive oil + more to taste
2 teaspoons salt
1/2 teaspoon pepper
1 cup prepared pesto
1 bunch collards greens, stems removed and cut into a chiffonde
1 colored pepper, diced
3 cups cooked wild rice (or other favorite grain; the nuttier the better)
1 teaspoon red pepper flakes
2 avocados, optional
Toasted sesame seeds, optional
- Preheat oven to 425 degrees. In a large bowl, toss potatoes, onions, and chickpeas with 2 tablespoons olive oil, salt and pepper until evenly coated. Lay out mixture on two large baking sheets and roast 55-60 minutes until potatoes are cooked through and crispy. Rotate a couple times to ensure even browning.
- When done, put potatoes back into the bowl you prepared them in and toss with pesto. Stir to combine. Add collards, pepper, wild rice, and red pepper flakes.
- Taste and adjust seasonings. The flavor will vary based on the pesto used. The pesto I used was homemade and honestly, a bit bland, so I added another drizzle or two of olive oil, a teaspoon of white wine vinegar (to brighten things up) and an additional teaspoon salt. Serve warm or at room temperature with avocado and sesame seeds.
.


