
Week #22, October 18/19, 2018
- On: October 17, 2018
 0
0
A few feet in elevation makes all the difference.

Maggie and Billy harvested your Koji greens on Tuesday.
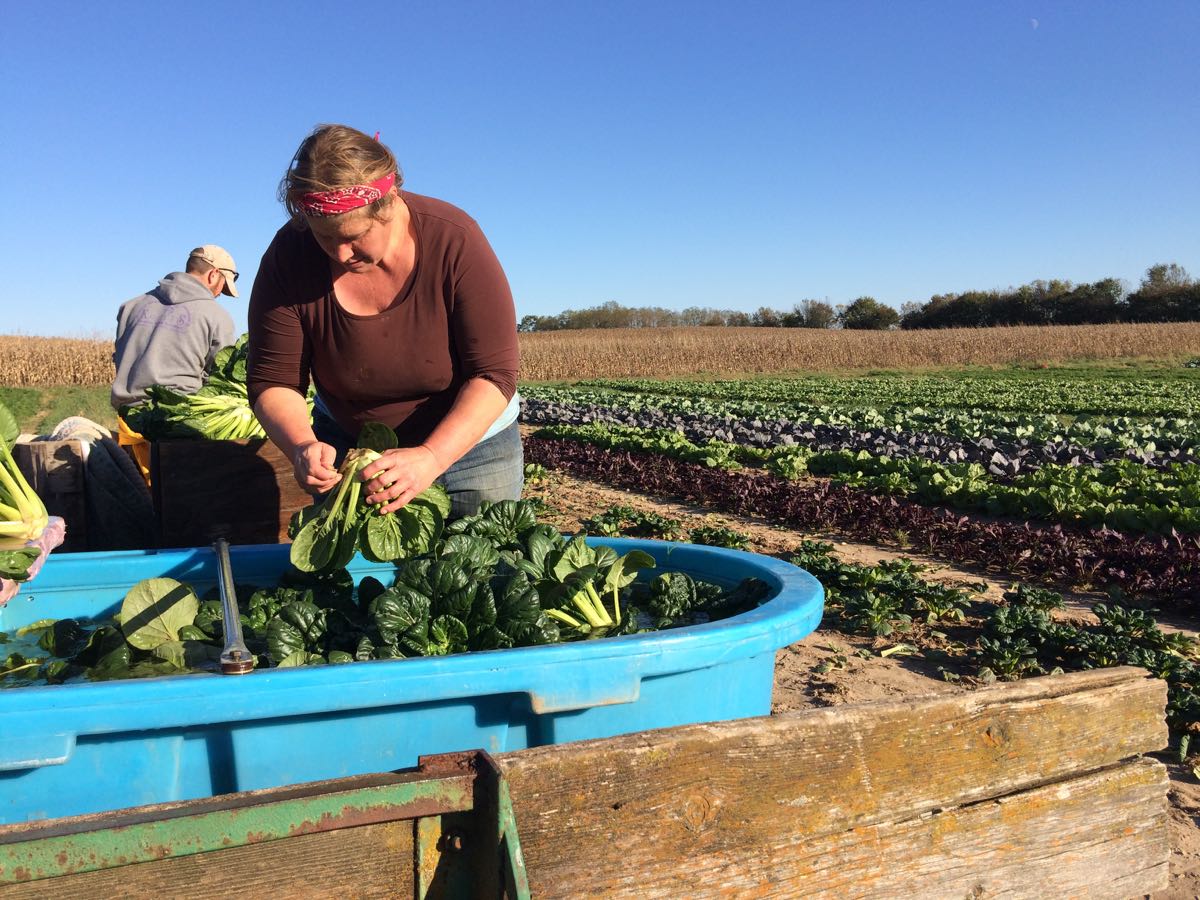
It was warm enough to wash the greens outside. Of course, Maggie is tough and would do this job in much colder weather.
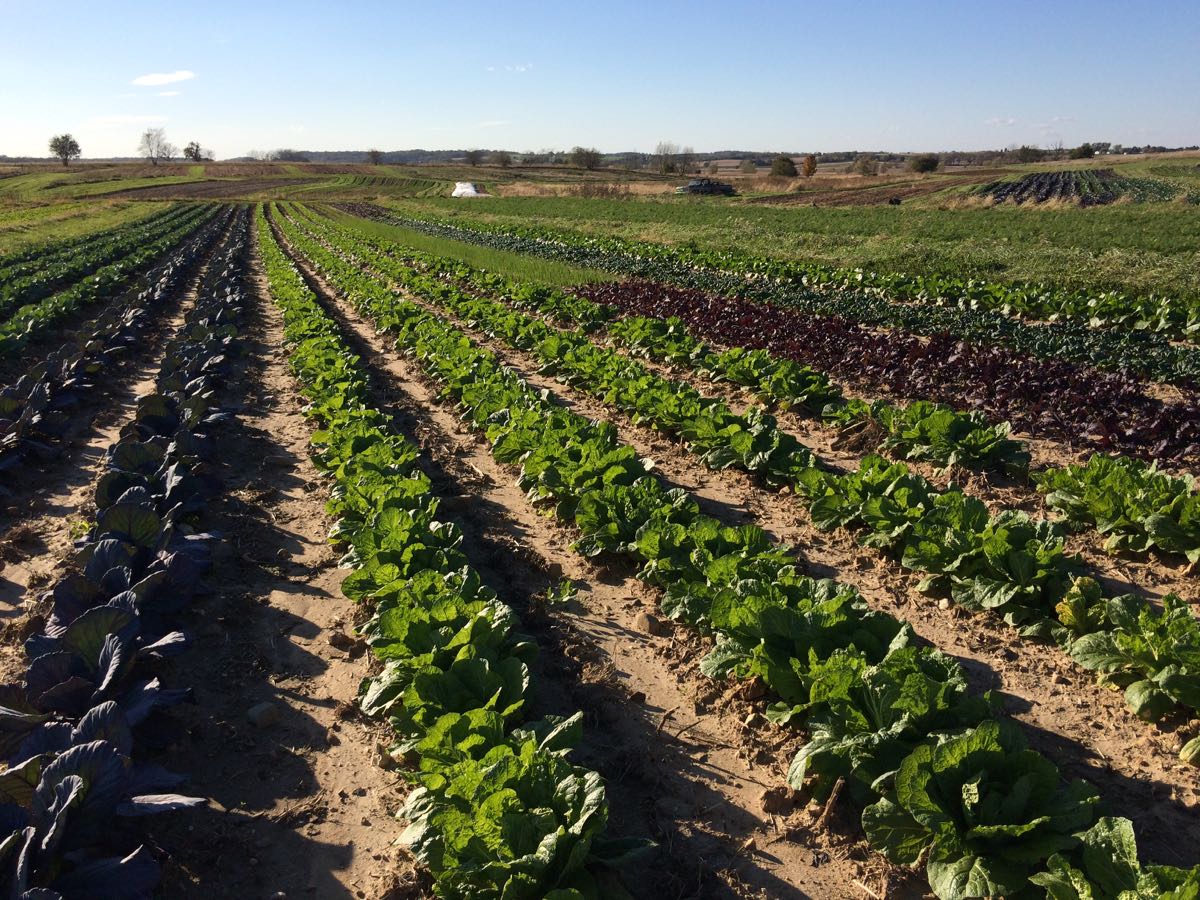
Let’s compare the Koji field (above) with the one we harvested your leeks from last week. See the pickup truck in the distance (to the right of the white row cover protecting fennel)? That’s the bottom of our farm, the lowest point before water drains into the neighboring wildlife area.
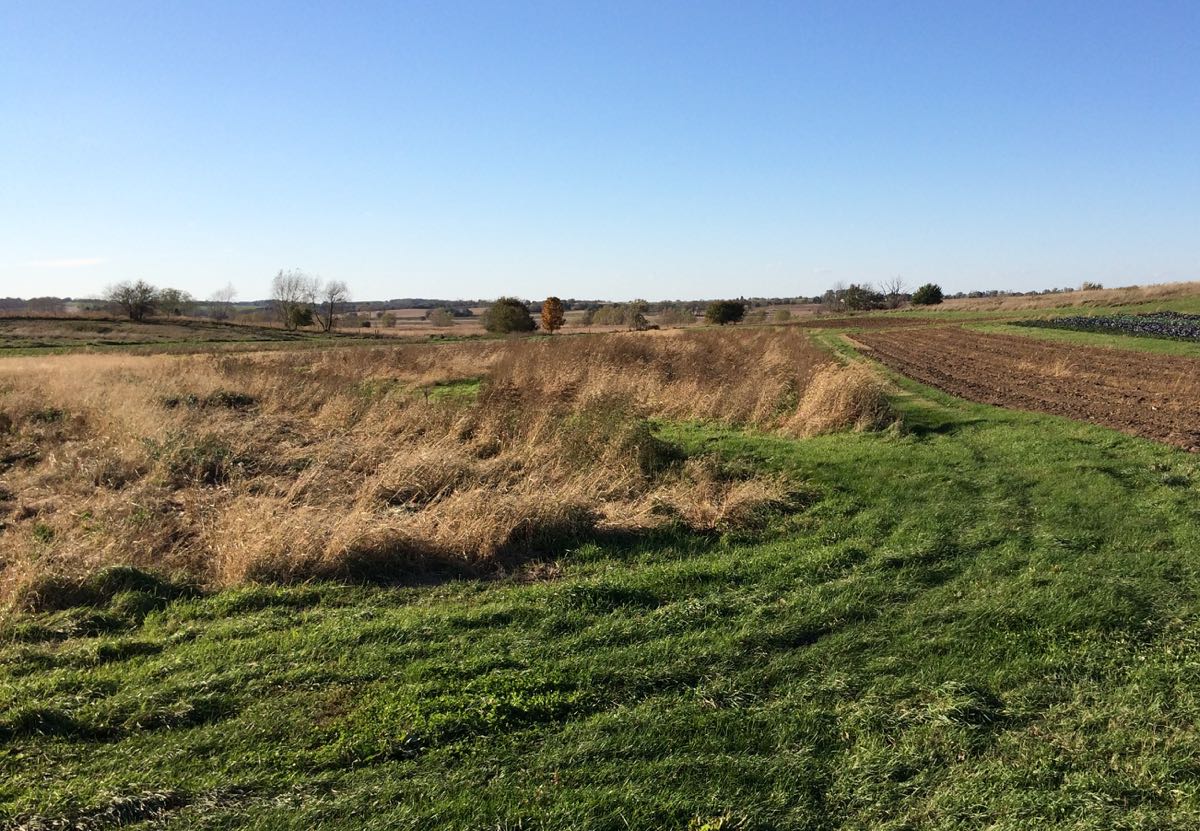
The tall brown grasses are not cover crops. Those are our leek and celeriac fields, buried in weeds. We cultivated several times by tractor but the weeds re-rooted after each rain. Eventually, it was too wet to take a tractor in those fields at all.
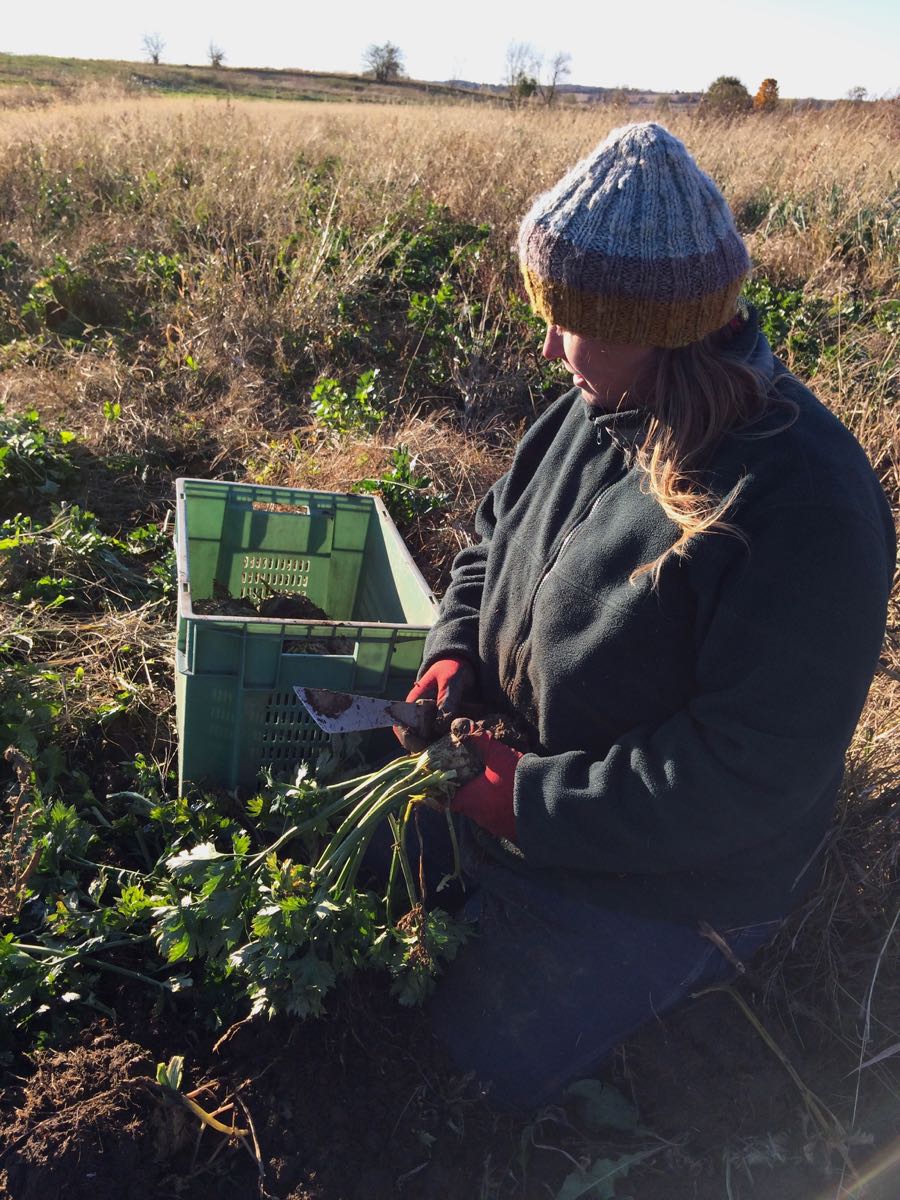
The leeks and celeriac are in there; we just have to dig them out. The celeriac did surprisingly well. The leeks are small.
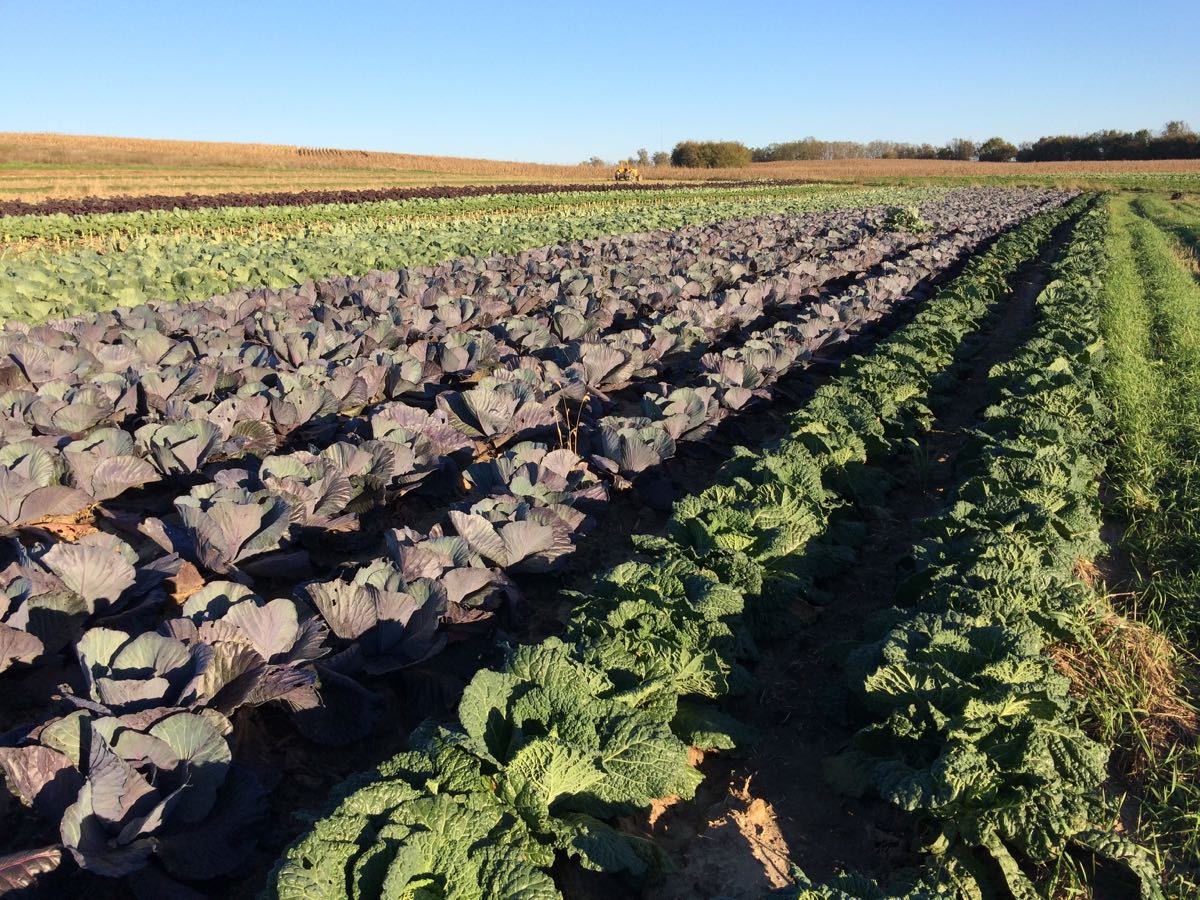
Turn and look up the hill and you find this pristine cabbage field. It’s just a few feet higher in elevation but that was enough for this field to drain and dry more quickly. We were able to successfully cultivate and weed this field and the Koji field shown above. We’re happy to have such nice fall crops. Beth
Veggie List and Veggie Notes
Week #22, Oct 18/19, 2018
– Weekly shares,
– Purple EOW,
– Sun Sampler.
This is the final Sun Sampler delivery.
Red cabbage
Butternut squash
Koji greens
Red beets, 2 lb
Frying peppers, mixed green & red, 6 – 7
Bell peppers, mostly green, ~3
Curly parsley, 1 big bunch
Yellow onion, 1
Red onion, 1
Garlic, 1 bulb
Each site gets one item from this list:
Cauliflower OR purple cauliflower OR Romanesco cauliflower OR broccoli
Next week’s box will probably contain winter squash, Satina potatoes, Brussels sprouts, carrots, celeriac, cauliflower/Romanesco, onions and more.
Red cabbage – This beautiful cabbage is great cooked or raw. We have a favorite winter salad that we make with red cabbage. I’ll include it below.
Butternut squash – This “Nutterbutter” variety is a favorite because it cures and sweetens quickly after harvest. These are golden-orange and delicious.
Storage: Store uncovered at room temperature or a bit cooler. Keep above 55 oF to avoid chilling injury.
Tips for cutting winter squash: Microwave your intact squash on high for one minute before cutting or peeling. That’s enough to warm and soften the squash, making it much easier to cut or peel.
Koji greens – Koji greens are a lot like Yukina if you know that one; dark green with a nice balance of bitter flavor but not too strong. Like tat soi but with larger, lusher leaves and not so many leaf stalks. Recipes that use mustard greens or bok choy will work with Koji.
Beets – Storage: Cover and refrigerate. Beet roots will store for months. Wash well to remove leaf fragments. For all the cooking methods below, wash and scrub the beets but do not peel. The skins slip off easily once the beets are cooked and cooled.
Cooking beet roots on the stovetop: Slice or quarter, cover with water in a pot, and simmer until tender. This will take from 25 to 45 minutes depending on how large the beet pieces are. Drain.
Roasting beets in oven: Wash beets, but do not peel. On a sheet of aluminum foil, put beets (halved or quartered if large), salt, pepper and a few sprinklings of water. Seal the foil packet, and roast at 400 oF until tender, about 45 minutes to 1 hour. Slip off skins once cool.
Microwave: Slice beets in half and place in a large microwave-proof bowl. Add ¾ inch water and cover with a plate. Microwave on high until tender, about 9-20 minutes, depending on your microwave’s power. Drain and slip off skins.
Uses: Use cooked beets in cold salads, or dress simply with vinaigrette, onions, salt and pepper. Beets are also good tossed with sour cream, minced onion, fresh herbs and walnuts.
Frying and bell peppers – These are the last frying peppers but we’ll have a few more bell peppers for you next week. Eat or freeze these soon. Some were picked last week, some were protected from cold under floating row cover. Either approach shortens the storage life. Remember, peppers are easily frozen. Chop raw peppers into bite-sized pieces. Put in a freezer bag or container and freeze. That’s it – there’s no need to blanch them. There’s no need to thaw the entire container at once; you can easily break off and thaw the amount you need. You will enjoy these come winter!
Curly parsley – This is a big bunch. If it’s more than you need, wash and drain well, then chop and freeze in a bag or container. Break off pieces and thaw directly in your dish near the end of cooking.
Garlic – Here’s another German Extra Hardy bulb, with nice fat cloves. We will continue growing this variety!
RECIPES
Visit our 2018 Recipe Log or our 2017 Recipe Log or join our Facebook discussion group.
Beth’s favorite Red Cabbage Slaw
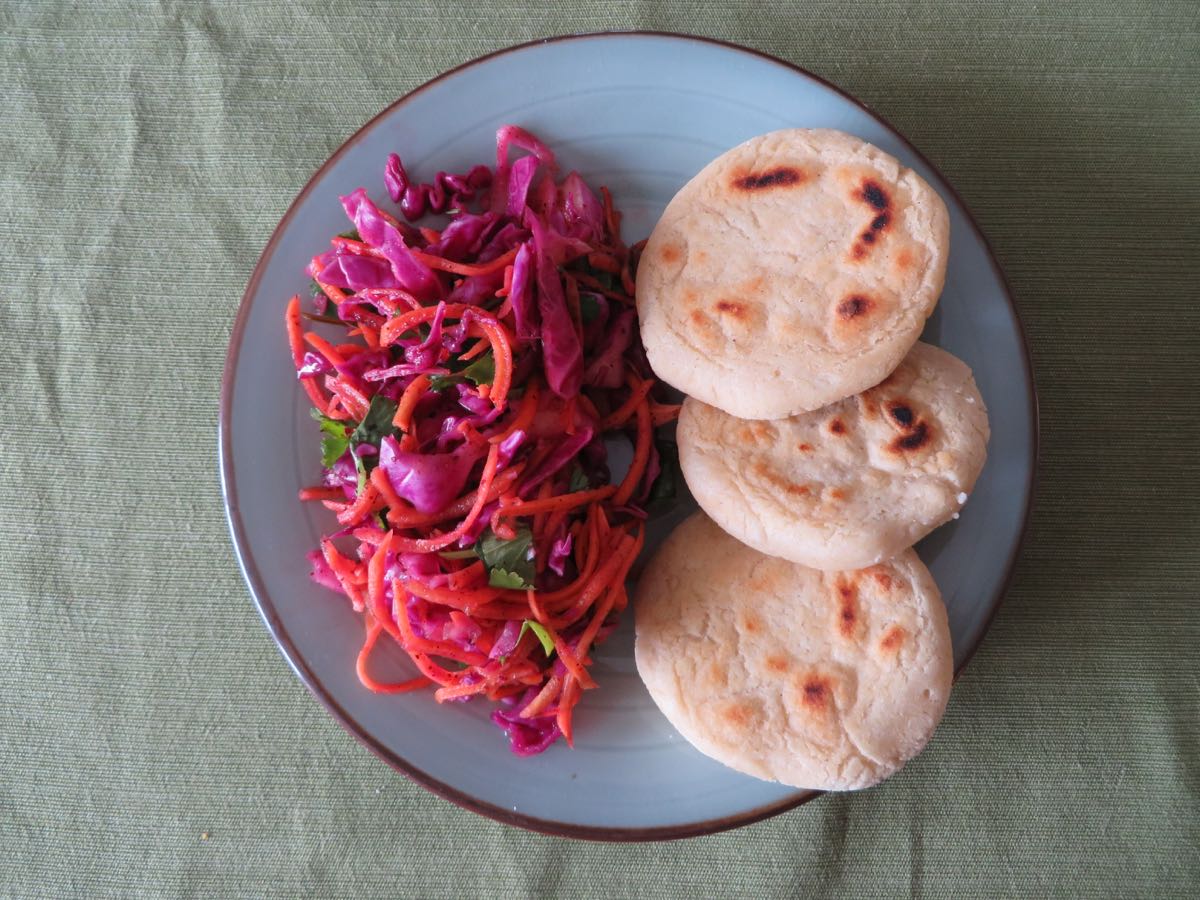
Red cabbage slaw with cheese-filled pupusas. If there’s interest, I can hunt up the pupusa recipe and post in the Facebook discussion group.
Adapted from Taqueria Gila Monster Restaurant’s recipe.
I’ve shared this recipe before but it’s worth sharing again; we seem to survive on this colorful, zesty salad in winter. There are no carrots in this week’s box, but maybe you have a few left over from last week. The slaw holds well, so it’s easy to prepare on Sunday then enjoy throughout the week. Can also be made with green cabbage. Beth
Makes 3 – 4 quarts
.
2-3 lb red cabbage (one small head or half a larger head)
1 lb. carrots
1/2 bunch parsley (good) or cilantro (even better)
1/3 cup freshly squeezed lime juice
1/3 cup apple cider vinegar
1 tsp. salt
1 Tbsp. ancho chili powder
1. Quarter and core the red cabbage. Slice thinly by hand.
2. Peel and grate the carrots.
3. Chop the parsley or cilantro.
4. Toss all ingredients together. Adjust the salt to taste. Let stand 30 minutes before serving. Toss again. Serve as a salad, or as a garnish for tacos or pupusas (pictured above).
LOCAL THYME/ Comforting Classics
Pickled Red Cabbage
Roasted Butternut Squash Puree
Quick Sesame Koji
Beet Salad with Parsley Pesto, Goat Cheese and Pistachios
LOCAL THYME/ Outside the Box Recipes
Black Bean Burrito with Chipotle Butternut Squash and Red Cabbage
Butternut and Ricotta Tart
Pan Seared Chicken Breasts with Curried Peppers and Koji
Beet Chips
LOCAL THYME/ Quick & Easy Meal
Laotian Mung Bean Noodles with Shredded Veggies
RECIPES FROM LAUREN
WARM RED CABBAGE SALAD WITH SQUASH & CHICKEN
Inspired by Epicurious
Takes 1 hour, most of it inactive.
Serves 4 as a meal (8 as a side).
1 tablespoon olive oil
1 teaspoon kosher salt
1/4 teaspoon freshly ground black pepper
1 butternut squash, peeled, halved and cut into 1/4-inch slices
2 pounds beets
1/2 head red cabbage, shredded
1/2 red onion, sliced=
1 grocery store rotisserie chicken (or roast your own chicken if you are feeling really ambitious), shredded (about 5 cups meat)
1 cups walnuts, toasted
4 ounces high quality blue cheese or gorgonzola, crumbled
Maple Balsamic Dressing:
2-3 large garlic cloves, minced
1/4 cup balsamic vinegar
1 tablespoon Dijon mustard
1 tablespoon maple syrup
3/4 cup olive oil
1/2 teaspoon kosher salt
1/4 teaspoon freshly ground black pepper
- Preheat oven to 425 degrees. Toss butternut squash with olive oil, salt and pepper. Roast for 45 minutes tossing once or twice for even browning. Wrap beets in foil and roast alongside the squash for 45 minutes or until they are well-softened (so the peel slips off easily).
- In a large bowl, combine red cabbage and onion.
- In a small bowl, preparing dressing by whisking together garlic, balsamic, mustard and syrup. Add olive oil and whisk until thick and creamy. Add salt and pepper. Taste and adjust seasonings as desired.
- When squash is finishing roasting add to bowl of cabbage along with chicken. Remove beets from foil, slide skins off and then slice thinly. Halve the circles if large. Add to salad.
- Dress as much of the salad as you plan to eat tonight and toss to coat. Sprinkle walnuts and blue cheese over salad and serve warm.
.
GENERAL TSO’S CAULIFLOWER
Adapted (barely) from Pinch of Yum
I can’t take any credit for this totally creative, totally genius way to make everyone’s favorite take-out Asian food at home (and a bit healthier!). I only take credit for sprucing it up with a couple more veggies. This recipe may look complicated with a lot of ingredients and steps but it really comes together pretty effortlessly and the payoff is way worth it. Enjoy! Lauren.
Serves 4 (generously).
Takes 45 minutes.
Rice:
1-3/4 cups water
1 teaspoon Kosher salt
1 cup white rice
General Tso’s Sauce:
1 tablespoon olive oil
1-inch ginger, peeled and minced
3 garlic cloves, minced
1/2 cup chicken (or vegetable) broth
1/2 cup soy sauce (or tamari)
1/3 cup rice vinegar
1/4 cup sugar
2 tablespoons cornstarch, dissolved in 2 tablespoons of cold water
1/2 teaspoon red pepper flakes
2-3 red and/or green Italian fryers, diced (about 2/3 cup)
Fried Cauliflower:
Vegetable oil
1 cup flour
2/3 cup cornmeal
1-1/2 teaspoons baking powder
1 tablespoon Kosher salt
4 eggs
Water as needed (about 1/3 cup)
1 head cauliflower (or purple cauliflower or romanesco cauliflower), cut into bite-size florets
For Serving:
1/2 yellow onion, thinly sliced
1/4 cup finely chopped curly parsley
1 tablespoon sesame seeds
- In a medium sauce pan, bring water for rice to a boil. Add rice and salt. Reduce heat to low, cover and cook for 18 minutes. Uncover and fluff with a fork.
- Heat olive oil in a small sauce pan over medium heat. Add ginger and garlic. Saute for a coupe minutes until fragrant. Add broth, soy sauce, rice vinegar, sugar and cornstarch slurry. Whisk to combine. Bring mixture to a boil, reduce to a simmer, stir in red pepper flakes and cook for 20 minutes until thickened. Stir in diced peppers and set aside.
- Meanwhile, prepare your fried cauliflower. Pour two inches of vegetable oil into a deep, heavy bottomed skillet. Heat over medium heat.
- Prepare your batter by combining flour, cornmeal, baking powder, salt, eggs and water. It should be thick enough to coat the cauliflower but thin enough to easily run off. Adjust this thickness with a little more water if needed. Dump in the cauliflower florets and stir until very well coated.
- Drop a bit of batter into the oil. If it floats to the top, it’s ready. If it sinks, the oil needs to be a little hotter. Once the oil comes up to temperature, fry a quarter of the cauliflower one batch at a time. Cook for 3-4 minutes until golden brown. Drain each batch on fresh paper towels.
- When ready to serve, toss fried cauliflower with General Tso’s sauce. Serve over rice and garnish with some onion, parsley and sesame seeds.
.


