
Welcome!
- On: May 17, 2017
 0
0
Welcome to our CSA! Deliveries begin this week for weekly members and for purple every-other-week (EOW) members. Green EOW, your first delivery is next week, May 25/26 (Thursday/Friday sites). Sampler share members, your deliveries begin June 1/2 (moon group) or June 15/16 (sun group). Go here to print the delivery calendar.
Things you need to know.
♦ On Thursday, we deliver CSA boxes to Evansville, Fitchburg, Madison, McFarland, Middleton and Oregon.
♦ On Friday, we deliver CSA boxes to Brookfield, Janesville, Mequon, Milwaukee, Waukesha and Wauwatosa.
♦ We post this newsletter/blog each Wednesday night, with the list of veggies for the week, quantities, information about storage and preparation, news of the farm, recipe list, and a forecast for the next week’s box. We alert you by email on Wednesday night once the newsletter is posted and ready to read.
♦ Want earlier notice of what will be in the box? Check the sidebar on our website homepage around 7 p.m. on Wednesday night. I’ll post the list under “Box Contents.” I also provide a tentative list for the following week in the Veggie List section of this newsletter. The next week’s list is rarely complete but the items listed are ones we feel confident about.
♦ EOW, sampler and weekly members, we assume you read all the newsletters, even on your “off” weeks. This newsletter (and our emails to you) are our means to communicate with you.
♦ The first few boxes of the season are often the lightest. EOW members, do not worry that you have signed up for the wrong share. Our deliveries get heavier and more abundant as the season progresses.
♦ We will sometimes write “OR” in the produce list, e.g. green leaf OR red bibb lettuce. You will receive one of these crops. All the boxes at each site are identical; we pack the same crops for all the members at each site. Please don’t open other members’ boxes.
Up and Running
Whew, it’s a relief to have our first CSA box almost complete. Soon the produce will be in your hands and you can take over. Our farmhands are back to work after a winter furlough. Steve says we have 10% of our fields planted. We are off to a good start Let’s share a few spring moments.
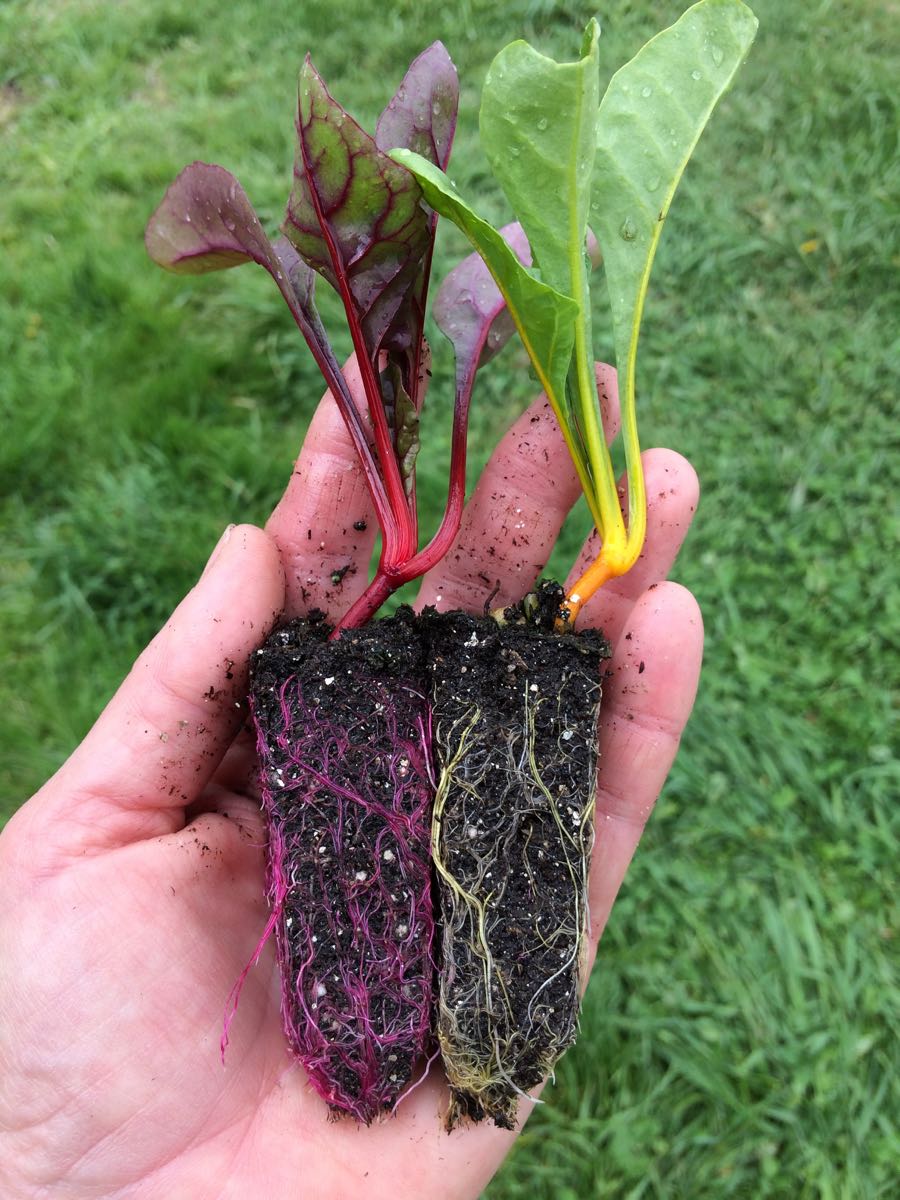
Look what we discovered when transplanting our Swiss chard seedlings. Chard roots are often tinged with color but none of us remember roots this vivid. That’s a red chard seedling on the left and a yellow chard seedling on the right.
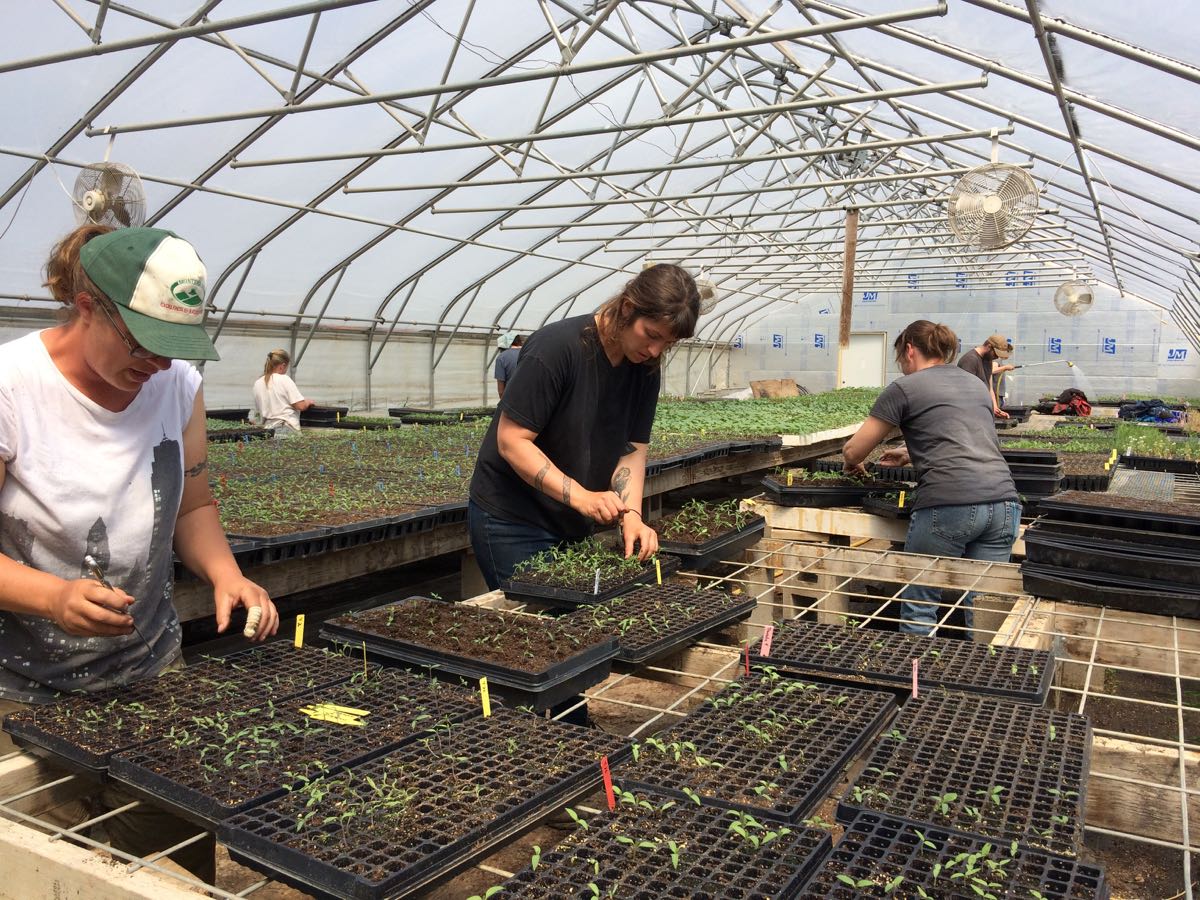
Many spring projects are group efforts. From left, Kristin, Simone, Smitty (in back), Charlotte, Karen, Jim and Kelsie repotting tiny pepper seedlings into bigger pots. We start the seeds in small plug trays to save greenhouse space in early spring when it’s costly to heat the greenhouses. Soon we can turn the heaters off. The transplanting job is a favorite; the work is social and the greenhouse is warm and cozy on sunny days.
![]()
Whenever possible, we prefer to nurture seedlings in the greenhouse then transplant them outdoors once big enough. It’s a great system for slow-growing seedlings like the celeriac being transplanted in the photo above. Simone drives the tractor. Jim, Smitty and Kelsie drop seedlings into the transplanter cups. Karen double-checks planting depth. Lush cover crops ripple in the background.
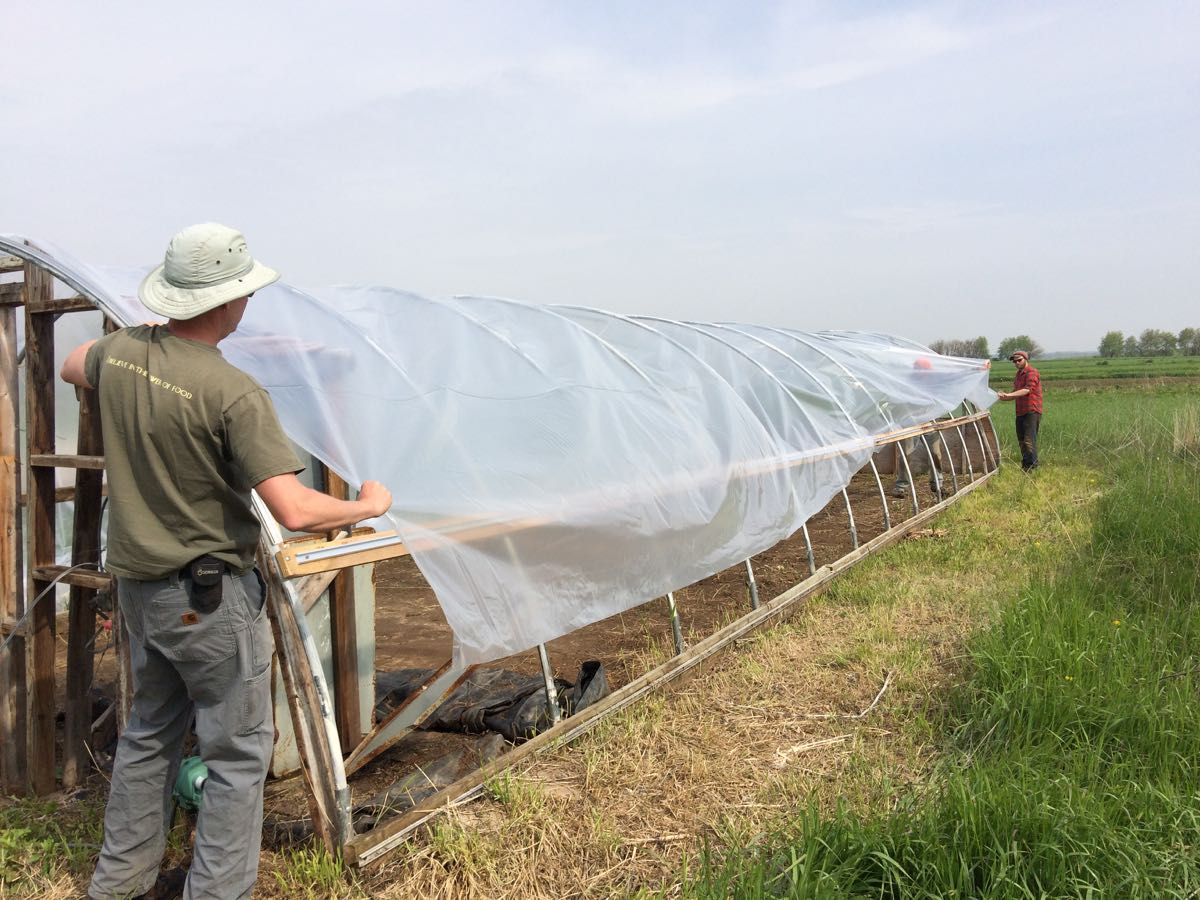
Matt and Kristin replace the plastic on one of our smaller greenhouses where we will grow celery this summer. This is a new experiment but we’ve read that it’s a good way to grow high-quality celery.
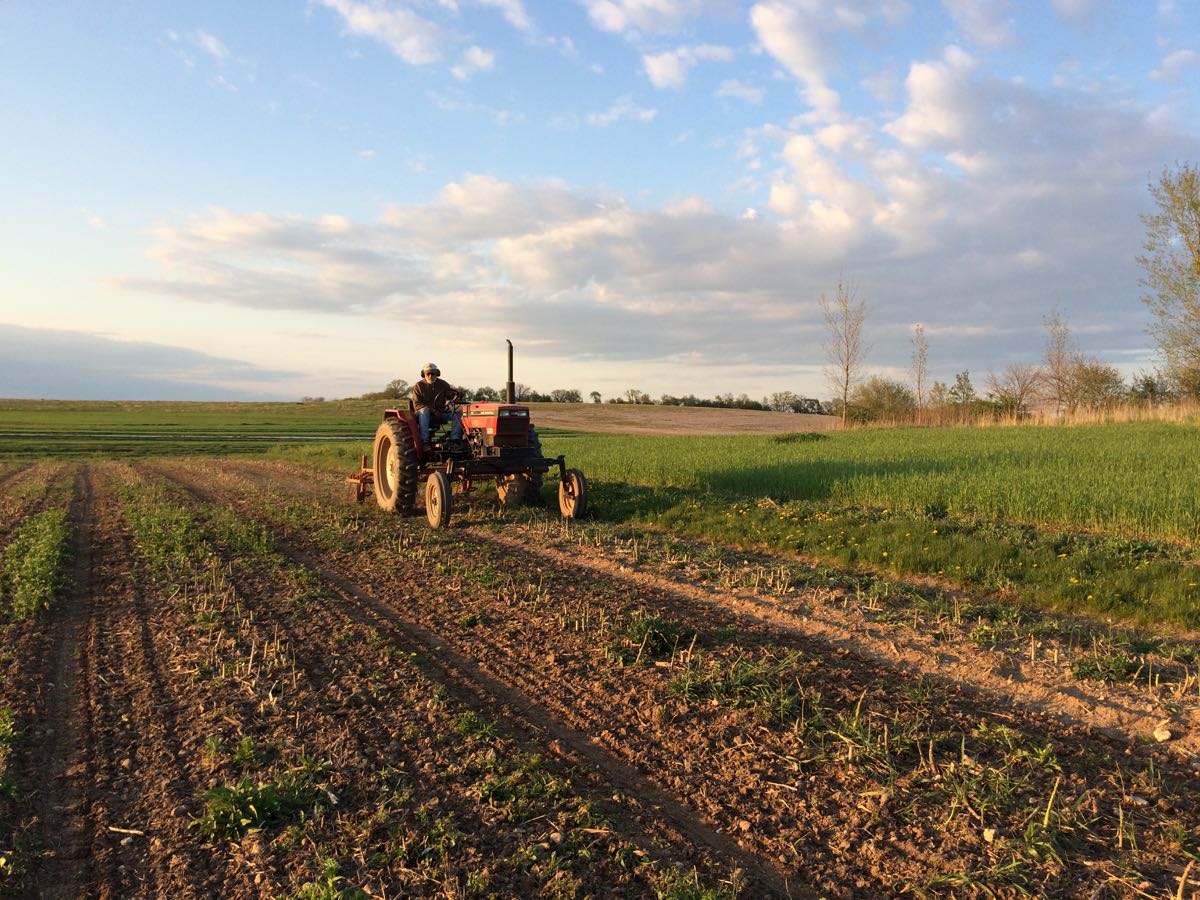
Steve enjoys a quiet moment cultivating the asparagus field.
Veggie List and Veggie Notes (May 18/19, 2017, week #1, purple EOW)
Read this section each week for specific information about the produce. For example, see our notes below about how to extend the storage life of your lettuce and spinach. I provide detailed notes on each crop only the first week we pack it. This is another reason to read our newsletter each week.
Asparagus, 1 lb
Oneida Gold potatoes, 3.5 lb
Spinach, 1 bunch
Bok choy
Red leaf lettuce
Salad radishes, 1 bunch
Green garlic, 1 bunch
Rhubarb, 2 lb
Next week’s box will probably contain asparagus, rhubarb, mushrooms, lettuce, spinach, radishes, green garlic and more. Watch next week’s newsletter for the final list.
Asparagus – Enjoy this spring treat! Your asparagus will be green or purple. The purple variety turns dark green when cooked. Its flavor is almost identical to normal green asparagus. Wash your asparagus thoroughly to remove hidden grit. Submerge in water, soak briefly, then swish vigorously and pull out of the water with the tips pointing down. The draining action helps pull the grit out of the asparagus tips. Repeat several times.
Storage: Asparagus is perishable, so eat it as soon as possible. Store it in the paper bag we packed it in, and wrap loosely in a plastic bag. The paper bag protects the asparagus tips from direct contact with the plastic bag. The plastic bag keeps the asparagus from wilting.
Preparation: We snap our asparagus at harvest, rather than cutting. Therefore, there is no need to snap the stalks to remove fibrous ends. For the same reason, it is not necessary to peel the asparagus stalks. It’s OK to trim the end a bit.
Cooking: If your asparagus stalks vary greatly in size, you will want to cook the thicker ones longer. Put the asparagus in a steamer pot over water. Alternatively, you can lay spears flat in the bottom of a broad pan, with ½ inch of water. Cover and steam over medium heat until just tender. Use two forks or a spatula to turn the asparagus during cooking, rotating the bottom spears to the top. Drain and serve. Also excellent broiled or grilled. Good dressed with vinaigrette, or simply with lime juice, salt and pepper.
Oneida Gold potatoes – Please refrigerate these potatoes. They are in great shape now but will sprout within days if stored at room temperature. They’ve been stored all winter and want to grow. Store in a paper bag to protect from light, even in the fridge. We grow everything we send in our CSA boxes except potatoes, some of the garlic, and mushrooms, all of which we buy from organic growers that we trust. We purchased these potatoes from Jesse Perkins at Vermont Valley Farm. This is a new variety for all of us. Jesse says “It is a very good all-purpose potato. They are very good eating.” He also says the potatoes have a higher sugar content because of starch to sugar conversion during cold storage. The potatoes taste a bit sweet, and will blacken slightly when fried. It’s a harmless color change due to the sugar conversion.
Lettuce and spinach – Wash your greens to remove grit splashed into the heads by rain. Cut to the size you like, submerge in water, swish gently, then pull from the water and drain in a colander. Some weeks, you will need to repeat in fresh water.
Storage hint – To extend the storage life of your tender greens, wash them, dry in a salad spinner, then store in a dry container or bag. Lettuce and spinach last much longer when handled this way.
Bok choy (large rosette with thick white stems and green leaves) – This Asian green is good for stir-frying or sautéing or in soup. You can think of the stems and leaves as two separate vegetables. The stems require longer cooking. The leaves will cook almost as quickly as spinach. Bok choy stores well, so feel free to pull off leaves as you need them, or use the whole head at once. Refrigerate in a plastic bag.
Green garlic (looks like scallions, tastes like garlic) – Last fall, we planted garlic cloves that grew into the stalks we harvested this week. If left to grow until mid-summer, the slim white bulb on this week’s garlic would divide and form the usual cluster of cloves in a garlic bulb. This year’s green garlic is robust. I’ll write more about that next week; t’s the result of a few years’ effort.
Preparation: Green garlic is more pungent than scallions, so slice thinly and use sparingly when raw. It mellows when cooked. Chop and add to any cooked dish that would benefit from garlic. Use the white bulbs and pale green stems. Avoid the dark green stems and leaves, as these are fibrous.
Rhubarb – Refrigerate in a plastic bag. FYI, 2 lb of rhubarb yields 6 – 6.5 cups when chopped.
Stewed rhubarb: This is the simplest way to prepare rhubarb. Chop rhubarb into one inch chunks. Stir over medium heat with a small amount of water in the bottom of the pan. The rhubarb will release moisture as it cooks. Stew until it softens and falls apart. Sweeten to taste with honey or sugar. Eat warm on its own, over vanilla ice cream, on pancakes, etc.
Recipes from chef Pat Mulvey at Local Thyme
Comforting Classics
Asparagus and Spinach Risotto
Rhubarb Preserves
Hot Pot with Tofu, Noodles, Bok Choy and Radish
Patatas Bravas with Smoked Paprika Aioli
Outside the Box Recipes
Potato and Asparagus Soup with Lemon Butter Braised Asparagus Tips
Rhubarb Baked Beans
Grilled Chicken or Tofu and Spring Vegetables
Potato, Spinach and Sausage (or Mushroom) Frittata with Parmesan
Quick and Easy Meal
Warm Asparagus, Potato and Egg Salad
Recipes from Lauren
SPRING DREAM SALAD with PICKLED RHUBARB & CANDIED WALNUTS
Just the greens, radishes, walnuts and pickled rhubarb with the creamy honey dressing is plenty to make your lunchbox sing, but I love to toss in some avocado for added creaminess and a little extra heft. If you don’t have one on hand or don’t feel like buying the very non-local ingredient, feta cheese makes a great substitution.
Serves 2-4 as a meal or 6-8 as a side dish
Takes 30 minutes (though rhubarb is best if made the day ahead so it can chill)
2/3 cup walnuts, halved or chopped
1/4 teaspoon Kosher salt
1/4 teaspoon cayenne pepper, optional
2 tablespoons honey
1/2 bunch spinach, roughly chopped
1 head lettuce, roughly chopped
1 bunch radishes, sliced
1 avocado, sliced in half, core removed and sliced, optional
Pickled Rhubarb:
1/2 cup apple cider vinegar
1/2 cup water
1/2 cup sugar
1/4 teaspoon Kosher salt
1/4 teaspoon black peppercorns
1/4 teaspoon cardamom
5 cloves
1/2 pound rhubarb, ends trimmed, cut into 1-inch piece
Honey Vinaigrette:
6 tablespoons olive oil
2 tablespoons apple cider vinegar
2 tablespoons honey
1 teaspoon mustard (I use stone-ground but Dijon will work well too)
1/4 teaspoon Kosher salt
Freshly ground black pepper
- Prepare the pickled rhubarb first so it has time to cool. It’s even better if you can make the pickled rhubarb a day in advance. Bring vinegar, water, sugar and salt to a boil in a small saucepan.
- While waiting, pack a pint-sized mason jar with black pepper, cardamom and cloves followed by rhubarb. Once the pickling mixture is boiling, pour it over the rhubarb. Seal and allow to cool before putting in the fridge to chill. Will store in the fridge for several weeks.
- In a large skillet, toast walnuts over medium heat for five minutes. Add salt, cayenne and honey. Cook 3-5 minutes longer until well toasted and honey just starts to turn a darker shade of brown. Pour out on a piece of wax paper or parchment to cool and prevent clumping.
- Whisk vinaigrette ingredients together in a small bowl until smooth and even. The mustard will help your dressing emulsify and stay together.
- Strain pickled rhubarb (or as much as you plan to use).
- Prepare salads by tossing spinach and lettuce together in individual bowls. Add pickled rhubarb, candied walnuts, avocado or feta, if using, and top with sliced radishes.
- Enjoy the healthy spring welcome!
.
MASHED POTATO FRITTERS
Serves 4
Takes 30 minutes (more if you have to make mashed potatoes first)
2 cups leftover mashed potatoes, cold is fine (actually it’s better)
1/2 bunch spinach, finely chopped
2 teaspoons minced green garlic
1/2 cup breadcrumbs
2 eggs, divided
1/2 teaspoon Kosher salt
1/4 teaspoon freshly ground black pepper
2-4 tablespoon vegetable oil, divided
- Combine leftover mashed potatoes, spinach, garlic, breadcrumbs, 2 eggs, salt and†pepper together in a large bowl until well-mixed. The batter will be pretty wet.
- In a large skillet (preferably cast-iron or something that can go in the oven), heat 2 tablespoons of oil over medium heat until it glistens. Add a 1/4 cup of batter (it can be heaping) into 4 piles with some room between them. You don’t want them to be crowded so if you can’t fit the 4 then just do a few more batches.
- Reduce heat to medium low and cook until the bottom of the fritter is golden brown, 3-4 minutes. Flip gently and then press down with your spatula to make a pancake. Cook another 4-5 minutes until golden brown and cooked through. Place on a paper towel, add remaining vegetable oil to pan (if you need it) and repeat with remaining batter.
- I love to serve these with eggs on top, a side of bacon and roasted asparagus. Sometimes we even get fancy and make hollandaise sauce on a lazy Sunday. That’s truly the best and what I’ll be serving up for a belated Mother’s Day feast!


