
Yearly Archives: 2019
Storage Share, Nov. 21/22, 2019
- On: November 20, 2019
 0
0

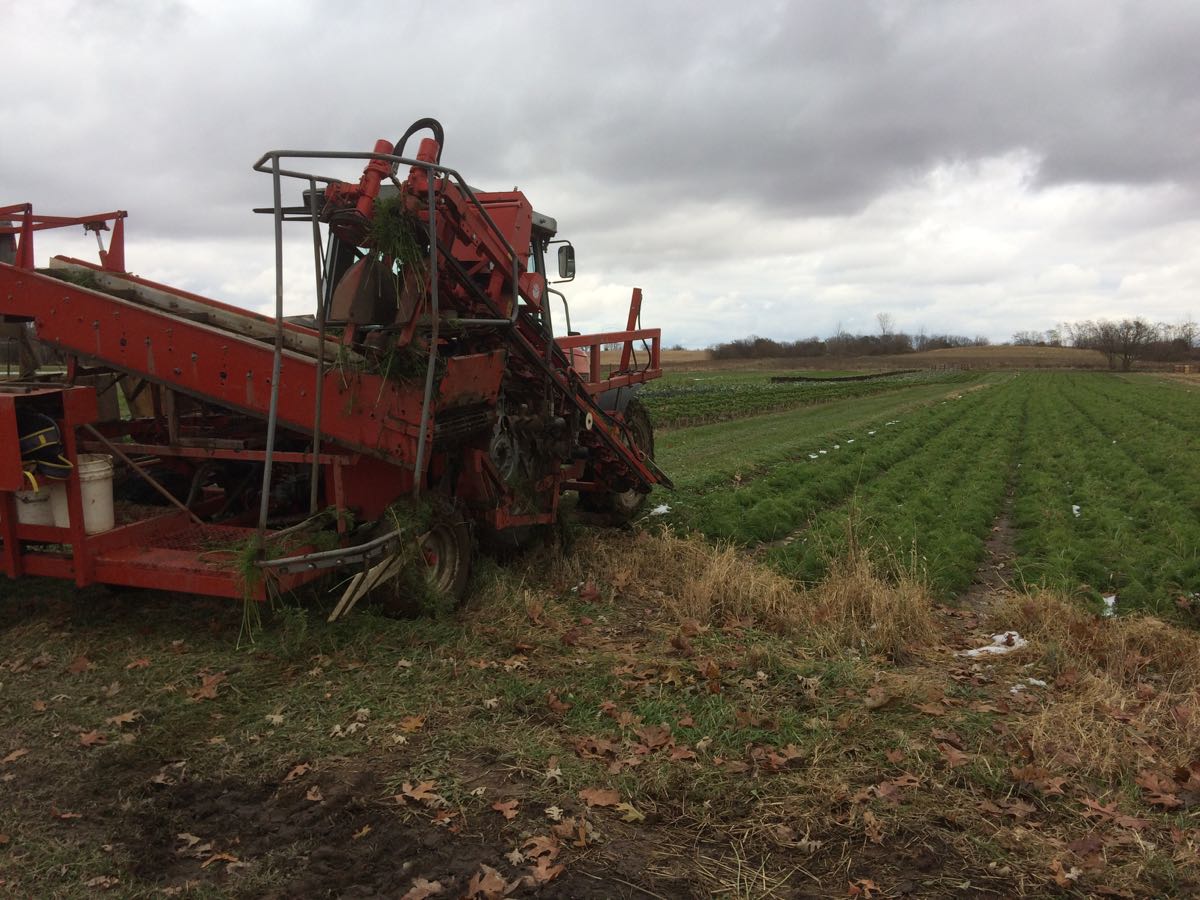
We ended the season with all our equipment covered in mud, including this very muddy carrot harvester.
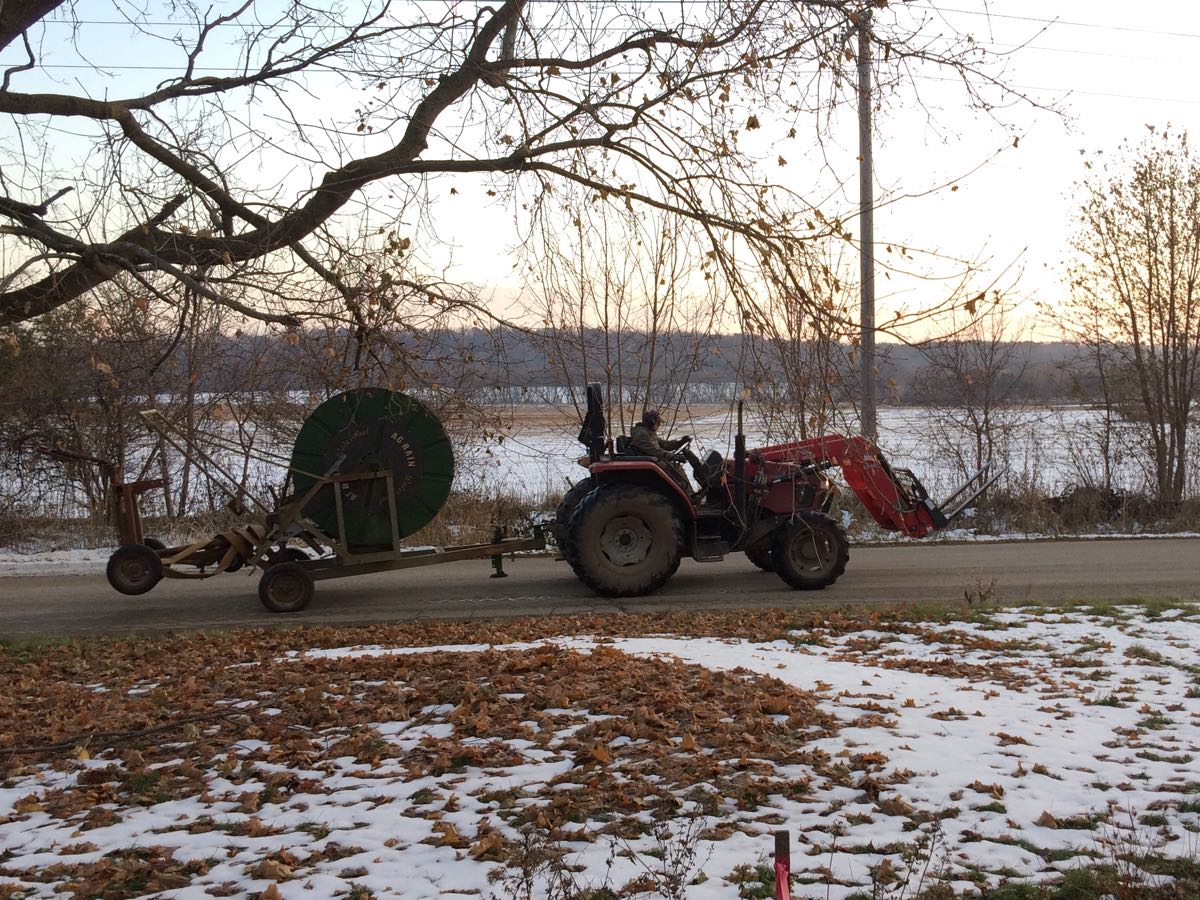
Steve takes our irrigator to overwinter in the neighbor’s shed. It didn’t get much use this year.
Our season is DONE. Often, we’re still harvesting in November but the cold weather ended our outdoor work. We are very grateful for the recent warm-up. It makes everything easier, including getting this Storage Share ready. The warmer weather has given us a chance to clean equipment before putting it away in storage until spring. We worried that we’d have to put everything away covered in mud.
Now we look forward to winter, with lots of cooking, ice skating and skiing (we hope!) before planning next season. Have a wonderful Thanksgiving! Beth & Steve
Storage Share this week
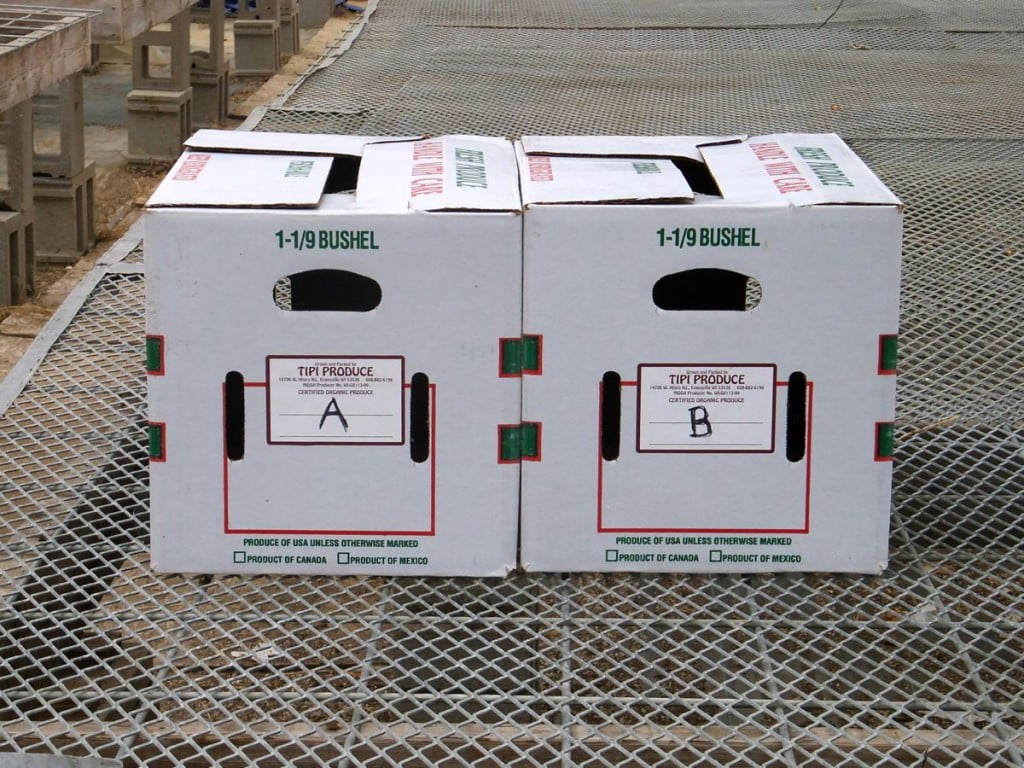
Take one box labelled “A” and one box labelled “B”.
Things you need to know about your winter share
* Your delivery will consist of two different boxes, labeled “A” and “B”. Take one “A” box and one “B” box. The boxes contain different vegetables.
* Please pick up your boxes on the day of delivery, during the normal hours for your site.
* Outpost members, pick up your boxes on Friday. This is the busiest weekend of the year for the Outpost staff, so they WILL NOT hold boxes past Friday, nor can they handle special requests.
* Members at unheated sites, please replace the blankets carefully. That keeps everyone’s produce in good shape.
* Bring lots of bags to take your produce home. It’s a lot of produce!
Veggie List and Storage Info (Storage share, Nov. 21/22, 2019)
We hope you enjoy this shipment of veggies. Strategize to use them well, as some will last longer than others.
* These are the most perishable vegetables: kale, the green parts of the leeks
* These are the next-most perishable: Brussels sprouts, cabbage, the white parts of the leeks, and onions. Keep an eye on your butternut, potatoes and sweet potatoes. The last two are susceptible to drying out. Expect the largest butternuts to last the longest.
* These will last the longest: daikon radish, beets, carrots, celeriac, garlic, parsnips.
Box “A”
Refrigerate everything in this box.
Beets, 3 lb
Brussels sprouts, on stalks
Carrots, 6 lb total
….. orange ~4 lb
….. yellow & purple ~2 lb
Celeriac, 1
Daikon winter radishes, several
Green cabbage, 1 medium or 2 small
Kale “garnish”
Leeks, ~3 lb
Parsnips, ~3 lb
Box “B”
The Brussels sprouts need refrigeration. Everything else in this box can be stored cool or at room temperature. See notes below for more detail.
One more Brussels sprouts stalk
Butternut squash, 9 – 10 lb
Garlic, 3 bulbs
Onions, 5 lb total
….. ~1 lb red
….. ~4 lb yellow
Potatoes, russet, 5 lb
Potatoes, Satina, 5 lb
Shallots, 2
Sweet potatoes, ~10 lb
Beets – Refrigerate in a bag or container. Beets will store for two months or longer.
Brussels sprouts – Pluck from stalks and refrigerate in a bag or container. Do this the day you pick up your CSA boxes. Eat within 2 to 3 weeks.
Butternut winter squash – You will receive ~9 lbs of squash. Store your butternut in a cool, dry place. 60 F is ideal. Do not put in a plastic bag. Expect the largest butternuts to store the longest. Inspect your squash frequently and cook promptly if you see any soft spots developing. You can cook, mash and freeze the squash for future use. I find that you can refrigerate cut raw squash for up to one week. This runs counter to the accepted way to store squash, but is useful if you want to cook just half a squash. Try microwaving your squash for one to two minutes before cutting or peeling. This softens the squash and makes a large butternut easier to handle.
Cabbage – Refrigerate.
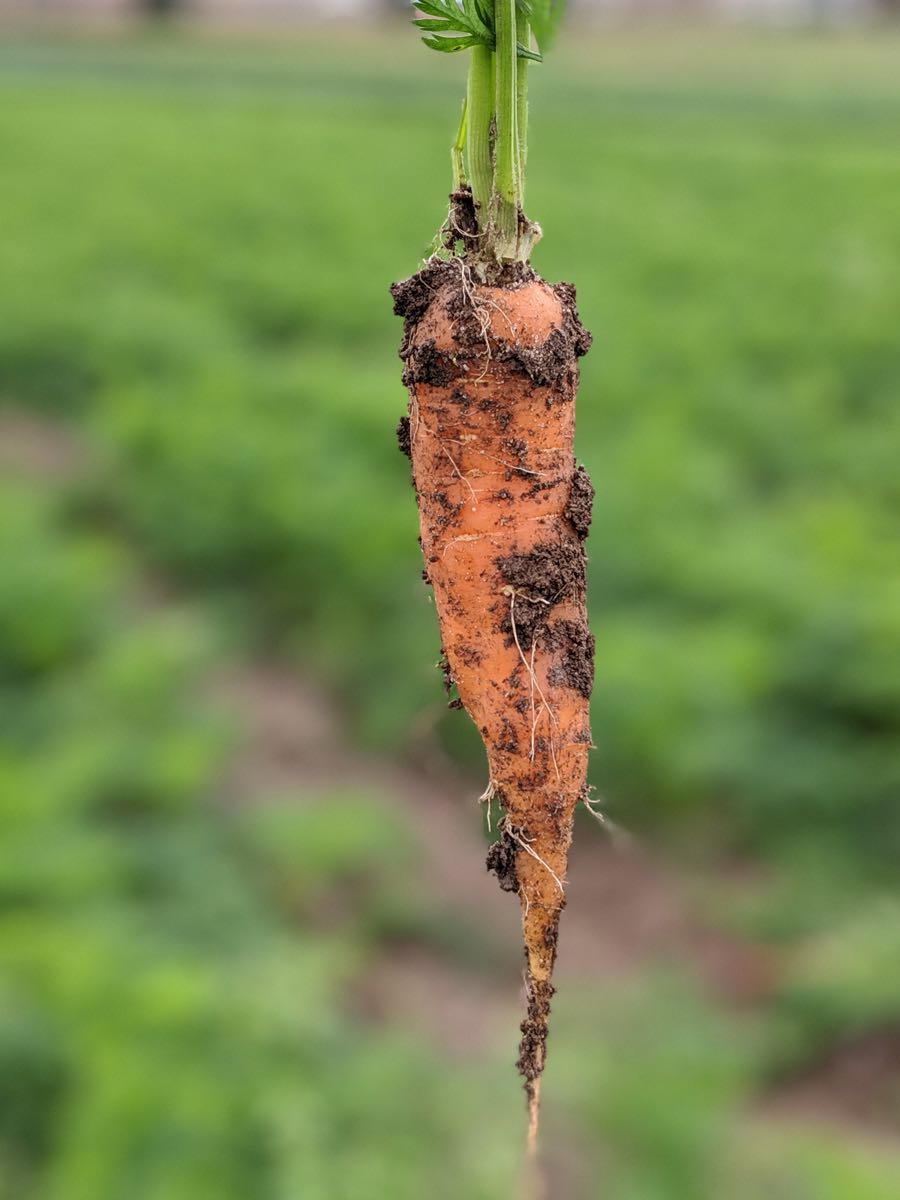
Carrots, orange. Refrigerate in a plastic bag. Will keep for several weeks.
Carrots, yellow & purple. These varieties are pretty AND they taste good.
Celeriac – Will store for months in your fridge. Cut off chunks as needed. Peel before using. I find it easiest to cut the celeriac into flat slices, then peel.
Daikon radishes (oblong, white or purple) – Refrigerate. The interior color of the purple ones is lovely. Slice thinly and add to salads, cook lightly in mixed vegetable medleys or cut into matchsticks and add to pasta salads. We enjoy grated carrot and daikon salads all winter.
Garlic – Store at room temperature.
Kale – It is tiny. We rarely send something so small. However, that was the last thing our crew harvested on a cold, dim, muddy day. They were so proud of what they accomplished that now we have to use it. Tuck it in a dish or use it as a garnish. The crew brainstormed and they think it would make a great corsage for the Thanksgiving cook in your household. Storage: Refrigerate and use soon.
Leeks. The bottoms (white part) will store longer than the tops (green and pale-green parts). We suggest that you cut off and use the tops first. It’s unconventional but you’ll be able to store the bottoms for longer. In general, leeks are not a long-storage crop. You may need to strip off one or two outer leaves to freshen the leeks before you cook them.
Onions: Refrigerate or store in a cool, dark spot and protect from light. Exposure to light stimulates sprouting. If you have the room, it’s safer to store the onions in the refrigerator. After the wet fall, they might not last as long as usual.
Parsnips (These look like large white carrots.) – Refrigerate in a plastic bag. Parsnips will store for several months but will darken in color. That is a harmless change.
Potatoes; russets and Satinas – Can be stored at room temperature or in a cool spot, but must be kept in the dark so they do not turn green. A cloth or loose plastic bag draped over the paper bag will slow moisture loss, but do not close the plastic bag. Both types will store longer if kept cool. Around 40 – 50 F is ideal. The potatoes were grown by the Igl family near Antigo.
Russets– We got the big ‘baking’ grade so you have nice bakers for Thanksgiving. Excellent for baked or mashed potatoes.
Satinas– These are good all-purpose potatoes, everything from roasted to potato salad. I really like this variety of yellow potato because they oven-roast so well and because they are less sweet than other yellow varieties such as Yukon Golds.
Shallots (look like small red onions) – Good for salad dressing.
Sweet potatoes – These are the Covington variety, with excellent flavor and sweetness. Store at room temperature, no lower than 55 F, but 60+ F is better. Keep them on your kitchen counter where it’s easy to keep an eye on them. I like to keep ours in a paper bag so they don’t dehydrate. Cook promptly if they start to soften. The roots come in a wide ranges of sizes and all are good.
Recipe Ideas
I will not try to sway your Thanksgiving menus. I bet you have your dishes chosen, perhaps based on family tradition. However, this is a great time of year to gather recipes to enjoy all winter. You should peruse online cooking sites while they are feature Thanksgiving menus, many of which are suited to your Storage share vegetables. Bookmark the recipes soon; Thanksgiving collections are taken down quickly after the holiday. I have a huge list of recipes bookmarked to delve into this winter.
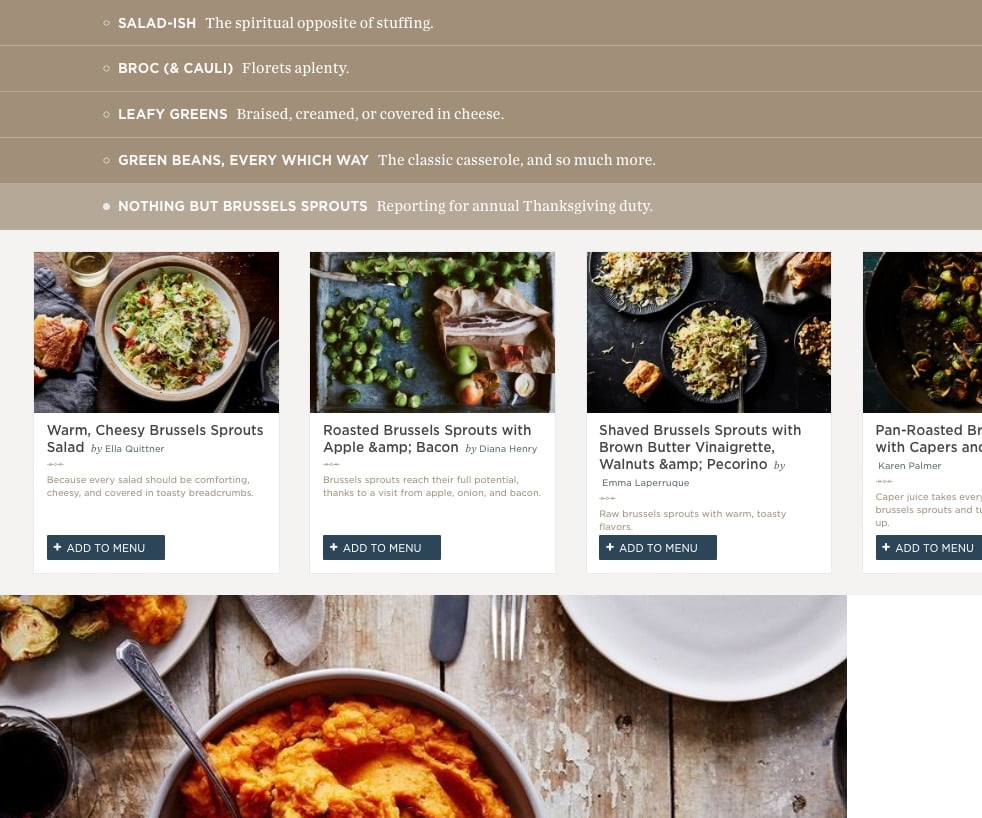
One small corner of Food52’s Thanksgiving Menu Maker.
♦ Once again, the lively Food52.com site has outdone itself with a fantastic Thanksgiving recipe collection. They call it their “AutoMagic Thanksgiving Menu Maker“. It’s organized by type of dish, e.g.
. “Gratins; Lots of creamy layers,” and
. “Veggie Packed Stuffing; Bring on the fall bounty”, and
. “Nothing but Brussels sprouts; Reporting for Thanksgiving Duty.”
Section #6 (“Orange Sides”) is extensive. I’m gathering a suite of recipes to try this winter. First stop will be “The Absolute Best—& Worst—Way to Make Mashed Potatoes, According to So Many Tests.” The tag line is “I spent 14 hours alone with only potatoes, and I did it for you.” Yes, they are amusing.
♦ Smitten Kitchen is our go-to site for dessert recipes but has excellent veggie recipes too. You can follow her Thanksgiving preparations or go straight to an amazing list of Thanksgiving recipes from previous years. I’m itching to try her Roasted Cabbage with Walnuts and Parmesan recipe.
♦ The Dishing Up the Dirt site doesn’t have a specific Thanksgiving section, but many of her recipes are tailored to Storage share produce.
♦ Halfbaked Harvest has appealing dinner and salad ideas, and gorgeous food photos.
♦ Finally, remember that we can use Local Thyme recipes all winter. Check them out for Thanksgiving ideas.

Extension Share, Nov. 7/8, 2019
- On: November 06, 2019
- 0
Extension Share
This is a stand-alone share, for those who registered. Our regular CSA season ended last week.
Mad dash
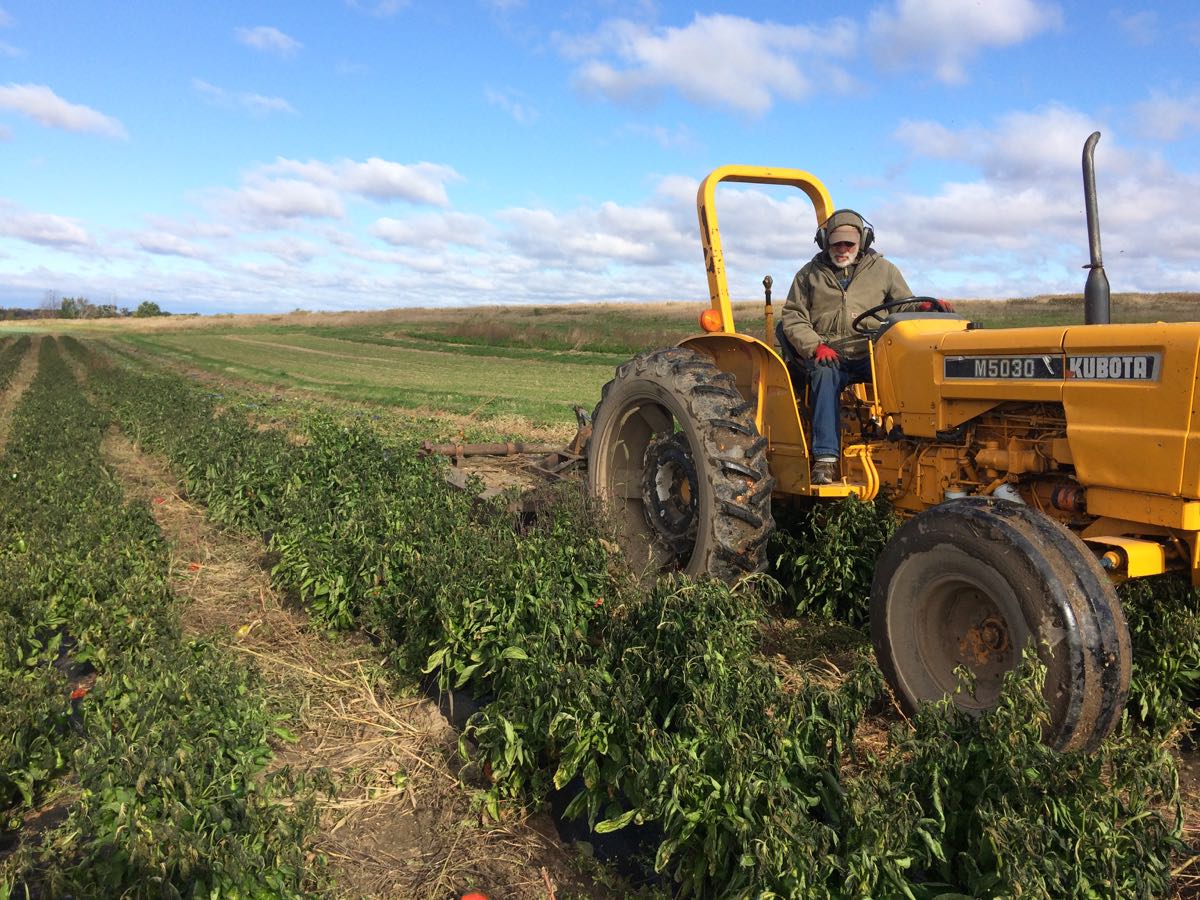
Folks, this is insane weather. Take a look at the forecast. Monday night is projected to be 8 degrees, followed by a string of nights almost as cold. We had no choice; in the last 10 days, we have sprinted through a month of harvests. It looked like Tuesday would be our last possible harvest. The day ended with almost all crops gathered except a field of parsnips still in the ground. That tainted our relief at getting almost everything finished. Then we got a reprieve! This morning’s snow skipped us, so Steve, Maggie and a few others got the harvester out and dug the parsnips. It was cold and windy but had to be done. The tractor and harvester ended the day completely covered in mud. Hopefully there will be a warm day to clean them before storing for winter.
Our field work is done. We are tired and our crew is tired, but we are thrilled to grub our way to the end of the field season. Thank you for being Tipi members this year! Beth & Steve
Weekend warriors. Steve and I spent the entire weekend harvesting carrots. Do you see the patches of snow between the carrot rows? We could not waste the weekend days.
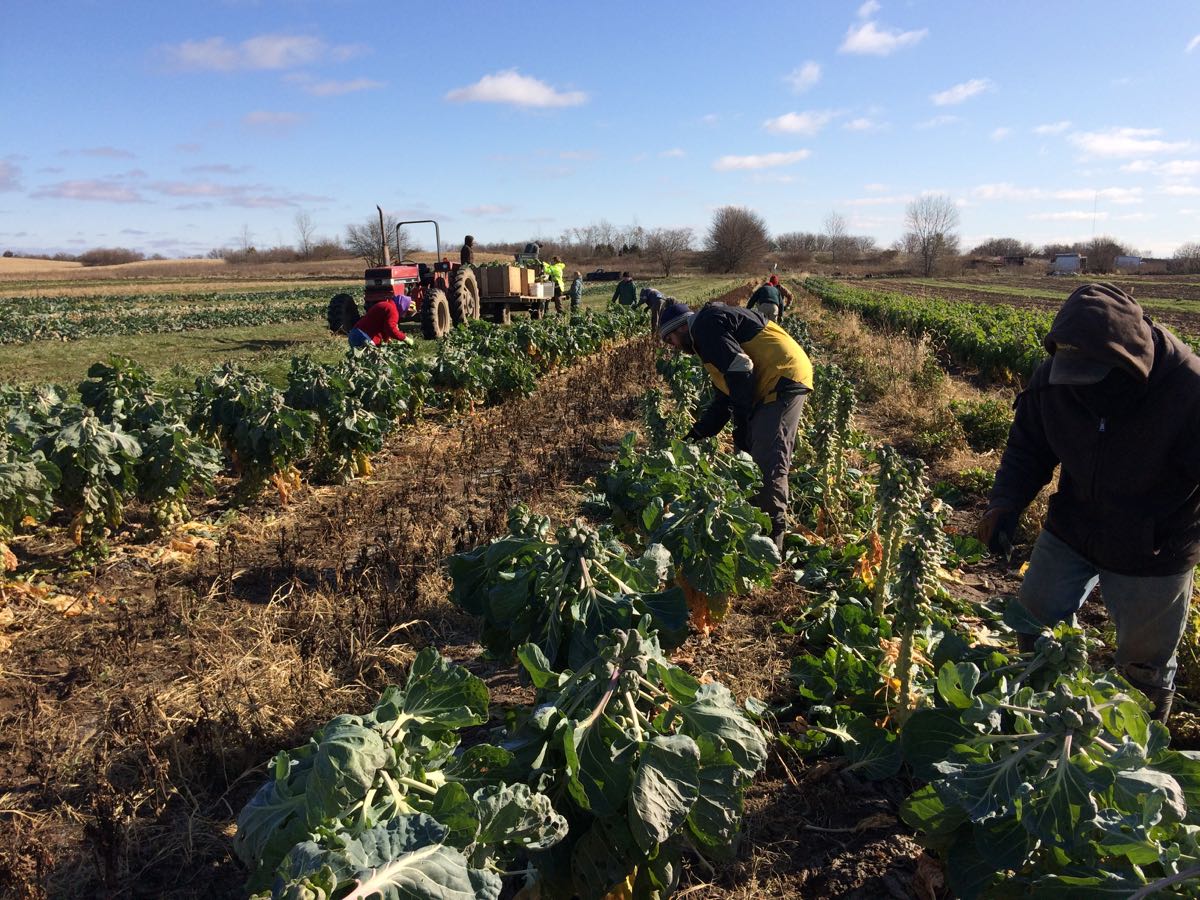
Only the most cold-hardy crops were still in the field on Tuesday. We made a mad dash through the Brussels sprouts field, cutting and piling stalks into bins. We worked indoors today to pluck the sprouts from the stalks.
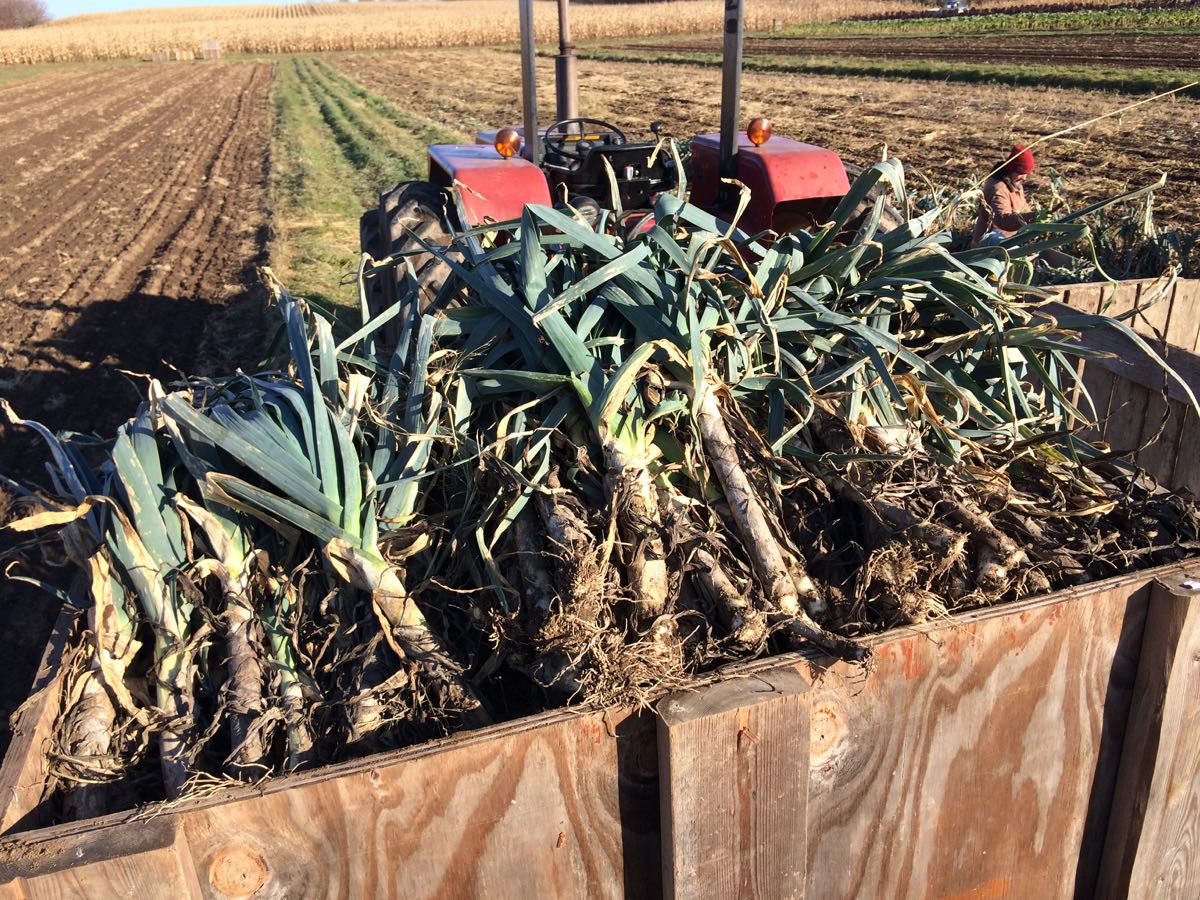
We filled bins with leeks too, then brought them back to the buildings to clean up.
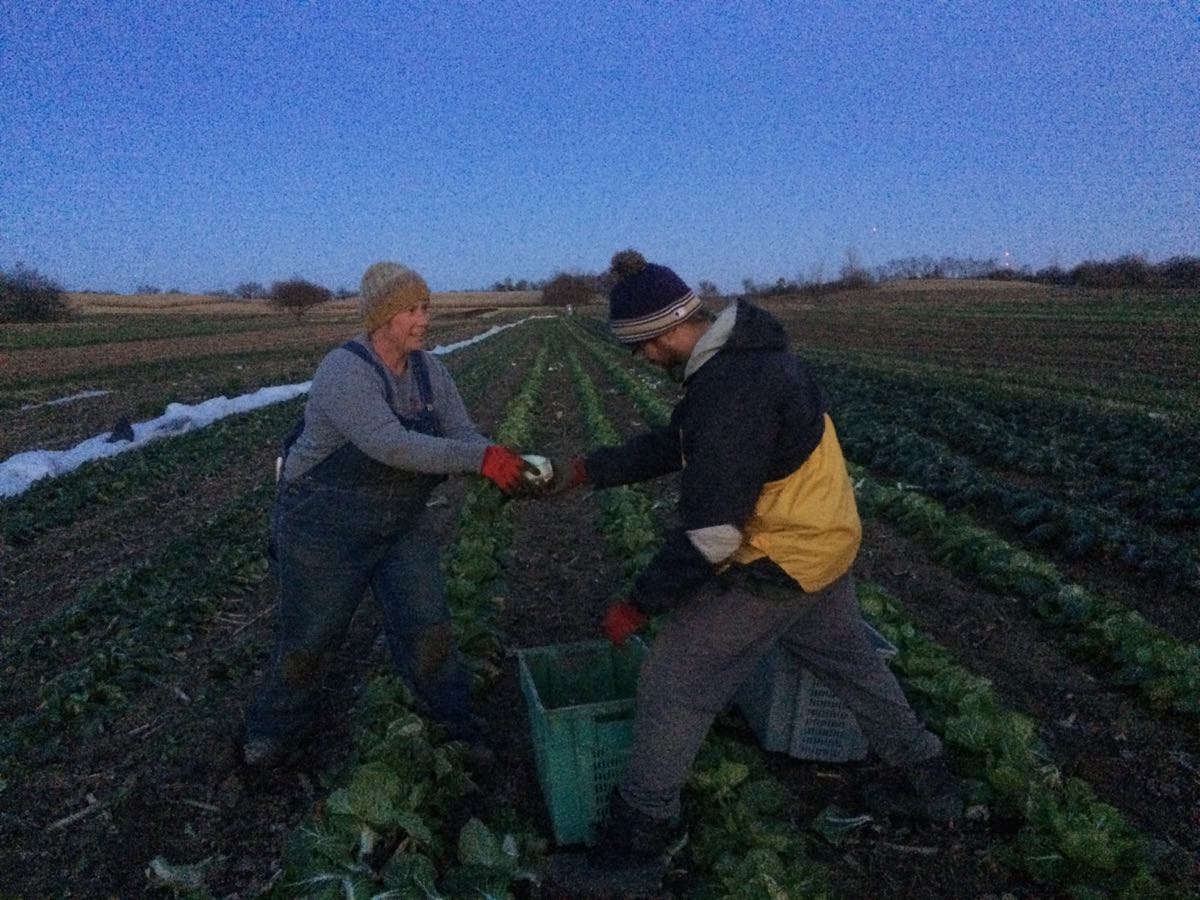
At dusk, Maggie and John raced to harvest the last napa cabbage.
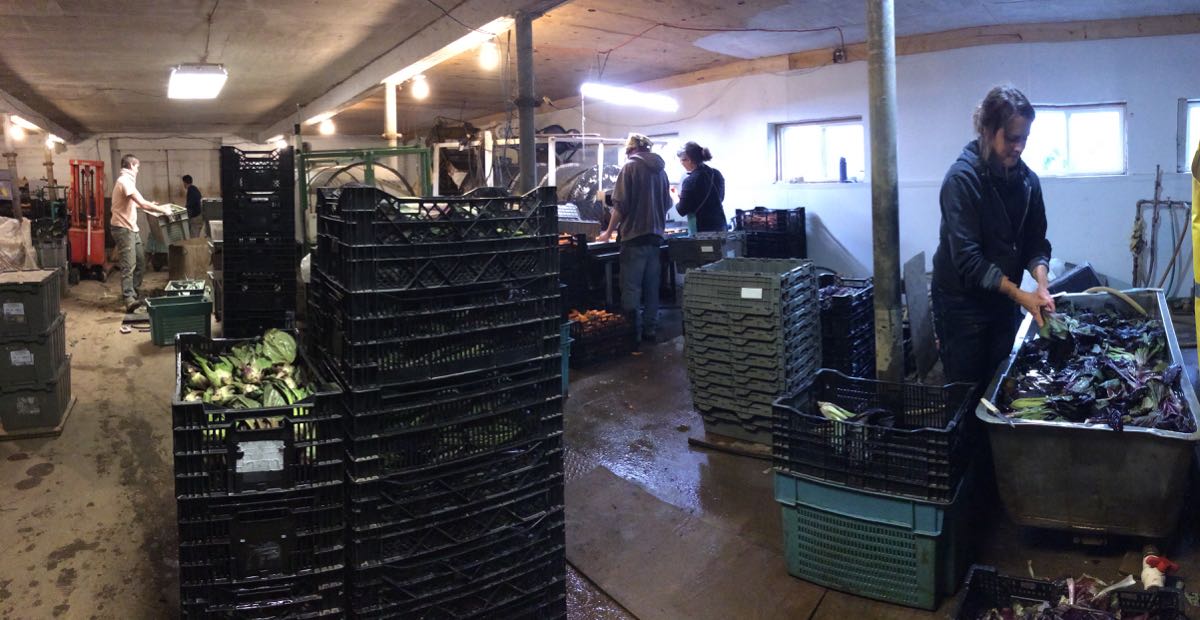
Today, we squeezed into our indoor heated space to prepare this week’s produce. It’s much smaller than our unheated pack shed and felt pretty crowded. From left, Billy and Jory prepare leeks, Smitty and Kristin wash carrots, and Karen washed bok choy.
Extension Share Veggie List
Red cabbage
Mixed fall greens, probably
– red bok choy, plus
– red mizuna, plus
– tatsoi.
‘Metro’ butternut squash
Sweet potatoes, ~3 lb
Brussels sprouts, ~ 1 lb
Carrots, 2 lb
Leeks, 1 – 1.25 lb
Yellow onion
A few items need extra washing.
The cold weather forced us into smaller quarters indoors. Your butternut squash, leeks and sweet potatoes are more lightly washed than usual, and will need a little extra attention from you. It’s the best we could do!
Mixed fall greens – We’re sending several small heads in the choy family. They’ll be good mixed together. The tat soi and the red choy have some silvering on the leaves, from being protected under row cover on cold nights.
RECIPES
Visit our 2019 Recipe Log or our 2018 Recipe Log or join our Facebook discussion group.
LOCAL THYME/ Comforting Classics
Brussels Sprouts with Lemon and Almonds
Red Cabbage and Brussels Sprout Slaw with Honey Poppy Seed Dressing
Black Eyed Peas and Greens Soup
Beef, Leek and Sweet Potato All-Day Stew
LOCAL THYME/ Outside the Box Recipes
Glass Noodles with Shredded Veggies and Sweet Chili Sauce
Braised Red Cabbage With Apples, Bacon and Wine
Miso Braised Chicken with Sweet Potato and Greens
Black Bean Burrito with Chipotle Sweet Potatoes and Red Cabbage
LOCAL THYME/ Quick & Easy Meal
Smoked Trout Salad on a Bed of Shredded Cabbage
????????????
RECIPES FROM LAUREN
BRUSSELS SPROUTS, PICKLED CARROTS & WINTER GREENS
Adapted from Six Seasons
Serves 2-4
Takes 1 hour
1 pound carrots, cut very thin on the diagonal
1 cup apple cider vinegar
1/2 cup water
1/2 cup sugar
2 tablespoons + 1 teaspoon Kosher salt, divided
1 tablespoon black peppercorns
1 tablespoon mustard seed
1 pound Brussels sprouts
1/4 cup olive oil, plus more for drizzling
1/4 teaspoon freshly ground black pepper
1/2 yellow onion, thinly sliced
1/4 cup honey
1/3 cup champagne vinegar
Pinch red pepper flakes
2 garlic cloves, minced
3 tablespoons butter
1 head mizuna, thinly sliced
1 head tatsoi, greens onion, thinly sliced
1 cup toasted walnuts, roughly chopped
- Preheat oven to 450 degrees.
- Place carrots in a small glass bowl.
- In a medium saucepan, combine vinegar, water, sugar, 2 tablespoons salt, peppercorns and mustard seed. Bring to a boil and then pour immediately over carrots. Set aside to quick pickle while you prepare the rest of the dish.
- Toss Brussels sprouts with olive oil, 1 teaspoon salt and pepper. Roast for 20-25 minutes until crisp all over. Place in large bowl with yellow onion.
- Meanwhile, heat honey in a small saucepan over medium low heat until it turns golden. Remove from heat and whisk in vinegar, red pepper flakes and garlic until smooth. Return to medium low heat and add butter, 1 tablespoon at a time, whisking until it melts. Let simmer 2-3 minutes more, stirring occasionally. Pour over Brussels and onions while still warm.
- Just before serving toss roasted veggies with greens, walnuts and half of the pickled carrots (store the rest in your fridge for up to 3 weeks). If the salad is too acidic, add a drizzle or two of olive oil.
.
????????????
.
FALL HARVEST RISOTTO
Takes 1 hour
Serves 6-8
4 tablespoons butter
2 large leeks, white and light green parts only, sliced in half lengthwise and sliced
1/2 large yellow onion, diced
2 cups peeled sweet potatoes, diced
3 cups butternut squash, peeled and diced
1 cup arborio rice
1/4 cup white wine
6 cups chicken broth
1/2 teaspoon dried sage
Kosher salt & freshly ground black pepper
- Melt butter in a large stockpot over medium heat. Add leeks and onions, along with a couple pinches of salt and pepper. Cook for 10 minutes.
- Reduce heat to medium low. Add potatoes, butternut squash and a few more pinches of salt and pepper. Cook for 15 minutes until soft, stirring every couple minutes. The bottom of the pan may brown a little, but don’t worry about this. It will just add flavor!
- In a separate large sauce pan, bring broth to a low simmer.
- Add rice and stir to combine. Stir for a couple minutes to toast the rice. Add wine and use a wooden spoon to scrape any browned bits off the bottom of the pan.
- Use a ladle to add a couple spoonfuls of simmering broth to the stockpot. Stir to combine and continue stirring every minute or so to keep it from sticking to the bottom of the pan. The idea is to stir it often enough that it has no chance to stick, but not so frequently that it doesn’t have a chance to simmer. Add sage after first addition of broth. Continue adding ladlefuls of stock every few minutes. You will keep adding and stirring and adding and stirring (slowly) for 30-35 minutes. Taste occasionally to test the texture of the rice. You want it to be cooked but not too mushy at the end. Adjust seasonings as desired.
Week #24; Final delivery of the regular season!
- On: October 30, 2019
- 0
Thank you!
Folks, this is the final delivery of our regular CSA season. Thank you for joining our farming adventure this year! We could not farm without the support of you, our community of eaters. We hope you enjoyed the produce, the newsletters and recipes, and the farm events.

All your farmers thank you. From left, back row; Ben (seated), Maggie, Smitty, Beth, Steve, Billy (seated), Linda, Chance and Michio. Front row; Raul, Monika, Anna, Jory, Karen, Simone, Kerry. MIA Alex, David, Jim, John, Josh, Kristin and the high school crew.
What a week
I often reflect on the season for this final newsletter. Not this year. The cold snap and coming snow forced us to hustle to bring in frost-sensitive crops, and to get garlic planted for next year. It’s been quite a week. After the snow melts, it will take another week or two to finish harvesting our root crops. We don’t like leaving them in the field in such cold weather but the roots are snug in the still-warm soil and the tops will (hopefully) remain strong enough to pull with our harvesting equipment. A blanket of snow will insulate the carrots but make a muddy harvest next week.
Soon, we will be done for the season. This year has taken a lot of effort, and we look forward to our winter rest. By January, we’ll have our plans finalized and will start ordering seeds. By late February, the greenhouse will be running and seeds sprouting. We hope most of you will join us again next season. We’ll be in touch this winter.
Beth and Steve
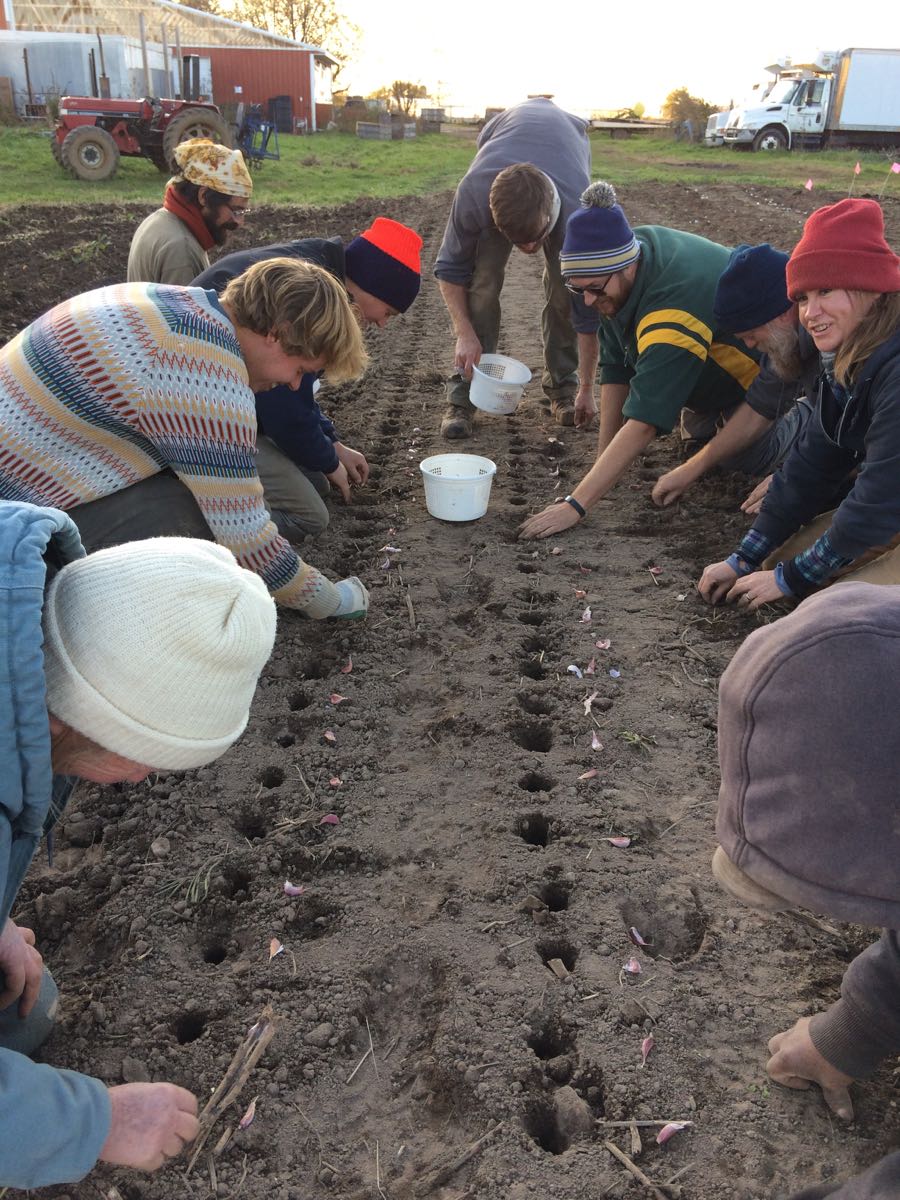
We planted garlic on Friday, before the weather turned wintery. You really need dry soil for this job. We rarely work in such a tight cluster but were at the end of the row and everyone was having fun together.
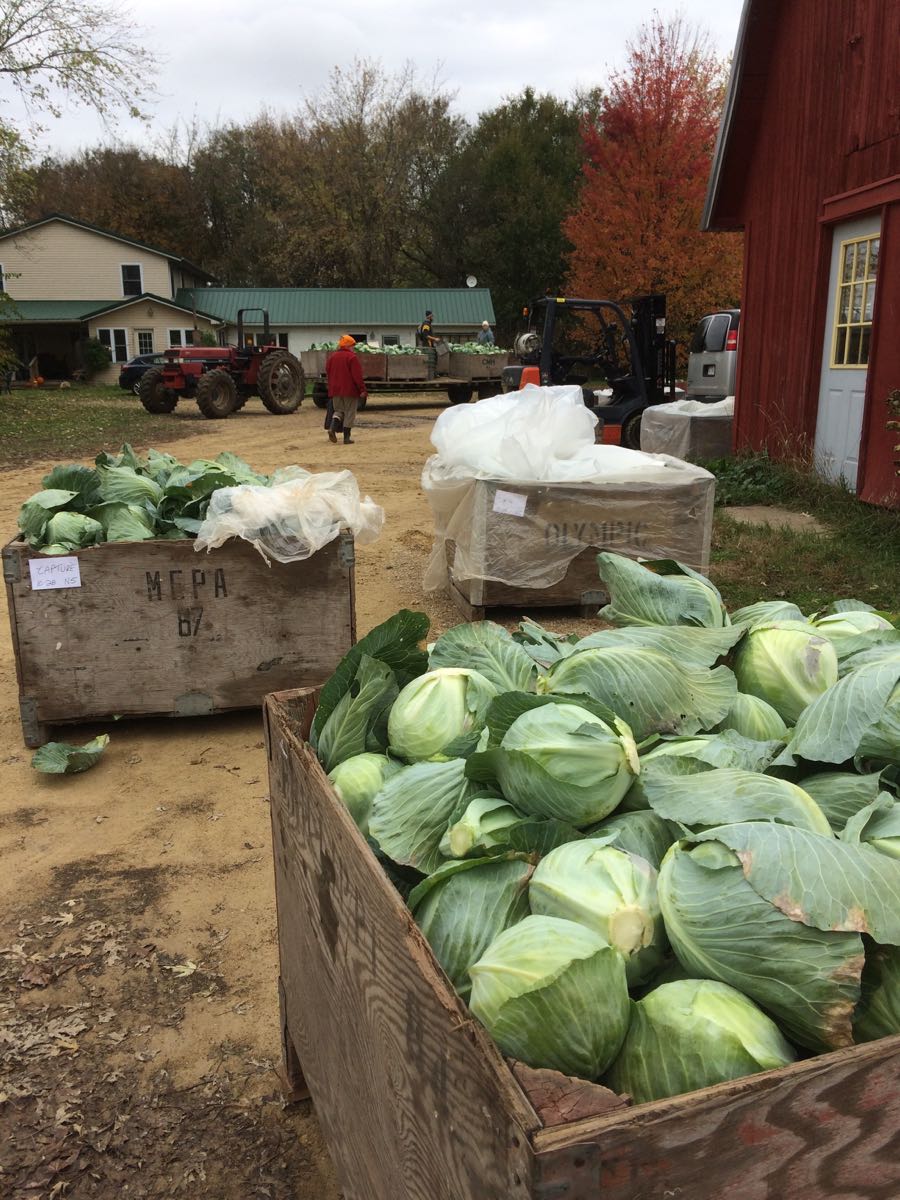
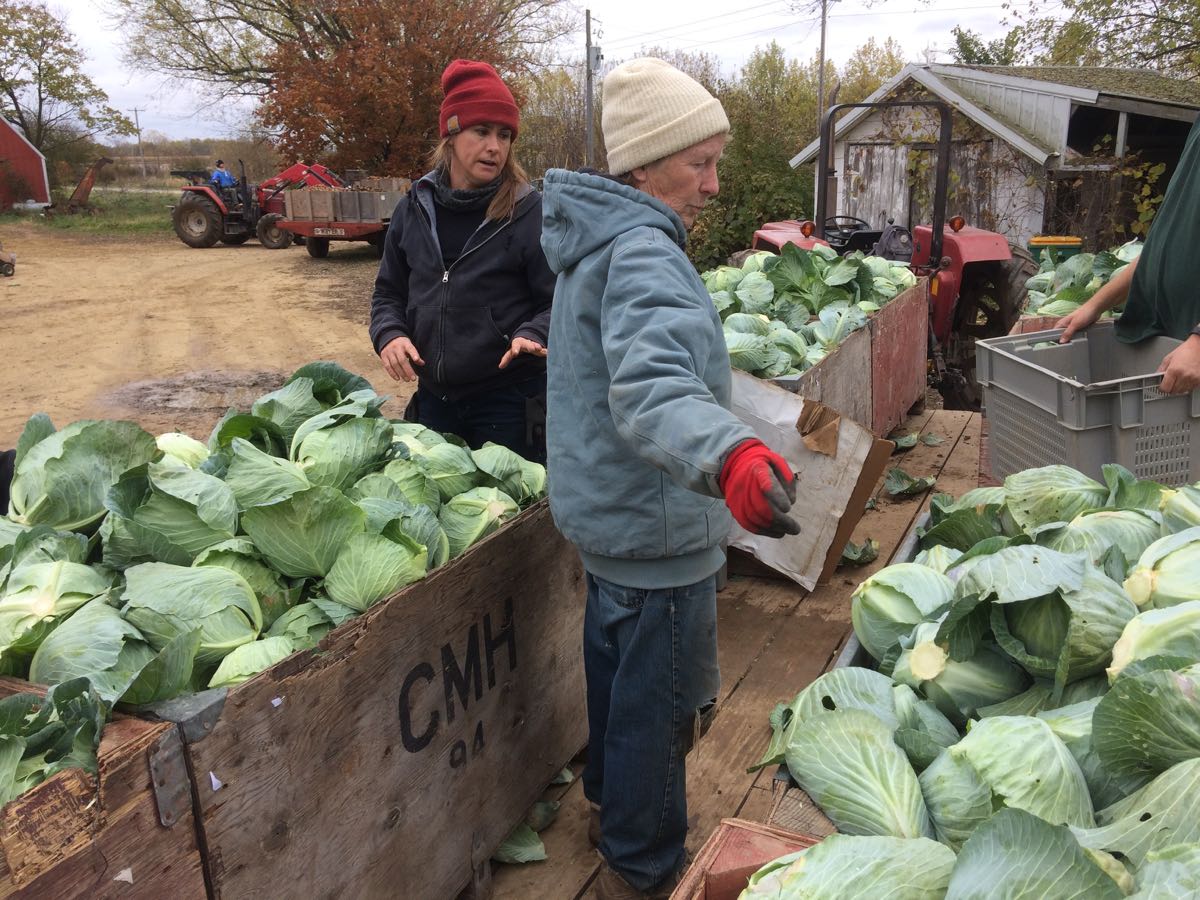
Cabbage is a very important crop for us, something we’ll store and sell through the winter. However, it won’t survive the low temperatures predicted for tomorrow night so we raced to get it all out of the fields. It’s taken a full week. Simone (blue coat) manages our cabbage crop. Above, she and Karen (red hat) make sure that all the varieties are kept separate.
We were simultaneously harvesting carrots with a separate crew. You can see Billy unloading bins of carrots in the background.

We couldn’t wait for the snow to melt to continue the cabbage harvest. Photo credit, Karen Nicholson
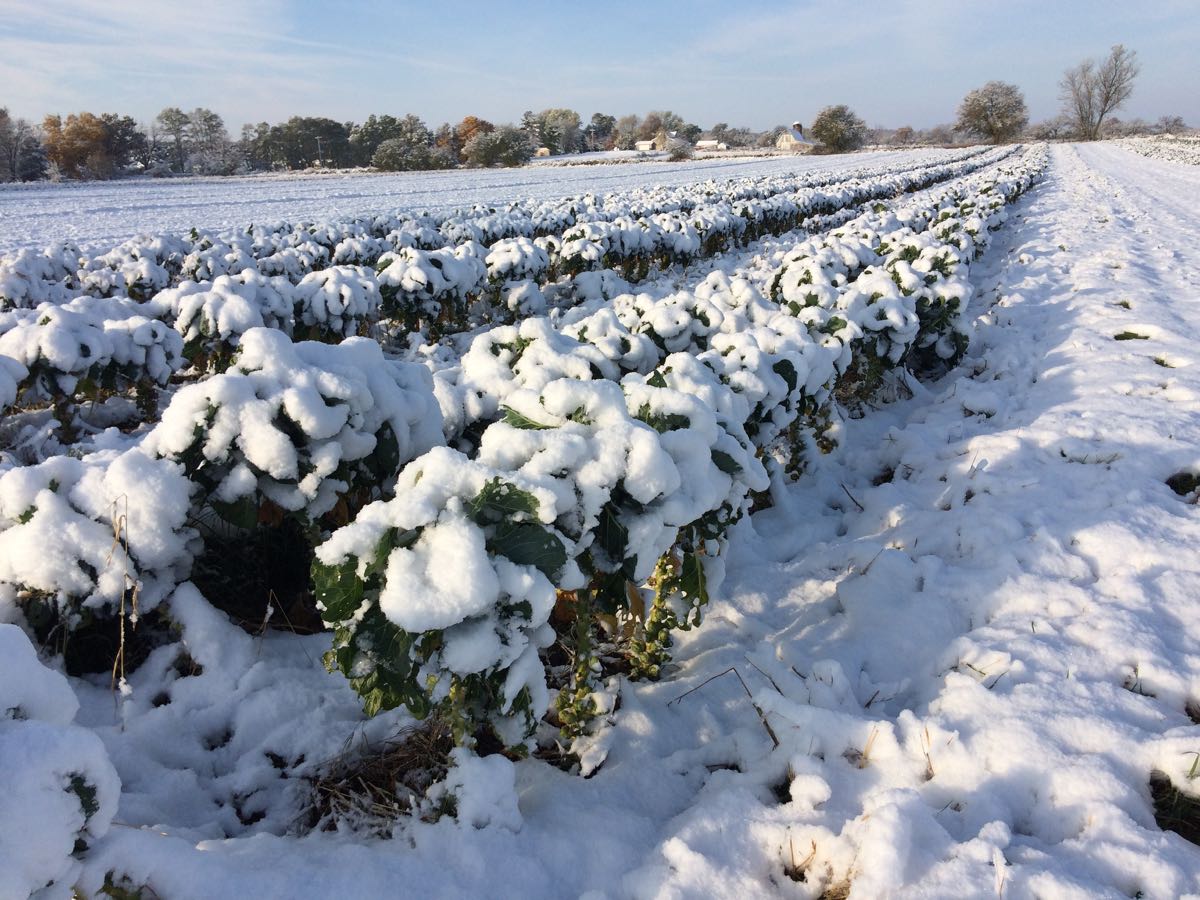
Here are your Brussels sprouts on Tuesday morning. We waited for the snow to (mostly) melt before picking. It’s too much of a mess otherwise, not to mention ridiculously cold. Brussels sprouts are cold-hardy, so we’re not worried about unharvested sprouts left in the field.
Veggie List and Veggie Notes
Week #24 = Final delivery of regular season
October 31/ Nov. 1, 2019 (Thurs/Fri. sites)
– Weekly shares
– EOW/ green
Sweet potatoes, 3 to 3.5 lb
Brussels sprouts, 1 lb
Celeriac, 1 large
Beets, ~2 lb
Carrots, ~2 lb
Koji greens
Bell or frying pepper, 1 or 2
Poblano chiles, 2
Yellow onion
Some sites get broccoli.
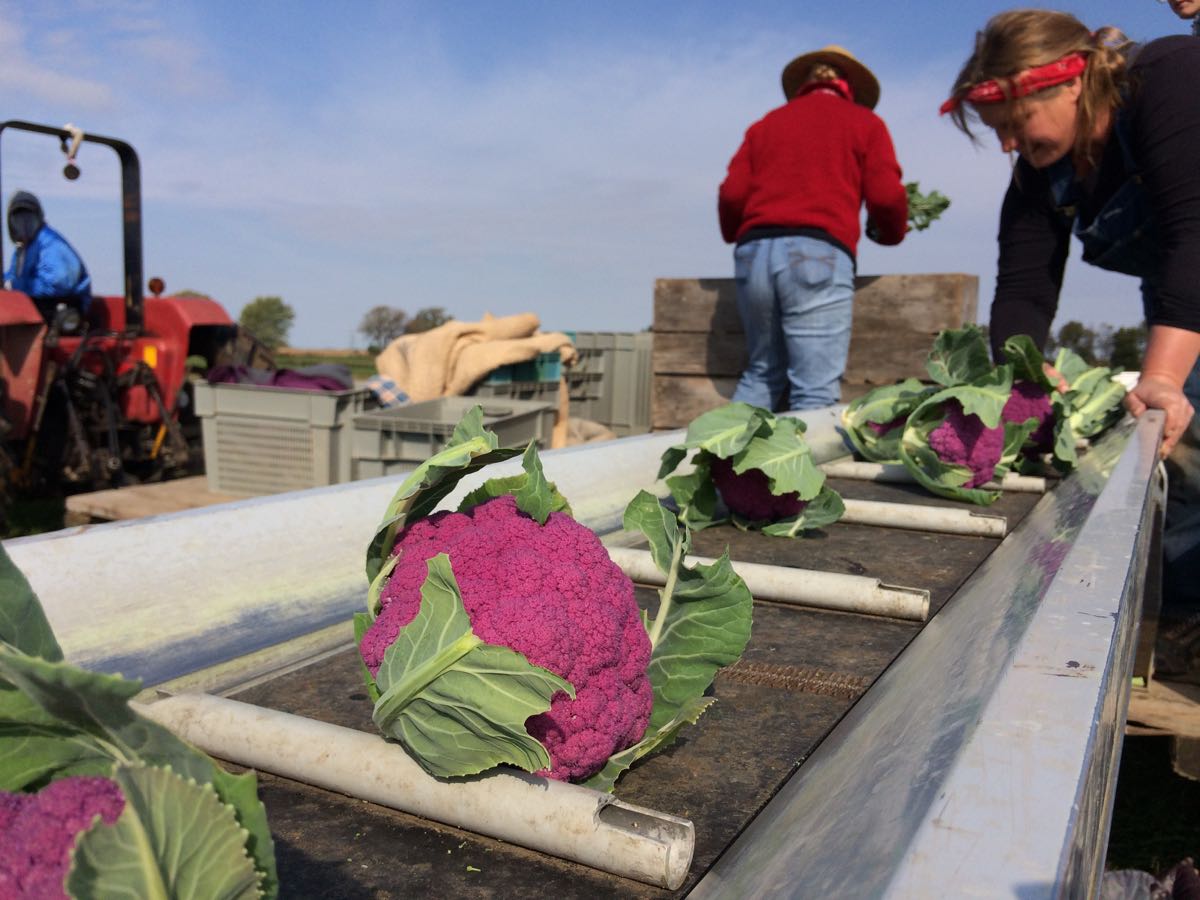
Some sites get Romanesco cauliflower.
Sweet potatoes – These are the ‘Beauregard’ variety. Store at room temperature, e.g. on your kitchen counter. Do not cover or wrap in plastic. These will store for a long time.
Brussels sprouts – See last week’s newsletter for cooking information.
Celeriac (knobby, round, bizarre-looking vegetable which smells like celery) – Flavorful celeriac is good raw or cooked. It is excellent in mixed roasted veggies or in soup. It’s especially good in cream soups, alone or mixed with potatoes. Grated raw celeriac is a great starting point for winter salads. Celeriac will store in your refrigerator for months. Cut off chunks as you need them. Peel before using.
Beets – Storage: Cover and refrigerate. Beet roots will store for months. Wash well to remove leaf fragments. For all the cooking methods below, wash and scrub the beets but do not peel. The skins slip off easily once the beets are cooked and cooled.
Cooking beet roots on the stovetop: Slice or quarter, cover with water in a pot, and simmer until tender. This will take from 25 to 45 minutes depending on how large the beet pieces are. Drain.
Roasting beets in oven: Wash beets, but do not peel. On a sheet of aluminum foil, put beets (halved or quartered if large), salt, pepper and a few sprinklings of water. Seal the foil packet, and roast at 400 oF until tender, about 45 minutes to 1 hour. Slip off skins once cool.
Microwave: Slice beets in half and place in a large microwave-proof bowl. Add ¾ inch water and cover with a plate. Microwave on high until tender, about 9-20 minutes, depending on your microwave’s power. Drain and slip off skins.
Uses: Use cooked beets in cold salads, or dress simply with vinaigrette, onions, salt and pepper. Beets are also good tossed with sour cream, minced onion, fresh herbs and walnuts.
Koji greens (head of dark green leaves) – These have some silvering on the tops of the leaves, from rubbing against row cover we used to protect the plants from frost. Just ignore or cut away. Sorry about that.
Koji greens are a lot like Yukina if you know that one; dark green with a nice balance of bitter flavor but not too strong. Like tat soi but with larger, lusher leaves and not so many leaf stalks. Recipes that use mustard greens or bok choy will work with Koji.
Bell or frying pepper – EAT SOON. We protected these plants with row cover outside for as long as we could. They’ve been exposed to cold nights which shortens their storage life. Eat within a few days OR chop and freeze for later. Just toss the frozen pieces into dishes at the end of cooking. We treasure these last few peppers and hope you do too.
Poblano chiles (dark green, shiny, triangular) – EAT SOON, for same reason as the bell peppers. Eat this weekend OR chop and freeze for later. These chiles have low-to-medium heat and great flavor. Most I’ve cooked so far this year were fairly mild, but a few were corkers.
RECIPES
Visit our 2019 Recipe Log or our 2018 Recipe Log or join our Facebook discussion group.
LOCAL THYME/ Comforting Classics
Soy Braised Shrimp with Koji
Nana Maniscalco’s Turkey Barley Soup
Shredded Carrot and Beet Salad with Carrot Ginger Dressing
LOCAL THYME/ Outside the Box Recipes
Vietnamese Noodle Salad with Grilled Beef, Koji and Carrots
Baked Celeriac
Beet Hummus
LOCAL THYME/ Quick & Easy Meal
Black Bean Quinoa Salad with Oranges, Peppers and Roasted Poblanos
????????????
RECIPES FROM LAUREN
BEET & CARROT SLAW WITH KOJI GREENS
Inspired by Bon Appetit
Takes 45 minutes
Serves 4-6
4 garlic cloves, minced
1/2 cup dried currants (or cranberries)
1/4 cup champagne vinegar
2 large (or 1 extra-large) beets, peeled
3-4 large carrots, peeled
2 apples
1 bunch koji greens (reserve the stems for another use), very thinly sliced
1/2 lemon, juiced
1 teaspoon Kosher salt
1/2 teaspoon freshly ground black pepper
1/4 teaspoon red pepper flakes
1/2 cup olive oil
1 cup chopped and toasted almonds
- In a small bowl, combine garlic, currants and vinegar. Let currants plump and garlic mellow in there for at least 20 minutes. It will likely take that long to get your veggies cut up anyhow.
- Cut the beets, carrots and apples into matchsticks and place in a large bowl with the koji greens. Squeeze with lemon and season with salt, pepper, and red pepper flakes. Toss to combine then add the garlic and currant mixture. Drizzle with olive oil and toss several more times to combine. Taste and adjust seasonings as desired.
- Serve with toasted almonds.
.
????????????
.
SWEET POTATO & CELERIAC HASH
Inspired by Bon Appetit
The original recipe that inspired this one didn’t actually call for Brussels Sprouts or poblanos so if you’d rather use them some other way, feel free to leave them out.
Takes 1 hour
Serves 2-4
5 pieces bacon
1 large celeriac, peeled and cut into 3/4-inch dice
1-2 pounds sweet potato, peeled and cut into 3/4-inch dice
1/2 pound Brussels sprouts, halved (quartered if very large)
1/2 teaspoon dried thyme
1 cup chicken broth
1 yellow onion. thinly sliced
2 poblanos, diced
1/2 teaspoon Kosher salt
1/4 teaspoon freshly ground black pepper
2 eggs, optional
Hot sauce, optional
- Preheat oven to 425 degrees.
- Place bacon on a baking sheet and put in oven right away (the oven won’t be preheated yet). Set the oven for 15 minutes and check the bacon then. Add more time if its not done. Once finished, drain grease on paper towel but do not wash pan or get rid of the grease left on the pan– you will use in the next span.
- In a large heavy skillet, combine celeriac, sweet potatoes, and Brussels sprouts. Add thyme and broth. Bring to a boil over medium high heat and cook for 20 minutes stirring occasionally until the vegetables are soft.
- Add softened vegetables to baking sheet you cooked the bacon on. Add onion and poblanos. Sprinkle with salt and pepper. Roast for 40 minutes, stirring after 20 to make sure veggies on the bottom do not burn.
- Serve hash with eggs and hot sauce.
- Cut bacon into pieces and sprinkle over the finished dish. Add more salt or pepper to taste.
.
Week #23, final purple & sun!
- On: October 23, 2019
- 0
Schedule count down
– This week (October 24/25) is the final delivery for our EOW/purple and Sampler/sun members.
– Next week (Oct. 31/ Nov. 1) will be the final delivery for our Weekly and EOW/green members.
Your bok choy came from this pretty field of greens.
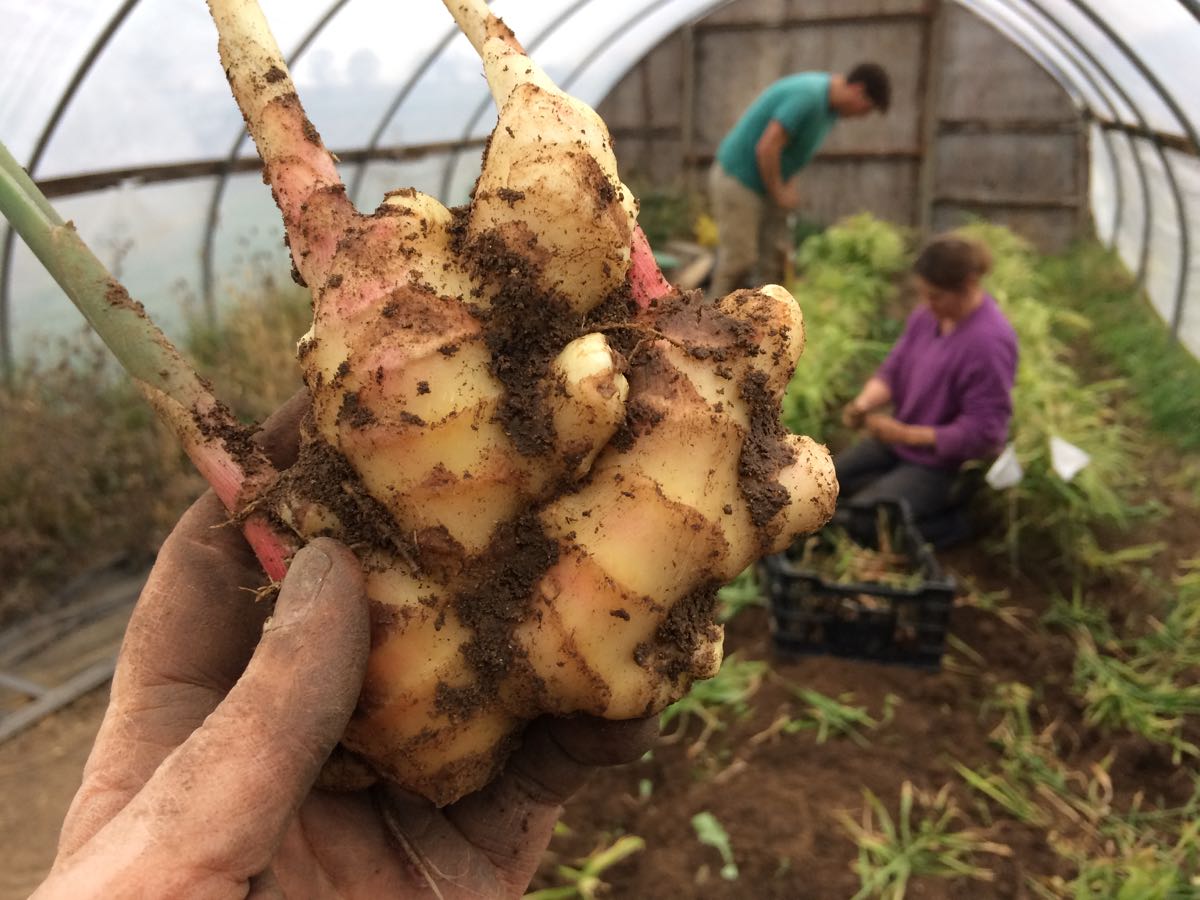
We dug our baby ginger this week. It’s a nice crop this year, enough to deliver a plump piece in every CSA box. In background, Jory and Karen dig the ginger. My job is to divide the harvested rhizomes into portions. It’s a bit of a jigsaw puzzle. I’ll probably divide the root in the photo into three portions. I almost gave up growing ginger because the yields are so low. It simply needs a longer season than we have in Wisconsin. This spring, I tinkered with our planting techniques to get an early start on the season. It worked, so the ginger pieces are bigger this year. We have not yet replicated our spectacular 2015 crop, but we’ll keep trying.
Veggie List and Veggie Notes
Week #23, October 24/25, 2019
– Weekly shares
– EOW/ purple
– Sampler/ sun
We’re packing bok choy with scallions and ginger because they are a great combo for stir-fries or Asian dishes. I plan to make chicken soup, then add bok choy and ginger near the end of the cooking time, then garnish with sliced scallions.
Bok choy
Brussels sprouts, 1 lb
Butternut squash
Yellow potatoes, 3 1/4 lb
Leeks, 1.3 lb
Parsnips, ~1.5 lb
Peppers, a few green bells or fryers
Jalapeno chile, 1
Scallions, 1 bunch
Baby ginger, 1 piece
Each site gets something from this list: broccoli OR cauliflower (white or purple) OR Romanesco broccoli OR maybe something else.
Next week’s box will probably contain Brussels sprouts, beets, carrots, celeriac, onions, Asian greens, sweet potatoes OR winter squash, and more.
Bok choy (large rosette with thick white stems and green leaves) – The bok choy has some minor damage from being covered with row cover on frosty nights. It’s a reasonable trade-off, since we can’t leave it unprotected and risk damage by frost.
This Asian green is good for stir-frying or sautéing or in soup. You can think of the stems and leaves as two separate vegetables. The stems require longer cooking. The leaves will cook almost as quickly as spinach. Storage: Bok choy stores well, so feel free to pull off leaves as you need them, or use the whole head at once. Refrigerate in a plastic bag or other container.
Brussels sprouts – If you are a new CSA member, please approach Brussels sprouts with an open mind. Many of us grew up eating awful, overcooked Brussels sprouts. These Brussels sprouts are completely different.
Here is our method to cook Brussels sprouts: Wash the sprouts and trim the cut ends. Cut an X in the stem end of large sprouts. Cut a single slit in small or medium sprouts. This does two things. It helps the Brussels sprouts cook evenly, plus it allows them to soak up any marinade or dressing. Place sprouts in a pot with one inch of water in the bottom and steam until tender, 7 to 10 minutes. If the sprouts are uneven in size, then set aside the smallest ones and add to the pot after the larger ones have cooked for a few minutes. Don’t overcook them! You can also oven-roast Brussels sprouts.
Here are a few dressing ideas for cooked sprouts:
– Sherry vinegar/olive oil/Dijon mustard/garlic/white wine/salt and pepper. This is our favorite, especially when you combine the Brussels sprouts with slivered peppers and thinly sliced onions. Delicious warm, cold, or at room temperature.
– Balsamic vinegar/olive oil/garlic/salt and pepper
– Lemon juice and zest/melted brown butter/poppy seeds/white wine/garlic/salt
Satina yellow potatoes – These organic potatoes were grown by our friends at Igl Farms. Satina is a good all-purpose potato. Personally, I like these better than Yukon Golds because they’re a little less sweet.
Peppers – Eat these soon! They’ve been exposed to cold nights, which shortens their storage. You’ll get green or green/red peppers. Could be bells, could be frying peppers, could be a mix.
Baby ginger – This is baby ginger, bright white and pink because it hasn’t grown a brown epidermis yet. The ginger sold in stores grows for a long season in warm places like Hawaii. Baby ginger is special because it has the full ginger flavor and spiciness but almost no fibers. That’s why it’s used to make the pickled ginger served with sushi. I asked the crew to wash it lightly to avoid bruising. Expect to do a final wash before using it.
Storage: Eat soon; baby ginger is perishable. Wrap in a damp cloth or paper towel, and keep in the refrigerator in a plastic bag. You can also freeze your ginger, then grate as much as you need from the frozen knob.
RECIPES
Visit our 2019 Recipe Log or our 2018 Recipe Log or join our Facebook discussion group.

Brussels sprouts gratin
LOCAL THYME/ Comforting Classics
Butternut, Brussels Sprout and Leek Gratin
Creamy Brussels Sprouts and Potato Soup
Red Curry with Chicken, Peppers, Parsnips and Potato
Tofu, Bok Choy and Pepper Fried Rice

Congee with Bok Choy
LOCAL THYME/ Outside the Box Recipes
Butternut Cookies
Sautéed Sesame-Ginger Brussels Sprouts
Pear Parsnip Puree
Bok Choy Congee
LOCAL THYME/ Quick & Easy Meal
Salisbury Steak with Leek, Pepper, and Mushroom Gravy
????
Week #22; Dismantling summer
- On: October 16, 2019
- 0
In the home stretch.
It’s hard to believe but we only have three more regular-season CSA deliveries, including this week. Let’s review our schedule.
October 17/18 (this week) = EOW/green
October 24/25 = final EOW/purple week and final Sampler/sun week
October 31/Nov. 1 = final delivery for Weekly shares and EOW/green.
Extension & Storage share members, I sent you a confirmation email on October 2 for each share. That email has your Extension or Storage delivery date.
Dismantling summer
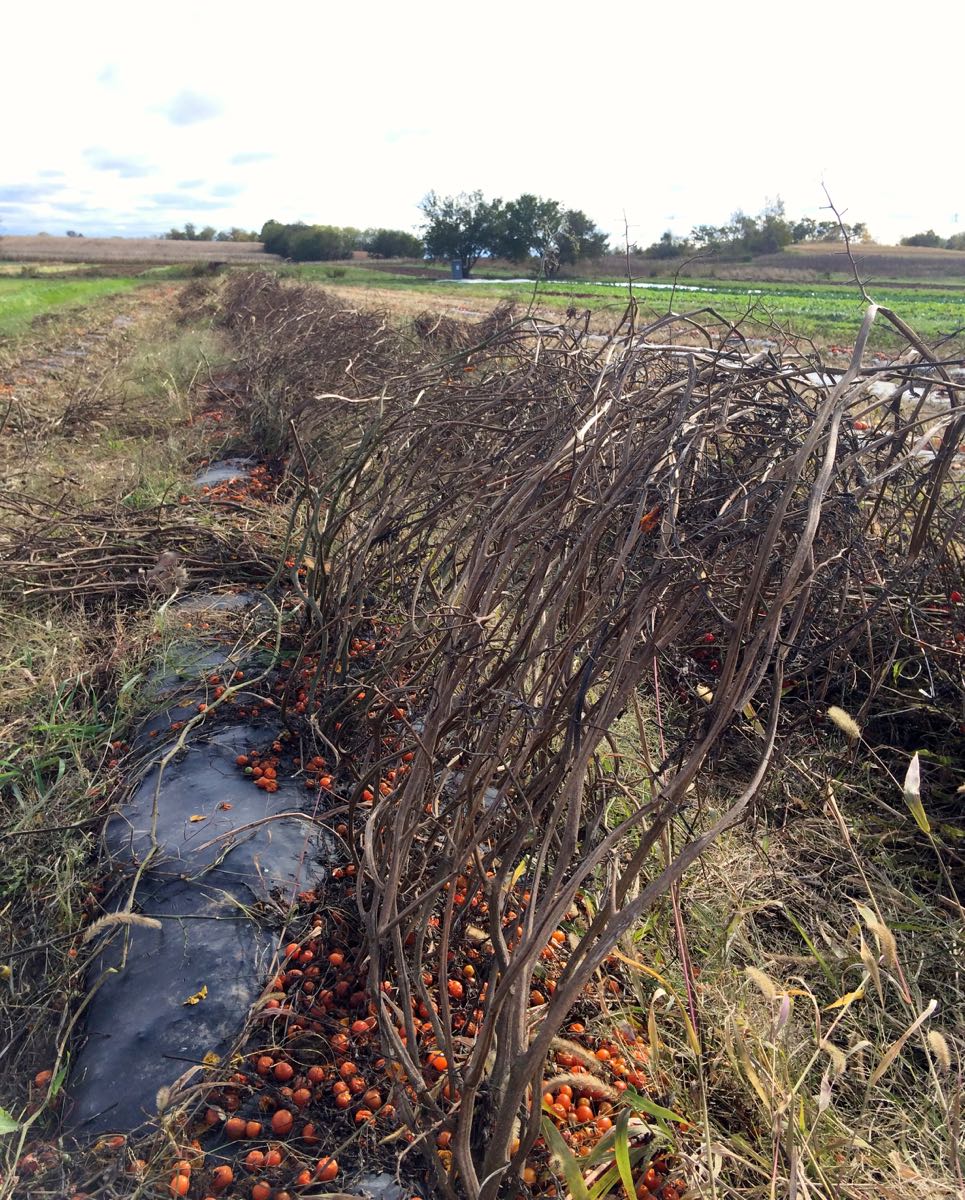
Skeletal cherry tomato plants
Frosty nights this past weekend finished off our tomatoes (a merciful end) and two of three pepper fields. We built those fields just a few months ago, pounding posts for tomato trellises, pulling weeds around each pepper plant. When the tomato posts are pulled, the skeletons of exhausted, frosted plants still stand, ready for mowing. On the other hand, peppers remain vigorous and loaded with small young fruits that will not mature on cold-damaged plants. Such promise! But not in Wisconsin.
We hustled to bring in tender crops before the frost. Sweet potatoes were a priority because they are so sensitive to cold temperatures. We dug our final two beds last week and tucked them into a heated, insulated box. We cure them at 85 F for a week to convert starches to sugar. Tomorrow, we’ll drop the temperature and gives them lots of air circulation to set the skins.
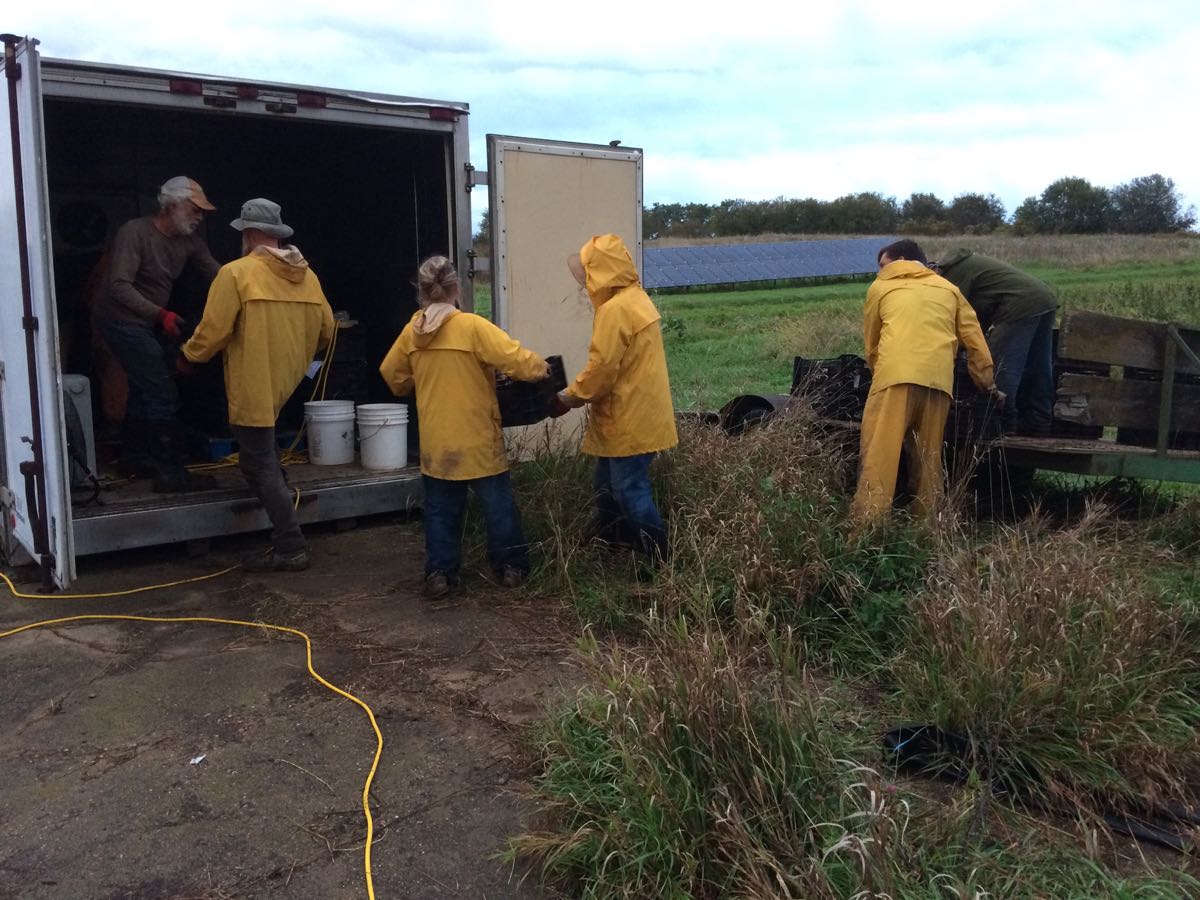
The crew loads freshly dug sweet potatoes into an insulated truck box.
We hurried to strip pepper fields before the frost. You’ll get a mix of green bell peppers and ones that are half green and half red. We are out of time for those to turn fully red so let’s enjoy them now. In the photo above, you can see that the tops of the plants are brown and wilted after frost on Sunday night. Steve chopped the pepper plants down so we can get the field seeded to a cover crop.
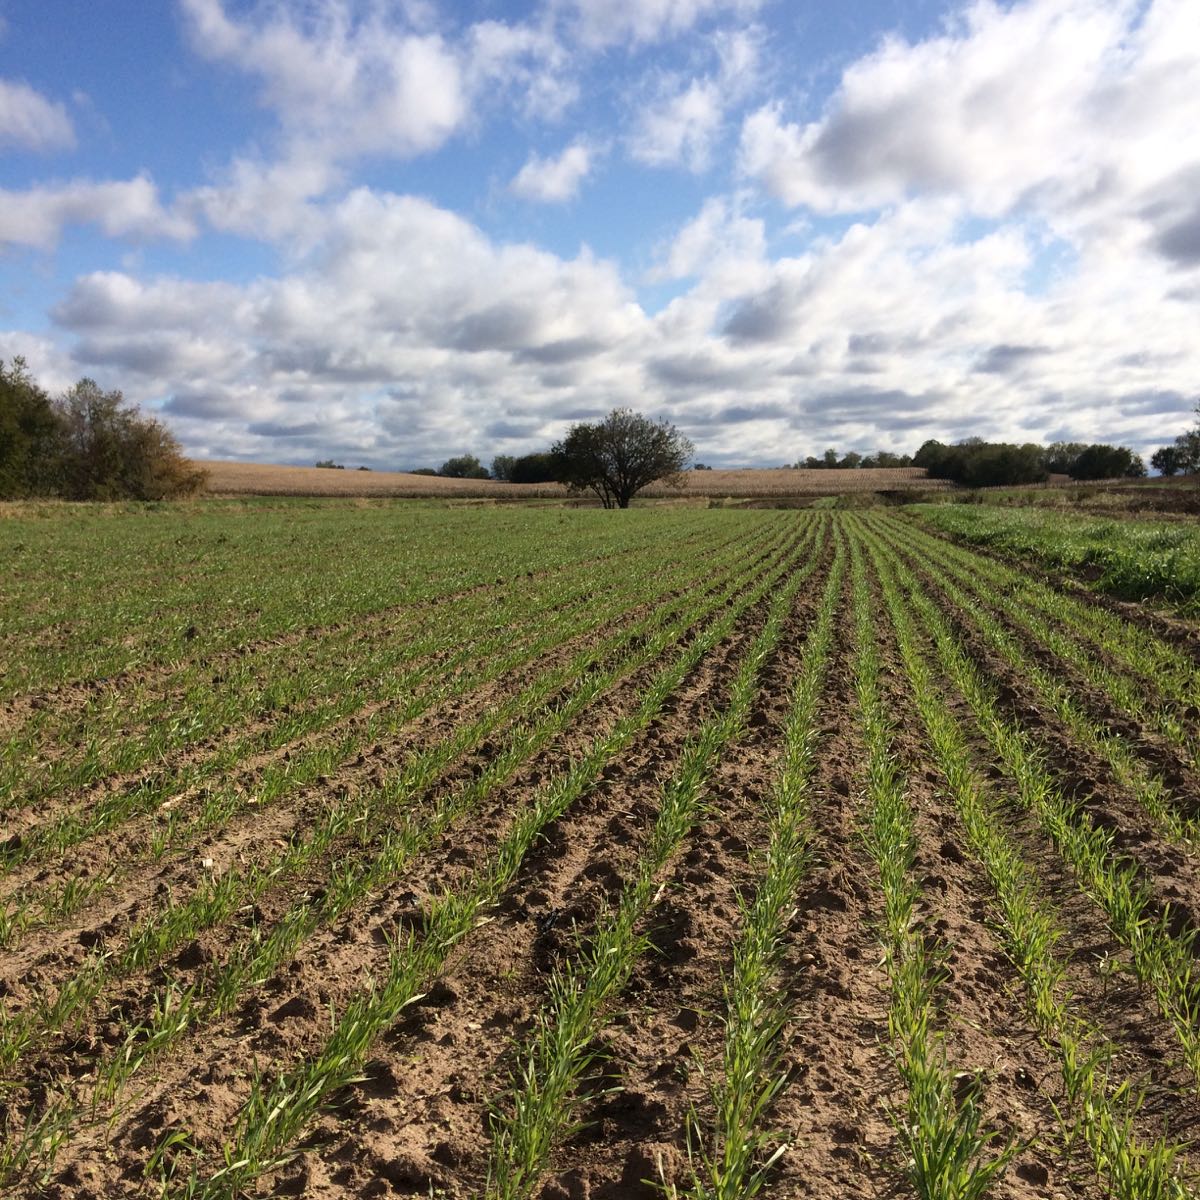
This field has a nice stand of rye and hairy vetch cover crop. The plants will keep growing until the ground freezes then will re-start growth in early spring. The cover crop keeps the soil covered and anchored over winter, then enriches the soil in spring when we till in the fresh organic matter.
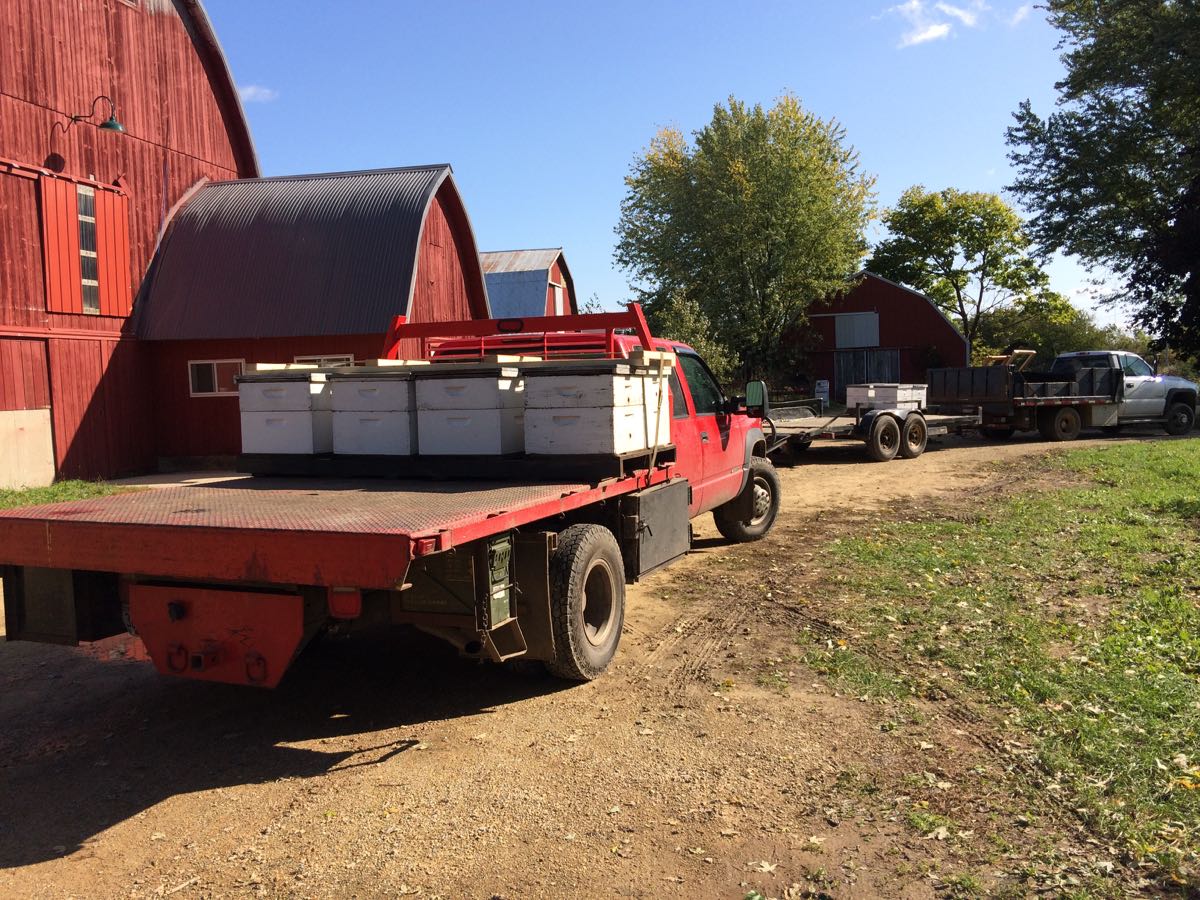
Even the bees are packed up and returned home to our beekeeper’s farm!
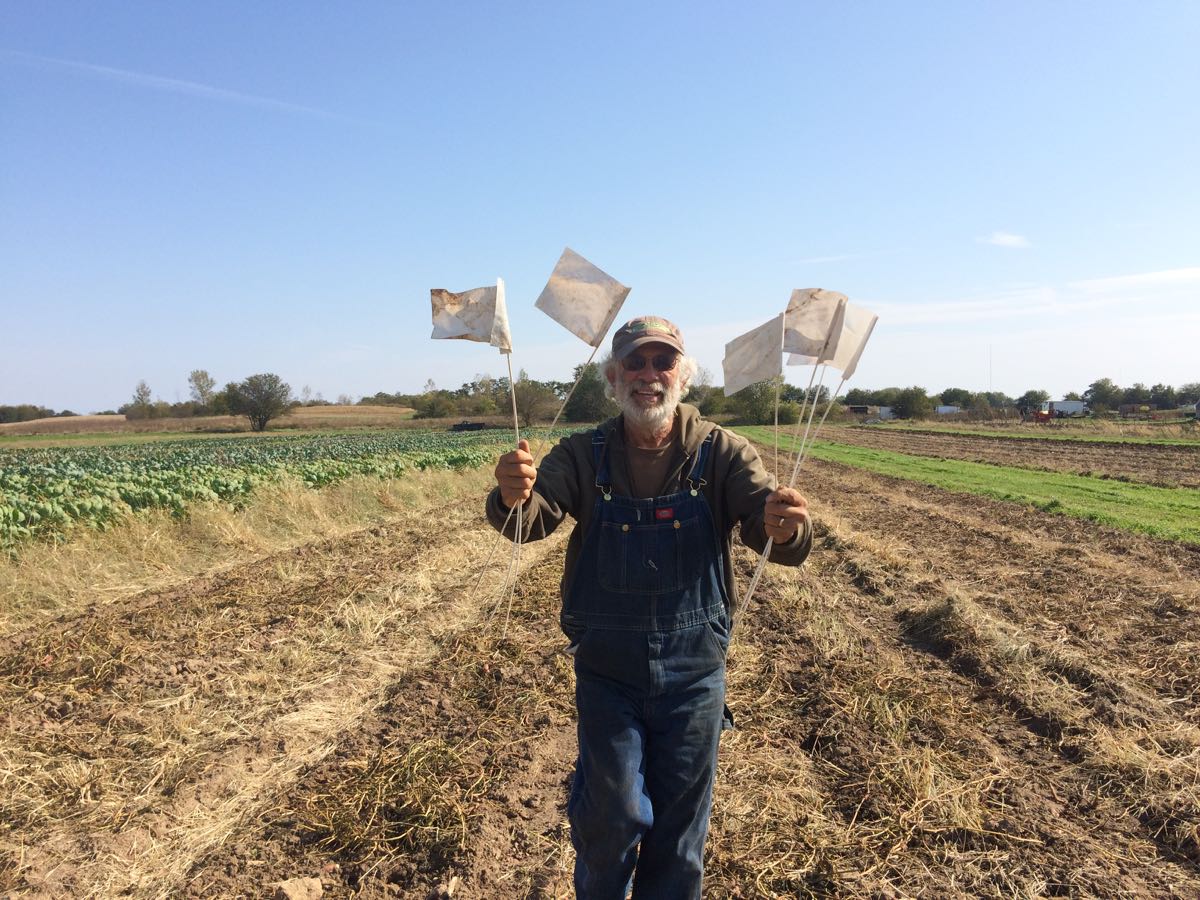
Steve surrenders! Actually, he’s just pulling marker flags before tilling the finished sweet potato field.
Of course, we’re still harvesting fall crops.
Enjoy the Indian summer this week. We sure will!
Beth & Steve
Veggie List and Veggie Notes
Week #22, October 17/18, 2019
– Weekly shares
– EOW/ green
Green cabbage
‘Nutterbutter’ butternut squash
Bell peppers, ~3, green or red/green
Purple or white cauliflower
Some sites get a 2nd cauliflower, some get broccoli.
Carrots, 2 lb
Parsnips, 1.5 lb
Yellow onion
‘Roulette’ not-hot habanero chiles, 3 or 4
Garlic
Next week’s box will probably contain bok choy, peppers, butternut squash, Brussels sprouts, parsnips, ginger and more.
Green cabbage – This cabbage will last for a long time in your refrigerator. Cut off chunks as needed.
‘Nutterbutter’ winter squash – We’re growing more and more of this early-season butternut variety. It cures quickly and is ready to eat within three to four weeks after harvest, letting us deliver winter squash over a few months.
Bell pepper – Most of your peppers will be “suntan.” That’s farm lingo for half red and half green. We stripped the peppers before frost, knowing they would never mature to fully red. Heck, it’s mid-October!
Purple or white cauliflower – These can be used interchangeably. When cooked, the purple cauliflower darkens to an inky blue. Still an intriguing color but no longer purple.
Parsnips (These look like large white carrots) – Those long, white roots are not carrots, they are parsnips. The two vegetables are related. When cooked, parsnips are sweet and starchy. For the best flavor, brown them to caramelize the sugars. Here are a few ideas for parsnip preparation:
– Caramelize the parsnips by roasting them in a vegetable medley.
– Parsnip fries are delicious: cut like French fries, oil lightly, place on a cookie sheet and roast in a hot oven until brown and cooked through.
– Try substituting grated parsnips in a potato pancake recipe. They brown beautifully and are very tasty.
– Steve loves pan-fried parsnips with onions and garlic.
‘Roulette’ chiles (small, shiny, bright red or orange) – This is the second time we’ve delivered this new variety bred to have the aromatic taste of habanero chiles, with almost no heat. Lo and behold, habaneros have a wonderful fruity flavor. No one knew because the blazing heat of a traditional habanero sears your taste buds and you cannot taste the chile itself. Snack on them to enjoy the flavor, or add them to any dish. To reduce all chances of spiciness, remove the seeds and midveins. I like these a lot. Even a few of these chiles will flavor a dish.
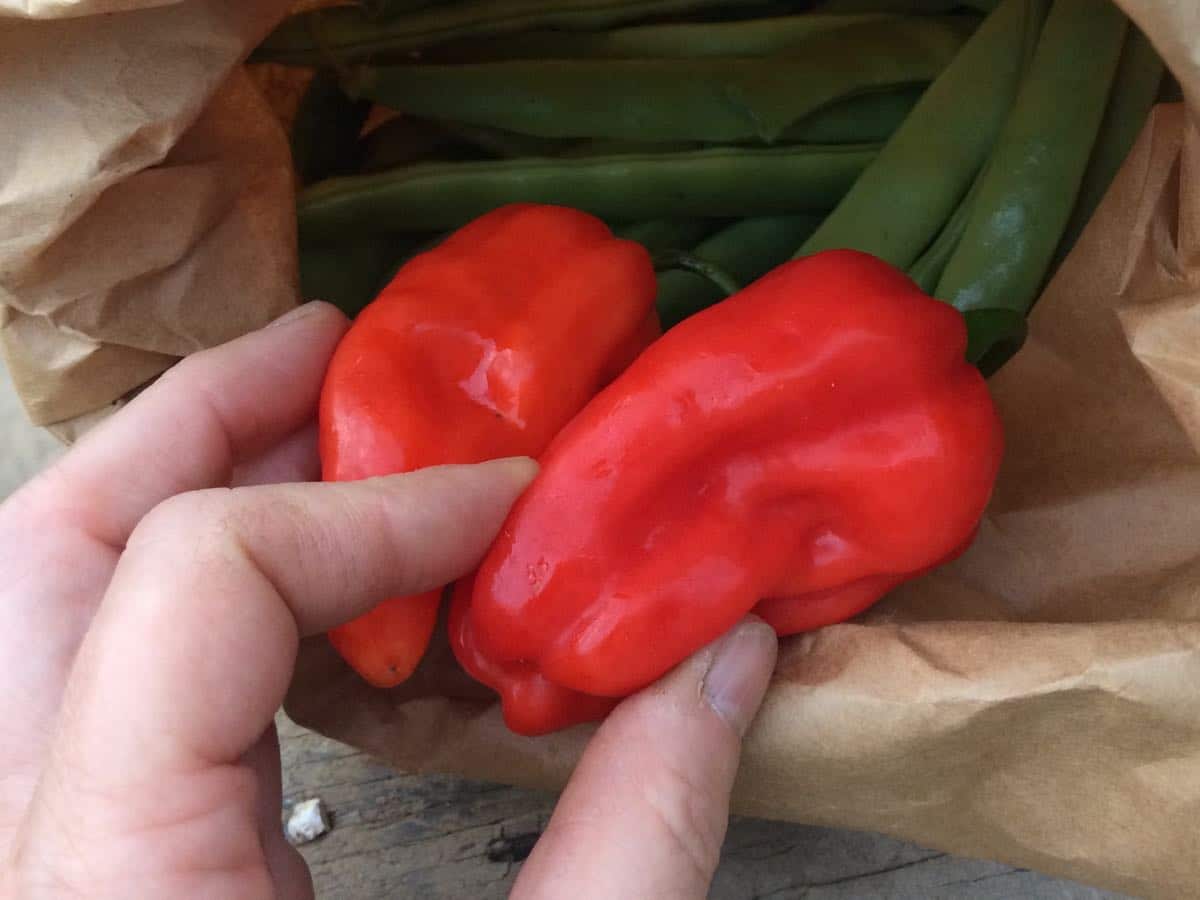
‘Roulette’ chiles – these are flavorful and mild.
RECIPES
Visit our 2019 Recipe Log or our 2018 Recipe Log or join our Facebook discussion group.
LOCAL THYME/ Comforting Classics or Cooking 101
Japanese Street-Style Cabbage Fritters
Braised Chickpeas with Butternut Squash and Cabbage
Veggie Packed Dal with Dried Apricot
Pot Roast with Parsnip and Carrot
LOCAL THYME/ Outside the Box Recipes aka Cooking 202
Chipotle Cabbage Pepper Slaw
Chili Roasted Winter Squash and Parsnip Bruschetta
Cumin and Turmeric Roasted Cauliflower
Cheesy Parsnip Soup
LOCAL THYME/ Quick & Easy Meal
Sesame Noodles with Carrots and Cabbage
????????????
RECIPES FROM LAUREN
LAMB RAGU
Inspired by this James Beard recipe
Takes 2 hours.
Makes 6 cups of sauce.
Serves 8-10 over pasta.
6 tablespoons bacon fat (or neutral oil if you don’t have bacon fat lying around)
2 pounds ground lamb (pork or beef are fine substitute if you don’t have access to lamb)
3 carrots, finely chopped
2 parsnips, finely chopped
1 yellow onion, diced
3 roulette chiles, seeded and minced
2 garlic cloves, minced
1/4 cup tomato paste
1 teaspoon dried thyme
1/2 cup red wine
2 cups chicken stock
2 cups tomato sauce (preferably homemade and frozen though store-bought is also fine)
2 teaspoons Kosher salt
1/2 teaspoon caraway seeds
1/4 teaspoon freshly ground black pepper
1/4 teaspoon cumin
1 pound cooked pasta, for serving
- Add bacon fat to a Dutch oven and heat over medium high heat until smoking. Add the lamb and break up until it forms an even layer. Leave the meat to cook for 10 minutes without moving. It will brown significantly on the bottom. Don’t worry, this is where the flavor comes from. Stir and cook for 10 more minutes without moving.
- Add the carrots, parsnips, onions, peppers and garlic to the pot. Stir to combine and then don’t touch for 5 minutes. Again, browning is good. Saute for 5 minutes until vegetables are softened then add the tomato paste and thyme, and cook for 5 minutes more.
- Add the wine and deglaze the pan, scraping up the browned bits at the bottom of the pan. Cook for 2-3 minutes until the liquid is evaporated then add chicken stock, tomato sauce, salt, caraway, pepper, and cumin. Cover the pot, reduce to a simmer and cook for an hour. Uncover and reduce until it has reached your desired consistency (thickened but still a little loose). Taste and add salt if needed.
- Serve over cooked pasta. My favorite is a fresh or Italian brand rigatoni. I like to use a little bit fancier pasta for this dish but you wouldn’t have to.
.
????????????
.
FALL CABBAGE, SQUASH & CAULIFLOWER GRATIN
Adapted from Food & Wine
Takes 90 minutes, much of it inactive
Serves 6-8
1/2 cup hazelnuts
1 butternut squash, peeled and cut into cubes
1 head cauliflower, cut into florets
1/4 cup olive oil, divided, plus more for greasing pan
4 garlic cloves, peel and thinly sliced
1 teaspoon Kosher salt, divided
1/2 teaspoon freshly ground black pepper, divided
1 head cabbage, cored and thinly sliced
2 cups milk
2 tablespoons cornstarch
4 ounces mild white cheddar or Fontina cheese, shredded
1/4 cup water
- Preheat the oven to 375 degrees. Once preheated, toast hazelnuts for 12 minutes, until fragrant. Coarsely chop and set aside.
- On two baking sheets, combine butternut and cauliflower with 2 tablespoons olive oil. Toss to coat and then sprinkle with garlic, 1/2 teaspoon Kosher salt, and 1/4 teaspoon freshly ground black pepper. Roast for 30 minutes until softened.
- In a large saute pan, heat the remaining two tablespoons olive oil. Add cabbage and season with remaining salt and pepper. Cook over medium heat, stirring occasionally, until wilted.
- Grease a 9 x 13-inch baking dish with olive oil and transfer the cabbage to this dish. Top with roasted squash and cauliflower.
- In a medium sauce pan, heat milk until it just comes to a boil then reduce to low. In a measuring cup, whisk together cornstarch and water until it forms a sort of slurry. Whisk until warm milk until thickened, about 1 minute. Add cheese and season with a little extra salt and pepper. Pour cheese mixture into baking dish and bake for 30 minutes, until bubbling.
- Turn the broiler to high. Transfer dish to the top rack of the oven and broil about 2 minutes, until exposed veggies are browned in spots. Sprinkle with the chopped hazelnuts and serve warm.
.
Week #21, Gleaning party, vicariously
- On: October 09, 2019
- 0
We are thrilled with how many of you came to the gleaning u-pick this year!


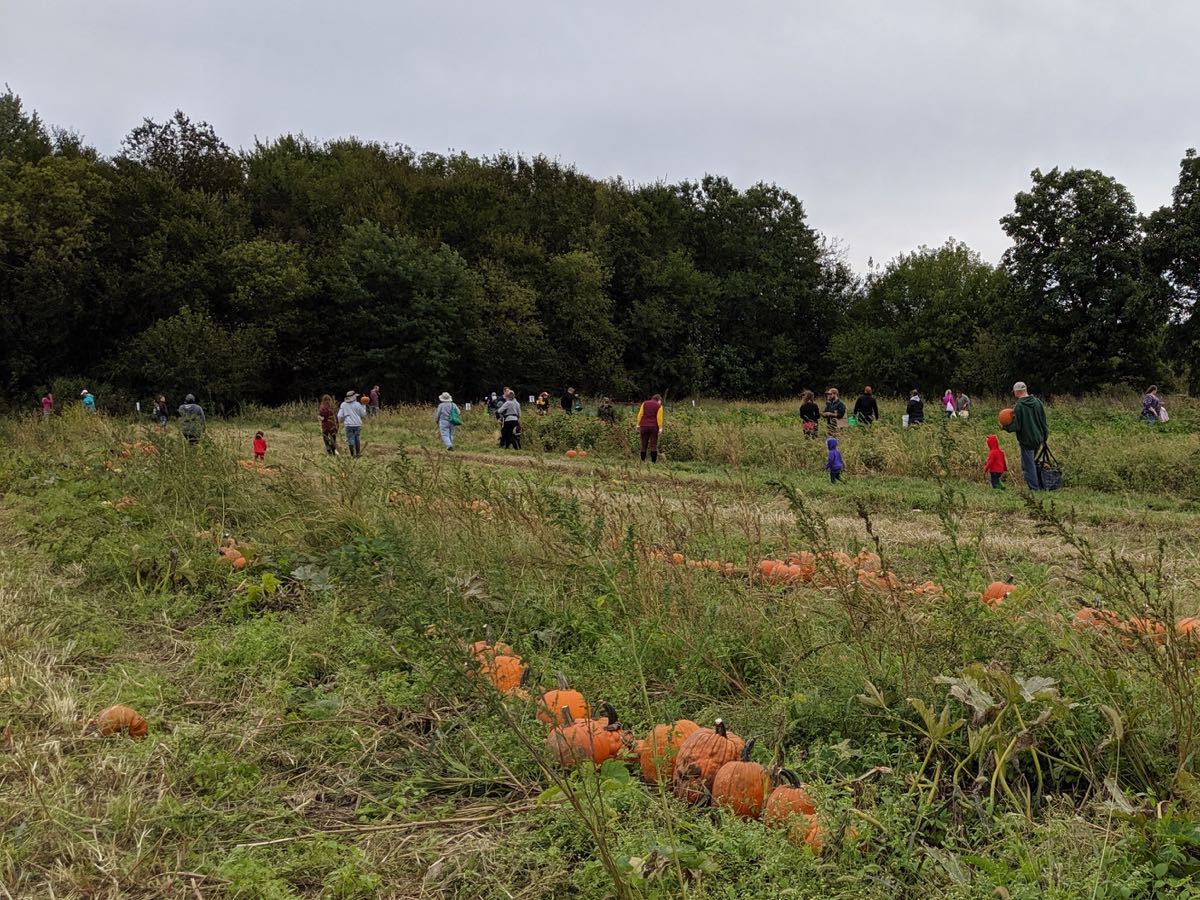
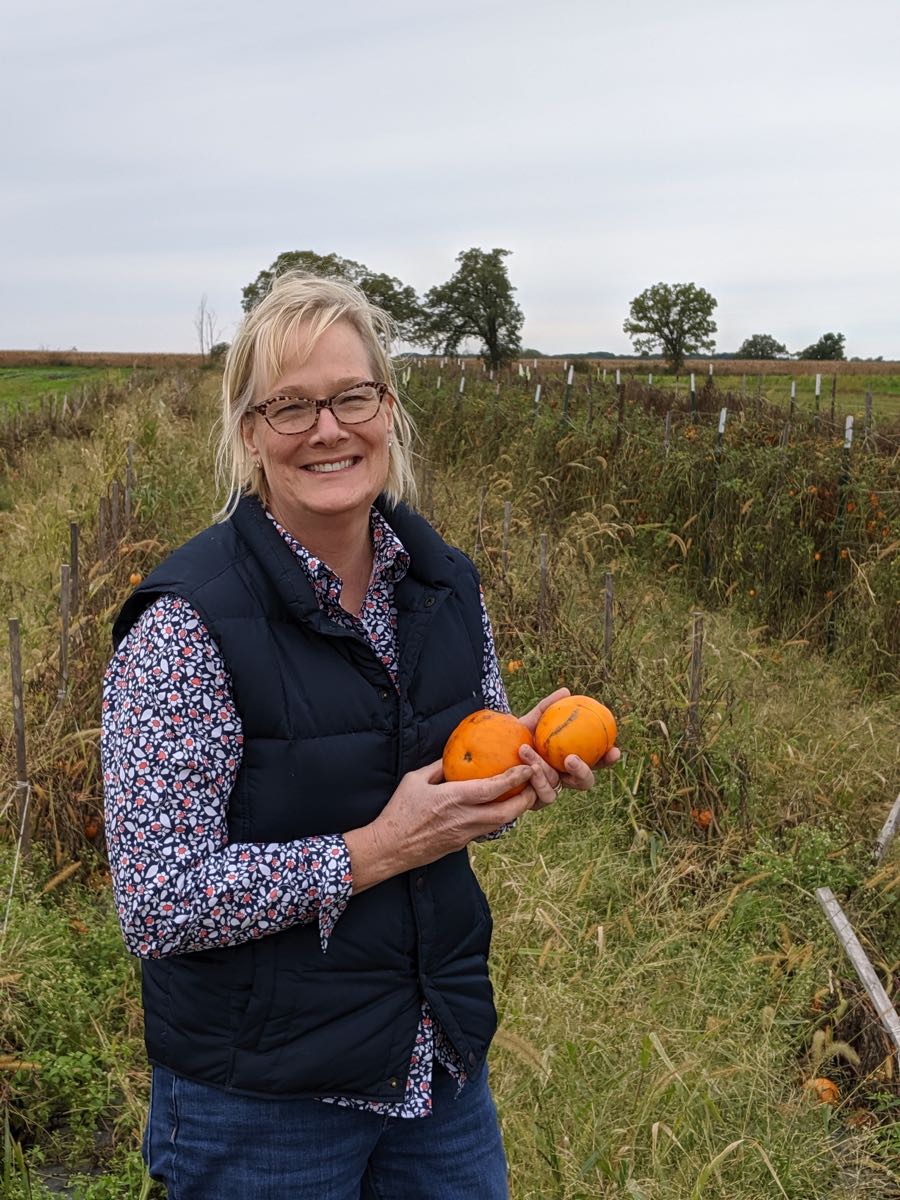
This is an unusually nice pumpkin crop. It was not difficult to find a favorite to take home. The pumpkins are thick-walled! Sharpen your knives when it’s time to carve your jack-o-lantern.

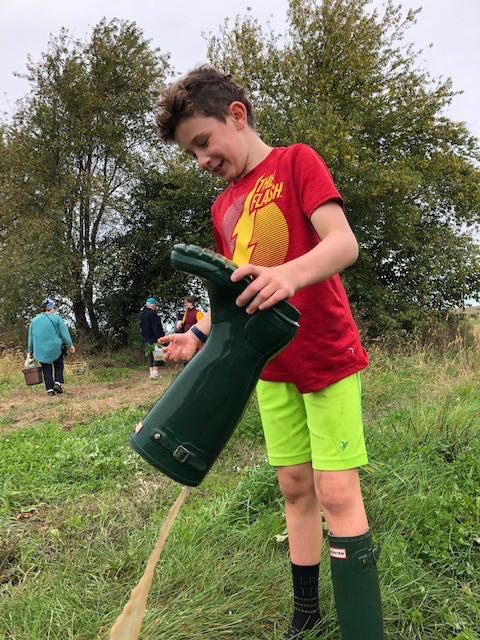
Did you quote my email to your children, “Be cautious about wading into the largest puddles – some are very deep.”? They took it as a challenge. I think every child waded into every puddle and overflowed their boots.
As usual the carrots were a highlight. The kids (and grownups) loved pulling them out of the ground. So exciting.
On the other hand, the tomatoes were so sparse and the field was pretty gross by the time the u-pick came around. Too much rain. Kathy was a brave gleaner!

This photo should help you understand gleaning. As kale grows taller, we harvest the bottommost leaves. Look how much we harvested from this plant over the summer. You were finishing the job for us.


Screen-printing t-shirts was a hit, as usual. Many of you wore previous years’ t-shirts to the farm!
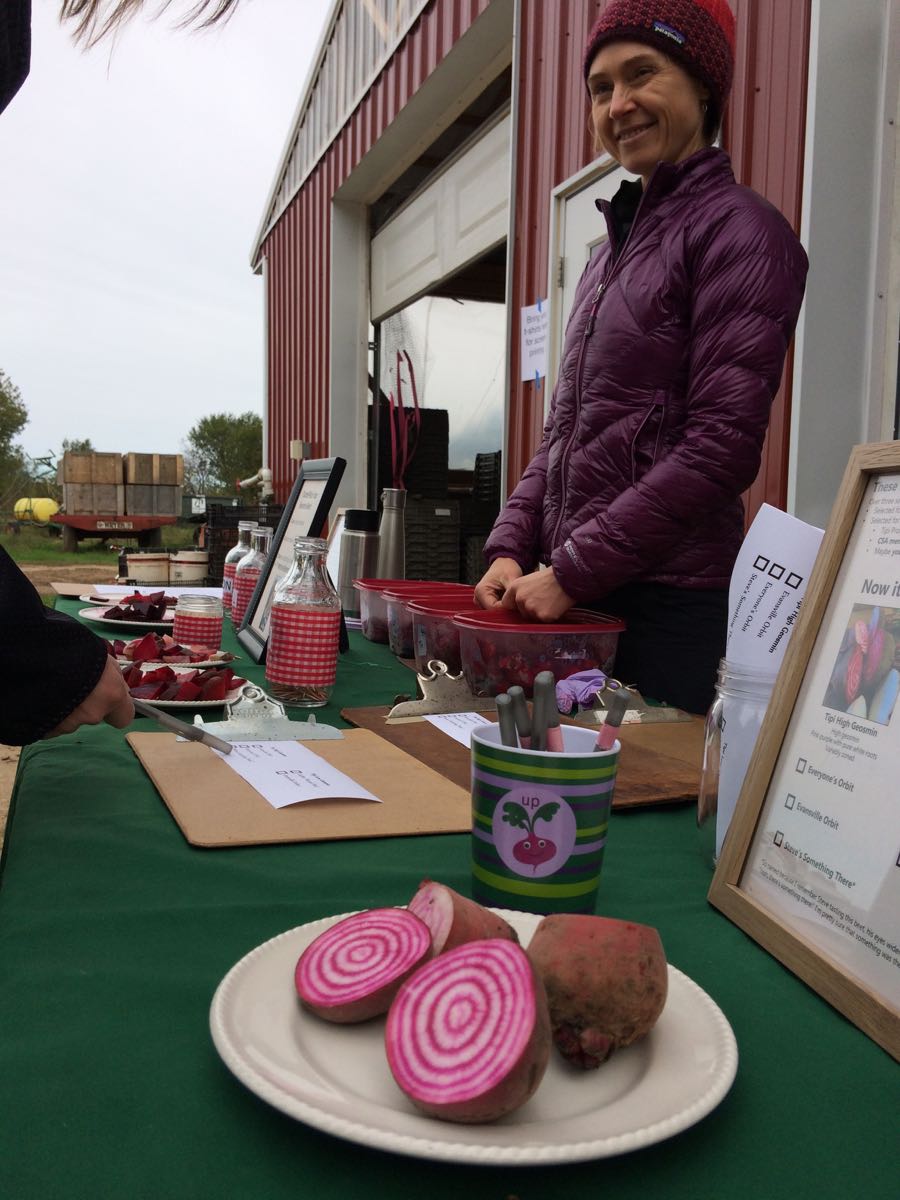
Grad student Solveig Hanson brought cooked beets for tasting and evaluation. This is really special. This is the fourth time she’s conducted a tasting survey at our gleaning party. By now, she is asking us to compare beet lines that she selected with your input over the last three years. That is so cool.

Karen and Monika did a great job clipping and lining up the pumpkins before everyone arrived. We take the time to sort out the icky pumpkins, to give everyone a better chance of taking home nice ones. Photo credits to Ari, me, and various families. Beth
Veggie List and Veggie Notes
Week #21, October 10/11, 2019
– Weekly shares
– EOW/ purple
– Sampler/ moon
Sweet potatoes, ~3 lb
Green beans, 0.85 lb
Fennel with fronds, 1 or 2 bulbs
‘Carnival’ or ‘Jester’ acorn squash, 1
Carrots, 2 lb
Red/green frying or bell peppers, ~3
Orano snack pepper, 1 (orange)
Poblano chiles, 3 (green)
Yellow onion
Garlic
Some sites get 2 cauliflower.
Some sites get cauliflower + broccoli.
Some sites get cauliflower + extra acorn squash.
Next week’s box will probably contain cabbage, carrots, winter squash, and more.
‘Beauregard’ sweet potatoes – Here are a few things we’ve learned about sweet potatoes:
– For best flavor, cook your sweet potatoes so they brown and caramelize. We have a simple, favorite way to roast sweet potatoes. We used to prepare sweet potato fries in the oven. Now we just quarter the potatoes, rub with olive oil, dust with salt and place cut-side-down on a cookie sheet. Roast in a 450 F oven without turning until soft. The flavors will caramelize (like sweet potato fries) but preparation is simpler and the cooking time less exacting. Slender sweet potato fries go from undercooked to overcooked in the blink of an eye. Larger slices are less exacting, and therefore are easier. Small sweet potatoes can be cut just in half. Jumbos will need to be chopped into pieces. Otherwise, they take a long time to cook.
– Store your sweet potatoes at room temperature. They suffer chilling injury below 50 F.
– The sweet potatoes we grow require slightly longer cooking than ones from the supermarket, perhaps because they contain higher moisture so soon after harvest.
– Sweet potatoes are good at any size. We have cooked everything from tiny to jumbo and consistently find that all sizes taste good.
Fennel (large vegetable with a fat bulb and lacy fronds) – Fennel is a ‘swing vegetable’; it can be used raw or cooked. Clean well and slice as thinly as possible for use in raw salads. It is good simply prepared with olive oil, lime or lemon juice, salt and shaved parmesan cheese. Cooking softens and sweetens fennel, and mellows its anise flavor. Both the bulb and leaves are edible. Here are ideas from Alice Water of Chez Panisse about how to use fennel: ‘It’s strong anise characteristic seems to suit fish particularly well. … We use fennel all the time. We add the feathery leaves to marinades for fish and to numerous salads, sauces and soups and we use them as a garnish, too. … The bulbs are sliced and served raw in salads in various combinations with other vegetables, parboiled for pastas; caramelized and served as a side dish; braised whole; or cooked in vegetable broths & fish stocks.”
Poblano chiles (triangular, shiny; green or brown; MEDIUM HEAT) – Poblanos are the creme de la creme of chiles. They have lots of great flavor in combination with manageable heat. Roast and add to soup or casseroles. To reduce heat, remove the seeds and midveins.
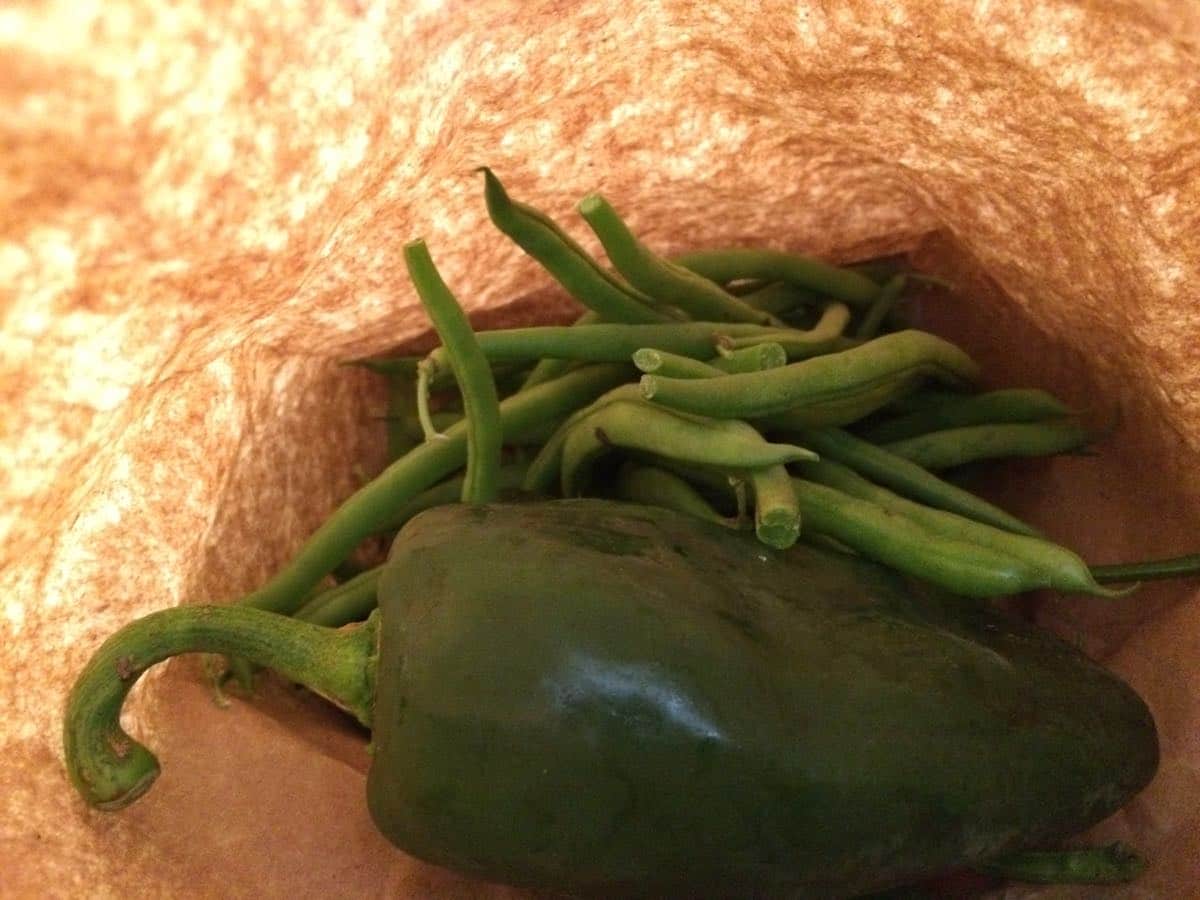
We packed your poblano chiles in the bag of green beans, for easy identification.
RECIPES
Visit our 2019 Recipe Log or our 2018 Recipe Log or join our Facebook discussion group.
LOCAL THYME/ Comforting Classics or Cooking 101
Carrot Winter Squash Puree with Sage Butter
Simmered Veggies in Green Curry Sauce
Teriyaki Noodle Stir Fry with Peppers, Green Beans and Garlic
Chili Stuffed Poblano and Sweet Pepper
Chicken Fennel and Onion Roast
LOCAL THYME/ Outside the Box or Cooking 202
Apple Cranberry Stuffed Acorn Squash Rings
Buffalo Chicken Stuffed Baked Sweet Potato
Green Beans with Olives and Mint
Roasted Poblano Buttermilk Dressing
Sausage and Fennel Hoagies
LOCAL THYME/ Quick & Easy Meal
Sweet Potato Poblano Posole with Pork
????????????
RECIPES FROM LAUREN
BBQ PULLED PORK & SWEET POTATO PIZZA
You definitely got the goods this week to make a double (if not TRIPLE) batch of this favorite pizza. I suggest you throw a party and scale this recipe up big time!
Takes 1 hour (not including time to make pulled pork), add an additional hour if you plan to make the dough from scratch
Makes 14-inch pizza that serves 4-6
1 batch pizza dough (your favorite or use my recipe below!)
2 cups peeled and cubed sweet potato
1 tablespoon olive oil
1/2 teaspoon Kosher salt
1/4 teaspoon freshly ground black pepper
3/4 cup favorite BBQ sauce (I always use Sweet Baby Ray’s Original)
1 cup pulled pork (here’s one of my favorite super easy slow-cooker pulled pork recipes!)
1 red bell pepper (or red Italian fryer), seeded and diced
1 poblano pepper, seeded and diced
1/2 yellow onion, diced
2 cups smoked cheddar cheese, shredded
For the pizza dough:
1-1/2 cups warm water
2 teaspoons active yeast
2 tablespoons honey
4 cups flour
2 teaspoons Kosher salt
- If you are making the dough from scratch, begin here. If not, skip to step 2. Combine warm water (but not hot!) with yeast and honey in a small bowl or measuring cup. Whisk to combine and let sit for 5 minutes. Combine flour and salt together in a large bowl. Make a well in the center of the flour mixture and pour in water with yeast. Stir to combine but do not work the dough at all, just stir until all the ingredients are incorporated together. Let dough rest for 15 minutes. Turn out onto a well-floured counter and knead for 3-5 minutes until smooth and uniform dough forms. Grease or oil a large clean bowl. Add dough, cover with plastic wrap or a towel and let rest in a warm place for an hour or until dough has doubled in size.
- Preheat oven to 425 degrees.
- Combine sweet potatoes, olive oil, salt and pepper in a small bowl to evenly coat. Add to a large baking sheet and bake for 30 minutes. Once finished remove from oven and add back to small bowl. Set aside.
- Preheat oven to 525 degrees.
- Once dough is risen. Roll it out on a well-floured counter until it’s about the size of the baking sheet you used for roasting the squash. Transfer the dough to the baking sheet.
- Top dough with BBQ sauce leaving an inch border on all the edges. Add pork followed by butternut squash, peppers, onions and smoked cheddar.
- Bake for 20 minutes until the crust is golden brown and the cheese is bubbly.
.
????????????
.
CRUNCHY GREEN BEAN BROCCOLI SALAD
Serves 2 (as a meal) or 4 (as a side)
Takes 1 hour
1 head broccoli, cut into florets
15-ounce can chickpeas, drained and rinsed
3 garlic cloves, minced
2 tablespoons olive oil, plus more for drizzling
1/2 teaspoon Kosher salt, plus more to taste
1/4 teaspoon freshly ground black pepper, plus more to taste
1/4 teaspoon dried rosemary
3/4 pound green beans
1 fennel bulb, cored and very thinly sliced
1/4 cup finely chopped fennel fronds
1/4 cup finely chopped parsley, optional
1 tablespoon rice wine vinegar
1/2 tablespoon maple syrup
2 tablespoons sesame seeds (white, black or a combo)
- Preheat oven to 450 degrees.
- On a baking sheet, combine broccoli and chickpeas with garlic, olive oil, salt, pepper and rosemary. Toss with your hands to evenly coat. Roast for 20 minutes, use a spatula to scrape pan and move everything around a bit. Roast 15-20 minutes more until chickpeas are crispy and broccoli is browned in spots.
- Meanwhile, bring a large pot of salted water to a boil on the stove. Add beans and blanch for 5 minutes. Rinse under cold water until cool to the touch. Cut into bite-size pieces and toss with fennel and parsley in a large bowl. Sprinkle with a few pinches of salt and pepper.
- Allow broccoli and chickpeas to cool for 10 minutes then add to bowl. Drizzle with olive oil, vinegar and syrup. Sprinkle with a bit more pinches salt and pepper then the sesame seeds. Stir it all together, taste and adjust seasonings as desired.
.
Week #20; Our first Food Safety review
- On: October 02, 2019
- 2
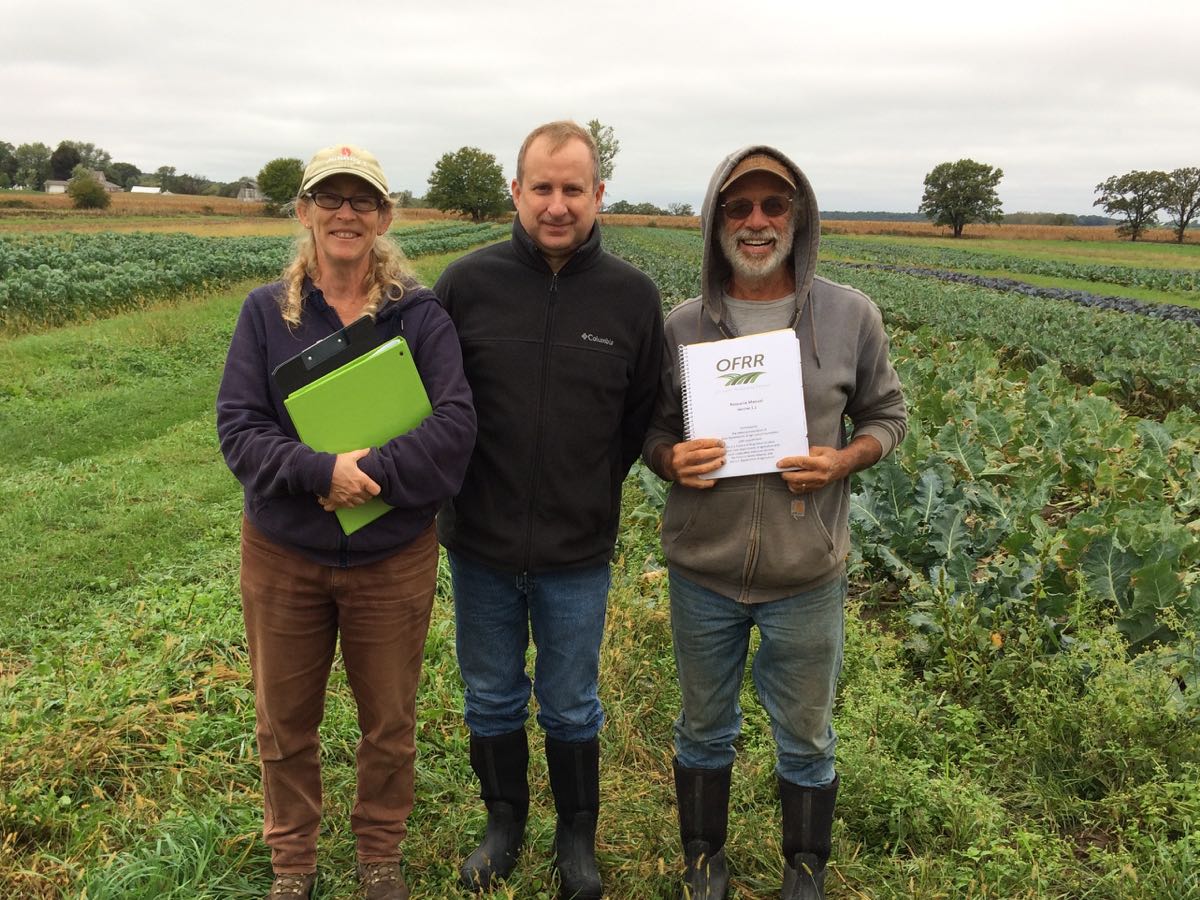
From left; Beth; Michael Barta, Dept of Agriculture, Trade and Consumer Protection (DATCP); Steve. Not in photo, Claire Strader of UW Extension.
We had our first, unofficial farm inspection under the Food Safety Modernization Act (FSMA). “Unofficial” because DATCP offers elective visits with an inspector, a chance to examine our farm without the pressure of an official inspection. The inspector promises to take neither notes nor photographs. It’s strictly informational. Our visit was with DATCP inspector Michael Barta, as well as Claire Strader of UW Extension, who attends these meetings to offer resource support.
FSMA is a big deal for vegetable growers. It’s a federal law intended to prevent outbreaks of food borne illness like E. coli and salmonella on lettuce, melons, etc. The final law was years in the making. Steve and I took FSMA training sessions this past winter and came home with intimidating 2-inch binders of detailed information.
We made two important decisions related to food safety when buying our farm in 2001. First, we knew we wanted a farm with a good underground water supply, and therefore invested in a deep irrigation well. Using surface water (lake, river) for irrigation can contaminate your produce. Second, we chose to avoid all raw manure because of the human pathogens it often carries. Therefore, no livestock, no using the neighbor’s manure, only using soil fertility amendments that we know are free of human pathogens.
The visit went very well. Claire and Michael’s first comment on entering our pack shed was “This is so clean and well organized.” What a great start! It was the middle of a busy work day and I silently thought “Actually, this is pretty messy.” We worked through Michael’s list of topics, eliminating surface water and raw manure as issues right away. They looked at our coolers, pack shed, produce containers, toilets, and fields. We talked a lot about hand-washing and hidden sources of germs. They identified a few things that need attention. We have to do a better job documenting food-safety trainings that we hold for employees. Apparently, we need a back-siphon preventer on our well. There are record-keeping details that need attention.
Over the past month, I prepared as if this were the official inspection, writing up protocols, holding training sessions with the crew, re-thinking some aspects of our pack shed. When in doubt, my motto is always “Stun them with over-preparation.” Honestly, I don’t know how else to function.
Now Steve and I are going to kick back and have a cold beer to celebrate. Beth
Veggie List and Veggie Notes
Week #20, Oct. 3/4, 2019
– Weekly shares
– EOW/ green
Cauliflower
Satina yellow potatoes, 3.5 lb
Leek(s), 1 – 1.25 lb
Green beans, ~3/4 lb
Red frying peppers, 4
Green (or green/red) bell pepper, 1
Orano snack pepper, 1
Broccoli OR Carnival acorn squash (by site)
Yellow onion
Parsley, 1 bunch
Jalapeno (HOT)
Garlic
No tomatoes! They took a nose-dive because of all the rain.
Next week’s box will probably contain sweet potatoes, green cabbage, green beans, yellow onion, poblano chiles and more.
Cauliflower – Storage: Cover and refrigerate. Should store for up to two weeks.
Yellow potatoes – These are good all-purpose potatoes, grown by our friends at Driftless Organics. You will receive one of these varieties: ‘Wega’ (oblong and waxy looking) or ‘Malou’ (round and a little lighter color of yellow).
Green beans – These are some of the best beans of the year. That’s typical as we move into fall weather. Beans grow nicely with cooler nights and less stress. We’ll have more beans for you next week. Storage: Keep in the paper bag but cover the entire paper bag with a plastic bag. It’s a good system. Left in just paper, the beans will wilt in your fridge. With the second layer, they don’t wilt, nor do they rot in contact with the plastic bag.. Alternatively, move them into a closed container of your own.
Leeks (look like big scallions) – We love leeks, one of our favorite fall crops. These alliums have a milder flavor than onions. Nonetheless, they can be used in recipes that call for onions. To wash, split the leek lengthwise, from the green tops about halfway to the base, leaving the base intact. Rinse well under running water, separating the layers to flush. If necessary, split the leek further if soil has penetrated more than halfway down the leek. Shake dry. Leeks are generally eaten cooked. They can be sauteed, steamed or roasted. Intact leeks will store 2 to 3 weeks if covered loosely and refrigerated. The outer leaves will yellow. Just peel them off and discard. The inner leek layers will be fine.
Carnival acorn squash (for a few sites) – Another beautiful speckled acorn squash. Use soon. They are good now but will not store for long.
RECIPES
Visit our 2019 Recipe Log or our 2018 Recipe Log or join our Facebook discussion group.
LOCAL THYME/ Comforting Classics
Lemony Cauliflower Pasta with Bacon
Mashed Potato Puffs
Leek Sweet Pepper Crostini
Roasted Pepper and Tomato Soup
LOCAL THYME/ Outside the Box Recipes
Cauliflower Leek Blue Cheese Soup
Veggie Korma
Grilled Steak with Grilled Peppers and Leeks
Slow Braised Sweet and Hot Pepper Lentils
LOCAL THYME/ Quick & Easy Meal
Chicken and Cauliflower Paprikash
????????????
RECIPES FROM LAUREN
RED PEPPER, POTATO AND HAM FRITTATA WITH RICOTTA
Adapted ever so slightly from the amazing Joshua McFadden Six Seasons cookbook
Takes 45 minutes
Serves 4 easily
1 pound potatoes
Kosher salt and freshly ground black pepper
2 tablespoons butter
3 red frying peppers, seeded and cut into juienne strips
1 leek (white and pale green parts only), cut in half lengthwise and sliced thinly
1/2 yellow onion, diced
4 ounces ham, diced, optional
8 eggs
1/2 cup finely diced fresh parsley
1/2 cup finely grated Parmsan cheese
Extra virgin olive oil
1/2 cup whole-milk ricotta
- Preheat the oven to 400 degrees.
- Put the potatoes in a stock pot and cover with water. Add a couple heavy pinches of salt and bring to a boil over high heat. Cook until the potatoes are tender but not mushy, about 15 minutes. Drain. When cool enough to handle, cut into small bite-size chunks.
- Melt butter in a large heavy, oven-proof skillet (a cast-iron works great if you have one) over medium high heat. Add the peppers, leeks, onion and ham. Season lightly with salt and pepper. Cook until the bell peppers have softened but not browned, about 7 minutes. Add the potatoes to the skillet.
- Crack eggs into a large bowl. Add 1 teaspoon salt, many twists of black pepper, parsley, and the shredded parmesan. Whisk until the eggs are nicely blended. Pour the eggs over the veggies.
- Reduce pan heat to medium and let the eggs sit for 2-3 minutes then carefully slip the spatula around the edges of the eggs, releasing them from the pan (allowing more liquid to flow underneath). Let the new layer of egg cook a bit and then repeat the process a couple more times, about 4 minutes. The top will still be runny but much of it will be set.
- In a small bowl, whisk ricotta lightly with salt and pepper so it’s more of a fluffy consistency. Dollop heaping spoonfuls of ricotta over the eggs in six or seven spots. Transfer to the oven to finish cooking, about 5 minutes. Let the frittata rest and then serve warm in wedges.
.
????????????
.
CHARRED GREEN BEANS WITH TAHINI YOGURT SAUCE
Adapted from the Dining In Cookbook
Takes 20 minutes
Serves 2 for a meal or 4 as a side
1 pound green beans
1/2 cup roughly chopped almonds
1 jalapeno, minced
2 garlic cloves, minced
3 tablespoons apple cider vinegar, divided
Pinch sugar
Kosher salt, divided
1/2 cup Greek yogurt
2 tablespoons tahini
2 tablespoons water
1 tablespoon vegetable oil
1/2 teaspoon freshly ground black pepper
- Bring a large pot of salted water to a boil on the stove. Once boiling, cook your green beans for 5 minutes then drain and rinse under cold water.
- While you wait for the water to boil, you can do a few other things. First toast almonds (either in the oven or on the stove). Then in a small bowl, combine 2 tablespoons vinegar with jalapeno, garlic, a pinch of sugar and a pinch of salt.
- In another small bowl, combine yogurt, tahini, water, remaining vinegar and 1/2 teaspoon Kosher salt. Whisk until smooth.
- Once your beans have been blanched and cooled, heat oil in a large skillet over medium high heat until it glistens. Toss the blanched green beans in there and sprinkle with 1/2 teaspoon Kosher salt and 1/4 teaspoon freshly ground black pepper. Cook over medium high heat, stirring every minute or two until most sides of the green beans are a little charred (about 10 minutes).
- Serve by spreading yogurt mixture over a shallow bowl and topping with green beans. Sprinkle with quick pickled jalapenos and almonds before enjoying. Season with flaky sea salt (or more Kosher salt) and more freshly ground pepper before serving.
.
Week #19, Winter squash primer
- On: September 25, 2019
- 0
We are pushing hard this week to gather all our winter squash and sweet potatoes. There has been so much rain, and more is coming. We have to get these crops harvested and safe in warm storage before the next storm. Our squash and sweet potato crops look great now, but will decline if left outside in wet, chilly weather. From left, Ben, Billy, Kristin, Jory, Linda, Smitty, Simone, John, Michio, Karen and Monika bring ‘Metro’ butternut harvest into the greenhouse. In front, ‘Carnival’ acorn squash.

THIS WEEK’S ACORN SQUASH; ‘Festival’ (left) OR ‘Heart of Gold’ (right)
These are distractingly beautiful, with stripes and patterns in yellow, green, orange and white. We used to grow green acorn squash but switched to the newer striped varieties because they taste better and the plants are more vigorous. You’ll get one or two squash, of one of these types.
Winter Squash Primer
We expect to have a steady supply of squash or sweet potatoes over the coming weeks. Let’s review some basics about winter squash.
Expected life: Some winter squash varieties are ready to eat soon after harvest, others store deep into winter. This week’s acorns are cured and ready to eat. Plan to eat these early varieties within two weeks of delivery. Check the newsletter each week for storage information about that week’s delivery.
Storage: Winter squash store best at room temperature with good air circulation. No cooler than 50 degrees. On your kitchen counter works. Do not cover.
To make squash easier to cut: Microwave on high for 30 to 60 seconds, depending on size of the squash. This will soften the rind and flesh, making it much easier to cut.
Beth’s favorite simple preparation (acorn or butternut): Winter squash are easily roasted in a 400F oven. The goal is to get brown, caramelized edges.
– Split in half with a sharp knife.
– Scoop out and discard seeds.
– Run the squash briefly under running water, then shake off the excess water. Place cavity-side-down on an oiled baking sheet. The little bit of moisture seals the squash to your roasting pan. The water soon evaporates, allowing the squash to brown and caramelize. Caramelization really boosts the flavor.
– Roast at 400F until easily pierced with a fork, 30 – 45 minutes depending on size. Flip over while hot. Add a little butter to melt and some seasoned salt. Cut into wedges and eat.
Stuffed squash
Acorn squash have a central cavity perfect for stuffing. Prepare your favorite fully-cooked stuffing, e.g. a rice or quinoa mixture. Roast your squash as described below. Preheat the stuffing. Fill the cooked squash with stuffing, top with grated cheese and return to the oven until everything is hot.
Can you eat the rind? Last week’s ‘Jester’ had an edible rind. Rinds for acorns and butternuts are thicker. It’s your choice whether to eat them or not. Steve eats them. I don’t.

Carmelized acorn squash.
Veggie List and Veggie Notes
Week #19, September 26, 2019
– Weekly shares
– EOW/ purple
– Sampler/ sun
‘Festival’ or ‘Heart of Gold’ acorn squash, 1 or 2
Broccoli, 1 or 2 heads
Carrots, 1.6 lb
Tat soi OR Swiss chard (by site)
Slicing tomatoes, ~3 lb
Orange grape tomatoes, ~1 pint
Bell pepper, 1, green, purple or yellow
Orano snack pepper, 1 or 2
Walla Walla onion
Yellow onion
Jalapeno chile (HOT)
Basil, 1 sprig
Garlic
Next week’s box will probably contain potatoes, leeks, garlic, cauliflower (or broccoli), peppers and more.
Broccoli – Some heads may have small blackened areas. Just cut them out of the head. This is common after rainy weather.
Tatsoi (head with dark green leaves) – This bok choy relative has darker leaves and thinner stems. Easily substituted for bok choy in recipes.
Slicing tomatoes – This might be our final tomato delivery. At most, we’ll have a handful for you next week. The plants have exhausted themselves after setting a record crop. These tomatoes will not last long. Eat or cook soon.
Basil – This is probably our final sprig of basil for you. I wanted to send it with the (potentially) final bag of tomatoes. We’ve sent tomatoes, basil, onion, garlic and jalapeño so you can make a small pan of sauce.
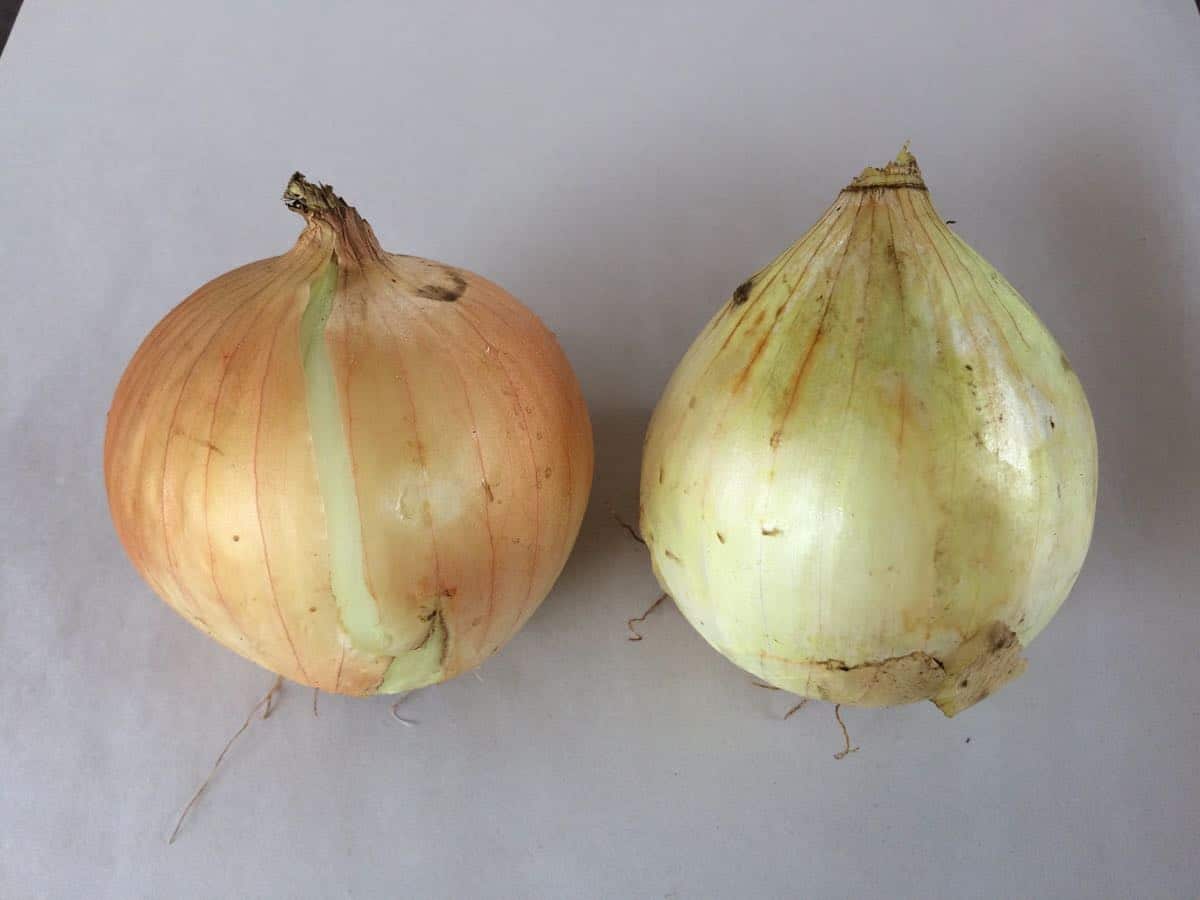
Yellow storage onion (left) versus sweet Walla Walla onion (right)
We have a bumper crop of onions this year, so we’re sending both a yellow storage onion, plus a Walla Walla again. Let’s repeat the information I shared a few weeks ago about their uses and how to tell them apart.
Yellow storage onions are pungent, and (unlike Wallas) will fry and sauté nicely. Their skins are tighter and darker yellow.
Walla Walla onions are sweet, wonderful in salad or for grilling. Because of their high moisture content, they do not fry well. Walla Wallas are a lighter shade of yellow, with sparse outer skins. They tend to look ‘messy’ because they have few outer layers to shed when we clean them up for you. In contrast, the outer skins of yellow onions flake off easily, taking all the soil with them, leaving clean, shiny skins.
RECIPES
Visit our 2019 Recipe Log or our 2018 Recipe Log or join our Facebook discussion group.
LOCAL THYME/ Comforting Classics or Cooking 101
Orecchiette with Tomatoes, Frozen Peas and Ricotta
Wilted Greens with Oyster Sauce
Acorn Squash with Cornbread Stuffing
Penne with Broccoli and Cherry Tomatoes
LOCAL THYME/ Outside the Box or Cooking 202
Pancetta, Beef, and Chorizo Chili with Sweet and Hot Peppers
Grilled Halibut with Wilting Greens and Chiles
Oven Fried Acorn Squash
Spiced Yogurt Roasted Broccoli
LOCAL THYME/ Quick & Easy Meal
Spicy Stir Fry with Broccoli, Greens and Tofu
????????????
RECIPES FROM LAUREN
SPICY MAPLE ROASTED SQUASH & BROCCOLI
Takes 45 minutes
Serves 2-4
3 tablespoons olive oil
1 or 2 acorn squash
1 or 2 heads broccoli, cut into bite size florets
1 teaspoon Kosher salt
1/2 teaspoon freshly ground black pepper
2 garlic cloves, minced
3 tablespoons maple syrup
1/2 – 1 teaspoon Kosher salt
- Preheat oven to 400 degrees.
- Drizzle olive oil over two baking sheets. Cut squash in half lengthwise and remove seeds. Cut into 1/2-inch wide slices and divide evenly onto baking sheets. Add broccoli florets to each tray and toss the mixture gently with your hands to coat. Sprinkle everything with salt and pepper. Roast for 30 minutes, removing half way through and tossing everything for even browning. After thirty minutes, add garlic, syrup and red pepper flakes. Roast 10 minutes further. Remove from oven, allow to cool, and try not to devour immediately.
.
????????????
.
MOROCCAN FALL STEW
Adapted ever so slightly from Dishing up the Dirt
Takes 1 hour
Serves 6
2 tablespoons coconut oil (or olive oil)
1 medium onion, diced
1 pound pork sausage
1 bunch chard or tatsoi (stems and leaves), thinly sliced, divided
3 garlic cloves, minced
1 jalapeno, minced
1 teaspoon ground cinnamon
1 teaspoon ground cumin
1/2 teaspoon ground allspice
2 teaspoons Kosher salt
4 cups diced tomatoes (either cored slicers or grape tomatoes would be fine)
15-ounce can chickpeas, rinsed
1 pound carrots, cut into 1/2 inch thick rounds
1/2 cup roughly chopped dried apricots
2 cups beef broth or water
2 teaspoons red wine vinegar
Greek yogurt, for serving
- In a large stock pot or Dutch oven, warm the oil over medium heat. Add onions and cook until soft, about 5 minutes. Add the pork, cooking it by breaking it apart with a wooden spoon until all the edges brown nicely (about 10 minutes). Add chard or tatsoi stems, garlic, jalapeno, and spices. Cook for a minute or two until the spices are fragrant. Add tomatoes and simmer, scrapping up any brown bits at the bottom of the pan, until the liquid has reduced a bit (about 15 minutes).
- Add the chickpeas, carrots, apricots and brother or water. Bring to a boil, reduce to a simmer and cook uncovered for 20 minutes until the carrots are tender and the stew has thickened. Remove from heat and stir in tatsoi or chard greens and vinegar. Stir several times to wilt the greens. Taste and adjust seasonings as desired.
- Serve the stew with yogurt and sprinkle with additional salt and pepper as needed.
.
Week #18; So many tomatoes
- On: September 18, 2019
- 0

So many tomatoes.
Tomato Gossip
Tomatoes have completely dominated our week.
– We took thousands of pounds of slicing tomatoes to our small-batch processor in East Troy, to make into juice for next year. Yeah! Those tomatoes were of very good flavor so we expect the juice to be really good.
– Members visited during the past two weekends for plum tomato u-picks. You’ve asked for more chances to visit the farm, so we created this new event and planted extra tomatoes to accommodate it. The tomatoes were abundant and everyone went home happy, with plans to make sauce, salsa, dried tomatoes, etc. For the record, people harvested twice as many tomatoes as they thought when placing their reservation. The picking was easy! We consider the u-picks a success and plan to repeat them next year.
– The tomatoes we picked for your CSA boxes are still good quality, good enough for fresh salads. Soon, we will recommend that you cook your tomatoes instead of eating raw.
– We have another 5 lb bag for you this week. Don’t worry, we will taper down the quantities soon.
Veggie List and Veggie Notes
Week #18, September 19/20, 2019
– Weekly shares
– EOW/ green
‘Jester’ winter squash, 1
Tomatoes, ~5 lb, mixed slicing (~2 lb) & plum (~3 lb)
Bok choy, 1
Carrots, 1.6 lb
Broccoli, 1 medium head
Celery, 1 bunch
Poblano chiles (medium heat), 3
A few peppers, maybe 1 bell + 1 fryer + 1 Orano
Shishito peppers (no heat), 3 or 4
Walla Walla onion
Yellow onion
Basil, 1 or 2 sprigs
Next week’s box will probably contain carrots, winter squash, tomatoes, peppers, broccoli, onions, and more.
‘Jester’ winter squash – This is my favorite squash. It’s a hybrid between sweet dumpling and acorn squash. It’s the size of an acorn but with the speckling and delicious taste of sweet dumpling. ‘Jesters’ do not store for long. They are prima donnas. Eat within two weeks, or sooner if you see problems developing. Storage: At room temperature, on your kitchen counter where you can keep an eye on them.
Tomatoes – Tomatoes remain in good shape but their storage life is diminishing. Store on your kitchen counter. Watch carefully and eat soon.
Carrots – These are “summer carrots,” meaning that they were harvested during summer weather. They tend to be more strongly flavored than our “fall carrots” which mature under cold nights. We’ll have “summer carrots” for you this week and next week. There will be a gap and then our fall harvests will begin.
Celery – Our celery is more strongly flavored and more fibrous than typical grocery store celery. Taste it raw then decide how you want to use it, raw or cooked. This is one of our better batches of celery, which we pack in the CSA boxes just once per year. We’ve pushed the planting date later. We want to avoid summer harvests because the celery is tough if it matures during hot weather. Harvest too late in the fall and insect problems accumulate. Who knew celery is so finicky to grow?
Broccoli – The first fall broccoli!
Bok choy (large rosette with thick white stems and green leaves) – This Asian green is good for stir-frying or sautéing or in soup. You can think of the stems and leaves as two separate vegetables. The stems require longer cooking. The leaves will cook almost as quickly as spinach. Bok choy stores well, so feel free to pull off leaves as you need them, or use the whole head at once. Refrigerate in a plastic bag or other container.
Basil – We remain happy with the new ‘Prospero’ variety, the one I wrote about a few weeks ago. It’s holding up well against downy mildew.
Pepper ID
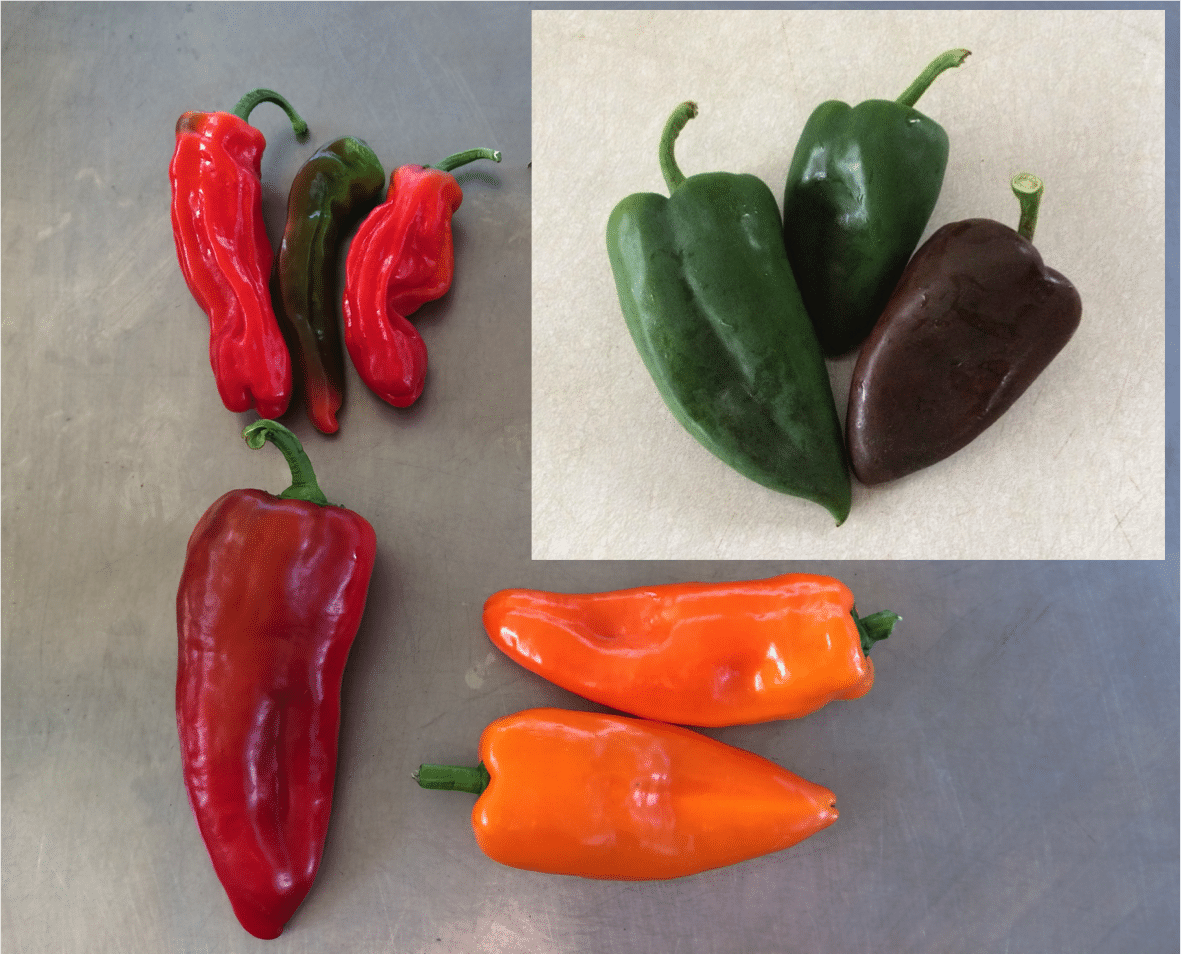
Clockwise from top left;
Shishito peppers (sweet) – From the Johnnys Seed catalogue: “Heavily wrinkled fruits are thin walled, mild (no heat) when green and slightly sweet when red. Popular in Japan where its thin walls make it particularly suitable for tempura. Also very good in stir fries or sautés. In Asia, fruits are always cooked green but they also may be used red. Thinly sliced, the red fruits are excellent in salads and coleslaw.”
Poblano chiles (triangular, shiny; green or brown; MILDLY HOT) – Poblanos are the creme de la creme of chiles. They have lots of great flavor in combination with manageable heat. Roast and add to soup or casseroles. To reduce heat, remove the seeds and midveins. These will go nicely in a stir-fry with the bok choy and red peppers.
Oranos (sweet) – Crisp, zesty snack pepper that can be used like a frying pepper too.
Red frying pepper (sweet) – So fragrant and sweet when roasted or pan-fried, try slicing thinly and adding to a stir-fry. Excellent raw too.
NOT PICTURED; Bell pepper (sweet) – Most of you know how to recognize bell peppers.
RECIPES
Visit our 2019 Recipe Log or our 2018 Recipe Log or join our Facebook discussion group.
LOCAL THYME/ Comforting Classics
Roast Beef and Blue Cheese Sandwiches with Quick Pickled Onions
Cream of Winter Squash and Tomato Soup
Bok Choy and Carrot Slaw
Carrot Squash Puree with Sage Butter
LOCAL THYME/ Outside the Box Recipes
Winter Squash and Caramelized Onion Flatbread
Tomato and Pepper Shakshuka with Eggs
Bok Choy Sauerkraut
Beer, Ham and Cheese Chowder
LOCAL THYME/ Quick & Easy Meal
Chicken Chow Mein
????
RECIPES FROM LAUREN
TAKE OUT STYLE NOODLES WITH BOK CHOY
Adapted from Half Baked Harvest
Takes 30 minutes
Serve 4-6
1/4 cup peanut oil
1 head bok choy, stems and greens thinly sliced, divided
1 orano pepper, seeded and diced
1 frying pepper, seeded and diced
1 inch fresh ginger, peeled and grated
1/2 teaspoon red pepper flakes
2 tablespoons sesame seeds
8 ounces Chinese style egg noodles
1/2 cup tamari
1/4 cup rice wine vinegar
2 tablespoons maple syrup
1-2 tablespoons sambal oelek (or other favorite garlic chili paste)
1/3 cup water
1 pound ground chicken or pork (optional)
1 Walla Walla onion, thinly sliced
Thinly sliced basil, optional
- In a large skillet over medium high heat, heat peanut oil. Add bok choy stems, peppers, ginger, and red pepper flakes. Cook until ginger is fragrant and peppers are just beginning to brown, about 8 minutes. Stir in sesame seeds and cook 1 minute more. Remove from heat, pour into a small bowl, and set aside. Don’t worry about wiping out the skillet. You’ll use it again later.
- Cook noodles according to package directions.
- In medium bowl, combine tamari, vinegar, maple syrup, chili paste, and water. Whisk to combine.
- Return skillet you used earlier to stove. Add ground chicken or pork and cook over medium high heat, breaking up and stirring often, until fully browned. It will take about 5 minutes. Add the sliced onion and cook just 2-3 minutes more. Slowly pour in tamari mixture and add the bok choy leaves. Bring to a simmer and cook until the sauce coats the meat, about 5 minutes. Stir in the noodles and half of the ginger pepper oil. Remove from heat. Serve the noodles warm with additional pepper oil. Stir in some fresh basil if you like right before serving.
.
????
.
AFRICAN PEANUT STEW
Serves 4-6
Takes 45 minutes
2 tablespoons butter, olive oil or coconut oil
1 yellow onion, diced
2 or 3 poblanos (as many as you received), diced
1-2 shishitos, diced
1-2 carrots, diced
1 teaspoon ground cumin
1/2 teaspoon Kosher salt
1/4 teaspoon freshly ground black pepper
2 cup diced tomatoes
1 tablespoon maple syrup
1 Jester squash, seeded and cut into bite-size pieces
4 cups chicken or vegetable broth
1/2 cup peanut butter
Bok choy greens, thinly sliced, optional
2 cups cooked rice
Sriracha, optional
- In a large stock pot, warm butter or oil over medium heat. Add onions, peppers, carrots, cumin, salt and pepper. Saute for 10-15 minutes until well softened. Add tomatoes and maple syrup. Cook for 5 minutes until reduced slightly then add squash, broth and peanut butter. Bring to a boil, reduce to a simmer and cook gently for 15-20 minutes until squash is tender. If using bok choy greens, add them at the very end and cook 2-3 minutes longer until wilted.
- Meanwhile, prepare your rice. Serve stew over rice with sriracha or other hot sauce.
Week #17; A big good-bye
- On: September 11, 2019
- 0
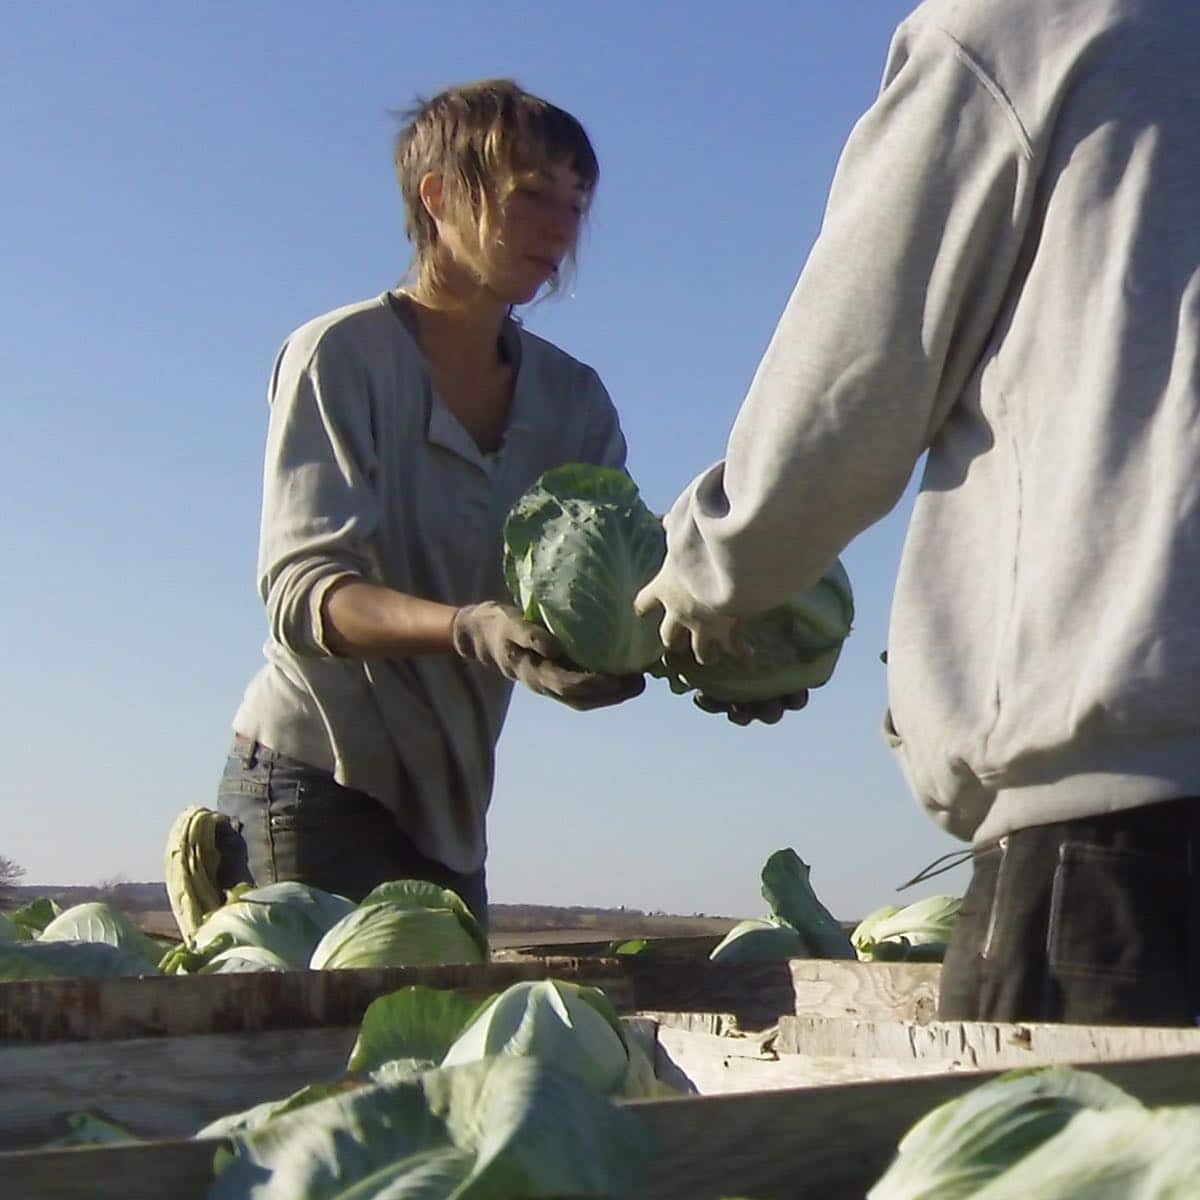
Kerry sorts cabbage at harvest. 2010.
Kerry
Longterm employee/ manager/ righthand woman Kerry Devlin has moved on to the next phase of her life. After working for us since 2006, she has returned to school to study Construction & Remodeling, leaving a big gap at our farm. In her 14 years with us, Kerry grew into being a manager, able to juggle employee crews, machinery and all the fine details of the 40 crops we grow. We call it the ‘split brain’ ability – the capacity to problem-solve and manage many, many details at once.
Kerry grew up while working for us. Hired at age 22, she developed along with the farm during her 20s and 30s. She was at my side as we grew the CSA from “Beth’s hobby” into over half of our farm’s sales. Her quiet steadiness drew her coworkers’ respect and allowed her to develop into an effective leader. She did not expect this. As a shy person, she was nervous about managing people. She grew into the job, gaining confidence as the years progressed.
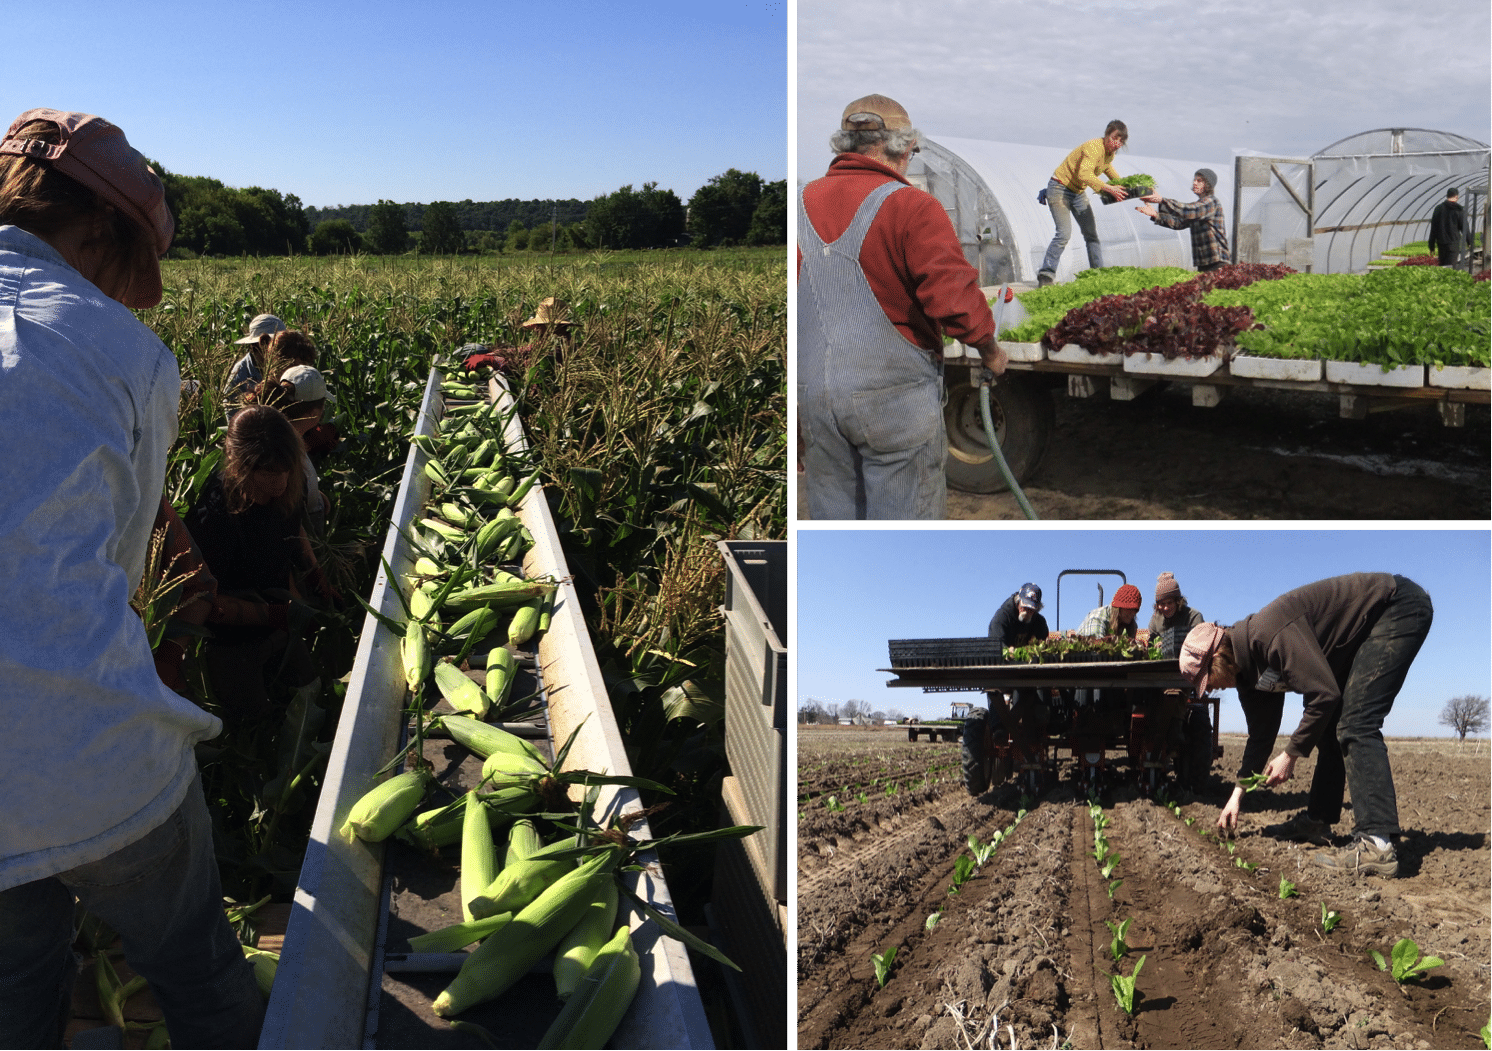
Left; Kerry (foreground, on wagon) sorts and counts sweet corn at harvest. The crew harvests the corn and places it on a conveyer belt for transport to the wagon. 2017.
Top right; Kerry (in yellow) arranges seedlings on the wagon in the correct order for transplanting. 2013.
Bottom right; Kerry (foreground) checks seedling depth and watering during transplanting. 2014.
What do you notice about Kerry in the photos above?
1. She is camera-shy.
2. In each job, she has positioned herself for maximum responsibility. During transplanting, everyone wants to ride the transplanter. It’s easier and more social. Kerry recognized that the person walking behind the transplanter is doing the most important job, even though the work is harder and grubbier, crawling or crouching to be sure the plants are properly set. Are the plants at the right depth? Is the water working? Are the rows at an even depth? Has the transplanter clogged with an old broccoli stem from last year? You can see these complications while walking, but not while riding.
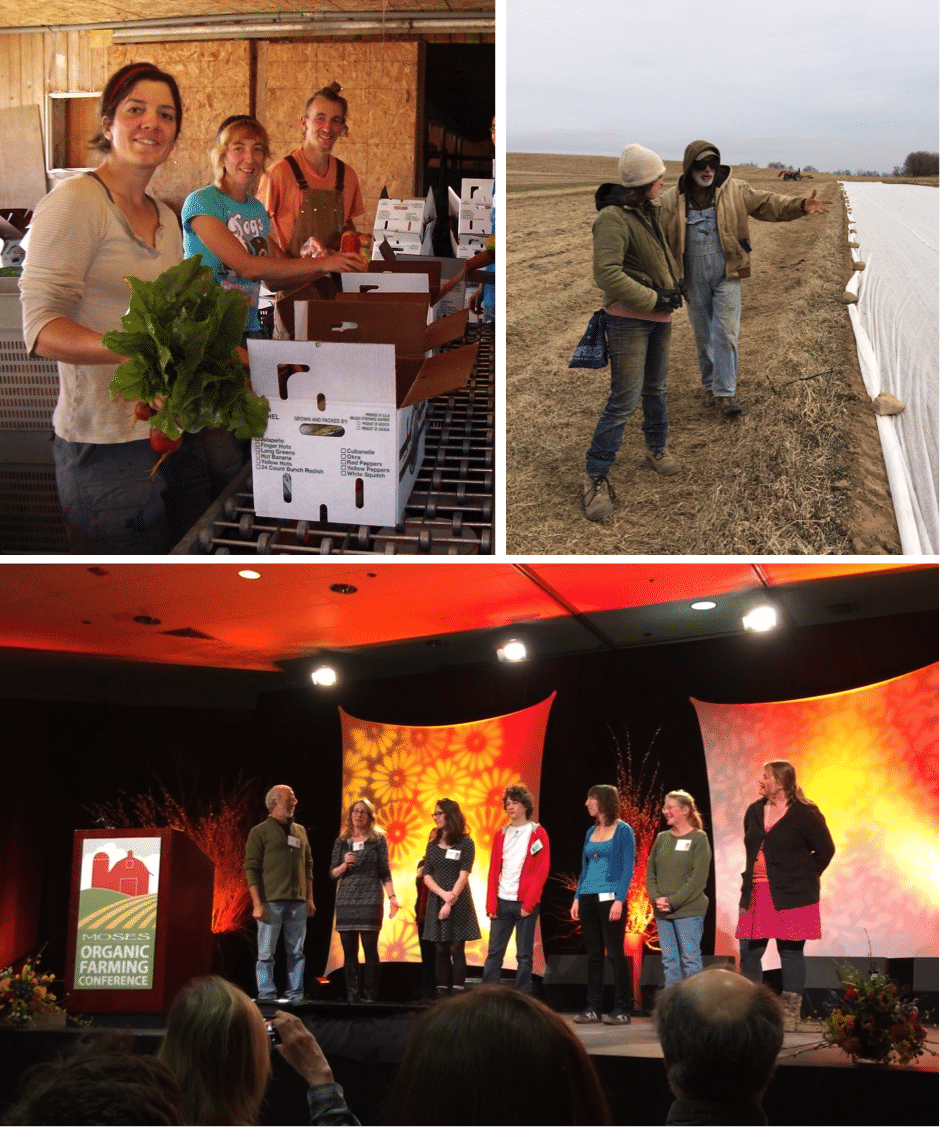
Top left; CSA packing crew (Georgia, Kerry, Noah, 2011.) Kerry has been my righthand woman in running the CSA. There are so many details and a lot of math and problem solving. Together, we got all the details right.
Top right; Steve relied on Kerry’s judgement too. In this photo, they strategize about laying row cover on spring lettuce, 2015.
Bottom; We were thrilled that all three of our Tipi managers could be with us when we were honored as the 2016 Organic Farmers of the Year, for the midwest. From left, Steve, Beth, daughter Sophie, son Ari, Kerry, Simone O’Donahue and Maggie Schley.
Now, what do we do? Panic? Of course not. There’s a lot of talent on the farm right now. We have many capable, longterm employees and managers. Let’s recognize the experience and knowledge of Maggie Schley (22 years), Simone O’Donahue (20 years), Smitty Bietila (9 years), Billy Frain (7 years), Karen Nicholson (7 years), Jory Carlin (5 years) and Kristin Knoener (5 years). They know so much. That’s not everyone, and doesn’t include the people who came and went over the years. Kerry gave us six months notice, plenty of time to train replacements for each of her specialized jobs. For example, we have a wonderful vacuum seeder for greenhouse flats that requires many fine adjustments. Maggie is taking over that important spring job, adding it to her other responsibilities. Our crew has stepped up. By the time Kerry left last week, all her work was covered. We hope!
During her final week on the farm, Kerry asked if she could take a crew to clean weeds out of our biggest greenhouse. I said ‘Sure.’ Weeds grow under the benches, creating a nuisance and sowing a new generation of weeds inside the greenhouse. I swung by later and found Kerry exiting the greenhouse hauling a huge pile of weeds. “This is great. Now the greenhouse is ready for spring,” she said. Even in her final days, she’s thinking about how to help the farm run better.
Kerry, thank you so much. We were lucky to have you as part of our farm for so many years. You are going to be a wonderful carpenter. Beth & Steve
#2 Grade Red Peppers
I write about pepper grading every year. Returning members can say “yeah, yeah” and skip ahead. New members, please read.
Many of the red bell peppers we send in the CSA boxes will be our #2 grade. We’ve sent a mix of #1 and #2 grade so far this year. We do this to avoid waste and to deliver good value to our CSA members. The #2 grade peppers are excellent eating quality, but are not quite pretty enough to sell to our coop store customers. As a result, we place a much lower value on these peppers. This allows us to provide generous amounts of peppers over the course of the season. We feel this is a good exchange, even if it means you occasionally open a pepper and find that it needs trimming. Here are the reasons that peppers are downgraded from #1 grade to #2 grade:
- They may have a minor blemish, or
- They may have minor insect damage, or
- They may be very ripe and beginning to wrinkle. (These are especially sweet and delicious as they are fully ripe. These cannot be sold to stores because their shelf life is short. You will find that the texture is less crisp than a #1 grade pepper, but the flavor more than makes up for it.)
- They might be partially red and partially green.
- Others are just too small.
.
Eating quality is fine (or excellent) for the #2 peppers. We throw away ALL peppers that we suspect have rot inside (although one may occasionally slip through in either #1 or #2 grade.)
Veggie List and Veggie Notes
Week #17, September 12/13, 2019
– Weekly shares
– EOW/ purple
– Sampler/ moon
Tomatoes, 5 lb total, plum (>4 lb) & slicing (<1 lb)
Red potatoes, 3.5 lb
Red frying peppers, ~3
Maybe 1 Jimmy Nardello frying pepper
Red or green bell pepper, 1
Red OR yellow watermelon, 1 small
Romano beans, 1 lb
Zucchini OR cucumber, 1 – 2
Edamame soybeans, 1 medium bundle
Walla Walla onion
Yellow onion
‘Roulette’ OR ‘Habanada’ not-hot habanero chiles, 2
Next week’s box will probably contain carrots, tomatoes, peppers, onions, winter squash and more.
Tomatoes – You will get mostly plum tomatoes this week. They are in good shape. Store at room temperature (e.g. your kitchen counter) but keep an eye on them. If you see signs of spoilage, use quickly. They are ripe.
Red potatoes – These beautiful red potatoes are from our friends at Driftless Organics.
Watermelon – This is the last melon of the season!
Romano beans – Take a look at last week’s newsletter for a description and cooking ideas. This week’s beans are more mature than last week, making them perfect for braising recipes.
Edamame soybeans – See last week’s newsletter for information. The edamame are more mature than last week, and will need longer cooking. Don’t be concerned about yellow leaves. It’s normal at this stage, as the plants divert resources from the leaves into the pods.
‘Habanada’ OR ‘Roulette’ chiles – You will receive one type. Both are new varieties bred to have the aromatic taste of habanero chiles, with almost no heat. Lo and behold, habaneros have a wonderful fruity flavor. No one knew because the blazing heat of a traditional habanero sears your taste buds and you cannot taste the chile itself. Snack on them to enjoy the flavor, or add them to any dish. To reduce all chances of spiciness, remove the seeds and midveins. ‘Habanada’ was developed through a collaboration between chefs and plant breeders. Read more about its background story.
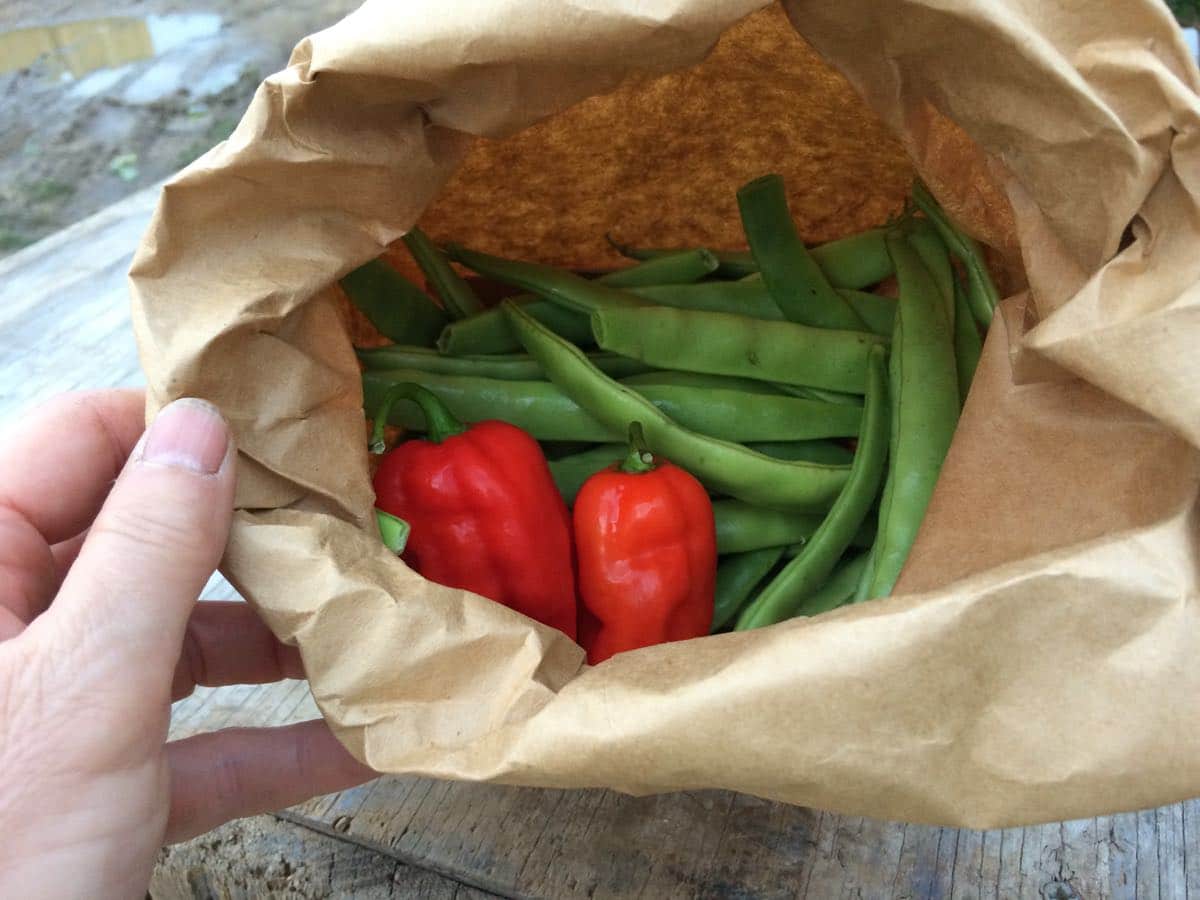
Your ‘Roulette’ or ‘Habanada’ chiles are packed in your bag of beans, to help you identify them.
Yellow storage onion (left) versus sweet Walla Walla onion (right)
You will receive two onions from us this week, with different purposes. Here are their uses and how to tell them apart.
Yellow storage onions are pungent, and (unlike Wallas) will fry and sauté nicely. Their skins are tighter and darker yellow.
Walla Walla onions are sweet, wonderful in salad or for grilling. Because of their high moisture content, they do not fry well. Walla Wallas are a lighter shade of yellow, with sparse outer skins. They tend to look ‘messy’ because they have few outer layers to shed when we clean them up for you. In contrast, the outer skins of yellow onions flake off easily, taking all the soil with them, leaving clean, shiny skins.
RECIPES
Visit our 2019 Recipe Log or our 2018 Recipe Log or join our Facebook discussion group.
LOCAL THYME/ Comforting Classics aka Cooking 101
Tomato and Pepper Braised Romano Beans with Herb and Garlic Goat Cheese
Sweet Red Pepper Sauce with Capellini
Wholegrain Mustard Roasted New Potatoes with Salmon and Tomatoes
Tomato Bruschetta with Thyme
LOCAL THYME/ Outside the Box Recipes
Romano Bean, Potato and Meatball Stew
North African Roasted Vegetable Salad
Curried Chana Dal with Potato, Peppers and Romano Beans
Spanish Roasted Tomatoes and Peppers with Jamon
LOCAL THYME/ Quick & Easy Meal
Shrimp Edamame and Pepper Stir Fry
????
RECIPES FROM LAUREN
SKILLET SAUSAGES WITH ROMANO BEANS & TOMATO CREAM
Takes 45 minutes.
Serves 4-6 (or more if served over rice).
3 tablespoons vegetable oil
1 pound favorite sausage, preferably a pre-cooked variety (I used Klement’s smoked sausage)
1 Walla Walla onion, diced
2 habanada or roulette chiles, diced
1 teaspoon Kosher salt, divided
1/4 teaspoon freshly ground black pepper
3 cups chopped tomatoes
1 cup chicken or vegetarian broth
1 pound romano beans, cut into 1-inch pieces on the diagonal
1/4 cup heavy cream
Cooked white rice, optional
- In a large heavy skillet or Dutch oven, heat oil over medium high heat. Add sausages and cook for 5-7 minutes until charred on both sides. Remove to a cutting board and slice into 1-inch pieces.
- Turn skillet or Dutch oven heat down to low. Add onions and peppers along with 1/2 teaspoon Kosher salt and pepper. Saute for 10 minutes until softened. Add tomatoes and broth. Bring to a boil, reduce to a simmer and cook for 5 minutes. Add romano beans along with remaining salt. Partially cover and continue simmering for 10 minutes. Remove from heat and stir in cream. Add sausages back in. Taste and adjust seasonings as deserved. Serve in bowls or over rice!
.
????
.
FALL FAJITAS WITH AVOCADO EDAMAME MASH
Takes 30 minutes.
Serves 4-6.
1/4 cup olive oil, divided
1-2 green bell peppers, seeded and cut into thin strips
2 colored peppers, seeded and cut into thin strips
1 yellow onion, cut in half and thinly sliced
3 garlic cloves, minced
1 teaspoon Kosher salt, divided
1/2 teaspoon freshly ground black pepper
1 pound flank steak, cut into thin strips
2 teaspoons cumin
2 teaspoon chili powder
1 pinch cayenne powder
2 avocados
1 cup shelled edamame (pods boiled for 4 minutes and then removed from shells)
1 lime, juiced
Tortillas
Sour cream or Greek yogurt, optional
Hot sauce, optional
- In a large heavy skillet, heat 2 tablespoons olive oil over medium heat. Add peppers, onions, and garlic with 1/2 teaspoon each salt and pepper. Cook for 15 minutes, stirring occasionally. You want the veggies to be softened and just beginning to char in places. Add steak along with cumin, chili powder, and cayenne. Saute 5 minutes longer, just until steak is cooked through.
- Combine avocado and edamame in a small bowl. Smash with a potato masher, pastry cutter or two forms until the two come together. Add lime juice from half a lime and remaining 1/2 teaspoon salt. Taste and adjust flavors as desired. I used the juice from a whole lime but you may not want to.
- Warm tortillas on a skillet or in microwave and serve with a generous portion of both avocado edamame mash and fajita mixture. Top with sour cream or Greek yogurt and hot sauce if desired. Enjoy!
.
????
.
EASY OVEN FREEZER TOMATOES
Takes 1 hour, 15 minutes (almost all inactive)
1/4 cup olive oil
5 pounds tomatoes, cored and cut into quarters or eighths depending on size
1 Walla Walla, cut into quarters
1 colored bell pepper, cut into large chunks
4 garlic cloves, peeled
1/2 teaspoon Kosher salt
1/4 teaspoon freshly ground black pepper
- Preheat oven to 450 degrees.
- Pour olive oil into a 9 x 13-inch pan. Add tomatoes, skin side down if possible. Nestle onion (it’s good if the layers fall apart a bit), pepper chunks, and garlic into between the tomatoes so they are even distributed throughout the pan. Sprinkle with salt and pepper.
- Roast for 45-60 minutes until their is less juice remaining and the tomatoes even have a little browning on their edges. Let cool and then pack into freezer-proof mason jars or freezer bags for chunky tomatoes to use in winter soups, stews, or chilis. Or puree in your food processor or blender before freezing for a quick pizza or pasta sauce.
.

