
Monthly Archives: May 2020
Week #2; May 28/29, 2020
- On: May 27, 2020
 2
2
![]()
Transplanting zucchini on Friday night.
A round of applause
Let’s hear it for our incredible, hard-working crew. The photo above was taken at 7:00pm on Friday, way past our usual 5:30 ending time. Rain was coming, we were short-handed all week, and needed to get those zucchini plants in the ground. Everyone stepped up, even while social distancing. Powerhouse crew leader Maggie egged everyone on with speed competitions. It was fun and got the job done, but we cannot end every week like this.
Otherwise, I do not have anything coherent to report this week. We are working so hard, figuring out new farm systems and getting your produce ready. I will catch you up on farm news in a week or so.
Enjoy the produce this week.
Beth
June 1 checks
Many of you paid us with checks post-dated to June 1. I plan to deposit the checks this coming week.
Veggie List & Veggie Notes
Week #2, May 28/29, 2020
– Weekly shares
– EOW/ purple
– Sampler/ sun
It’s another week for salad! Please wash your greens and asparagus well, using the techniques we described in last week’s newsletter. It rained a lot this week and rain splashes grit into asparagus tips and anything that forms a head (lettuce, bok choy).
‘Goldrush’ potatoes, 3.3 lb
Asparagus, 0.9 lb
Romaine lettuce, 1 large
Bok choy, 1 medium
Spinach, 1 bunch
Arugula, 1 small bunch
Salad radishes, 1 bunch
Green garlic, 1 bunch
Rhubarb, 1.5 lb
Next week’s box will probably contain asparagus, lettuce, spinach, some kind(s) of greens, scallions and more.
See last week’s newsletter for storage and cooking information for these vegetables:
Asparagus, spinach, lettuce, arugula, salad radishes, green garlic, rhubarb
‘Goldrush’ russet potatoes – Please refrigerate these potatoes. They are in great shape now but will sprout within days if stored at room temperature. They’ve been stored all winter and want to grow. Store in a paper bag to protect from light, even in the fridge. We grow everything we send in our CSA boxes except potatoes and mushrooms and some asparagus, all of which we buy from organic growers that we trust. We purchased these potatoes from Jesse Perkins at Vermont Valley Farm. ‘Goldrush’ are good all-around potatoes with outstanding flavor. Jesse says the potatoes have a higher sugar content because of starch to sugar conversion during cold storage. The potatoes taste a bit sweet, and will blacken slightly when fried. It’s a harmless color change due to the sugar conversion.
Asparagus – This week’s asparagus is from our farm and from LOTFOTL Farm in Elkhorn, run by our friends Tim Huth and April Yuds. Tim has planted an organic asparagus field larger than they need. Our asparagus is less productive this year because of Japanese beetle attacks last summer. We have the perfect joint solution; Karen, Kristin and Ben went down this week and harvested the asparagus, to deliver to you folks. This week’s delivery is about half our crop and half LOTFOTL.
Romaine lettuce (upright head of lettuce with crisp leaves) – More sturdy and less fragile than our other spring lettuces. Great for Caesar Salad or lettuce wraps. If you’re intimidated by the amount of salad greens this week, Ceasar salad is a good option because it really shrinks a big head of lettuce and everyone will fight over the leftovers. Poof, it’s gone.
Bok choy (large rosette with thick white stems and green leaves) – This Asian green is good for stir-frying or sautéing or in soup. You can think of the stems and leaves as two separate vegetables. The stems require longer cooking. The leaves will cook almost as quickly as spinach. Bok choy stores well, so feel free to pull off leaves as you need them, or use the whole head at once. Refrigerate in a plastic bag or other container.
Rhubarb – If you are looking for rhubarb ideas, head over to our private Facebook group. Wow, I am impressed with everyone’s creativity and energy, and not just with rhubarb.
Storage: Rhubarb is the easiest thing to freeze. Wash, chop and pop it in a freezer bag. That’s it; no need for blanching. When baking muffins or cakes, just add the frozen rhubarb to the batter.
RECIPES
Visit our 2020 Recipe Log or our 2019 Recipe Log or join our Facebook discussion group.
LOCAL THYME/ Comforting Classics
Pasta Salad with Feta, Asparagus and Arugula
Salmon with Bok Choy, Ginger, Garlic and Sesame
Garlicky Three Greens Soup
LOCAL THYME/ Outside the Box Recipes
Veggie Sauté with Bok Choy, Radishes and Asparagus
Soba, Pork and Bok Choy Stir Fry
Arugula, Radish Salad with Tuna
LOCAL THYME/ Quick & Easy Meals
Lentil Soup with Rhubarb
Hot Pot with Tofu, Noodles, Spinach and Radish
.
Recipes from Lauren

SPICY PORK TACOS WITH GREEN GARLIC CHIMICHURRI & RADISHES
Serves 4-6
Takes 15 minutes.
2-3 pounds pork shoulder, bone-in or out are both fine
Kosher salt and freshly ground black pepper
12-ounce lager of your choice (does not need to be fancy; I usually keep a bunch of Miller Lite around for this purpose)
2 teaspoons favorite chili powder (the spicier the better)
1 bunch green garlic, white and pale green parts only, trimmed and cut into 1-inch pieces
1/4 cup rice wine vinegar
1 tablespoon honey
1/2 teaspoon red pepper flakes
1/2 cup olive oil
Tortillas
3-4 radishes, julienned
1/4 pound arugula, roughly chopped, optional
1-2 avocados, optional
- Season pork shoulder well with salt and pepper. Place in crock pot. Pour beer into crock pot and cover. Turn on low for 8 hours (longer is fine) or high for 4 hours.
- When you get home, remove the meat from the crock pot and allow it to cool while you make the chimichurri.
- Combine green garlic, vinegar, honey, red pepper flakes and 1 teaspoon salt in food processor. Process until combined and finely chopped. Drizzle in olive oil with processor running until smooth.
- Shred the pork, toss it with chili powder and serve on tortillas with chimichurri and julienned radishes as well as arugula or avocado if using.
????
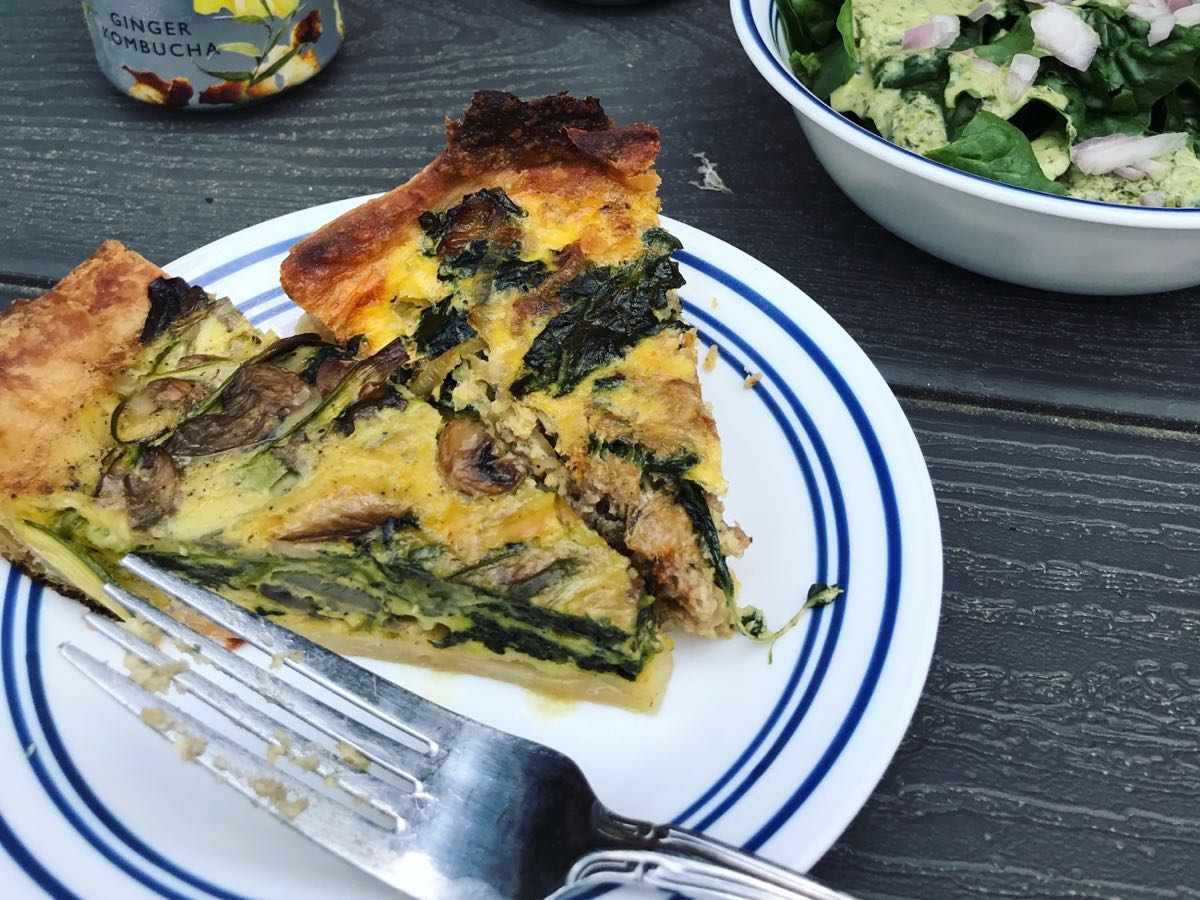
SHAVED ASPARAGUS, SPINACH & MUSHROOM QUICHE
One 9-inch quiche
Serves 4-6
Takes 1 hour if making crust from scratch (and if not made in advance)
1 cup cold water
2 sticks + 2 tablespoons butter, cold, divided
2-1/2 cups all-purpose flour
1 tablespoon sugar
2-1/2 teaspoons salt, divided
12 ounces button, cremini or shittake mushrooms, cleaned and sliced
1/2 pound spinach, leaves torn or roughly chopped
1-1/2 teaspoon Kosher salt, divided
1/2 pound asparagus, shaved
4 eggs
1/2 cup heavy cream
1/4 cup whole milk
1/2 cup shredded Parmesan
1/2 teaspoon freshly ground black pepper
- Preheat oven to 400 degrees.
- Now, let’s start your pie dough! Are you ready?! (If you used store-bought crust or have your own great pie dough recipe skip to step 5). Fill your liquid measuring cup with 1 cup cold water and place it in the freezer. Next get your butter out of the fridge and cut it into small cubes. Place it in the freezer until ready to use.
- Meanwhile, measure flour, sugar and 1 teaspoon salt into the bowl of a food processor. Pulse once or twice to combine. Add chilled cubes of butter and process for 10-15 seconds until butter is broken into smaller pieces. Drizzle in cold water while the processor is running, first 1/2 cup then a couple drops more. Let it keep processing for 10-15 seconds after you’ve added the water. Add a little more water if the dough isn’t coming together. It should form a ball in the processor. Immediately remove it from the food processor with a spatula, wrap in plastic and place in the freezer for 15 minutes while you slice your mushrooms, chop your spinach, shave your asparagus and grate your Parmesan. (If you made this in advance, it could be kept in the fridge and ready for you immediately).
- Remove the dough from the freezer, cut in half and roll out into a 14-inch circle. (The other half of the dough can be kept in the fridge about a week or just make a double batch!). Press the dough into a 9 or 10-inch pie pan, cover with foil and pie weights then bake for 15 minutes. If you are using a store-bought crust, follow package directions.
- Meanwhile, in a large saute pan, melt butter over medium heat. Add mushrooms and 1/2 teaspoon salt. Saute for 5-10 minutes until just beginning to release their juices then add the spinach. Stir to combine and cover. Turn off the heat but leave pan on burner for five minutes just to steam the spinach. Add shaved asparagus along with remaining salt and pepper. Stir to combine and then pour into pre-baked crust.
- In a medium bowl, combine eggs, cream and milk. Whisk until smooth then add Parmesan. Pour over asparagus mixture. Shake pan to even out the filling. Bake for 30-35 minutes until cooked through.
????
.
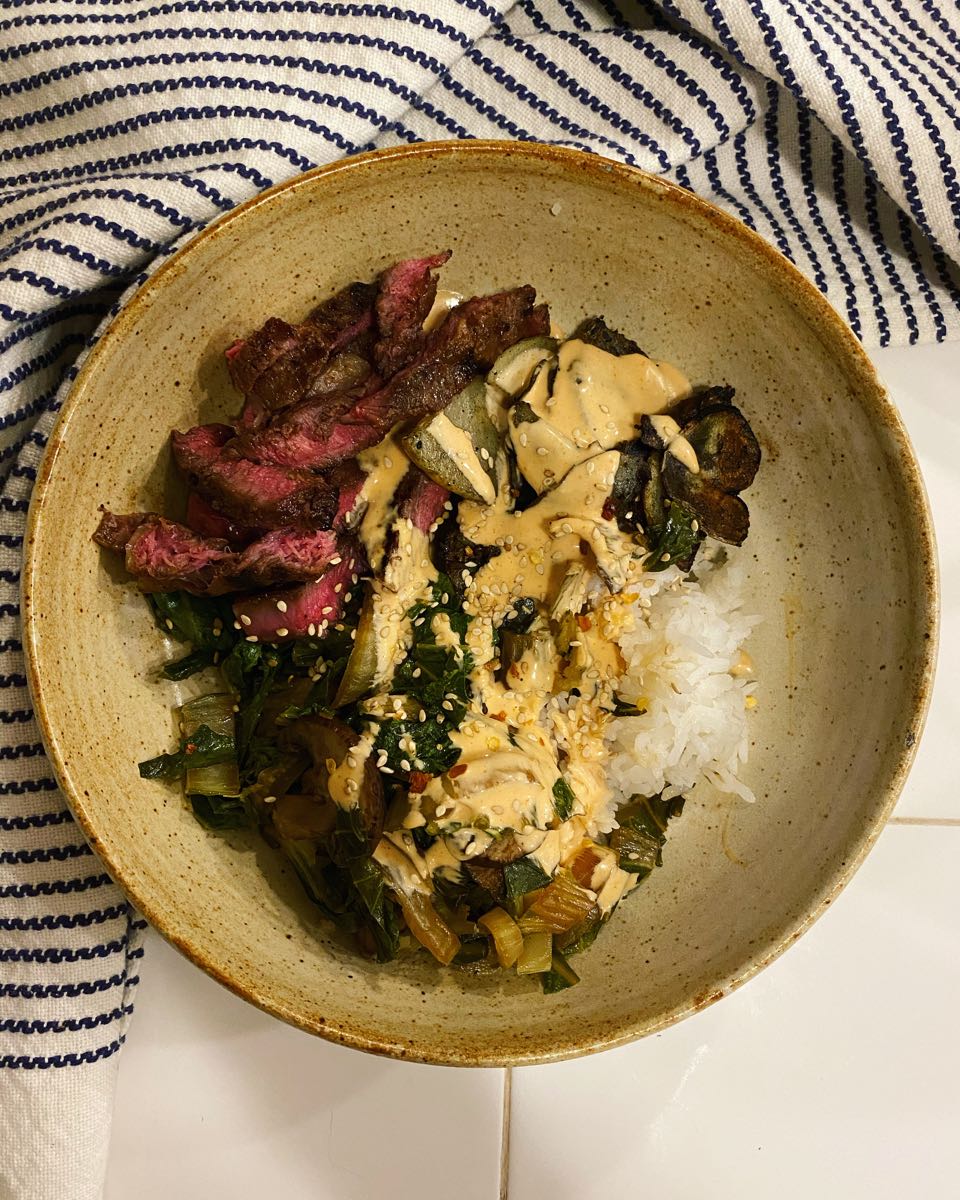
BEEF, POTATO & BOK CHOY BOWLS
Takes 40 minutes
Serves 2-4
4 garlic cloves
1/2 cup soy sauce
3 tablespoons maple syrup
3 tablespoons rice wine vinegar
1 tablespoon toasted sesame oil
1 teaspoon red pepper flakes
1 pound favorite steak (flat iron or skirt steak work great here)
1/4 cup olive oil, divided
1-1/2 pounds Gold potatoes
2 teaspoons Kosher salt, divided
1/2 teaspoon freshly ground black pepper, divided
1 head bok choy, stems and leaves thinly sliced
Siracha mayo (recipe below), optional
Toasted sesame seeds, optional
- In a small bowl, whisk together first five ingredients. Set 1/3 of the mixture off to the side and pour the rest over steak. Let things marinate while you cook the veggies.
- Heat a heavy skillet over medium high heat. Add two tablespoons until almost smoking and then add potatoes followed by 1 teaspoon Kosher salt and 1/4 teaspoon freshly ground black pepper. Set the timer for 15 minutes and let those potatoes crisp up. You’ll want to use a metal spatula to scrape the bottom of the pan every 2-3 minutes or so.
- Remove the potatoes, reduce heat to medium low and heat an additional 2 tablespoons of olive oil in the same skillet. Add mushrooms along with additional teaspoon of salt and 1/4 teaspoon pepper. Cook for 3-5 minutes until browned. Add bok choy and reserved marinade. Cook down until reduced slightly, about 3 more minutes.
- When everything is just about ready, cook the steak over a medium high grill until cooked to desired doneness.
- Serve steak, potatoes and bok choy mixture in a bowl with a drizzle of sriracha mayo and sesame seeds, if using. Add rice or another grain if desired.
.
SRIRACHA MAYO
1/2 cup mayonnaise
2 tablespoons sriracha
1 tablespoon soy sauce
1/2 lime, squeezed
Combine together in a small bowl. Whisk to combine.
.

First delivery!
- On: May 20, 2020
- 4
Welcome to our CSA! Deliveries begin this week for:
– Weekly members, and
– Every-other-week/ green group
Go here to check the delivery schedule for other shares.
Things you need to know.
♦ We post this newsletter/blog each Wednesday night, with a list of veggies for the week, quantities, information about storage and preparation, news of the farm, recipes, and a forecast for the next week’s box. We alert you by email on Wednesday night once the newsletter is posted and ready to read.
♦ Want earlier notice of what will be in the box? Check the sidebar on our website homepage around 7 – 8 p.m. on Wednesday night. I’ll post the list under “Box Contents.” I also provide a tentative list for the following week in the Veggie List section of this newsletter. The next week’s list is rarely complete but the items listed are ones we feel confident about.
♦ EOW, sampler and weekly members, we assume you read all the newsletters, even on your “off” weeks. This newsletter (and our emails to you) are our means to communicate with you.
♦ The first few boxes of the season are often the lightest. EOW members, do not worry that you have signed up for the wrong share! Our deliveries get heavier and more abundant as the season progresses.
♦ Wash your produce well this week to remove grit. It has rained a lot lately, driving grit into the asparagus and anything that forms a head (lettuce, arugula, spinach). Our crew took extra care with washing but expect to wash everything. You should always wash your produce!
♦ On Thursday, we deliver CSA boxes to Evansville, Fitchburg, Madison, McFarland, Middleton, Oregon and Verona.
♦ On Friday, we deliver CSA boxes to Brookfield, Janesville, Mequon, Milwaukee, Waukesha and Wauwatosa.
Mushroom experiment
We are experimenting with paper bags this year, instead of foam trays. We arranged this in winter with Mary from Hidden Valley Mushrooms, our mushroom supplier, as part of an ongoing effort to switch from plastic to paper. Now our plastic liner bags dwarf these efforts. Sigh. Anyway, you are part of the experiment. We think you should keep the mushrooms in the paper bag, but cover it with a plastic bag to reduce moisture loss. Handle as little as possible to avoid bruising. I am curious how well they hold up for you. After eating them, tell us your experience.
How to wash greens efficiently and to maximize storage life
Everything needs careful washing this week. All the rain splashed grit into the lettuce, escarole, etc. Here’s our approach. It works.
1. We have one kitchen sink so we use a 4 gallon Rubbermaid basin. Fill halfway with cold tap water. If you have two sinks, fill one sink partway with cold water.
2. Chop your lettuce, spinach, escarole or other green to the size you wish.
3. Dump it into the water and swish around gently but thoroughly.
4. Working in two batches (for average lettuce head) or more batches (big spinach bunches, Romaine), pull handfuls out of the water and drain in the basket of a salad spinner.
5. After all the greens have been rinsed one time, dump the water. Rinse the basin and refill with cold tap water.
6. Repeat the process.
7. Spin your greens dry and store in a dry container. They store much longer when spun dry.
This works because …
– pre-chopping the greens frees soil trapped in the head.
– the large amount of water washes and dilutes away the grit.
– By pulling the greens out of the water, you take advantage of the draining action to pull the grit with it.
Veggie List and Veggie Notes
May 21/21, 2020 (Th/Fri sites)
Overall, quality of the produce is very nice, with a few caveats. The greens have grown beautifully in the cool weather. Notice how dense and tender your lettuce head is, and how lush and thick the spinach. However, many crops show silvering on a few leaves. Most of this is frost-damage, even on crops that were sheltered under row cover during recent cold nights.
Spinach, 1 big bunch
Green leaf lettuce
Arugula, 1 bunch
Button mushrooms, 12 oz.
Salad radishes, 1 bunch
Asparagus, ~1/4 lb
Green garlic, 1 bunch
Rhubarb, 1.5 lb
Next week’s box will probably contain spinach, lettuce, potatoes, asparagus, radishes, rhubarb and more.
Lettuce and spinach – Wash your greens to remove grit splashed into the heads by rain. Cut to the size you like, submerge in water, swish gently, then pull from the water and drain in a colander. Some weeks, you will need to repeat in fresh water. I find it useful to use a kitchen tub for this job, so you don’t have to run an entire sink of water.
Storage hint – To extend the storage life of your tender greens, wash them, dry in a salad spinner, then store in a dry container or bag. Lettuce, spinach and arugula last much longer when handled this way.
Arugula – (bunch of green leaves with pungent scent) – This is a spring treat! Arugula is good mixed with lettuce or spinach in salads, or added to cooked dishes such as lasagne or quiche. I love it on sandwiches. This arugula is thin-leaved and tender and will not store for long. Eat soon. Cover and refrigerate.
Button mushrooms – These are from Hidden Valley Mushrooms in the WI Dells. As mentioned above, this is the first time we’ve delivered button mushrooms in paper bags. We suggest that you cover the entire paper bag with a plastic bag.
Salad radishes – These are so good right now; tender, crisp and not too spicy. They are great in salads or thinly sliced on sandwiches. A few years ago, I was served open-faced radish and butter sandwiches on toast and was impressed with how tasty they were. Use good quality butter.
Storage: cover and refrigerate.
Asparagus – Asparagus has grown very slowly this week, following frost and cold nights. There’s more to come in the next few weeks! It’s a small amount this week, but let’s discuss how to use it well, for this week and future deliveries.
Prep: Wash your asparagus thoroughly to remove hidden grit. Submerge in water with the tips pointing down, soak briefly, then swish vigorously and pull out of the water. The draining action helps pull the grit out of the asparagus tips. Repeat several times.
Storage: Asparagus is perishable, so eat it as soon as possible. Store in a paper towel, cloth or paper bag, then wrap loosely in a plastic bag. The paper bag protects the asparagus tips from direct contact with the plastic bag. The plastic bag keeps the asparagus from wilting.
Preparation: We snap our asparagus at harvest, rather than cutting. Therefore, there is no need to snap the stalks to remove fibrous ends. For the same reason, it is not necessary to peel the asparagus stalks. It’s OK to trim the cut end a bit.
Cooking: If your asparagus stalks vary greatly in size, you will want to cook the thicker ones longer. Put an empty steamer pot over water, and bring the water to a boil. Add the asparagus. Cover and steam over medium heat until just tender. Use two forks or a spatula to turn the asparagus during cooking, rotating the bottom spears to the top. Drain and serve. Alternatively, you can lay spears flat in the bottom of a broad pan, with ½ inch of water. Also excellent broiled or grilled. Good dressed with vinaigrette, or with lime juice, salt and pepper.
Green garlic (looks like scallions, tastes like garlic) – Last fall, we planted garlic cloves that grew into the stalks we harvested this week. If left to grow until mid-summer, the slim white bulb on this week’s garlic will divide and form the usual cluster of cloves in a garlic bulb. This year’s green garlic is robust.
Preparation: Green garlic is more pungent than scallions, so slice thinly and use sparingly when raw. It mellows when cooked. Chop and add to any cooked dish that would benefit from garlic. Use the white bulbs and pale green stems. Avoid the dark green stems and leaves, as these are fibrous.
Rhubarb – Refrigerate in a plastic bag. FYI, 2 lb of rhubarb yields 6 – 6.5 cups when chopped.
Stewed rhubarb: This is the simplest way to prepare rhubarb. Chop rhubarb into one inch chunks. Stir over medium heat with a small amount of water in the bottom of the pan. The rhubarb will release moisture as it cooks. Stew until it softens and falls apart. Sweeten to taste with honey or sugar. Eat warm on its own, over vanilla ice cream, on pancakes, etc.
Recipes from Local Thyme
Comforting Classics
Arugula Salad with Shaved Parmesan and Balsamic Vinaigrette
Pappardelle Florentine
Gingered Rhubarbade
Outside the Box Recipes
Spinach, Radish,
Mushroom, Asparagus Salad with Rhubarb Vinaigrette
Pan Seared Chicken Breasts with Curried Spinach and Apples
Rhubarb Bread with Almonds and Orange Zest
????
RECIPES FROM LAUREN
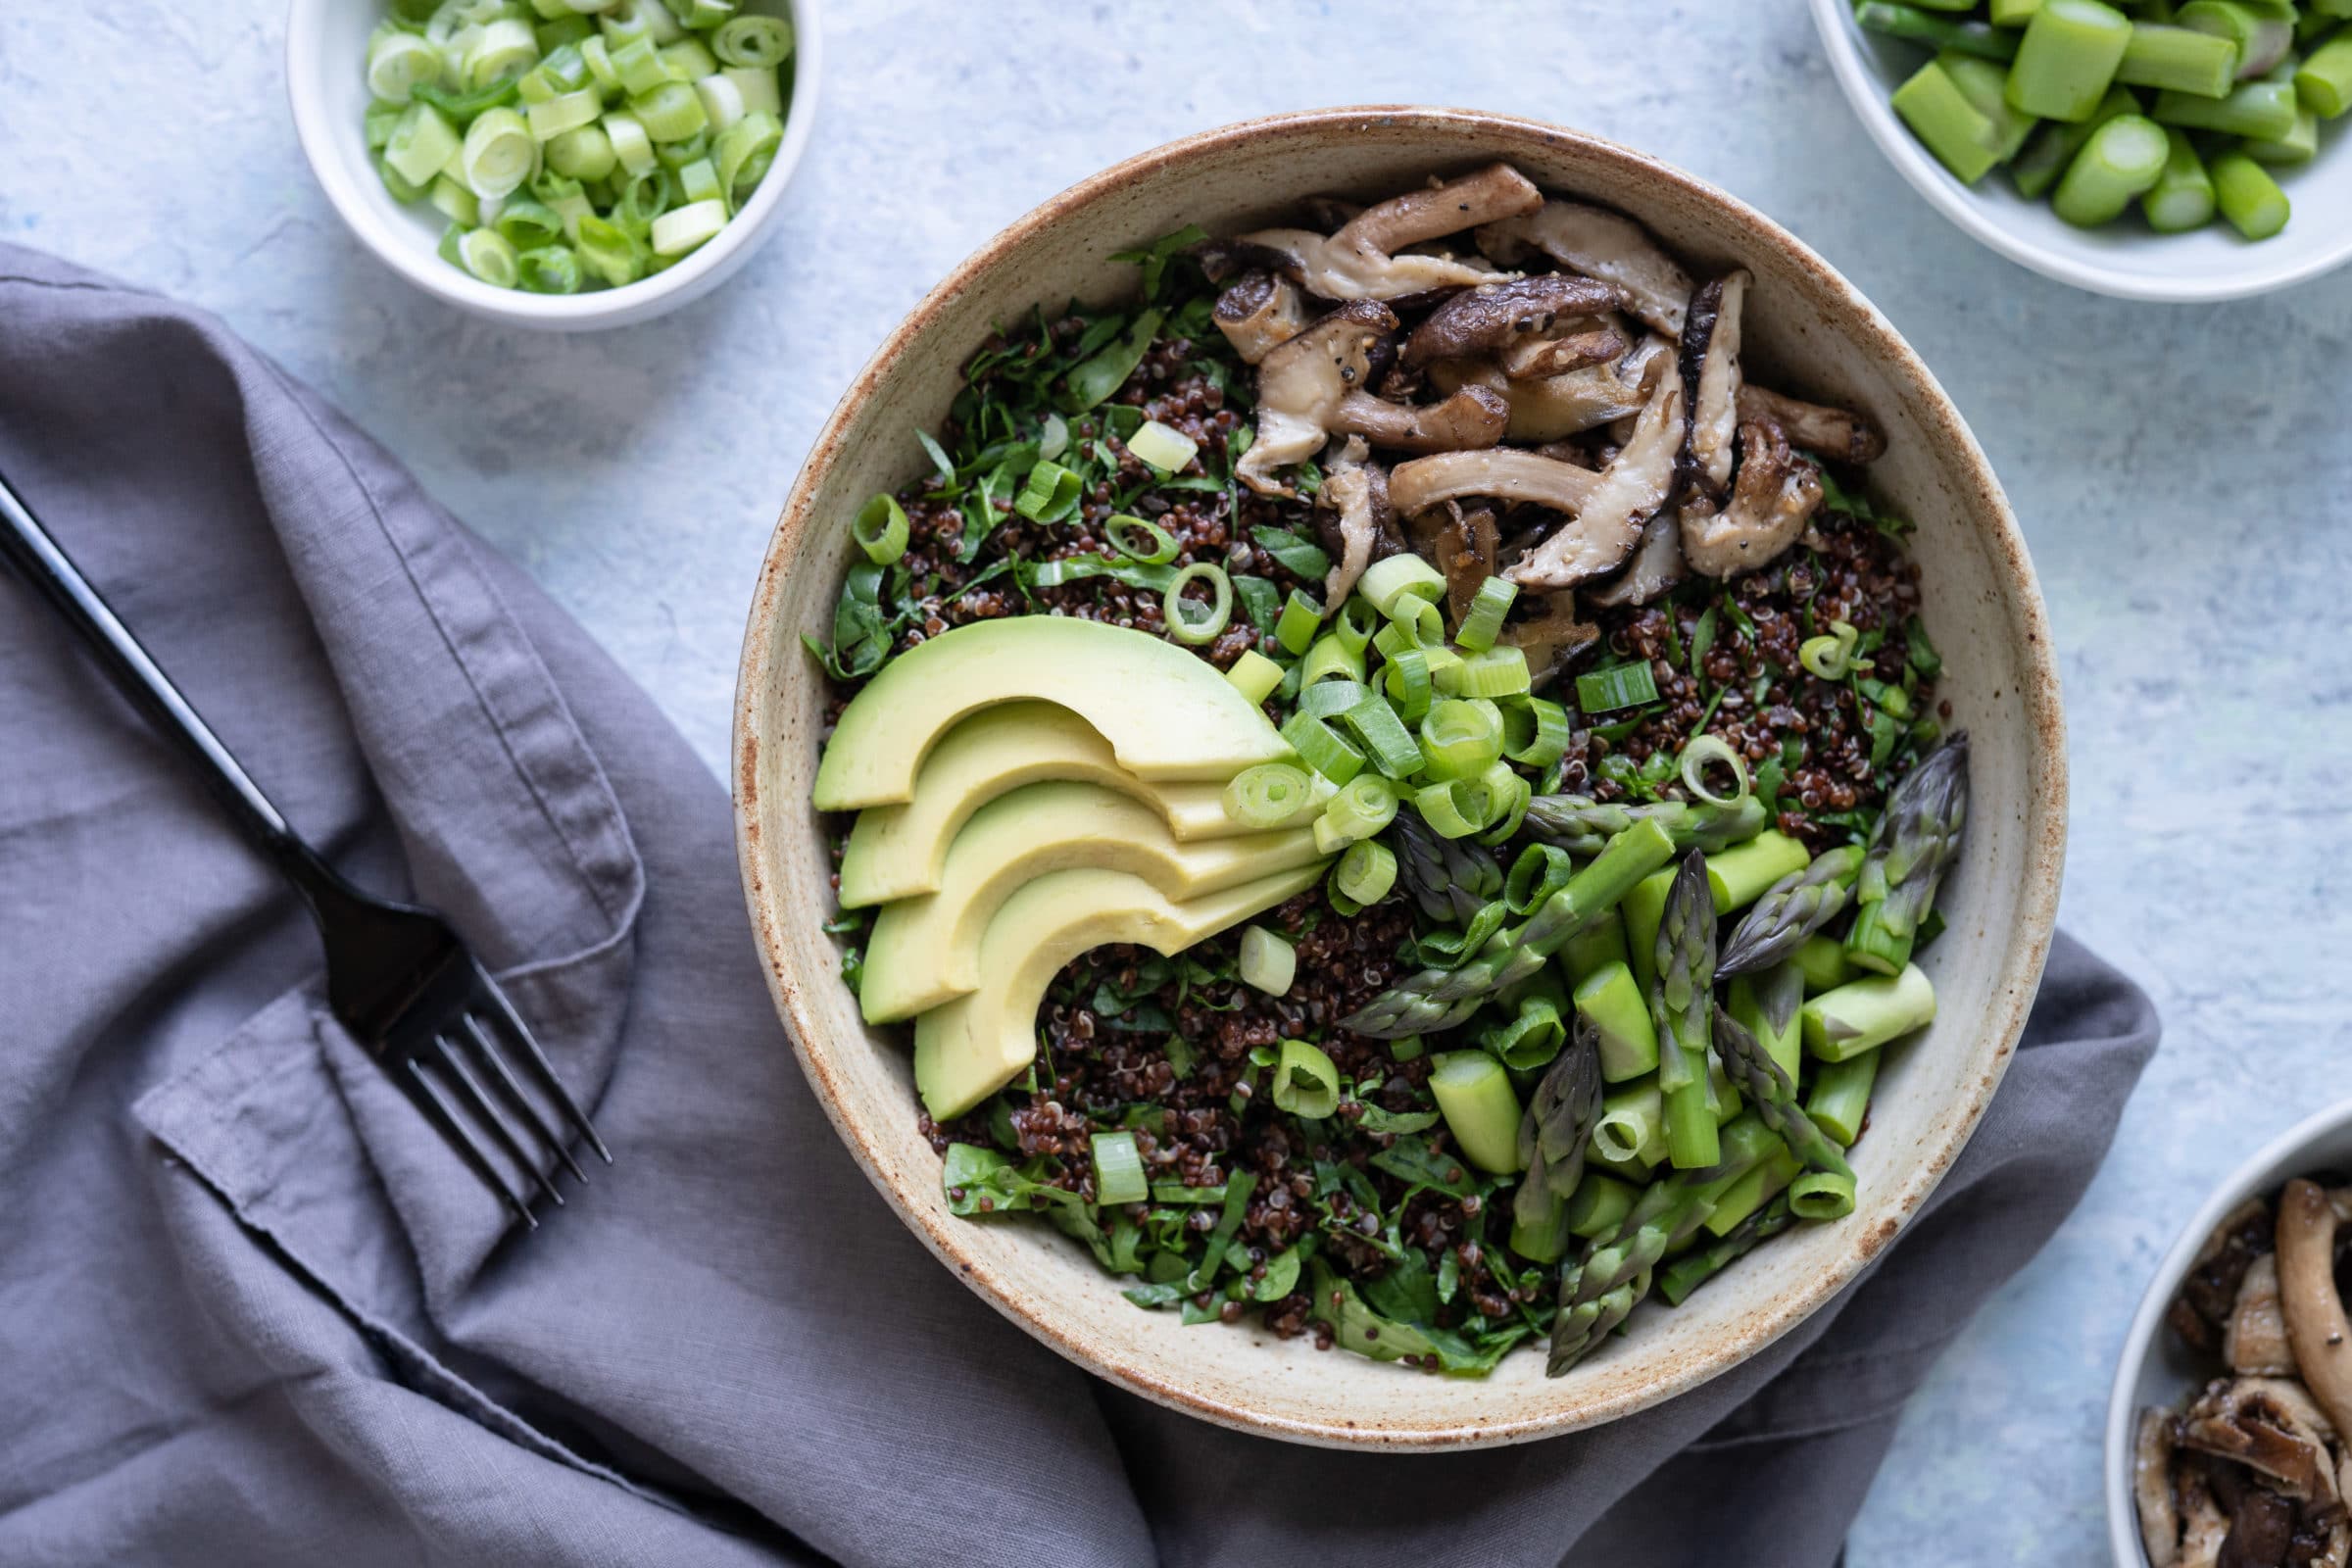
SPRING HARVEST GRAIN SALAD
Serves 4-8 depending on whether it’s a meal or a side
Takes 30 minutes
1 cup quinoa
1-1/4 cup beef broth
1/3 pound asparagus, cut into 1-inch pieces (spears halved if larger)
2 tablespoons butter
12 ounces button mushrooms, sliced
2 green garlic stalks, white and pale green portions only, minced
1/2 cup (or more) arugula
1 cup (or more) spinach
1 tablespoons toasted sesame oil
1/4 cup olive oil
2 tablespoons rice wine vinegar
2 tablespoons low-sodium tamari (or soy sauce)
1 tablespoon maple syrup (or honey)
1-3 avocados, optional
Extra sliced green garlic, optional
- This first step is my fool-proof method for making quinoa (learned from I am a Food Blog). If you have your own tried and true method, feel free to do that instead and ignore this first step. Rinse your quinoa is a fine-mesh strainer. Add to a medium saucepan and toast over medium heat for 1-2 minutes until fragrant but way before it begins to burn. Add broth and bring to a boil. Reduce to a simmer, cover and cook for 15 minutes. Once the timer goes off. Turn off the heat but leave the pan on the burner and leave the cover on for 5 minutes more.
- Meanwhile, steam your asparagus for 5 minutes until just tender (but still crisp). I don’t have a steamer so I put a metal colander with handles in a stock pot and cover it to get that steamed effect.
- Then in that same stock pot (if you used one), drain the asparagus water and melt butter over medium heat. Add mushrooms and minced green garlic. Saute for 7 minutes until mushrooms begin to release their juices and are cooked but not too soft.
- Combine your quinoa, asparagus, mushrooms, and green garlic together in a large bowl.
- Cut your greens into a delicate chiffonade (roll a stack of leaves and slice them thinly; then roughly chop the thin strands of greens) and add them to your bowl.
- In a small bowl combine oils, vinegar, tamari and maple syrup. Whisk until smooth. Pour over salad and stir to combine. Serve right away or chill before eating. Serve with avocado slices (or cubes) and extra green garlic on top, if using.
.
????

RHUBARB HAND PIES
Inspired by Smitten Kitchen
Makes 20-30 (depending on the size you make)
Takes 2 hours (30 minutes inactive)
1 cup butter (2 sticks)
2-1/4 cup all-purpose flour
2/3 cup + 1 tablespoon sugar, divided
1 teaspoon Kosher salt
1/2-3/4 cup ice cold water
4 cups rhubarb, cut into 1-inch pieces
2/3 cup sugar
1 tablespoon fresh lemon zest, optional
1 teaspoon fresh lemon juice, optional
4 ounces cream cheese
1 egg, whisked
Turbinado sugar, for sprinkling
- Cut your butter into small cubes and place in freezer while you collect the rest of your pie ingredients.
- In a large bowl, combine flour, 1 tablespoon sugar, and salt. Fill a measuring cup with 1/2 cup of cold water and add 3-4 ice cubes. Set aside.
- Remove your butter from the freezer and add to flour mixture. Use a pastry blender, two forks, or your fingers to incorporate the butter and break it into small pieces. You are looking for a crumbly mixture with butter pieces no larger than the size of green pea. Work quickly so the butter doesn’t warm. Drizzle in cold water, stir to incorporate and then knead together gently with your hands. If the dough isn’t coming together, add a little more water to your ice cube measuring cup (to quickly chill it) and then add to your pie dough. A dry dough is better than a wet dough, but you do need the mixture to fully come together.
- Break the pie dough into two discs, wrap in plastic and place in the fridge to chill for at least an hour.
- In a medium saucepan, combine rhubarb and remaining sugar over medium low heat. Reduce down for 30 minutes, stirring every 5-10 minutes to ensure the mixture is not sticking. Remove from heat and add lemon zest and juice. If you don’t have a fresh lemon, just skip the lemon.
- Pour the rhubarb mixture in a small bowl and place in the fridge to cool for at least 30 minutes. Leave in the fridge until ready to use.
- When ready to bake your pies, preheat your oven to 400 degrees and line a baking sheet with parchment paper.
- Flour your counter well and remove one disc of pie dough from the fridge. Sprinkle pie dough with more flour and roll out it out thinly (about 1/8 inch thick). Use a biscuit cutter or upside down glass to cut out the pie dough into small circles or squares. Use something between 2-1/2 or 3-inches in circumference. Use a knife to mark half of the circles with a small X.
- Cut your cream cheese into 1 x 1-inch squares that are about 1/4-inch thick. Don’t worry about getting too exact. What you really want is to divide the cream cheese evenly(ish) so you have enough for each of your hand pies. If you go to big and wind up using 6 ounces of cream cheese instead of 4, or run out and have some handpies without cream cheese, it is totally fine.
- Place a cream cheese piece on half of the dough circles (the ones WITHOUT the X’es). Remove the rhubarb mixture from the fridge and top the cream cheese with a tablespoon(ish) of rhubarb mixture (more if making larger pies, less if using smaller ones). Place the remaining circles of pie dough (the ones with the X’es) on top of the rhubarb (making a little pie sandwich). Use a fork to seal up the pies.
- Brush each pie with egg and sprinkle with turbinado sugar (regular sugar will also work fine). Bake for 15 minutes until lightly browned. Repeat process with remaining pie dough, cream cheese and rhubarb mixture.
.
????
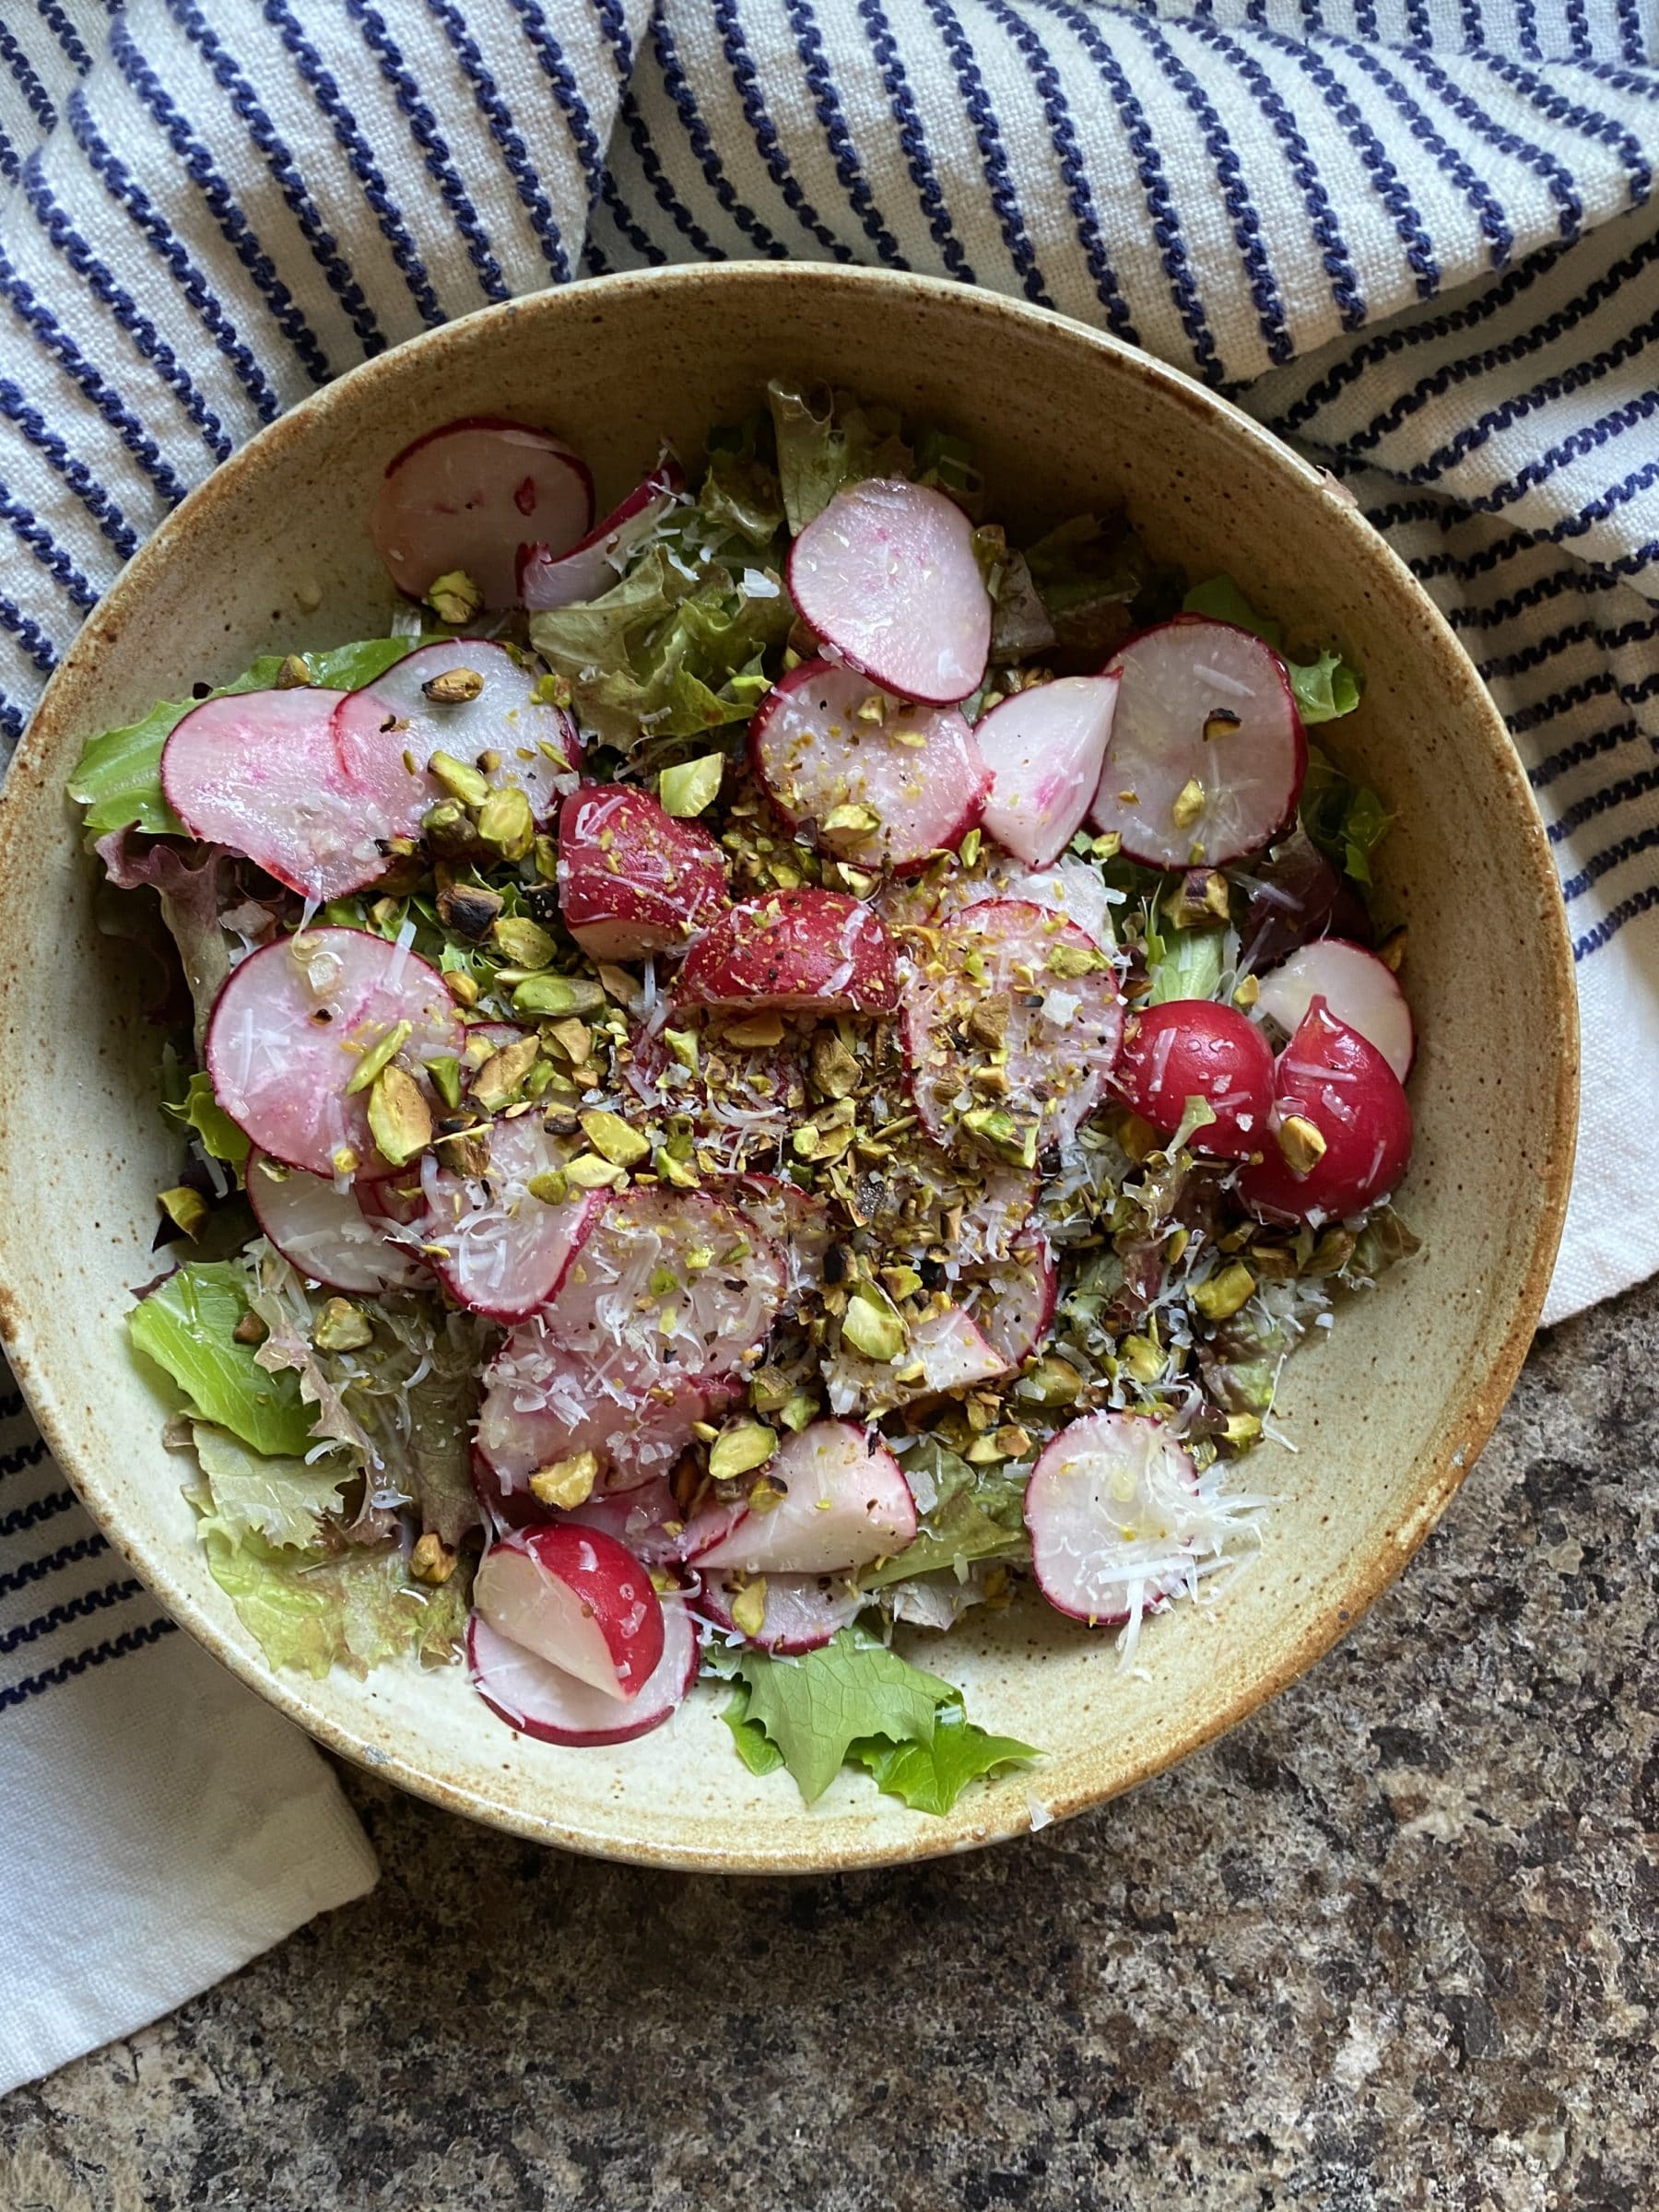
SIMPLE SPRING SALAD
Serves 2-4
Takes 20 minutes
1 bunch radishes
1 teaspoon Kosher salt
1/2 lemon, squeezed
1 head lettuce, washed and roughly chopped
1/2 cup toasted pistachios, finely chopped
1/4 cup finely shredded Parmesan
1-2 tablespoons olive oil
Flaky sea salt, optional
- Remove the greens from your radishes and trim the ends. Thinly slice half of the radishes and quarter the rest. Toss in a small bowl with salt and lemon juice. Gently massage to incorporate the salt and lemon into the radishes. Let sit for at least 10 minutes.
- Wash and roughly chop the lettuce and place in a large bowl. Sprinkle with half the pistachios and Parmesan, and then drizzle with half the olive oil. Top with the marinated radishes and all their liquid. Drizzle with the remaining olive oil then sprinkle with the remaining pistachios and Parmesan. Finish with a little flaky sea salt.
.

