
Yearly Archives: 2017
Storage Share, Nov. 16/17, 2017
- On: November 15, 2017
 0
0
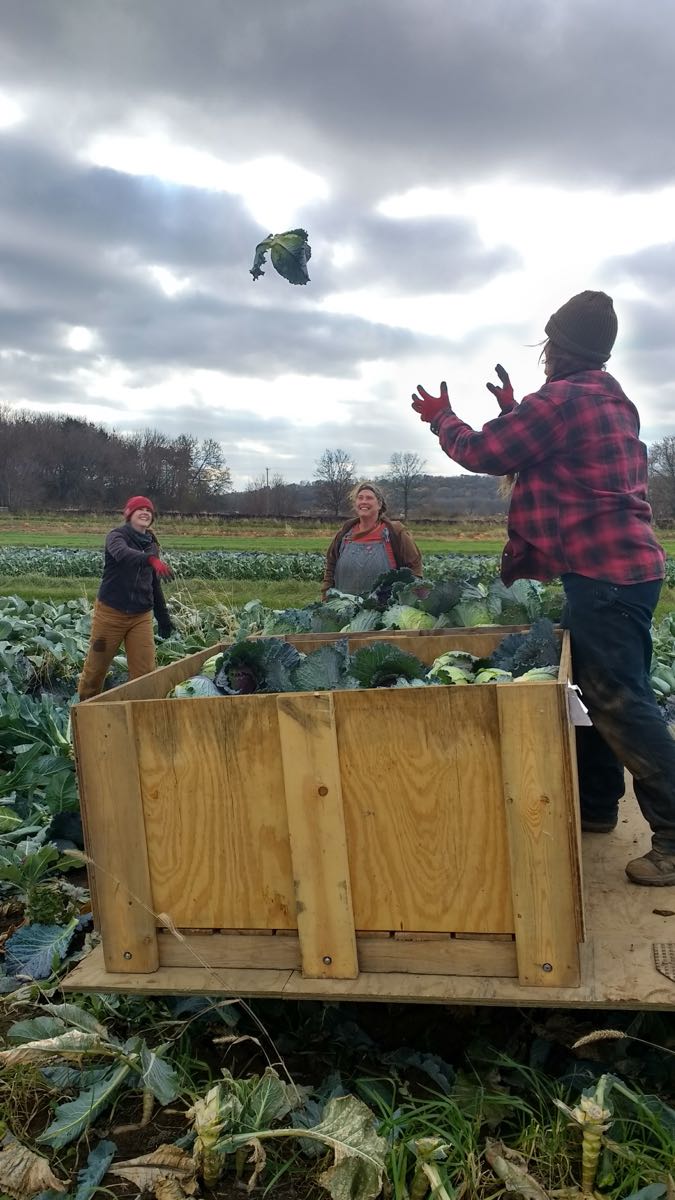
Cabbage in flight, on its way to you.
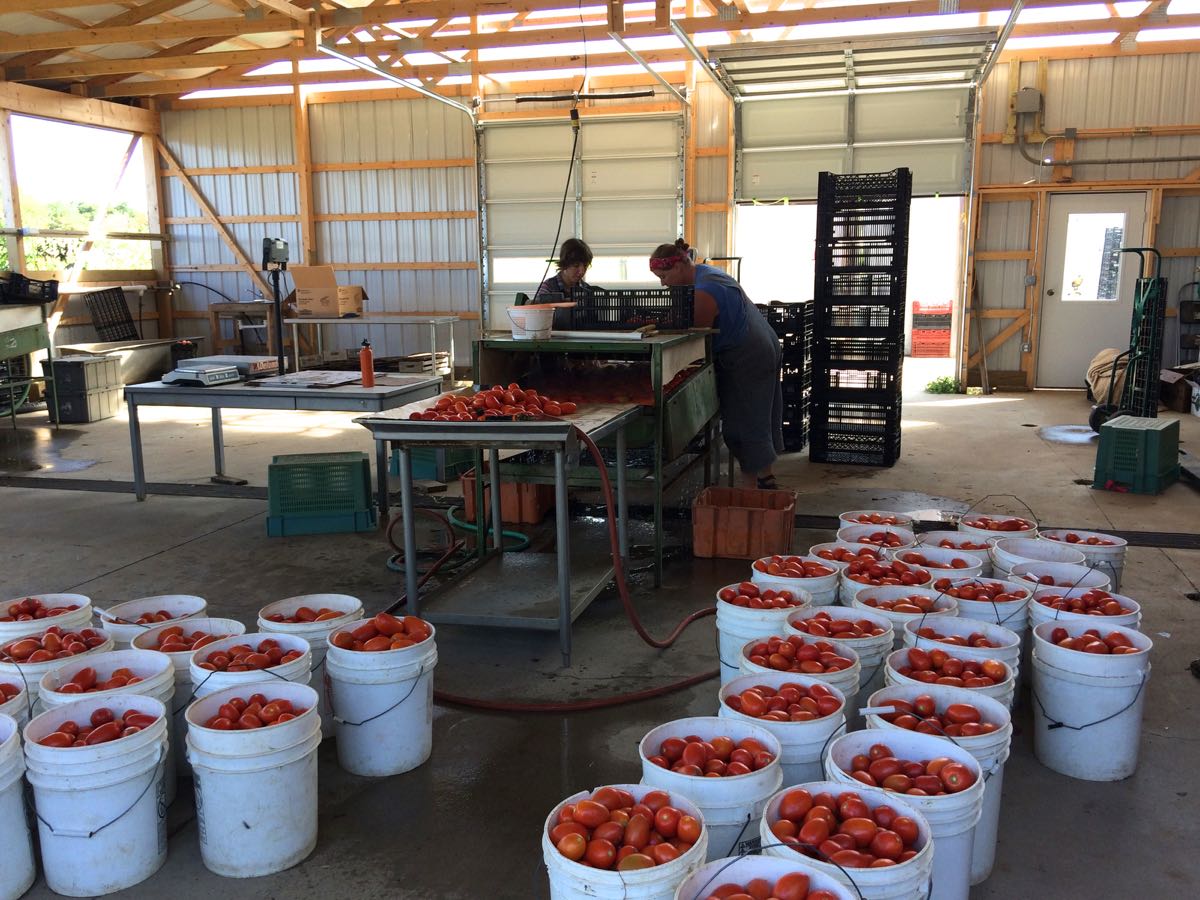
We are tantalizingly close to the end of our season. The cold spell last week hurried us along. 13 degrees! That will do some damage. With that deadline, we pulled in all but the hardiest crops. Cabbage, celeriac, even leeks can get damaged at 13o. We are still harvesting carrots. Protected in warm-enough soil, they survived the brief cold night without trouble.
Instead, trouble came as broken machinery. Our complex carrot harvester broke down unexpectedly. This is the machine we imported from Europe a few years ago. It’s a terrific harvester but largely unknown in the USA. We had to get a replacement part flown in from Germany, routed through the North American dealer in Canada. It took over a week to travel here and clear customs. Oh, this has been a tense week. As our kids say “The intensity intensifies!”
We pulled out our trusty older carrot harvester but it’s slower and requires a much bigger crew for harvest. Plus it’s more demanding physically for all of us. The replacement part arrived this morning and we got the big harvester back in the field by midmorning. If the weather holds through Friday, we will finish every field, leaving our coolers stuffed to the gills. Wish us luck.
We are ready to wrap up this season. Then we’ll enjoy the winter, with lots of cooking and ice skating and maybe even a vacation before we start plotting next year. Have a wonderful Thanksgiving! Beth & Steve
Storage Share this week
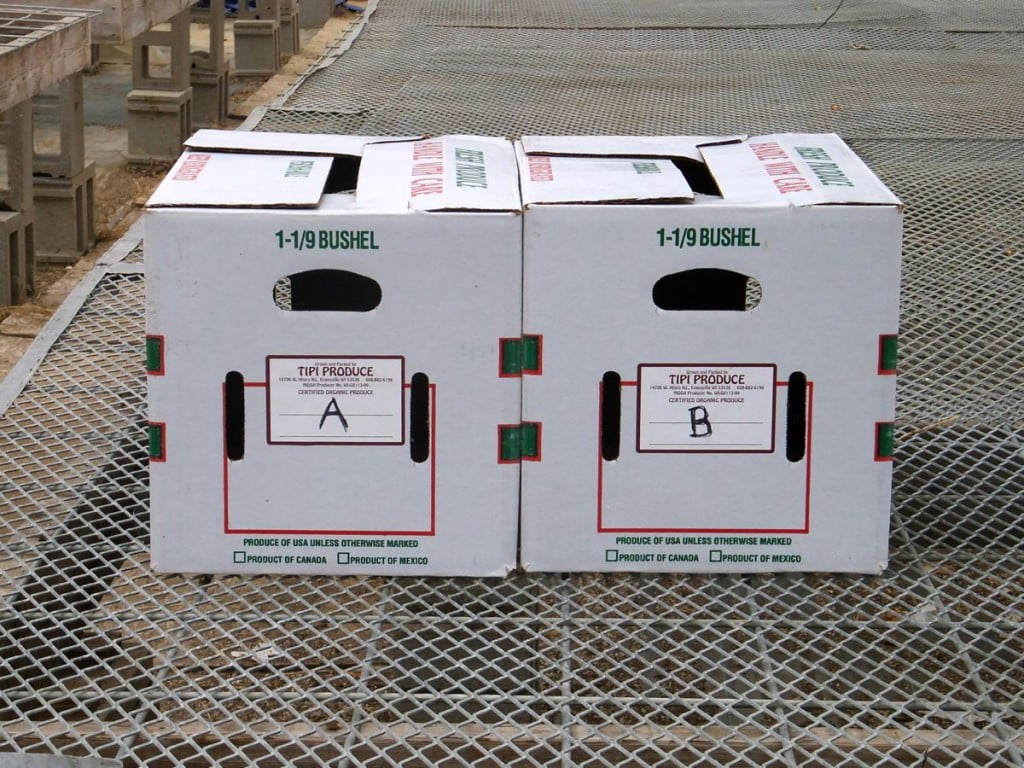
Take one box labelled “A” and one box labelled “B”.
Things you need to know about your winter share
* Your delivery will consist of two different boxes, labeled “A” and “B”. Take one “A” box and one “B” box. The boxes contain different vegetables.
* Please pick up your boxes on the day of delivery, during the normal hours for your site.
* Outpost members, please get your boxes on Friday. This is the busiest weekend of the year for the Outpost staff, so we cannot ask them to hold boxes past Friday.
* Members at outdoor sites, please carefully put the blankets back on the boxes. That keeps everyone’s produce in good shape.
* The boxes are heavy! It’s OK to take home the packed boxes, then return the empty boxes to your pickup site within two weeks. We’ll swing back and pick them up.
Veggie List and Storage Info (Storage share, Nov. 16/17, 2017)
We hope you enjoy this shipment of veggies. Strategize to use them well, as some will last longer than others.
* These are the most perishable vegetables: green cauliflower, fennel, Romanesco.
* These are the next-most perishable: Brussels sprouts, cabbage, leeks and onions. Keep an eye on your butternut, potatoes and sweet potatoes. The last two are susceptible to drying out. Expect the largest butternuts to last the longest.
* These will last the longest: Beauty Heart radish, beets, carrots, celeriac, garlic, parsnips, shallots.
Box “A”
Refrigerate everything in this box.
Beauty Heart winter radishes, 1 or 2
Brussels sprouts, on stalk(s)
Carrots, 6 lb total
….. orange ~4.5 lb
….. yellow ~1.5 lb
Celeriac, 1
Fennel, 1 fat bulb
Green cabbage
Green cauliflower, 1 very small
Leeks, ~3 lb
Parsnips, 3 lb
Romanesco cauliflower, ~2
Box “B”
The beets need refrigeration. Everything else in this box can be stored cool or at room temperature. See notes below for more detail.
Beets, 3 lb
Butternut squash, ~4
Potatoes, russet, 5 lb
Potatoes, Satina, 5 lb
Sweet potatoes, ~10 lb
Onions, 5 lb total
….. ~1 lb red
….. ~4 lb yellow
Shallots, 3
Garlic, 3
Beauty Heart radishes (round, white with pale green shoulders and bright pink interior) – Refrigerate. The interior color is lovely. Slice thinly and add to salads, cook lightly in mixed vegetable medleys or cut into matchsticks and add to pasta salads. We enjoy grated carrot and Beauty Heart salads all winter.
Beets – Refrigerate in a bag or container. Beets will store for two months or longer.
Brussels sprouts – Pluck from stalks and refrigerate in a bag or container. Do this the day you pick up your CSA boxes. Eat within 2 to 3 weeks.
Butternut winter squash – You will receive up to four butternuts, depending on size. Store your butternut in a cool, dry place. 50 F is ideal. Do not put in a plastic bag. Expect the largest butternuts to store the longest. Inspect your squash frequently and cook promptly if you see any soft spots developing. You can cook, mash and freeze the squash for future use. I find that you can refrigerate cut raw squash for up to one week. This runs counter to the accepted way to store squash, but is useful if you want to cook just half a squash. Try microwaving your squash for one to two minutes before cutting or peeling. This softens the squash and makes a large butternut easier to handle.
Cabbage – Refrigerate. Cut off chunks as needed.
Cauliflower, green – Refrigerate in a bag or container.
Carrots, orange. Refrigerate in a plastic bag. Will keep for several weeks.
Carrots, yellow. This variety is pretty AND they taste good.
Celeriac – Will store for months in your fridge. Cut off chunks as needed. Peel before using. I find it easiest to cut the celeriac into flat slices, then peel.
Garlic. Can be stored at room temperature.
Leeks. Refrigerate and eat within three weeks. Leeks are not a long-storage crop. You may need to strip off one or two outer leaves to freshen the leeks before you cook them. Your leeks will probably need washing. We finished preparing them after dark and didn’t realize how much soil was still on them.
Onions: Refrigerate or store in a cool, dark spot and protect from light. Exposure to light stimulates sprouting.
Parsnips (These look like large white carrots.) – Refrigerate in a plastic bag. Parsnips will store for two months but will darken in color. That is a harmless change.
Potatoes, Russets and Satinas – Can be stored at room temperature or in a cool spot, but must be kept in the dark so they do not turn green. A cloth or loose plastic bag draped over the paper bag will help avoid moisture loss, but do not close the plastic bag. Both types will store longer if kept cool. Around 40 – 50 F is ideal. The potatoes were grown by the Igl family near Antigo.
Russets– We got the big ‘baking’ grade so you have nice bakers for Thanksgiving. Excellent for mashed potatoes.
Satinas– These are good all-purpose potatoes, everything from roasted to potato salad. I really like this variety of yellow potato because they oven-roast so well and because they are less sweet than other yellow varieties like Yukon Golds.
Shallots – These look like small red onions, often with internal divisions into several bulbs. They can be round or oblong. Store at room temperature. This is the first time we’ve grown shallots! They seemed like a fun thing to try and have turned out nicely. Honestly, I am a novice with shallots but from what I’ve read (and eaten at restaurants) they are good in salad dressing, and caramelized and used to top dishes or sandwiches. We split some in half and roasted them with other veggies in a hot oven. They turned out mild and sweet, very nice.
Sweet potatoes – These are a mix of the Covington and Beauregard varieties. Both types have developed excellent flavor and sweetness. Some tubers have dark skins, the result of soil staining during wet weather. It’s unsightly but superficial and harmless. Store at room temperature, no lower than 55 F. Keep them on your kitchen counter where it’s easy to keep an eye on them. I like to keep ours in a paper bag so they don’t dehydrate. Cook promptly if they start to soften. The roots come in a wide ranges of sizes and all are good.
What are you cooking for Thanksgiving?
We are creatures of habit when it comes to Thanksgiving. Here are our plans so far: brined roast heritage turkey from our friends Jen and Bryce Riemer (Beth), Brussels sprouts with garlic-mustard vinaigrette (Steve), roasted sweet potatoes with garlicky yogurt dip (Sophie), glazed butternut squash (Beth), crunchy carrot-Beauty Heart salad with sesame-seed dressing (Steve), pickled onions (Beth & Ari), pickles (Beth & Ari), homemade applesauce (Ari), and apple pie (Sophie). I’ll probably make stuffing with lots of celeriac and onions but that might be overkill. We love celebrating Thanksgiving and the end of harvest season!
Menu Ideas
There are many terrific Thanksgiving menus and recipes online right now. Search any of the sites below if you are stumped about what to do with your storage share. Check out the online Thanksgiving collections soon; they get taken down quickly after the holiday.
♦ I like the lively Food52.com site. It’s a curated community site so judge a recipe’s rating and read the comments. Start at their Thanksgiving page and settle in. I want to read and cook everything on this site! Here’s a tiny subset of their current articles and recipes.
….. Thanksgiving Menu Maker
….. Freezer-Friendly Thanksgiving Dishes For the Ultra-Prepared
….. Make room for Spicy Raspberry Relish
….. The Genius Fix for Broken Gravy
….. 22 Pack-and-Go Thanksgiving Recipes
….. etc, etc.
♦ Smitten Kitchen is our go-to site for dessert recipes but has excellent veggie recipes too. Plus blogger Deb Perelman is funny. She has not posted a Thanksgiving menu yet but her recipes from last year are still accessible.
….. Thanksgiving recipe list
….. Last year, she was all about Team Casserole.
♦ 101cookbooks. Always has good vegetarian and whole-grain recipes.
♦ The New York Times has changed access to their Cooking app. They now require a paid subscription, although there appears to be occasional free access. This year, they’ve posted how to cook an entire Thanksgiving feast in a 400 degree oven, a very thorough Thanksgiving Menu Planner and many holiday-themed recipe collections, such as “Our 21 Most Popular Thanksgiving Pies“, “What to Bring to a Thanksgiving Potluck“, “Thanksgiving Casseroles” and more. If you can access it, start at their Thanksgiving 2017 page. In my opinion, Melissa Clark is the best NYT food writer. She’s practical and her dishes are always flavorful. David Tanis is my second-favorite. Recipes from Mark Bittman and Martha Rose Shulman are always worth a look.
♦ Finally, remember that we can use Local Thyme recipes all winter. Check them out for Thanksgiving ideas. Send me an email is you need the registration information.
Do you have favorite menu sites for fall and winter recipes?
If so, please share in a comment!
RECIPES FROM LAUREN
SHEET PAN CHICKEN WITH ROAST VEGETABLES
Recipe adapted from Food 52
I love the ease of this recipe. It uses one baking sheet and and a couple large bowls and comes together effortlessly while you do the dishes or tidy up. Honestly, the hardest part will be slicing the cabbage and fennel! If you feel like getting a second sheet pan dirty, throw some extra roast veggies on there and stock up on roasted veggies for the whole week! Carrots, sweet potatoes, parsnips, celeriac, potatoes and/or butternut squash would all go well with this tasty meal. Lauren.
Serves 6-8
Takes 1 hour
1 tablespoon toasted sesame oil
1/4 cup olive oil + more for drizzling
3 tablespoons soy sauce
1 tablespoon rice vinegar
1 tablespoon sriracha, optional
Kosher salt
Freshly ground black pepper
8 pieces chicken, bone-in, skin-on chicken thighs or drumsticks (or a mix)
1/2 head cabbage
1 head garlic, separated and peeled
1 large fennel bulb, cored and cut into 1-inch wedges
3 leeks, white and pale green parts only, cut int 1-inch thick slices
- Preheat the oven to 425 degrees.
- In a large bowl combine oils, soy sauce, vinegar and sriracha. Place chicken in a second large bowl. Sprinkle generously with salt and pepper. Pour 1/4 cup of the oil mixture over the chicken and let is marinade while the oven preheats.
- Cut the cabbage in half through it’s core. Set half aside for later use. Cut half you are using through to core again and keep slicing until you wind up with many wedges (all no thicker than 1-inch). Add cabbage to first large bowl (with remaining sauce not chicken) along with peeled garlic cloves, fennel, and leeks. Season with a bit of salt and pepper.
- Drizzle baking sheet with olive oil and add chicken. Spread it out evenly so not crowded and roast for 10 minutes. Remove pan from oven and nestle chicken with vegetables– tucking it under if necessary. It will feel like a lot. That’s fine! Roast for 25 minutes longer. Remove pan from oven and transfer chicken to a platter to rest. Also remove garlic if it seems to be beginning to brown at all (will depend on the size of your cloves). Continue roasting veggies for 10-15 minutes until juices have reduced and edges of veggies have caramelized ever so slightly.
- Serve veggies and chicken together with any residual sauce. Season with salt and pepper as desired.
.
JAPANESE VEGETABLE PANCAKES (OKONOMIYAKI)
Adapted from Smitten Kitchen
There is a chance that some people won’t get as excited about vegetable pancakes as me, but I swear I could eat them every single dang day. They are the perfect combination of crunchy, hearty, healthy, fresh and fried. They can be a side of a meal or a whole meal and despite all the chopping that goes into them, come together rather quickly. If you have a mandolin, this is a great time to use it.
And again, the recipe is pretty flexible. Feel free to swap in any other root veggies (in similar quantities) for the sweet potato, carrots and parsnip. Lauren.
Takes 45 minutes
Serves 4-6 (more if it’s a side dish)
1 pound Brussels sprouts, ends trimmed and very thinly sliced (you will want about 4 cups sliced sprouts)
1 medium sweet potato, peeled and julienned (about 4 cups)
2-3 carrots, peeled and julienned (about 3 cups)
1 parsnip, peeled and julienned (about 1 cup)
1 shallot, peeled and very thinly sliced
1 teaspoon Kosher salt
2/3 cup flour
4 large eggs
Vegetable oil
- In a large bowl combine Brussels sprouts, sweet potato, carrots, parsnip and shallots. Sprinkle with salt followed by flour and stir until flour coats vegetables. Stir in the eggs until mostly smooth.
- Heat a heavy large skillet over medium high heat. Coat the bottom with oil and warm until hot but not smoking. Drop 1/4 cup spoonfuls into the pan (about 4-5) so they do not crowd. Gently press the pancake down until almost flat. Cook until the edges begin to brown, about 3 minutes and then flip. Cook for 1-2 minutes until other side browns. Remove to paper towel to drain grease.
- Add more oil in between batches and continue cooking until no more batter remains. Feel free to keep the first ones warm and crisp in a 250-degree oven while you cook the rest.
- Serve warm with tangy ketchup (below), spicy mayo or other favorite Asian dipping sauce.
.
Tangy Ketchup
1/2 cup ketchup
2 tablespoons rice wine vinegar
2 tablespoons honey or maple syrup
1 tablespoon Worcestershire sauce
2 teaspoons soy sauce
1 teaspoon Dijon mustard
1/4 teaspoon ground ginger
Combine all sauce ingredients in a small saucepan and simmer until smooth and thick, about 3-5 minutes.

Extension share; Nov 2, 2017
- On: November 01, 2017
- 0
Carrot Team
We are hurrying our storage crops from the fields to the coolers. This week, we brought in the final parsnips and daikon, plus carrots and cabbage. We hope to finish the carrot and cabbage harvests next week but the work could continue into the following week.
It takes a team to bring in the carrot harvests.

Steve drives the root harvester. We imported this implement from Sweden two years ago. Steve appreciates what this machine can do, and continues to tinker and improve it.
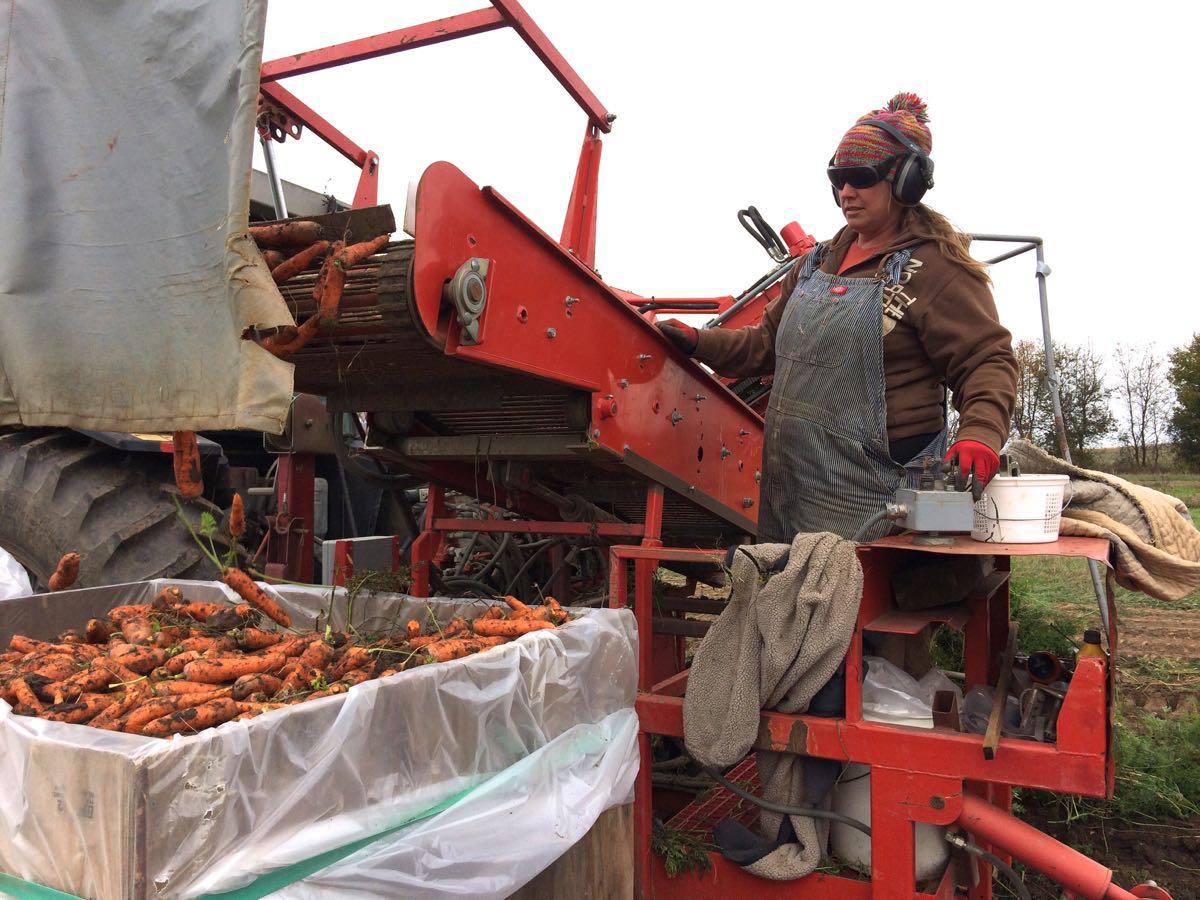
Maggie controls the harvester from the back platform. With the controls at her left hand, she distributes the carrots into a bin. Once the bin is full, she’ll send it down a ramp to the ground.
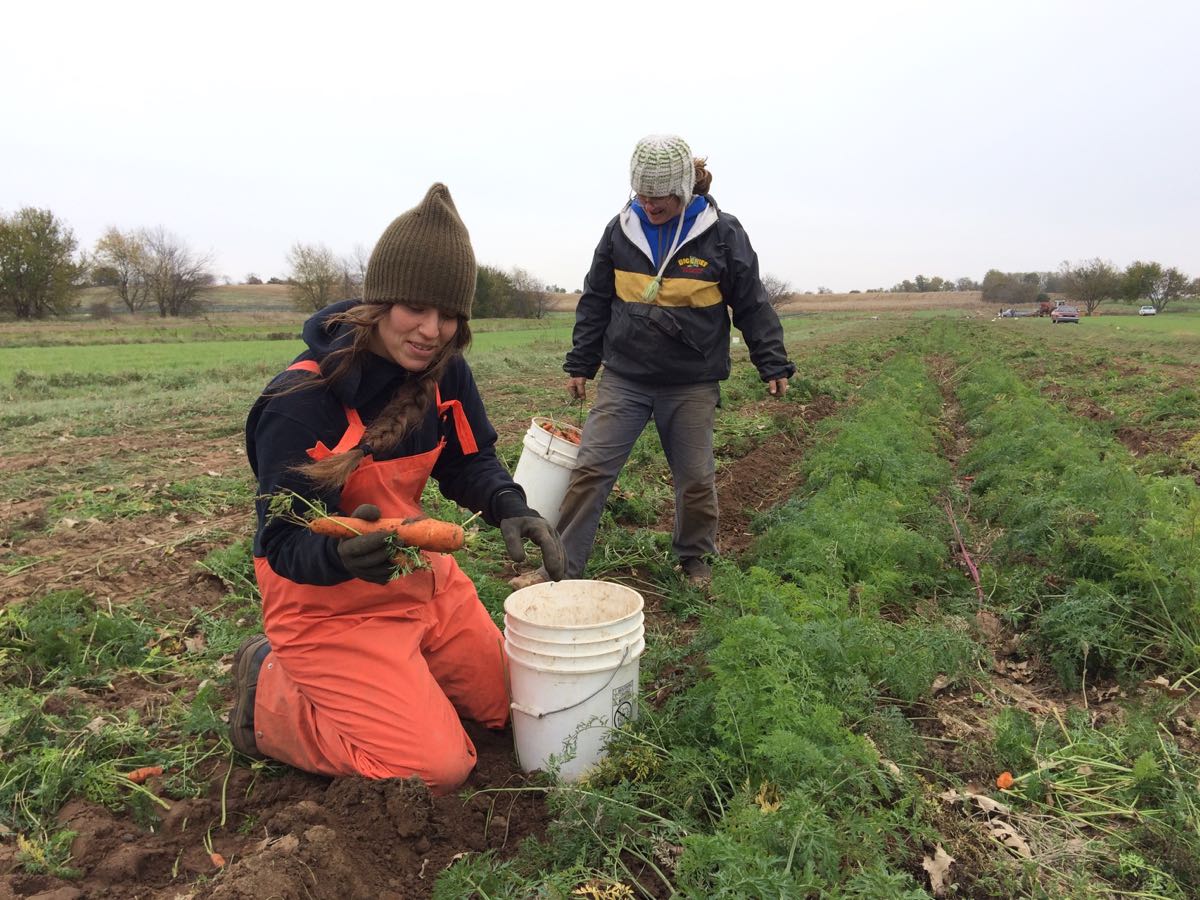
Charlotte and Kristen pick up carrots dropped by the harvester. They are too valuable to leave behind.

Matt picks up filled bins with the front end loader and places them on a wagon for transport back to the farmstead.

A wagon o’ carrots, plus parsnips at the front.

We cover the bins and tuck them in our cooler. We’ll wash the carrots and other roots all winter long, providing food for our customers and work for our longterm employees.
VEGGIE LIST and VEGGIE NOTES
Extension Share, 1 delivery, Nov 2/3, 2017)
Beth’s box logic:
(i) You can roast almost everything in this box. See Lauren’s recipe for roasting and sauce ideas. We routinely roast carrots, parsnips, and onions together. They cook at the same rate. Sweet potatoes get sliced, oiled, and roasted on their own sheet, because they cook more quickly. Even Brussels sprouts and Romanesco can be pan-roasted in the oven. We bought a convection oven a few years ago, and find the convection speeds roasting and evens the results.
(ii) We send the Beauty Heart radishes in combination with carrots because they make lovely, mixed salads, like Lauren’s Beauty Heart Radish, Carrot & Avocado Salad from last year.
Sweet potatoes, ~2 lb
Butternut squash
Brussels sprouts, ~1 lb
Romanesco, 1 head
Broccoli, 1 head
Carrots, 2 lb
Parsnips, 1.5 lb
Beauty Heart radish, 1 or 2
Yellow onion
Leek, 1 large
Jalapeno chile
Beauty Heart radishes (round, white with pale green shoulders and bright pink interior) – Refrigerate. The interior color is lovely. Slice thinly and add to salads, cook lightly in mixed vegetable medleys or cut into matchsticks and add to pasta salads.
RECIPE LOG
Visit our Recipe Log, a list of all our 2017 recipes. Look for Brussels sprout recipes in the past two weeks (Oct 19, Oct 26)
LOCAL THYME RECIPES
Comforting Classics
Squash Chickpea Curry with Parsnips and Romanesco
Vegan Miso Soup with Winter Squash
Mashed Carrots, Parsnips and Sweet Potatoes
Sweet Potato Posole with Black Beans
Outside the Box Recipes
Steamed Romanesco with Mustard Butter
Roasted Vegetables with Goat Cheese Crostini and Pumpkinseed Oil
Black Pepper Tagliatelle with Parsnips and Pancetta
Elbows with Sweet Potato, Capers and Parsley
Quick and Easy Meal
Hazelnut Butter Sandwich with Beauty Heart Radish
RECIPES FROM LAUREN
ROASTED FALL VEGGIES with TURMERIC TAHINI SAUCE
Adapted from Dishing Up The Dirt
Something about fall abundance just has me cooking in huge batches to prepare for the cold days ahead. I love roasting up tray after tray of veggie on Sundays, sticking them in my fridge and using them as a base all week long. These veggies are great on their own or you can turn them into a meal with some baked fish, grilled steak or a pile of wild rice. Lauren
Beth’s note: I love the sound of this tahini sauce. We roast vegetables every week through the winter. As Lauren points out, they make versatile leftovers. Our go-to sauces are sriracho mixed with mayo, or yogurt seasoned with salt, garlic, smoked paprika, and good olive oil.
Takes 1 hour
Serves 8
4 cups peeled and chopped sweet potato
2 cups peeled and chopped parsnips
2 cups chopped carrots
1 pound Brussels sprouts, ends trimmed and halved
1 head broccoli or romanesco, cut into bite-size florets
6 tablespoons olive oil
2 teaspoons Kosher salt
1 teaspoon dried thyme
1/2 teaspoon freshly ground black pepper
1/4 teaspoon cayenne powder
1 watermelon radish, thinly sliced
Turmeric Tahini Sauce
1 cup tahini
1/4 cup rice wine vinegar
1/4 cup soy sauce (or tamari)
2 tablespoons peeled and freshly grated ginger
2 teaspoons dried turmeric (unless you can get your hands on some fresh stuff– then use 2 tablespoons freshly grated)
1 tablespoon maple syrup
3/4 cup water, plus more if needed
- Preheat oven to 400 degrees.
- In a huge bowl, combine sweet potatoes, parsnips, carrots, brussels sprouts, and broccoli or romanesco with oil, salt, thyme, pepper and cayenne. Stir until everything is evenly coated with oil and spices. Pour out onto three baking sheets or roasting pans. (If you don’t have a huge bowl, just combine all ingredients on baking sheets as evenly as you can.)
- Roast for 40-45 minutes or until veggies are tender and beginning to brown in places. Halfway through roasting, make sure to turn veggies and rotate pans for more even cooking.
- While the veggies roast, prepare your sauce by combining all ingredients in a food processor and pulsing to combine. If you don’t have a food processor, you can absolutely just whisk all ingredients together in a medium bowl (it’s just easier to break up the tahini with a food processor). If the mixture looks too thick, add more water. If it’s too thin, add a bit more tahini. Taste and adjust seasonings as desired. More syrup for sweetness. More vinegar to brighten it up. More soy sauce if you think it needs more salt.
- Serve veggies warm with a generous amount of sauce drizzled over them. Garnish with radish slices.
.
CURRIED BUTTERNUT SQUASH SOUP
Adapted from Minimalist Baker
This soup just feels like fall. I love it on a cold night buried in blankets on the couch. Soup is always warming, but the creamy coconut milk and soothing curry and cinnamon spices really boost the coziness factor. Add the garnishes if you’re feeling fancy but don’t worry if you’d rather skip them. The soup very much stands up well on its own. Lauren
Serves 4-6
Takes 40 minutes
2 tablespoons butter (or coconut oil if vegan)
1 yellow onion, peeled and diced
1 leek, white and pale green parts only, peeled and diced
1 jalapeno, seeded and diced
6 cups butternut squash, peeled and diced
2 tablespoons favorite curry powder
1/2 teaspoon Kosher salt
1/4 teaspoon freshly ground black pepper
1/4 teaspoon ground cinnamon
2 cups water.
2 cups chicken or vegetable broth
1 can coconut milk (I always use full-fat but you can also use low-fat)
2 tablespoons maple syrup
Greek yogurt, optional
Sriracha, optional
Toasted pepitas, optional
- In a large stock pot, melt butter over medium heat. Add onion, leek and jalapeno. Saute for about 10 minutes until veggies are very tender and fragrant.
- Add squash and spices. Stir to combine well. Cover and cook for 5 minutes, stirring occasionally. If spices begin to stick to the bottom of the pot, just add a cup of water early.
- Add remaining water, broth, coconut milk and maple syrup. Bring mixture to a boil, reduce to a simmer and cook for 15 minutes until squash is tender.
- Let soup cool for a few minutes then puree with an immersion blender. Taste and adjust seasonings as desired. If it’s too thick, add a bit of water.
- Serve warm with optional garnishes of yogurt, sriracha and pepitas.
.
Good bye!; Oct 26 2017
- On: October 25, 2017
- 0
This is the last delivery for our May-October CSA shares. Thank you, thank you, thank you for being members of our farm. We truly appreciate your commitment to our CSA. We could not farm without you. We hope you enjoyed the adventure.
Many of you registered for continued deliveries with our Extension and Storage shares. We will be in touch with more information as those deliveries approach.
We will open registration for our 2018 season by early December. Watch for emails from us. In the meantime, you can continue eating our produce through the winter. Our stored cabbage, carrots and other roots will be on the shelves at these stores: Willy Street Coop (Madison, Middleton), Outpost Natural Foods (Mequon and Milwaukee area), Basics Coop (Janesville), Whole Foods (Madison only, with deliveries beginning soon), Good Harvest Market (Pewaukee), and Health Hut (Brookfield).
Love,
Beth and Steve
Best year ever (maybe). Highs and lows
This is a good moment to evaluate the season. I think the title above says it all. 2017 was a terrific season for us. With a few exceptions, the crops were abundant. Even the weather wasn’t too bad. The ‘maybe’ in the title simply indicates that our work is not finished yet. Our big storage harvests stretch over the next few weeks. We have a lot of good-looking crops in the field and hope to have our coolers stuffed full by Thanksgiving. Keep your fingers crossed for dry weather.
We sat down with the crew to brainstorm the highs and lows of this season.
HIGH – Best crew ever. Most of our 22 farmhands and managers were returning employees, and our three new hires brought a combined 50+ years experience in growing vegetables. Wow. Together, this crew has deep, deep knowledge of vegetables. Having so much experience on the farm took the pressure off Steve and me, allowing us to relax a bit and enjoy our work in a new way.
HIGH – Steve was healthy, pain-free and energetic this year. He spent the 2016 season in pain from a bicycle mishap, and limited in the energy he could muster for farming. He began working with a new physical therapist this past winter with amazing results. She showed him new techniques like “nerve flossing” that sped his recovery. He feels like a new man.
HIGH – I love our new experimental prairie planting. It was a fascinating new hobby and I did not even realize how much I need a hobby. Nevermind that it involves plants and field prep and transplanting, it still counts as a hobby.
HIGH – As mentioned above, most of our crops grew very well this year. The moderate weather helped. Even during the mid-summer rainy spell, most of the rain came at night, making work easier and more pleasant for all of us. A dry start to the summer plus dry fall weather kept crop diseases in check. Usually a whole bunch of different crop diseases explode in fall. Not this year. As a result, our fall brassica crops have been amazing! We’ve never had this much broccoli and cauliflower to share in the CSA boxes.
LOW – Unfortunately, a troubling new disease appeared during that mid-summer rainy spell. For years I’ve told Steve “If we can get through our farming careers without Phytophthora capsici (Pcap) showing up, I’ll be happy.” Well, Pcap showed up this year, wiping out entire melon fields and eliminating all the late melons we planted for you. That was painful. I have photographs of those fields but I am not going to share them with you. This is a family-friendly newsletter and the photos are like a snuff film.
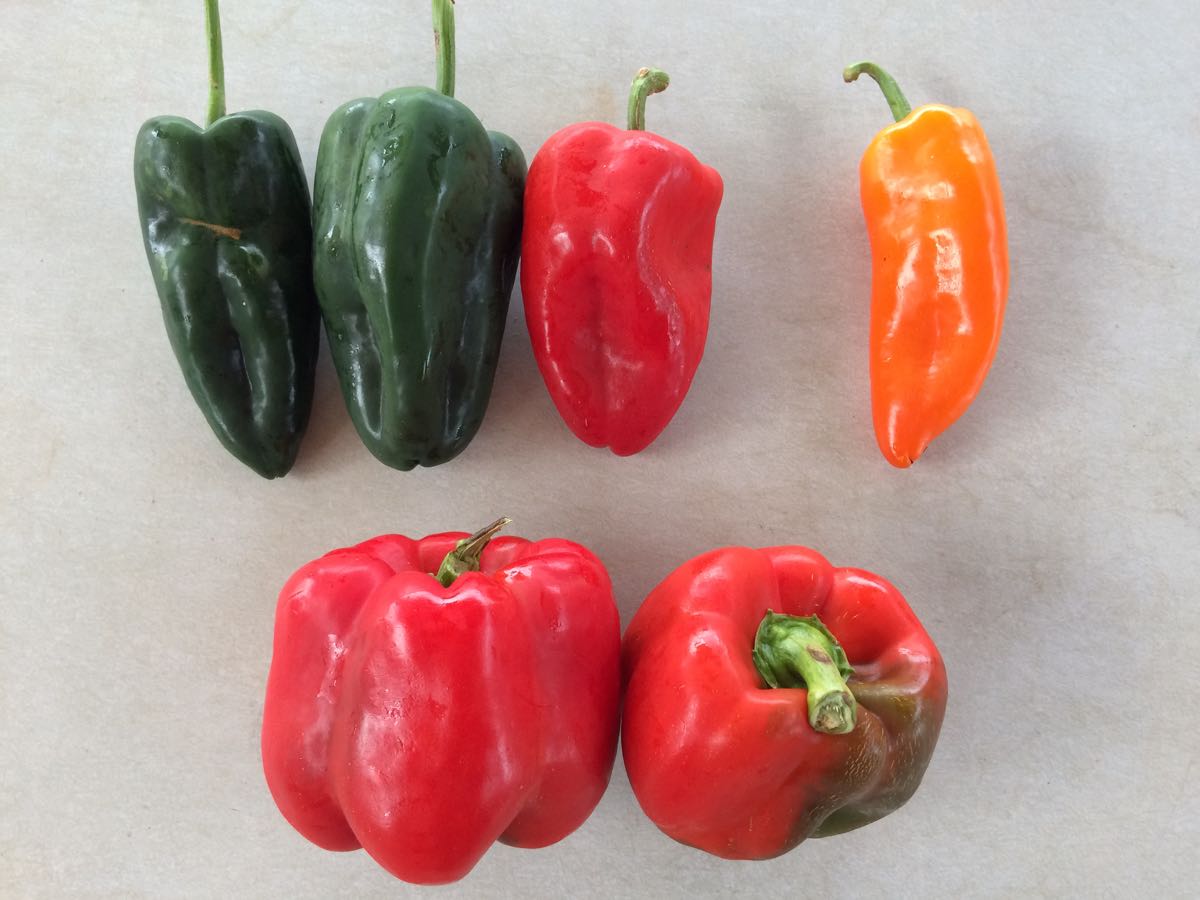
LOW – Pcap also damaged about a third of our peppers. Our pepper crew wore uncomfortable plastic booties over their shoes for months to confine Pcap to the infected fields. That was a low for all involved.
HIGH/LOW – Daily use of the word “bootie” inspired one crew member to endless baudy jokes.
HIGH – There was a shining moment when six of our farm pickup trucks were working. That’s extraordinary. Of course, it only lasted one day before one of them broke. We use a combination of tractors and wagons plus pickup trucks for our harvests, giving each field team something for transport. The number of operating pickups directly affects our collective quality of life. Life is good when the pickups are running.
LOW – There was a dispiriting day when only one pickup was operating.
LOW – One day, a door suddenly fell off one of the pickups! The crew managed to realign it and lock it in place. We haven’t opened that door again. Fixing it is a winter project.
HIGH – The 2nd staked tomato field and the 3rd kale plantings were genuine high points. Those two fields just kept on giving.
HIGH – A garter snake took up permanent residence in one of the zucchini fields, appearing reliably during each zucchini harvest.
LOW – The garter snake always showed up in the row worked by the crew member who is terrified of snakes.
HIGH/LOW – One time, the crew found a garter snake with a toad in its mouth. The toad was still alive, feebly gasping and waving its arms. That’s the stuff of legends or nightmares or at least persistent farm memories.
HIGH – Poblano chiles. Wow, they were abundant this year. That’s why we could pack them in the boxes two times.
HIGH – Best farm lunches ever! A woman in Madison cooks lunch for our crew two days per week. She has cooked for us for years but was on a roll this year, with creative, abundant dishes. Thank you Gen!
HIGH – Finger weeders! Steve set up finger weeders, a new type of cultivating tool that does an amazing job. We weeded quite a few fields just by tractor, with no follow-up hand weeding, saving so much effort.
HIGH – Due to the finger weeders, we had beautiful, weed-free cabbage fields situated near the buildings where we could look at them every day. Ah, so nice.
LOW – Lake Tipi. Somehow, we ended up with an enormous, truck-devouring pothole. We have got to fix that.
That’s all I’m going to share. The crew had many more ideas but their highs and lows were getting pretty obscure (“Remember the time Billy caught a corndog in his mouth when you threw it from the porch?”, etc., etc.) You don’t need to hear these things! Thank you again for being Tipi-people this year. Beth.
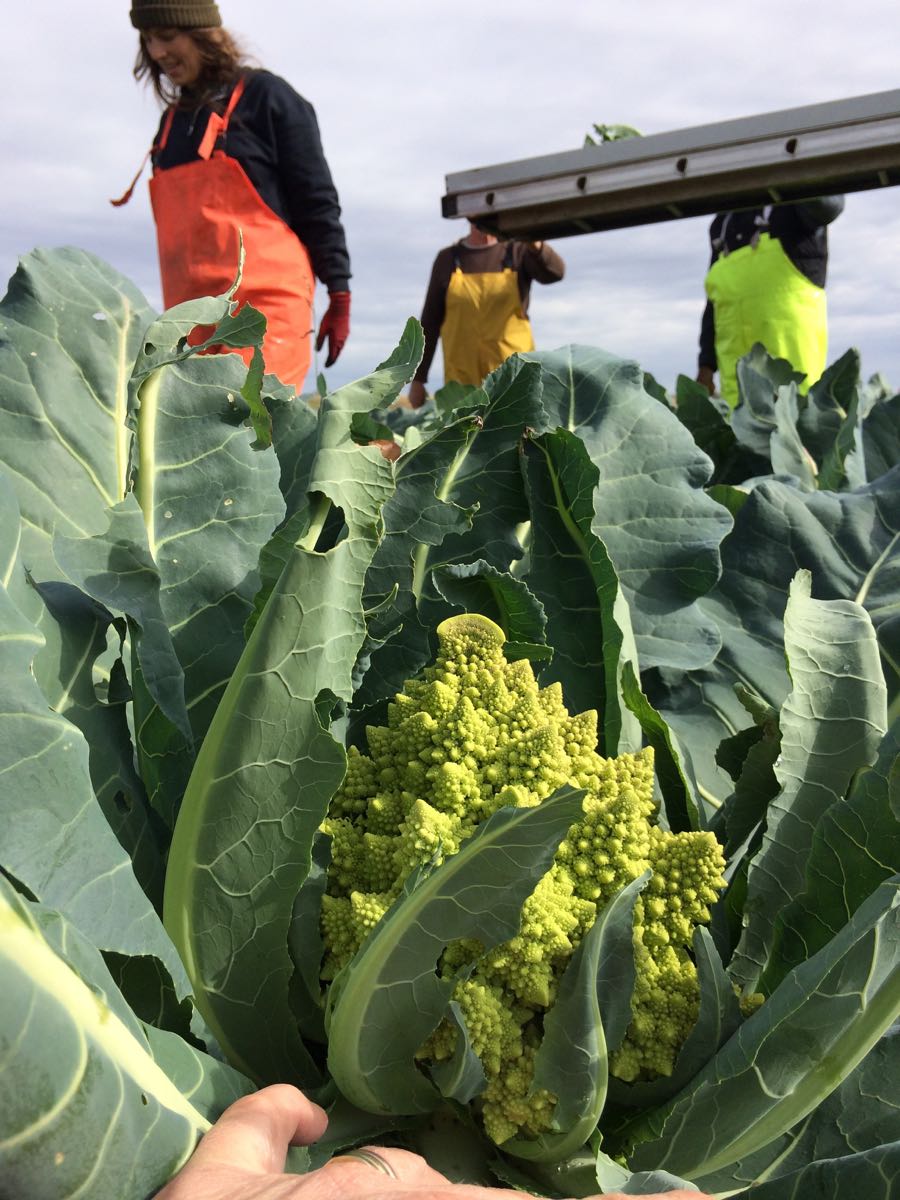
Fractally beautiful Romanesco at harvest. That’s Charlotte in the background.

It’s likely to frost tonight, so we stripped the pepper field of the last peppers. Above, Raul and Jory bring in the harvest. Look at Jory’s feet – you can just see his boot covers behind the basket. The valiant pepper crew wore boot covers for months to avoid spreading a new disease beyond the infected fields. A big thanks to Simone, Jim, Raul and Jory for making the effort. We know it was uncomfortable.

We’re preparing for our big, big carrot harvests. The wooden bins are repaired and ready to go. Steve’s worked over the carrot harvester. We have someone coming tomorrow to do preventative maintenance on our storage coolers. Carrot and root harvests start this week and extend into mid-November. We can’t afford any downtime during these critical weeks. Wish us luck! We should have enough cabbage, carrots and other roots to supply our store customers through the winter.

The cover crops are so vibrant right now. They protect against erosion during the winter, then revive and grow again in spring to nourish the soil. If you review the four photos above, the color green pops out. The farm glows on sunny days. It’s not too shabby on cloudy days either.
VEGGIE LIST and VEGGIE NOTES
(Oct. 26/27, 2017; week #24, purple EOW)
Sweet potatoes, 2 – 2.5 lb
Butternut squash
Red cabbage
Brussels sprouts, 1 lb
Romanesco
Celeriac
Purple daikon radish
Green bell peppers, ~2
Yellow onion
Shallots, 1 – 3
Baby ginger, 1 knob
This is the final box of our regular CSA season.
Romanesco (pale green conical head, possible tinged with purple) – This is the prettiest vegetable we grow. Look at it closely to appreciate its branched beauty and repeating spiral pattern. It is closely related to cauliflower which it resembles in flavor and texture.
Preparation: Like broccoli and cauliflower, it is fine eaten raw or cooked. It requires cooking times intermediate between the two. Don’t overcook it. I usually steam it, then dress it simply with a butter-lemon-garlic-mustard sauce.
Celeriac (knobby, round, bizarre-looking vegetable which smells like celery) – Flavorful celeriac is good raw or cooked. It is excellent in mixed roasted veggies or in soup. It’s especially good in cream soups, alone or mixed with potatoes. Grated raw celeriac is a great starting point for winter salads. Celeriac will store in your refrigerator for months. Cut off chunks as you need them. Peel before using.
Shallots – These look like small red onions. They can be round or oblong. Store at room temperature. This is the first time we’ve grown these! They seemed like a fun thing to try and have turned out nicely. Honestly, I am a novice with shallots but from what I’ve read (and eaten at restaurants) they are good in salad dressing, and caramelized and used to top dishes or sandwiches. Have fun!
Baby ginger – This is baby ginger, bright white and pink because it hasn’t grown a brown epidermis yet. The ginger in stores is grown for a long season in warm places like Hawaii. Baby ginger is special because it has the full ginger flavor and spiciness but almost no fibers. That’s why it’s used to make the pickled ginger served with sushi. I asked the crew to wash it lightly to avoid bruising. Expect to do a final wash before using it.
Storage: Eat soon; baby ginger is perishable. Wrap in a damp cloth or paper towel, and keep in the refrigerator in a plastic bag. You can also freeze your ginger, then grate as much as you need from the frozen knob.

Baby ginger
RECIPE LOG
Visit our Recipe Log, a list of all our 2017 recipes.
LOCAL THYME RECIPES
Comforting Classics
Romanesco Gratin
Chicken or Tofu and Brussels Sprout Stir Fry with Ginger
Rice Bowl with Romanesco, Bell Pepper, Cabbage and Fried Egg
Celeriac Ribbon Remoulade
Outside the Box Recipes
Romanesco Polonaise
Brussels Sprouts Braised in Nutmeg Cream
Red Cabbage and Apple Soup
Celeriac, Smoked Mozzarella and Prosciutto Salad
Quick and Easy Meal
Roasted Sweet Potatoes and Brussels Sprouts with Miso Vinaigrette
RECIPES FROM LAUREN
DEEP DISH HARVEST PIZZA
If there is anything I love more than taking every vegetable I have and throwing it into one mess of a beautiful deep-dish pizza, I don’t know what it would be. This recipe is simple, insanely versatile and (as usual) fit for a crowd. It only makes one pizza so you won’t think it’s a lot of food, but trust me, this baby is dense. If you aren’t vegetarian, I totally recommend throwing some bacon on there. Enjoy! Lauren.
Serves 6-8
Takes 1 hour, 15 minutes
4 cups peeled and chopped butternut squash
2 cups water
2 teaspoons Kosher salt, divided
2 tablespoons olive oil plus more for drizzling
2 cups halved and quartered brussels sprouts
1 head romenesco, cut into bite-size florets
1 green pepper, diced (about 1/2 cup)
1/4 teaspoon freshly ground black pepper
1 tablespoon butter
2 shallots, peeled and thinly sliced
1 tablespoon maple syrup
1/2 teaspoon red pepper flakes
2 cups favorite pizza cheese (I used a blend of havarti, munster and Parmesan but mozzarella is also great on its own)
- Preheat the oven to 450 degrees.
- If making pizza dough from scratch, begin the dough now (see below). If not, skip to the next step.
- In a medium sauce pan, combine winter squash, water and 1/2 teaspoon Kosher salt. Bring to a boil, reduce to a simmer and cook for 25 minutes until squash is very soft. Drain and return to pan.
- Drizzle two tablespoons olive oil on a baking sheet. Add brussels sprouts, romanesco, green pepper, pepper and 1 teaspoon Kosher salt. Roast for 25 minutes, turning once for even cooking.
- While the winter squash simmers and veggies roast, melt a tablespoon of butter in a large cast-iron skillet. Add shallots along with remaining 1/2 teaspoon Kosher salt. Cook for 5-10 minutes until beginning to char in places. Add to drained winter squash along with maple syrup and red pepper flakes. Mash with a potato masher (or fork) until mostly smooth.
- Remove veggies from oven and bump temperature up 500 degrees.
- Drizzle cast-iron skillet with a bit of oil and then press pizza dough into pan and up the sides. It will stretch and sink but just keep pushing it up the sides until it stays about 2/3 of the way up. Let rest for a couple minutes while you shred the cheese.
- Add half the cheese to your pizza crust. Top with mashed winter squash and spread into an even layer. Add roasted veggies followed by remaining cheese.
- Bake for 25 minutes until crust is golden and cheese is bubbling. Serve warm.
.
Pizza dough:
1 cup warm (but not hot) water
1 packet instant yeast (or 2-1/2 teaspoons)
Pinch sugar
1 teaspoon Kosher salt
4 tablespoons olive oil
3 cups all-purpose flour
- Combine water, yeast and sugar together in a small bowl or measuring cup. Let sit for 5 minutes so the yeast proofs and becomes all yeasty.
- Add salt and olive oil to the yeast mixture.
- Pour flour into a large bowl (preferably your mixing bowl if you have one). Slowly stir in yeast liquid and stir until clumpy dough forms.
- Turn out dough onto counter and knead until smooth, and shape into a ball.
- Grease bowl you used to make dough and place dough ball in it. Cover with plastic and set in a warm place (like the warm oven that’s roasting your veggies) until ready to use. For me, this was 40 minutes and it was perfectly doubled in size.
.
.
SWEET POTATO CABBAGE BOWL WITH CASHEW LIME DRESSING
Takes 45 minutes
Serves 4-6
2 pounds sweet potatoes, cut into bite-size pieces
1 yellow onion, cut in chunks
2 tablespoons olive oil
2 teaspoons Kosher salt, divided
1/4 teaspoon freshly ground black pepper
1/2 cup quinoa
1/2 cup lentils
1-1/2 cup water
1/2 red cabbage, shredded
1 purple daikon, quartered and very thinly sliced
2 avocados, sliced
Sesame seeds, optional
Cashew Lime Dressing:
1/3 cup cashew (or almond or peanut) butter
1/3 cup olive oil
1/3 cup lime juice (about 3 limes)
2 tablespoons maple syrup
2 tablespoons water
1 tablespoon soy sauce (or tamari)
1 tablespoon minced ginger
1 teaspoon Kosher salt
1/2 teaspoon cayenne pepper
- Preheat oven to 450 degrees.
- Drizzle baking sheet with olive oil and add sweet potatoes, onion, black pepper and 1 teaspoon Kosher salt. Roast for 25 minutes, turning once for even cooking.
- Rinse quinoa and add to a medium saucepan along with lentils and remaining 1 teaspoon Kosher salt. Toast over medium heat about 5 minutes, until little to no moisture remains. Add water and bring to a boil. Reduce to a simmer, cover and cook for 20 minutes. Turn off heat, but leave lid on and continue steaming for 5 minutes.
- Prepare dressing by combining all ingredients in a small bowl and whisk until smooth. Taste and adjust seasonings as desired. Add water if it’s too thick.
- Build bowls by placing about 1/2 cup of quinoa and lentil mixture in each bowl. Top with a quarter of the sweet potatoes and onions, a generous amount of cabbage and daikon, and half an avocado. Drizzle with sauce and sprinkle sesame seeds on top (if using).
.
Week #23, final purple EOW box
- On: October 19, 2017
- 0
Box Countdown
October 19/20 (this week) = final box for purple EOW members
October 26/27 (next week) = final box for weekly members & for green EOW
Extension & Storage Shares in November – Just for members registered for these extra shares.
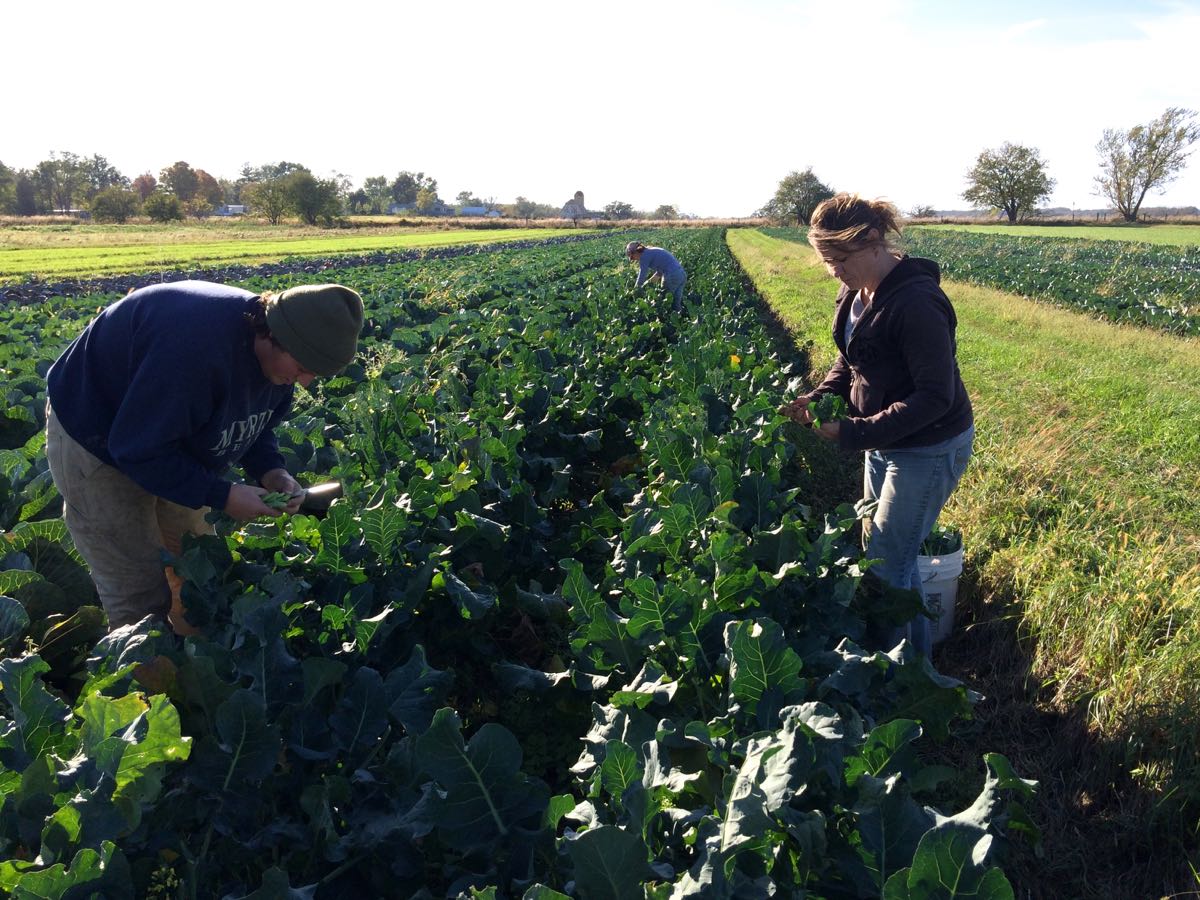
Jory, Kerry, and Karen in the broccoli field. The warm weather is OK for vegetables and wonderful for people.
Veggie List and Veggie Notes
(Oct. 19/20, 2017, week #23, purple EOW)
Beth’s box logic:
– Cauliflower. This has been an incredible year for broccoli and cauliflower. Some seasons, cauliflower is so rare that we only have enough for one CSA delivery. Not this year. We realize we have delivered cauliflower in your boxes at least three of the last four weeks. Let’s enjoy this bounty while it’s here. If you are feeling overwhelmed, you can freeze your cauliflower to use in winter soups. Here are Pat from Local Thyme’s instructions to freeze cauliflower: To freeze, wash and separate cauliflower florets, blanch for 3 minutes and submerge in ice bath. Drain well. Flash freeze by spreading the cauliflower out on a baking pan and putting them in the freezer to harden up. Once hard, pack the cauliflower in a plastic freezer bag and return to the freezer to store.
– Garnishes. We’ve sent multiple items to enliven your cooking this week (poblanos, scallions, parsley and garlic). Both Pat and Lauren have folded these ingredients into their recipes this week. If you’re not sure what to do with the poblano chiles, roast them, slice into ribbons and use to top anything you cook this week. These are the last scallions (sob) so I’ve hidden away a few bunches for our favorite ways to use scallions; use to garnish any soup but especially chicken soup; scallion-kimchi pancakes like this recipe (a favorite) or this recipe (which I want to try). I plan to try Lauren’s Smoky Butternut & Poblano Chile (see below) this weekend, and I know it will be great with scallions.
Butternut squash
Brussels sprouts, ~1 lb
Satina potatoes, ~3.5 lb
Leeks, 1 or 2
Cauliflower
Broccoli
Carrots, 2 lb
Bell pepper, 1
Poblano chiles, 3 – 4
Scallions, 1 bunch
Parsley, 1 bunch
Garlic
Next week’s box will probably contain butternut squash, Brussels sprouts, sweet potatoes, red cabbage, purple daikon radish, ginger, celeriac and more.
Butternut winter squash – Everyone gets one medium or two small butternuts. These early-maturing varieties are all on the small side.
Brussels sprouts – If you are a new CSA member, please approach Brussels sprouts with an open mind. Many of us grew up eating awful, overcooked Brussels sprouts. These Brussels sprouts are completely different. We usually delay B-sprout harvest until after they are sweetened by the first frost. We can’t wait any longer!
Here is our method to cook Brussels sprouts: Wash the sprouts and trim the cut ends. Cut an X in the stem end of large sprouts. Cut a single slit in small or medium sprouts. This does two things. It helps the Brussels sprouts cook evenly, plus it allows them to soak up any marinade or dressing. Place sprouts in a pot with one inch of water in the bottom and steam until tender, 7 to 10 minutes. If the sprouts are uneven in size, then set aside the smallest ones and add to the pot after the larger ones have cooked for a few minutes. Don’t overcook them! You can also oven-roast Brussels sprouts. Here are a few dressing ideas for cooked sprouts:
– Sherry vinegar/olive oil/Dijon mustard/garlic/white wine/salt and pepper. This is our favorite, especially when you combine the Brussels sprouts with slivered peppers and thinly sliced onions. Delicious warm, cold, or at room temperature.
– Balsamic vinegar/olive oil/garlic/salt and pepper
– Lemon juice and zest/melted brown butter/poppy seeds/white wine/garlic/salt
Satina potatoes – These pale yellow potatoes are from Igl Farms. Satinas are an all-purpose potato with thin skin and smooth flesh. We oven-roasted a batch and they browned perfectly.
Cauliflower – See Beth’s notes above.
RECIPE LOG
Visit our Recipe Log, a list of all our 2017 recipes.
LOCAL THYME RECIPES
Comforting Classics
Aloo Gobi
Cock-A-Leekie Soup
Maple Balsamic Roasted Brussels Sprouts
Butternut and Poblano Quesadillas
Outside the Box Recipes
Sweet and Savory Cauliflower Toast Melts
Mexican Pinto Bean Green Rice Skillet Supper
Whole Grain Spaghetti with Brussels Sprouts
Winter Squash Hummus
Quick and Easy Meal
Quick Broccoli and Cheddar Stuffed Potatoes
RECIPES FROM LAUREN
A recipe from last year: MASHED POTATO & LEEK FRITTERS
SMOKY BUTTERNUT SQUASH & POBLANO CHILI
Adapted ever so slightly from the lovely Love & Lemons.
Takes 1 hour
Serves 6-8
1 tablespoon extra-virgin olive oil
1/2 bunch scallions, sliced
1 teaspoon Kosher salt
1/4 teaspoon freshly ground black pepper
3 carrots, diced
3 cups cubed butternut squash
1 bell pepper (any color), stem and seeds removed, and diced
2 poblano peppers, stem and seeds removed, and diced
1 tablespoon brown sugar
1 tablespoon chili powder
2 teaspoons cumin
1 teaspoons smoked paprika
1/8 teaspoon cayenne pepper
28-ounce can diced tomatoes with their juices
15-ounce can black beans, drained and rinsed
15-ounce can canellini or Navy beans, drained and rinsed
Juice of 1 lime
4 cups water or vegetable broth (or enough to cover)
Garnishes:
1/2 bunch scallions, sliced
Shredded cheddar
Sour cream
Sliced avocado
Extra limes
- Heat the oil in a large pot over medium heat. Add the scallion, salt and pepper and cook until soft, 5 to 8 minutes. Stir in the carrots, butternut squash, bell pepper, and poblano. Cook until the vegetables just start to become tender and the scallions are lightly browned, about 15 minutes. Reduce the heat if necessary.
- Add the sugar, chili powder, cumin, smoked paprika, cayenne, and tomatoes and cook for 1 minute. Stir in the beans, lime juice and then add 4 cups of water or vegetable broth (or enough to cover everything). Simmer until the butternut squash and carrots are tender, 20 to 30 minutes, adding more broth, as needed.
- Season to taste with more salt, pepper, and spices to your liking. If your chili is too spicy, stir in a small splash of apple cider vinegar. If it’s too thick, add another cup of water or broth.
- Serve with scallions, cheddar, sour cream, avocado and extra limes.
.
CREAMY GOUDA VEGGIES WITH BREADCRUMBS
Adapted from Joy the Baker.
Serves 8-10 as a side
Takes 1 hour
1 pound brussels sprouts
1 head broccoli, chopped
1 head cauliflower, chopped
4 tablespoons butter, divided
1/2 cup breadcrumbs (I made my own by cutting into crouton-sized pieces and baking for 30 minutes at 350 degrees, then pulsing in a food processor)
2-3 leeks, white and light green parts only, cut in half lengthwise and sliced
1 teaspoon Kosher salt, plus more for seasoning
1/4 teaspoon freshly ground black pepper
1/2 teaspoon ground mustard
1/2 teaspoon thyme
1/4 teaspoon cayenne pepper
3 tablespoons flour
2 cups whole milk
2 cups shredded Gouda, divided
- Bring a large pot of salted water to a boil over high heat and preheat oven to 375 degrees.
- While waiting for the water to come to a boil, prepare the Brussels Sprouts. You’ll want to leave the smallest ones whole (but still trim the ends), halve the medium ones and quarter the largest ones.
- Toss the prepped brussels sprouts into the water once its boiling and cook for two minutes. After two minutes, add the broccoli and cauliflower and blanch for two minutes longer. Strain in a colander, rinse with cold water and then place ice cubes on top to stop the cooking process.
- In a large cast-iron skillet or other oven-proof skillet, melt one tablespoon of butter over medium heat. Add breadcrumbs and cook until golden brown throughout (about 5 minutes). Remove to a paper towel to drain extra grease. Scrape the pan with a spatula to make sure you get all the crumbs.
- Add remaining butter to skillet and cook over medium heat until melted. Add leeks, salt and pepper. Saute for 5 minutes until softened. Add ground mustard, thyme and cayenne pepper. Continue cooking for 5 minutes and then add flour. Reduce heat to low and cook for 3 minutes until flour is very lightly browned.
- Add milk to roux (mixture of butter, leeks and flour) and turn up heat to medium high. When milk just begins to simmer, remove from heat and stir in 1 cup cheese until melted. Remove ice cubes from blanched veggies and add vegetables into cheese mixture.
- Sprinkle remaining cup of cheese over the veggies and bake for 30 minutes until top is golden and bubbly. Sprinkle breadcrumbs on top when ready to serve.
.
Week #22, Oct 12 2017
- On: October 11, 2017
- 1
Box Countdown
October 19/20 (next week) = final box for purple EOW members
October 26/27 = final box for weekly members & for green EOW
Extension & Storage Shares in November – Just for members registered for these extra shares. You know who you are.
Extension & Storage Share registration
We continue to get questions about these shares, which we are happy to answer. I’ve left registration open through this Sunday Oct. 15. After that, we need to move on and close the registration. Learn more here. To sign up, go here and follow instructions.
Gleaning Party
The gleaning party was wonderful. We love having all of you come visit. It’s a chance for you to experience the farm firsthand by getting in the fields, gathering produce and stomping through mud puddles. There were so many excited kids. We were very, very lucky – the weather was sunny and warm. Here’s our favorite paraphrased quote of the day: “Your CSA boxes are like the Tardis. I can’t believe how much produce you pack in there. That box is bigger on the inside than the outside.”
Here are a few photos. I got distracted during the upick and neglected to take photos. If you have good ones to share, post them to our Facebook page or send them to me and I’ll post them. I love all the kid + veggie photos. Beth
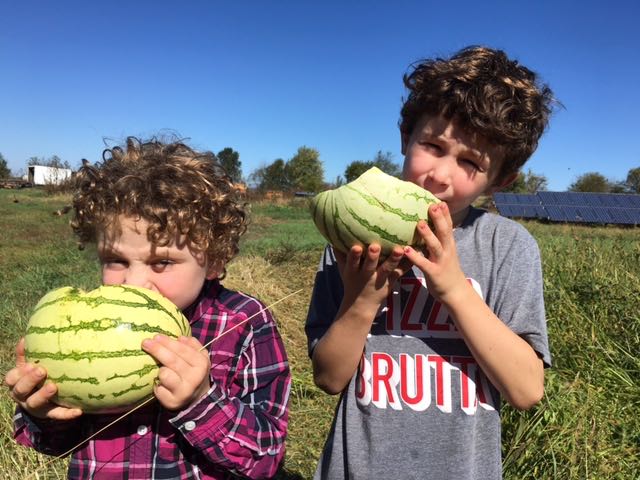
There were late-maturing melons to test how well you judge watermelon ripeness. Photo credit Shelly D
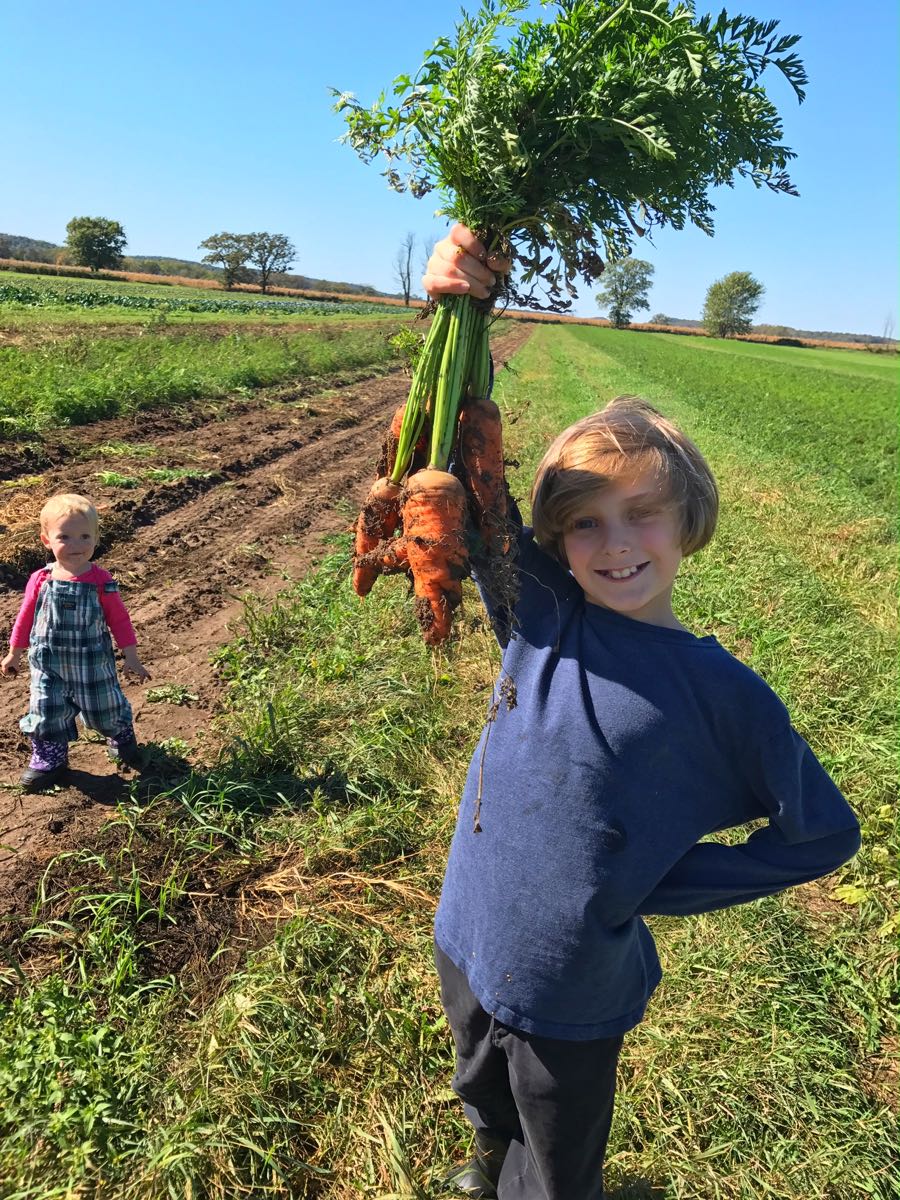

Photo credit Jess S

Karen and Chance silk-screened a gazillion t-shirts.

Freshly printed t-shirts in immediate use.
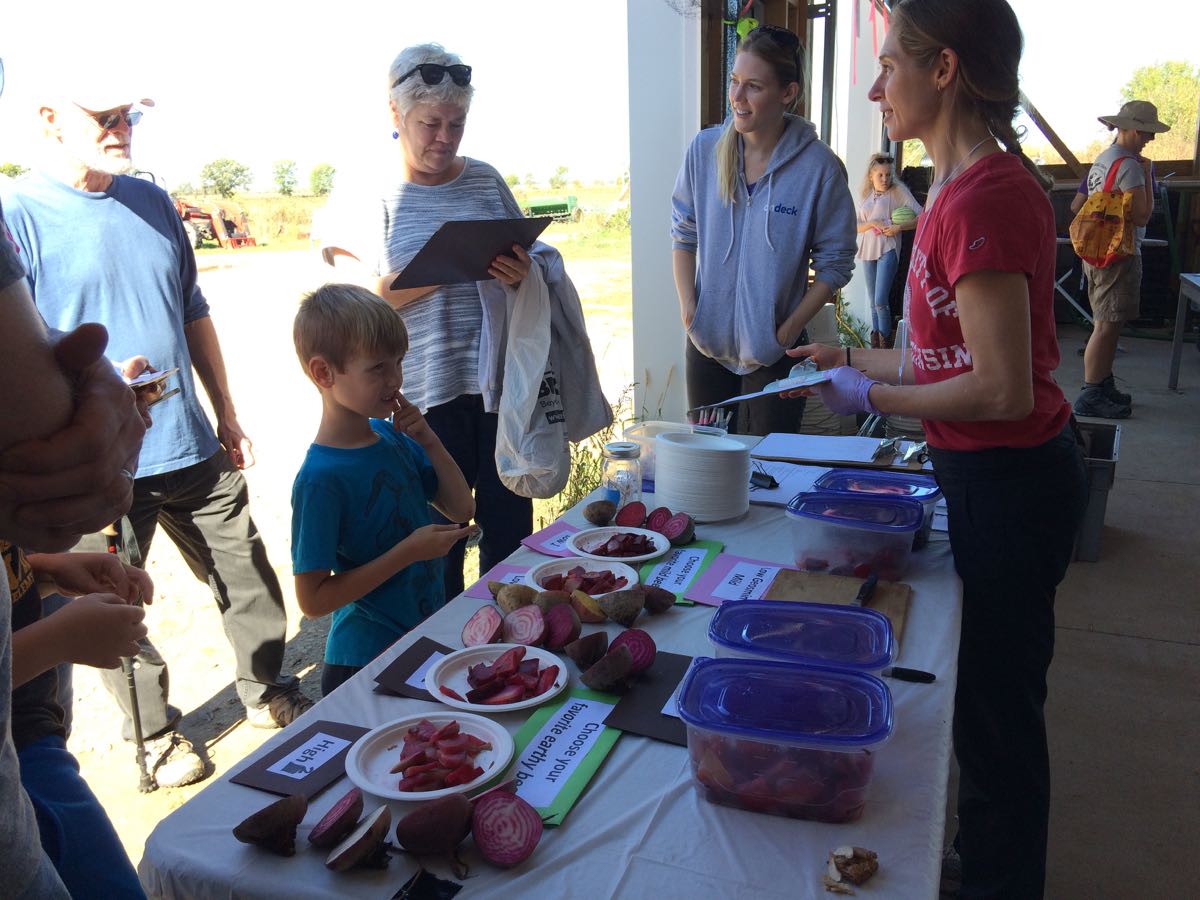

UW grad student Solveig Hanson (at right) is breeding beets for different flavor components. She offered beets for tasting, and collected members’ opinions about the flavor and appearance of her breeding lines. I explained to Solveig that you folks are not a typical population. You are a self-selected group of vegetable enthusiasts. We have helped raise Solveig’s beets for the last two years. She values having her selections grown within a genuine farm setting. After last season, Solveig decided to enroll in our CSA, giving us 100% participation of UW beet-breeding grad students. Solveig asked me to thank all of you who participated in the tasting and survey at the upick.
Veggie List and Veggie Notes (Oct. 5/6, 2017, week #22, green EOW)
Winter squash, 1 or 2
Parsnips, 1.5 lb
Carrots, 2 lb
(together in one bag)
Red bor kale, 1 bunch
Purple cauliflower
Bell peppers, ~2
Romano beans, 0.9 lb
Kohlrabi
Yellow onions
Scallions, 1 bunch
Garlic
Next week’s box will probably contain winter squash, potatoes, Brussels sprouts, leeks, carrots, scallions and more.
Parsnips (tapered, cream colored roots) – Those long, white roots are not carrots, they are parsnips. The two vegetables are related. When cooked, parsnips are sweet and starchy. For the best flavor, brown them to caramelize the sugars. Here are a few ideas for parsnip preparation:
– Caramelize the parsnips by roasting them in a vegetable medley.
– Parsnip fries are delicious: cut like French fries, oil lightly, place on a cookie sheet and roast in a hot oven until brown and cooked through.
– Try substituting grated parsnips in a potato pancake recipe. They brown beautifully and are very tasty.
– Steve loves pan-fried parsnips with onions and garlic.
Romano beans – These big beans need braising or long-cooking. They are worth the effort – lots of flavor. These are the last beans of the season. Steve is having trouble letting them go.
Winter squash – Everyone gets one or two squash, depending on size. This week’s squash are Festival (speckled acorn), Carnival (speckled acorn) or Sugar Dumpling (like a very solid sweet dumpling). Some squash have dry flaws that need trimming. I encourage you to eat these squash soon. These varieties are valuable because they are full-flavored and ready to eat soon after harvest, unlike butternuts which need time to cure. The flip side is that they do not store for long.
Purple cauliflower – Like regular cauliflower but prettier. When cooked, the color darkens but persists.
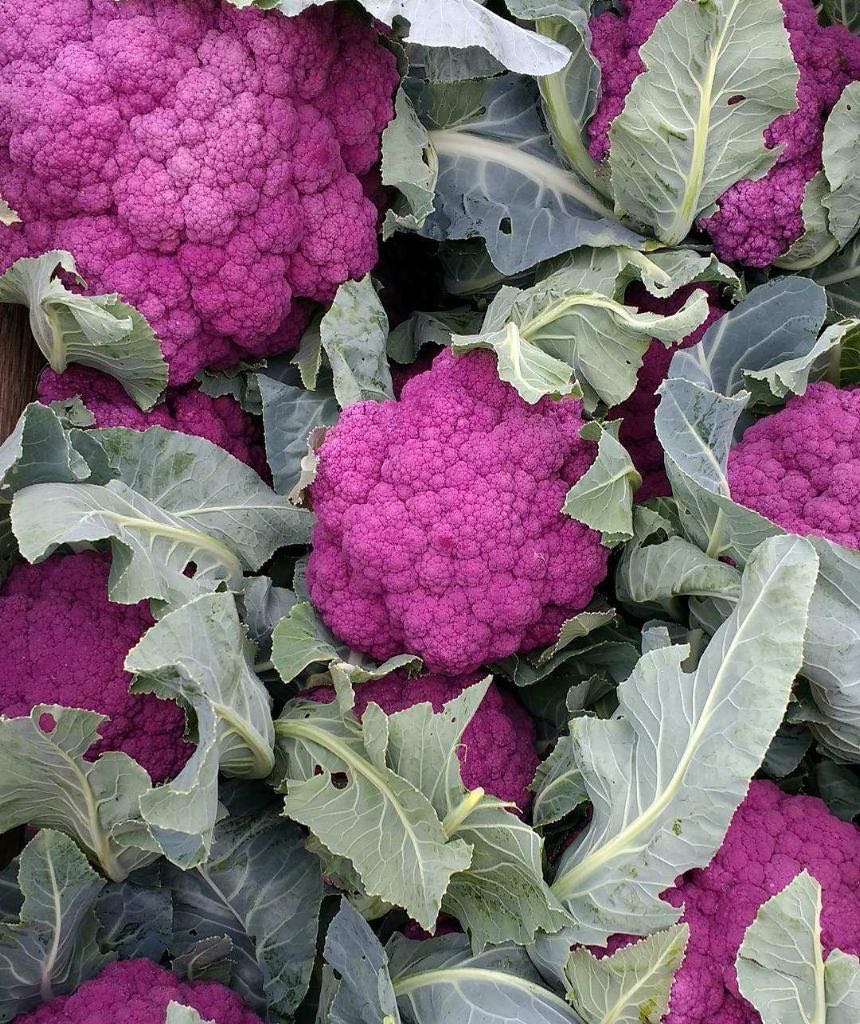
Photo credit Karen Nicholson
RECIPE LOG
Visit our Recipe Log, a list of all our 2017 recipes. Pat has given us a number of recipes for kale or other greens. Check out July 27, August 24, Sept. 28.
LOCAL THYME RECIPES
Comforting Classics
Lemony Cauliflower Pasta
Irish Root Vegetable and Bean Stew
Egg Salad Sandwiches with Carrot, Kohlrabi and Onion
Microwave Maple Soy Glazed Winter Squash
Outside the Box Recipes
Curry Roasted Cauliflower and Root Vegetables
Parsnip Cake with Cream Cheese Frosting
Kohlrabi Apple Salad
Squash and Caramelized Onion Pizza
Quick and Easy Meal
Kale and Pepper Eggs Benedict
RECIPES FROM LAUREN
ROASTED CAULIFLOWER & PARSNIP SOUP
There are so many fall things in this box, they just go together like a dream with minimal work. Part of me just wants to tell you to serve a huge dish of roasted cauliflower, parsnips, winter squash, onions and garlic seasoned with maple syrup and thyme with every meal you serve this week (which you can absolutely also do), but the other part of me loves to pair these same exact flavors with coconut milk and puree it into the most velvety, beautiful soup. If you have purple cauliflower, this soup will be pale purple which only makes me love it all the more. Lauren
Takes 1 hour, 15 minutes
Serves 6-8
1-1/2 pounds parsnips, peeled and cut into chunks
1 head cauliflower, cut into florets
2 garlic cloves, sliced
1/4 cup olive oil
2 teaspoons salt, divided
3/4 teaspoon freshly ground black pepper, divided
2 tablespoon butter
1/2 yellow onion, peeled and diced
1 large winter squash, peeled, seeded and diced
2 tablespoons maple syrup
1 teaspoon dried thyme
1/4 teaspoon red pepper flakes
9 cups water
15-ounce can full-fat coconut milk
- Preheat oven to 425 degrees.
- Combine parsnips, cauliflower and garlic with olive oil, 1 teaspoon salt and 1/2 teaspoon pepper on two large baking sheets. There’s a chance it would all fit on one sheet, but the veggies will just steam instead of getting all that delicious carmelization that comes from roasting. It’s worth the one extra pan to wash. I promise. Roast for 40 minutes, tossing veggies halfway through.
- In a large stock pot, melt butter. Add onion plus remaining salt and pepper. Saute for 5 minutes until onions are softened and fragrant. Add roasted veggies, diced squash, maple syrup, time and red pepper flakes. Stir and saute for a couple minutes to allow flavors to combine.
- Add water and coconut milk. Bring to a boil, reduce to a simmer and cook for 25 minutes until the squash is tender.
- Puree with an immersion blender (or blender or in your food processor in batches) until smooth. Taste and adjust seasonings as desired.
- Serve warm on a cold day.
.
ROMANO BEAN & CARROT FRIED RICE
I have fallen in love with fried rice this summer. It is the perfect vehicle for almost any summer veggies and quick to whip up with a bit of advanced planning. I love to make a huge batch of rice on Sundays and store it in my fridge until a weeknight where I’m not feeling creative. Cooking the rice ahead saves on time and also helps with the texture of the fried rice, allowing it to crisp up a bit more (if that sort of thing matters to you).
Also note that step 3 is completely optional. If you don’t care about crispy rice, you can just toss the already cooked rice (warmed in the microwave) with the veggies along with the salt and sesame oil it would have been cooked with. Lauren
Takes 1 hour
Serves 6-8
3 tablespoons butter, divided
.9 pound romano beans, thinly sliced
1 teaspoon Kosher salt, divided
2 garlic cloves, minced
1-2 tablespoons soy sauce, divided
1/2 cup water
2 carrots, diced
1 colored pepper, diced
1 tablespoon + 1 teaspoon oyster sauce, divided
6 cups cooked white rice
3 tablespoons toasted sesame oil
1 bunch scallions (white and pale green parts only, reserve dark green tops for another use), sliced
6-8 eggs
Sriracha, for serving
- Melt 2 tablespoons butter in a large saute pan over medium heat. (If you don’t have a 7+ quart saute pan, it won’t be big enough and use a stock pot or Dutch oven instead). Add romano beans along with 1/2 teaspoon of salt. Saute for 10 minutes until very tender. Add garlic, 1 teaspoon soy sauce and water to pan. Let simmer for 15 minutes until the liquid has evaporated. While that simmers, dice your carrots and bell peppers.
- Add carrots, peppers and 1 tablespoon each soy sauce and oyster sauce. Cook over medium high heat until carrots are tender and no liquid remains, 5-10 minutes. Remove cooked veggies to a very large bowl.
- Optional step (see note above). In the same pan you used to cook the veggies, pour 2 tablespoons of sesame oil in so it coats the bottom. (If there was residue from the veggies, just whip it out with a towel quickly). Heat the oil over medium high heat until hot but not smoking. Dump in your fried rice and sprinkle with remaining 1/2 teaspoon salt. Cook on medium high heat for 6-10 minutes, stirring and scraping often so that the rice gets crispy in places but doesn’t burn to the bottom of the pan. Add 1 additional tablespoon sesame oil and 1 tablespoon of butter as you go to keep things from sticking.
- Add rice to bowl of veggies followed by sliced scallions and 1 teaspoon oyster sauce. Stir to combine well and then taste. Add 1-2 teaspoons soy sauce based on your tastes.
- Serve warm with a fried egg and hot sauce. You can also scramble your eggs and fold them into the fried rice if you prefer.
.
Week #21, Oct 5 2017
- On: October 04, 2017
- 0
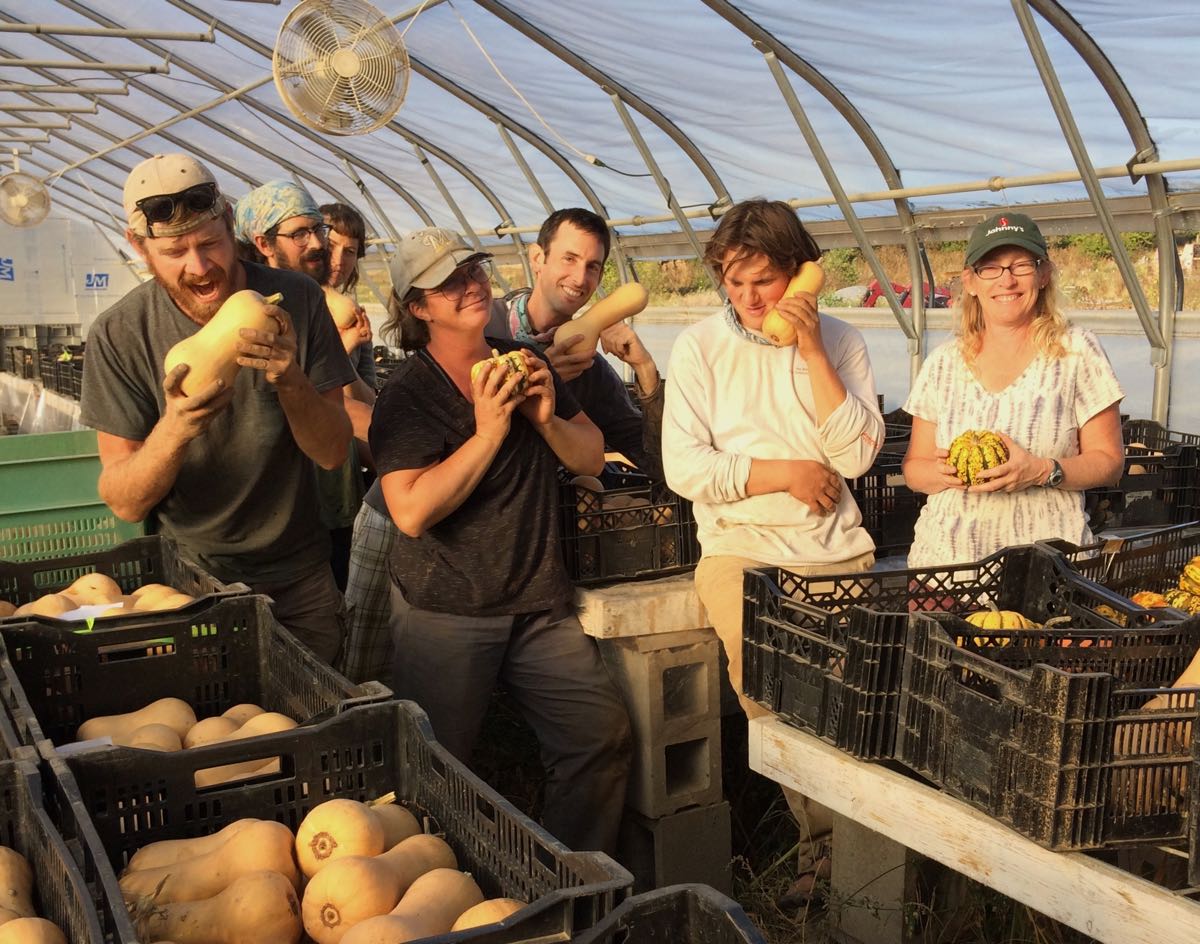
From left, Billy (ready for a snack), Smitty, Charlotte, Kristin (with a favorite squash), Jon, Jory (taking a call during our photo shoot!) and me (playing straight man). MIA Karen, Maggie & Simone.
Our winter squash crew gets a big thank you from me. Together, we clipped and picked up many, many squash over the last few weeks. It’s an exacting job to judge ripeness of the different varieties. Also, we notice that squash get heavier after you pick up a few hundred. Special thanks to Kristin, who stuck with me through every harvest this year, and to Jon and Karen who have helped with squash harvests for many years. Each crop needs judgement which makes it so valuable to work with the same crew each year. This year’s harvests happened during dry weather, perfect for us and perfect for the squash. Beth
Sweet potato harvest
Our main sweet potato harvest happened this week. (The sweet potatoes in this week’s box are from a smaller harvest a few weeks ago.) This week’s harvest was perfect. You can’t dig the sweets out of dry ground – they damage too easily. Steve irrigated the field a few days ago so the ground would be moist. Last night’s rain helped. Soil moisture was perfect and the sweet potatoes popped right out of the ground. So satisfying.
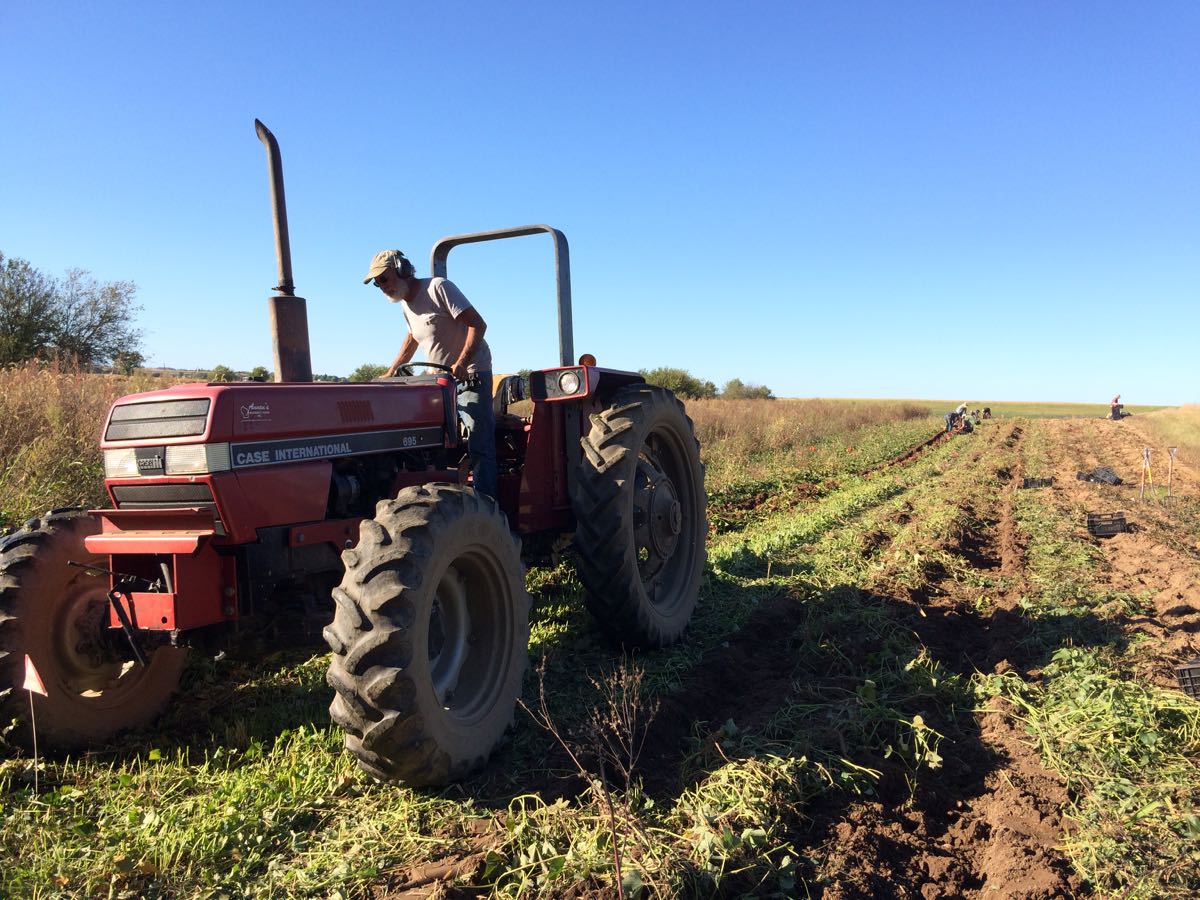
Steve undercuts the roots with the tractor and digger.
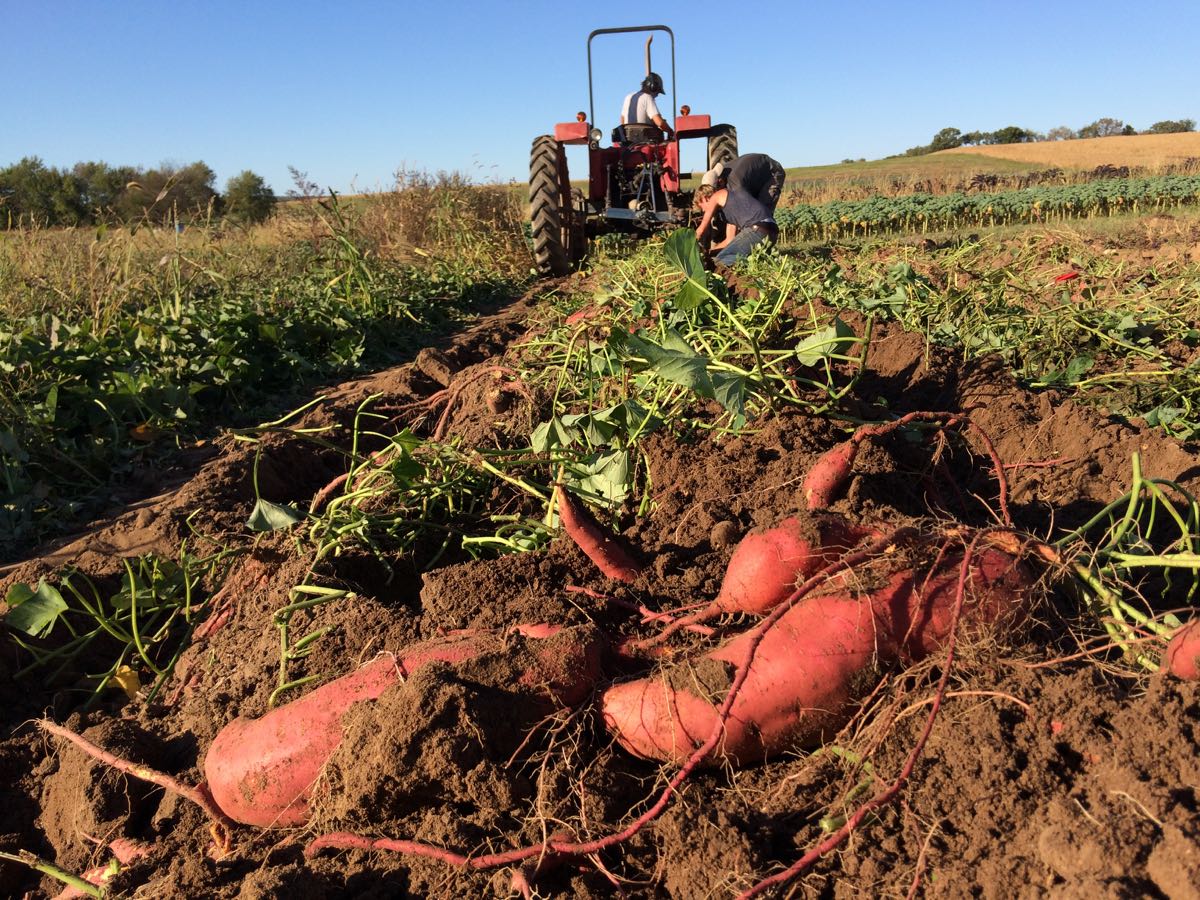
If conditions are good, the sweet potatoes end up on the surface.
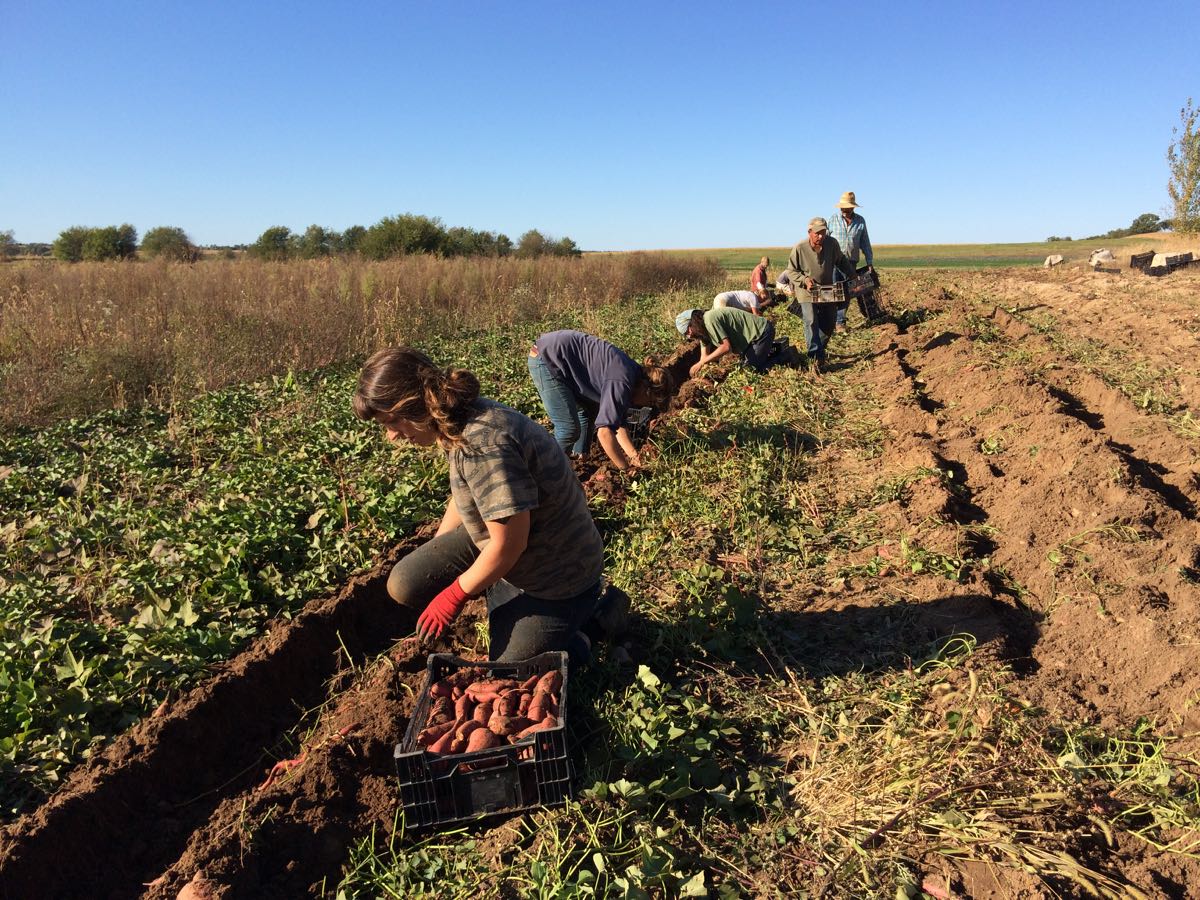
We pick them up by hand. It helps to gather a mob for this step. This crop is also heavy.
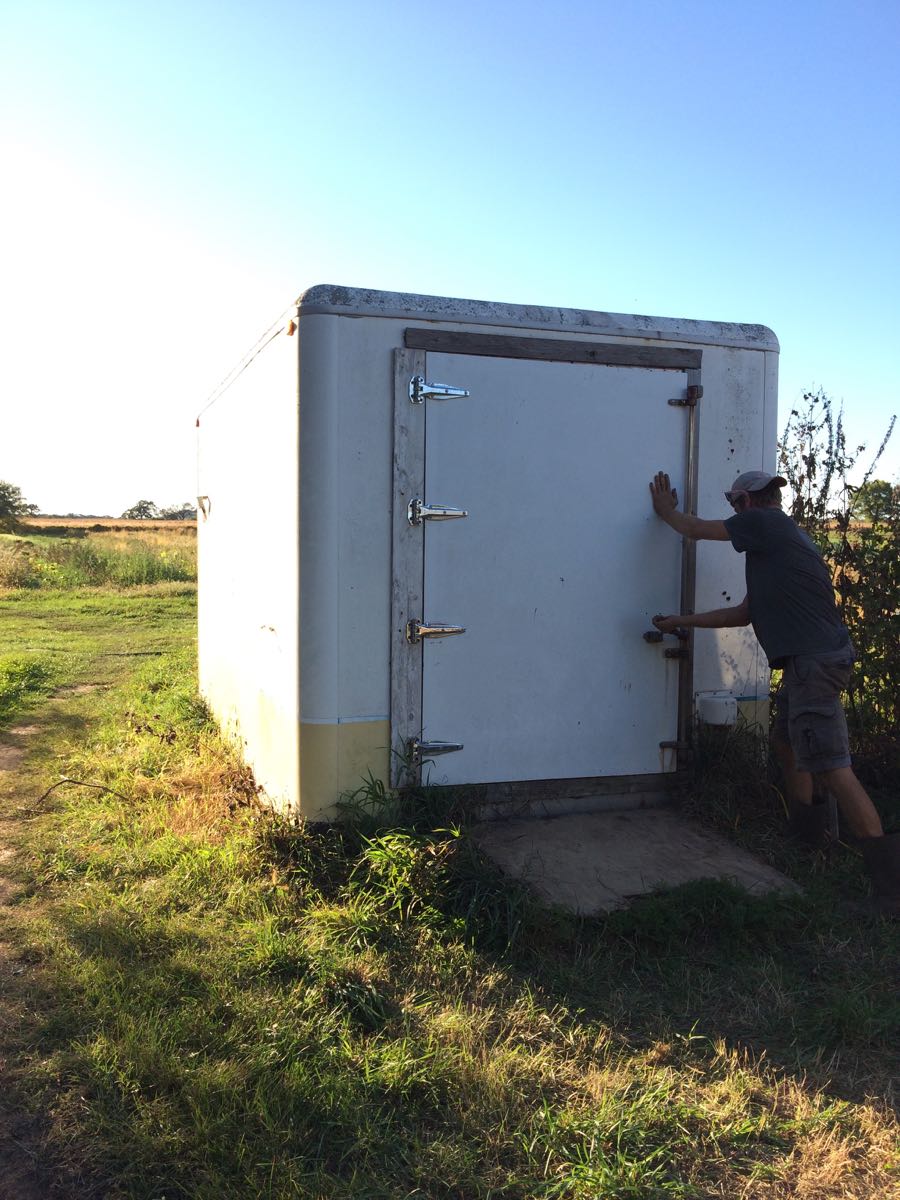
We put them in an insulated truck box and crank up the heat to 86 degrees with high humidity for a few days. That starts the curing process so the tubers sweeten and the skins toughen. Curing helps heal any dings and scrapes that happen during harvest.
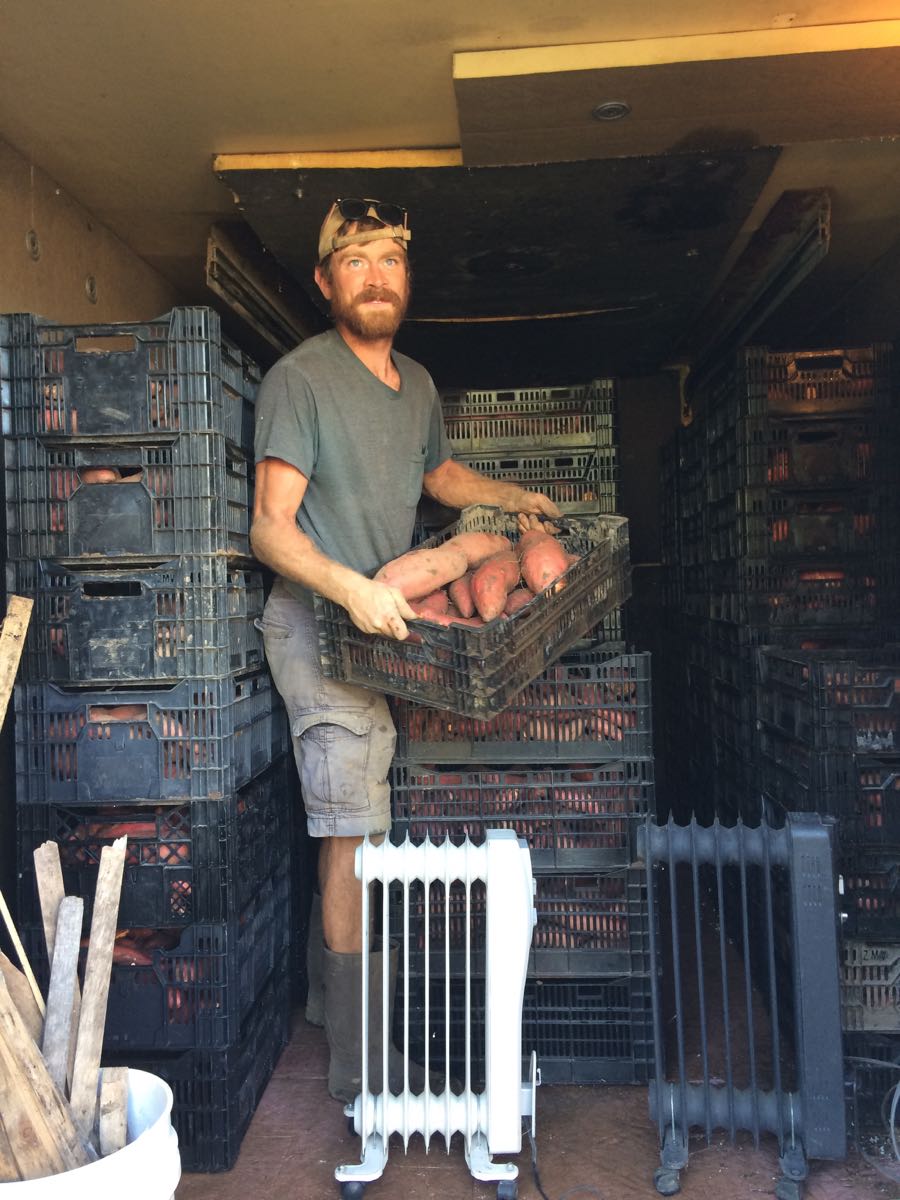
Billy (above), Kerry and Jory stacked the sweet potatoes in rows for good air movement.
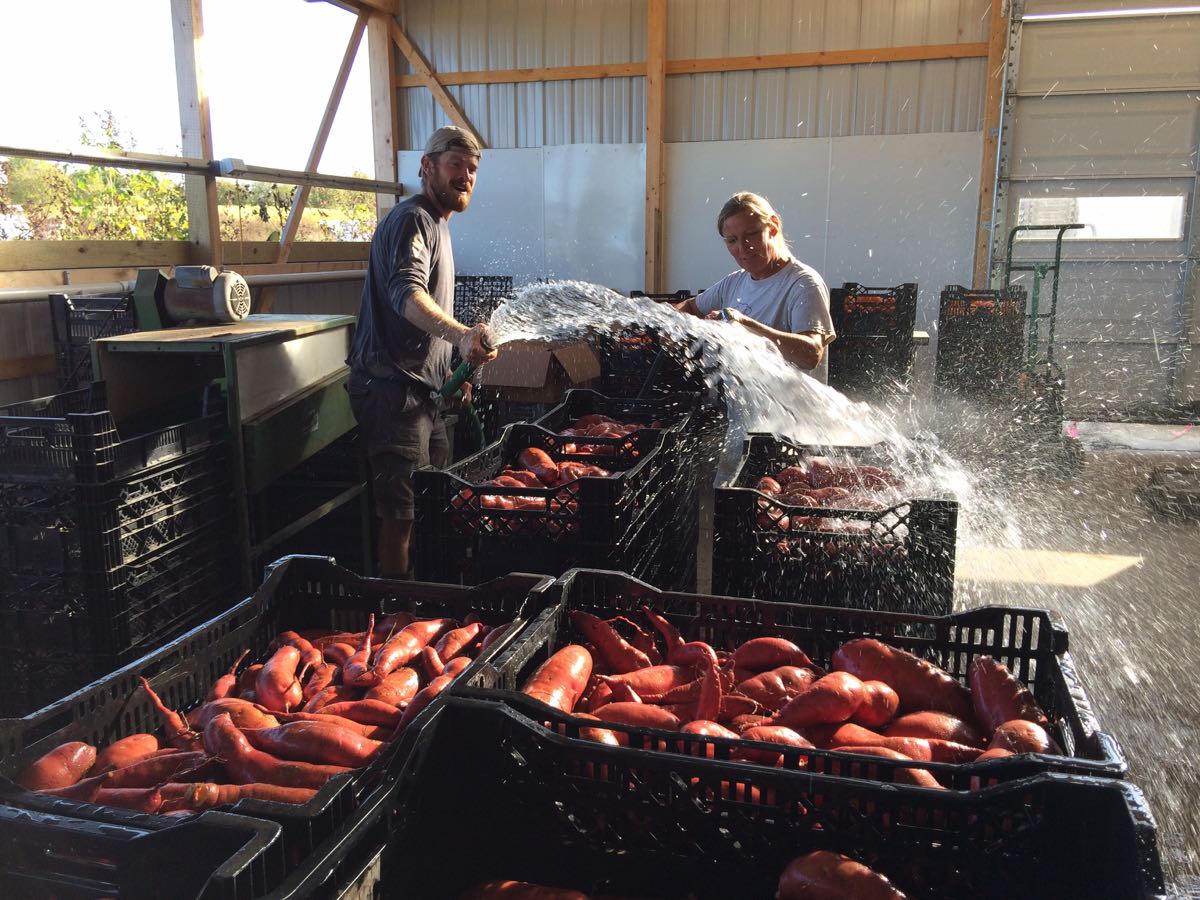
Wetting down this week’s sweet potatoes before washing. We dug these ones about three weeks ago.
Veggie List and Veggie Notes
October 5/6, 2o17; week #21, purple EOW, sun SMP
Green cabbage
Sweet potatoes, ~2 lb
Romano beans, 1.9 lb
Edamame soybeans, 1 bundle
Red mizuna, 1 bunch
Winter squash, 1 or 2
Red onion
Slicing tomatoes, a few
Bell peppers, 2
Some sites get broccoli.
Some sites get cauliflower.
Next week’s box will probably contain winter squash, broccoli or cauliflower, kale or collards, peppers, carrots, scallions and more.
‘Beauregard’ sweet potatoes – Here are a few things we’ve learned about sweet potatoes:
– For best flavor, cook your sweet potatoes so they brown and caramelize. We have a simple, favorite way to roast sweet potatoes. We used to prepare sweet potato fries in the oven. Now we just quarter the potatoes, rub with olive oil, dust with salt and place cut-side-down on a cookie sheet. Roast in a 450 F oven without turning until soft. The flavors will caramelize (like sweet potato fries) but preparation is simpler and the cooking time less exacting. Slender sweet potato fries go from undercooked to overcooked in the blink of an eye. Larger slices are less exacting, and therefore are easier. Small sweet potatoes can be cut just in half. Jumbos will need to be chopped into pieces. Otherwise, they will take a long time to cook.
– Store your sweet potatoes at room temperature. They suffer chilling injury below 50 F.
– The sweet potatoes we grow require slightly longer cooking than ones from the supermarket, perhaps because they contain higher moisture so soon after harvest.
– Sweet potatoes are good at any size. We have cooked everything from tiny to jumbo and consistently find that all sizes taste good.
Romano beans – Steve says these are ‘meaty’ this week. They aren’t overripe. They are just big, perfect for braising recipes.
Edamame soybeans (bundle of green stems with pods attached) – These edible soybeans are a treat. Pull the pods from the stem and wash well. It helps to submerge the pods and rub them together. Boil in water until the pods have split and the beans are quite tender. Season with salt and pop the beans out of the pods into your mouth. This Japanese specialty is becoming more and more popular in the USA.
Storage: Remove the pods from the stems promptly and refrigerate.
Mizuna – Mizuna is similar to mustard greens but with the pepperiness of arugula. Good raw in salads or cooked in any recipe that calls for mustard greens. Cooking tames the pepperiness. Use the leaves and younger, more tender stems. Discard older stems as they can be tough.
Slicing tomatoes – I fibbed last week. These are the final tomatoes of the season. They aren’t as flavorful as summer tomatoes but are surprisingly good for this time of year. Thank the dry weather. You should refrigerate these tomatoes because they are not going to store well at room temperature. Eat soon.
Winter squash – You’ll get one of the types in the photo. They are ready to eat, and should be eaten within two weeks. Store your squash at room temperature on your kitchen counter where you can keep an eye on it.
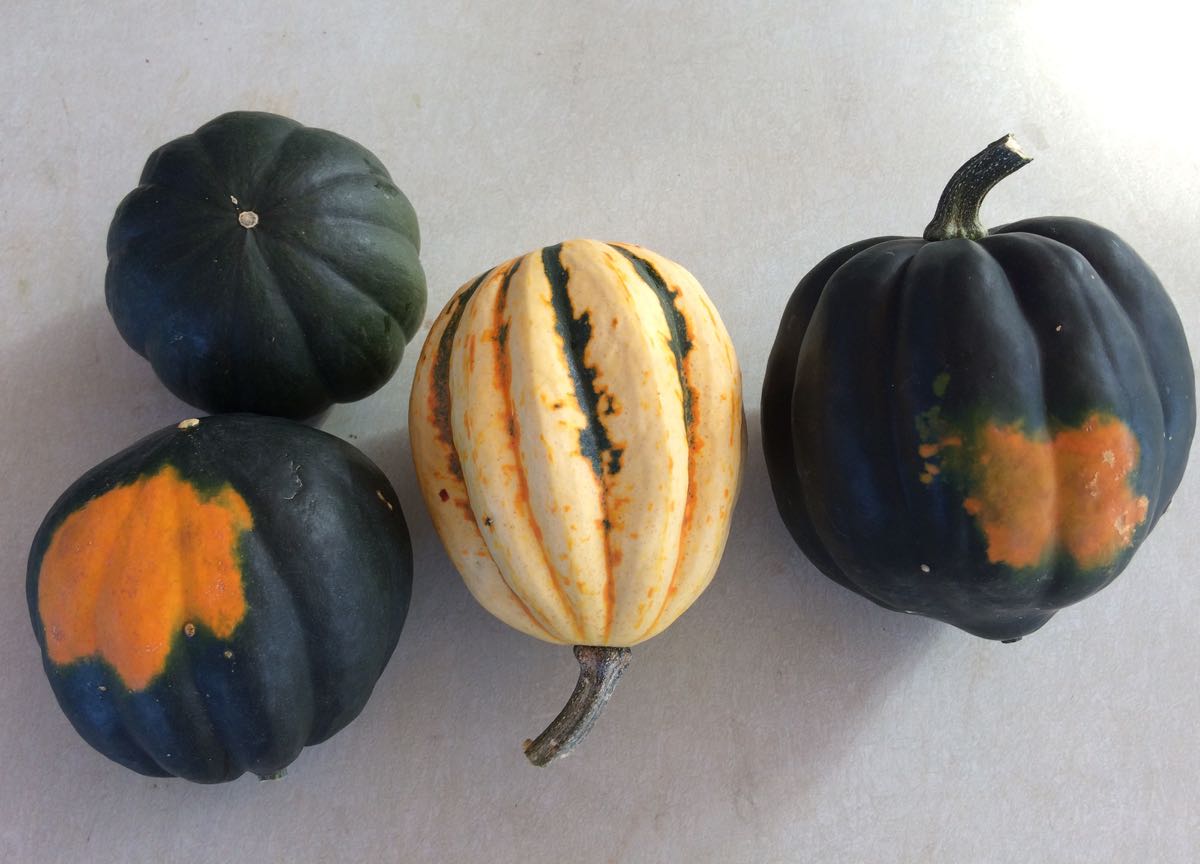
This week’s winter squash. Each site gets one type. From left, Sugar Bush acorn, Jester, TipTop acorn.
RECIPE LOG
Visit our Recipe Log, a list of all our 2017 recipes. Pat and Lauren have given us lots of broccoli and bean recipes already this year. Check out 9/21/17 for a few winter squash recipes.
LOCAL THYME RECIPES
Comforting Classics
Braised Mustard Greens
Minestrone with Peppers, Tomatoes, Cabbage and Romano Beans
Risotto with Braised Green Cabbage
Sweet Potato Puree
Outside the Box Recipes
Mizuna & Turkey Salad
Braised Romano Bean with Feta and Lemon Pepper
Slow Roasted Cabbage Chips
Chipotle Chicken and Sweet Potato Burrito
Quick and Easy Meal
Sweet Potato Posole with Black Beans
Week #20, Sept 29 2017
- On: September 27, 2017
- 0
Register for November shares this week
We offer two shares to extend the CSA season into November, for hungry members who want to continue their local-foods adventure. Both shares focus on fall vegetables, roots, winter squash, etc. Go here to learn more and view sample boxes from previous years.
– Extension Share, $30, November 2/3 (Thurs/Fri sites), one delivery, same size box as the regular CSA deliveries (3/4 bu)
– Storage Share, $108, November 16/17 (Thurs/Fri sites), one delivery, two large 1 & 1/9 bushel boxes
Veggie List and Veggie Notes (Sept 28 2017; week #20, green EOW)
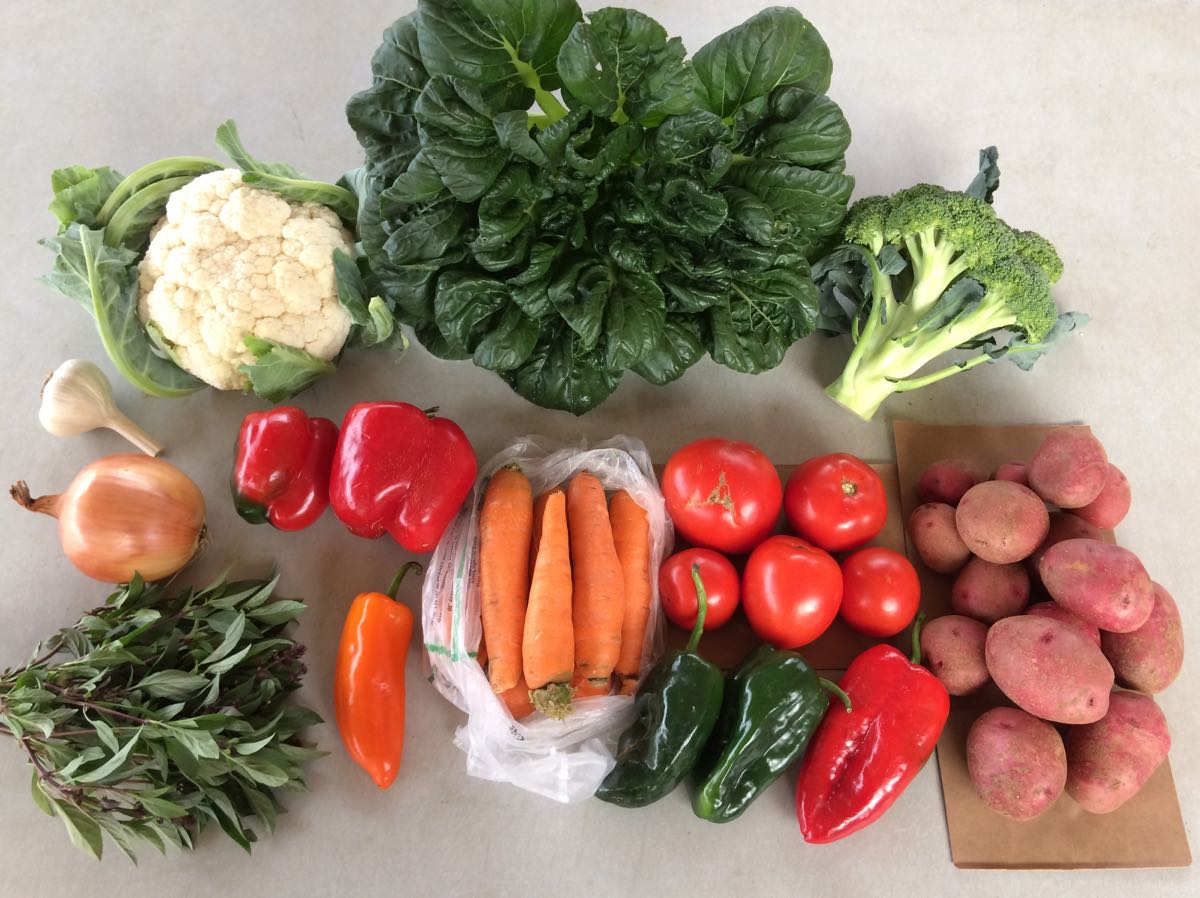
Beth’s box logic: – Wow, look at all the cabbage family vegetables in this box (cauliflower, broccoli, Koji or tatsoi greens). That’s what happens in fall. Stock up on your anti-oxidants this week.
– Roast your three poblano peppers. This is easiest on a grill. Peel the roasted chiles, cut into strips and use to top any dish this week. Great with any version of potatoes, or sprinkled into soup, or over top of casseroles, or cooked into scrambled eggs. We stir strips of roasted poblanos into tomato-pepper soup at the end of cooking.
– See below for a recipe to wilt your raw Koji greens. It’s a great technique to manage large heads of Asian greens.
Cauliflower, 1 large or 2 small
Broccoli, 1 large or 2 small
Koji OR tatsoi greens, 1 head
Red potatoes, 3.5 lb
Slicing tomatoes, 2.2 lb, see note
Carrots, 2 lb
Bell peppers, 2
Oranos peppers (orange, sweet), 1 or 2
Poblano chiles (mild heat), 3
Yellow onion
Thai basil
Garlic
Next week’s box will probably contain sweet potatoes, cauliflower or broccoli, cabbage, peppers, red onion and more.
Cauliflower – Woohoo! The cauliflower is ready and the heads are beautiful.
Koji greens (large head of dark green leaves) – Similar to other Asian greens like tatsoi or Yukina. We did not expect this to be ready until mid-October but it’s ready now. Cool weather in August was ideal for the young plants to get going. The recent hot spell sped them to maturity. These are really, really great. Consider trying my Wilted Choy Salad (below) if you are intimidated by large heads of Asian greens.
Red potatoes – These red potatoes are from our friends at Driftless Organics in western Wisconsin. This is a fresh batch of the red potato variety we got from them a few weeks ago. I found those to be excellent and more broadly useful than red potatoes often are. They were successful in potato salad yet they also roasted beautifully as oven fries.
Slicing tomatoes – These might be the final ripe tomatoes of the year. By this time of year, we recognize that tomatoes do not store well. Use them quickly; don’t try to hold them.
Poblano chiles (triangular, shiny, green or red) – These are mildly hot. Poblanos are the creme de la creme of chiles. They have lots of great flavor in combination with manageable heat. Roast and add to soup or casseroles. For our household, they are emblematic of fall cooking.
Garlic – This garlic is from John Hendrickson of Stone Circle Farm.
Pepper ID. Top left, poblano chiles (mild heat, triangular in shape, green or red).
Top right, Orano pepper (sweet, orange). Bottom, bell peppers (sweet, red or green).
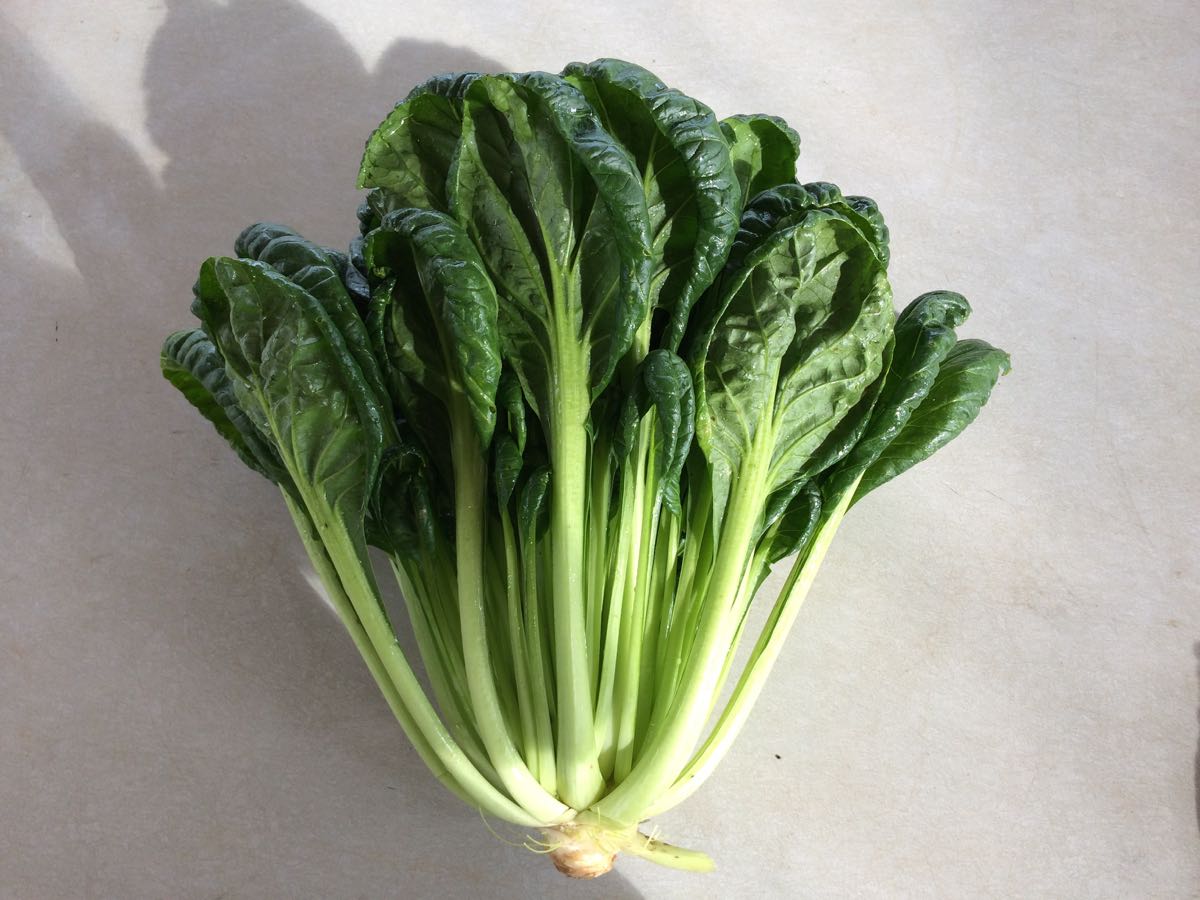
Koji and tatsoi are similar Asian greens. Eat both the leaves and stems.
RECIPES
Visit our Recipe Log, a list of all our 2017 recipes.
Recipe from Beth:
Succulent Wilted Choy Salad (aka “Tame That Choy” Salad)
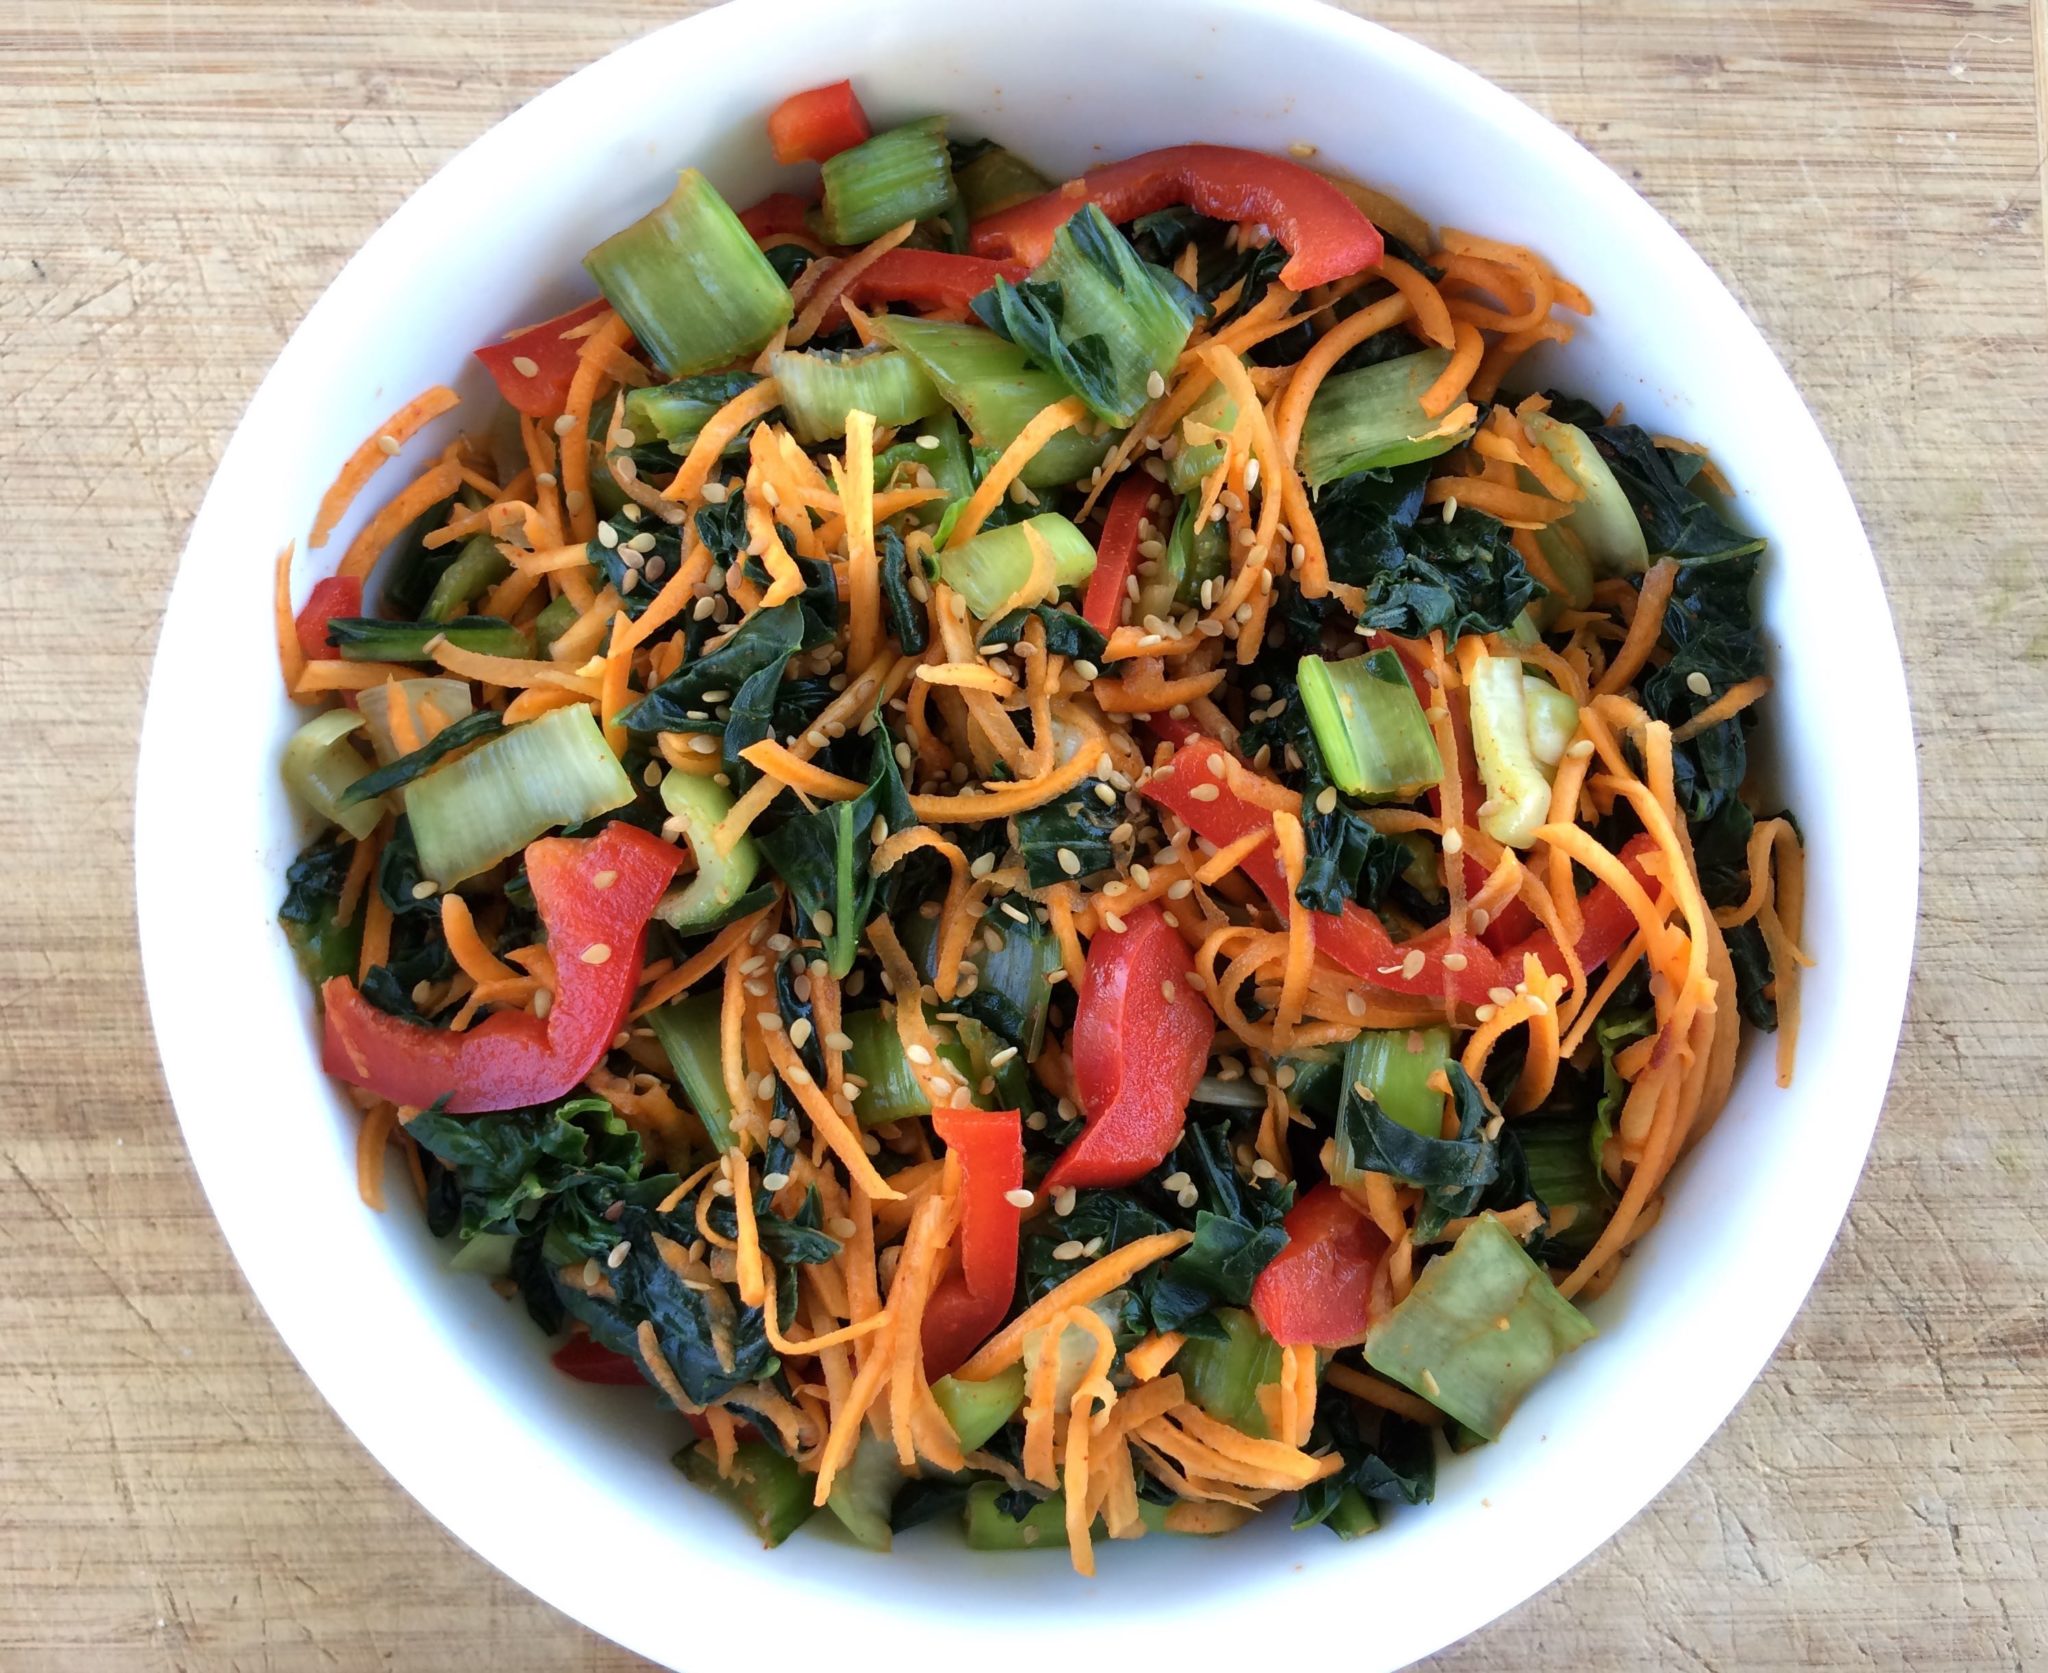
Large heads of bok choy or Koji greens can be intimidating. This technique shrinks raw greens without cooking, while preserving their peppery flavor. It’s a useful approach with bok or pak choy, Yukina, tatsoi or Koji greens. I’ve provided a dressing suggestion, but you can use any dressing you like, even bottled.
1 head Asian greens (bok choy, Yukina, Koji greens, or tatsoi), about 1.5 lb
salt
1 carrot, grated
1/2 red bell pepper, thinly sliced
2 scallions, sliced (optional)
1. Slice Asian green leaves and stems into 1/2 inch strips. Wash well in a basin of water. Drain in a colander.
2. Set the colander in a bowl or in the sink. Sprinkle 1 1/2 Tbsp salt over the greens and mix with your hands. This large amount of salt will be washed away later.
3. Wait 30 – 45 minutes. The salt will wilt the greens.
4. Rinse greens under running water, then dump into a fresh basin of cold water. Swish and drain, then repeat. Taste the greens. They will be slightly salty.
5. Squeeze most of the liquid from the greens. (Leave more liquid for thin-stemmed greens like Koji or tatsoi. Thick-stemmed bok choy will continue to release moisture after you assemble the salad.) In a large bowl, mix with the carrots and peppers. Dress with your favorite dressing.
Suggested dressing:
1 clove garlic, minced
1/2 tsp sugar
1 tsp soy sauce
2 tsp rice vinegar
1 tsp sesame oil
1/4 tsp paprika
pinch cayenne
toasted sesame seeds
Mix all dressing ingredients except the sesame seeds together in a small bowl. Dollop over the salad and massage together with your hands. Adjust the vinegar and soy sauce to taste. Sprinkle with toasted sesame seeds and serve.
LOCAL THYME RECIPES
Comforting Classics
Grilled Halibut with Yukina Savoy and a Thai Lime Sauce
Dried Apricot and Cauliflower Dal
Broccoli Cheddar Soup
Autumn Chicken or Veggie Pot Pie
Outside the Box Recipes
Tatsoi and Pecorino Salad
Mac, Cauliflower and Greens
Broccoli and Greens Soup
Vegetable Korma
Quick and Easy Meal
Roasted Tomatoes and Garlic Sauce with Ravioli
RECIPES FROM LAUREN
MEATLOAF WITH BROWN BUTTER MASHED POTATOES
This is one of my favorite dinner party meals. It feeds a crowd. It’s simple to make (especially if you have a food processor). It warms up well and incorporates loads of fresh veggies. If I were you, I’d make a pile of roasted broccoli and serve that on the side along with some sliced tomato. Lauren.
Takes 1 hour, 30 minutes
Serves 8-10
Tomato Glaze:
1/4 cup cider vinegar
2 tablespoons olive oil
2 tablespoons maple syrup
4 teaspoons Dijon mustard
4 teaspoons Worcestershire
3 large tomatoes, cored and finely chopped (about 2 cups diced), divided
1/2 teaspoon Kosher salt
Meatloaf:
2 pieces sandwich bread, food process, remove
2 carrots, roughly chopped
1/2 onion, roughly chopped
1 orano pepper, roughly chopped
2 garlic cloves
2 tablespoons olive oil
1-1/2 teaspoons Kosher salt, divided
1/4 teaspoon pepper
2 pounds ground beef
2 eggs
2 tablespoons Worcestershire
1 teaspoon Dijon mustard
1 teaspoon smoked paprika
Roasted broccoli, optional
Sliced tomato, optional
Mashed Potatoes:
3-1/2 pounds red potatoes, quartered
1 stick butter (1/2 cup)
1 cup whole milk
2 teaspoons Kosher salt
- In a small saucepan, combine all tomato glaze ingredients. Whisk together as best you can and then bring to a boil. Reduce to a simmer and let cook while you prepare everything else (about 45 minutes-1 hour), whisking occasionally to prevent it from sticking. You want the sauce to reduce to less than half its original amount and a consistency a little thinner than ketchup.
- In a large saute pan, melt butter for mashed potatoes. Continue cooking over medium heat until it begins to sizzle and then brown. It should smell nutty but not burnt. Use a spatula to remove all the delicious buttery bits from the pan to a small bowl.
- Preheat oven to 400 degrees and find two 9×13 baking pans.
- Next, begin to prepare your meatloaf. Tear bread into pieces and toss in a food processor. Process until it turns into crumbs. Remove to a large bowl. It’s fine if a few crumbs remain. Add carrots, onion, pepper and garlic to the food processor and process until finely chopped.
- In the same saute pan you browned the butter in, heat olive oil for meatloaf over medium heat until hot. Add chopped veggies and sprinkle with 1/2 teaspoon salt and pepper. Cook for 10 minutes until just starting to char in places. Add to bowl with breadcrumbs along with eggs, Worcestershire, Dijon, paprika and remaining 1 teaspoon of salt.
- Let the meatloaf mixture sit while you begin your potatoes. Add potatoes to a large stock pot, cover with water and bring to a boil. Once boiling, reduce to a simmer and cook for 25 minutes.
- Now, shape your meatloaves. You will want 12 small loaves total, six in each baking pan. Place in the oven. Bake for 10 minutes then remove and top with reduced tomato glaze. As much as you can get to stay on. Anything leftover can be served with the meal. Bake loaves an additional 10-15 minutes until brown on the edges and cooked through.
- Drain your potatoes. Return to the pot and mash as best you can. Add browned butter, milk and salt and mash until smooth.
- Serve potatoes with meatloaves on top. Throw some roasted and charred broccoli and/or sliced tomato on the side. Make sure to add any additional leftover tomato glaze to the loaves.
.
CAULIFLOWER RICE BURRITO BOWLS
Takes 45 minutes
Serves 4-6
1 large head cauliflower (or 2 smaller ones), leaves removed
1 yellow onion
2 tablespoons olive oil, divided
3 garlic cloves, minced
1 teaspoon Kosher salt, divided
2 limes, juiced, divided
1-1/2 teaspoons chili powder, divided
1 teaspoon cumin, divided
1/4 teaspoon oregano
2 red peppers, seeded and cut into strips
2 poblanos, seeded and cut into strips
1/4 teaspoon cayenne pepper
15-ounce can black beans
2 tomatoes, cored and diced
Simple guacamole (recipe below)
Sour cream, optional
Hot sauce, optional
- Using the large holes of a cheese grater (what you’d use to shred cheese), shred cauliflower into small pieces that resemble rice. Change the angle of the cauliflower so you get all the florets but not much of the stems. Set “rice” on a towel to remove excess moisture.
- Prepare your onion. Peel and halve it. Thinly slice half of the onion. Cut the remaining half in half again and thinly slice one of these quarters. Finely chop the other quarter and put both onion preparations to the side.
- In a large saute or sauce pan (that has a tight-fitting lid), heat 1 tablespoon olive oil over medium low heat. Add garlic and half of the diced onion. Sprinkle with 1/4 teaspoon salt. Cook gently until veggies become fragrant, about 3 minutes. Add the cauliflower rice and put the lid on. Cook for four minutes then remove to a medium bowl.
- Add half the lime juice, 1/2 teaspoon chili powder, 1/2 teaspoon cumin and 1/4 teaspoon dried oregano to cauliflower rice. Taste and adjust seasonings. Set aside.
- In the same pan you used for the cauliflower, add the remaining tablespoon of olive oil and heat over medium heat. Add the sliced onions, red peppers and poblano peppers and cook for 8-10 minutes until softened and even charred in places. Add 1/2 teaspoon salt, 1/2 teaspoon chili powder and cayenne pepper.
- While this cooks, combine black beans with remaining salt, chili powder and cumin in a small saucepan. Cook over medium low heat until warm.
- Serve in bowls with cauliflower rice on the bottle and all desired toppings. I love the beans and peppers with diced tomatoes, guacamole, sour cream and hot sauce.
.
SIMPLE GUACAMOLE
4 avocados
1 garlic clove, minced
1 poblano, finely diced
1/4 cup diced onion (reserved from above)
1 lime, juiced
1/4 teaspoon Kosher salt
- Place avocados in a medium bowl. Mash with a fork.
- Add remaining ingredients and stir to combine. Taste and adjust seasonings as desired.
.
Week #19, Sept 21 2017
- On: September 20, 2017
- 0
Scenes from the week
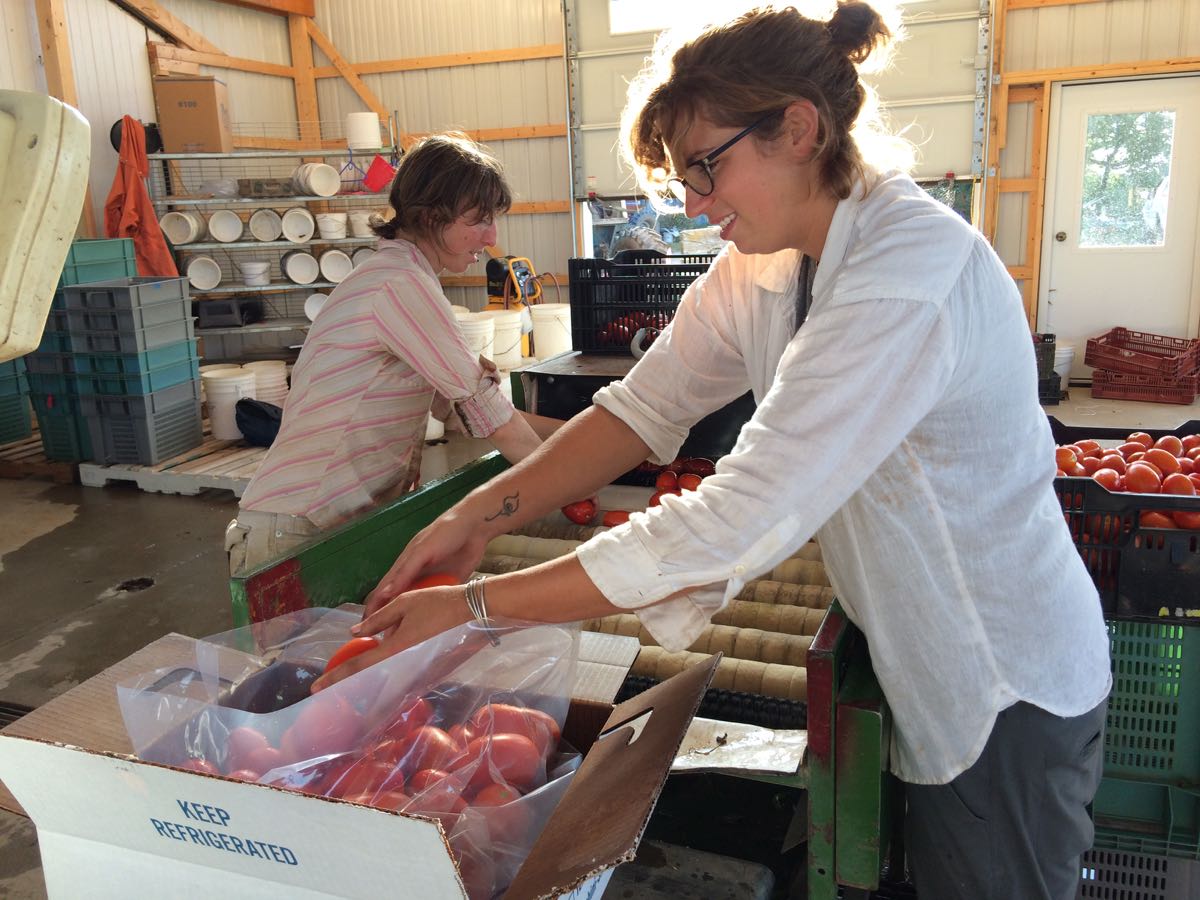
The tomatoes are still going strong. We can thank the dry weather for that. At top, Kerry and Kelsie wash plum tomatoes. The improved light in our new shed is wonderful. We’ve enjoyed it all season.
Charlotte and Maggie bundle dill for the CSA boxes.
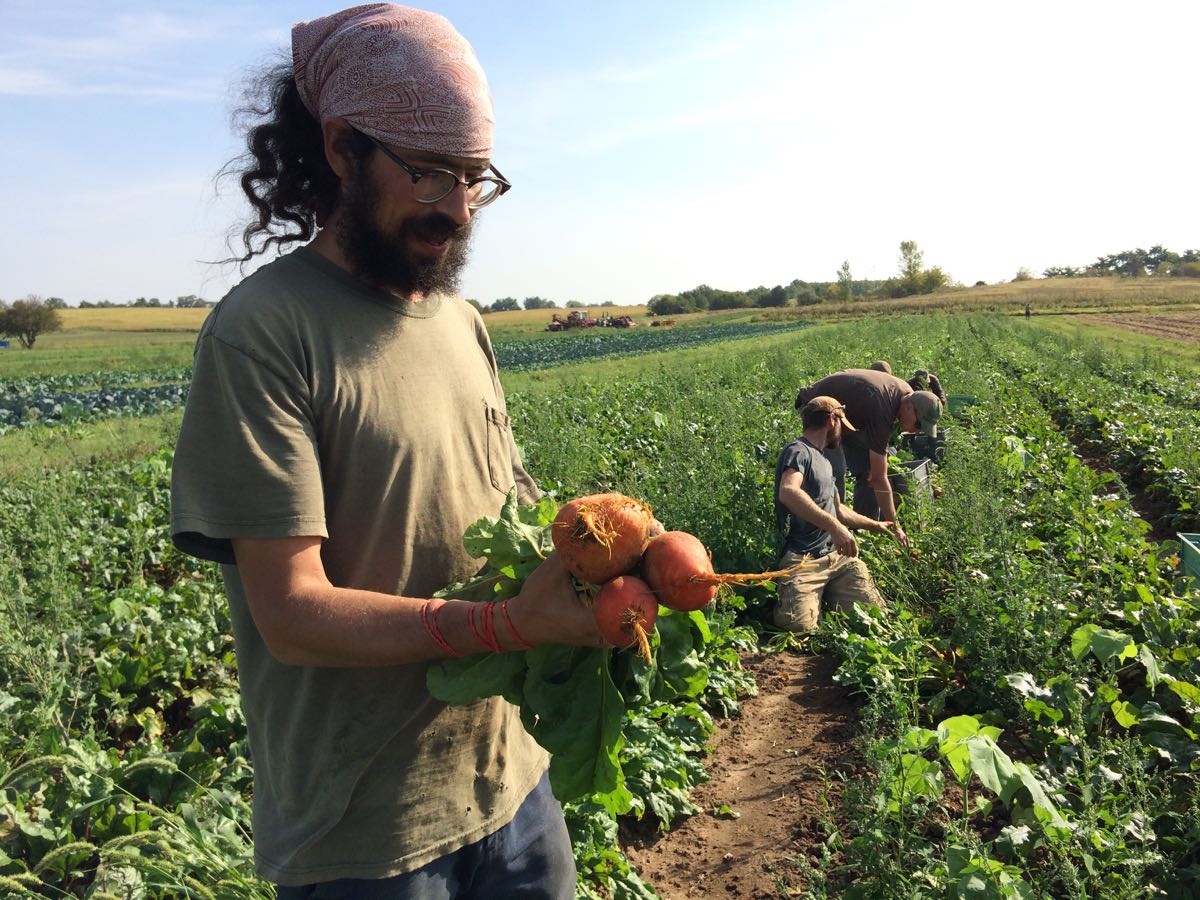
Small scale, big scale. Smitty, Billy, Matt, Jim, Jose, Raul and Kelsie bundle golden beets with the greens attached. We do this task by hand. Really, it’s the only way to do a quality job.
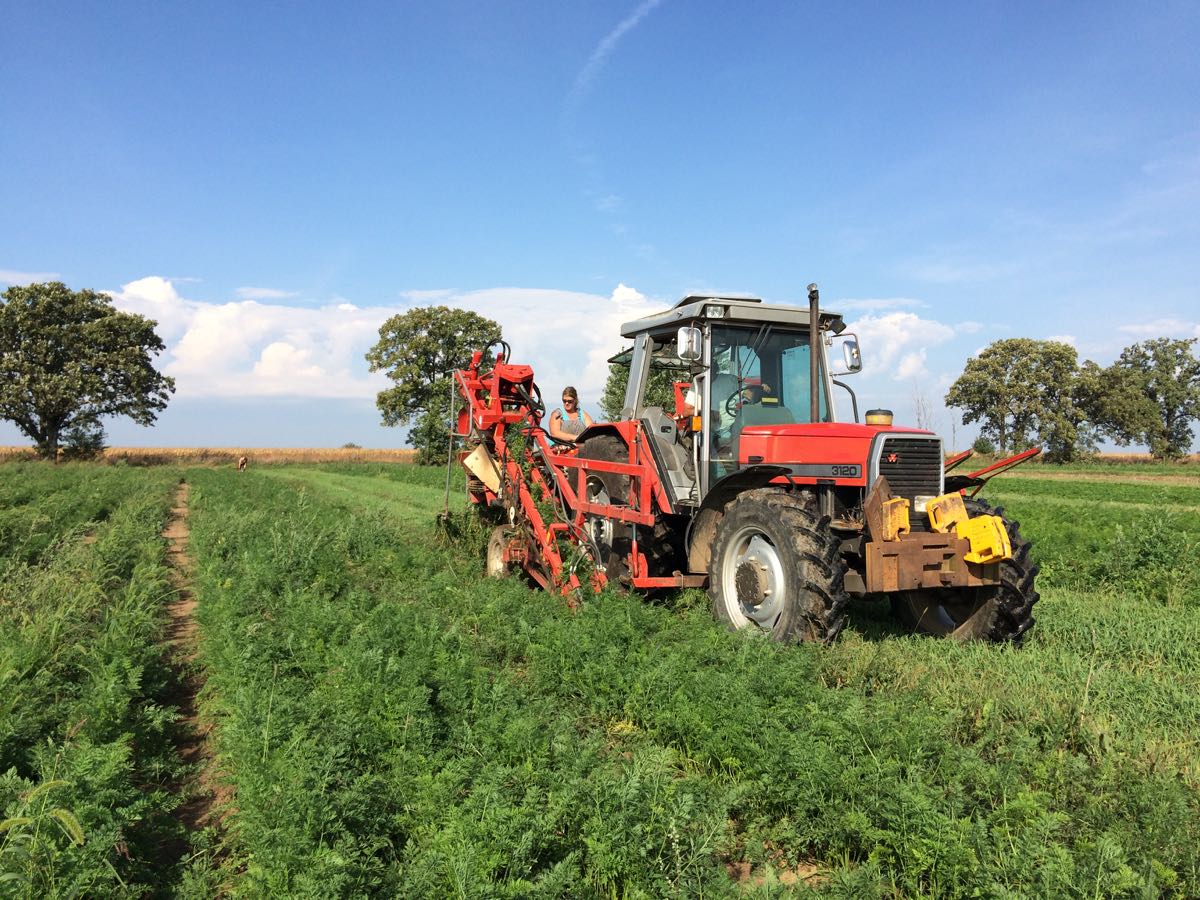
In a nearby field, Steve harvested carrots mechanically. With our root digger, we can harvest 1000 lb carrots in 30 minutes with just three people. Without this sort of tool we couldn’t grow enough carrots to feed you all winter.
WINTER SQUASH
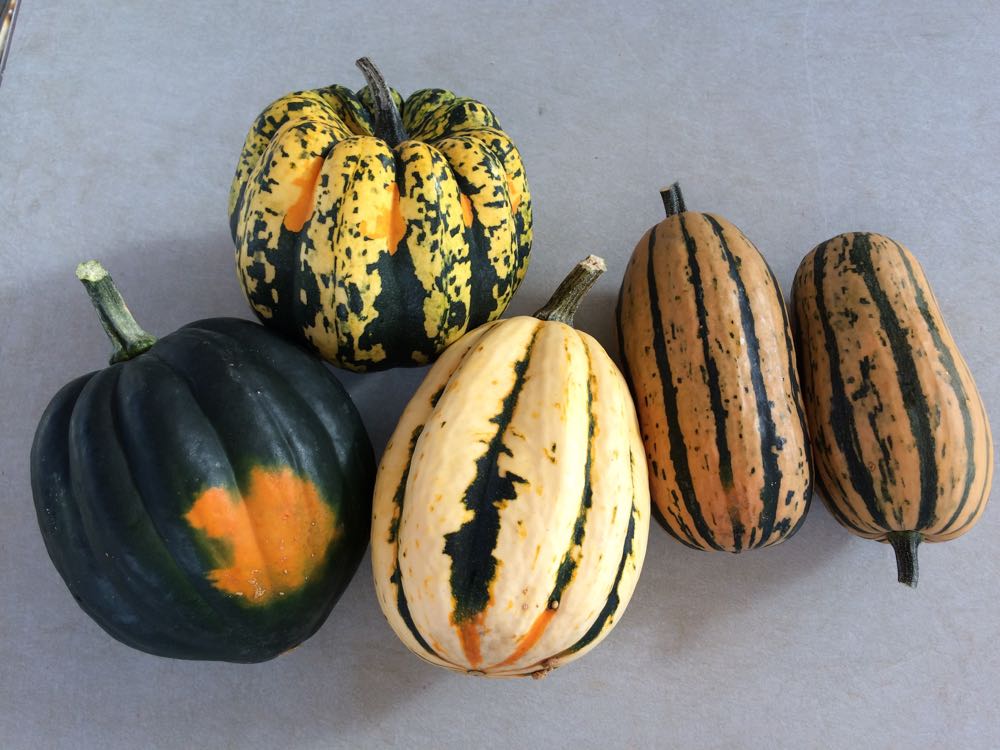
From left, TipTop acorn, Carnival acorn, Jester (an acorn x sweet dumpling hybrid), Honey Boat delicata (2/box).
We harvested a variety of early maturing types for this week’s box. You will receive one of these types. Some are new-ish varieties for us. We trial new varieties for a few years before scaling up and each of these types made the cut. I think these are all winners but I’d like to hear what you think of them. There’s a limit to how many I can sample!
Expected life: These acorn and delicata types do not store for long. Plan to eat within two weeks.
Storage: Store at room temperature, uncovered.
To make squash easier to cut: Microwave on high for 30 to 60 seconds, depending on size of the squash. This will soften the rind and flesh, making it much easier to cut.
Beth’s favorite simple preparation: Winter squash are easily roasted in a 400F oven. Microwave your squash to soften it. Split in half with a sharp knife. Scoop out and discard seeds. Run the squash under running water and shake off the excess water. Place cavity-side-down on an oiled baking sheet. The little bit of moisture helps seal the squash to your roasting pan. The water soon evaporates, allowing the squash to brown and caramelize. The caramelization really boosts the flavor. Roast at 400F until easily pierced with a fork, 20 – 45 minutes depending on size. Flip over while hot. Add a little butter to melt and some seasoned salt. Cut into wedges and eat.
Can you eat the rind? Well, Steve eats the rind for all these types but he’s a little crazy. In my opinion, the rinds are too thick to eat on the acorn types (TipTop, Jester, Carnival). Delicata skin is usually thin enough to eat but this durable Honey Boat variety has a somewhat thicker rind than usual. I don’t eat it; Steve does.
Stuffed squash: Each of this week’s types has a central cavity that can be stuffed. Prepare your favorite fully-cooked stuffing, e.g. a rice or quinoa mixture. Roast your squash as described above. Preheat the stuffing. Fill the cooked squash with stuffing, top with grated cheese and return to the oven until everything is hot.

Carmelized Carnival squash.
Veggie List and Veggie Notes
Sept 21/22, 2017, week #19, purple EOW, moon Sampler
Beth’s box logic w.r.t. dill:
– Your dill will be a bundle of both flowers and leaves. Use the flowers to make a dilly-bean salad or some refrigerator dilly-beans, similar to refrigerator pickles.
– Dill leaves combine well with broccoli, so think about an egg-broccoli-dill dish, along the lines of a quiche or frittata.
– Cream of tomato soup with dill is really, really good. Use your favorite tomato-basil soup but substitute dill for the basil, and reduce the amount. Use a light hand with the dill if you’re planning to save soup for leftovers. Dill tends to strengthen over time in tomato soup.
Golden beets with greens, 1 bunch
Broccoli, 1 or 2 nice heads
Winter squash, 1 medium or 2 small, see notes
Tomatoes, slicing, ~2 lb
Tomatoes, plum, ~2 lb
(Both types are in one paper bag.)
Carrots, 2 lb
Green beans, ~0.7 lb
Red bell peppers, 2
Yellow onion
Dill, 1 bunch
Jalapeno chile (HOT), 1
Garlic
A few sites get an heirloom tomato or a cucumber or some extra beans.
Next week’s box will probably contain broccoli, potatoes, tomatoes, peppers, spinach and more.
Golden beets with greens – Beet greens are tasty, similar to Swiss chard in flavor, texture & cooking time. These two crops are very closely related. You can remove the thickest midribs before cooking if you wish, but it is not essential. Storage: Cover and refrigerate. Separate the tops and roots if you don’t plan to eat the greens immediately, to preserve freshness in the roots. Beet greens are perishable and should be eaten soon. The beet roots will last for weeks.
Broccoli – 2017 continues to be a good broccoli year. Broccoli needs a lot of water at its adolescent stage and this planting certainly got it this summer.
Yellow onion – This week’s onion is an intermediate type which will fry successfully yet is not as pungent as a typical yellow storage onion.
Dill – You’ll get a bundle with both flowers and leaves. Ideas: See above.
Winter squash – See above.
RECIPES
Visit our Recipe Log, a list of all our 2017 recipes.
RECIPES FROM LOCAL THYME
Comforting Classics
Golden Beets with Citrus and Greens
A Hungarian Goulash
Asian Stir Fry with Broccoli, Peppers, Beet Greens and Beef
Baked Winter Squash with Tomatoes
Outside the Box Recipes
Farro Salad with Beets, Broccoli, Dill and Walnuts
Orange Scented Pork with Tomatoes and Onions
Black Bean, Broccoli and Cheese Stuffed Bell Peppers
Winter Squash Agrodolce
Quick and Easy Meal
Black Bean, Shredded Carrot and Pepper Burrito
Week #18, Badger on the farm!
- On: September 13, 2017
- 1
While puttering in our sand pit one day in July, I looked up and saw a badger peeking out of its den. This is quite rare; badgers are elusive. I took the video below with my cell phone. You can see that the badger was curious about me too.
This creature has brightened my summer, even though I have not seen it again. It continues living in our sand pit, digging extensive tunnels within the walls of the pit and in the nearby tree line. I find fresh prints and digging every day. Before noticing the badger, I visited the sandpit frequently in spring, planting prairie seedlings along its dry walls. The badger has dug tunnels everywhere except the area I planted. Perhaps it recognizes that as my territory. At first, I worried about disturbing it but then I saw this video of various animals romping outside badger dens in southern Wisconsin.

The sandpit is a special place for our family. The previous owners of our farm sold sand for road construction, leaving an open bowl-shaped pit in a hillside. Over the years, it was a giant sandbox when our children were young, then a sled run, then a sheltered and exotic fire pit. We’ve ceded it to the badger for now. Beth
#2 Grade Red Peppers
I write about pepper grading every year. Returning members can say “yeah, yeah” and skip ahead. New members, please read.
Many of the red bell peppers we send in the CSA boxes will be our #2 grade. We do this to avoid waste and to deliver good value to our CSA members. The #2 grade peppers are excellent eating quality, but are not quite pretty enough to sell to stores. As a result, we place a much lower value on these peppers. This allows us to provide generous amounts of peppers over the course of the season. We feel this is a good exchange, even if it means you occasionally open a pepper and find that it needs trimming. Here are the reasons that peppers are downgraded from #1 grade to #2 grade:
- They may have a minor blemish, or
- They may have minor insect damage, or
- They may be very ripe and beginning to wrinkle. (These are especially sweet and delicious as they are fully ripe. These cannot be sold to stores because their shelf life is short. You will find that the texture is less crisp than a #1 grade pepper, but the flavor more than makes up for it.)
- They might be partially red and partially green.
- Others are just too small.
The eating quality is fine (or excellent) for all these #2 peppers. We throw away all peppers that we suspect have rot inside (although one may occasionally slip through in either #1 or #2 grade.) Today’s peppers are a mix of #1 and #2 grade.
Veggie List and Veggie Notes (week #18, Sept 14/15, green EOW)
Slicing tomatoes, ~4.4 lb
Green beans, 1.2 lb
Celery, 1 head
Red peppers, 3 – 4, mostly red frying peppers
Swiss chard, 1 bunch
Leek, 1 or 2
Yellow onion, 1 medium
Lettuce, red or green leaf
Zucchini/squash, ~1
Cucumber, ~1
A few sites get an heirloom tomato.
Next week’s box will probably contain tomatoes, peppers, onion, green beans, some kind of greens and more.
Celery – Our celery is more strongly flavored and more fibrous than typical grocery store celery. Taste it raw then decide how you want to use it, raw or cooked. This is one of our better batches of celery, which we pack in the CSA boxes just once per year. We’ve pushed the planting date later. We want to avoid summer harvests because the celery is tough if it matures during hot weather. Harvest too late in the fall and insect problems accumulate. Who knew celery is so finicky to grow?
Frying (long) and bell (blocky) peppers – You’ll get 3 or 4 peppers this week, based on size. Everyone gets frying peppers but some get frying peppers plus a bell pepper. Frying peppers have lower moisture, making them ideal for browning in a pan with a little oil. You can also roast them in the oven. I cut into pieces, lightly oil and put close to the broiler until they are a bit charred. It doesn’t take much broiling to develop the roasted flavor.
Yellow onion – This week’s onion is a yellow storage onion, the type you’ll find most often in the grocery store. These are pungent and will fry well.
RECIPES
Visit our Recipe Log, a list of all our 2017 recipes. Check June 29 for other cabbage and Swiss chard recipes.
RECIPES FROM LOCAL THYME
Comforting Classics
Wilted Chard with Almonds
Summer Squash, Green Bean and Tomato Sauté
Braised Sausage, Peppers and Onions
Tuna Noodle Casserole
Outside the Box Recipes
Sausage, Brown Rice and Lentil Stuffed Chard
Pungent Green Beans and Tomatoes with Cumin, Garlic and Ginger
North African Roasted Vegetable Salad
Mozzarella and Celery Salad
Quick and Easy Meal
Red Bean Jambalaya
RECIPES FROM LAUREN
GREEN BEANS with ROMESCO SAUCE
Adapted from Naturally Ella
Though technically a side dish, I absolutely have a meal in mind for you here. Do yourself a favor and pick up some tuna steaks from the grocery store and then serve this simple dish on the side of seared tuna. Tuna and romesco is one of my all time favorite combinations and the addition of crunchy, gently blanched green beans is just heavenly. Lauren.
Takes 1 hour
Serves 4 as a side
2-3 Italian frying peppers
1-1/2 cups unsalted roasted almonds, divided
1/4 cup diced leek (if you made the African peanut stew, just make sure you leave this much on the side)
1 small to medium tomato, cored and seeds removed
2 tablespoons red wine vinegar
1 tablespoon smoked paprika
1/2 teaspoon Kosher salt
1/4 teaspoon freshly ground black pepper
1/4 teaspoon cayenne pepper
1/4 cup olive oil
1+ pounds green beans
- Preheat the broiler of your oven and bring a large pot of salted water to a boil on the stove.
- Place peppers on a baking sheet and let cook under the broiler for 15-25 minutes (it will vary a lot based on how hot your broiler can get), turning occasionally until blackened (and I mean really blackened) on all sides.
- Remove from oven, place in a bowl and cover with a plate. Allow to cool for 30 minutes for easiest peeling.
- While the peppers roast, trim the ends of your green beans and submerge them in boiling water for three minutes. Drain and rinse with cold water until cool to the touch. Leave in colander to drain further until ready to use.
- In a separate small pan, toast remaining almonds over medium heat until lightly browned and fragrant. Set aside.
- Once peppers have rested, remove from bowl and peel the skin away. Remove the seeds and toss the peppers into a food processor. Add 1 cup of almonds, leek, tomato, vinegar, spices and oil to food processor. Process until mostly smooth.
- Toss with cooled beans in a large bowl and sprinkle with remaining almonds.
.
AFRICAN PEANUT STEW
This time of year, the meal I’m always dreaming of is African peanut stew. I’m not sure why but for me it’s the quintessential mid-September dishes. It uses up a few pounds of tomatoes without being too tomato-forward and the spicy flavors warm you through September’s coolest nights. The peanut butter adds heft to a meal that would otherwise almost be too light. It’s a stick to your bones kind of a meal and everything I’m craving this time of year. Lauren.
Serves 4-6
Takes 50 minutes
2 tablespoons butter
1 yellow onion, diced
1 large leek (white and pale green part only), halved and sliced
1 teaspoon Kosher salt plus more to season
1/4 teaspoon freshly ground black pepper
1 bunch chard, divided
2 stalks celery, diced
1 red Italian frying pepper, seeded and diced
1 zucchini, cut into space cubes
1 teaspoon red pepper flakes (if you have a jalapeno or other hot pepper lying around from a previous week just dice that and throw that in instead)
1 teaspoon ground ginger
2 teaspoons ground cumin
1/4 teaspoon cayenne powder
2 pounds tomatoes, cored and diced
4 cups vegetable stock
1/2 cup peanut butter
1/4 cup brown sugar
For serving:
2 cups cooked rice
1/2-1 cup roasted peanuts
1-2 limes, quartered
- In a large stock pot, melt butter over medium heat. Add onion, leek, salt and pepper. Saute for 5 minutes until softened and fragrant.
- While that cooks, remove the chard stems from the leaves. Very thinly slice the stems and throw them into the pot with the onions and leeks. Roughly chop the chard greens and set them aside for later use. Add celery, red pepper and zucchini. Saute 2-3 minutes longer until all the veggies have softened. Add spices and continue to cook for 2-3 minutes. You want the spices to become fragrant and toast ever so slightly but not burn. The second you smell even the faintest burnt flavor, add the tomatoes. Simmer for 15 minutes until significantly reduced.
- Add vegetable stock, peanut butter, and brown sugar. Continue simmering very gently for another 15 minutes. Add chard leaves and cook until just wilted. Taste and adjust seasonings. You may want a little more salt, sugar or spice.
- Serve over cooked rice with peanuts and lime juice.
.
Week #17, Sept 7 2017
- On: September 06, 2017
- 0
Veggie List and Veggie Notes (Sept 7/8, 2017, week #17)
– Weekly members
– Purple EOW
– Sun sampler
Beth’s notes: This box is loaded with solanaceous crops (tomatoes, potatoes, eggplant, peppers, chiles). This is an excellent week to make ratatouille. Remember, Pat gave us a recipe for Ratatouille Provencal earlier this season. Pat and Lauren’s recipes are always appealing but they have come up with an unusually appetizing set this week.
Red potatoes, ~ 3.3 lb
Globe eggplant, 1 or 2
Green or red leaf lettuce
Slicing tomatoes, ~5 lb
Bell or Orano peppers, ~2 (or 3 if small)
Zucchini/squash, maybe 1.5 lb
Cucumber, ~1
Yellow onion
Anaheim chile, 1
Garlic
A few sites get one heirloom tomato per box.
.
Next week’s box will probably contain tomatoes, peppers, leeks, lettuce, beans, some kind of green and more.
.
Bok choy (large rosette with thick white stems and green leaves) – This Asian green is good for stir-frying or sautéing or in soup. You can think of the stems and leaves as two separate vegetables. The stems require longer cooking. The leaves will cook almost as quickly as spinach. Bok choy stores well, so feel free to pull off leaves as you need them, or use the whole head at once. Refrigerate in a plastic bag.
Red potatoes – These Red Norland potatoes are from our friends at Driftless Organics.
Yellow onion – This week’s onion is an intermediate type. They are not very pungent but not as mild as a Walla Walla. They are fairly moist but you can brown them successfully.
Heirloom tomatoes (ONLY AT SOME SITES; a large tomato that’s not in the paper bag with the other tomatoes) – We will rotate heirloom tomatoes among the sites as they ripen. Heirloom tomatoes are full-flavored but delicate. If you receive one this week, please handle it very gently, as these fragile beauties bruise easily. Some are delivered ripe, some need to ripen at room temperature for a day or two. Plan to eat your heirloom as soon as it is ripe. FYI, we did not wash the heirlooms this week, in an effort to minimize handling and bruising. Just give it a gentle wash when you are ready to eat it.
Anaheim chiles (MEDIUM HEAT, long slender peppers, red or green) – Anaheims usually have medium spiciness although it varies from pepper to pepper. As usual, the heat is concentrated in the seeds and midveins. Remove the seeds and midveins is to lessen the chili’s heat. Anaheims are easily mistaken for Italian frying peppers. We never send them in the same box for that reason. Keep this in mind if you have peppers left over from previous weeks.

The only slender green or red peppers in your box this are spicy Anaheims. Slender orange peppers are sweet Oranos. Bell peppers this week are blocky and could be green, red, yellow, orange or purple. Everyone gets two sweet peppers this week (or three if they are small). Everyone also gets one Anaheim.
RECIPE LOG
Visit our Recipe Log, a list of all our 2017 recipes to date.
LOCAL TIME RECIPES
COMFORTING CLASSICS
Fresh Marinara
Korean Style Bok Choy Fried Rice
Zucchini, Tomato and Eggplant Tian
Potato and Sweet Pepper SM-Hash with Smoked Salmon or Trout and Poached Eggs
From earlier this year: Ratatouille Provencal
OUTSIDE THE BOX
Charred 2 Pepper and Tomato Salsa
Bok Choy Kimchi
Rigatoni with Roasted Eggplant, Capers and Anchovies
Summer Squash, Potato and Tomato Tagine
QUICK AND EASY MEAL
Salad with Tuna, Olives, Cucumbers, and Onion Vinaigrette
RECIPES FROM LAUREN
FARM STAND QUINOA BOWL
Adapted from my farming buddy Andrea Bemis. Lauren
Takes 1 hour
Serves 4-6
2 cups cooked quinoa (or grain of your choice)
1 anaheim chili, seeded and diced
1 bell pepper or 2 orano peppers, seeded and diced
2 tablespoons olive oil, divided
1 pound zucchini, halved and cut into 1/4-inch slices
1/2 Expression onion, sliced
Kosher salt and freshly ground black pepper
2 pounds tomatoes, cored and sliced
15-ounce chickpea
1 teaspoon paprika
Tahini Dressing:
1/4 cup tahini
1/4 cup water
1 garlic clove, minced
2 tablespoons lemon juice
2 tablespoons olive oil
2 teaspoons honey
1/2 teaspoon Kosher salt
1/8 teaspoon freshly ground black pepper
Pinch cayenne pepper
- Preheat oven to 450 degrees.
- Cook your quinoa (or grain of your choice). I always follow these directions for perfect results.†Once cooked, add diced peppers and set to the side.
- On a large baking sheet, drizzle with 1 tablespoon olive oil. Add zucchini and onion to pan and sprinkle generously with salt and pepper. Bake for 15 minutes. Move veggies to one side of the pan and add sliced tomatoes to the other. Season with salt and pepper. Roast 25 more minutes. At this point, veggies should begin to look charred. If not, turn on the broiler and cook 5-10 more minutes.
- Meanwhile, while the veggies cook, heat remaining olive oil in a large saute pan over medium high heat. Add chickpeas and 1/2 teaspoon Kosher salt. Cook for 15 minutes until chickpeas are golden brown and crispy. Remove to paper towel to drain grease and then toss with paprika.
- Prepare the dressing by combining all ingredients in a small bowl and whisking until smooth.
- To serve, scoop quinoa into large bowls. Top with roasted veggies and drizzle with dressing. Add crispy chickpeas just before serving.
.
PAN-FRIED EGGPLANT with BUTTERMILK DRESSING
Adapted ever so slightly from Bon Appetit. Lauren
Takes 30 minutes
Serves 2-4
1 eggplant, quartered and cut into 1/4-inch slices
4 tablespoons olive oil, divided
Kosher salt
1 cucumber, seeded, quartered and sliced
1 tablespoon lemon juice
1/2 lemon zest
2 avocados, cup into 1/2-inch slices
Buttermilk Dressing:
1 tablespoon olive oil
1/2 Expession onion, diced
Kosher salt
2 tablespoons yogurt
2 tablespoons white wine vinegar
1/2 tablespoon honey
1/2 tablespoon Dijon mustard
1 garlic clove, minced
2 tablespoons olive oil
- Begin with the dressing. In a large, heavy saucepan (use a cast-iron skillet if you have it!) heat olive oil over medium high heat. Add onion and saute gently for 5-7 minutes for until the onions begin to be charred (and smell almost burnt). Sprinkle generously with Kosher salt and remove from heat.
- In a small bowl, combine yogurt with vinegar, honey, mustard and garlic. Whisk until smooth then add sauteed onion. Stir in olive oil and set aside to marinate.
- In the same large pan you cooked the onions in, heat two tablespoons olive oil over medium high heat. Add half the eggplant in a single layer and sprinkle with salt. Cook for 3-4 minutes without moving until browned. Use tongs to flip and cook 2 minutes longer. Remove to a large bowl. Add remaining olive oil to pan and repeat browning with remaining eggplant.
- Add cucumbers followed by lemon juice and lemon zest. Gently fold in avocado.**
- Transfer to a platter and drizzle with dressing. Enjoy at room temperature (with a grilled pork chop if you’re anything like me).**
**If you aren’t planning to eat all the salad in this one sitting, place as much avocado as you plan to use on a platter and top with proportionate amounts of salad. Drizzle with dressing.
.

