Farm Newsletter
Week #22. Gleaning day.
- On: October 13, 2021
 0
0
The most common question at the gleaning party this weekend was:
Q: “What happened to the pumpkins?”
A: They were ripe and ready six weeks ago! The blossoms set fruit early and then hot weather sped development. They were ready very early, long before we could host a gleaning party. The winter squash ripened around the same time, but we moved the squash into our dry, safe greenhouse to cure. The pumpkins were left on the ground and many rotted. We simply didn’t have a safe place to move them. Fortunately, we had one pumpkin for each visiting household but everyone had to hunt for the good ones.
The weather was spectacular and there were many other crops to glean, so no one seemed to mind.
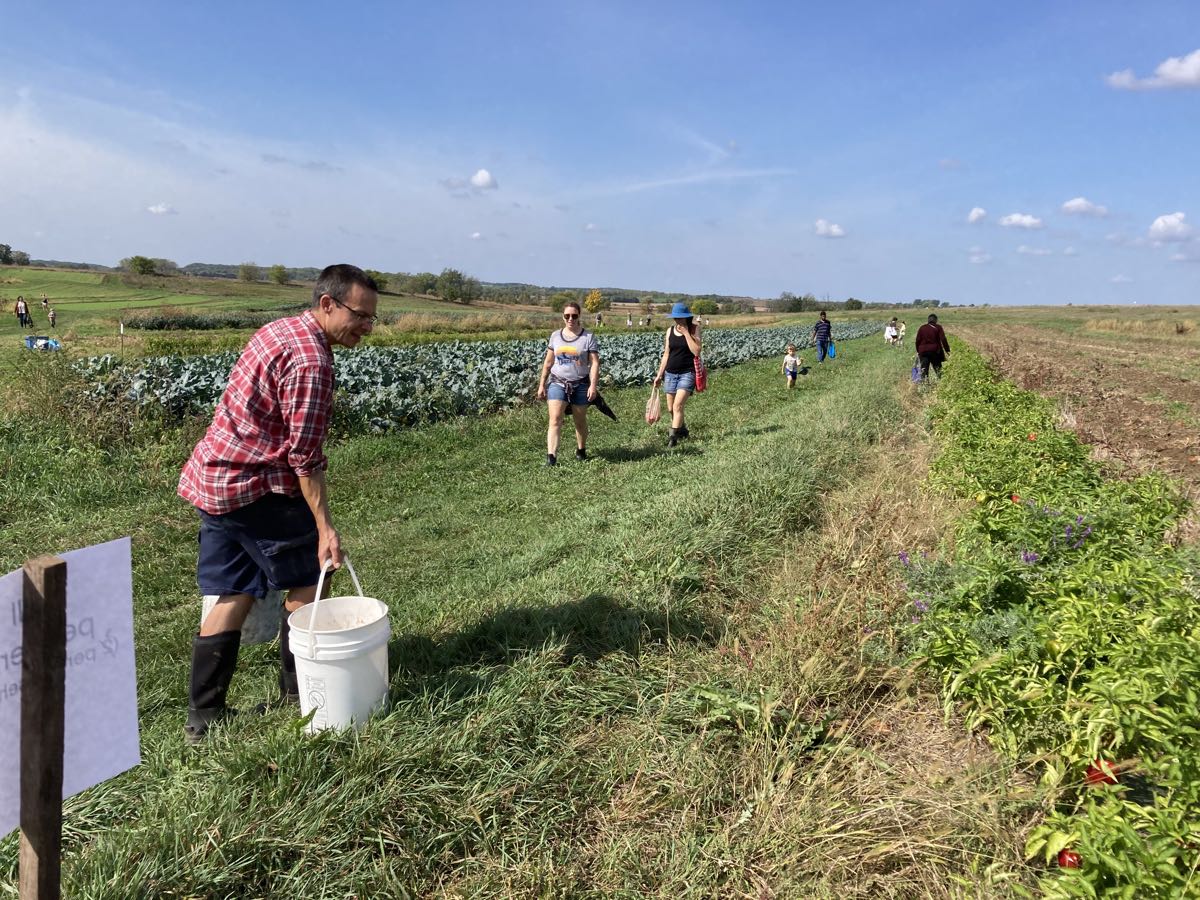
Hunting for a few peppers.

One family’s haul. Everyone pitched in!
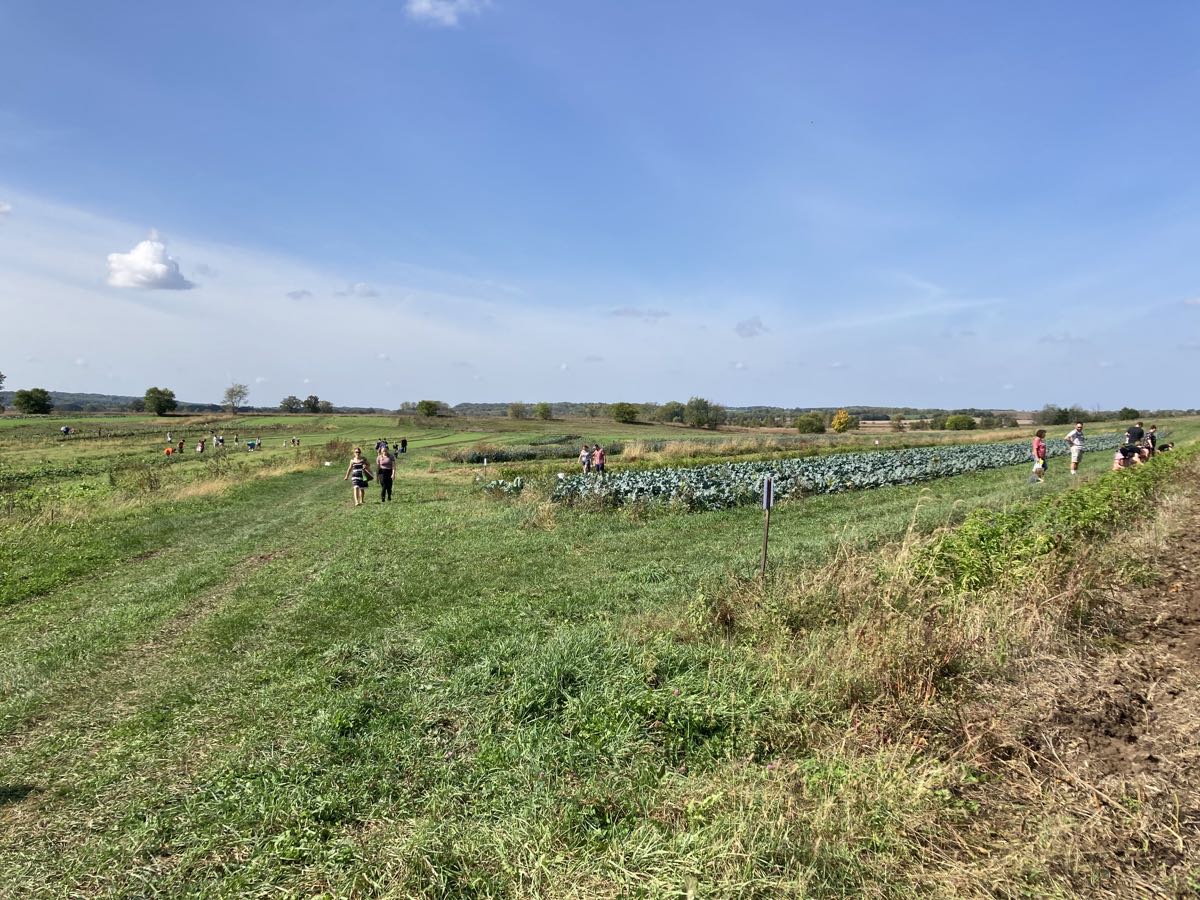
There was plenty of room to spread out. We created the reservation system to manage parking and to moderate how many people arrived at once. Space in the fields isn’t an issue.

We made everyone hike this year. Many gleaning crops were far from the buildings. It just turned out that way, but meant that members got to see the entire farm this year. It was a perfect day to wander.
Korean radish
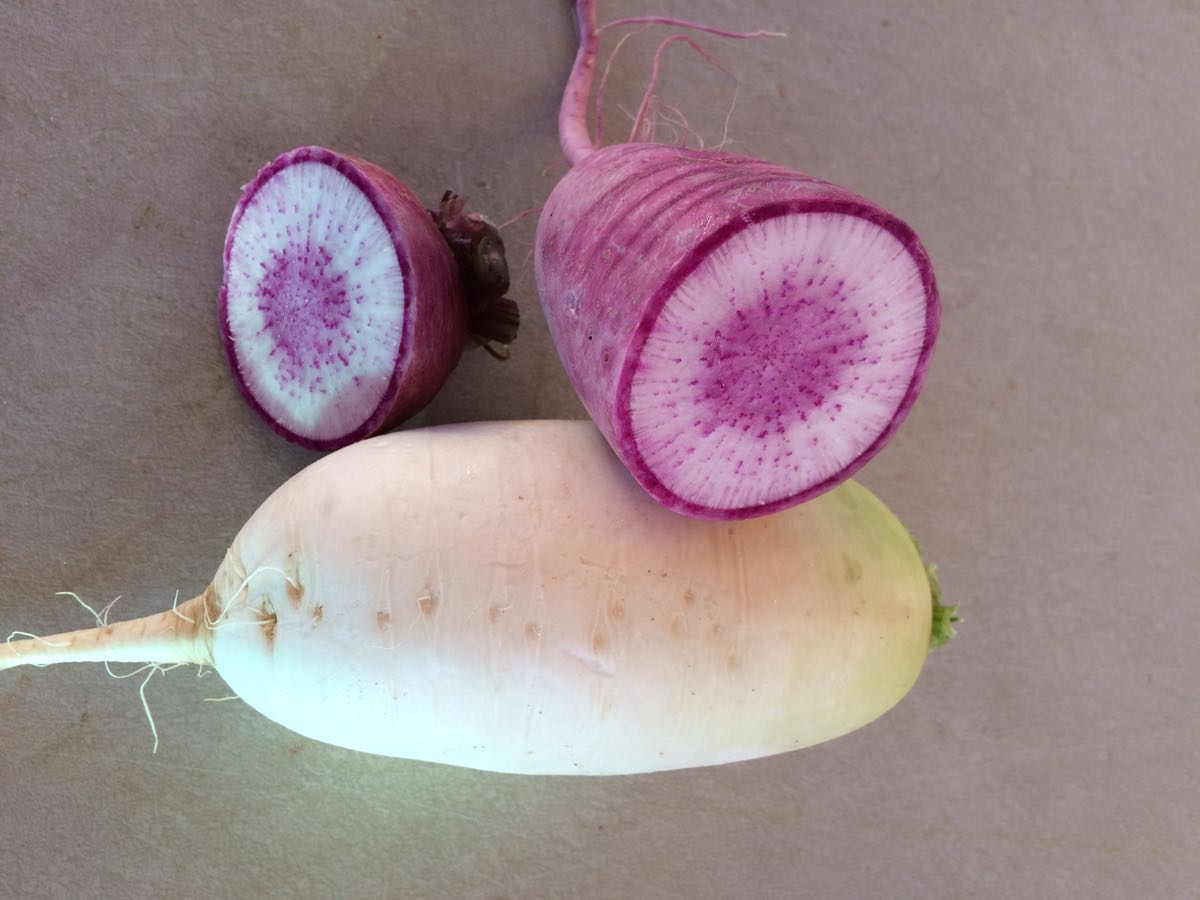
You will receive white and/or purple radish.
This is a favorite vegetable among our farm crew. These crunchy Korean radishes are sweeter and milder than Japanese daikon radishes and come in a more manageable size. They contain lots of water, which makes them easy to pickle or ferment.
Here are some of my favorite uses. You’ll receive about 1.5 lb radish this week (one or two radishes).
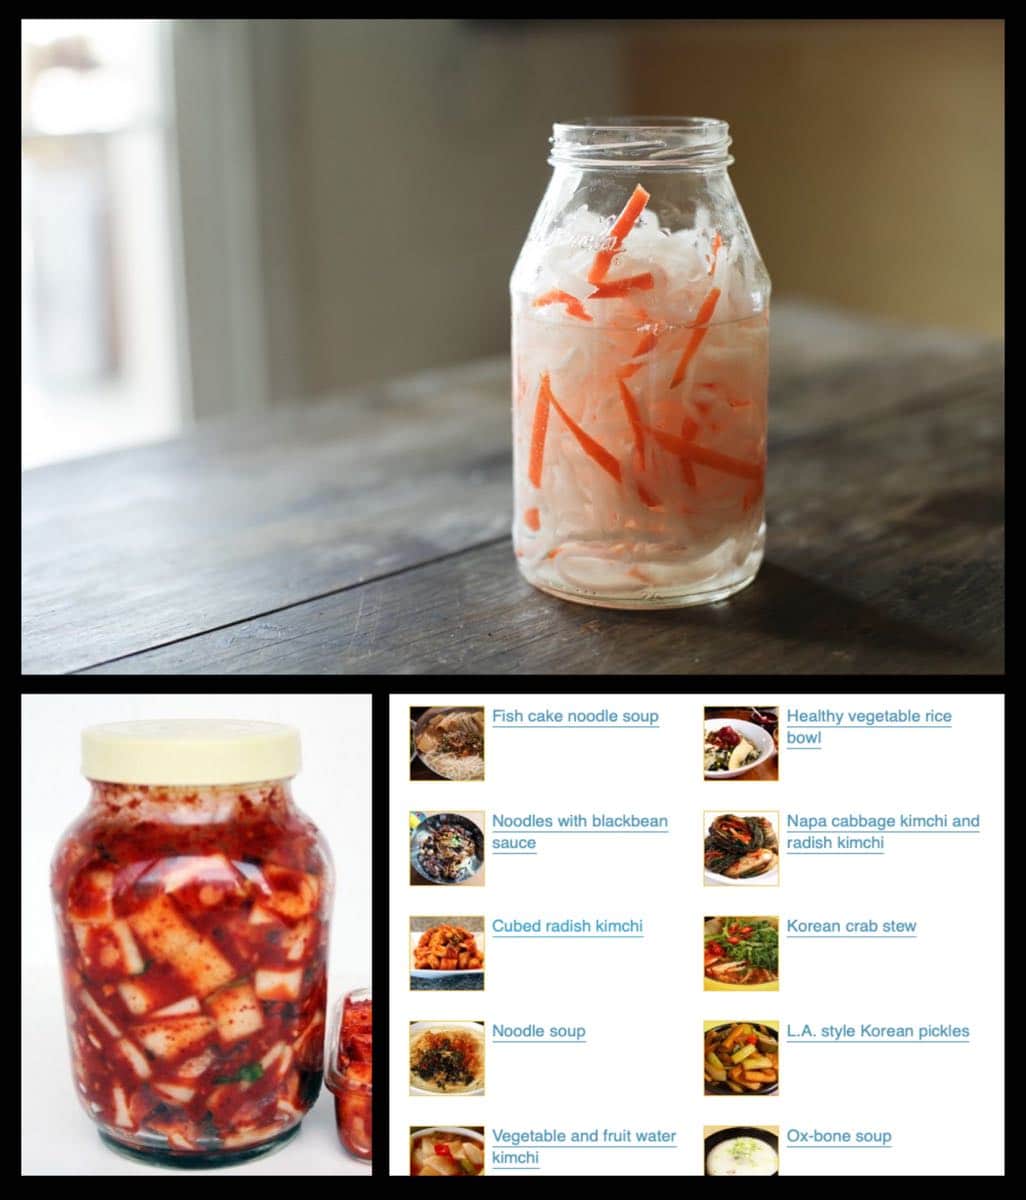
Clockwise from top; Vietnamese Pickled Carrots & Daikon Radish Recipe (Đồ Chua, photo credit Hungry Huy); the Maangchi.com website has so many recipes for Korean daikon including Radish Kimchi (photo credit Maangchi).
Vietnamese Pickled Carrots & Daikon Radish Recipe (Đồ Chua)
From Hungy Huy.
This is my go-to recipe for mixed daikon-carrot salad. The recipe calls for a light fermentation but it’s good after an hour in the fridge. This pickled carrot-daikon salad is used to top bahn mi sandwiches and in other Vietnamese dishes. Huy offers a nice discussion of how this pickle evolved as his family emigrated to the US. He lists these other recipes that the pickles can be used with:
Vietnamese sandwiches (bánh mì), savory crepes (bánh xèo), grilled pork and noodles (bún thịt nướng), egg rolls (chả gìo), and the list goes on. Larger cuts are usually found next to cuts of meat, while finer shreds are put in nước chấm (dipping sauce).
Maangchi rules for radish ideas!
Head to Maangchi for dozens of radish recipes. She has the best website for Korean recipes. Her Radish Kimchi recipe is close to foolproof and easy to scale. If you make kimchi with the radish you receive this week, it should produce about one quart.
The Oriental Food Mart on Park Street in Madison is a Korean grocery that stocks Korean hot pepper flakes called for in many of her recipes. Ask the owner for help picking out your pepper flakes – he is super helpful. I keep a bag of medium heat in our freezer and use them in everything for flavor without excessive heat.
Veggie List & Veggie Notes
Week #22, October 14/15, 2021
– Weekly shares
– EOW/ green
Bok choy
Butternut squash
Romano beans, 1 lb
Carrots, 2 lb
Daikon radish, white OR purple, 1 – 2
Red frying peppers, 5 small
Yellow or red bell pepper, 1
Onion
Scallions, 1 bunch
Jalapeno (HOT)
‘Korean Red’ garlic
– Most sites get broccoli.
– One site gets cauliflower.
Next week’s box will probably contain Koji dark greens, butternut squash, parsnips, leeks, scallions and more.
Butternut squash – Storage: Winter squash store best at room temperature with good air circulation. No cooler than 50 degrees. On your kitchen counter works well. Keep an eye on your squash and cook promptly if any flaws develop. This batch of butternuts should be good for at least one month.
Hint: To make squash easier to cut, microwave on high for 30 to 60 seconds, depending on size of the squash. This will soften the rind and flesh, making it much easier to cut.
Romano beans – These need washing. We got a lot of rain this week. These are pretty mature but might surprise you with their tenderness. They ripened under ideal conditions. I usually recommend braising for beans this mature but we think they are tender enough to use in any fashion.
Frying peppers (red or yellow) – Some are very ripe and have begun to wrinkle. This is not cause for alarm. We call these ‘pepper raisins’. They will be sweet and flavorful.
RECIPES from PHOEBE
Visit our 2020 Recipe Log or our 2019 Recipe Log.

Curried Butternut Squash and Chickpea Quesadillas
Instead of filling these quesadillas with cheese, I stuff them with a yummy mix of roasted butternut squash, chickpeas, and curry spices. A bright scallion yogurt sauce takes them over the top.
Serves: 4-6
Prep time: 20 minutes
Cook time: 1 hour, including roasting the squash
Ingredients
For the scallion yogurt
1/2 cup whole milk Greek yogurt
3 tablespoons thinly sliced scallions
1 teaspoon fresh lemon juice
1/4 teaspoon sea salt
Freshly ground black pepper
For the quesadillas
1 cup roasted butternut squash*
1 1/2 cups cooked chickpeas, drained and rinsed (1 14-ounce can)
1 tablespoon extra-virgin olive oil
1 1/2 teaspoons curry powder
1 teaspoon fresh lemon juice
1/2 teaspoon sea salt
3 tablespoons thinly sliced scallions
2 tablespoons diced jalapeño
Freshly ground black pepper
6 medium flour tortillas
- Make the yogurt sauce: In a small bowl, stir together the yogurt, scallions, lemon juice, salt, and pepper. Season to taste and set aside.
- Prepare the quesadilla filling: In a medium bowl, mash together the squash, chickpeas, olive oil, curry powder, lemon juice, salt, and a few grinds of pepper using a potato masher or the back of a fork. Leave a few whole/larger chickpea pieces for texture. Fold in the scallions and jalapeño and season to taste.
- Assemble the quesadillas: Lay each tortilla flat, and spread the right half with a scant 1/3 cup of the squash filling. Fold each tortilla closed over the filling. Heat a dry nonstick or cast-iron pan over medium heat, and cook each quesadilla for 1-2 minutes per side, or until lightly crisp and golden brown. Remove from the heat, slice, and serve with the scallion yogurt.
*To roast the squash: Preheat the oven to 375°F and line a large baking sheet with parchment paper. Slice a butternut squash in half vertically, scoop out the seeds, and rub the cut sides with olive oil and sea salt. Place cut-side-down on the baking sheet and roast until the squash is very tender, 35-45 minutes. Measure 1 cup of the soft flesh for this recipe (about 1/2 a medium-large squash). Blend the remaining squash into soup or a dip, or use it in baking recipes, like the scones in the newsletter from Week 19.
.
.

Sesame Bok Choy and Bell Pepper Slaw
This quick slaw is such a fresh, easy side dish. A tangy sesame dressing coats crisp veggies and crunchy toasted nuts.
Serves: 4-6
Prep time: 20 minutes
Cook time: 10 minutes
Ingredients
1/2 cup raw unsalted cashews
2 tablespoons sesame seeds
2 tablespoons extra-virgin olive oil
1 1/2 tablespoons tamari or soy sauce
1 tablespoon toasted sesame oil
1 tablespoon rice vinegar
2 teaspoons maple syrup
1 teaspoon grated fresh ginger
1 large bok choy, stems and leaves thinly sliced
1 colored bell pepper, thinly sliced into 1-inch strips
4 scallions, thinly sliced on the bias
- Preheat the oven to 350°F and line a baking sheet with parchment paper. Spread the cashews and sesame seeds on the baking sheet in a single layer and transfer to the oven. Toast for 8-12 minutes, until the cashews are golden brown and the nuts and seeds are fragrant. Set aside to cool.
- In a small bowl, whisk together the olive oil, tamari, sesame oil, rice vinegar, maple syrup, and ginger.
- In a large bowl, toss together the bok choy, bell pepper, and scallions. Pour on the dressing and toss to coat. Add the toasted cashews and sesame seeds and toss again. Season to taste and serve.
.
.

Carrot Ginger Soup
From Love & Lemons
Made with under 10 ingredients, this lightly creamy carrot soup is ridiculously simple and delicious.
.
.
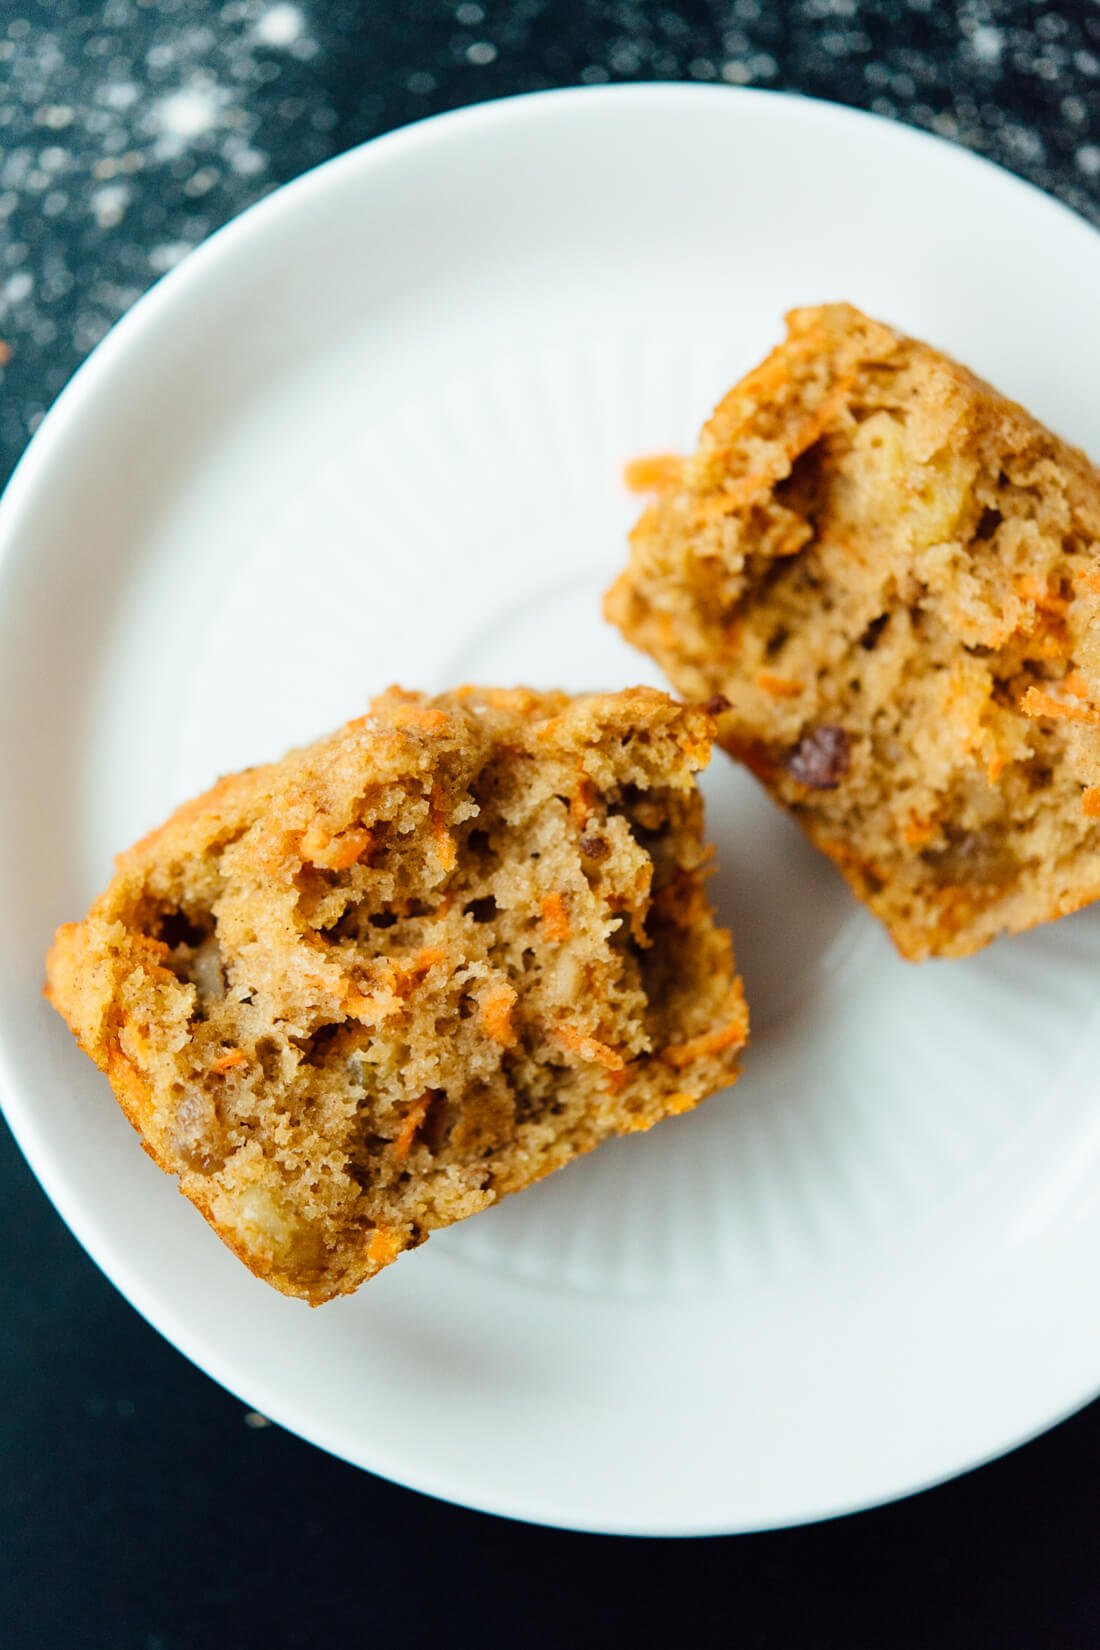
Healthy Carrot Muffins
From Cookie & Kate
These veggie-packed muffins would be a yummy breakfast or afternoon snack.
.
.
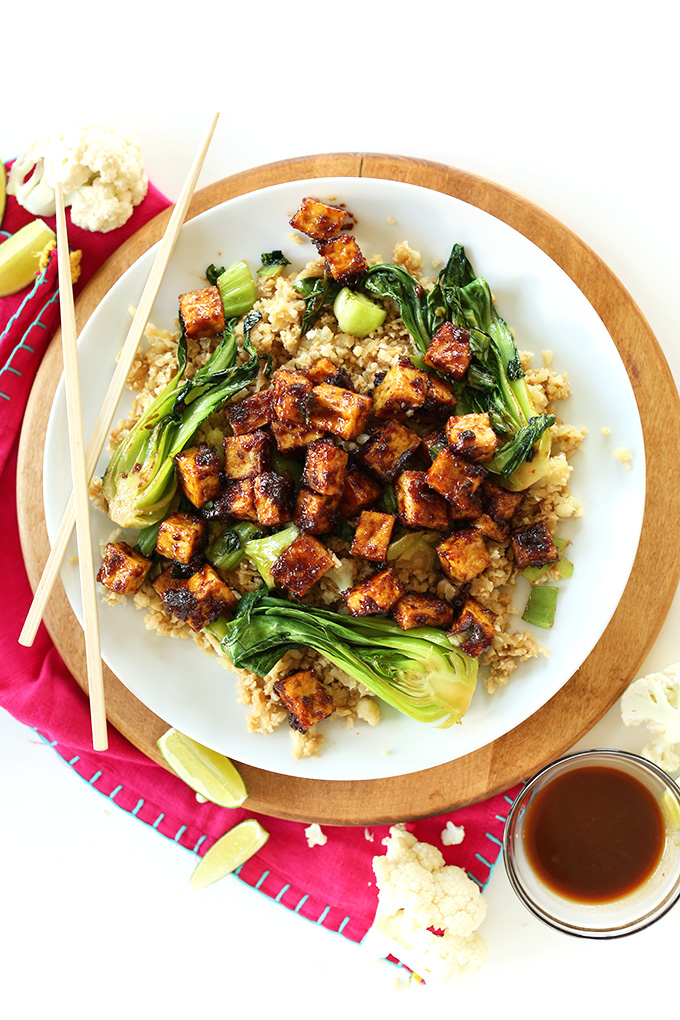
Crispy Peanut Tofu and Cauliflower Rice Stir-Fry
From Minimalist Baker
This stir-fry would be a great way to use your bok choy, green onions, bell pepper, and/or broccoli this week! If you have cauliflower in your box, you could also make the cauliflower rice. If not, the stir-fry would be just as good served over regular rice. A mix of regular rice and cauliflower rice would work well too.
.
.
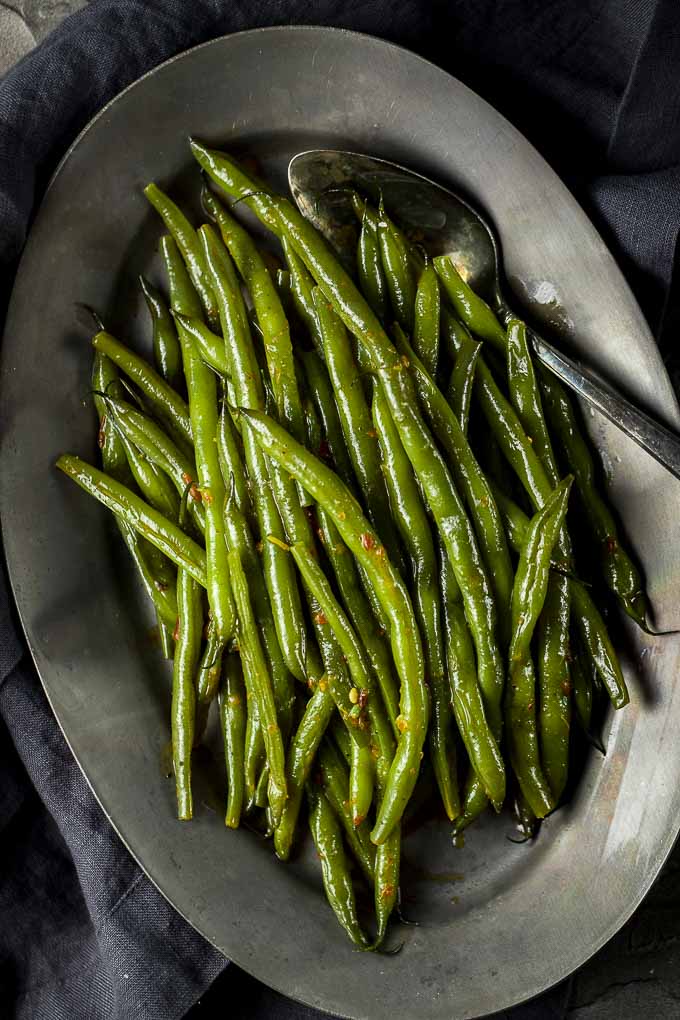
Spicy Braised Green Beans
From Went Here 8 This
This method would be a great way to cook your romano beans this week. Because romano beans are thicker and tougher than regular green beans, you may need to increase the simmering time to 45 minutes or more. If the pan starts to dry out, just add a bit more coconut milk or water.
.
.
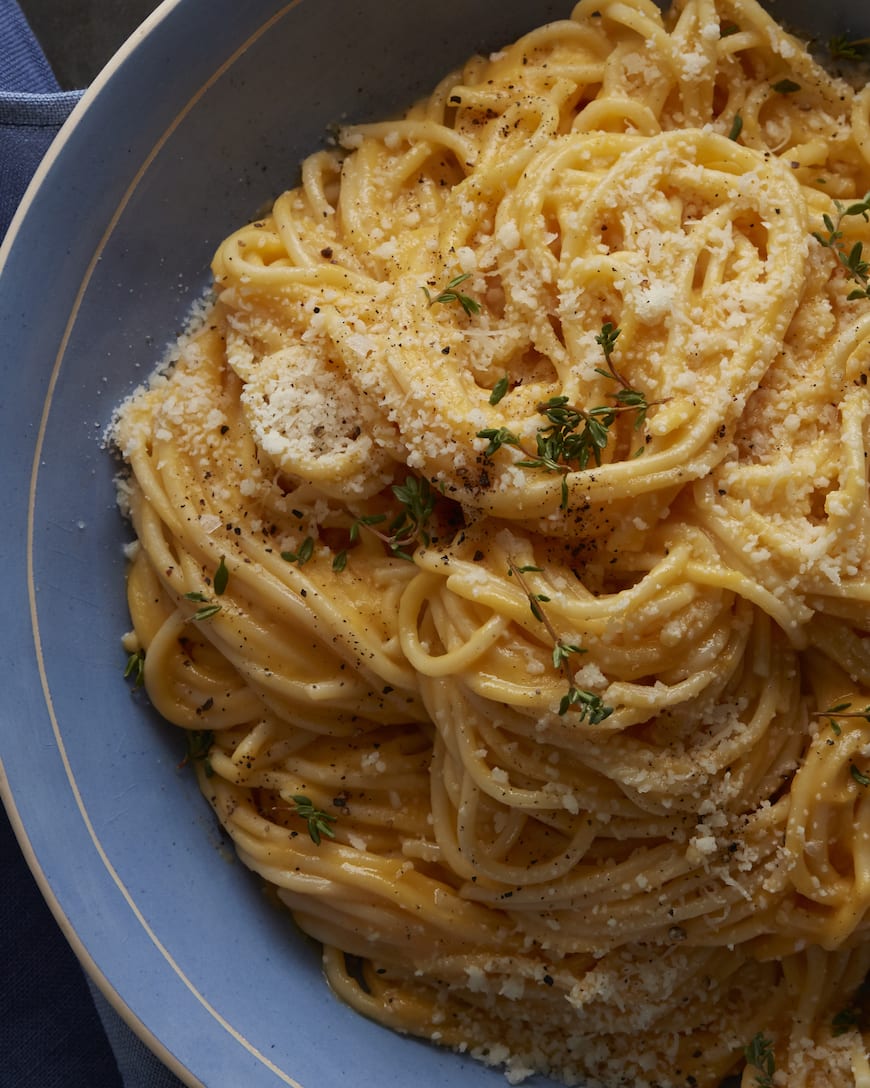
Creamy Butternut Squash Pasta
From What’s Gaby Cooking
This creamy squash pasta is such an easy, comforting vegetarian dinner. If you don’t have shallots on hand, you can substitute the onion from this week’s box. Instead of halving it, chop it into large chunks to roast with the squash and garlic.

Week #21: Darn it, Steve won the bet.
- On: October 06, 2021
- 0
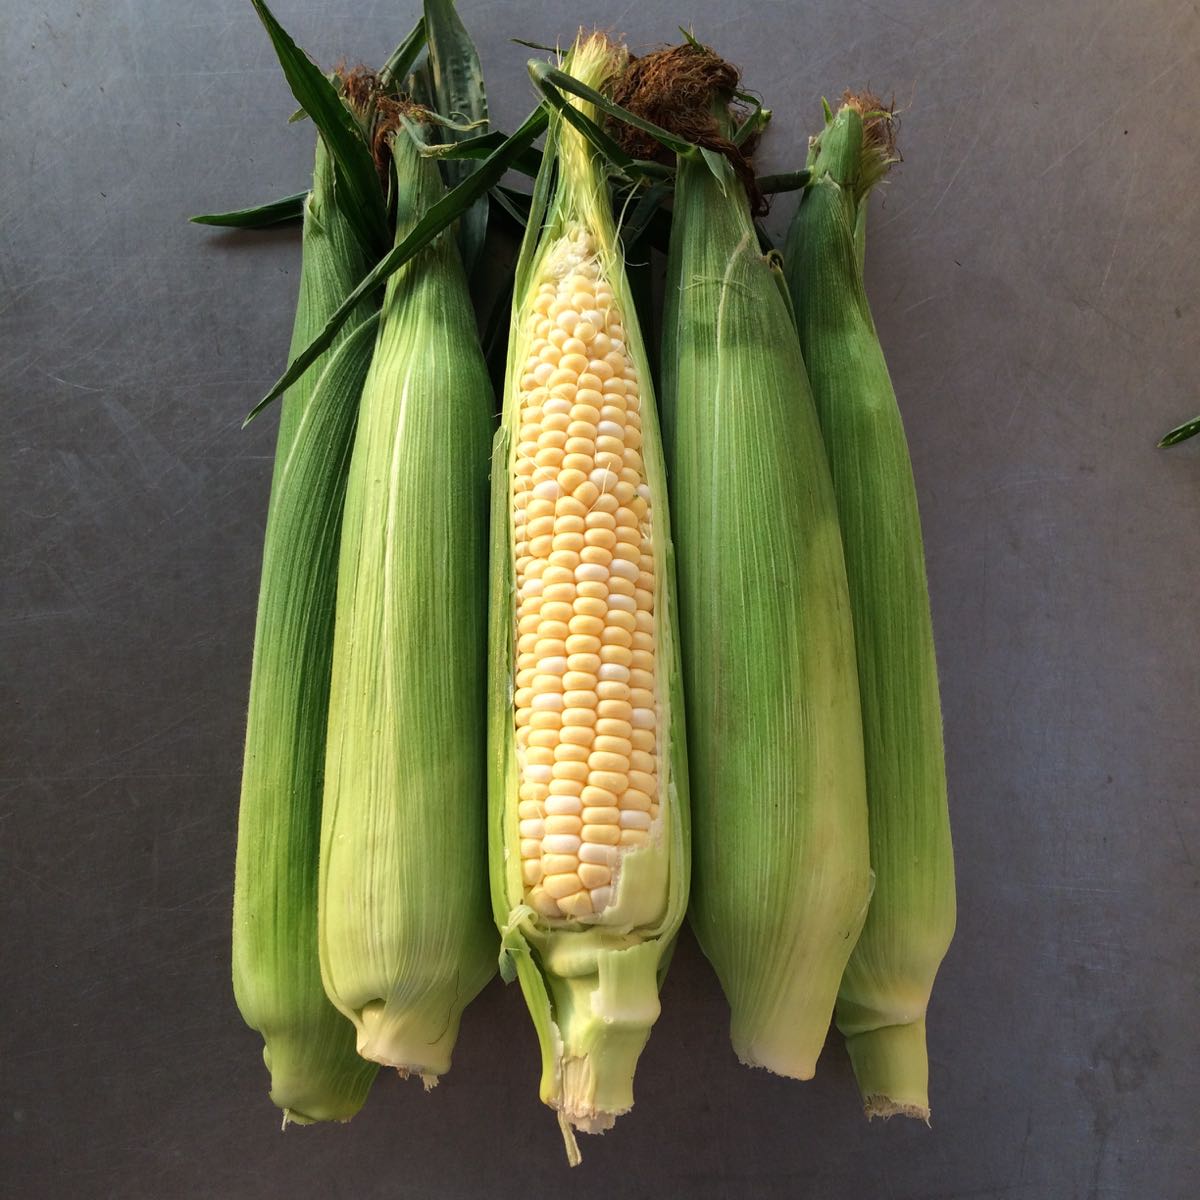
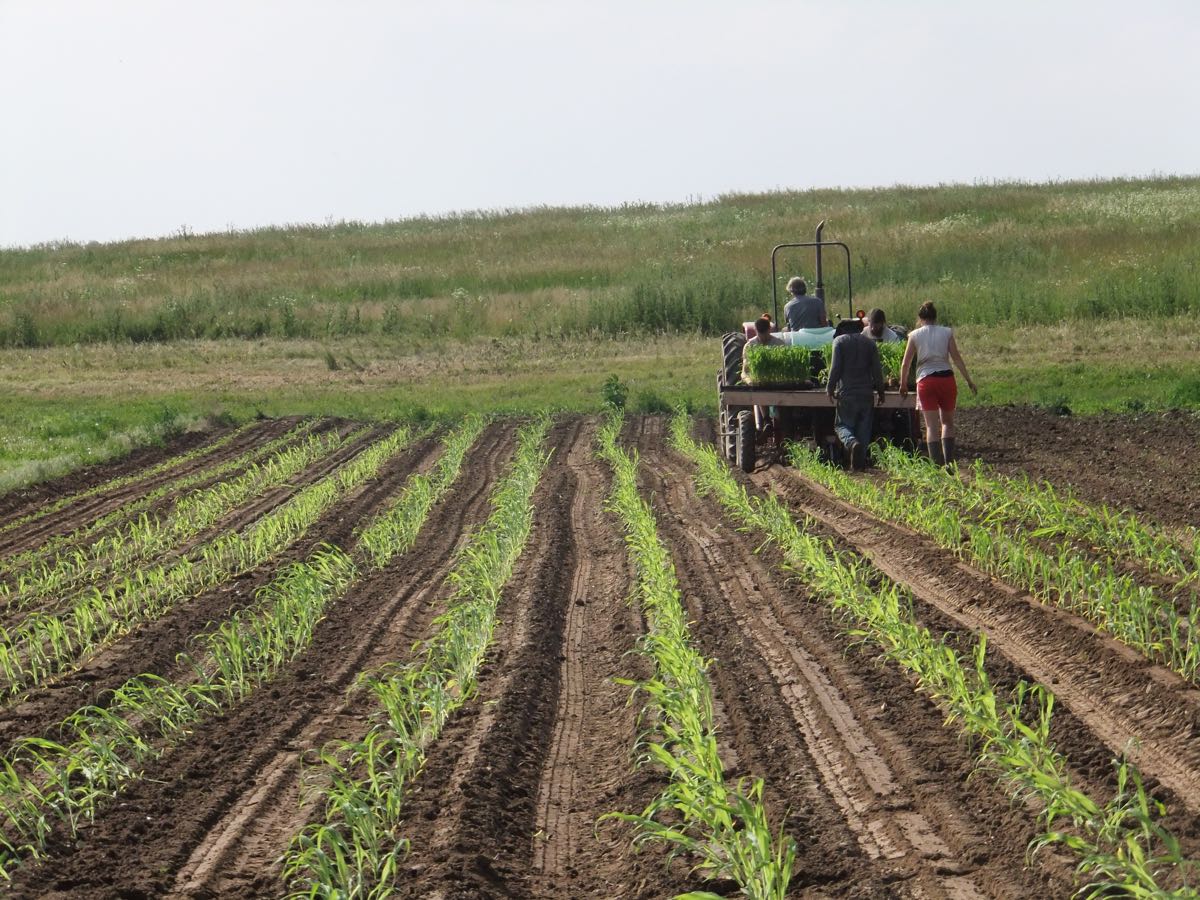

Top, sweet corn for your CSA boxes,
Middle, transplanting sweet corn seedlings to the field
Bottom, protecting the ears from birds.
I’ve written before to explain our decision to plant more but smaller sweet corn fields this year. Let’s explore more details and share your responses to our sweet corn survey.
Our intention was to increase the number of sweet corn deliveries from five to seven, thereby increasing the odds that we’d deliver corn to all members, regardless of their box schedule. For example, one year we planted five fields but four deliveries fell on one EOW group and the other EOW group only got one delivery. It was just bad luck related to the weather but worth avoiding if we can.
First, we increased the number of plantings but made each field smaller. Then we settled on a favorite variety (‘Vision’) and seeded in flats every 7 to 10 days. This was a dry year, so we were able to transplant the seedlings on a regular schedule but that’s unlikely to work every year. Wet weather can force transplanting delays, throwing off the schedule. Seven weeks is our maximum. Later plantings have too much likelihood of bug damage.
The downside of this new effort is that it creates more work for us; more seedings, more times to gather a transplant crew, more weedings, irrigations, harvests, etc. You get the idea. But we were lucky and it worked well this season.
Wow, you like sweet corn
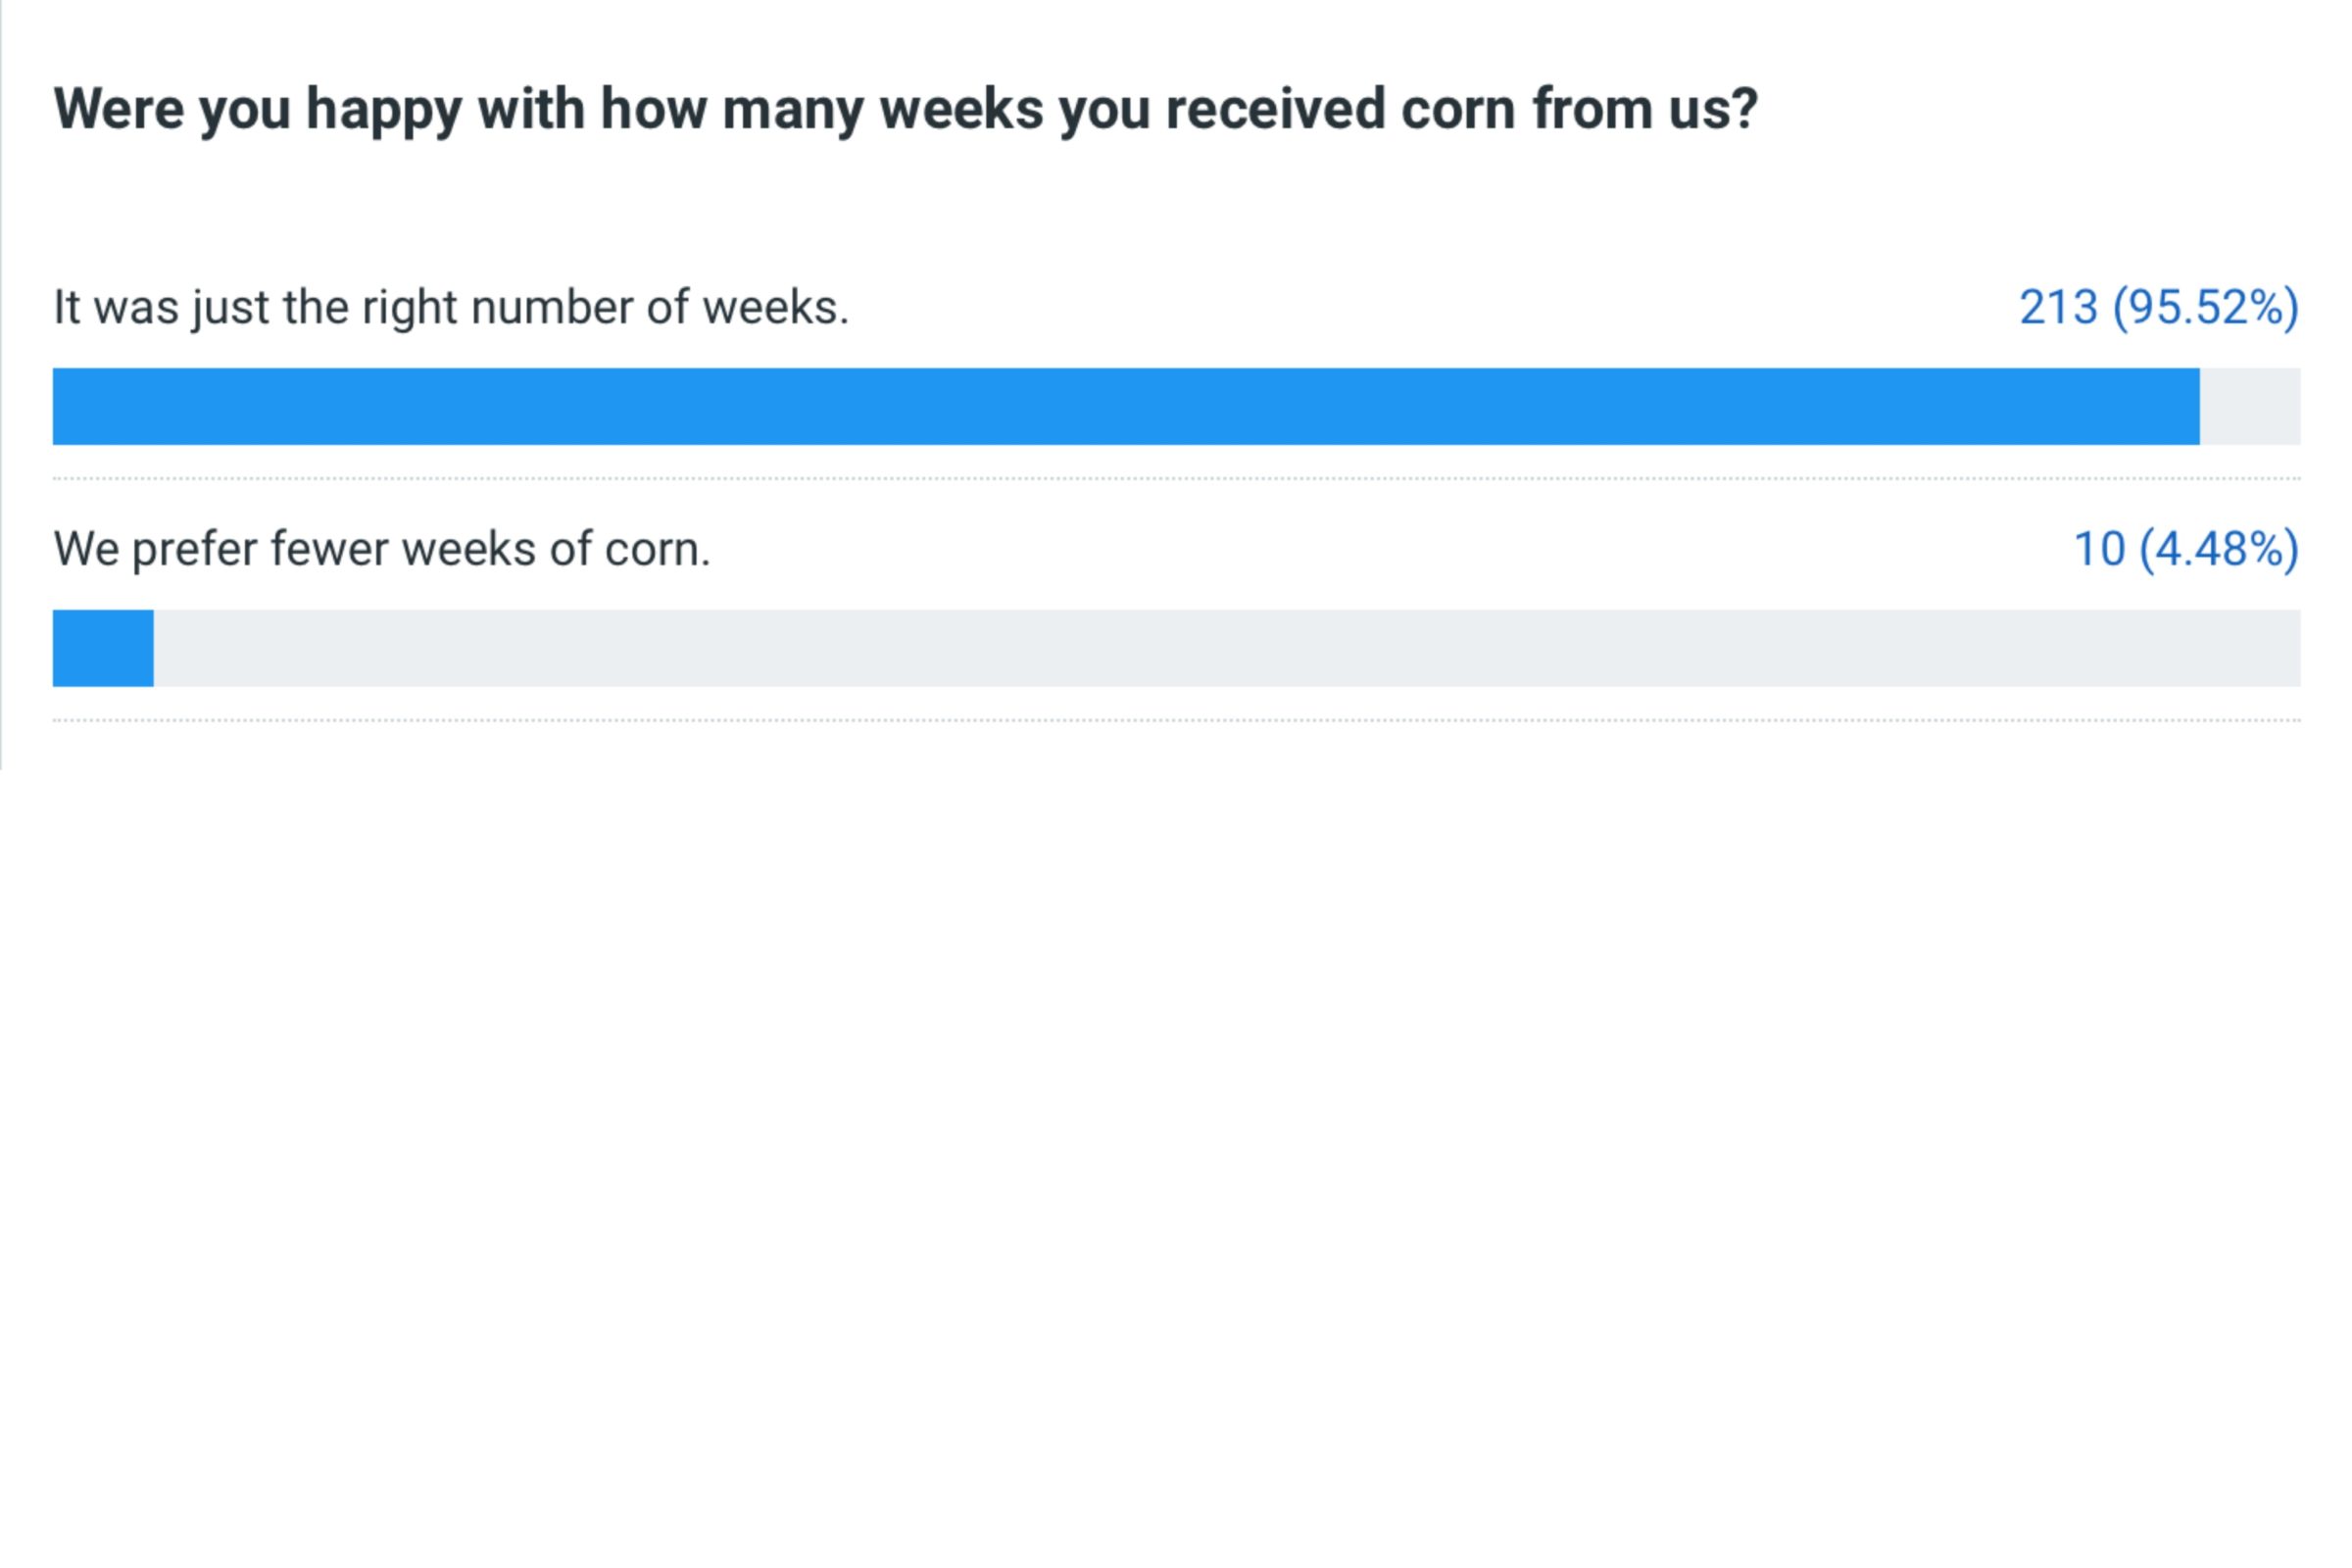
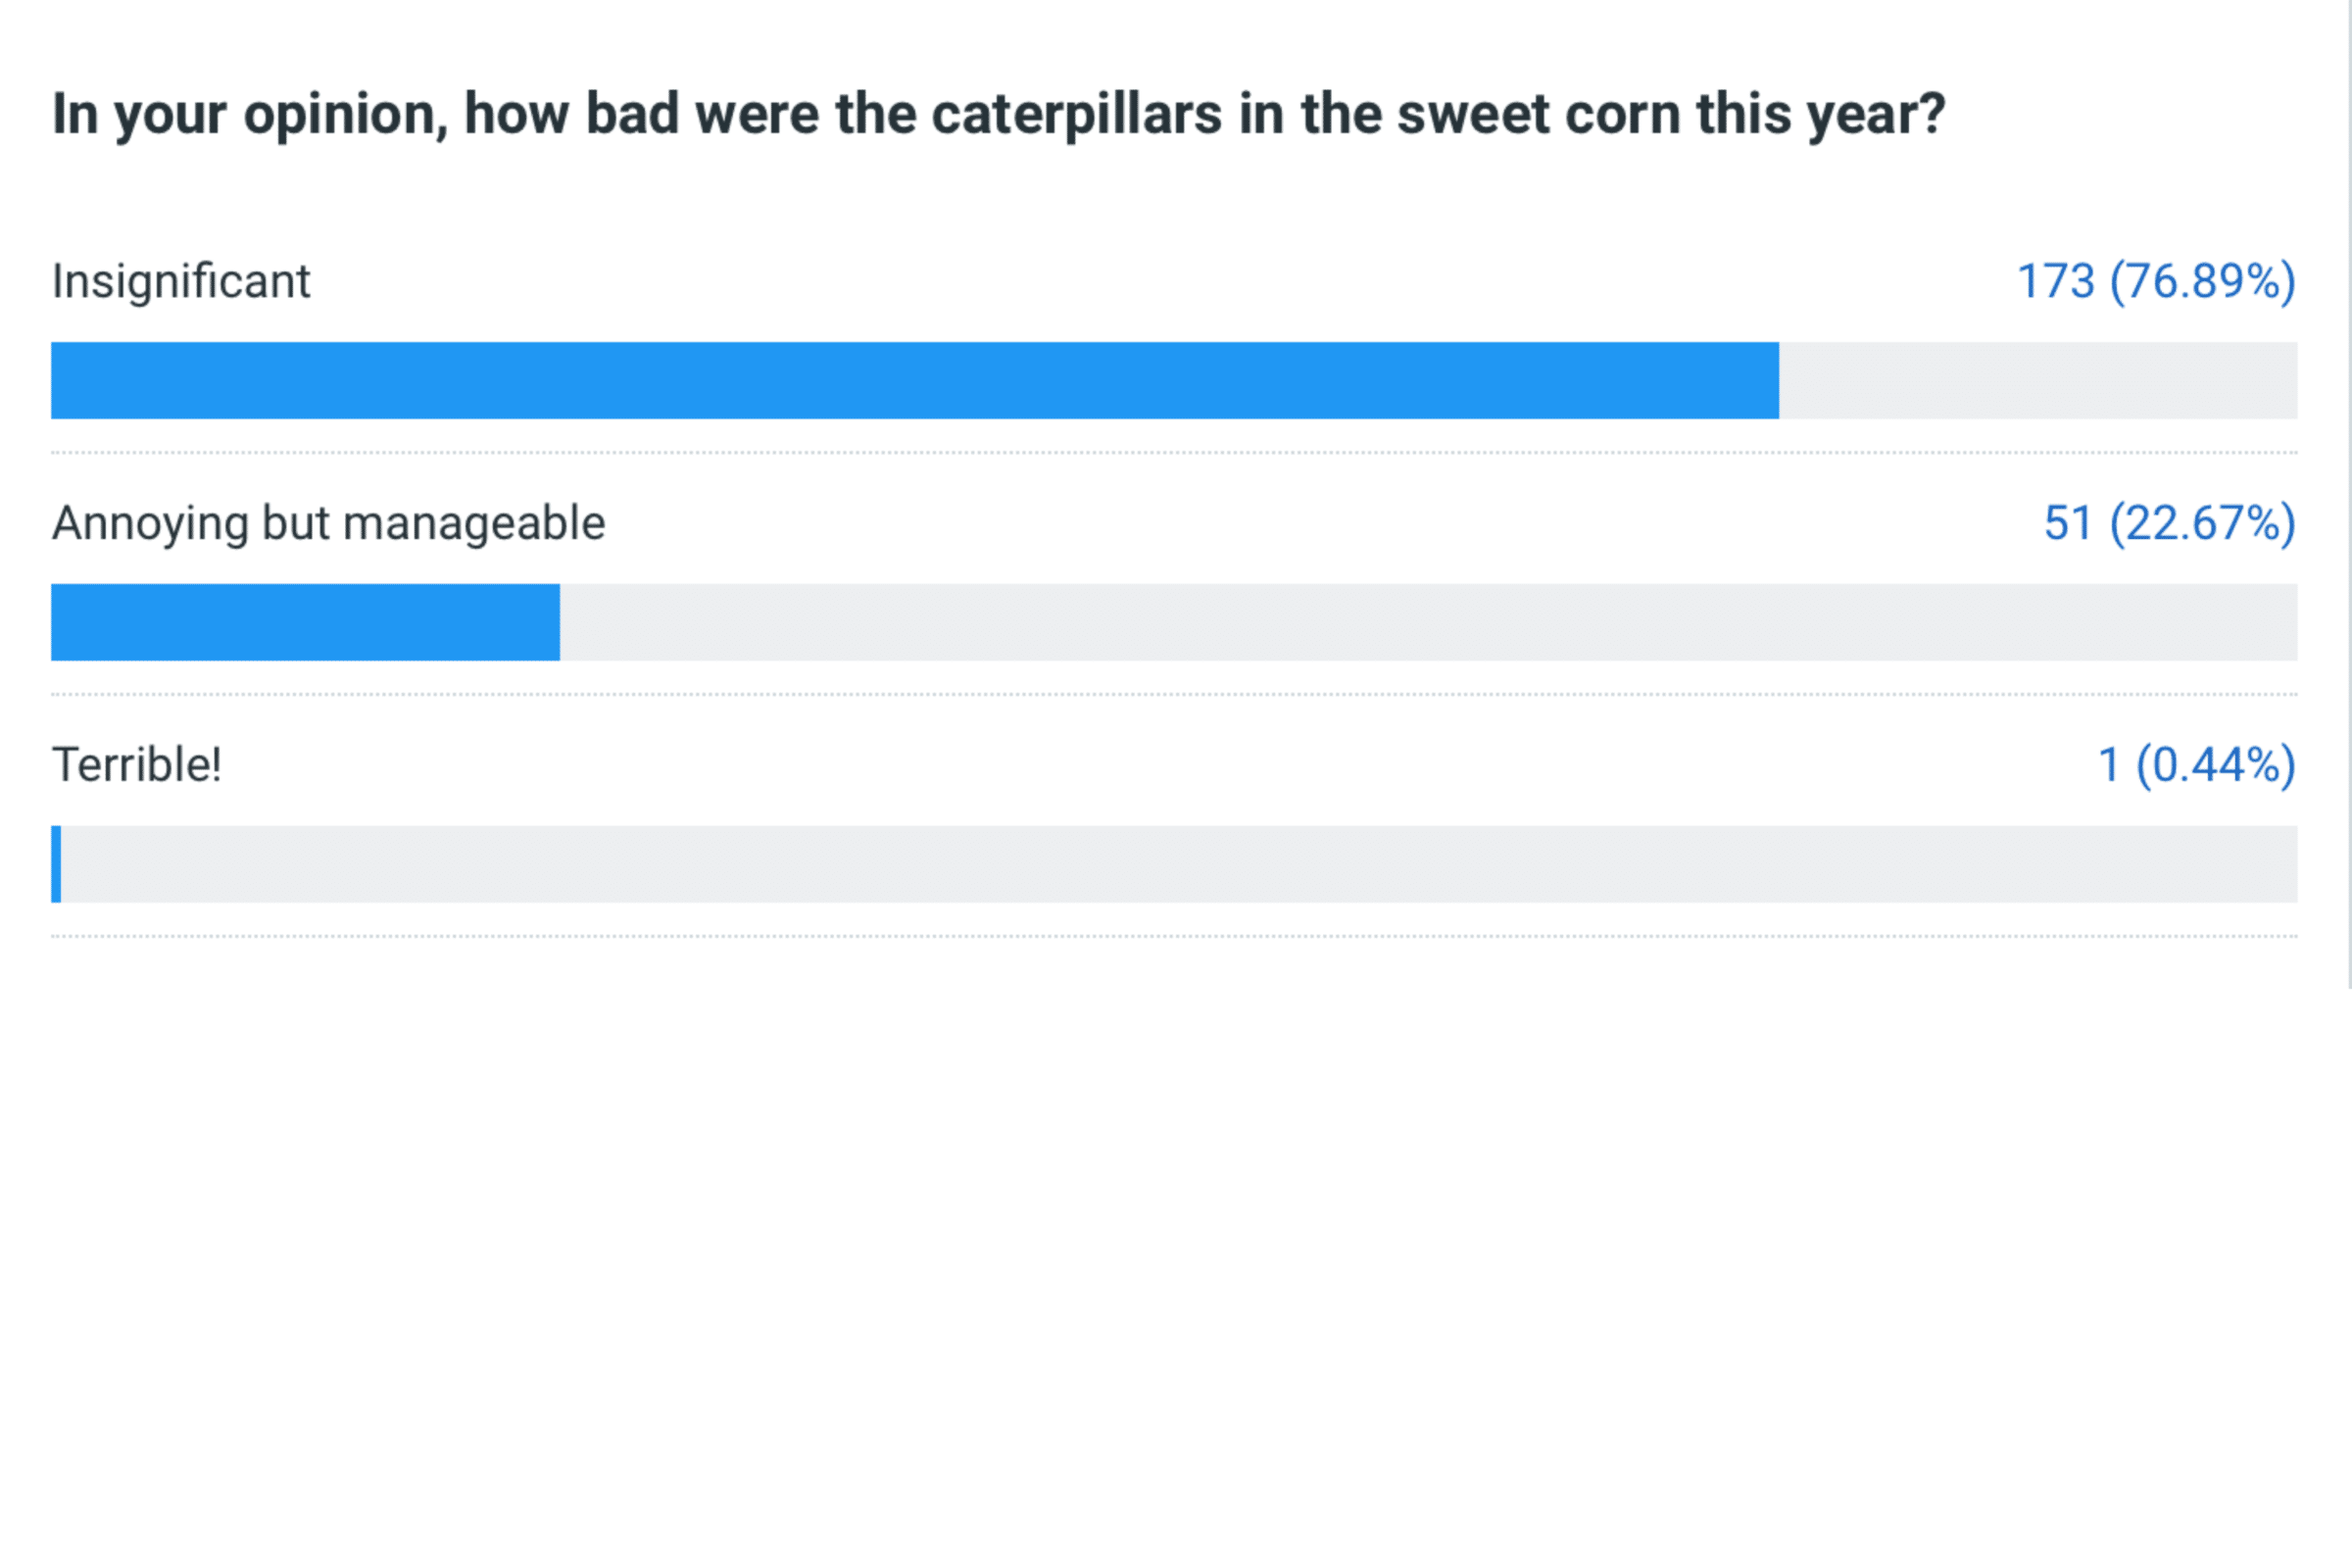
I sent a short survey to ask how you felt about the new corn schedule. I predicted that you would like getting 8 ears of corn per week, but would be sick of sweet corn by the end of seven weeks. Steve guessed that you wouldn’t (he eats corn every day in season). Darn it, he won the bet! But you won the corn!
Here are your answers. We are very happy with these results.

Comments and Questions
Here are a few of the many comments submitted with the survey. Basically, you either loved the extra corn deliveries or found ways to make them work, eg freezing extras for corn & potato chowder. It’s tough to pick which comment is most endearing, but the first one is an honor.
You gave us some of the best sweet corn we’ve ever had. That’s saying something because we’re both in our 70s and we’ve eaten a lot of sweet corn in our time!
The “sweet corn from the farm” was the only sweet corn that our son would eat!
The number of ears of corn was generally too much for us to eat in one week, but we froze a lot of it, which is just fine with me. Actually I’m thrilled to make some corn chowder later with potatoes…yum! Thank you!
About the caterpillars – I so appreciate when you tell us to just cut the tips off. I follow those instructions and otherwise would find the bugs disturbing and terrible. But when I don’t have to see them, I can pretend they’re not there.
My son and I LOVE, LOVE, LOVE your farm! Our weeks are almost totally based around the CSA! We sit down several times a week to plan and discuss meals, we keep a running inventory, we’re excited about picking it up from our site! Thanks!
To be honest I think you should plant and harvest whichever way is easiest for you. The corn keeps well in the fridge so having a few extra or a few fewer ears per box didn’t make a difference for us.
Brought on by your 5 vs. 7 weeks of corn question: As someone who receives EOW, I wonder why you don’t plan for 6 deliveries? So it doesn’t seem like the other ‘color’ might get an extra week of something depending on timing?
Beth: In a perfect world, six plantings would make sense. We hedge our bets with seven. Don’t worry, we’ll have something special for the other ‘color’.
Maybe we’ve veered into self-congratulation, but it’s fun!
Thanks for taking the survey. I sent the link again in tonight’s email, if anyone still wants to participate.
Beth
.
.

Half garlic bulb this week
Everyone gets a half bulb of garlic this week. These bulbs dried slowly or had bug issues, so we wanted to open and examine each one. Some of them are a little odd but all are useable.
Beth
Veggie List & Veggie Notes
Week #21, October 7/8, 2021
– Weekly shares
– EOW/ purple
– Sampler/ moon
‘Beauregard’ sweet potatoes, ~2 lb
Romano beans, 1.4 lb
Acorn winter squash, 1 small
Carrots, ~2 lb
Colored peppers, 2
Oranos snack peppers, 4 – 5 small
Yellow onion
Red onion
Jalapeno (HOT)
Garlic, one half bulb. Might be a little weird.
Some sites get broccoli (purple &/or green).
Some sites get broccoli & cauliflower.
Next week’s box will probably contain bok choy, butternut squash, scallions, peppers and more.
‘Beauregard’ sweet potatoes – Store your sweet potatoes at room temperature. They suffer chilling injury below 50 F.
Here are a few things we’ve learned about sweet potatoes:
– For best flavor, cook your sweet potatoes so they brown and caramelize. We have a simple, favorite way to roast sweet potatoes. We used to prepare sweet potato fries in the oven. Now we just quarter the potatoes, rub with olive oil, dust with salt and place cut-side-down on a cookie sheet. Roast in a 450 F oven without turning until soft. The flavors will caramelize (like sweet potato fries) but preparation is simpler and the cooking time less exacting. Slender sweet potato fries go from undercooked to overcooked in the blink of an eye. Larger slices are less exacting, and therefore are easier. Small sweet potatoes can be cut just in half. Jumbos will need to be chopped into pieces. Otherwise, they take a long time to cook.
– This first batch of sweet potatoes will need slightly longer cooking than ones from the supermarket, perhaps because they contain higher moisture so soon after harvest.
– Sweet potatoes are good at any size. We have cooked everything from tiny to jumbo and consistently find that all sizes taste good.
Romano beans – Romano beans are more robust and meaty than green beans. They are excellent raw but really shine when gently cooked for a long time. Here’s a pep talk from Tipi member Steve Rankin:
“You have finally sold me. I have never been a fan of Romano beans. This week I have been sautéing them with various peppers and garlic, as well as the oregano from earlier this season. They are especially tasty with poblanos. Lots of black pepper and some soy sauce, which make the pan sticky. I deglaze the pan with wine and braise them in the wine. I’m sold!”
Acorn winter squash – Everyone gets one ‘Jester’ or ‘Carnival’ squash. Store at room temperature for two weeks but keep an eye on your squash and cook promptly if it starts to deteriorate.
Jalapeno chile (HOT) – This small chile is dark green or dark green with a red tip. It’s recognizable by its color and size. It is the only hot pepper this week. All other peppers in this week’s box are sweet.
RECIPES from DEB
Visit our 2020 Recipe Log or our 2019 Recipe Log.
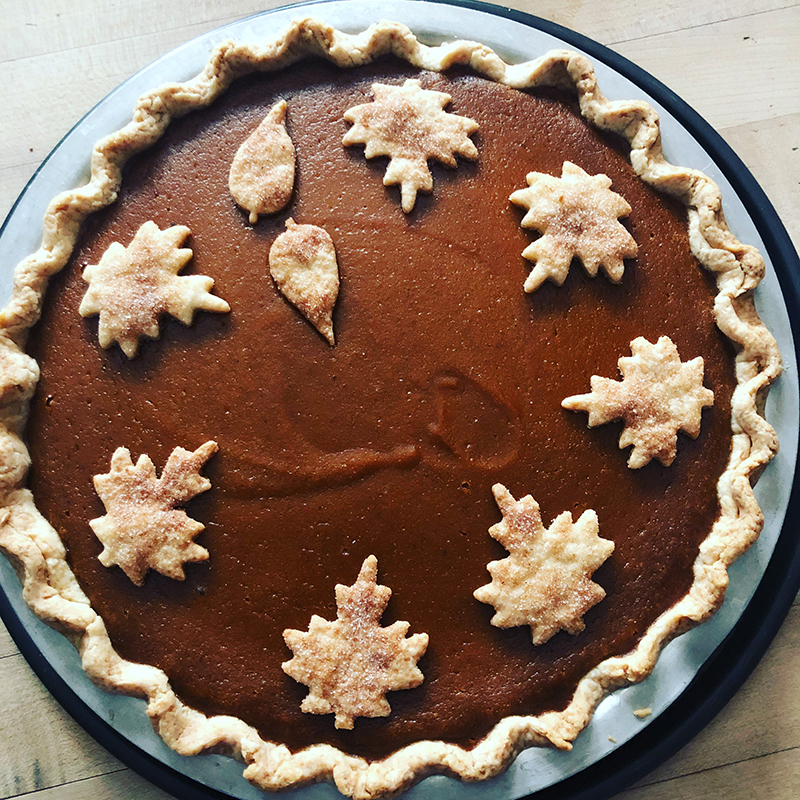
Caramel sweet potato pie
Based on a recipe from November 2018 Food & Wine, this pie could also be made with squash or pumpkin puree.
Takes about 45 minutes active time, plus 30 minutes to chill the crust and 45 minutes to bake.
Makes 8 big slices.
Crust:
1 1/2 cups flour
good pinch salt, unless you’re using salted butter
1 tablespoon sugar
1/2 cup butter, either salted or un- (1 stick, 8 tablespoons)
1 tablespoon vegetable shortening or lard
1 tablespoon sugar
2-4 tablespoons cold water
Special equipment – pie weights or dried beans, parchment paper
Filling:
2 3/4 cups sweet potato puree (roasting the sweet potatoes will give you a drier puree, but steaming also works and is quicker!)
3 large eggs
3/4 cup granulated sugar
3 tablespoons water
2/3 cup heavy cream, warmed
2/3 cup packed dark brown sugar
3 tablespoons unsalted butter
1 teaspoon vanilla extract
a generous pinch of kosher salt
1 1/2 teaspoons ground cinnamon
1/2 teaspoon freshly grated nutmeg
OR use two teaspoons pumpkin pie spice blend, such as Penzey’s
Make the crust: measure the flour, salt and sugar into the bowl of your stand mixer (my favorite method), your food processor, or a mixing bowl. Slice the butter and shortening over the top and combine with the flour mixture, using the paddle attachment of the mixer, by pulsing the processor, or using a pastry blender, 2 knives or your fingers, until you have a crumbly mixture with no butter lumps bigger than currants. With the mixer or processor running, or while stirring with fork, drizzle in the water by tablespoons, until the mixture just starts to come together in clumps. Stop before you have one big ball. Turn the crust out onto a floured surface and knead lightly to bring it together. Gather it into a ball, flatten into a disk, wrap (in plastic, wax paper, one of your reusable snack/sandwich bags), and chill for about 30 minutes, and up to 2 days.
After chilling, roll out the crust and fit it into a deep 9-inch pie plate and trim and crimp the edges. Set it in the freezer or fridge to chill while you make the filling. Cut the trimmings into decorative shapes for the top of your pie, set them on a baking sheet, and chill them, too.
After the crust has chilled, heat the oven to 400°. Line the pie shell with parchment paper, and fill with pie weights or beans. Bake for 16 to 18 minutes. Sprinkle the cutouts with cinnamon sugar, and bake them, too – they’ll brown quickly, so watch carefully! After about 16 minutes, take the shell out, carefully remove paper and weights, and prick the bottom of crust all over with a fork. Return the crust to the oven and bake until bottom is lightly browned, another 4 to 6 minutes. Remove the crust from the oven and let it cool while you make the filling. Reduce the oven temperature to 350°.
Make the filling: Combine the pumpkin puree and the eggs – you’ll get the smoothest filling if you use a food processor, but you can whisk the eggs and potato together in a big bowl, too.
Stir the granulated sugar and 3 tablespoons water together in saucepan much bigger than you think you will need – at least 2 quarts. Cook over medium heat until the sugar melts, about 3 minutes. Increase heat to medium-high and continue cooking, occasionally swirling the saucepan, until mixture is a rich caramel in color, 6 to 7 minutes. Remove from the heat and carefully pour in the warm cream – it will bubble furiously – this is why you need a big pan! Whisk in brown sugar and butter until smooth and incorporated.
When the warm caramel sauce into the pumpkin & egg mixture, and add the vanilla, salt, cinnamon and nutmeg. Pour the filling into the pie shell and smooth the top. Bake until the filling is just set, about 45 minutes. Decorate the top with your crust cutouts while the pie is still warm – they’ll stick better that way.
.
.
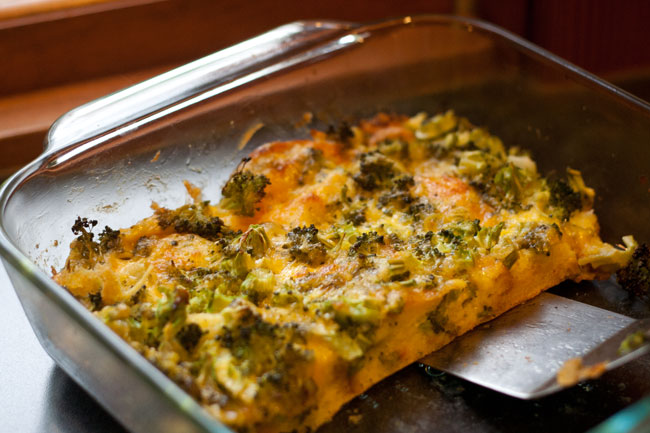
Broccoli Casserole
This is based on Jane & Michael Stern of Roadfood fame, and I got the recipe from the Splendid Table’s How to Eat Supper cookbook. It’s basically a strata, bread, egg, broccoli, and cheese.
Takes about 20 minutes active time, plus an hour to bake.
Serves four generously.
4-6 slices of bread, enough so that torn into bite-sized pieces it will cover the bottom of an 8-in. baking dish. The original recipe calls for soft white bread; I think soft whole wheat is good, too.
3 large eggs
1/4 cup milk
4 tablespoons butter, melted, plus a little extra for greasing the baking dish
1 cup grated cheddar cheese
1 teaspoon salt
1-2 tablespoons sugar (The original recipe calls for three!)
2 cups finely chopped broccoli – I like to do this in the food processor.
Heat the oven to 350°. Butter your baking dish – glass recommended, and cover the bottom of the dish with the torn bread. Beat the eggs, milk, and melted butter together, then add the cheese, salt and sugar. Stir in the broccoli and pour the mixture over the bread. Cover the dish with foil or a lid, and bake for about 45 minutes. Uncover and bake another 10 to 15 minutes to brown the top, and if you want an even crispier top crust, run the casserole under the broiler.
.
.
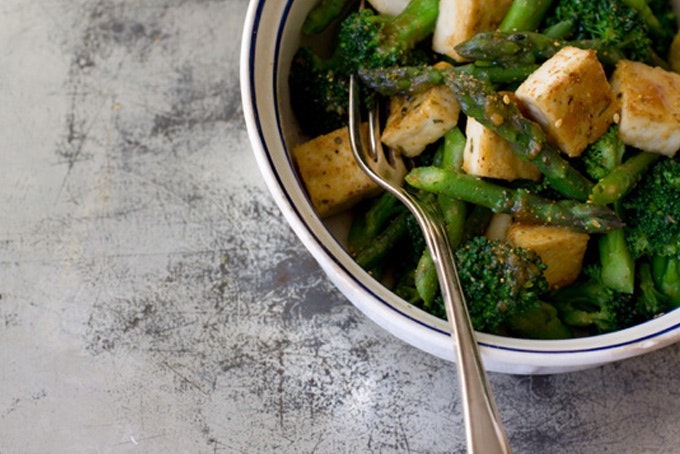
Miso Vegetables & Tofu Recipe
From 101 Cookbooks
Takes 30 minutes.
Serves 4-6, plus extra miso dressing.
This is a main dish salad with lots of veggies, from the 101 Cookbooks blog. The author, Heidi Swanson, uses asparagus in this version, and says the original recipe, from a book called Everyday Harumi, uses green beans, that we get in the box this week. When I tested this recipe I served it over ramen noodles, and the leftovers were delicious for lunch the next day.
.
.
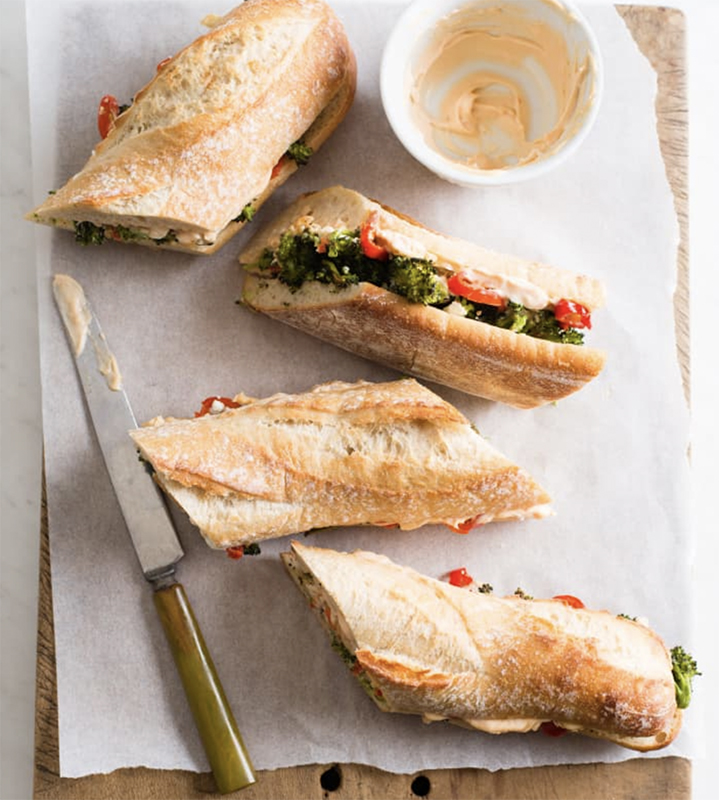
Image credit Maria Siriano
Garlicky Broccoli Subs
From the Kitchn; by Megan Splawn
Take about 30 minutes.
Serves 4 to 6.
Why can’t broccoli be the star of a sandwich? This recipe from the Kitchn says, “Sure!” Substitute for the peppadews with thin slices of the Oranos peppers from the box, and spice the sandwiches up with some jalapeño if you like.
.
.
Cookie + Kate
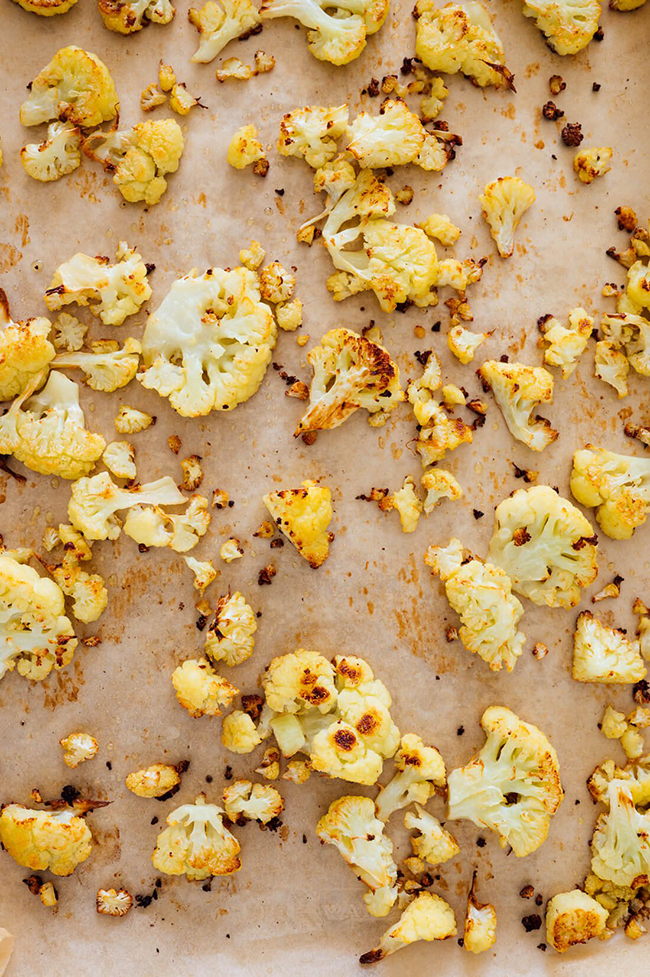
Roasted Cauliflower Recipe (Four Ways!)
Kate of Cookie and Kate gives us four different ways to roast cauliflower: Basic, Italian, Mexican, and my personal favorite, with Indian curry spices.
.
.
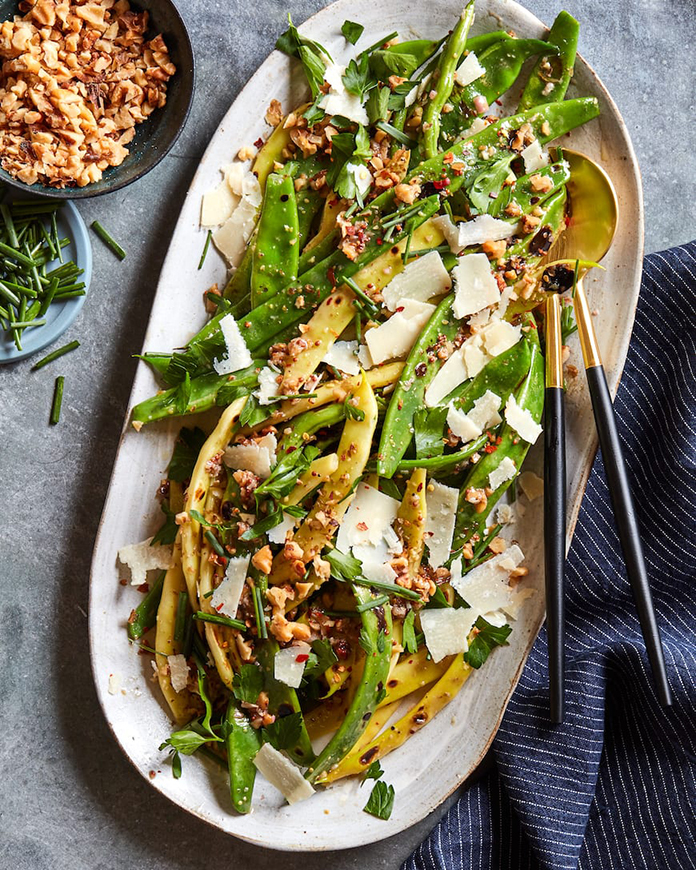
Adam’s Green Bean Salad
From What’s Gaby Cooking
Takes 20 minutes
Serves 6
This delicious salad can be made with any type of green bean including the Romano beans in this week’s box, as shown in the picture.
.
.
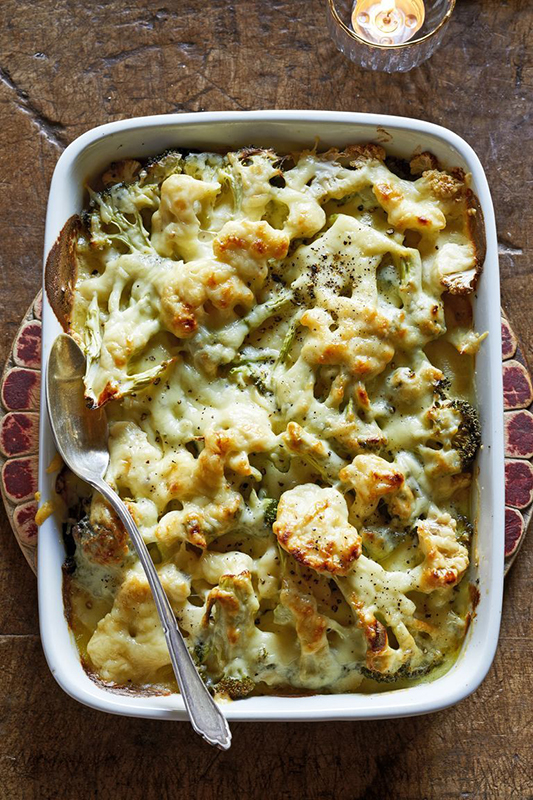
Photo by Dana Gallagher
Best Broccoli & Cauliflower Gratin
From Country Living; by Nancy Fuller.
Takes an hour and 10 minutes.
Serves 8-10.
The source of this recipe, County Living Magazine, suggests it as an upgrade for your Thanksgiving side dishes – but I see no reason to wait that long to make it!
.
.
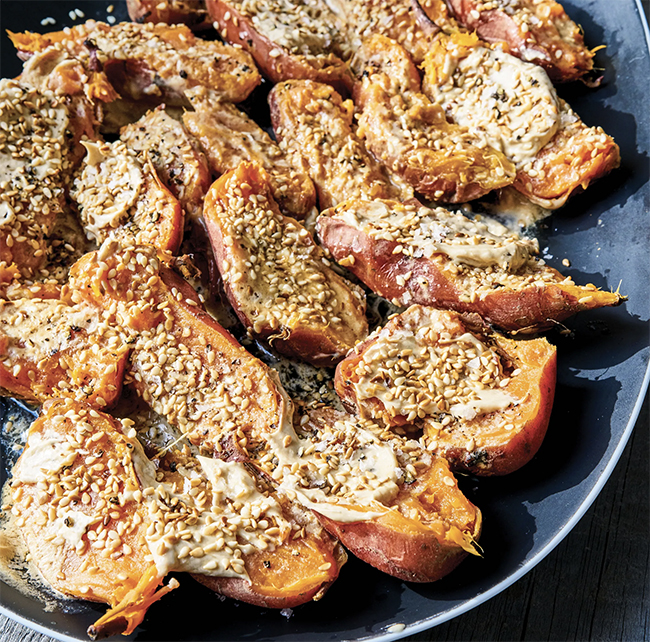
Photo by Gentl and Hyers
Sweet Potatoes with Tahini Butter Recipe | Bon Appétit
From Bon Appetit; by Carla Lalli Music
Takes about 40 minutes
Serves 6
This recipe for steamed sweet potatoes doused with tahini, butter, and lime juice, by Carla Lalli Music has also appeared in the New York Times, and is the type of recipe that gets a ton of comments – people are passionate about it! Give it a try and see how you feel.
Week #20; Spectacular winter squash harvests
- On: September 29, 2021
- 0
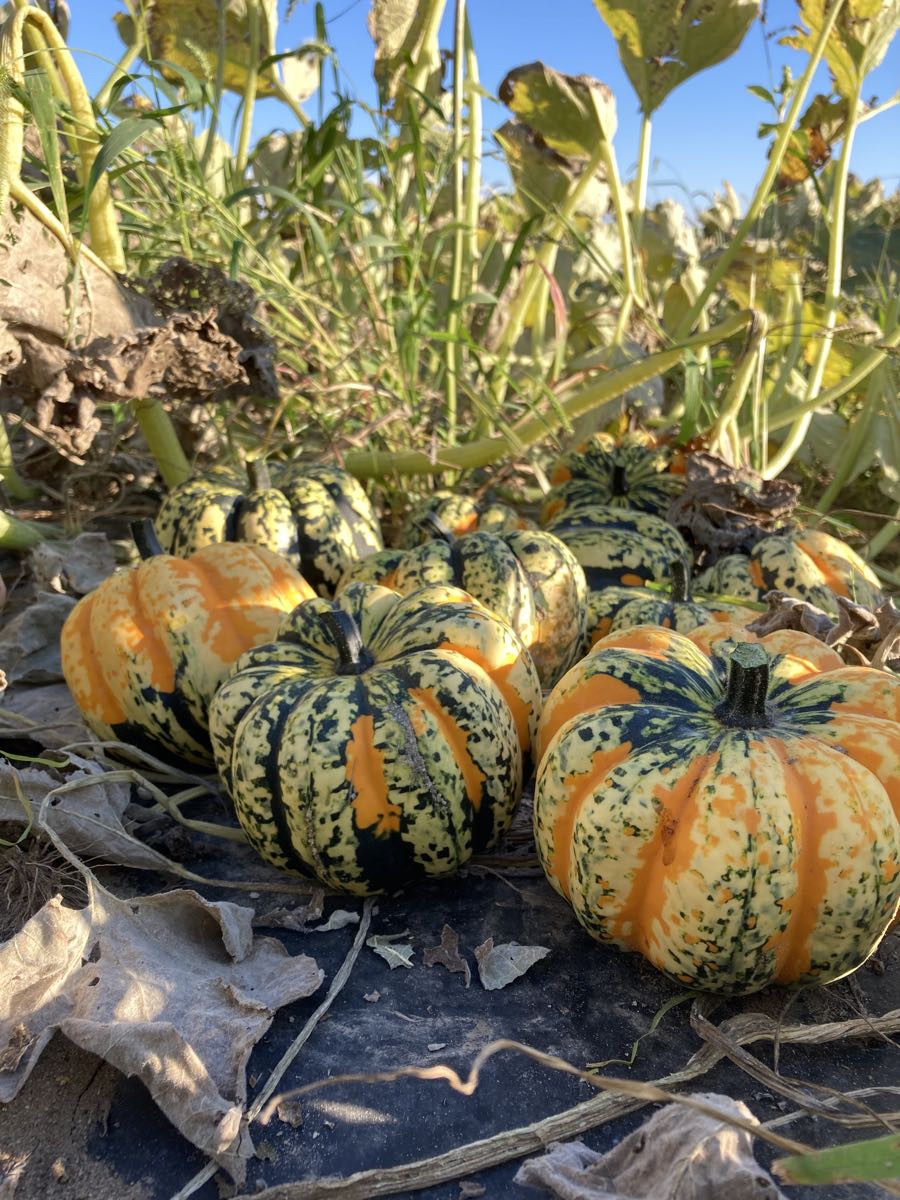
Carnival squash, in the wild
Winter squash are tricky to grow. They take a full season to mature, allowing many perils of insect attack or rot in wet weather. This has been a remarkably dry growing season for us. Dry years create extra irrigation work for us, but usually produce spectacular crops. I’ve written it before, but we think this might be our best-ever CSA season.
Anyway, the winter squash have benefited from the dry weather plus our typical squash-loving insects were less abundant than usual (cucumber beetles and squash bugs). Harvests have been so easy! The same team of squash cutters have worked with me for years because it’s an exacting job and takes time to learn. Not this year – almost all the squash were harvestable without special evaluation. That gave me the freedom to include everyone in squash harvest at some point. It’s a good job to share – squash are heavy, you know.

One of many wagonloads of winter squash. From left, Billy, John, Matt and Scott, plus Simone in back near the tractor. We are a good team. You can see the harvest conveyor belt stretching off the wagon to the right. We clip the squash, pile them in the field, then return to pick them up with the wagon and belt. That harvest belt saves our backs – we place the squash directly on the belt instead of carrying filled crates out of the field.
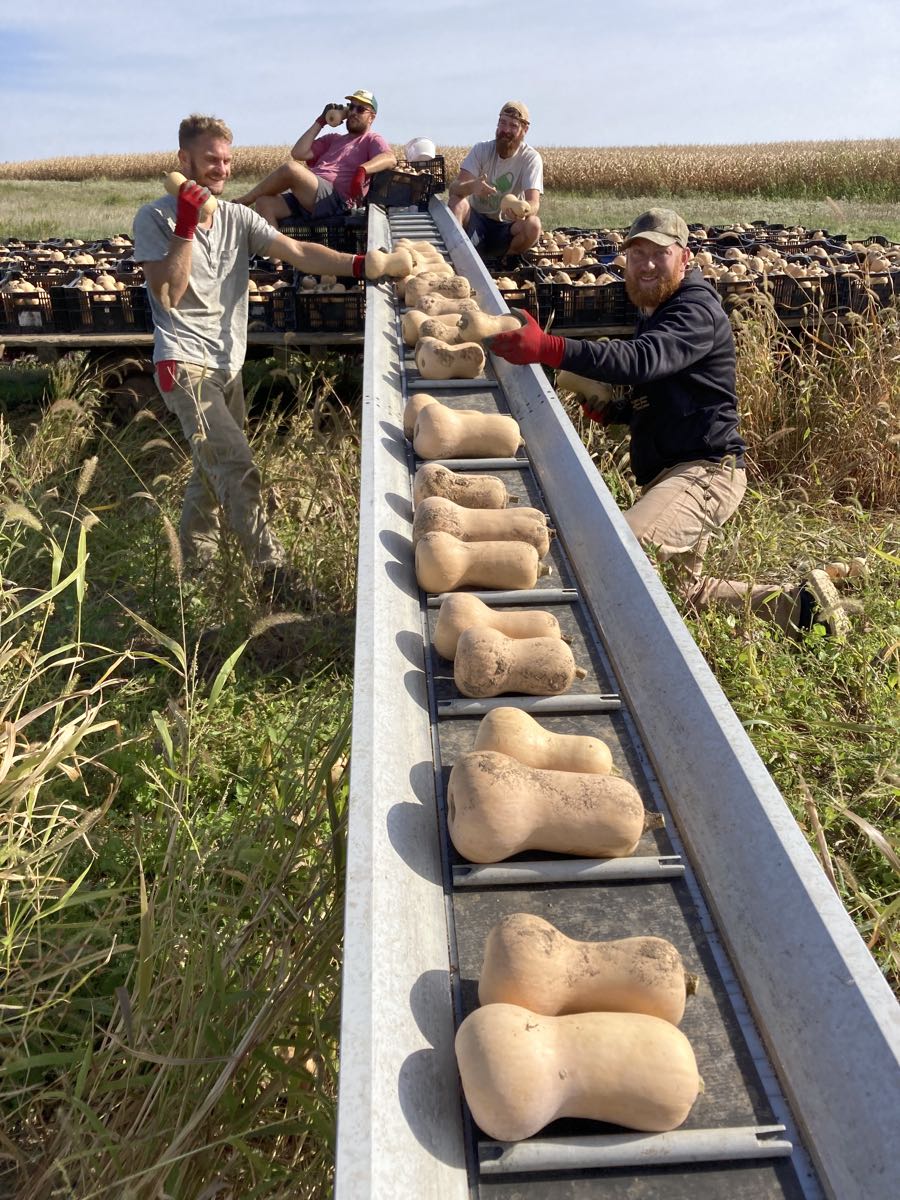
The harvest belt in action, kind of.
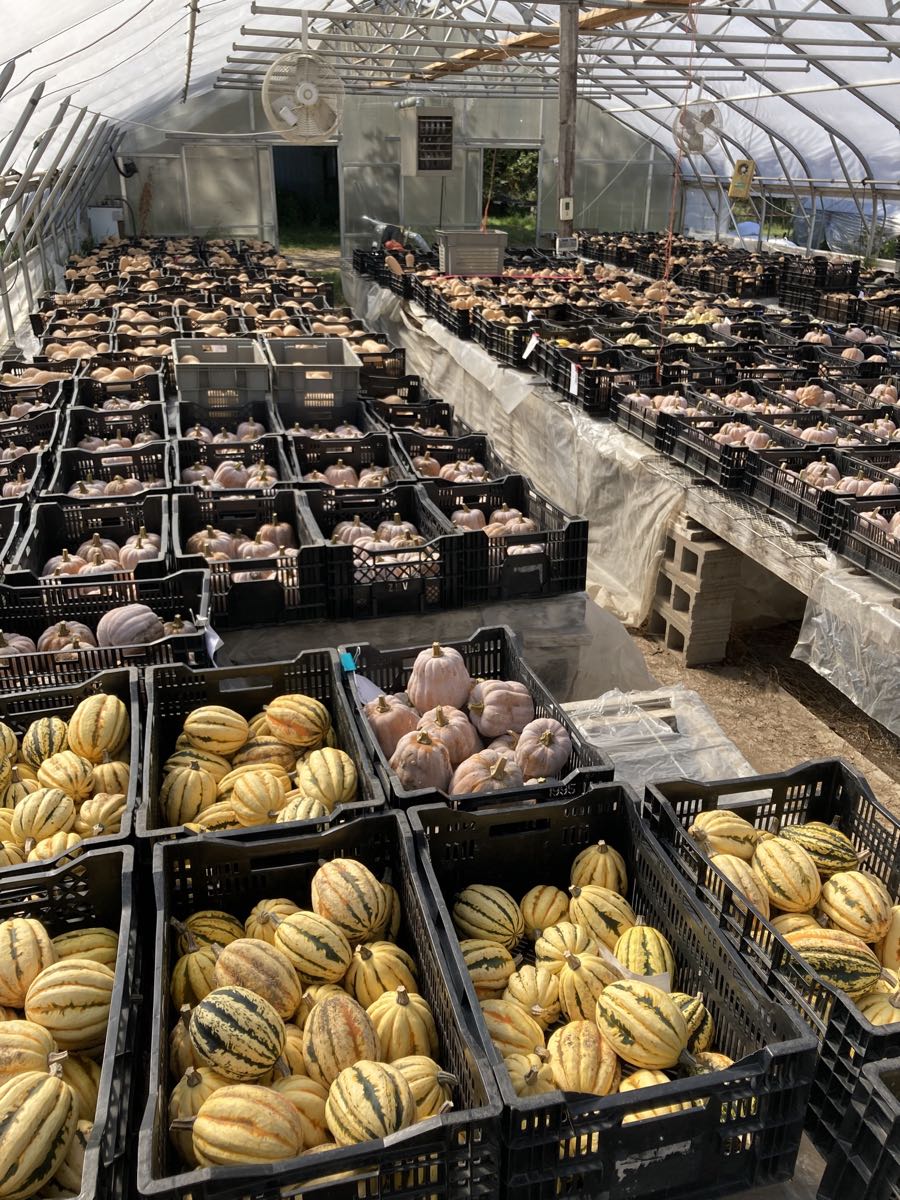
From the front, Jester, Autumn Frost (for the Storage shares probably), then Nutterbutter butternuts.
We store the harvested squash in our biggest greenhouse. It’s warm and dry, perfect for curing squash.
Thanks for reading.
Beth
Veggie List & Veggie Notes
Week #
– Weekly shares
– EOW/ green
Green cabbage, ~ 3 lb
‘Carnival’ winter squash, 1 – 2
‘Mollie’ yellow potatoes, 3.5 lb
Green beans, 1.1 lb
Plum tomatoes, ~4 count
Colored peppers, ~3
Poblano chiles, 2
Onion
Garlic
Some sites get cauliflower this week.
Some sites get broccoli.
Next week’s box will probably contain sweet potatoes, carrots, green beans, peppers, some kind of fall greens and more.
‘Carnival’ winter squash – These acorn squash were harvested from very healthy plants and should store at room temperature for up to one month. After that, they’ll start to get stringy and lose flavor. They are beautiful so keep them in your kitchen somewhere that you can admire them and also watch for developing flaws. If you see any flaws, then eat them soon. The skins are too tough to eat.
‘Mollie’ yellow potatoes – These organic potatoes were grown by our friends Josh and Noah Engel of Driftless Organics. Josh says that Mollie is a “nice all-around potato, good for frying, boiling or mashing.”
Plum tomatoes – The tomato plants are in decline so these tomatoes have an expiration date of Sunday. Eat or cook with them soon.
Poblano chiles (triangular, shiny; green or brown; MILDLY HOT) – Poblanos are the creme de la creme of chiles. They have lots of great flavor in combination with manageable heat. Roast and add to soup or casseroles. To reduce heat, remove the seeds and midveins.
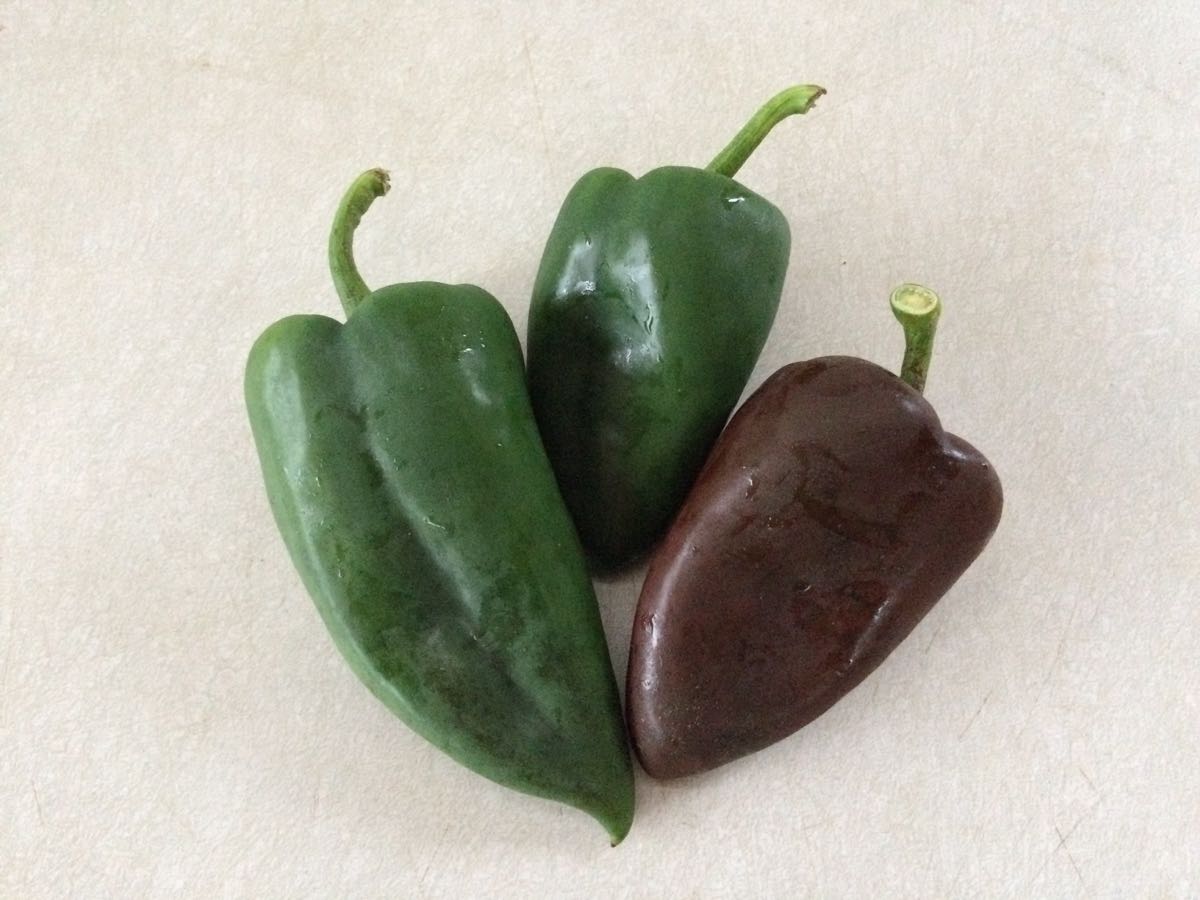
Poblano chiles will be dark green or chocolate-colored, occasionally with a red tip. These are the only hot peppers in this week’s box. All other peppers are sweet.
RECIPES from PHOEBE
Visit our 2020 Recipe Log or our 2019 Recipe Log.
.
.
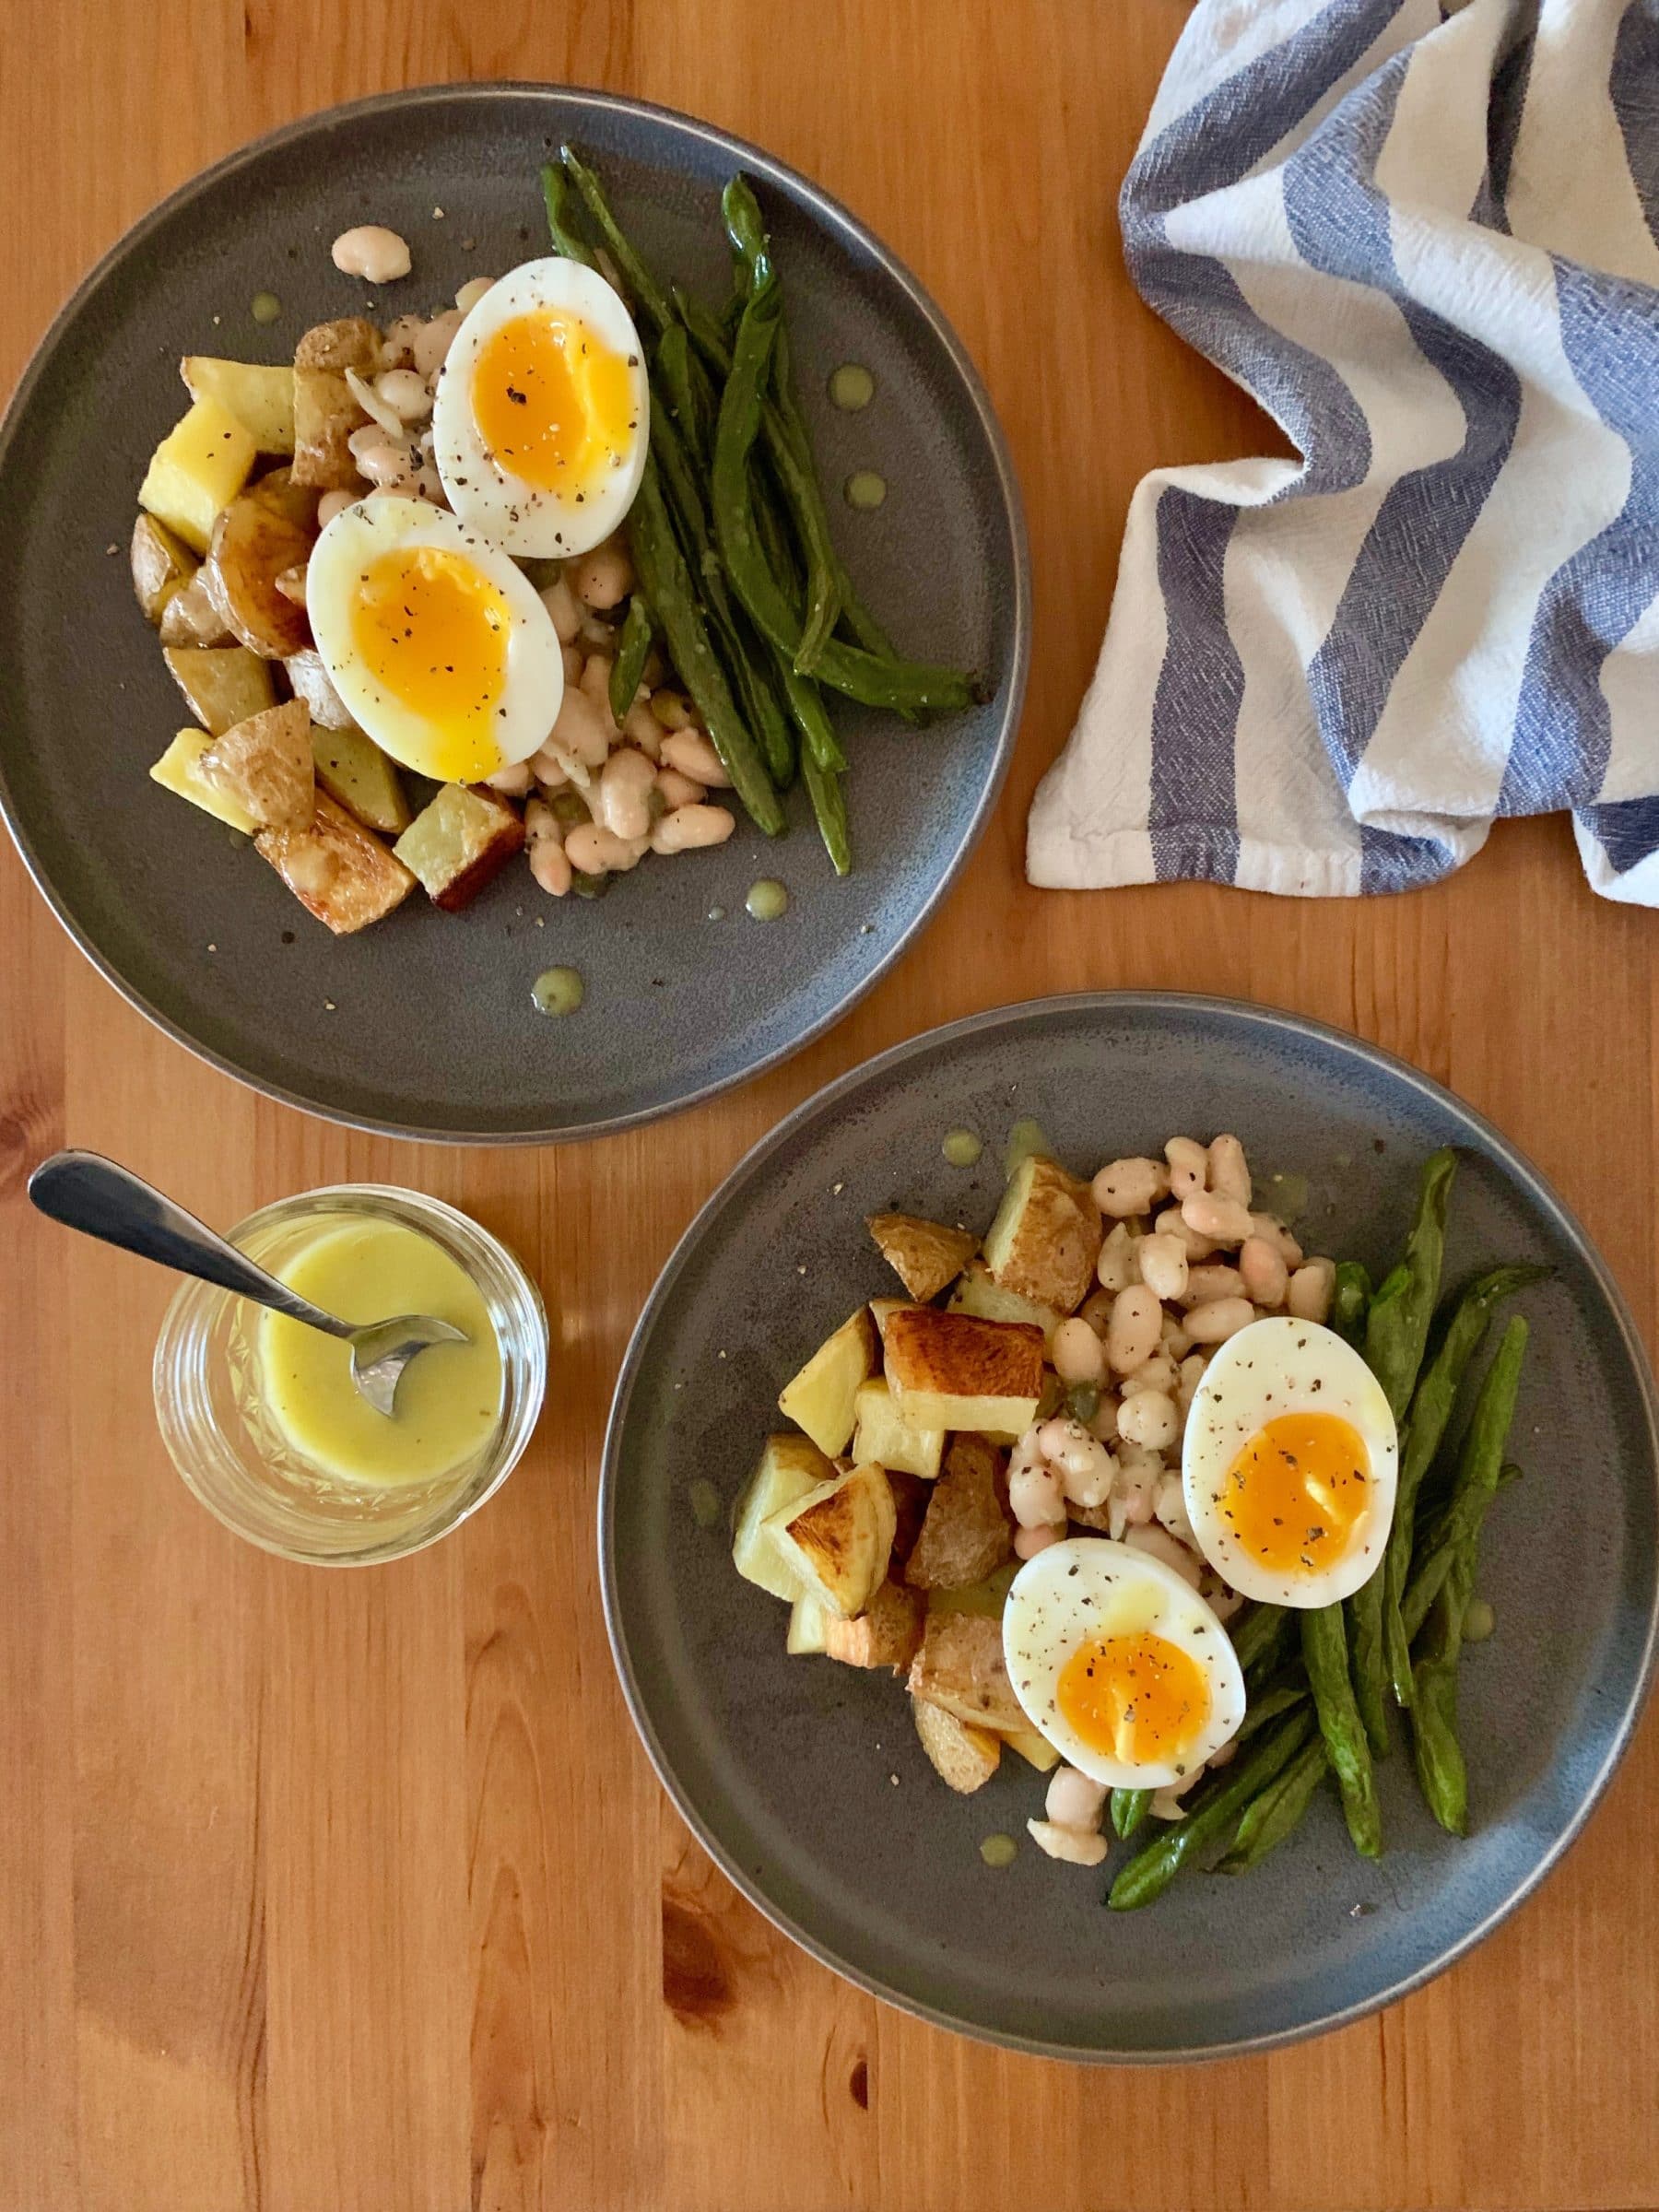
Lemony Sheet Pan Potatoes and Green Beans with Soft-Boiled Eggs
Crispy, creamy roasted potatoes, soft-boiled eggs, and a bright lemon-Dijon dressing make this simple recipe a satisfying meal. Don’t hold back on the dressing here – it really takes this dish over the top.
Serves: 4
Prep time: 15 minutes
Cook time: 30 minutes
Ingredients
1 pound green beans, trimmed
1 1/2 pounds yellow potatoes, cut into 1/2-inch chunks
1/3 cup extra-virgin olive oil, more for drizzling
3 tablespoons fresh lemon juice
1 garlic clove, grated
1 teaspoon Dijon mustard
1/2 teaspoon honey
1/4 teaspoon sea salt, more for sprinkling
Freshly ground black pepper
1 1/2 cups cooked white beans, drained and rinsed (1 14-oz can)
1 tablespoon capers
1 teaspoon lemon zest
4 large eggs
- Preheat the oven to 425°F and line two large baking sheets with parchment paper.
- Place the green beans on one baking sheet and the potatoes on the other. Drizzle them with olive oil, sprinkle with salt and pepper, toss to coat, and spread the veggies in a single layer. Roast the green beans for 17-22 minutes, or until crisp and beginning to brown. Roast the potatoes until the skins are puffed and crispy and the middles are tender, about 3o minutes, stirring halfway.
- Meanwhile, make the dressing. In a small bowl, whisk together the olive oil, lemon juice, garlic, mustard, honey, 1/4 teaspoon sea salt, and several grinds of fresh black pepper.
- Place the white beans, capers, lemon zest, and 2 tablespoons of the dressing in a medium bowl and fold to combine. Set aside the beans and the remaining dressing while you prepare the eggs.
- Fill a large saucepan halfway with water and bring to a boil over high heat. Set a medium bowl of ice water nearby. Reduce the heat to a simmer, and carefully lower the eggs into the pot. Simmer for 7 minutes, drain, and transfer the eggs to the bowl of ice water to stop the cooking process. Allow them to cool in the ice water for at least 2 minutes before carefully peeling off the shells.
- Divide the roasted potatoes, green beans, and white beans among four plates and top each one with a soft-boiled egg. Season with salt and pepper and serve with generous drizzles of the dressing.
.
.
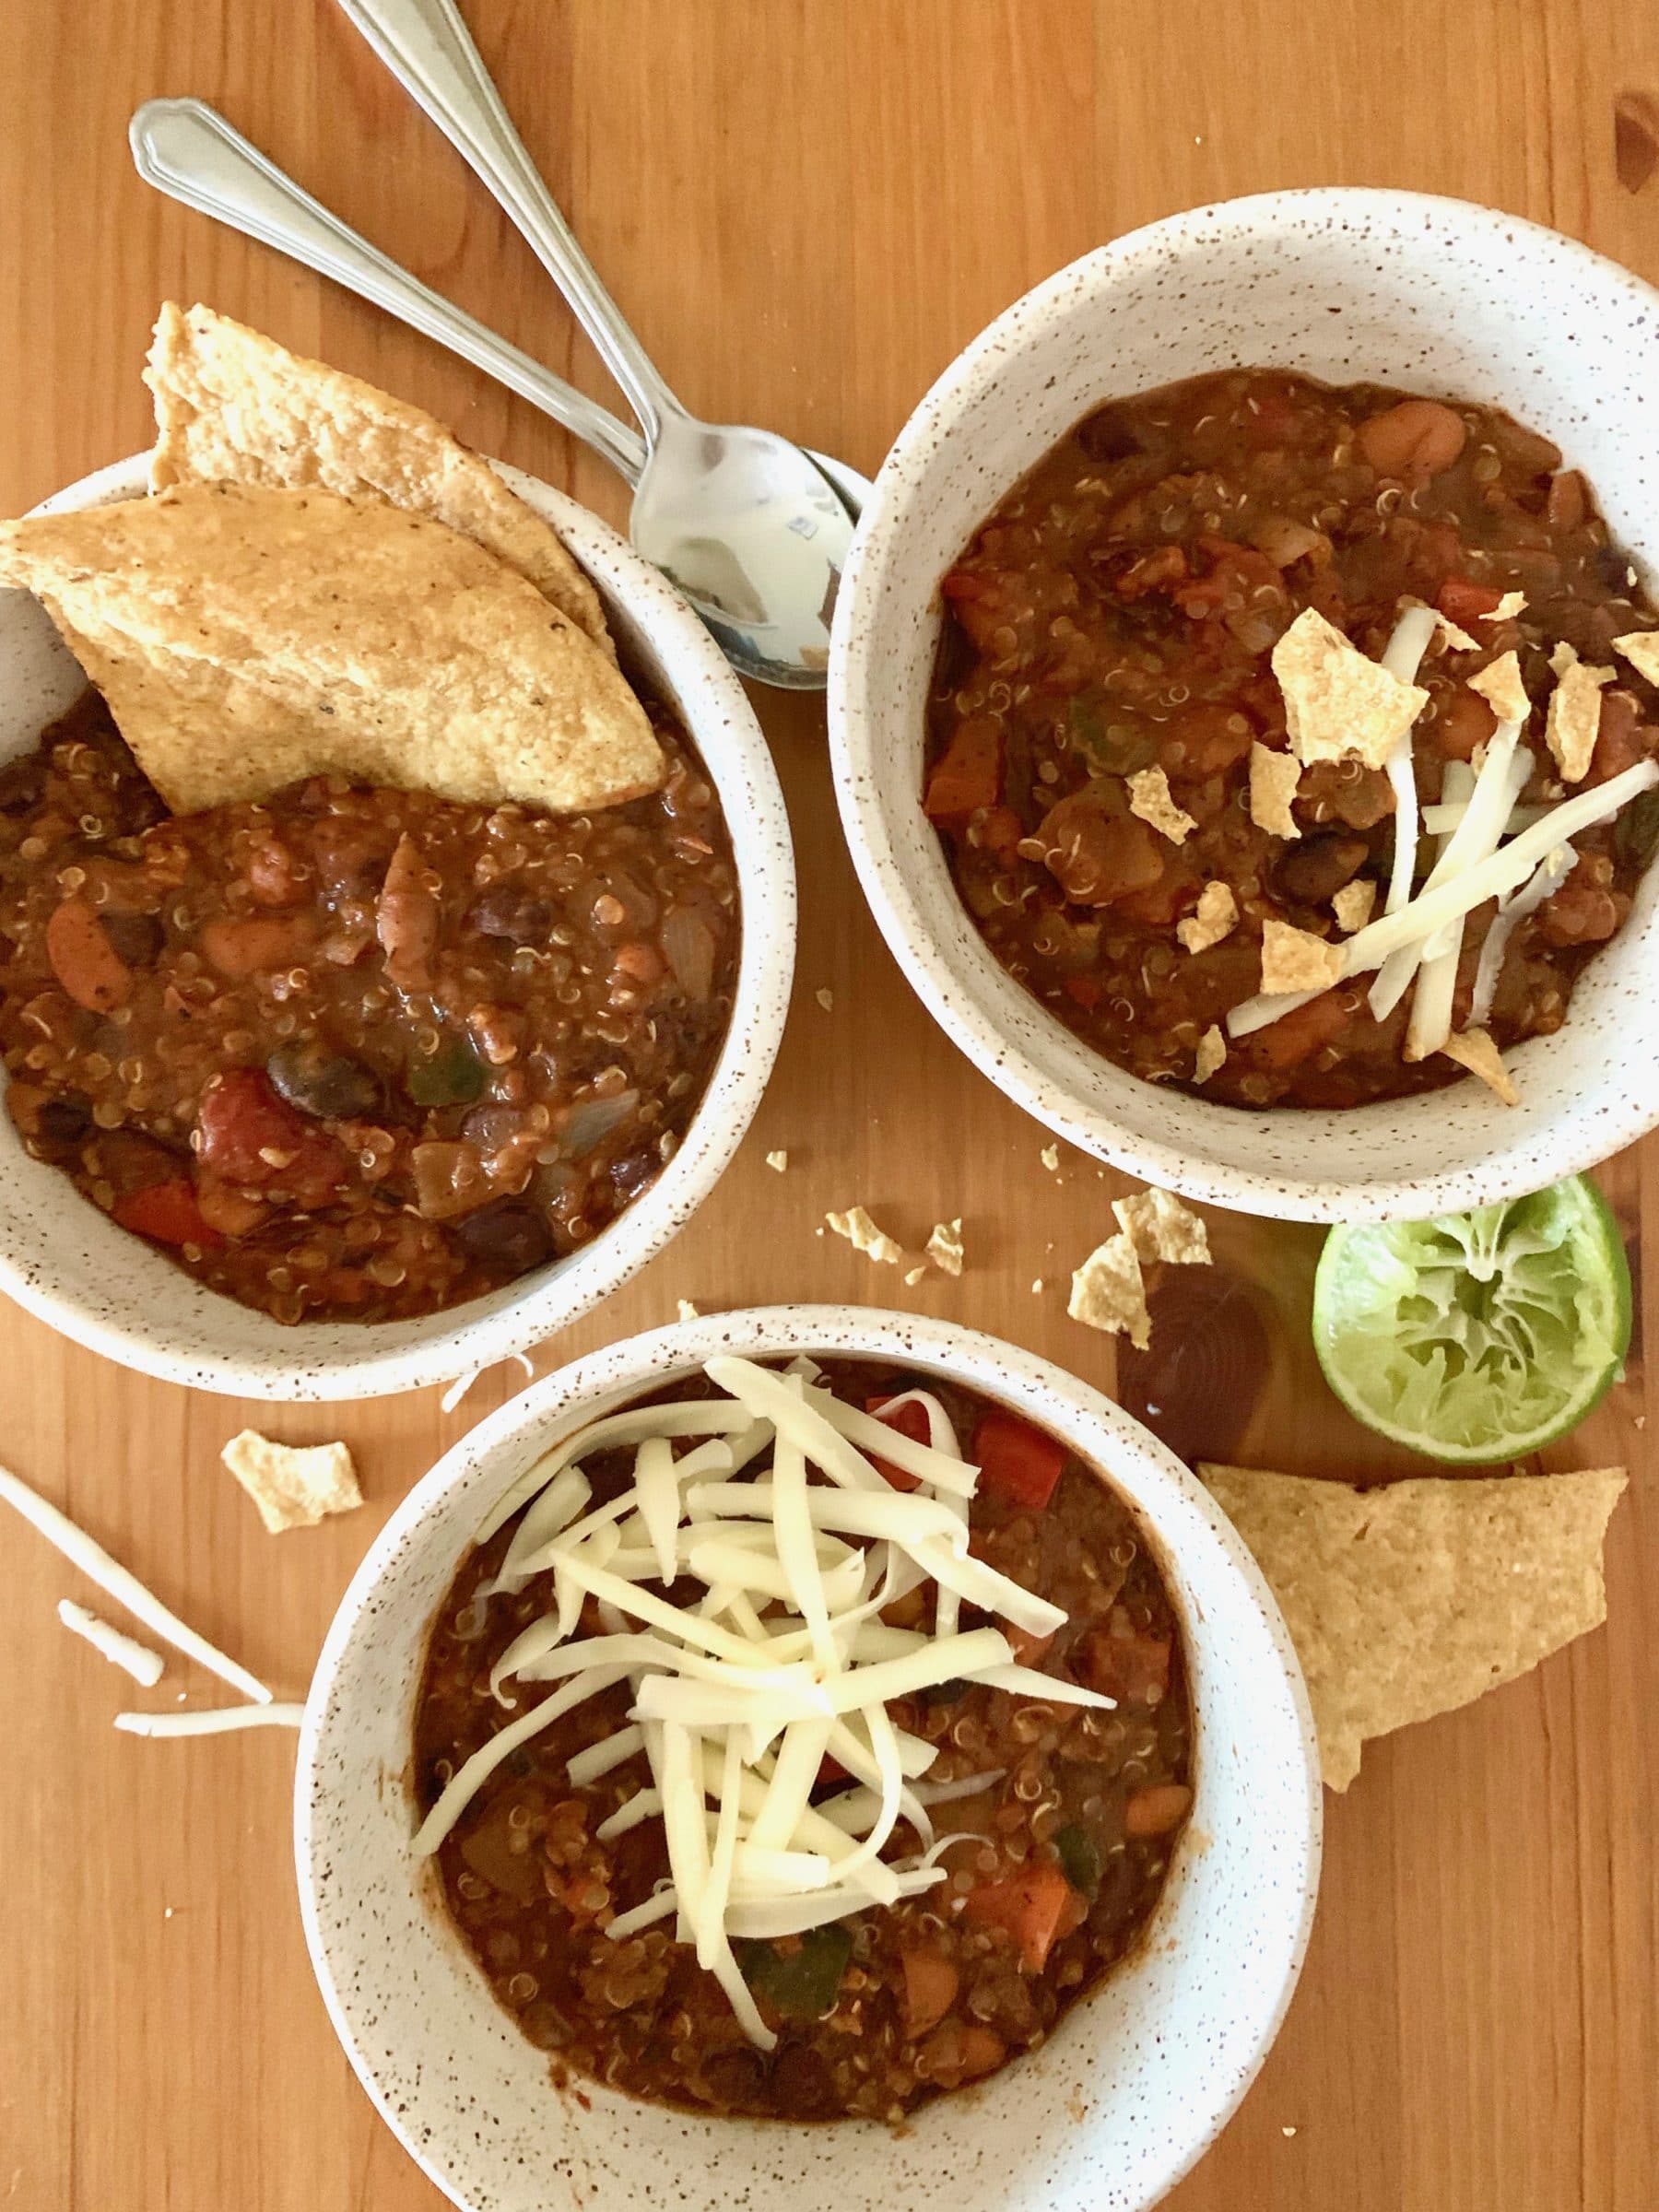
Quinoa and Black Bean Vegetarian Chili
Serve this hearty veggie chili with whatever fixings you like. Crushed corn chips, sour cream or plain Greek yogurt, grated cheddar cheese, cilantro, pickled onions, and pickled jalapeños would all be great.
Serves: 4
Prep time: 10 minutes
Cook time: 30 minutes
Ingredients
1 tablespoon extra-virgin olive oil
1 onion, chopped
1 poblano pepper, stemmed, seeded, and diced
1 bell or frying pepper, stemmed, seeded, and diced
3 garlic cloves, minced
2 tablespoons chili powder
1 teaspoon cumin
1 teaspoon coriander
1 teaspoon smoked paprika
1 teaspoon dried oregano
1 1/2 teaspoons sea salt
1 (14-ounce) can fire-roasted diced tomatoes and their juices
1 (14-ounce) can pinto beans and their liquid
1 (14-ounce) can black beans and their liquid
1/2 cup uncooked quinoa
1/2 cup water
2 tablespoons fresh lime juice
- Heat the oil in a large pot or Dutch oven over medium heat. Add the onion, poblano, bell pepper, and a pinch of salt, and cook, stirring occasionally, until soft, 5-8 minutes.
- Stir in the garlic, chili powder, cumin, coriander, smoked paprika, oregano, and salt and cook for 30 seconds, or until fragrant.
- Add the tomatoes and their juices, pinto beans and their liquid, black beans and their liquid, quinoa, and water and bring to a boil. Reduce the heat to a simmer and cook, uncovered and stirring occasionally, until the quinoa is tender and the chili has thickened, about 25 minutes.
- Remove from the heat, stir in the lime juice, and season to taste.
.
.
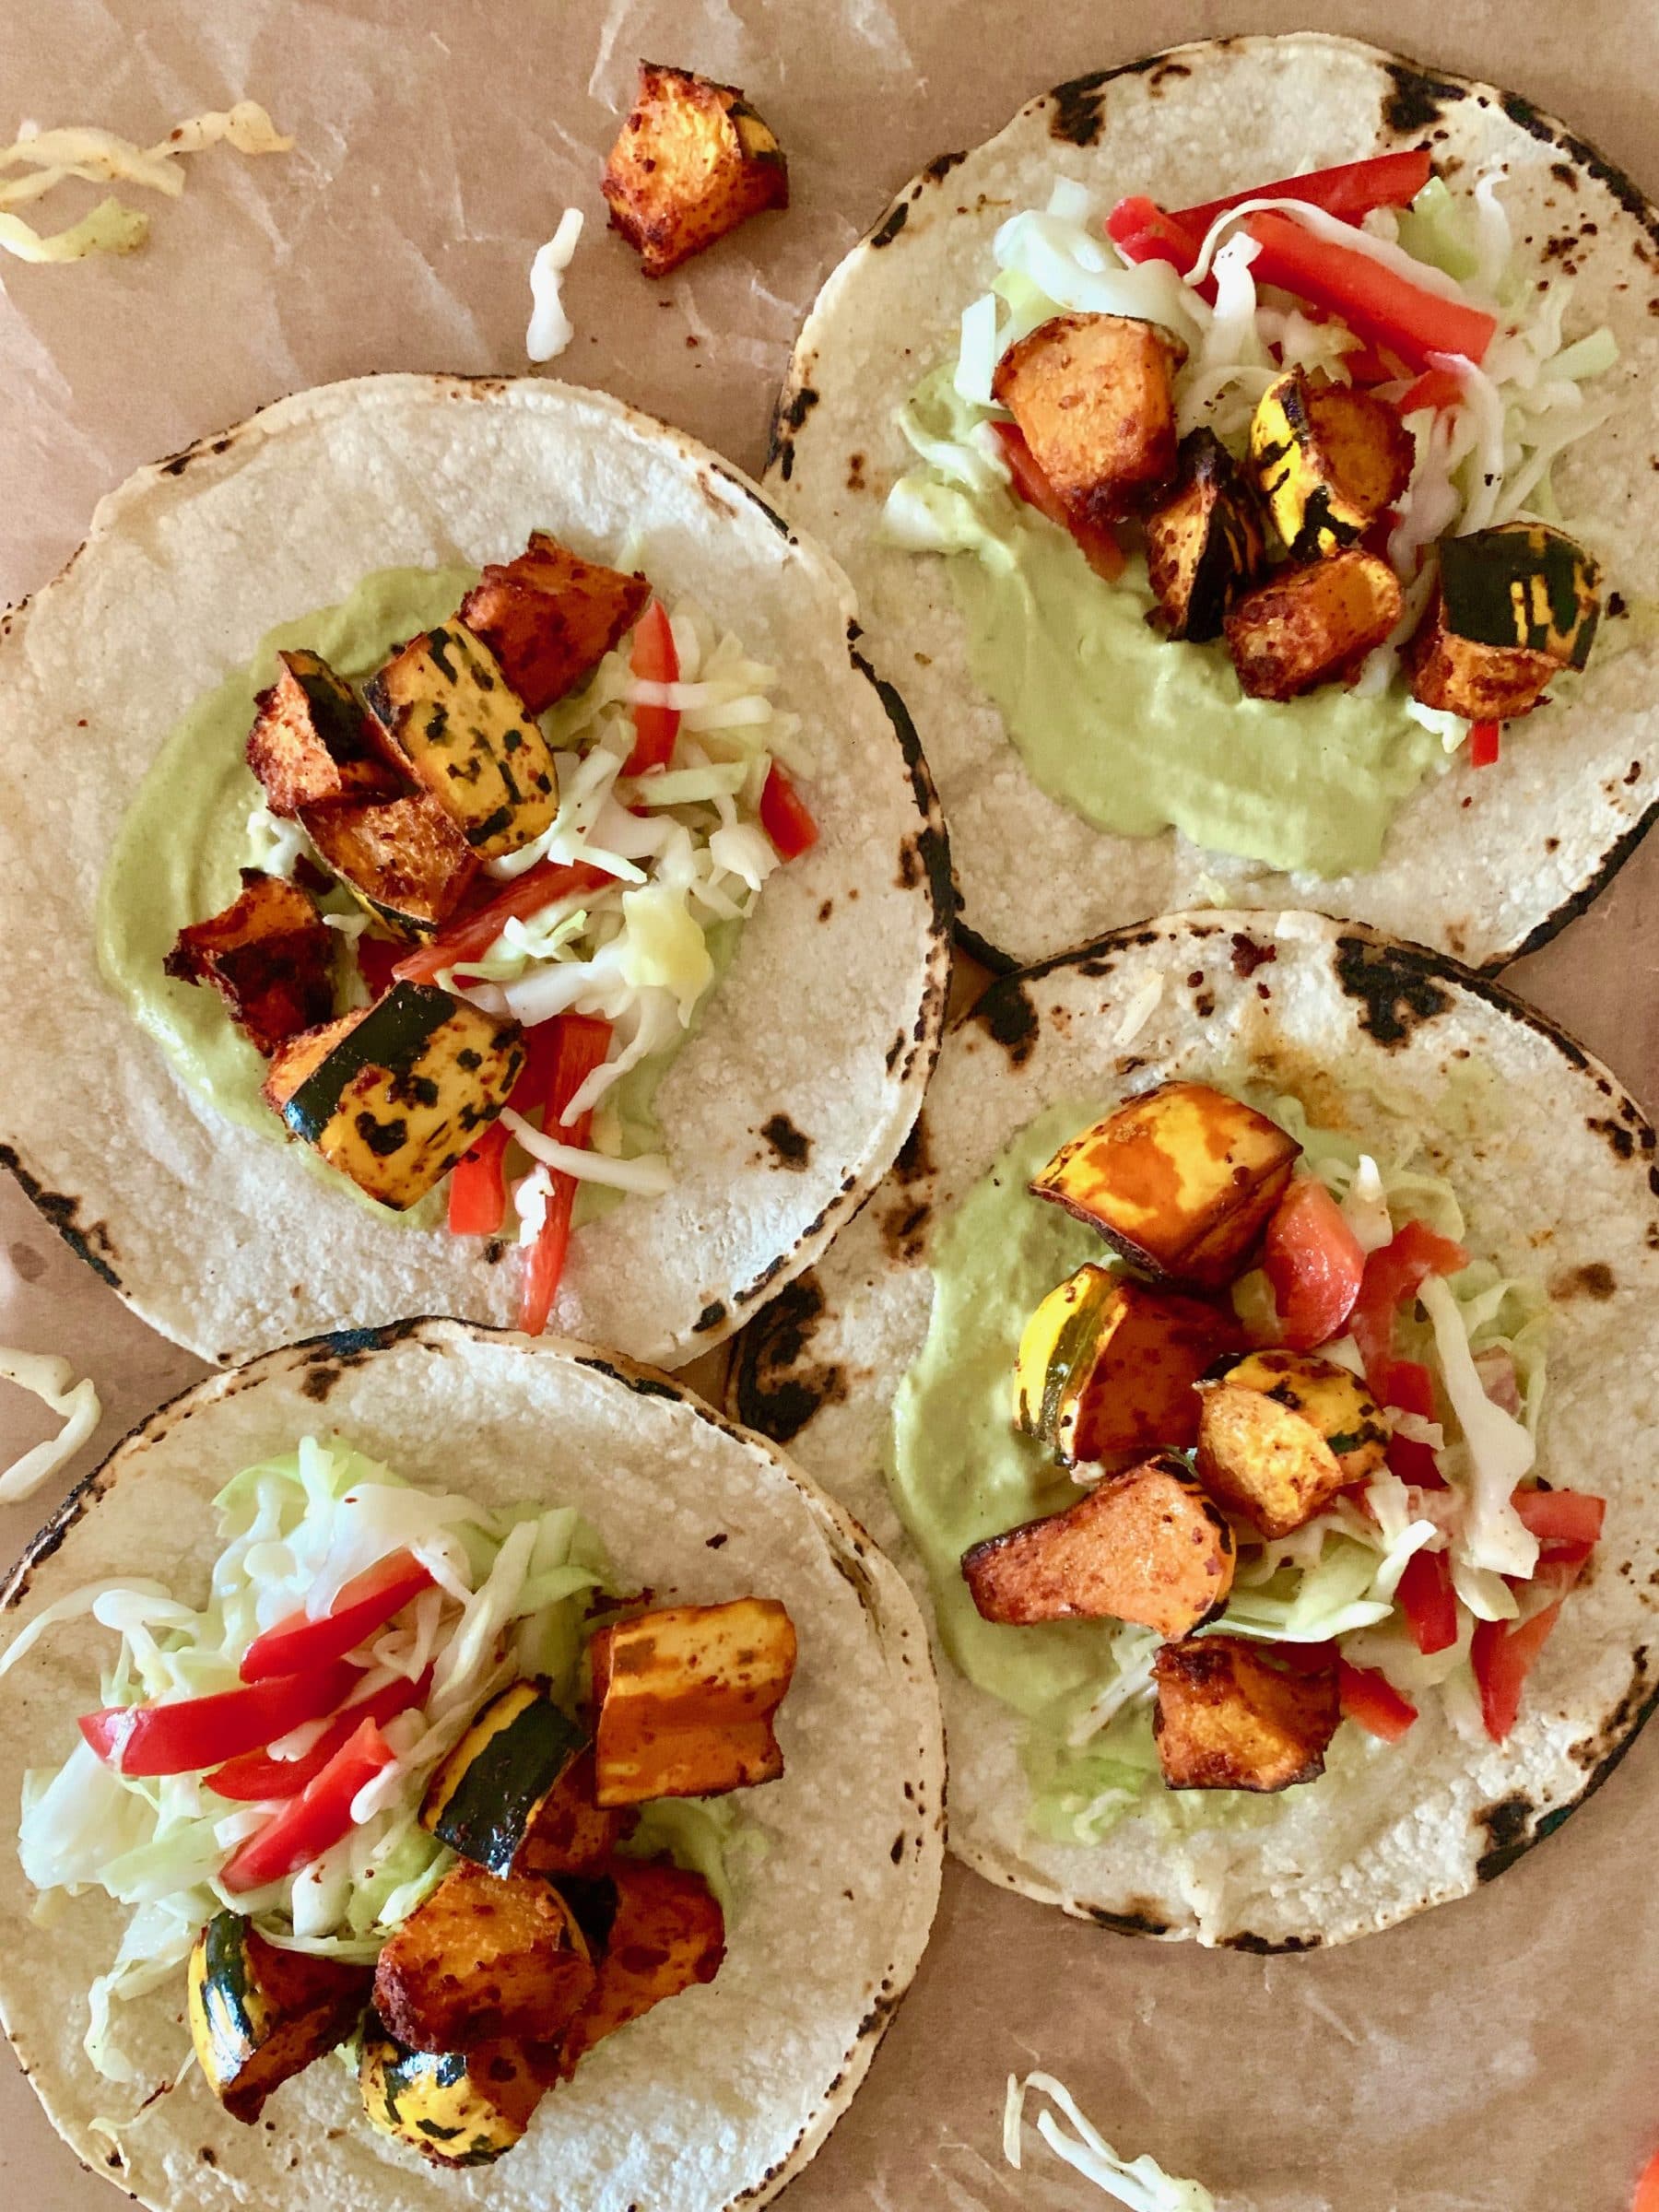
Roasted Squash Tacos with Garlic-Poblano Cream
Carnival squash’s skin is edible, so you can peel the squash or leave it un-peeled in this recipe. I typically don’t peel it (peeling acorn squash is not my favorite thing to do in the kitchen), but if you don’t love eating squash skin, go ahead and cut it off.
The poblano sauce here is delicious, but you need to blend it well to get a really creamy texture. If you don’t have a high-speed blender, such as a Vitamix, soak the cashews for at least 4 hours before making the sauce.
Serves: 4
Prep time: 20 minutes
Cook time: 50 minutes
Ingredients
For the poblano sauce
1 poblano pepper
1/2 onion, peeled and cut into wedges
2 garlic cloves, left unpeeled
1/2 cup raw unsalted cashews
3 tablespoons water
2 tablespoons extra-virgin olive oil, more for drizzling
1 tablespoon fresh lime juice
1 teaspoon rice vinegar
1/2 teaspoon garlic powder, more for sprinkling
1/2 teaspoon sea salt
For the squash
1 carnival squash, halved, seeded, and cut into 1/2-inch chunks
1 tablespoon extra-virgin olive oil
1 tablespoon smoked paprika
1 teaspoon cumin
1 teaspoon garlic powder
1/2 teaspoon sea salt
For the slaw and tacos
12 ounces green cabbage, shredded (about 1/2 one small cabbage)
1 colored bell or frying pepper, cut into 1-inch matchsticks
1 tablespoon fresh lime juice
2 teaspoons extra-virgin olive oil
1 teaspoon lime zest
1 garlic clove, grated
1/2 teaspoon sea salt
12 small tortillas, warmed
- Preheat the oven to 450°F and line two large baking sheets with parchment paper.
- Make the poblano sauce: Place the whole poblano and the onion wedges on one of the baking sheets. Drizzle with olive oil and sprinkle with salt. Wrap the unpeeled garlic cloves in a small piece of aluminum foil with a drizzle of olive oil and a sprinkle of salt. Add the foil packet to the baking sheet and roast for 20 minutes, or until all the vegetables are tender. Allow to cool slightly.
- Remove the skins from the garlic and the stem and seeds from the pepper. Transfer the roasted garlic, onion, and poblano to a high-speed blender with the cashews, water, olive oil, lime juice, vinegar, garlic powder, and salt. Blend until smooth and set aside.
- Roast the squash: Place the squash in a large bowl and toss with the olive oil, smoked paprika, cumin, garlic powder, and salt. Use your hands to make sure the squash is well-coated, then spread it in an even layer on the remaining baking sheet. Roast for about 30 minutes, or until you can easily pierce the squash with a fork, stirring every 10 minutes.
- Meanwhile, make the slaw: Place the cabbage and pepper in a large bowl and toss with the lime juice, olive oil, lime zest, garlic, and salt.
- Assemble the tacos in the tortillas with a big spoonful of the poblano sauce, a scoop of the slaw, and several pieces of the roasted squash.
.
.

Cozy Cabbage and Farro Soup
From Smitten Kitchen
This recipe is an adaptation of the cabbage soup from the cookbook Six Seasons by Joshua McFadden, which is an excellent guide to cooking with seasonal vegetables. In the book, Joshua says that this soup has “a definite grandma vibe,” which is true in the best way. It’s comforting, nourishing, and deeply flavorful. Serve with good crusty bread.
.
.
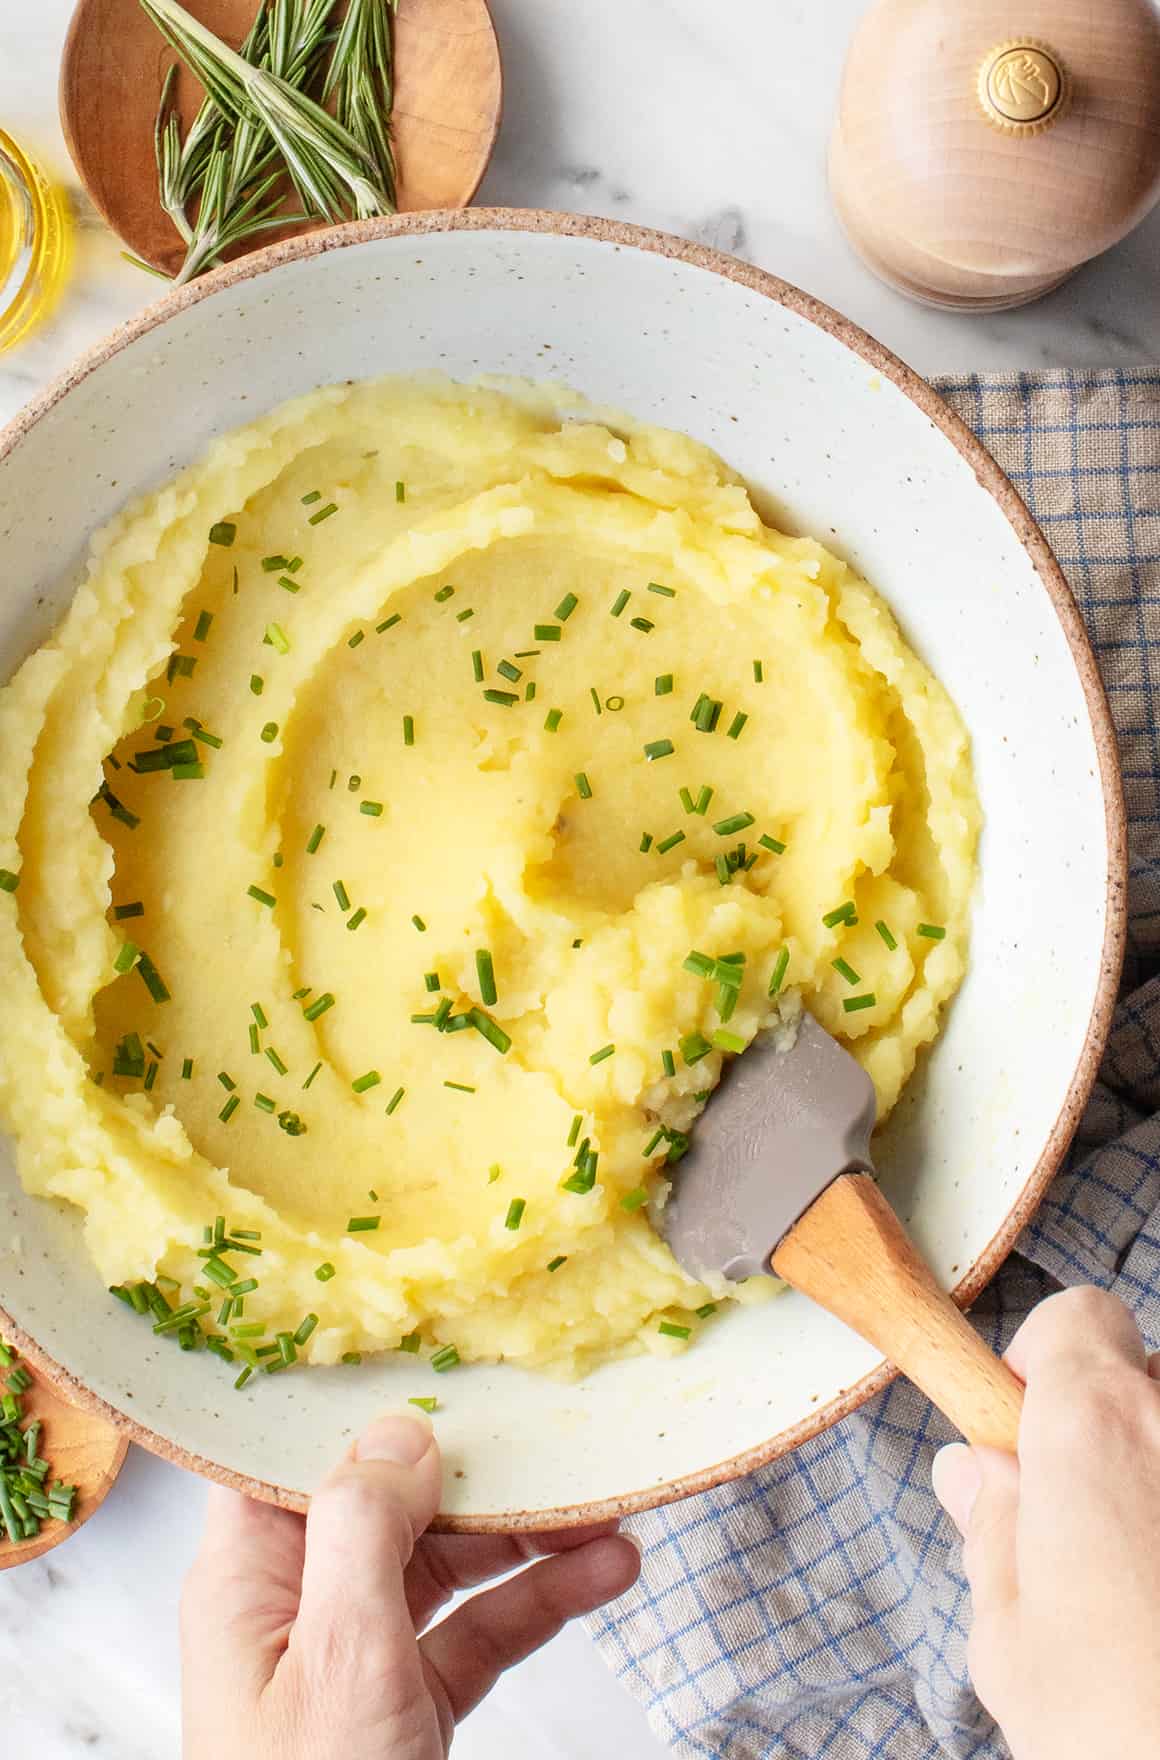
Roasted Garlic Mashed Potatoes
From Love & Lemons
I love this recipe, which yields light and creamy mashed potatoes with a rich garlic flavor.
.
.
Smoky Sautéed Cauliflower with Green Beans, Tahini, and Almonds
From The First Mess
A tasty, out-of-the-box veggie side dish. If you don’t have fresh thyme on hand, substitute 1/2 the amount of dried thyme.
.
.

Creamy Potato Soup
From Love & Lemons
This smoky, tangy soup is such a cozy fall meal! It’s great topped with shredded cheese and/or sour cream, but if you skip those garnishes, it’s entirely vegan. Its rich, creamy texture comes from blended white beans and potatoes instead of dairy.
Week #19.
- On: September 22, 2021
- 0
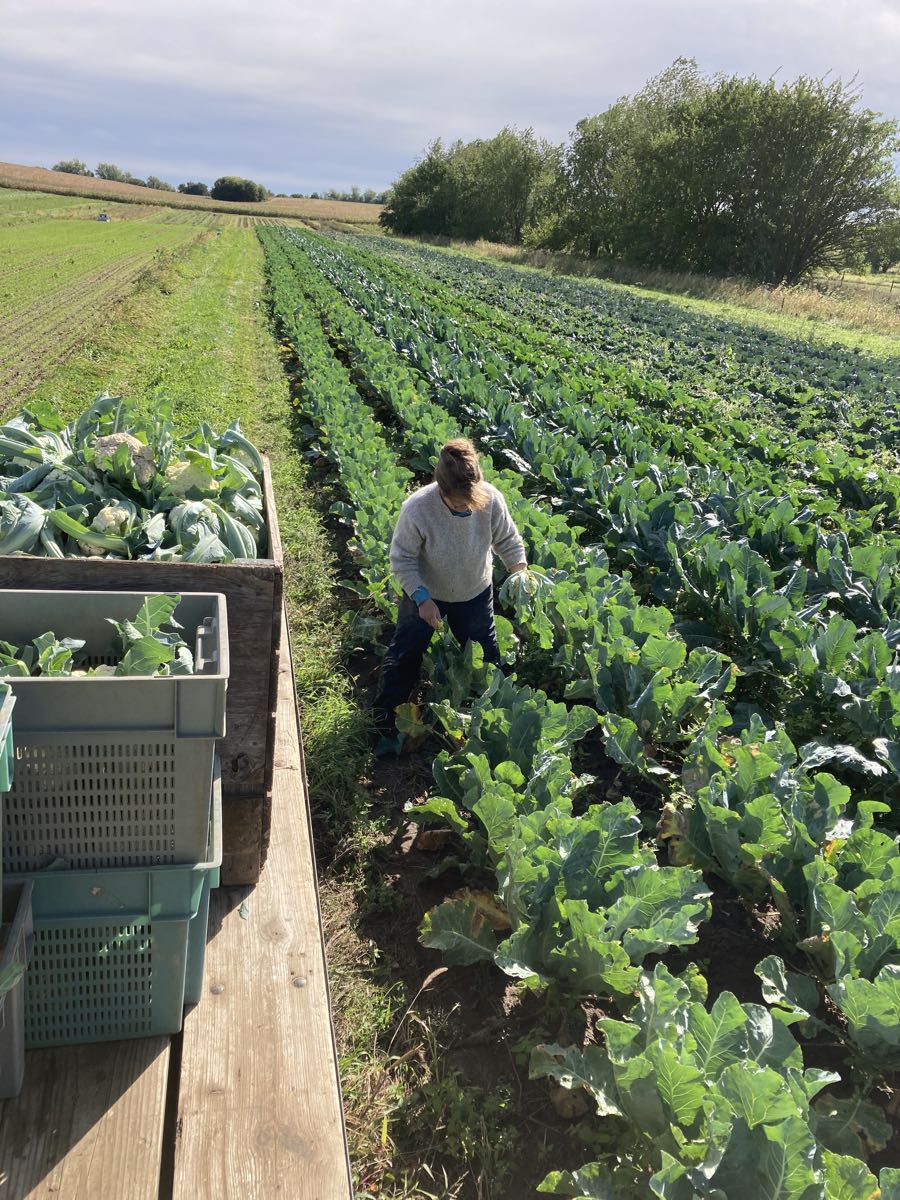
The farm is beautiful in fall. Work has slowed slightly so we’re able to enjoy our work more now. Above, Kristin cuts cauliflower and throws it to me on the wagon, to count and pack into bins. We’re glad cauliflower harvest has started. We’ll have enough for all the sites soon.
Veggie List & Veggie Notes
Week #19, September 23/24, 2021
– Weekly shares
– EOW/ purple
– Sampler/ sun
Green beans, 2 lb
Bok choy, 1 head
‘Jester’ winter squash, 1
Summercrisp lettuce
Tomatoes, ~2 lb, mixed plum & slicing
Red frying peppers, ~2
Oranos snack peppers, ~4
Jalapeno chile (HOT)
Onion, 1
Basil, 1 sprig
Garlic, 1 bulb
– Some sites get cauliflower.
– Some sites get a second ‘Jester’ winter squash
Next week’s box will probably contain green beans, winter squash, potatoes, peppers and more.
Green beans – Wow, this planting is successful! Enjoy them fresh or blanch and freeze for winter.
Bok choy (large rosette with thick white stems and green leaves) – This Asian green is good for stir-frying or sautéing or in soup. You can think of the stems and leaves as two separate vegetables. The stems require longer cooking. The leaves will cook almost as quickly as spinach. Bok choy stores well, so feel free to pull off leaves as you need them, or use the whole head at once. Storage: Refrigerate in a plastic bag or other container.
Jester winter squash – This is a cross which gets its shape from its acorn parentage, and it’s flavor from its sweet dumpling parentage. These Jester are delicious and ready to eat. Simply roasting cut halves shows off their flavor. They will not store well. Plan to eat within two weeks. Read last week’s newsletter for lots of information about winter squash.
Summercrisp lettuce – This last lettuce of the season is a variety that tolerates hot weather. Summer is a difficult time to grow lettuce – it prefers cooler weather – so this type is helpful.
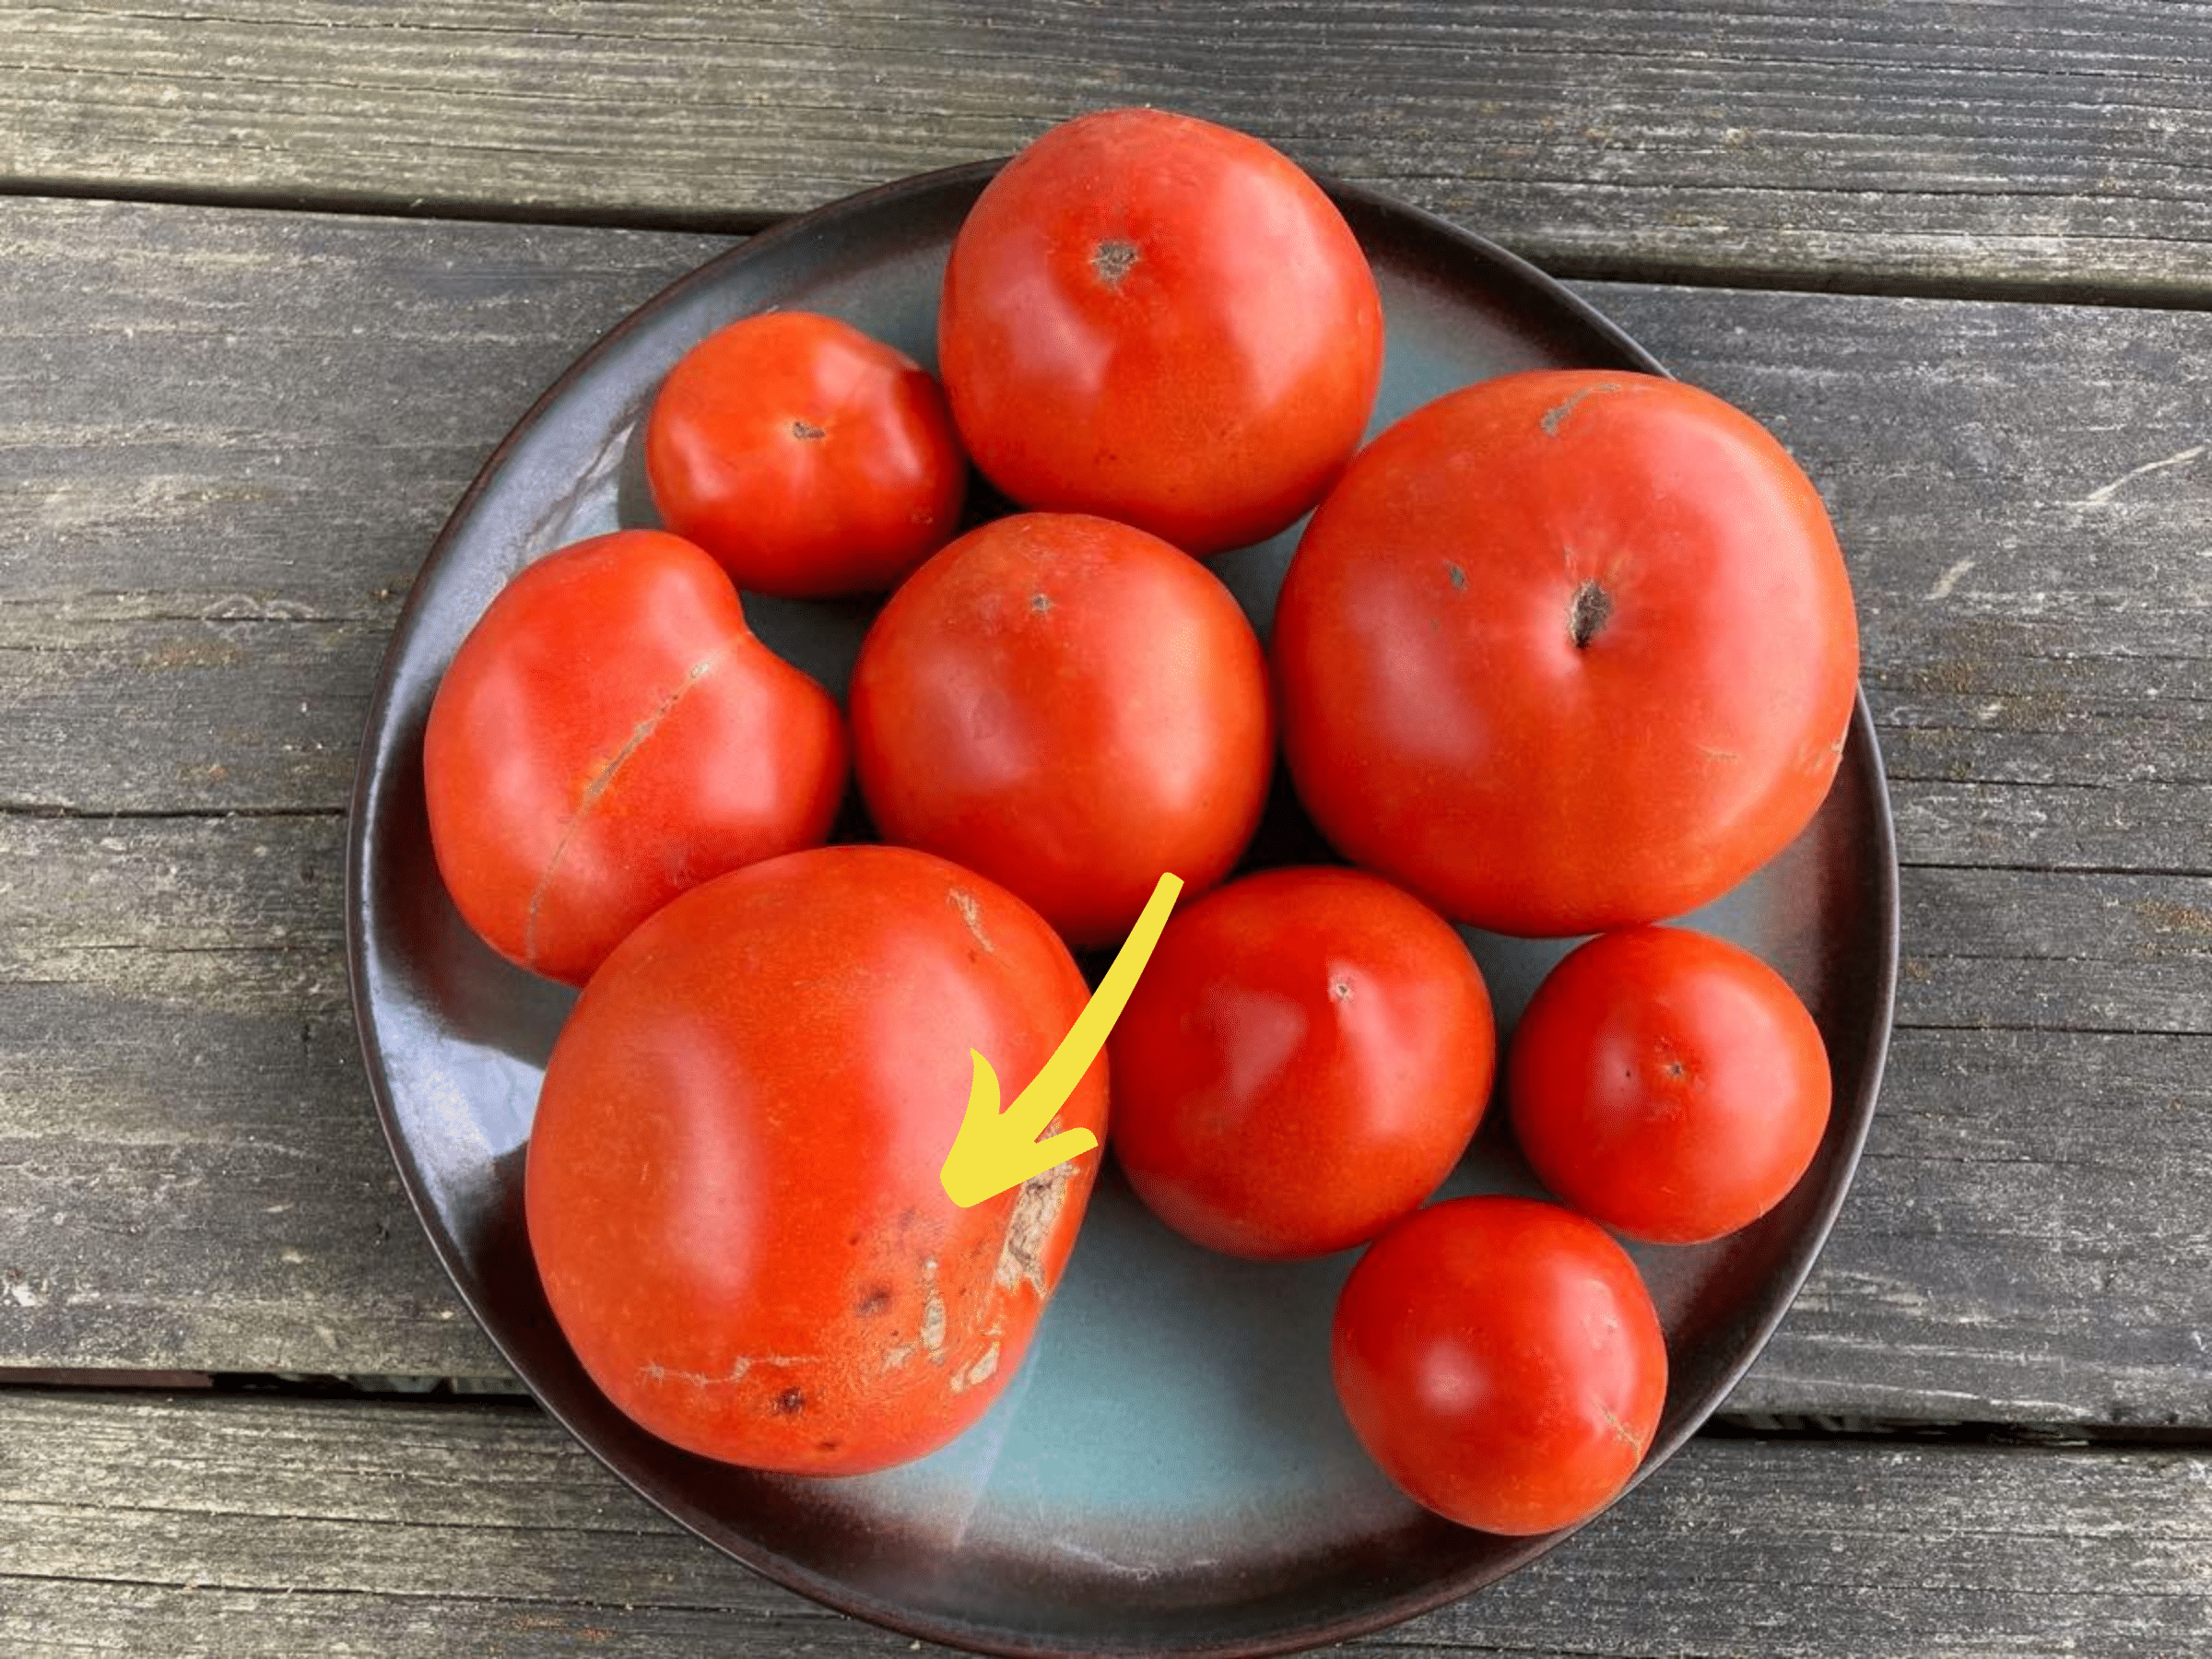
Keep an eye on your tomatoes
We’re at the end of the season and these tomatoes will not last. Spread them on a plate and keep on your kitchen counter so you can quickly identify and eat any that develop flaws. They taste pretty darn good for this time of year! Don’t keep in the paper bag.
Veggie ID
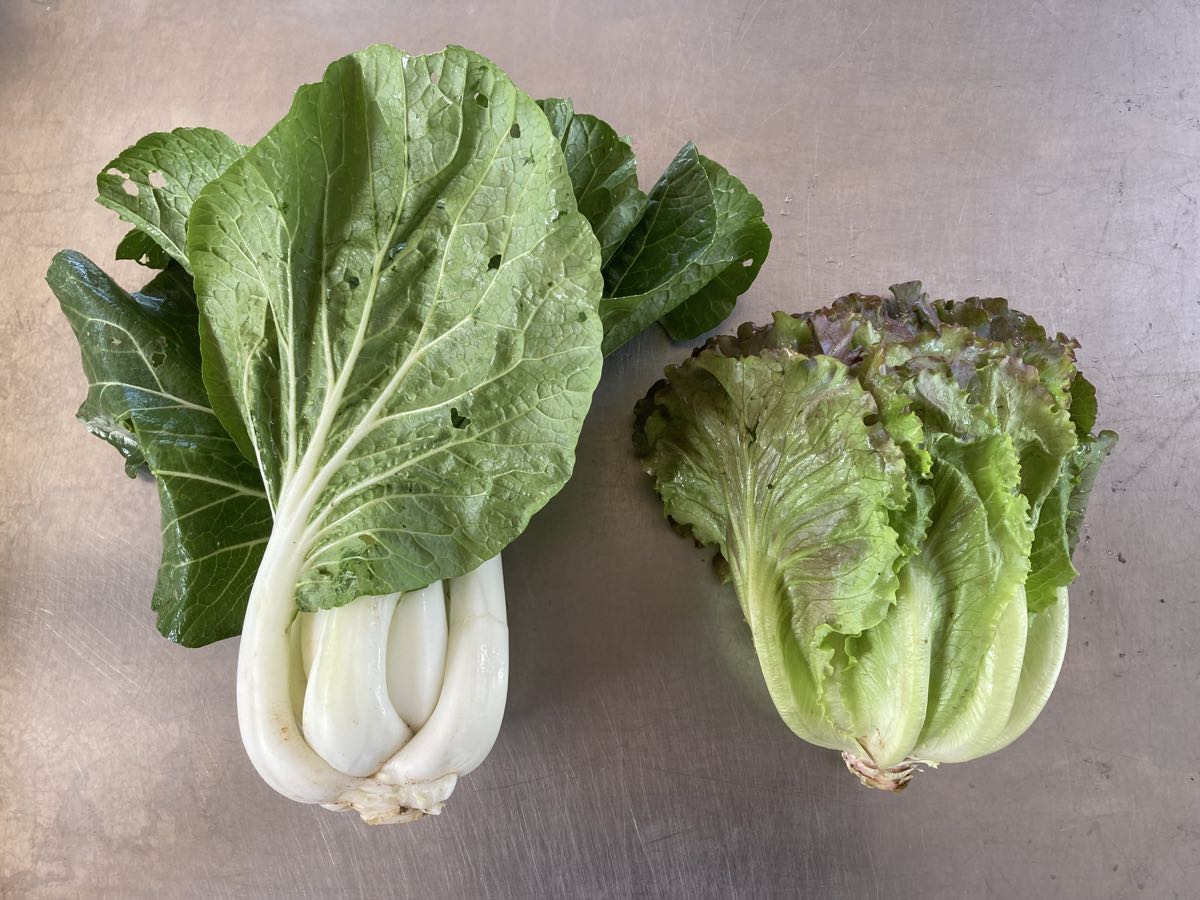
Bok choy (left) and Summercrisp lettuce. The lettuce varies in how much it’s tinged with red.
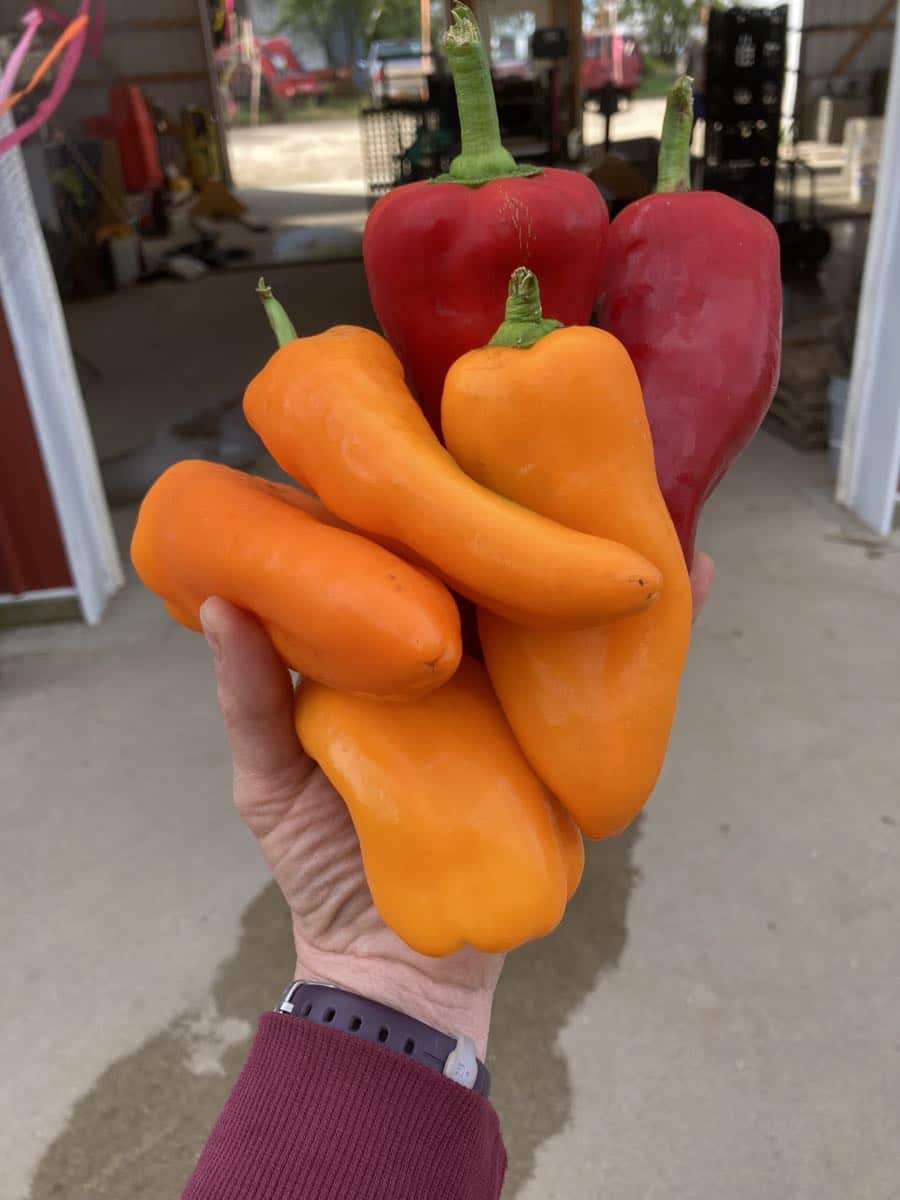
Oranos snack peppers (orange) and frying peppers (red). If you receive a yellow pepper, then it’s a frying pepper. There will be occasional bell peppers.
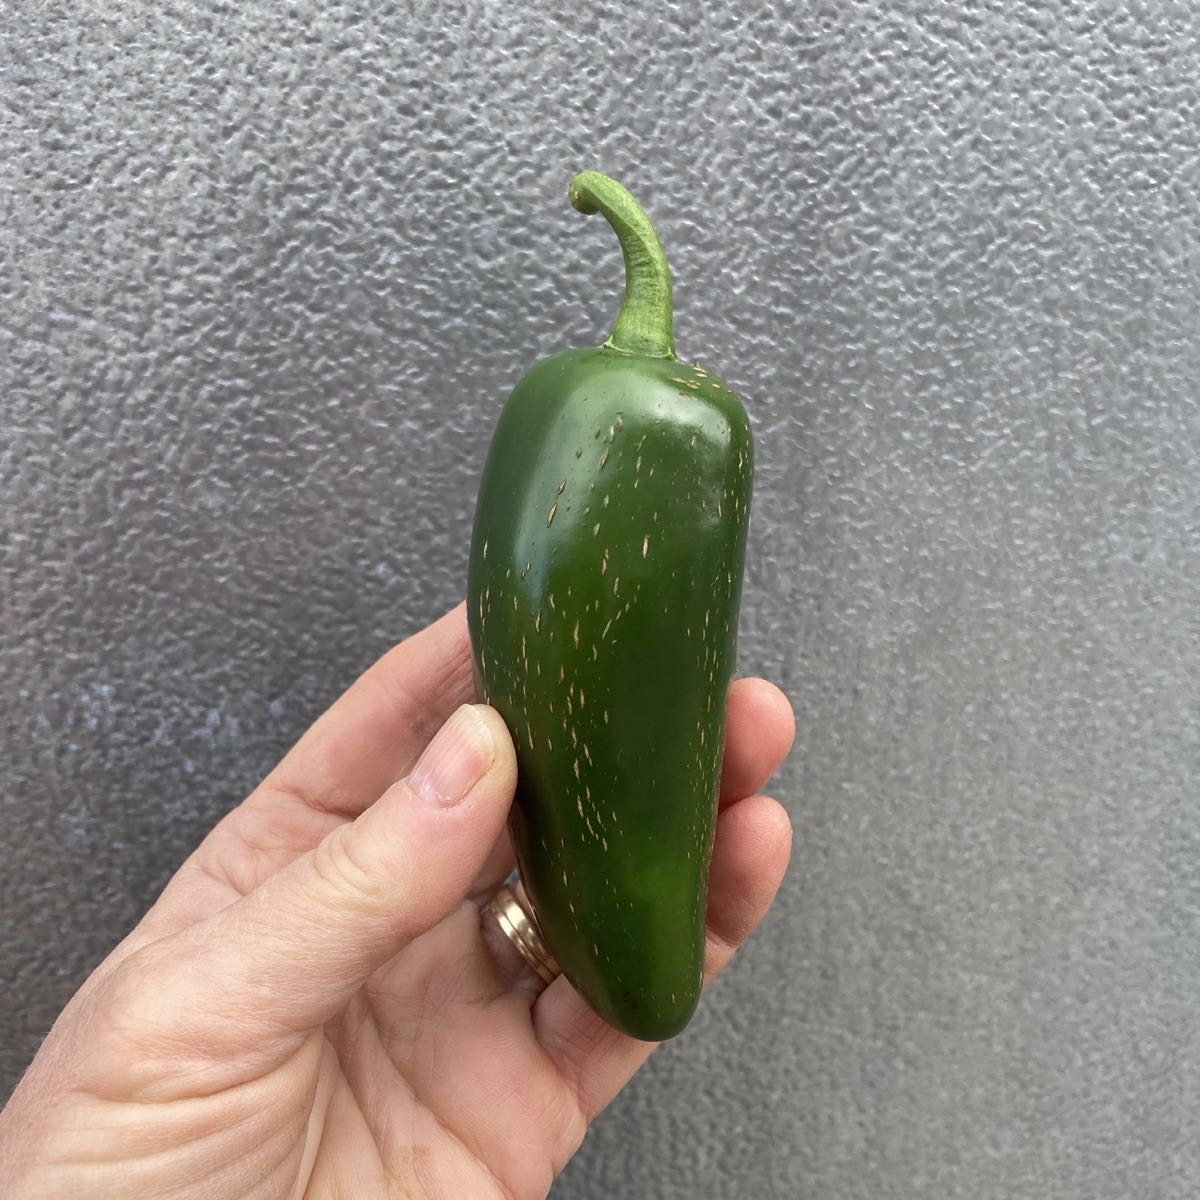
Jalapeno chile. HOT!
RECIPES from DEB
Visit our 2020 Recipe Log or our 2019 Recipe Log.
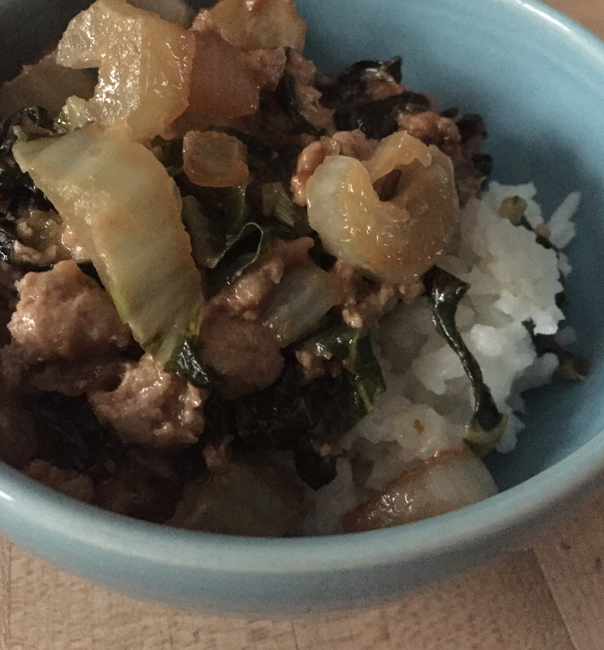
Bok choy, red pepper, and ground turkey, or pork, or tofu stir fry
Serves 6-8
Takes about 30 minutes, longer to cook brown rice
For serving:
1 1/2 cups white or brown rice
Sauce:
1/3 cup soy sauce
2 tablespoons Hoisin sauce
1-2 tablespoons dark brown sugar
1 tablespoon sherry or white wine (optional)
1 tablespoon sesame oil
1/2 cup chicken or vegetable stock or water
1-2 tablespoons cornstarch
Optional – pinch red pepper flakes or a good squirt of chili-garlic sauce, like Siracha
Stir Fry:
1 pound ground turkey, or pork, or a 12-14 ounce package of tofu
1 cup onion, sliced pole to pole
2 garlic cloves minced or put through a press
4 cups sliced bok choy, leaves and stems separated
1-2 frying peppers, thinly sliced
Optional – in lieu of red pepper flakes in the sauce, 1 jalapeño, finely chopped
1-2 tablespoons vegetable oil
First, put the rice on to cook.
Then, mix up all the sauce ingredients, except the cornstarch.
Heat 1 tablespoon of the vegetable oil in a wide deep skillet or wok, and brown the turkey (or pork). Add about half of the sauce to the pan, when the meat is almost done. If you are using tofu, crumble it, and brown it, and then add the sauce when it is browned on all sides. Transfer the mixture to a bowl or plate, and wipe out the skillet.
Add another tablespoon of the vegetable oil to your skillet, and stir fry the veggies in the order given: onion, garlic, bok choy, peppers. When the vegetable are almost done, add the protein mixture back into the pan. Mix the cornstarch into the sauce and add that, stirring so that everything is glazed nicely as it thickens.
Enjoy over rice.
.
.

Pumpkin (or winter squash) Scones with Maple Glaze
Make 12 scones
Takes about 45 minutes
3 cups flour
3 tablespoons sugar
1 teaspoon cinnamon
1/2 teaspoon ground nutmeg, freshly grated
1/2 teaspoon ginger, or 1 tablespoon grated fresh ginger
OR omit the other spices and use to 2 teaspoons pumpkin pie spice
1/2 teaspoon salt
1 tablespoon baking powder
3 tablespoon butter
1 cup pumpkin or winter squash puree (approximately the yield of one roasted squash!)
1 egg
3 tablespoons honey
2-3 tablespoons milk, if necessary
Optional: up to 1 cup chopped dates, cinnamon chips, nuts, dried cranberries
Icing
1 cup confectioners’ sugar
3 tablespoons maple syrup
Preheat the oven to 400 degrees.
Combine flour, sugar, spices, and baking powder in a bowl. Slice butter on top, and cut in with a pastry blender until the mixture has a meal-like consistency. Mix the pumpkin, egg, and honey, and add to the flour mixture, mixing and kneading until you have a soft dough, adding optional milk if necessary.
Divide the dough in half and on a floured surface, roll or pat it into two 8-9 inch circles, and cut each into 6 wedges. Place on a parchment lined, or un-greased baking sheet, and bake in the oven until browned and firm.
Combine the icing ingredients while the scones bake. Drizzle the icing over the scones after they have cooled for about 10 minutes.
.
.
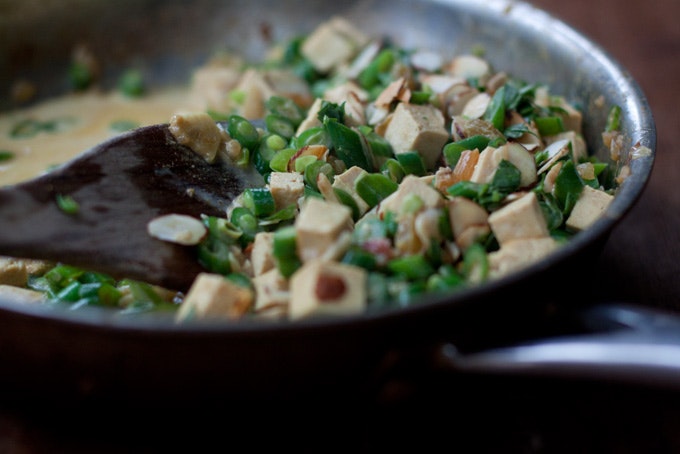
Photo by Heidi Swanson
Feisty Green Beans
From 101 Cookbooks.
Serves 4-6
Takes 45 minutes
From Heidi Swanson’s 101 Cookbooks, Heidi says this recipe does have a lot of ingredients, but is worth making as written at least once. You’ll also find recommendations for substitutions, and even more related green bean recipes, at the website.
.
.
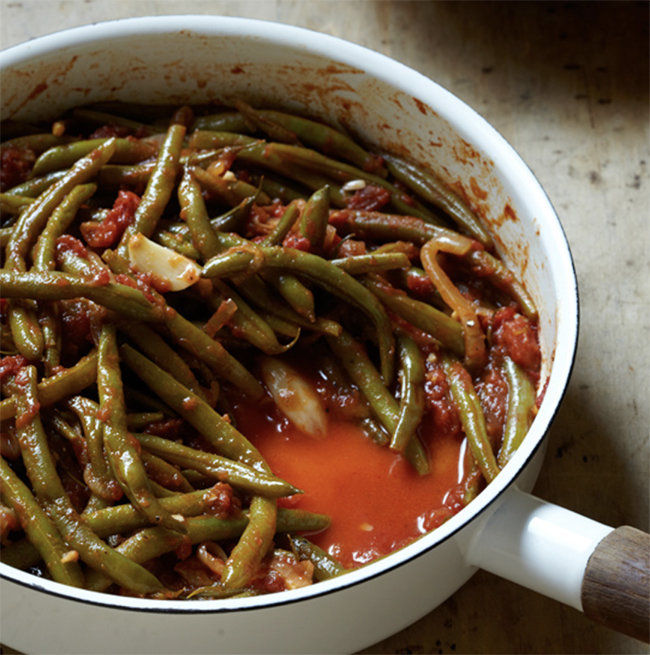
Photo by Christopher Testani
Braised Green Beans with Tomatoes and Garlic Recipe
From Food and Wine.
Makes 8 servings
Takes 30 minutes active time + 40 minutes braising
There are A LOT of recipes for green beans braised with tomatoes out there; this one, by Rita Nakouzi, from Food & Wine, uses canned tomatoes, but fresh tomatoes from this week’s box, peeled and diced, are even better. Deborah Madison’s version from Vegetarian Cooking For Everyone layers onions, the beans, and diced tomatoes in a deep skillet, seasoned with whole cumin seeds and dill. Smitten Kitchen also offers a recipe for long cooked beans – Braised Romano Beans, that could be made with skinnier green beans.
.
.
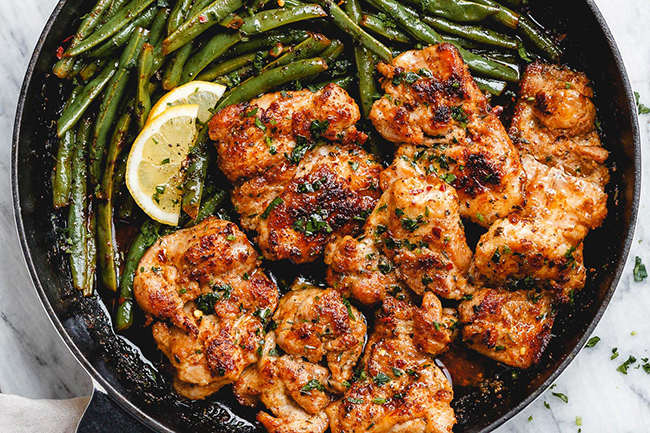
Photo by Eatwell101.com
Lemon Garlic Butter Chicken Thighs with Green Beans
From eatwell 101
Makes 3 servings
Takes 30 minutes
In this recipe from Eatwell 101 the green beans out number the chicken with delicious results!
.
.
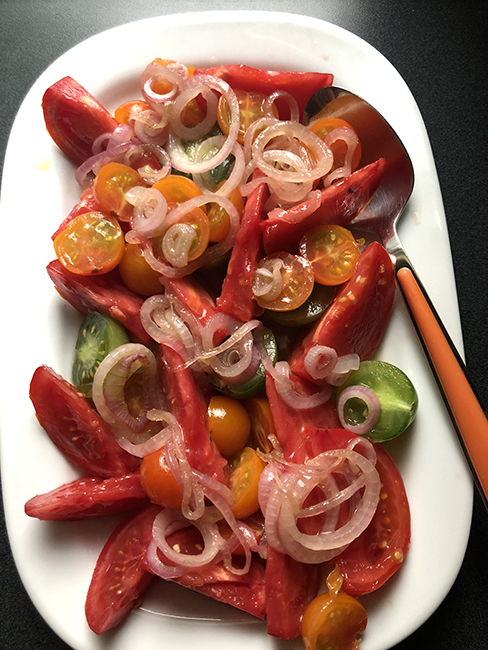
Tomato Salad with Warm Shallot Dressing
From Deb’s Lunch
Serves 3, easily doubled
Takes less than 20 minutes
This is really non-recipe recipe – you can make it with any variety of tomatoes that you have and sub in onions or garlic for the shallots. Serve on a bed of the fresh lettuce from this week’s box.
.
.
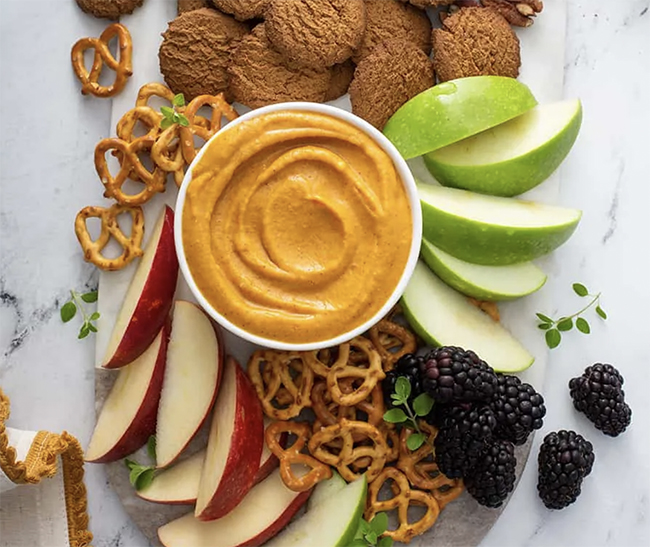
Photo by My Baking Addiction
Sweet Pumpkin (or winter squash) Dip
From My Baking Addiction
Makes 16 servings
Takes 10 minutes active time + 3 hours to chill
My Baking Addiction suggests serving this sweet dip with mainly sweet dippers – apples, pretzels, ginger snaps – but few strips of the red or orange peppers from this week’s box would not be out of place in the assortment.
Week #18; Winter squash season begins!
- On: September 15, 2021
- 0
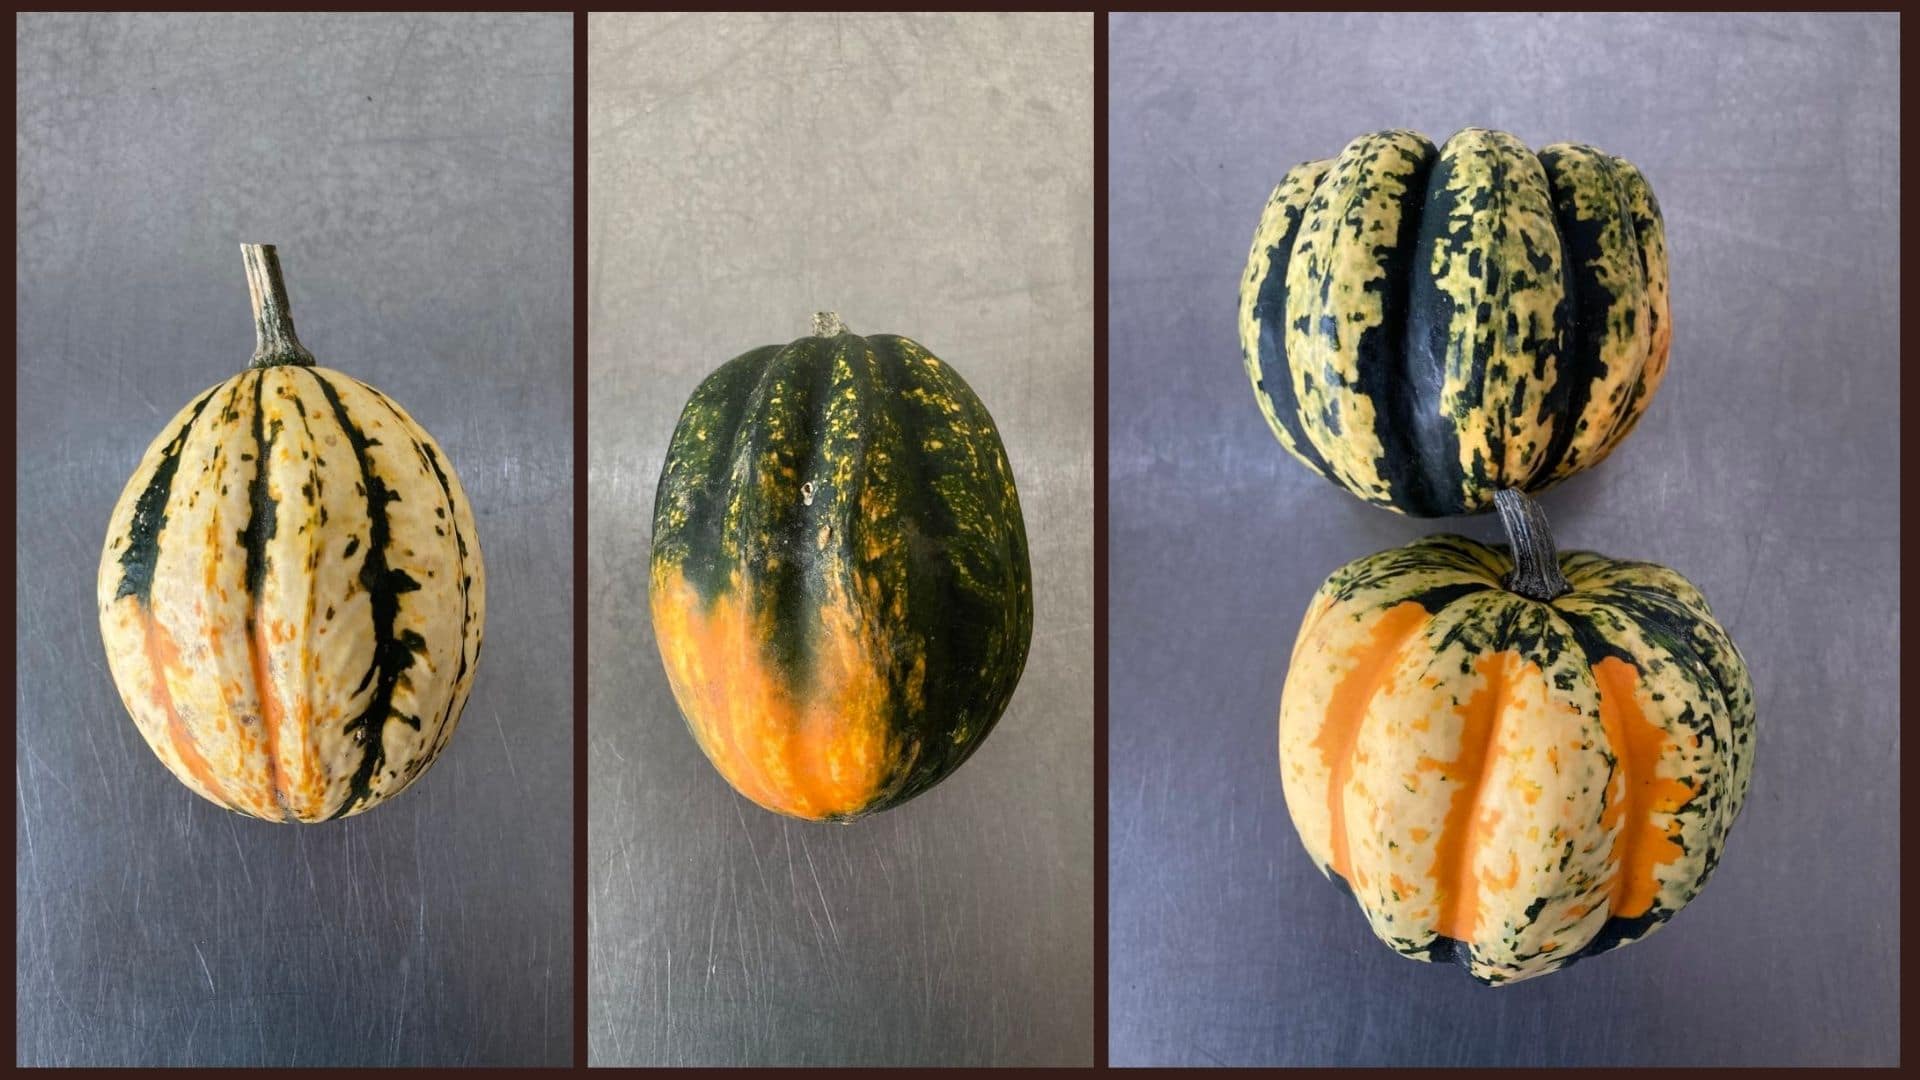
Everyone gets two acorn squash this week. One Jester (top) or Starry Night (middle) plus one Carnival (bottom).
We used to grow traditional green acorn squash but switched to the newer striped varieties because they taste better, the plants are more vigorous, and the squash are so pretty. Some Carnival squash are have yellow and orange stripes, some are green and cream. The colors vary with temperature during pollination.
Winter Squash Primer
We expect to have a steady supply of squash over the coming weeks. Let’s review some basics about winter squash.
Expected life: Some winter squash varieties are ready to eat soon after harvest, others store deep into winter. This week’s acorns are cured and ready to eat. Plan to eat these early varieties within two weeks of delivery. Jester has the shortest storage life, so eat that first if you receive one. Check our newsletter each week for storage information about squash delivered that week.
Storage: Do not refrigerate! Winter squash store best at room temperature with good air circulation. No cooler than 50 degrees. On your kitchen counter is good, where you can keep an eye on them. If you see deterioration, cook promptly. These early squash are not intended for storage. Do not cover – that promotes mold.
To make squash easier to cut: Microwave on high for 30 to 60 seconds, depending on size of the squash. This will soften the rind and flesh, making it much easier to cut.
Beth’s favorite simple preparation (acorn or butternut): Winter squash are easily roasted in a 400F oven. The goal is to get brown, caramelized edges.
– Split in half with a sharp knife.
– Scoop out and discard seeds.
– Run the squash briefly under running water, then shake off the excess water. Place cavity-side-down on an oiled baking sheet. The little bit of moisture seals the squash to your roasting pan. The water soon evaporates, allowing the squash to brown and caramelize. Caramelization really boosts the flavor.
– Roast at 400F until easily pierced with a fork, 30 – 45 minutes depending on size. Flip over while hot. Add a little butter to melt and some seasoned salt. Cut into wedges and eat.
Stuffed squash
Acorn squash have a central cavity perfect for stuffing. Prepare your favorite fully-cooked stuffing, e.g. a rice or quinoa mixture. Roast your squash as described below. Preheat the stuffing. Fill the cooked squash with stuffing, top with grated cheese and return to the oven until everything is hot.
Can you eat the rind? In my opinion, rinds on these acorn squash are too tough to eat. Steve eats the Jester rind. I don’t.
We pick, you wash. We remain short-handed this fall yet our crops are abundant. We are committed to getting them harvested and delivered to you, but have to focus on the essentials. You can help by washing your squash!
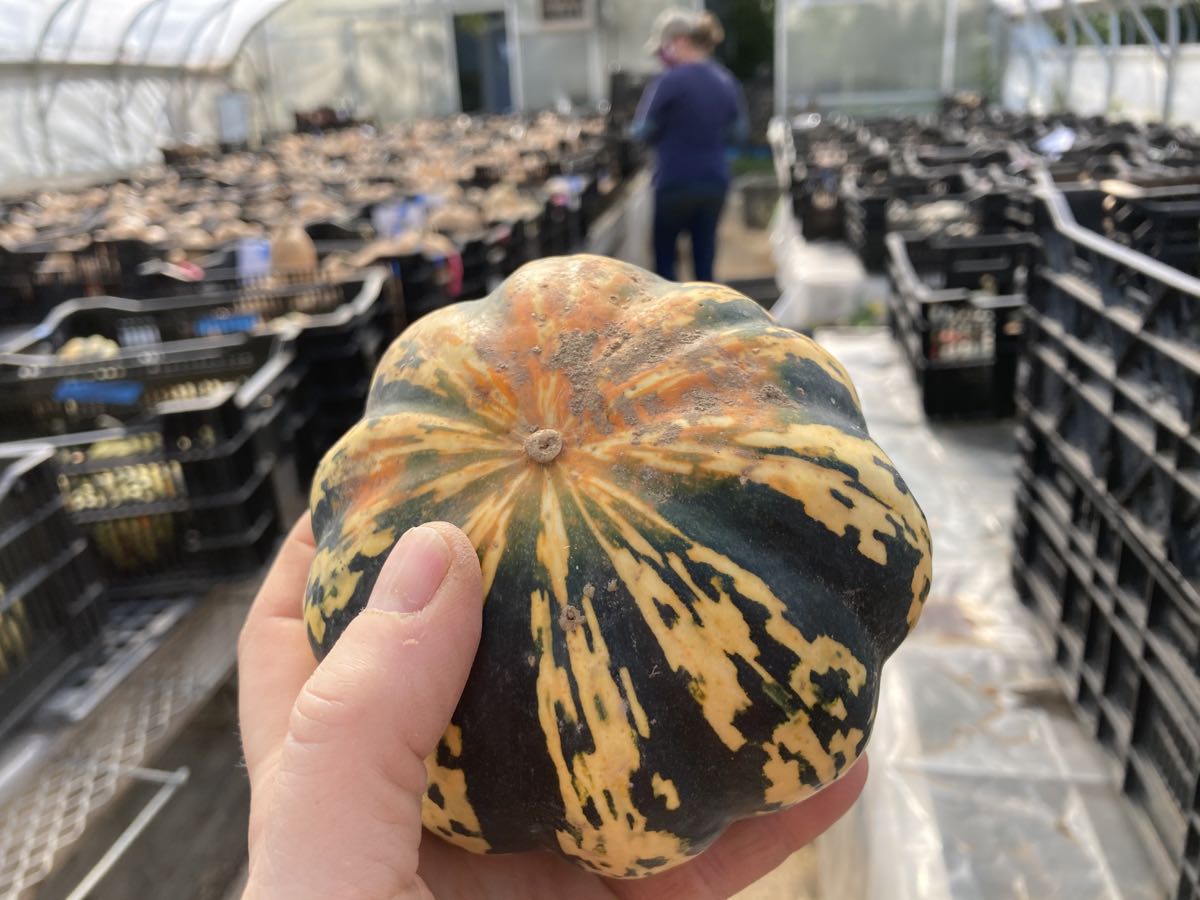
Please wash your squash to remove any soil.
Veggie List & Veggie Notes
Week #18, September 16/17, 2021
– Weekly shares
– EOW/ green
Koji greens, 1 head
‘Carnival’ winter squash, 1
‘Jester’ winter squash, 1
Leeks, ~2
Plum tomatoes, ~4 lb
A mix of colored bell & frying peppers, ~5
‘Roulette’ not-hot habanero, 3
Onion, 1
Garlic, 1 bulb
Basil, 1 sprig
Next week’s box will probably contain winter squash, bok choy, Romano beans, tomatoes, peppers and more.
Koji greens (head of dark green leaves) – Refrigerate.
Koji greens are a lot like Yukina if you know that one; dark green with a nice balance of bitter flavor but not too strong. Like tat soi but with larger, lusher leaves and not so many leaf stalks. Recipes that use mustard greens or bok choy will work with Koji. In a contest for my favorite fall green, Koji runs neck and neck with bok choy.
Acorn squash – See above for cultivar photos. All types are cured and ready to eat. Plan to eat within two weeks.
Leeks (look like big scallions) – These alliums have a milder flavor than onions. Nonetheless, they can be used in recipes that call for onions. To wash, split the leek lengthwise, from the green tops about halfway to the base, leaving the base intact. Rinse well under running water, separating the layers to flush. If necessary, split the leek further if soil has penetrated more than halfway down the leek. Shake dry. Leeks are generally eaten cooked. They can be sauteed, steamed or roasted. Intact leeks will store 2 to 3 weeks if covered loosely and refrigerated. The outer leaves will yellow. Just peel them off and discard. The inner leek layers will be fine.
‘Roulette’ chiles (small, shiny, red, thin-walled) – This chile has been bred to have the aromatic taste of habanero chiles, with almost no heat. Snack on them to enjoy their flavor, or add them to any dish. To reduce all chances of spiciness, remove the seeds and midveins. These will be the smallest peppers in your box.
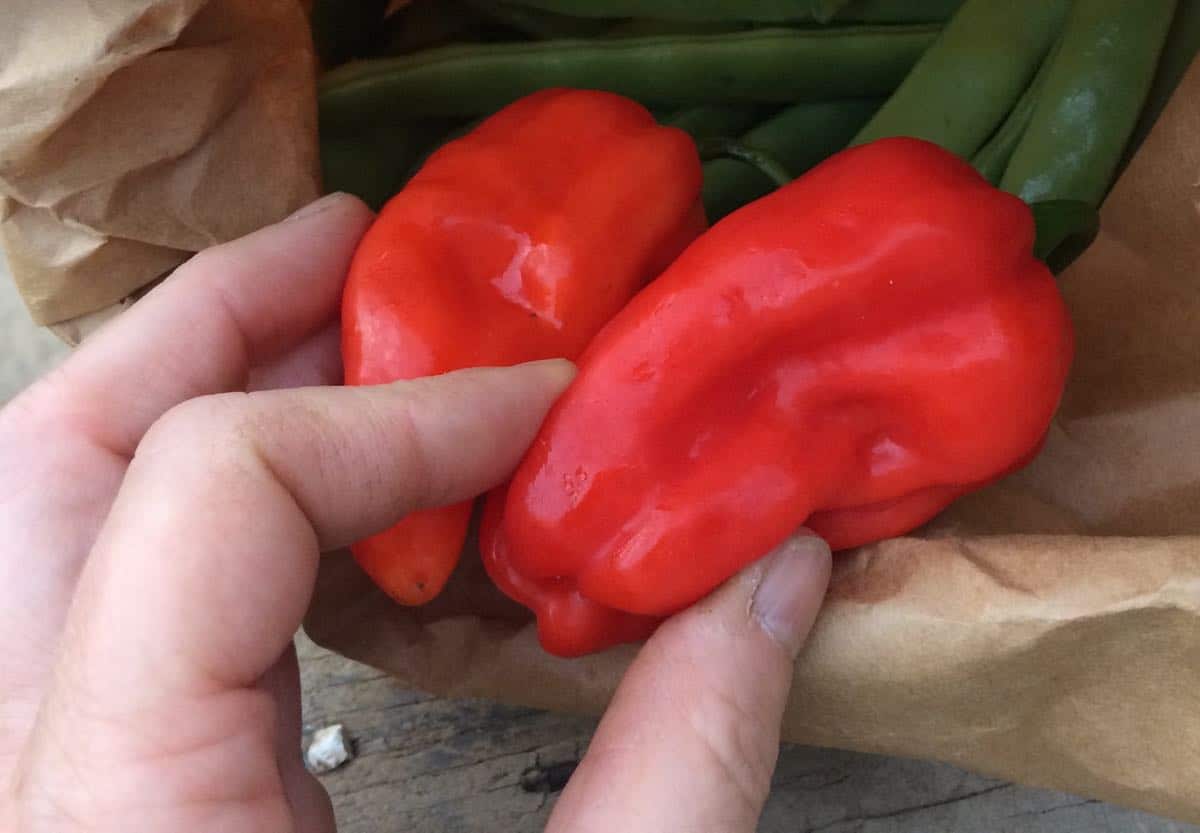
Roulette chiles
RECIPES from PHOEBE
Visit our 2020 Recipe Log or our 2019 Recipe Log.
Leek and Red Pepper Frittata
The beauty of a frittata is that you can eat it for any meal of the day! Serve this recipe for an easy weeknight dinner or weekend brunch. Any leftovers are great cold for lunch the next day.
Serves: 4-6
Prep time: 15 minutes
Cook time: 25 minutes
Ingredients
8 large eggs
2 tablespoons whole milk
2 garlic cloves, grated
1/2 teaspoon dried thyme
Heaping 1/4 teaspoon sea salt
1/4 teaspoon Dijon mustard
1/2 cup grated Gruyère cheese, divided
1 tablespoon extra-virgin olive oil
2 heaping cups thinly sliced leeks, white and light green parts
2 red frying peppers, diced
Fresh basil leaves, optional, for serving
- Preheat the oven to 400°F.
- In a large bowl, whisk together the eggs, milk, garlic, thyme, salt, and mustard. Fold in half the Gruyère and set aside.
- Heat the oil in a 10-inch cast-iron skillet over medium heat. Add the leeks and a pinch of salt and cook, stirring, until the leeks soften, 3-4 minutes. Add the peppers and cook for 4-5 minutes, stirring often, until they soften.
- Spread the vegetables in an even layer at the bottom of the skillet and pour the egg mixture evenly on top. Sprinkle on the remaining Gruyère and transfer the skillet to the oven.
- Bake for 10-15 minutes, or until the frittata is set.
- Slice and serve with fresh basil leaves, if desired.
.
.
Maple Sesame Grain Bowl with Acorn Squash and Greens
Acorn squash’s natural sweetness tastes fantastic with the nutty sesame-maple-ginger sauce and earthy brown rice in this recipe. If you can’t find adzuki beans, chickpeas would work nicely in their place.
1 acorn squash
1 large leek, white and light green parts, halved and chopped into 1-inch chunks
1/4 cup avocado oil, more for drizzling
1/4 cup maple syrup
2 tablespoons toasted sesame oil
2 tablespoons tamari or soy sauce
2 tablespoons plus 1/2 teaspoon rice vinegar, divided
2 tablespoons white miso paste
2 teaspoons grated fresh ginger
1/2 teaspoon dried ginger
4 garlic cloves, 2 grated, 2 chopped, divided
6 cups loose-packed Asian greens
3 cups cooked brown rice
1 1/2 cups cooked adzuki beans, drained and rinsed (1 14-oz can)
Sesame seeds, for serving
Sea salt
- Preheat the oven to 400°F and line two large baking sheets with parchment paper.
- Cut the acorn squash in half vertically and scoop out the seeds. Cut each half crosswise into 1/2-inch slices. Place the sliced squash on one of the baking sheets, toss it with oil and pinches of salt, and arrange it in a single layer. Place the leeks on the other baking sheet, toss with oil and salt, and spread them in a single layer. Transfer both baking sheets to the oven. Roast the leeks for 15 minutes, or until softened and just beginning to brown. Roast the squash for 25 to 30 minutes, or until completely tender and easily pierced with a fork, flipping halfway. If desired, peel the skin off the squash wedges after roasting.
- Make the sauce. In a medium bowl, place the avocado oil, maple syrup, sesame oil, tamari, 2 tablespoons rice vinegar, miso, fresh and dried ginger, and grated garlic. Whisk vigorously until thoroughly combined. Set aside.
- Heat a large nonstick skillet over medium heat and add enough oil to coat the bottom of the pan. Add the chopped garlic, greens, and a pinch of salt and cook, tossing, until the greens are just wilted. Remove from the heat and toss with the remaining 1/2 teaspoon rice vinegar.
- Assemble bowls with the rice, adzuki beans, roasted squash, leeks, and sautéed greens. Sprinkle with sesame seeds and serve with generous drizzles of the sauce.
.
.
Saucy Chickpea Skillet with Creamy Lemon Zest Ricotta
These saucy chickpeas are like a distant cousin of shakshuka, the Middle Eastern and North African dish consisting of eggs poached in tomato sauce. Serve this recipe with baguette or other crusty bread for mopping up the creamy ricotta and sauce.
Serves: 2-4
Prep time: 15 minutes
Cook time: 25 minutes
Ingredients
1 pound plum tomatoes, roughly chopped
2 tablespoons extra-virgin olive oil
3 garlic cloves, sliced
1/4 teaspoon red pepper flakes
1 onion, diced
1 bell pepper, diced
1 1/2 cups cooked chickpeas, drained and rinsed (1 14-oz can)
1/4 teaspoon dried oregano
1 (4-inch) basil stem, leaves reserved for garnish
1 cup whole-milk ricotta cheese
1 teaspoon lemon zest, more for garnish
Sea salt and freshly ground black pepper
Parmesan cheese, for serving
Crusty bread, for serving
- Place the tomatoes in a blender and puree until smooth. Set aside.
- Heat the oil in a heavy 10-inch skillet over medium heat. Add the garlic and red pepper flakes and cook, stirring, until the garlic is fragrant and just beginning to brown, 1-2 minutes. Add the onion and bell pepper and cook, stirring occasionally, until softened, 5-8 minutes.
- Stir in the chickpeas, oregano, basil stem, 1/2 teaspoon salt, and several grinds of fresh black pepper. Pour in the tomato puree and stir to combine. Simmer over medium-low heat, stirring occasionally, for 20-25 minutes, until the sauce has thickened.
- Meanwhile, prepare the ricotta. In a medium bowl, stir together the ricotta, lemon zest, and 1/4 teaspoon sea salt.
- When the chickpeas are ready, remove and discard the basil stem and season the sauce to taste. Serve in bowls with dollops of the ricotta, freshly grated Parmesan, and lemon zest and fresh basil for garnish. Enjoy with crusty bread.
.
.
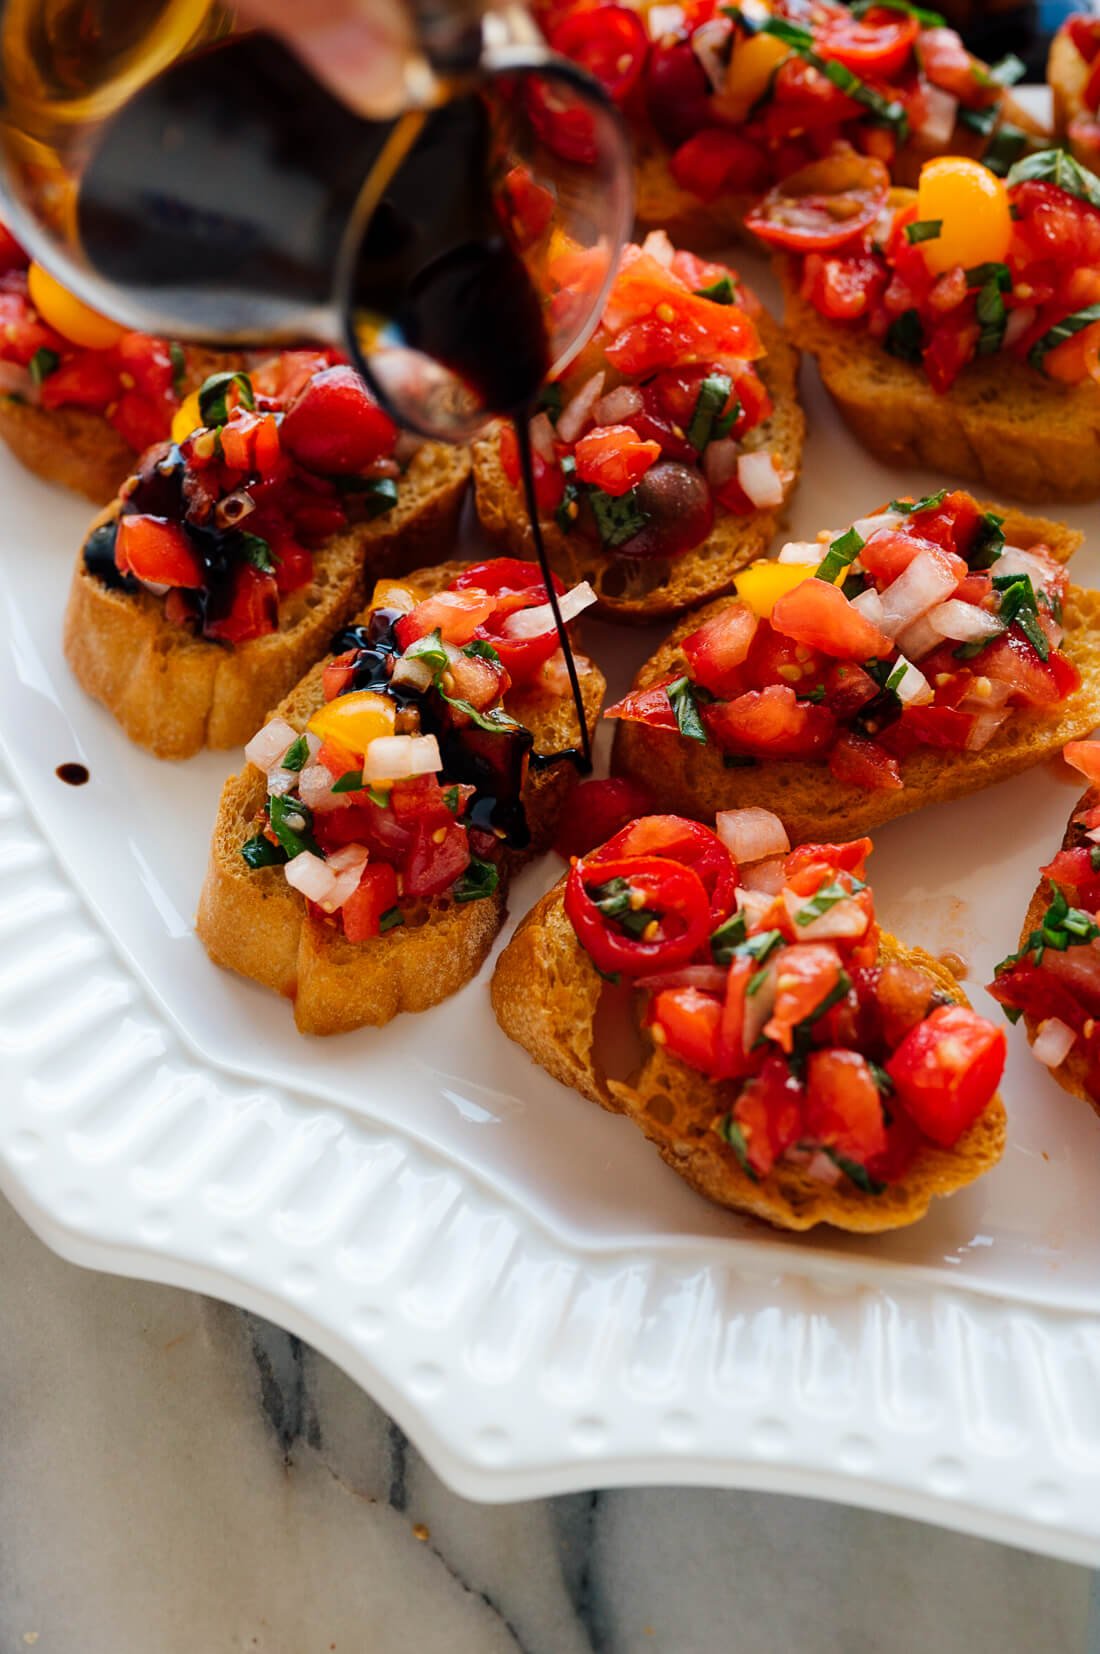
Tomato Basil Bruschetta with Balsamic Drizzle
From Cookie & Kate
A classic way to use your tomatoes, basil, onion, and garlic. Enjoy this recipe as an appetizer, side dish, or light meal.
.
.
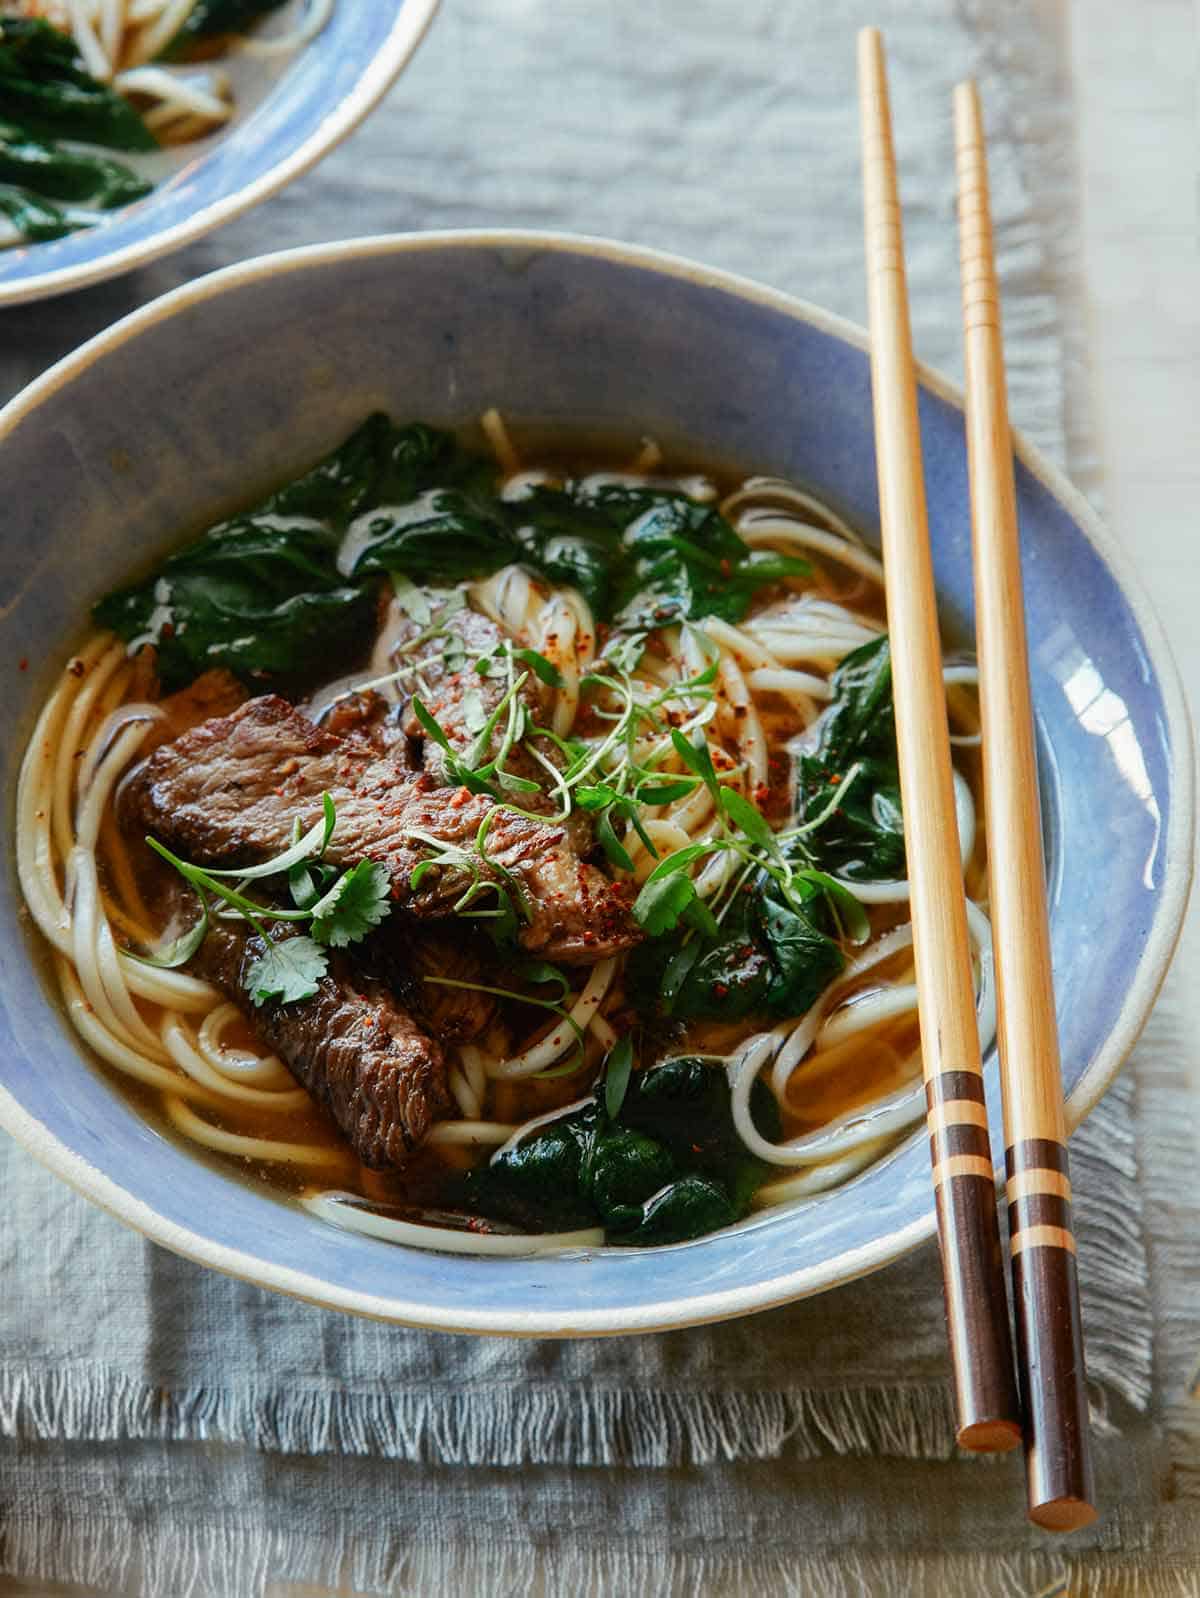
Garlic Ginger Beef Noodle Soup
From Spoon Fork Bacon
This recipe calls for spinach and kale, but the bok choy or koji greens from this week’s box would be a great substitute.
.
.
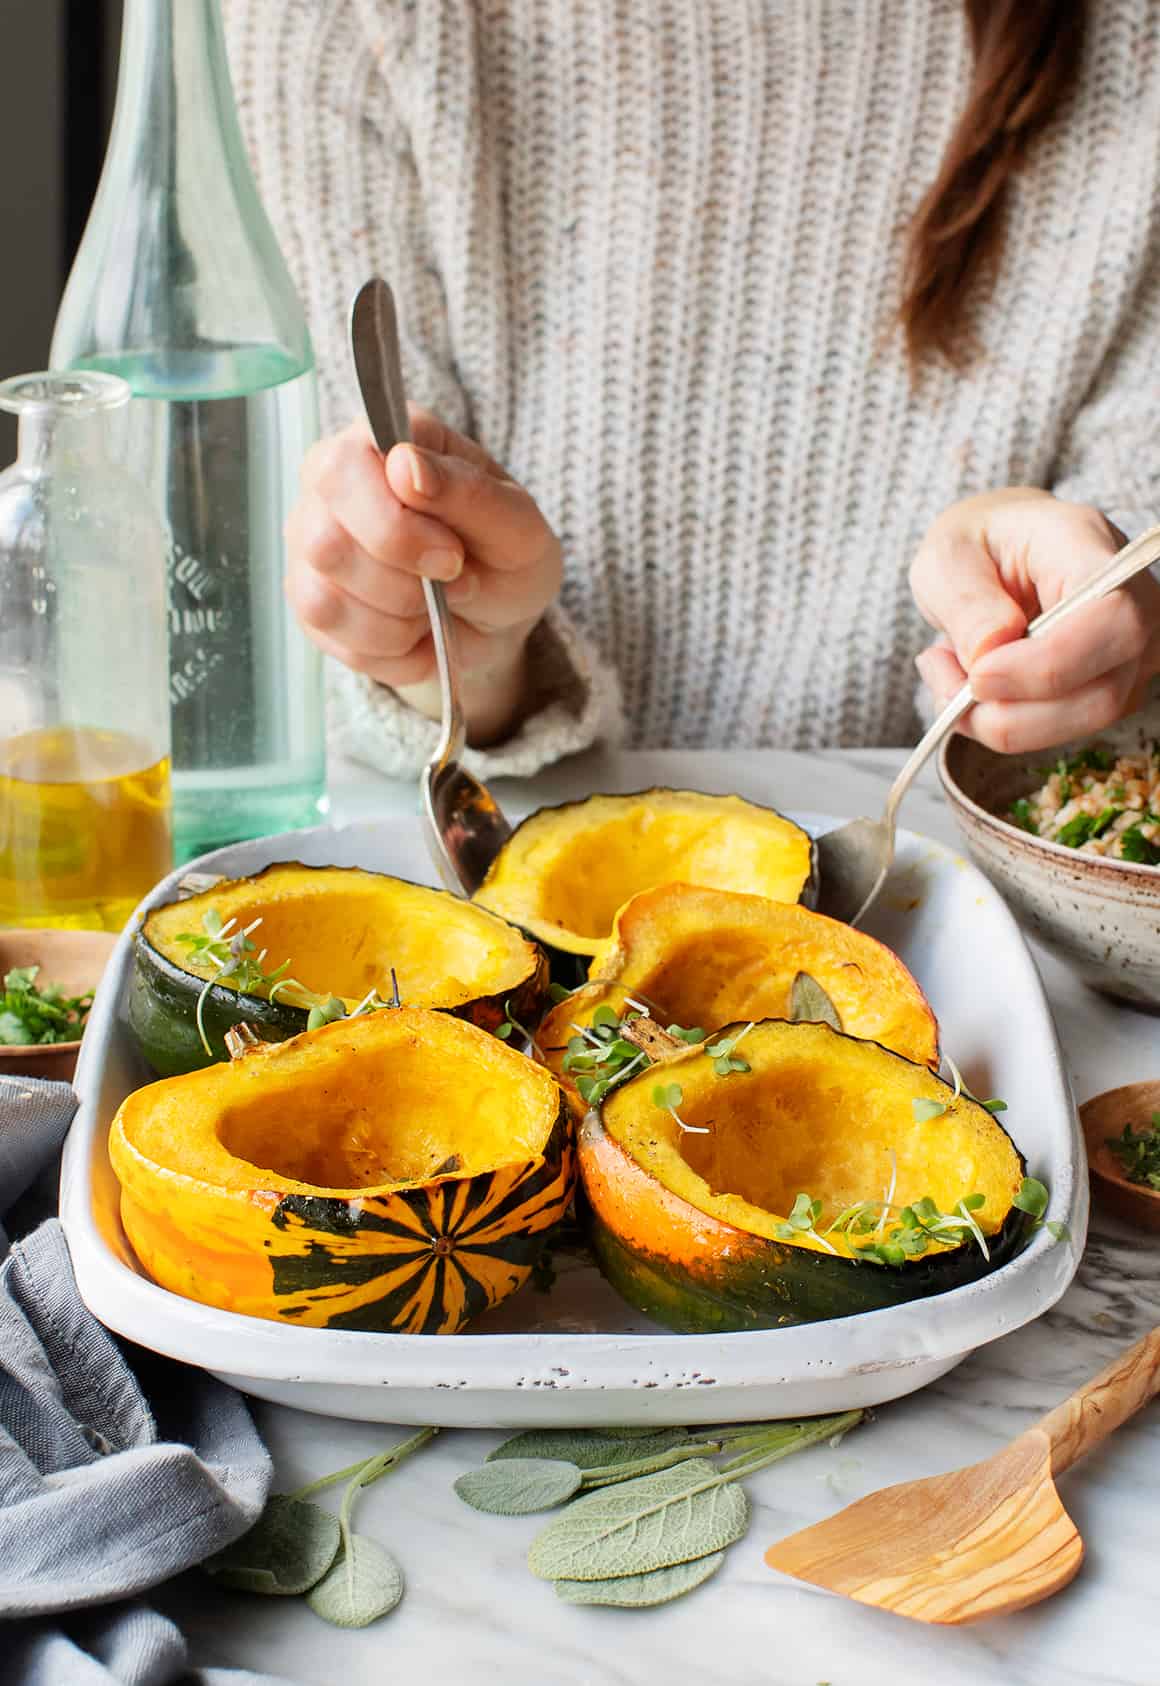
Maple Roasted Acorn Squash
From Love & Lemons
A simple, cozy fall side dish. Feel free to use dried rosemary and/or sage instead of fresh.