Yearly Archives: 2017
Week #16, August 31 2017
- On: August 30, 2017
 0
0

Steve doffs his cap in the watermelon field. The vines and leaves look normal but the melons are rotting.
Folks, this might be your final melon for the season.
A new disease is wreaking havoc in our large, third melon planting. Nearly all the watermelons in that acre have been infected and are quickly collapsing. We’re sorry that some of you did not get your usual quota of watermelons! As I wrote last week, we have sent lots of muskmelons this year because they’ve been so good and we wanted to get them to you during the short muskmelon season. We assumed that watermelons would remain abundant in September as usual. The disease is related to all the rain. Considering how wet it’s been, we really haven’t had many losses until now so we can’t complain.
This week’s melons came from an unaffected field but almost all those melons are now harvested.
We’re doing our research, talking with extension experts and figuring out how to keep the disease from spreading. Steve ran samples to the disease diagnostic clinic in Madison immediately, to get the disease identified (Phytophthora Blight). Over the years, we’ve learned to move quickly when problems arise. We’ll pull and destroy isolated disease patches. Amanda Gevens, the vegetable pathologist for Wisconsin, suggests looking into some of the available plant oils like rosemary, clove, and peppermint. If nothing else the field will smell good.
Steve is really bummed. Watermelons are his favorite crop, plus we know you’ve been waiting for watermelons. Beth
Veggie List and Veggie Notes
(Aug 31/Sept 1, week #16, green EOW)
Beth’s notes: Let’s call this “An Almost Salsa” box.
You’ve got tomatoes, peppers, jalapeño chile and onion, everything you need, as long as you substitute parsley for the traditional cilantro. You can even add corn kernels. The cilantro will be ready in a few weeks. We lost two seedings during the heavy rains in July but have re-planted.
You will receive most but not all of the items on this list:
Sweet corn, ~8 ears
Yellow watermelon
Slicing tomatoes, 3.25+ lb
Bell pepper, ~2
Fennel, 1 bulb with fronds
Cucumber, ~2
Zucchini/squash, 1 – 3
Grape tomatoes, 1 pint
Walla Walla onion
Flat parsley, 1 bunch
Jalapeno chile (HOT), 1
Garlic
Next week’s box will probably contain potatoes, tomatoes, onion, peppers, lettuce and more.
Sweet corn – This is the final sweet corn planting.
Fennel (large vegetable with a fat bulb and lacy fronds) – Fennel is a ‘swing vegetable’; it can be used raw or cooked. Clean well and slice as thinly as possible for use in raw salads. It is good simply prepared with olive oil, lime or lemon juice, salt and shaved parmesan cheese. Cooking softens and sweetens fennel, and mellows its anise flavor. Both the bulb and leaves are edible. Here are ideas from Alice Water of Chez Panisse about how to use fennel: ‘It’s strong anise characteristic seems to suit fish particularly well. … We use fennel all the time. We add the feathery leaves to marinades for fish and to numerous salads, sauces and soups and we use them as a garnish, too. … The bulbs are sliced and served raw in salads in various combinations with other vegetables, parboiled for pastas; caramelized and served as a side dish; braised whole; or cooked in vegetable broths & fish stocks.”
Grape tomatoes – We’ve experimented with new varieties and think you are going to like these tasty grape tomatoes.
Jalapeno chile – These are HOT. If you want to diminish the heat, remove and discard the seeds and midveins. That’s where the heat concentrates. Wear gloves if you are sensitive.
Garlic – This week’s garlic is from our friend John Hendrickson at Stone Circle Farm.
RECIPE LOG
Visit our Recipe Log, a list of all our 2017 recipes to date.
LOCAL THYME RECIPES
Comforting Classics
Grilled Corn
Southwestern Black Bean, Tomato, and Vegetable Salad
Spanish Bruschetta with Tomatoes and Parsley
Grilled Flatbread with Fennel and Peppers
Outside the Box Recipes
Blistered Cherry Tomato and Corn Salad
Tomato Choka
Parsley and Barley Salad
Shaved Fennel Salad with Oranges and Olives
Quick and Easy Meal
Shrimp with Fennel and Tomatoes
RECIPES FROM LAUREN
SWEET CORN RISOTTO WITH CORN COB BROTH & CHERRY TOMATOES
Adapted barely from a genius recipe from Susige at Food52
Oh my, oh my this dish! This is hands down one of the most tasty things I’ve ever consumed (and I live a pretty decadent and delicious life). I love really any combination of corn, peppers, onion and garlic but something about this risotto just sings on another level. I think the corn cob broth is the real game changer. Don’t skip this step if you can help it. It adds a little time (but also can be left alone while you get things done around the house). Also don’t omit the quartered cherry tomatoes on top. It’s a simple thing but it adds the acidity and brightness that the rich creamy risotto needs. Lauren.
Takes 90 minutes (1 hour active cooking time)
Serves 4-6
5-6 ears sweet corn
6 cups water
1 tablespoon Kosher salt, divided plus more for seasoning
5-6 garlic garlic, divided
1/4 cup butter, divided
1 tablespoon olive oil
1/2 large yellow onion, diced
1/4 teaspoon freshly ground black pepper
1 colored pepper, diced
1 cup arborio rice
1/2 cup dry white wine
1/2 cup parmesan
1 pint cherry tomatoes, quartered
- Husk ears of corn. With a knife, remove kernels from corn and set aside in a small bowl (hopefully there is 1-2 cups). In a large stock pot or Dutch oven, combine water and corn cobs (sans kernels) and 2 teaspoons Kosher salt. Smash 3-4 garlic cloves with the blade of your knife and remove the skin. Toss into pot.
- Bring corn cob broth to a boil and then immediately reduce to a gentle simmer. Simmer slowly for an hour. Then keep warm on very low heat to add into the risotto.
- After the corn cob broth has been simmering for about 30 minutes, begin your risotto. Melt 1 tablespoon butter with olive oil in a large saute pan (with tall sides) over medium heat. Add onion, black pepper and remaining teaspoon Kosher salt. Cook until the onion is very fragrant and just beginning to brown, about 10 minutes. Reduce heat to low.
- Mince remaining two garlic cloves and add to the onion along with your diced pepper. Cook over very low heat for 15 minutes, stirring occasionally.
- Turn heat up to medium low. Add rice and cook for 2-3 minutes until it has absorbed any fat from the pan. It should look slightly puffed.
- Add the wine to deglaze the pan (aka get any browned onions off the bottom of the pan and into the risotto with all their yummy caramelization). Cook, stirring occasionally until the rice has absorbed all the wine.
- By now your broth should be nicely reduced to 4 cups of liquid. Remove the corn cobs with tongs. If you feel ambitious, run the back of a knife against the corn cob to get every yummy morsel of corn off the cob and into the broth. Toss the garlic gloves into the pan with the rice.
- Add three ladles of broth to the rice and stir. Let simmer gently, stirring occasionally until broth is absorbed by rice. Then add a couple more ladles of broth. Continue this process of adding broth, stirring occasionally and letting the rice absorb the broth until you’ve used all the broth and the rice is tender but not mushy. It should take about 20 minutes. (If you use up the broth before the rice is cooked enough to your likely just add a little more warm water).
- Remove pan from heat. Add reserved kernels, remaining three tablespoons butter and Parmesan cheese. Stir to combine then cover and let sit for five minutes.
- Serve warm with quartered cherry tomatoes and a sprinkle of salt.
.
TOMATO & FENNEL PIE
Tomato pie was the thing that got me on board with tomatoes five years ago. I always thought tomatoes were to be enjoyed on sandwiches alone and never as the main event. This made me realize what I’d been missing out on. This recipe is wildly adaptable. You can toss any herbs or cheeses that you feel like into the topping. You could add other veggies beside onions and fennel to the bulk of the pie (think sweet corn, zucchini, peppers). You could even spruce up the crust if making from scratch with some cornmeal or other embellishments. The main event is simple: tomatoes, pie crust and a mayo + cheese topping. The rest is totally up to you. Lauren.
Takes 1 hour with store-bought crust or 2 hours if you make the crust yourself
Serves 4-6 very happy people
1 favorite pie crust (my favorite pie crust recipe is over here at Smitten Kitchen or feel free to use store-bought crust)
3 pounds tomatoes, thinly sliced
1 1/2 teaspoon Kosher salt, divided
1 tablespoon olive oil
1/2 large yellow onion, diced
1 fennel bulb, cored and very thinly sliced
1/4 teaspoon freshly ground black pepper
1/4 cup mayonnaise
1/2 cup shredded cheddar
1/2 cup grated Parmesan
1/4 cup finely chopped fresh parsley
1 tablespoon dried basil
1 teaspoon dried oregano
1/2 teaspoon dried sage
- If making pie crust, start by first making that and then get it chilling in the freezer for at least 20 minutes before beginning. If using store-bought crust, jump straight to step 5.
- Preheat oven to 425 degrees.
- Roll out pie dough on a well-floured surface into a 12-inch round. Move into a 9-inch pie pan and press the dough onto the edges of the pan so it stays put. Place in the freezer for 15 minutes to chill.
- Remove from freezer. Line with foil and pie weights, rice or dried beans. Bake for 20 minutes. Remove foil and pie weights and bake 5 minutes longer. Reduce oven to 350 degrees once finished baking.
- While the pie crust bakes (or if using store bought crust just begin here), line a baking sheet with two layers of paper towels. Lay out tomatoes on sheet and sprinkle with 1 teaspoon of Kosher salt. Let sit until crust is done.
- In a large saute pan, warm olive oil over medium heat. Add onions, fennel, remaining 1/2 teaspoon salt and pepper. Saute for 5-10 minutes until soft and fragrant.
- Blot tomatoes with paper towel to remove excess moisture. Place in pre-baked crust or purchased crust in even layers. Top with sauteed onions and fennel.
- In a medium bowl, combine mayo, cheeses, parsley and dried herbs. Stir into well-combined. Place all over tomato pie and even out with a spoon until smooth.
- Bake pie 30 minutes or until top is golden brown. Let sit at least 10 minutes before serving or you will have a sloppy messy on your hand. Tomato pie is best served warm.
Week #15, August 24 2017
- On: August 23, 2017
 0
0
This week
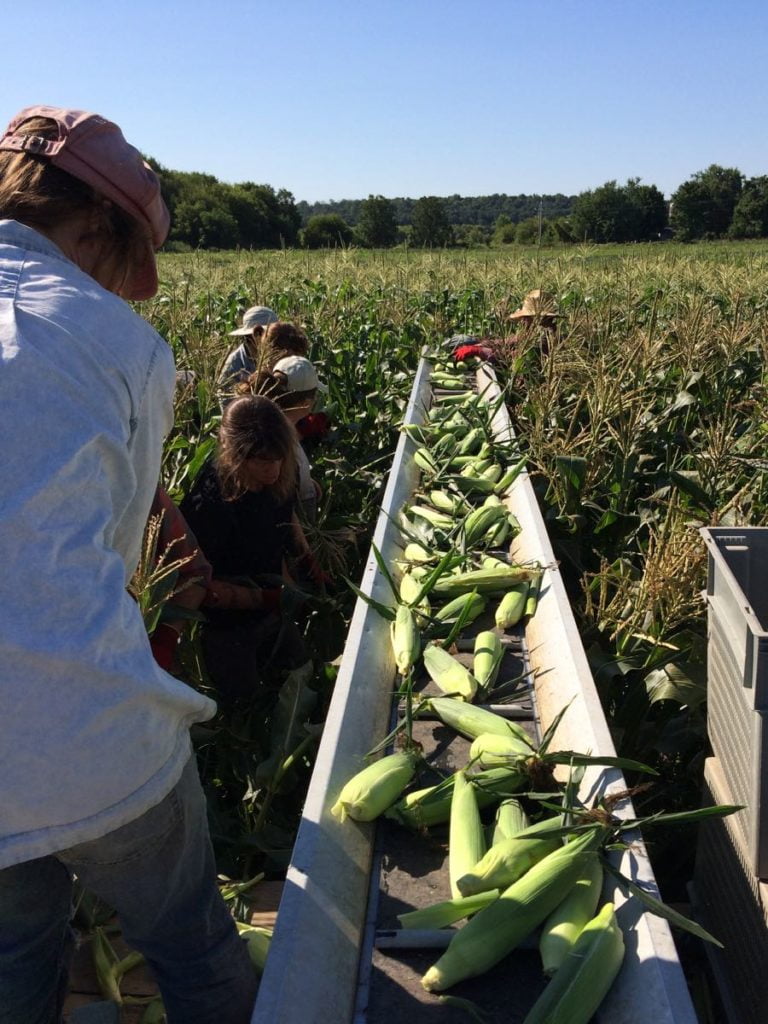
The crew praised this week’s corn harvest. The ears were evenly ripe, making harvest easy and fast. It’s slower and more difficult when the ears mature at different times, and you have examine each ear closely. It was a mob harvest, with eight people on the ground, two on the wagon and one tractor driver. This is a perfect use for our harvest belt, a conveyor that we strap to the wagon and stretch out over the field. Instead of hauling buckets of corn, we just put the ears on the belt and they make their way to the harvest wagon. Kerry (at left) and Jon (not seen) unload from the belt and stack the corn in crates.

A modern scarecrow protects the corn.
Right now, nearly all our work involves harvesting. We’re in the thick of big harvests of crops to deliver in future months, especially onions and beets. Peak tomato season is here, with peak peppers soon to follow. All our greenhouse and field seedings are complete although there are still a few flats to transplant. That feels great. Weed cultivation continues, mainly in late crops like carrots, cabbage, broccoli and cauliflower. It’s a busy and productive time of year. We are all grateful for the recent dry weather. Sunny days and cool nights are a good combination for quality vegetable crops. Steve and Beth
Veggie List and Veggie Notes
(August 24/25, 2017; week #15; purple EOW, moon Sampler)
You will receive most but not all of these items:
Sweet corn, ~10 ears
Romano beans, ripe, 1 & 1/3 lb
A small muskmelon or watermelon, by site
Tomatoes, ~4 lb, mixed slicing and plum
Greens (collards or Red Russian kale, by site)
Leek, 1 or 2
Carrots, 2 lb
Cucumbers, ~2
Silver Slicer cukes, 1 or 2
Red or green pepper, 1 or 2
Basil
Garlic
One site gets heirloom tomato this week.
Next week’s box will probably contain sweet corn, tomatoes, peppers, fennel, cucumbers, melon, onion, garlic and more.
Romano beans – These beans are mature, and will need to be cooked or braised. Check out the recipes below. All our cooks focussed on braising recipes for these beans. The recipes differ enough in ingredients and technique that it’s worth reading all three bean-braising recipes.
Melon – Melons are deliberately small this week, including some muskmelons bred to be small personal-sized melons. Most sites get muskmelons. We’ve sent a lot of muskmelons this year. They are quite good and the muskmelon season is always so short. We want you to have them while they’re good.
Leeks (look like a big scallion) – These alliums have a milder flavor than onions. Nonetheless, they can be used in recipes that call for onions. To wash, split the leek lengthwise, from the green tops about halfway to the base, leaving the base intact. Rinse well under running water, separating the layers to flush. This lets you wash away soil accumulated between the leaves. If necessary, split the leek further if soil has penetrated more than halfway down the leek. Shake dry. Leeks are generally eaten cooked. They can be sauteed, steamed or roasted. Intact leeks will store 2 to 3 weeks if covered loosely and refrigerated. The outer leaves will yellow. Just peel them off and discard. The inner leek layers will be fine.
Red pepper – Most sites get a red bell pepper. One or two sites get a red frying pepper.
RECIPE LOG
Visit our Recipe Log, a list of all our 2017 recipes to date.
RECIPE from TIPI CREW
Braised Green Beans with Tomato and Fennel
Serves 6 to 8
Crew member Jon Fagan offered this favorite recipe, which he makes it in a slow cooker. This dish is perfect for mature beans, that shine when slowly braised. I asked if he really cooks this dish for 3 hours. He replied “Oh yeah, that’s what makes it good. Yesterday, I left it in the slow cooker for 8 hours and it was still awesome.” Clearly, the cooking time is flexible! I haven’t tasted this dish yet, but everyone Jon shares it with raves about it. Beth
2 Tbsp bacon drippings or olive oil
1 medium yellow onion, thinly sliced
1 lb green beans, trimmed
15 oz diced tomatoes, including juices
2 thick slices bacon, diced
1 tsp freshly ground fennel seed
Salt
Freshly ground pepper
- Grind the fennel seeds in a mortar and pestle, or chop them coarsely with a knife.
- Heat the bacon drippings or oil in a heavy pot or Dutch oven with a tight-fitting lid over medium heat. Add the onion and cook, stirring occasionally, until tender, about 5 minutes.
- Add the beans, tomatoes and juices, bacon, fennel, 1/2 tsp. salt and pepper to taste. Bring to a simmer.
- Cover, reduce the heat to very low and simmer gently until tender, about 3 hours, stirring and tasting the beans occasionally. Season with salt and pepper to taste. Serve warm.
.
LOCAL THYME RECIPES
Comforting Classics
Bacon, Leek and Gruyere Strata
Huevos con Collards and Black Bean Salsa
Grain Salad with Tomatoes and Romano Beans
Gazpacho
Outside the Box Recipes
Sautéed Leeks and Kale with Breadcrumbs
Mac and Cheese with Braised Greens Casserole
Smoky Braised Romano Beans with Chorizo
Roasted Grouper with Tomato
Quick and Easy Meal
Rice Noodle Stir Fry with Carrots and Peppers
RECIPES FROM LAUREN
Braised Romano Beans with Cannellini Beans and Sausage
Adapted lovingly from Smitten Kitchen
Serves 6
Takes 1 hour, 20 minutes (most of it inactive allowing maximum time for dish washing and relaxing)
2 tablespoons butter
3 carrots, minced
4-5 garlic cloves, minced (feel free to use the whole bulb as I did)
1 teaspoon of Kosher salt, divided
1/4 teaspoon freshly ground black pepper
3 pounds tomatoes, cored and finely chopped (you can leave the seeds in)
1 cup water
1-1/4 pound romano beans, ends trimmed
2- 15.5 ounce cans cannellini beans, drained and rinsed
1 pound favorite linked sausage (I used Italian)
Grated parmesan, optional
- In a Dutch oven or large stock pot, melt butter over medium heat. Add carrots, garlic, 1/2 teaspoon salt and pepper and reduce heat to medium low. Cook, stirring occasionally for 15-20 minutes, until carrots and garlic become nicely browned and begin to caramelize from the sugars in the carrots. The pan will be a little brown at the bottom. This means you are doing it right.
- Add tomatoes, remaining salt and water to pot. Bring mixture to a boil and toss in the romano beans and cannellini beans. Reduce to a simmer and cook, uncovered for 40-50 minutes until beans are tender. The tomatoes should have reduced to a thick sauce that is not longer soupy. If it gets too thick before the beans are cooked, just add a bit more water.
- Meanwhile place sausages in a cast-iron (or other heavy large) skillet. Add enough water to cover the base of the pan with 1/2-inch of water. Simmer over medium heat, uncovered, until sausages are cooked through and water has evaporated, about 10 minutes. Once water has evaporated, continue cooking, turning often until edges have crisped and are golden brown all around.
- Serve braised beans with sausage on top and a sprinkle of grated Parmesan.
.
SUMMERY PANZANELLA
Serves 4-6 as a meal, many more as a side
Takes 30 minutes + time to let the flavors marinate
3 ears sweet corn
1 loaf favorite bread, cubed and left out overnight to dry out (it works better the staler it gets)
1 leek, halved and sliced
2 cucumbers, seeded and diced
1-2 red peppers, finely diced
2 pounds tomatoes (use those heirlooms if you got them this week!),
1/2 teaspoon Kosher salt
1/4 cup basil, ribboned
Vinaigrette:
1/4 cup olive oil
2-3 tablespoons red wine vinegar
1 teaspoon honey
1/2 teaspoon mustard
1/4 teaspoon Kosher salt
- Cook you corn. You can do this one of two ways. You can remove the husks and boil it for 7 minutes or you can leave the husk on and grill it over medium heat for 10-15 minutes until husk is well charred and then remove the husk (my preferred method). Once you have cooked your corn, allow it to cool for a couple minutes and remove the kernals from the ear.
- In a large bowl, combine corn with cubed bread, leek, cucumbers, red peppers, tomatoes, and kosher salt. Toss to combine.
- In a small bowl, whisk together all vinaigrette ingredients. Taste and adjust seasonings as desired.
- Pour over vegetables and top with basil. Gently stir to combine. Let sit for at least 30 minutes and up to an hour before serving. Serve at room temperature.
Week #14, August 17 2017
- On: August 16, 2017
 0
0
Steve’s mother
Steve’s mother Shifra passed away this week, not unexpectedly, at age 90. We will travel to Philadelphia this weekend to be with family and to celebrate her energetic and generous life.
Veggie List and Veggie Notes (week #14, Aug 17/18, 2017, green EOW)
– Some sites get muskmelon. Some sites get orange watermelon.
– Most sites get globe eggplant. A few sites get 2 ears of sweet corn.
Romano beans, 1.1 lb
Tomatoes, ~4 lb, mixed plum and slicing
Red bell pepper, 1 or 2
Red or green leaf lettuce
Beets, 2 lb
Cucumbers, 1 or 2
Silver Slicing cucumbers, 1 or 2
‘Zoey’ onion, 1
Oregano, 1 bunch
Italian Romano beans – This is Steve’s favorite type of bean. They can be lightly cooked, e.g. Pat’s recipe this week for Romano Beans Sauteed with Oregano. However, Romano beans (or Italian beans) really shine when braised for a longer time. Their broad, sturdy shape allows them to cook to a velvety texture without becoming mushy. Instead of a quick steaming or sautéing, braise the beans in a flavorful sauce until they are very tender and have taken up the sauce’s flavors. See our recipe below.
Beets – Storage: Cover and refrigerate. Beet roots last for weeks. For all the cooking methods below, wash and scrub the beets but do not peel. The skins slip off easily once the beets are cooked and cooled.
Cooking beet roots on the stovetop: Slice or quarter, cover with water in a pot, and simmer until tender. This will take from 25 to 45 minutes depending on how large the beet pieces are. Drain.
Roasting beets: Wash beets, but do not peel. On a sheet of aluminum foil, put beets (halved or quartered if large), salt, pepper and a few sprinklings of water. Seal the foil packet, and roast at 400oF until tender, about 45 minutes to 1 hour. Slip off skins once cool.
Microwave: Slice beets in half and place in a large microwave-proof bowl. Add ¾ inch water and cover with a plate. Microwave on high until tender, about 9-20 minutes, depending on your microwave’s power. Drain and slip off skins.
Uses: Use cooked beets in cold salads, or dress simply with vinaigrette, onions, salt and pepper. Beets are also good tossed with sour cream, minced onion, fresh herbs and walnuts.
Zoey onion – These large onions are moderately mild, more pungent than Walla Wallas. They will brown and fry nicely, but not as well as the yellow onions we’ll send soon. Basically, they are an intermediate step between Walla Wallas and pungent yellow onions.
Oregano – Cover and refrigerate. Alternatively, you can wash your oregano bundle and hang it to dry in a dry spot. Don’t try to keep at room temperature with the stems in a glass of water. This is the second cutting so some of the stems are woody.
RECIPE LOG
Visit our Recipe Log, a list of all our 2017 recipes to date.
RECIPE FROM BETH (Lauren is on vacation)
Sausages and Summer Beans with Tomatoes and Caramelized Onions
Adapted from the New York Times.
This is our go-to recipe for braising beans. The beans get tender and delectable, and the tomatoes+wine cook down to a glaze. You can use Romano or green beans; slicing tomatoes or cherry tomatoes. Pre-cooked sausages make the preparation easy. Beth
Serves 4.
1 lb pre-cooked turkey or chicken sausages
3 tablespoons olive oil
1 large onion, thinly sliced
4 fresh thyme sprigs (optional)
Kosher salt and freshly ground black pepper
Pinch of sugar
1 cup diced ripe tomatoes
1 pound Romano or green beans, trimmed
1/4 cup white wine
1/4 to 1/2 cup chopped fresh herbs (basil (1/2 c) or parsley (1/2 c) or oregano (1/4 c)
Fleur de sel or coarse sea salt, for serving (optional).
1. Slice the sausages diagonally. Heat 1 Tbsp oil in a large skillet with a cover. Saute the sausages until the slices are browned on one side. Remove sausages from the pan and set aside to cool.
2. Add another 2 Tbsp oil to the hot pan. Add onion, thyme sprigs (optional) and a pinch each of salt, pepper and sugar. Saute over medium-high heat until onions are golden in spots and browned around edges.
3. Add tomatoes and saute until they start to release their juices, 2 minutes. Add beans and wine and toss to mix everything in the pan. Cover, reduce heat to medium-low, and cook 3 minutes. Uncover pan, add herbs and continue to cook. Toss beans occasionally, until liquid evaporates and beans are done to taste, 5 to 30 minutes, adding water to pan if it dries out. Return the sausages and any accumulated juices to the pan to re-heat. Garnish with coarse salt if you like. Can be served hot or at room temperature.
LOCAL THYME RECIPES
Comforting Classics
Sweet and Sour Stewed Eggplants, Tomatoes and Peppers
Romano Bean and Meatball Stew
Beet and Spaghetti with Poppy Seeds
Tomato Cucumber Relish
Outside the Box Recipes
Dengaku Style Eggplant
Romano Beans Sauteed with Oregano
Beet and Cucumber Salad with Feta and Couscous
Melon and Tomato Salad with Ricotta Salata
Quick and Easy Meal
Two groups. Two worlds.
- On: August 09, 2017
 1
1
We hosted two groups of 40 people in the last week. Both groups are important to our farm. Otherwise, they could not be more different.

We hired a labor crew of 40 Mexican and Central American guys to weed our carrot plantings. This is the third year this crew has worked for us, generally just one or two days per season. A group that size can accomplish a lot in six hours. They are professionals.
There is need in agriculture for migrant work crews. Think about apples. Orchards cannot employ staff year-round if they only need workers during a short harvest season. Similarly, when we grow enough carrots to store and sell through the winter, we need extra help. Our big carrot fields are planted in a short window, meaning the weeding window is also short. Our regular crew takes care of weeding the rest of the year but this is too big a job when we are also harvesting like crazy.
Who chooses to work on a migrant crew? To leave their home and travel for months, doing seasonal, physical work? In our experience, it’s immigrants. I am not saying that Americans won’t do this work. Ninety-six percent of our regular crew are American-born. Their work is just as demanding but why would they join a migrant crew if good work is available locally? It’s strivers and hard workers and people with fewer options who take this work. We rely on this contract labor crew, and respect them for their hard work. Again, they are professionals.
“Immigrants, we get the job done.” Hamilton, the musical.
NSAC visits

National Sustainable Ag Coalition (NSAC) annual meeting participants visited our farm on Monday. Friend Harriet Behar (with umbrella) is a longtime advocate/force in the local organic movement. She is a member of the National Organic Standards Board.
On Monday, we hosted a busload of organic policy wonks. They were attending the annual meeting of the National Sustainable Agriculture Coalition (NSAC), held this year in Madison. NSAC is an alliance of more than 100 local and regional organizations that work together to advocate for federal policies favoring sustainable farming and healthy rural communities.
These people are immersed in the alphabet soup of federal and state ag agencies, regulation, price supports, and natural resource conservation programs. They do an important job of bringing farmer and grassroots voices into policy discussions that are usually dominated by big business. They keep us informed about government proposals and actions that could affect our farming lives. For example, when the US government released a 548-page draft of the Food Safety Modernization Act, NSAC boiled it down into a workable version that we could address. They’ve got our back.
Our farm needs both groups to function. One group on the ground, and in the soil. The other group at their computers, watching out for us at the national level. Beth and Steve.
Sweet potatoes!


Three weeks ago I showed this pair of photos in the newsletter and gushed about how much the sweet potato vines had grown in the intervening three days. A few of you said “Really Beth? Really? There’s hardly any difference.”

This photo was taken 16 days after the initial photo. Now are you impressed?? We are. Sweet potato vines are amazing. Beth
Veggie List and Veggie Notes
(August 10/11, 2017; purple EOW, sun SMP)
Sweet corn, 10 ears
Muskmelon, 1 large or 2 small
Slicing cucumbers, ~4
Silver Slicer cucumbers, 1 – 2
Tomatoes, ~2.5 lb
Red pepper, 1
Green beans, ~0.5 lb
Green leaf lettuce
Walla Walla onion
Basil, 1 robust bunch
Next week’s box will probably contain melon, tomatoes, peppers, onions, cucumbers, lettuce, beets, an herb, and more.
Sweet corn – This week’s variety is called “Vision”. It’s the same variety we sent two weeks ago.
Muskmelons – We pick muskmelons at field-ripe stage. However, Steve says they will be even better if you let them ripen further on your counter for a day or two. Watch for a slight ‘give’ when you press the blossom end of the melon (opposite the stem end). Check for fragrance too. Eat or refrigerate when fully ripe.
Cucumbers – Our second cucumber field is very productive! We’re sending 4 slicing cucumbers (dark green) plus one or two ‘Silver Slicing” cukes. These smaller, white cucumbers must have some pickle genetics, as they are thin skinned with excellent crunch. We’ll continue to send these in small quantities each week, as long as we have them.
Tomatoes – Your bag contains a mix of slicing and plum tomatoes. Storage: Tomatoes retain their best flavor and texture when stored at room temperature, no lower than 55oF. However, you should refrigerate your tomatoes if they are fully ripe and you don’t expect to eat them right away. It is better to sacrifice a little flavor and texture than lose your tomatoes to rot. Also, fully-ripe tomatoes are less sensitive to chilling injury.
Red Pepper – Some sites get one red frying pepper, some sites get one red bell pepper.
Basil – We’re sending a bigger bunch that usual this week. As usual, store it at room temperature with the cut ends in a jar of water. If you don’t expect to use it quickly, you can chop and freeze it. I usually mix with olive oil to help hold it together.
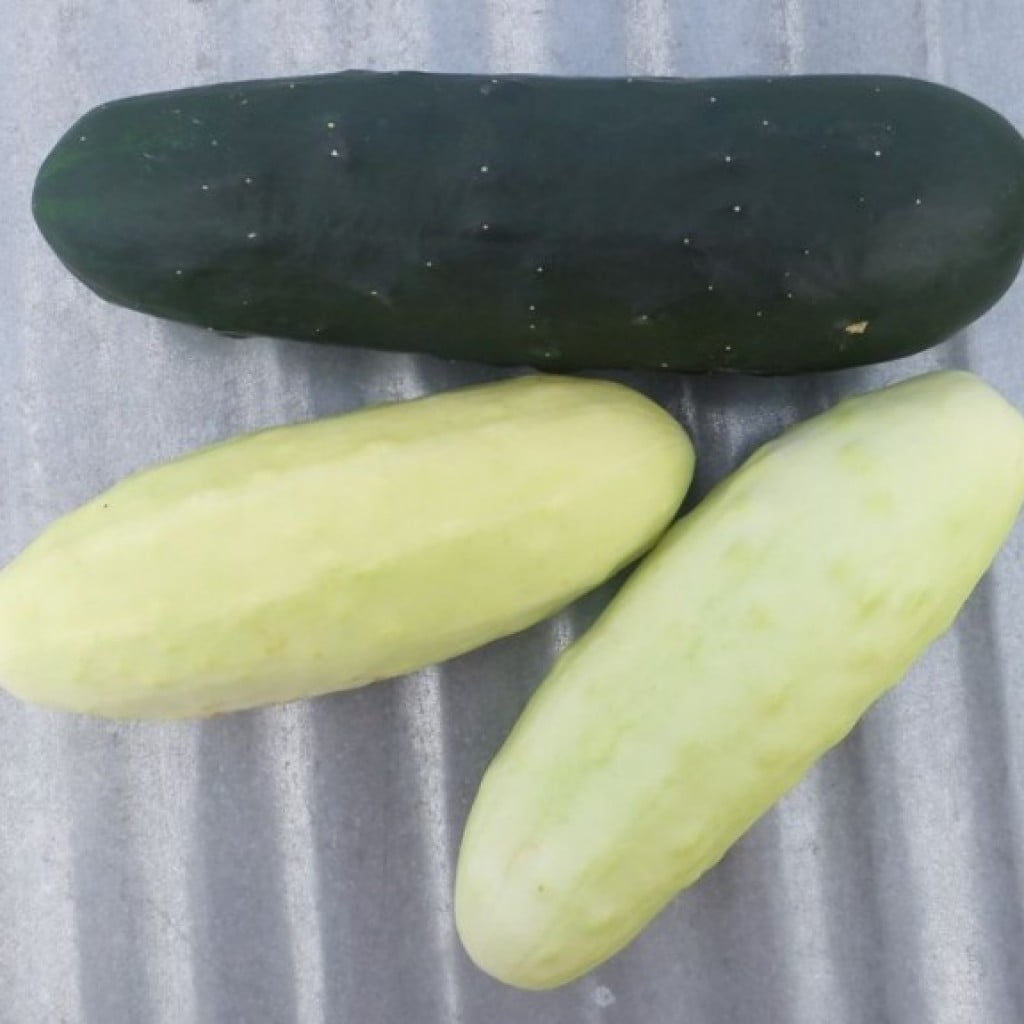
Slicing cucumber (green) and Silver Slicers cucumbers (white)
RECIPES
Visit our Recipe Log, a list of all our 2017 recipes to date.
LOCAL THYME RECIPES
Comforting Classics
.
Outside the Box Recipes
.
Quick and Easy Meal
RECIPES FROM LAUREN
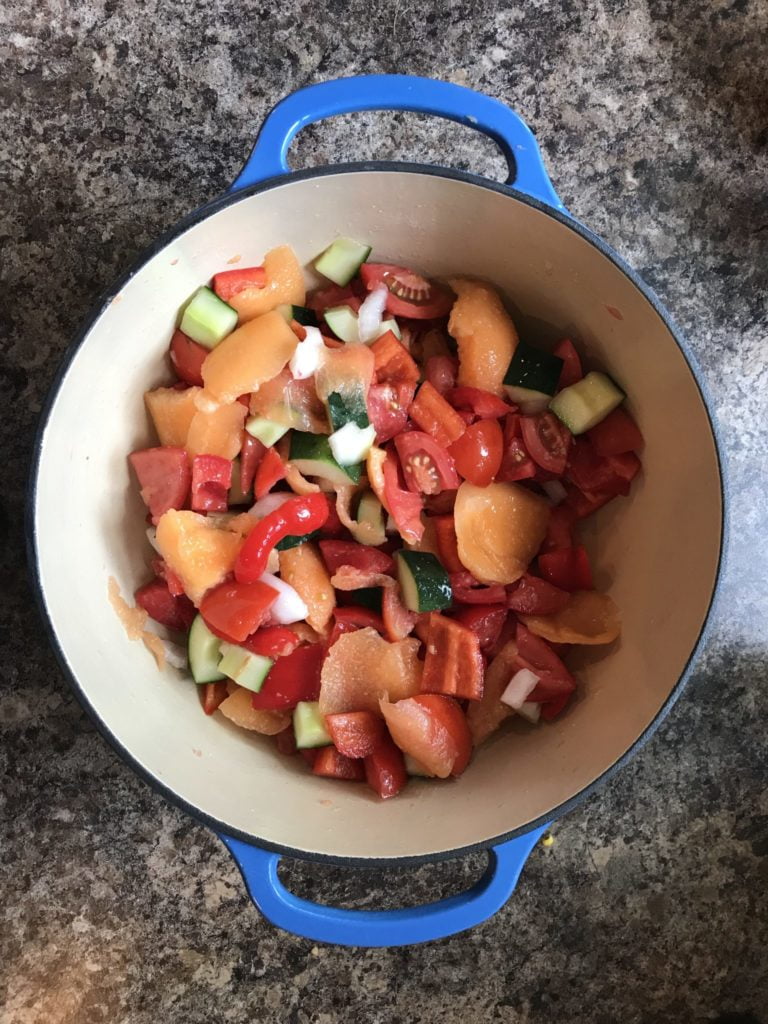
MUSKMELON GAZPACHO
I never thought I could like gazpacho. A cold soup of pureed veggies? It sounded absolutely terrible to me. Then I had gazpacho with melon. Beth and Steve remember this transformative moment. It was a watermelon gazpacho I made for a dinner we had together. It was sweet, savory, bright and flavorful. It wasn’t just pureed vegetables. It was wonderful. This muskmelon gazpacho is equally interesting and even more simple. This is the kind of dish you can throw together quickly after a long day and feel refreshed. This is summer eating at it’s finest. Hope you enjoy! Lauren.
Serves 4-6
Takes 50 minutes
1/2 head muskmelon, seeds removed
1 large cucumber, seeds removed
1 large red pepper, seeds removed
2 pounds extra ripe tomatoes, cored
1/2 Walla Walla onion
1 tablespoon salt
2 tablespoons sherry vinegar
3 tablespoons olive oil
-
- Roughly chop muskmelon (I just removed pieces with a spoon in odd shapes), cucumber, red pepper, tomatoes and onion. Place in a large bowl or stock pot along with salt and vinegar. Let sit for 30 minutes.
- Add olive oil and process until 90% smooth. You can do this several ways: blender, food processor, immersion blender. I mashed it with a potato masher first and then used an immersion blender.
- Taste and adjust seasonings. Serve at room temperature.
.
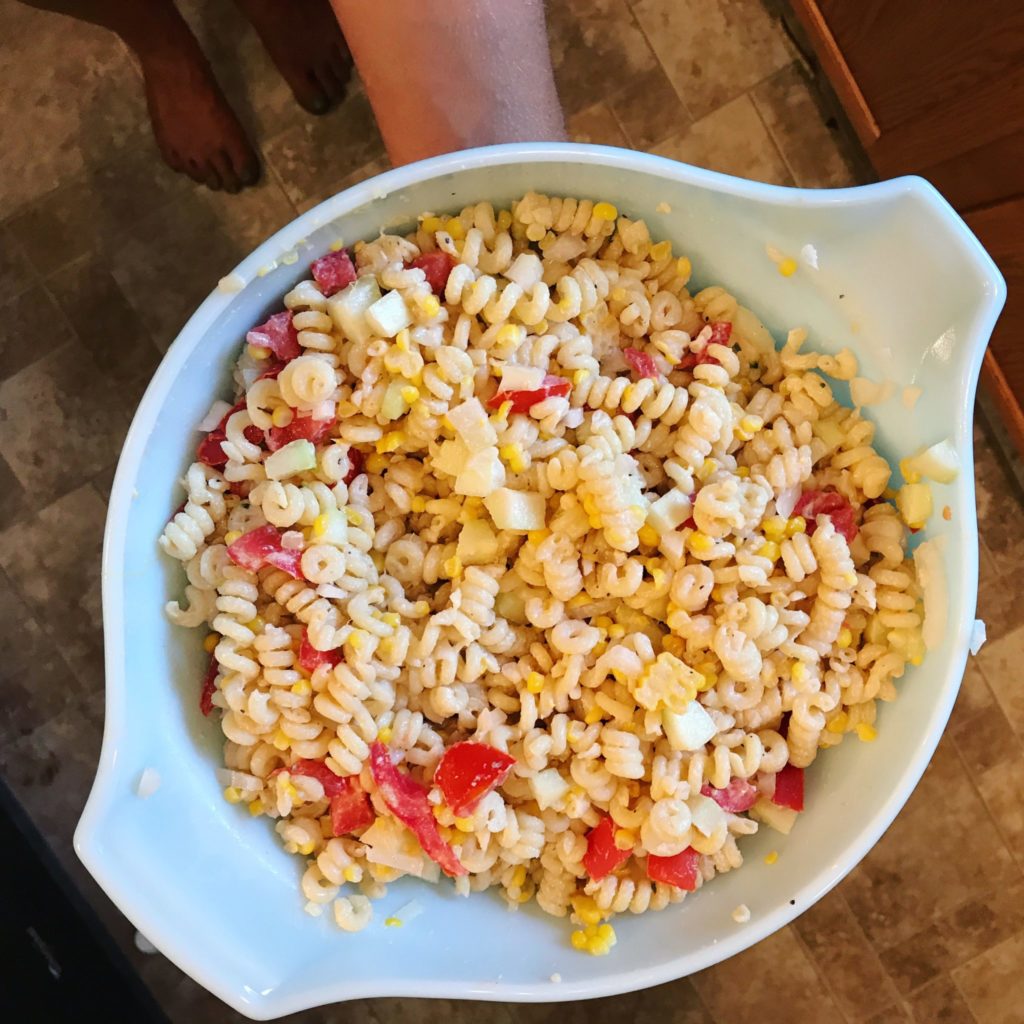
TOMATO & SWEET CORN PASTA SALAD
We have entered the land of peak summer produce. There are melons, peppers, tomatoes, cucumbers, sweet corn and so much more. The harvests are heavy and the eating is easy. With yummy summer veggies like this it’s important to just keep things simple. This pasta salad is as versatile as it is quick to make. I love the combination of tomatoes, sweet corn, cucumber, onion and basil, but you could easily add any cherry tomatoes, broccoli, or peppers you have laying around. Feel free to also use half the amount of noodles if you like more veggies than noodles in your pasta salad. Hint: a noodle with more nooks and crannies equals a better pasta salad. I love fusilli and orechiette. Lauren.
Serves 8-12 as a side
Takes 40 minutes
1 pound pasta
1 silver slicer
1/2 Walla Walla onion
1/2-1 pound tomato, seeded and roughly chopped
4 ears corn, husks removed
1/2 cup basil leaves, roughly chopped
Dressing:
1/4 cup mayo
1/4 cup Greek yogurt
1 tablespoon white wine or white vinegar
1 tablespoon kosher salt
1/2 tablespoon sugar
1/2 teaspoon freshly ground black pepper
-
- Bring a large pot of well-salted water to a boil on the stove over high heat. Once boiling, add pasta and cook to al dente according to package directions.
- While pasta cooks, prepare your dressing by whisking together all ingredients.
- Drain pasta in a colander and let sit for a minute to lose some of the water, then add to a large bowl. Add dressing to noodles while they’re still warm and toss to combine. Set aside.
- Refill stock pot with salted water and bring to a boil. Once boiling, add sweet corn and cook for 7 minutes. Meanwhile, chop your other veggies. Rinse corn under cold water to cool and then cut off kernels with a knife. Add cucumber, onion, tomatoes, corn and basil to bowl. Toss to combine.
- Taste and adjust salt and pepper as desired.
Experimental Farm Habitat, week #12
- On: August 02, 2017
 0
0
I set out to establish an experimental patch of prairie this year. Interspersing natural areas among our fields is an important practice of organic farming. Our farm has a lot of land that is not in crops, mostly grassy field roads and untilled hills planted to alfalfa. However, much of it is not quality habitat. The blooming species are limited and the hills are getting overgrown with introduced grasses. We need to do better. Our goal is to have a long season of flowers to support our bees and the beneficial insects that protect our crops. They are important pieces of the puzzle of organic farming.
Hiring Kristen Knoener abetted my interest in prairie. She has many years experience working for a prairie restoration company. She and I talk endlessly about prairie. Thank goodness she’s here because Steve will no longer discuss prairie with me. He’s heard enough.
Most modern prairies are established with heavy herbicide use, especially if weeds are already present. Read extension manuals and they say “it can’t be done without herbicides.” This cannot be true! I began reading last winter and discovered there’s belief among biologists that prairie can be established using just fire to suppress introduced weeds. I joined the local Prairie Enthusiasts chapter and found they are experimenting with the same idea. There are tricks, such as burning in late spring, an unusual time of year but effective against some difficult weeds. It also helps if you keep your expectations low.
Last fall, I collected seed from friends’ land and nearby prairies. This spring, we started 2000 prairie seedlings in our greenhouse, using the same techniques we use to grow our vegetable seedlings. In early July, we burned a small strip at the edge of a fallow area. Kristen and friends with burning experience came to show us how to do this properly. We planted more seed using our vacuum seeder, the one Steve plants carrots with. Finally, we transplanted our seedlings in mid-July. The timing was perfect, sandwiched between two substantial rains. The plants are already growing strongly.
Will this work? We are using an unusual technique. I plan to keep my expectations low and will be content if we achieve a long season of bloom even if mixed with weedy species. It will not be picture-perfect prairie but that’s OK. It will make our farm a healthier ecosystem and a prettier place to live. Wish us luck! Beth

Even weedy areas can support bees and other pollinators. Most of the blooming plants in this photo are introduced species that linger on the edges of our farm. This little flowering strip bisects our farm and stays in bloom for almost two months. It buzzes with bees from nearby hives.
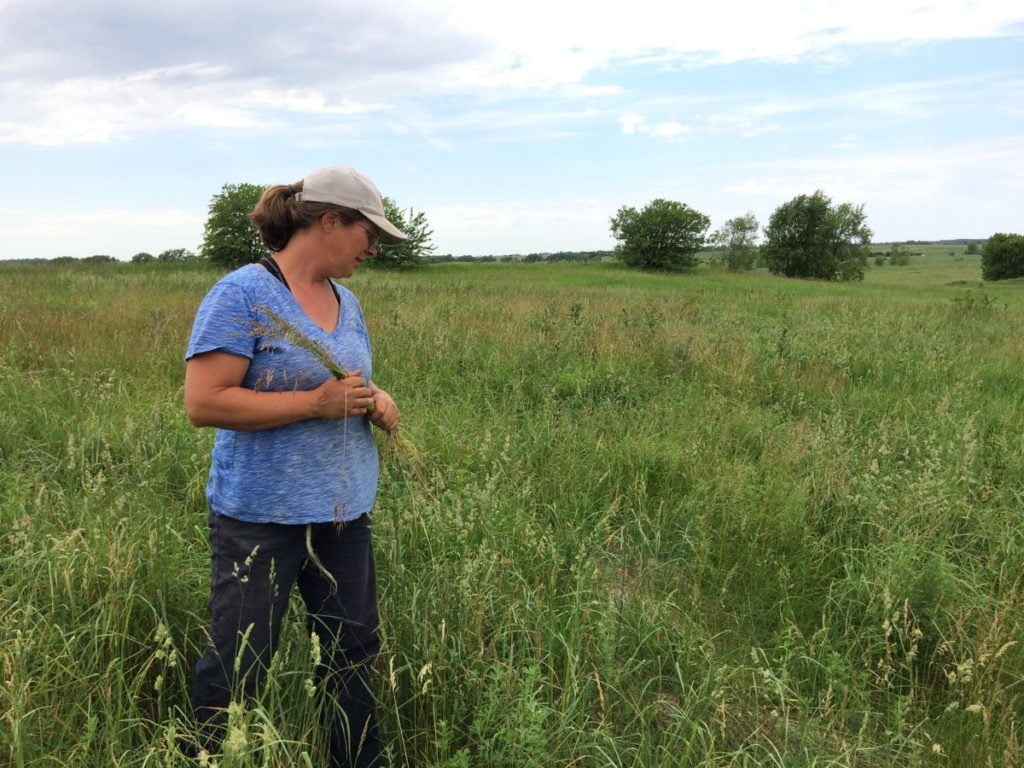
Kristin looks through the area we chose to work in. We seeded this field to alfalfa 15 years ago but grasses have crept in. It’s a daunting area. That’s why this is an experiment.

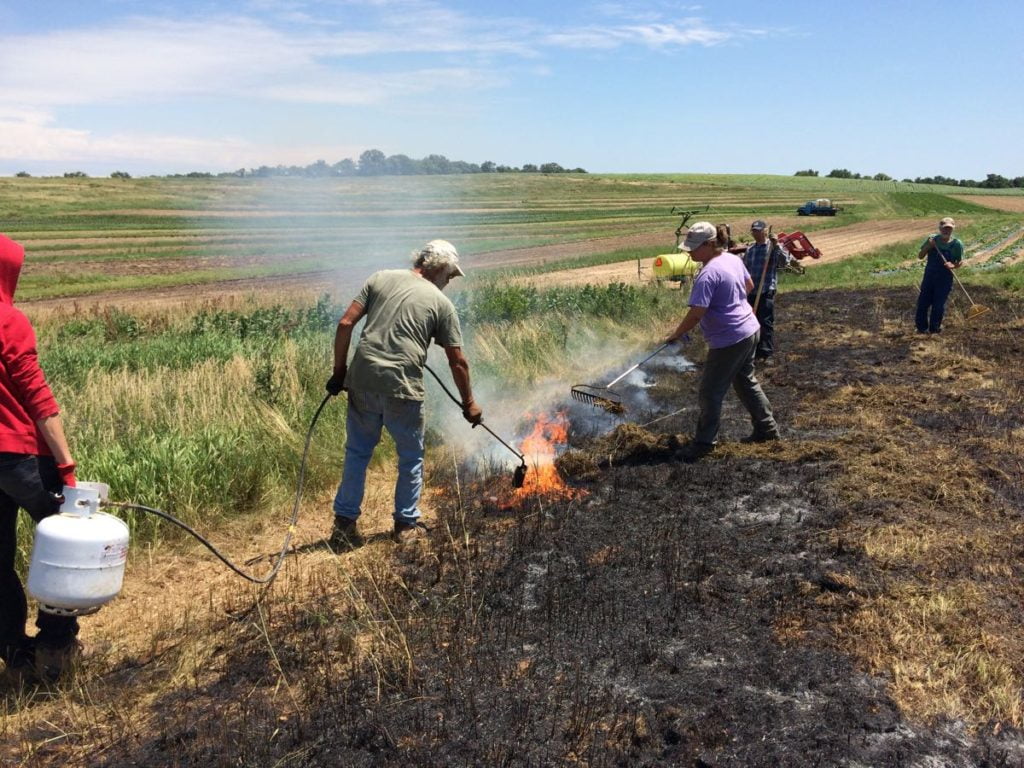
We burned the area in early July. Top, Kristin’s friend Nate Gingerich carries a water can, I move the fire around with a rake and Steve checks the edge. Bottom, Ari, Steve and Kristin clean up unburned patches. Nate and John Ischner in background.

We added seed, using our expensive vacuum seeder. We own many tools for growing vegetables and may as well use them for this project.
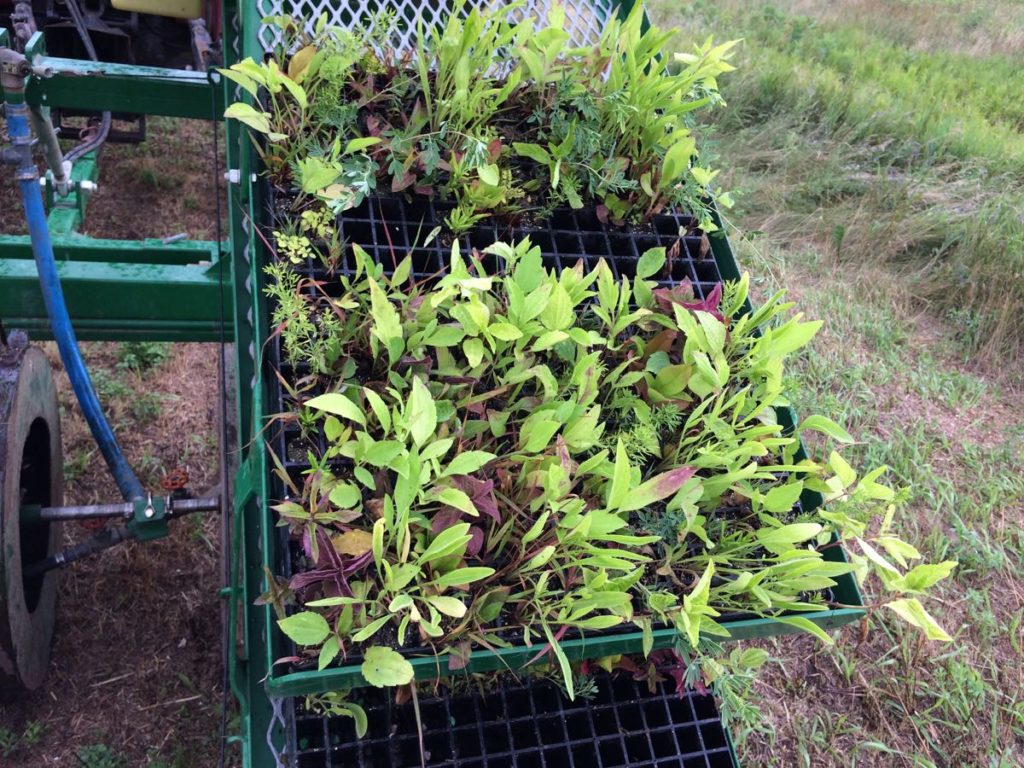
Mixed flats of greenhouse-grown prairie seedlings.
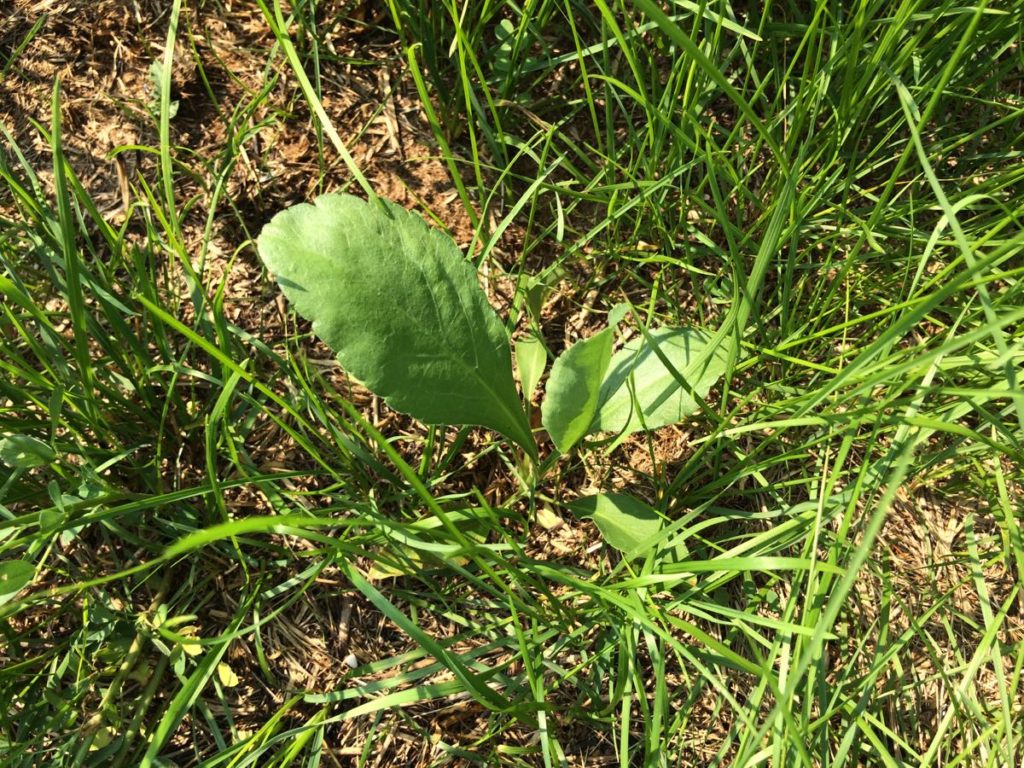
Three weeks later, the seedlings have already grown a lot! The alfalfa and grasses are growing back too (as expected). We’ll try to manage those by mowing and burning again next spring.

If you are interested in prairie restoration, this is a terrific book.
Veggie List and Veggie Notes (Aug 3/4, 2017, green EOW)
Treat this as an approximate list. We’re not sure each box will have all the items.
Sweet corn, 9-10 ears
Green beans, ~0.9 lb
Broccoli, 1 or 2 heads
Tomatoes, 2 or 3
Frying OR bell pepper, 1
Cherry tomatoes, 1 pint
Zucchini/summer squash, 1
Salanova lettuce, 1 small
Red onion
Walla Walla onion
Garlic, 1 bulb
Italian basil, 1 husky sprig
Some sites get watermelon.
Some sites get muskmelon.
Next week’s box will probably contain melon, green beans, tomatoes, peppers, cucumbers, onion and more.
Sweet corn – Be prepared to cut off the tips of your corn. Almost all the ears have damaged tips, from bugs or birds or rain driving water into the tip. Sorry about that. Just chop the tips off before you peel the ears.
Green beans – Our beans are unusually late this year because we lost the first planting during cool, damp weather in May. Anyway, enjoy these first beans.
Tomatoes – You will get 2 or 3 plum or slicing tomatoes.
Salanova lettuce – The lettuce heads are small. We harvest lettuce small this time of year, before they get bitter or too big to fit in the CSA boxes. This is the ‘Salanova’ variety that falls apart into salad mix when you cut the head at the base.
Onions – We’re sending two types of onions this week. They are easy to tell apart. Everyone receives a sweet Walla Walla onion, the type we have sent in recent boxes. Wallas are best used raw. We are also sending a red onion so you have an onion that will fry well. They are also good raw but are more pungent than Walla Wallas.
Garlic – This week’s organic garlic is from our friend John Hendrickson at Stone Circle Farm.
RECIPES
Visit our Recipe Log, a list of all our 2017 recipes to date.
RECIPES FROM LOCAL THYME
Comforting Classics
Melon Granita
High Summer Vegetable Soup
Spice Rubbed Chicken and Zucchini, Pepper and Onion Tacos with Chipotle Cream
Beef or Cashew Broccoli Stir Fry
Outside the Box Recipes
Chilled Melon Soup with White Wine and Basil
Green Beans with Caramelized Red Onions
Triple Chocolate Zucchini Dessert Muffins
Roasted Broccoli with Pancetta
Quick and Easy Meal
Chopped Salad with Basil Buttermilk Dressing
RECIPES FROM LAUREN
GRAIN SALAD WITH BROCCOLI, BEANS & BASIL
Also known as the grain salad I’ve been attempting to make my whole life adapted from this Bon Appetit recipe
After making this grain salad, I finally realized what I’ve been doing wrong all along. Not enough veggies. Too much quinoa. No dressing. With the perfect balance of crunchy veggies (some raw, some blanched), nuts, grains and herbs, this grain salad has changed my life and I can’t wait to make it again and again. Lauren.
1/3 cup quinoa
2/3 cup water
2 teaspoons Kosher salt, divided
3/4 pound beans, ends trimmed
1 head broccoli, roughly chopped into bite-size pieces
1/4 cup diced Walla Walla onion (about 1/4 of one onion)
1/2 cup shelled, toasted pistachios, divided
1/2 cup coarsely chopped basil (about 1/2 of the leaves from your sprig)2
5 tablespoons olive oil
2 tablespoons white wine, chapagne or rice wine vinegar
1 tablespoon maple syrup (or brown sugar)
2 teaspoons Dijon mustard
1/4 teaspoon Kosher salt
1/4 teaspoon freshly ground black pepper
- In a small sauce pan combine quinoa, water and 1 teaspoon salt. Bring it to a boil, reduce to a simmer and cover. Cook for 15-20 minute until most of the liquid has been absorbed.
- In a separate large pot, bring water to a boil over high heat with remaining salt. Once boiling, add beans and cook for 2 minutes. Drain and rinse with cold water. Let sit in the colander while you prepare the rest of the meal.
- In a large bowl, combine cooked quinoa, blanched beans, broccoli, and Walla Walla onions.
- In a food processor, combine 2 tablespoons pistachios, basil, olive oil, vinegar, maple syrup, mustard, salt and pepper. Process until dressing comes together. It should be pale yellow and very creamy. If you don’t have a food processor, you can whisk the ingredients together in a bowl. Just make sure you very finely chop the 2 tablespoons of pistachios first!
- Pour dressing over quinoa and veggies. Add remaining pistachios and stir until dressing coats everything evenly. Taste and adjust seasonings as needed.
.
TOMATO & BASIL PIZZA
This is an attempt to recreate a pizza I had at Sal’s in Madison a few weeks ago that my husband and I dubbed the best pizza we’ve ever had. It’s not quite as good as the real thing (because I have yet to master a crust that good), but it’s darn close. I love the combination of sweet, salty, creamy, and spicy. Lauren.
Takes 90 minutes (if making dough from scratch), 50 minutes with store-bought crust
Serves 4-6
1 batch favorite pizza dough, I used this recipe but wish I would have planned ahead and made this one a couple days in advance (it’s way better!)
1 head garlic
1 tablespoon olive oil, plus more for drizzling
1 Italian fryer pepper
1 pint cherry tomatoes
1/2 teaspoon Kosher salt, plus more to taste
1/4 teaspoon freshly ground black pepper
1-1/2 cups whole-milk ricotta cheese
15-20 pepperoni slices
1/2 red onion, thinly sliced
1/2 teaspoon red pepper flakes, plus more to taste
1/2 cup shredded mozzarella cheese
15-20 basil leaves (about half sprig)
- Prepare dough if making from scratch. Leave to rise on the warm oven.
- Preheat oven to 350 degrees (I always usually use the toaster oven for this step to avoid turning the whole oven on early).
- Cut the top off the garlic and remove any excess paper (the stuff around the cloves is fine but remove the paper surrounding the whole bulb). Set on a piece of aluminum foil. Drizzle with olive oil slowly so it soaks into the garlic. Wrap the entire bulb in the aluminum foil and roast for 35 minutes until softened. Remove from oven and allow to cool.
- Preheat broiler of oven.
- Drizzle olive oil on a sheet pan. Add Italian fryer and pint of cherry tomatoes. Sprinkle with salt and pepper. Broil for 10-15 minutes until charred all over and tomatoes have burst. Let cool and then slice Italian fryer, scooping out seeds with a spoon when you get to the top.
- When the pizza dough is doubled in size, roll out to approximately 10×14-inches in size and transfer to a baking sheet. Spread ricotta over crust with a spatula. Sprinkle pizza with pepperoni, sliced onion, cherry tomatoes, sliced Italian fryer and red pepper flakes. Scoop garlic out of the skin with a spoon and place all over the pizza in dollops. Top with mozzarella. Bake 10 minutes. Remove from oven, add basil leaves, a drizzle of olive oil and another sprinkle of Kosher salt. Bake 5-10 minutes longer until both the crust and cheese is golden brown.
- Serve hot with more red pepper flakes based on your desired heat level.
Week #11, July 27 2017
- On: July 26, 2017
 0
0
Veggie List and Veggie Notes
(July 27/28, 2017, week #11, purple EOW and moon Sampler)
Sweet corn, ~6 ears
Green bell pepper, 1 small
Walla Walla onion
Cucumbers, ~2
Carrots, 2 lb
Kale, 1 bunch
Cherry tomatoes, 1 pint
Tomatoes, 2 or 3
Globe eggplant, ~1 lb
Red leaf lettuce
Zucchini/summer squash, ~2ct
Some sites get another cucumber.
Some sites get broccoli.
Some sites get another ear of corn.
Some sites get another pepper.
Next week’s box will contain sweet corn, melon, tomatoes, peppers, onions, broccoli and more.
Sweet corn – Storage. Sweet corn is best when fresh, so we encourage you to eat it asap. Store in the refrigerator, in the husks if you have the room.
Cooking. It is quicker to steam sweet corn than to boil it.
1.) Stand ears of corn upright in a tall pot. Put one inch of water in the pot.
2.) Bring the water to a boil. If the corn is cold when you begin cooking, steam for 5 – 6 minutes. If the corn starts at room temperature, steam for 4 – 5 minutes. The cooking time will vary somewhat depending on how many ears are in the pot. Pay attention to how the corn smells. The scent changes once the corn is ready. Another clue: water will bead on the corn until it is cooked. Don’t overcook it.
Globe eggplant – Storage – Eggplant will store unrefrigerated for 3 to 4 days on your kitchen counter. If you need to store longer, keep in the warmest part of your fridge. Eggplant does not store well for long periods of time. Both our cooks included eggplant in recipes this week.
RECIPES
Visit our Recipe Log, a list of all our 2017 recipes to date.
RECIPES FROM LOCAL THYME
Comforting Classics
Ratatouille Provençal
Beer, Ham and Cheese Chowder
Slow Roasted Kale Chips
Creamy Corn
Outside the Box Recipes
Eggplant and Meatball Tagliatelle
Slow Roasted Carrots with Harissa Yogurt
Marinated Kale and Carrots with Quinoa
Fresh Tomato Pesto Pasta with Corn, Broccoli and Peppers
Quick and Easy Meal
Hummus, Cucumber, Tomato, Lettuce Wraps
RECIPES FROM LAUREN
SUMMERTIME GREEN CURRY
Serves 4-6
Takes 50 minutes
1 cup brown rice
1-1/4 cup water
1 teaspoon Kosher salt
1 tablespoon butter
1-2 tablespoons green curry paste
1/2 Walla Walla onion, diced
1-inch ginger, peeled and minced
1 eggplant, quartered and thinly sliced
1 green bell pepper, thinly sliced
1 head broccoli, cut into bite-sized pieces
1 tablespoon maple syrup
1 13.5 -ounce can coconut milk
2 cups chicken (or vegetable) stock
Fish sauce, soy sauce or tamari, optional
Lime juice, optional
- In a medium saucepan, combine rice, water and salt. Bring to a boil, then cover and reduce to low. Cook for 45-50 minutes.
- Meanwhile begin your curry! In a large stock pot, melt butter over medium heat. Add curry paste and cook for a minute until fragrant. Add onion and ginger. Saute for 4-5 minutes over medium heat until onions are just beginning to brown and bottom of pan looks dry. Add eggplant, green pepper, broccoli and syrup. Cook for 5-10 minutes until vegetables soften.
- Add coconut milk and stock. Bring mixture to a boil, reduce to simmer and cook gently for 10-15 minutes.
- Serve over rice with a splash of fish sauce, soy sauce or tamari as well as a generous squirt of lime juice.
.
ZUCCHINI, SWEET CORN & TOMATO CAKE
Takes 1 hour
Serves 4-6
1 cup sliced tomato, about 1-2 tomatoes
3 cups sliced zucchini and summer squash, about 2 medium summer squash
1/2 Walla Walla onion, thinly sliced
1/2 cup sweet corn, removed from ear (no precooking necessary), about 2-3 ears
1-1/2 cup cornmeal
2 tablespoons sugar
1 teaspoon Kosher salt
1/2 teaspoon freshly ground black pepper
1 teaspoon baking powder
2 tablespoons butter
1-1/4 cup milk
2 eggs
1/2 cup parmesan cheese
400 degrees, 35 minutes
- Preheat oven to 400 degrees.
- Prep you veggies. Start with the tomatoes, slice them and lay them on a paper towel or cloth with a pinch of salt to drain some of the juice out while you work on the other veggies.
- Combine cornmeal, sugar, salt, pepper and baking powder in the bowl of a stand mixer or other large bowl.
- Combine milk and butter in a small pan. Heat it over high heat until it just begins to simmer and then pour into bowl with cornmeal. Let it cool for a couple minutes, then add the eggs. Stir until well-combined and smooth, scraping down the sides a couple times with a spatula, and then add all the veggies. Fold in gently. It’s ok if they get beat up a little bit.
- Pour the mixture into a greased 9×9 square pan or 10-inch pie pan and smooth with a spatula.
- Bake for 30 minutes. Remove from oven, add parmesan and bake 5-10 minutes longer until center is set. Serve warm.
Week #10, July 20 2017
- On: July 20, 2017
 0
0
Farm News
It has been a very wet week for us, as for most of you. We did not suffer damage in the thunderstorms and hope you didn’t either. All our fields are wet so we’ve had to grab opportunities between storms to do our field work. What else can we do?? We have to be ready for any window that opens. A big concern with wet weather is disease. If the weather dries for a few days, things will be fine. If it keeps raining, we’re sure to see diseases developing. Let’s hope for the best. Beth

Maggie and others weed Brussels sprouts. First harvest isn’t until October but we must keep them weeded. The woman of mystery is Charlotte in her mosquito net shirt.
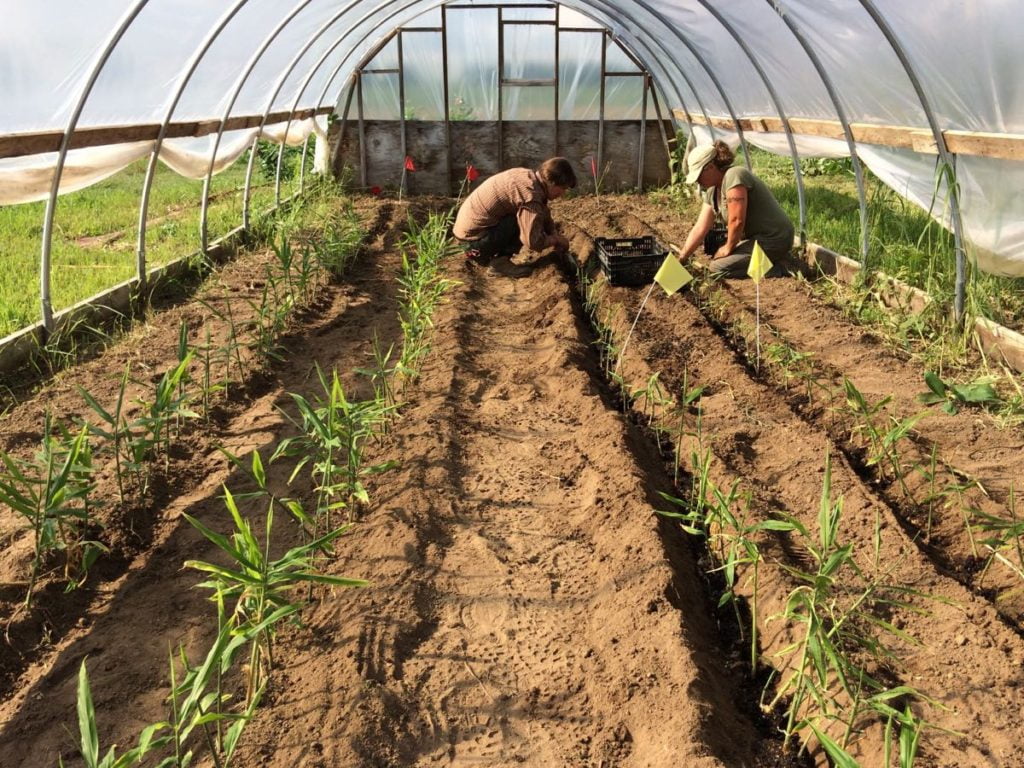
Here’s a job we can do when the fields are wet. Charlotte and Kristen transplant ginger into our smallest greenhouse. The ginger will also be ready to harvest in October. This little house is one of my favorite places on the farm. It’s small but tight enough to grow spinach for our family in winter.


For the most part, our crops love the heat and moisture. This is our sweet potato field, photographed three days apart. Three days!
What does ‘OR’ mean?
Often our Veggie List includes something like “globe eggplant OR cherry tomatoes, etc.” Sometimes our crops ripen in fits and starts, eg. eggplant and the first harvest of almost any crop. When there are small amounts, we split them up among the sites. We make sure that all boxes at a site are uniform. That lets us deliver cherry tomatoes in future to the people who received eggplant this week, and vice versa.
When our list says “xxx OR yyy” please do not open CSA boxes searching for your preference. All the boxes at your site are the same. Take your box off the top of the stack. When you open other members’ boxes, their produce warms up. No one wants that. Thank you for your help.
I will be away next week, leaving July 22.
I am taking our teenagers to visit family. Please limit communication with us until Sunday 7/30/17. Steve is staying home to take care of everything. If there’s an urgent issue, call or send an email and Steve will help you. However, he already has a lot on his plate. I will check in remotely when possible. Thank you! Beth
Veggie List and Veggie Notes
(Week #10; July 20/21, 2017; green EOW)
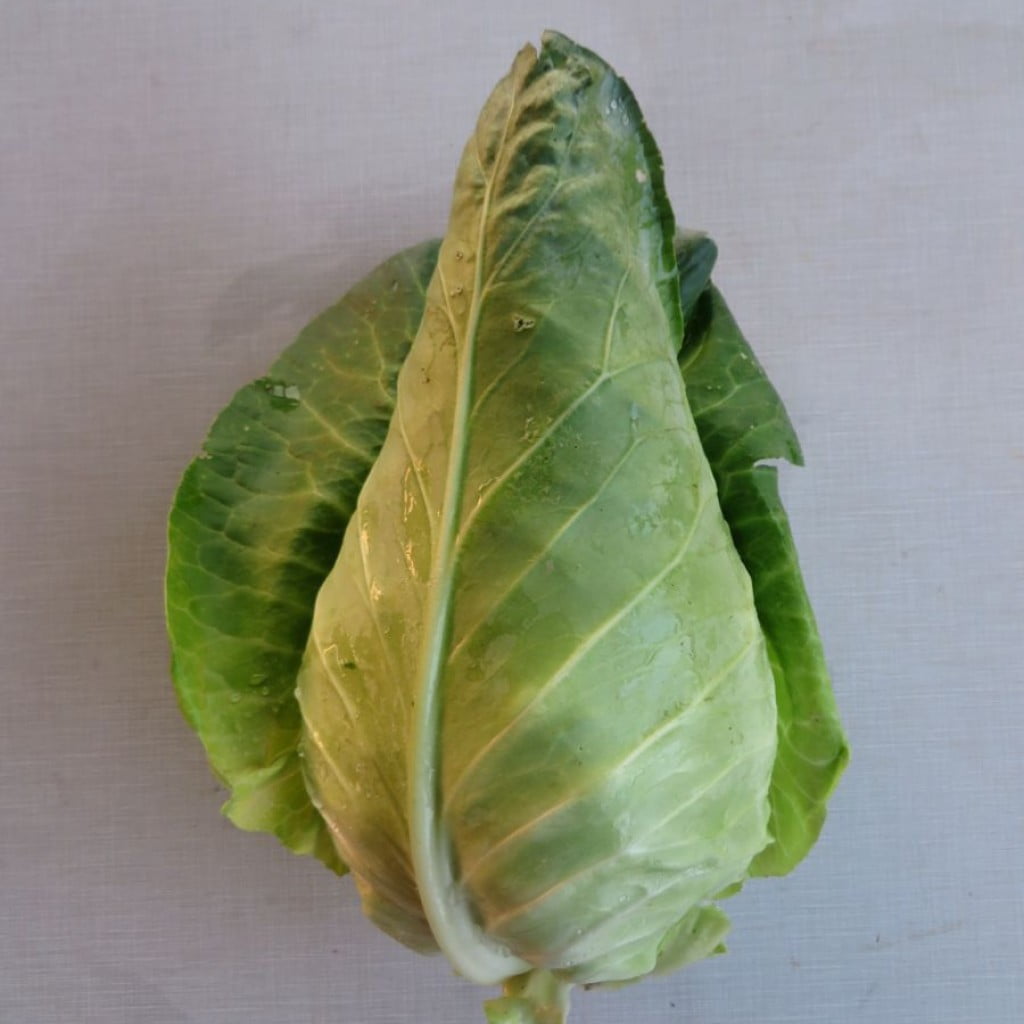
Caraflex cabbage
Swiss chard, 1 bunch
Carrots, 2 lb
Green bell &/or green frying peppers, ~4
Zucchini & summer squash, ~2 lb
Cucumber, 1
Walla Walla onion, 1 large
Flat parsley, 1 bunch
We have small amounts of several new crops, and your site might get one of these:
Broccoli OR cherry tomatoes OR globe eggplant OR a slicing tomato OR an extra cucumber.
Next week’s box will probably contain sweet corn, some kind of greens, carrots (unless it rains too much!), peppers, zucchini & summer squash, cucumbers, onion and more.
Carrots – The first carrot harvest! Refrigerate. We bagged these soon after washing (without much time to drain) so you might need to swap your carrots into a drier bag. Use your judgement.
Green peppers (sweet) – You’ll get green bell peppers (blocky) and/or a green frying pepper (long, slender). Both types are sweet. Frying peppers have lower moisture which makes them particularly suited to frying. Other than frying, the two types can be used interchangeably in recipes. A lot of the bell peppers this week happen to be small. They’ll reach a more typical size soon.
RECIPES
Visit our Recipe Log, a list of all our 2017 recipes. Check June 29 for other cabbage and Swiss chard recipes.
RECIPES FROM LOCAL THYME
Comforting Classics
Seared Cabbage Persillade
Provençal Chard and Zucchini Omelet
Zucchini Parmesan
Bean and Cabbage Soup a Le Marche
Outside the Box Recipes
Parsley Salad
Swiss Chard Carrot Juice
Chocolate and Zucchini Cake
Braised Cabbage with Prosciutto di Parma
Quick and Easy Meal
Laotian Charred Beef on a Bed of Cabbage
RECIPES FROM LAUREN
ALMOND-CRUSTED TROUT WITH RAINBOW CHARD & GRITS
Adapted from Bon Appetit
This recipe is adapted from a Bon Appetit favorite. The grits are tasty with any number of veggies thrown in. If you happen to have some garlic or jalapenos laying around, feel free to toss that in as well.
Now trust me when I tell you that the grits and chard are super simple to make. The only thing that makes this recipe tricky is the trout so I want you to know I am telling you right now, I won’t be offended if you skip the trout entirely. I also won’t be sad if you buy store bought ground almonds so you don’t have to grind them yourselves or if you skip the almonds altogether. It’s a fun recipe to make to completion if you have the extra 15 minutes to make the fish, but if you don’t, plain ol’ baked fish (any baked fish) will work just fine. Lauren.
Serves 4-6
Takes 50 minutes
2 tablespoons butter
1 bunch chard, ribs removed and sliced, leaves torn, divided
1/2 Walla Walla onion, diced
1 green pepper, bell or fryer will both work fine, diced
2 teaspoons Kosher salt, divided
3/4 teaspoon freshly ground black pepper, divided
1 cup grits (not instant) or cornmeal
2 cups water
2 cups whole milk (or substitute more water if you prefer)
1 cup whole, skin-on almonds (see note above)
1 large egg
1 pound trout filets, skin on (preferably rainbow trout from a fish market you trust)
2 tablespoons vegetable oil
1/2 teaspoon red pepper flakes
1/4 cup minced parsley
- Melt butter in a large sauce pan over medium heat. Add chard stems, onion and pepper along with 1-1/2 teaspoon salt and 1/2 teaspoon freshly ground black pepper. Reduce heat to medium low and saute for 10 minutes until very fragrant.
- Add grits, water and milk. Bring to a very gentle boil, reduce heat to medium low and gently simmer, whisking every couple minutes for 20-25 minutes until all liquid has been absorbed.
- Puree almonds in a food processor until texture of course breadcrumbs. Place in a shallow dish and season with 1/2 teaspoon Kosher salt and 1/4 teaspoon freshly ground black pepper.
- In a second shallow dish, whisk egg. Going filet by filet, dip skin side of filet into egg and then into almonds pressing down gently so almonds adhere. Place each filet on a plate (skin side up) and sprinkle with additional salt and pepper.
- In a large skillet, heat vegetable oil over high heat until hot but not smoking. Add filets, almond side down, to the pan (as many as fit without crowding (for me it was just one at a time). Press it down so things brown evenly. Cook for three minutes, flip and cook on the other side for an additional two minutes. Repeat with remaining filets, removing any burnt bits from the pan in between batches and adding oil as necessary.
- When fish are finished cooking but the pan is still hot (and has lingering pieces of almonds, oil and fish bits) toss in the torn chard. Sprinkle with a pinch of salt and 1/2 teaspoon of red pepper flakes. Saute for 2-3 minutes until wilted.
- Just before serving, stir parsley into the grits.
- Serve grits in a bowl with sauted chard and fish.
.
PICKLED CABBAGE SALAD
Borrowed from the incredible Smitten Kitchen
This is a Smitten Kitchen masterpiece just as simple to make as it is to eat. I’ve simplified it a bit but largely kept her original recipe. The marriage of cabbage, carrots and cucumbers is a match made in heaven. I’ve also had cabbage salads with red cabbage, cauliflower or pepper so feel free to toss any of these in the mix if you have them lying around.
As for how to eat this, it may be pickled (and perfect on top of some fried fish tacos) but this is no side dish. I love to just eat a big bowl of it for lunch. Light, bright and crunchy, it won’t way you down. It’s also great on the side of rich dishes or as a topping for grain bowls. The possibilities are endless for this yummy salad. Hope you enjoy! Lauren.
Makes 5-6 cups
Takes 20 minutes (mostly chopping) + at least one hour to rest in the pickling liquid
Brine:
1-1/2 cups white vinegar
1-1/2 cups water
1/3 cup sugar
1/2 teaspoon celery seed
2 tablespoons Kosher salt
Salad:
1 head Caraflex cabbage, cored and shredded
2-3 carrots, peel and thinly slice or julienne
1 cucumber, quartered and sliced
- Combine all brine ingredients in a large measuring cup or medium bowl. Whisk so sugar is well-combined. Whisk a few times if sugar and salt are not coming together.
- Add cabbage, carrots and cucumber to a large bowl. Pour brine over vegetables, toss to combine and cover bowl with plastic wrap. Store in the fridge for at least 1 hour (and up to 1 week). The longer it sits, the more pickled it becomes.
- Eat on its own or with everything!
.
Week #9, July 13 2017
- On: July 12, 2017
 0
0
Farm News

Steve has begun seeding our fall and winter storage carrots, and has already planted three acres. The seedlings are beginning to come up. The big question is whether any of these fields will need to be re-seeded after the rains. Carrot seedlings are delicate and have trouble emerging from the ground if there’s a crust. It’s pretty normal to have to re-seed at least one carrot field. I guess we don’t need the irrigation pipe this week!
It rained 4.5 inches this past week (2 inches on Monday night and 2.5 inches today). That’s not bad, considering the Madison area got 5 – 6 inches and a farmer-friend wrote that they got 10 inches. That’s crazy. We feel lucky. Our fields were getting dry, so the first 2 inches were welcome. The second round, not as much. Your produce is quite clean despite the mud; the crew gave it their full attention. Wash the beets carefully but that’s the only thing that will hold grit. A few items show storm damage. You can see dings in both the snap peas and basil but it’s cosmetic damage. Enjoy your produce and let’s hope for some drier weather. Beth
Let’s talk daikon radishes and Korean food
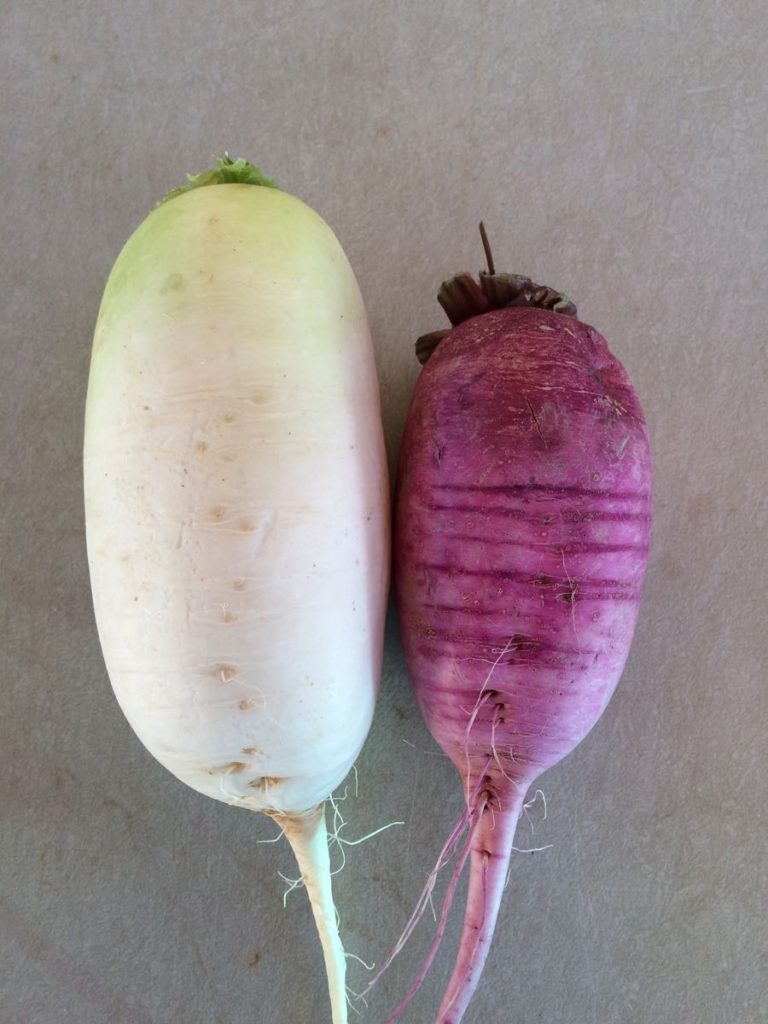
Everyone gets one purple and one white radish this week.
We are sending Korean daikon this week, the same type you received three weeks ago. I love Korean radishes! They are so much sweeter than the Japanese types. We might switch completely to the Korean types in future. First, we need to evaluate how they perform in fall plantings.
Uses: Daikon radish make excellent salads. Both Pat and Lauren gave us recipes for pickled daikon three week ago and both featured bahn mi recipes this week. Great minds think alike. The recipes have overlapping ingredients but each recipe is distinct. We are sending about 1 lb total this week, a perfect amount for salad although you may need to adjust the ingredient quantities since we sent more radishes three weeks ago. Here are their recipes.
– Summer Squash and Kale Tacos with Quick Pickled Radishes
– Pork, Broccoli & Snow Pea Lettuce Wraps with Pickled Daikon
– Grilled Pork Tenderloin Banh Mi Sandwich (A Local Thyme recipe this week)
– Bahn Mi Burgers (below)
I am enchanted with Korean cuisine. If you are interested in Korean food, you must check out Maangchi’s website. She has the best Korean recipes and videos, including an extensive list of daikon recipes. I enjoyed the Maangchi site this winter, making Tteokbokki (Hot and spicy rice cake), various stews, and Bibimbop (Rice mixed with vegetables, meat, an egg, and chili pepper paste), skipping half the ingredients but excellent with her White Radish Salad (Musaengchae).
I am eager to try her newest Cubed Radish Kimchi (Kkakdugi) recipe; I love kimchi and have always found homemade daikon kimchi recipes more reliable than those made with napa cabbage. When it comes to kimchi, I am an amateur compared to Maggie who makes gallons and gallons each year. I’ll get her to share one of her recipes in a future newsletter. If you don’t have Korean red pepper flakes, you can substitute paprika mixed with some cayenne, although the Korean pepper is ground more coarsely. Korean red pepper flakes have a lot of flavor but moderate heat.
In Madison, I shop for Korean staples at the Oriental Food Mart on Park Street, and at an Asian grocery at the northwest corner of Odana and Whitney Way. Lee’s Oriental on University is good too. The owners at Oriental Food Mart on Park Street are very helpful. If you have questions, that’s the place to go. Beth

Ari, Steve and Sophie enjoy a New Years Eve feast at Koreana restaurant outside Toledo. At least five dishes on the table contain daikon. We try to stop at this excellent restaurant during our annual cross-country trip to celebrate Christmas and Hanukkah with family. This year, we managed to stop on both legs of the journey!
Veggie List and Veggie Notes
(July 13/14, 2017; week #9, purple EOW, sun Sampler)
Beets with greens, 1 big bunch
Sugar snap peas, 1.7 lb
Cucumbers, 2
Broccoli, 1 or 2 nice heads
Zucchini & summer squash, 2 – 3 lb
Korean daikon radishes, ~2, white or purple
Walla Walla onion, 1
Basil, 1 bunch
Fresh garlic, 1 bulb
Next week’s box will probably contain ‘Caraflex’ cabbage, cucumbers, zucchini, Walla Walla onion, carrots (unless it rains too much) and more.
Beets with greens – Beet greens are tasty. They are similar to Swiss chard in flavor (the two crops are very closely related.) This week’s greens are a little tough so you should remove the thickest midribs before cooking, and give them a little extra cooking time. We could have harvested them last week but the fennel harvest was more urgent. The extra week gave the beet roots more time to plump up.
Storage: Cover and refrigerate. Separate the tops and roots if you don’t plan to eat the greens immediately, to preserve freshness in the roots. Beet greens are perishable and should be eaten soon. The beet roots will last for weeks.
Sugar snap peas – Let’s give a big cheer for our crew who persevered with the lengthy pea harvest. This might be the largest bag of snap peas we’ve ever put in the CSA boxes. These peas are showing some light storm damage. You’ll see white spots from rain or hail. The peas are not as perfectly tender as those we delivered last week but are still sweet and delicious, good for either raw salads or lightly cooked.
Cucumbers – The first cukes! Enjoy!
Korean daikon radishes – See above.
Fresh garlic – This is the first garlic harvest. We can ship these while freshly dug, without curing. We’ll complete the garlic harvest soon, but then the bulbs need to cure. It will be a few weeks until we can send more. Good thing we have lots of onions.
RECIPES
Visit our Recipe Log, a list of all our 2017 recipes. We’ve already accumulated several zucchini recipes over the past two weeks.
LOCAL THYME RECIPES
Comforting Classics
Grilled Pork Tenderloin or Tofu Banh Mi Sandwich
Beets, Beet Greens, and Sautéed Onions with Feta and Pine Nuts
Raw Beet Salad
Wagon Wheel Pasta with Peas
Outside the Box Recipes
Hoisin Braised Daikon
Bruschetta with Beets and Goat Cheese
Broccoli Pesto
Chilled Snap Pea Soup with Honey Sage Butter
Quick and Easy Meal
Seared Scallops on Snap Pea Puree
RECIPES FROM LAUREN
BAHN MI BURGERS
I know it looks like a long ingredient list on this one but I promise it will come together in a cinch. The hardest thing you have to do is cut daikon into matchsticks and pickle them. Also note that a technically traditional bahn mi uses a Vietnamese baguette, some sort of delicious slow-roasted pork product (usually pork belly), pork pate, pickled daikon & carrots, cucumber slices, pickled jalapeno, and cilantro so calling this a bahn mi is a bit of a stretch. But it’s darn tasty so we’re going there anywhere. Lauren
Makes 6-8 burgers
Takes 1 hour
Pickled Daikon
1/2 cup rice wine vinegar
1/2 cup water
1/2 cup sugar
1 tablespoon soy sauce or tamari
3 cups daikon, white or purple or a mix, cut into matchsticks (no need to peel)
Burgers:
2 pounds ground pork
6 cloves garlic, minced
1 teaspoon curry powder
1 teaspoon fresh lime juice
Kosher salt and freshly ground black pepper
Spicy Mayo:
1 cup mayonnaise
4-6 tablespoons sriracha depending on your preference for heat
1 tablespoon fresh lime juice
1 tablespoon sugar
1 tablespoon soy sauce or tamari
For Assembly:
6-8 of your favorite burger buns (or baguette bread sliced into bun size for a more authentic bahn mi), toasted
Cucumber, very thinly sliced
Basil
Pickled sliced jalapeno, optional
- Make pickled daikon. Combine rice wine vinegar, water, sugar and soy sauce together in a large bowl. Whisk to combine. Add daikon and leave at room temperature to rest while you prepare the rest of the burger. Let pickle for at least thirty minutes. Feel free to do this step the morning or night before preparing the burgers.
- Make your burgers. Combine pork, garlic, and curry powder in a large bowl along with a generous amount of salt and pepper. Form into 6-8 patties depending on the number of mouths you are feeding. Grill the burgers or cook them in a small amount of vegetable oil on the stovetop until cooked through or about 3-4 minutes per side. Remove to a plate and let rest for 5 minutes.
- Prepare spicy mayo. Combine all ingredients in a small bowl and whisk to combine until smooth. Taste and adjust seasonings to your preference.
- Assemble burgers. Spread a generous about of spicy mayo on the base of your toasted buns. Top with a 6-10 slices of cucumber followed by burger patty. Add a few basil leaves, some pickled jalapenos (if using) and a generous pile of pickled daikon followed by the top of your bun. Press down slightly to try and make your burger a manageable, bite-able size and enjoy!
BEET, SNAP PEA & AVOCADO SALAD
Adapted from Yotam Ottolenghi’s Plenty
Takes 30 minutes
Serves 2 as a main dish dinner salad or 4-6 as a side
1 bunch beets
3 tablespoons sherry vinegar (red wine or balsamic vinegars also would work fine)
1/4 cup olive oil
1/2 tablespoon hot sauce
1 teaspoon kosher salt
1/2 teaspoon sugar
1 Walla Walla onion, thinly sliced
3 cups snap peas, ends trimmed and halved lengthwise
1 avocado, thinly sliced
1/4 cup basil leaves
- Bring a large pot of unsalted water to a boil on the stove. Prepare beets, by trimming off the tops. Discard the greens or save for another purpose. Cut any beets larger than a golf ball in half. If they are the size of a baseball, cut them into quarters. Drop the beets into the boiling water and blanche for 5 minutes. Strain and rinse under cold water until cool enough to peel. Peel beets. Thinly slice beets (ideally on a mandolin if you have one but a knife will work fine if you don’t).
Whisk together vinegar, olive oil, hot sauce, salt and sugar in a medium bowl. Add sliced onion and beets. Let sit for 15 minutes. - Meanwhile, prepare peas. Trim ends and slice in half lengthwise. Mix together peas and basil leaves on a large, lipped platter. Lay avocado over the top. Once onions and beets are ready, pour them over the peas, mint and avocado. Use as much of the dressing as you desire.
.
Week #8, July 6 2017
- On: July 05, 2017
 2
2
I queried our crew members about their favorite fruits and vegetables that we grow. Here are some of their responses plus a photo for each. I’ll post more people’s responses in a future newsletter. Think of our hard-working crew when you enjoy one of their favorites! Beth
Smitty Bietila (2008 – 2013, returned in 2017) Kale, the gift that keeps on giving all summer long.
Jory Carlin (2014) Carrots because they are delicious.
Jon Fagan (2013) Crenshaw melons. Jon loves crenshaw melons because they are delicate, ephemeral, sweet and delicious. They are very difficult to grow in Wisconsin so we only get a few each year.
Billy Frain (2013) Onions. He likes the steps in harvesting onions; pull from the ground, leave to dry, pull off tops, gather to cure in the greenhouse. Also … “Carrots. They bring the whole crew together during weeding, despite the tedious, arduous nature of the work.”
Charlotte Hammond (2016) “Watermelons because our watermelons are the best on the planet. I can eat a whole watermelon every day during melon season. If I ever have my own farm, it’s gonna be a watermelon farm.” It’s also her favorite crop to harvest. Charlotte is on Steve’s melon harvest crew because she’s very strong and can catch. Out of season, Charlotte stays in shape with a ‘watermelon chair’ exercise routine, using a Roman chair at her gym (google it for photos). She works with 20+ lb weights to mimic picking up and stacking melons.
Kristin Knoener (2008, returned in 2016) Kristin likes cherry tomatoes, lettuce and watermelons. “There’s nothing like watermelon at 3:00 pm on a hot day.”
Kelcie Morgan (2015) Sweet corn. “It’s a fast-paced straight-forward harvest, a race to the end of the row. Then we get to eat it on the wagon on the way back to the buildings.” Strawberries and peas are other favorites to eat but are not her favorites to harvest. (Beth’s note; these low-to-the-ground crops are hard on everyone’s backs.)
Maggie Schley (1999?) Maggie loves cucumbers because she loves pickles and salt and fermentation. Tipi carrots are a big part of Maggie’s life. They were pictured on her wedding invitation. She has lots of carrot jewelry. Everyone on the farm saves ‘lover carrots’ for Maggie; carrots that have grown together in a spiral. Maggie is always on the carrot harvest crew.
Dana Teske (2015) Sweet corn. It’s her favorite to harvest and favorite to eat.
Jim Walker (2016) Rhubarb. He likes the fact that you can make dessert from a vegetable with mildly poisonous leaves. (Actually, it’s a petiole.) Also, it reminds him of home because rhubarb grew at all the houses where he grew up.

Jory (center) helped re-insulate and re-cover our cooler roofs last year.

Billy shows off some ‘farm bling’ he unearthed in a field. We find all kinds of things.
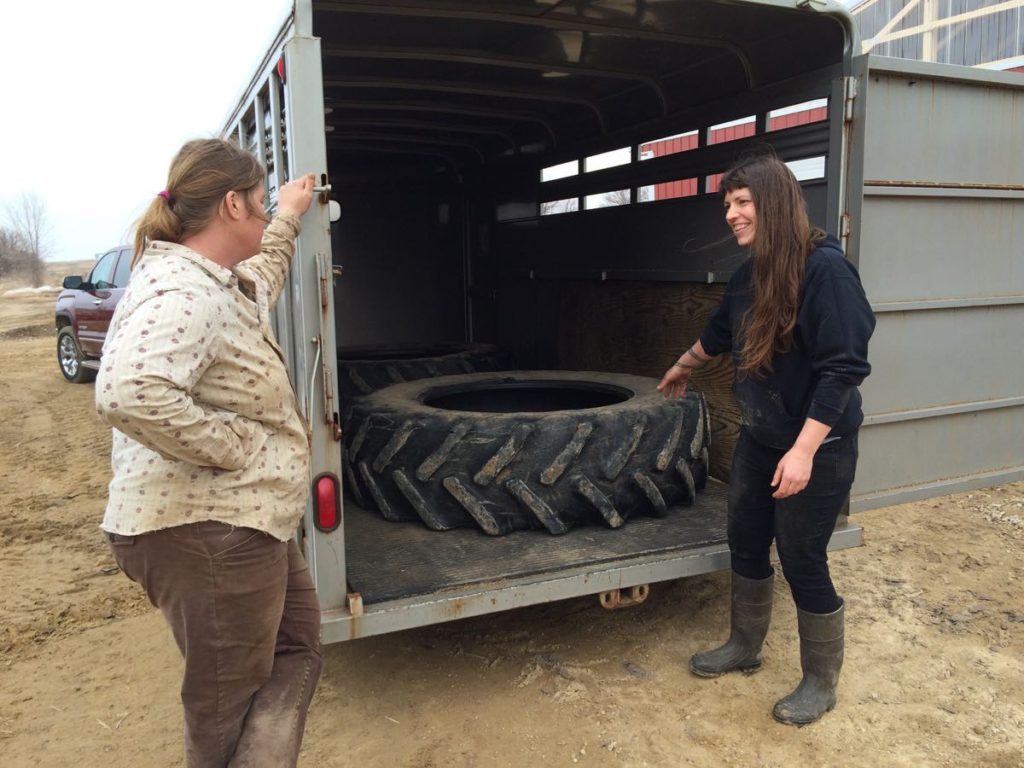
From left, Maggie and Charlotte retrieve an old tractor tire from the farm. It weighs 284 lbs. They took it to Charlotte’s farm for strength training, where they train by flipping the tire. These are two strong women.

Kristin in an untilled area of our farm. I want to establish prairie plantings and Kristin is helping me figure out how to do it. She’s worked in prairie restoration for years and has deep knowledge about prairie management.

Kelcie and Billy harvest Brussels sprouts two falls ago.
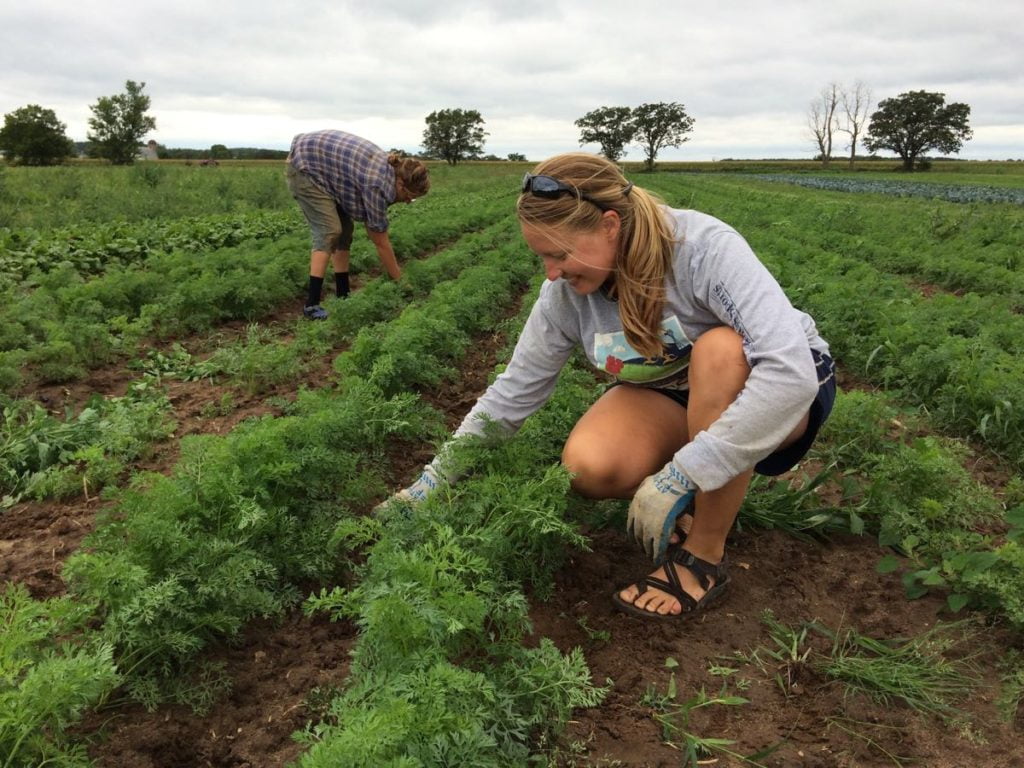
From left, Kelcie and Dana weed carrots.
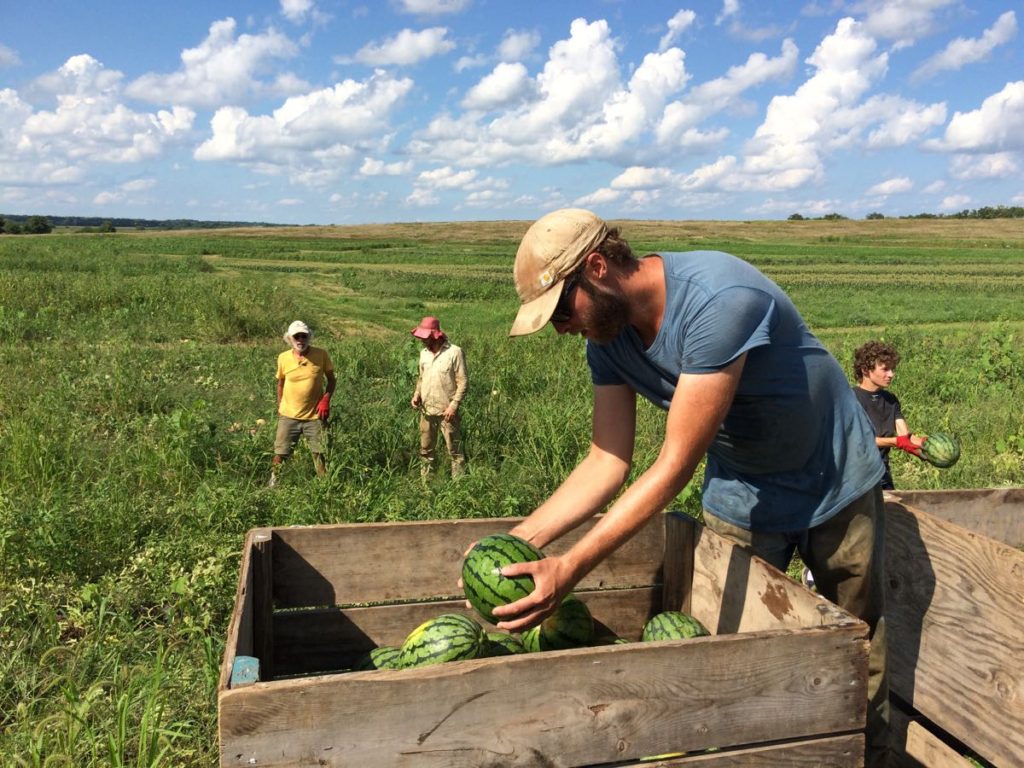
Jim stacks watermelons at harvest.
Veggie List and Veggie Notes
(July 6/7, 2017, green EOW)
Fennel, 1 bulb with fronds
Broccoli, 1 – 2 nice heads
Snap peas, 1.3 lb
Zucchini & summer squash, ~3 lb
‘Salanova’ lettuce (red or green)
Kohlrabi, 1 (or 2)
Sweet Walla Walla onion, 1 large
Basil, 1 husky sprig
Next week’s box will probably contain some type of greens, carrots, Walla Walla onion, zucchini, basil, fresh garlic and more.
Fennel (large vegetable with a fat bulb and lacy fronds) – Fennel is a ‘swing vegetable’; it can be used raw or cooked. Clean well and slice as thinly as possible for use in raw salads. It is good simply prepared with olive oil, lime or lemon juice, salt and shaved parmesan cheese. Cooking softens and sweetens fennel, and mellows its anise flavor. Both the bulb and leaves are edible. Here are ideas from Alice Water of Chez Panisse about how to use fennel: ‘It’s strong anise characteristic seems to suit fish particularly well. … We use fennel all the time. We add the feathery leaves to marinades for fish and to numerous salads, sauces and soups and we use them as a garnish, too. … The bulbs are sliced and served raw in salads in various combinations with other vegetables, parboiled for pastas; caramelized and served as a side dish; braised whole; or cooked in vegetable broths & fish stocks.”
Snap peas – We harvested two varieties this week. One has strings, the other is stringless. You’ll just have to figure out which one(s) you receive.
Kohlrabi (round, pale green) – See our June 15 newsletter for info on kohlrabi.
Walla Walla onion – Yeah for the first Walla Wallas! These are sweet onions, crisp and very mild. Wonderful raw or lightly cooked. Try cutting into wedges, threading on a skewer and grilling. Do not try to fry these onions – it doesn’t work because of their high water content. Storage: It’s OK to store at room temperature for up to one week. Otherwise, refrigerate.
Basil (curly-leaved sprig) – Almost everyone receives the ‘Napoletano’ variety this week. The leaves are larger and more frilly than most basils. We like this variety because it remains tender and flavorful even as the plants mature. Storage: Basil will blacken if stored in the refrigerator. It is best stored at room temperature with the cut ends in water, for example in a jar or vase. Treat it like a flower. Give the stem a fresh trim. You will receive one sturdy sprig this week.
‘Salanova’ lettuce – This is a new innovation in lettuce breeding that lets you prepare salad mix easily. It also has nice flavor and texture, even during the summer when it’s otherwise difficult to grow lettuce. Cut the head across the base and it will fall apart into individual leaves. Dunk and swish in a tub of water. Drain and spin dry to store.
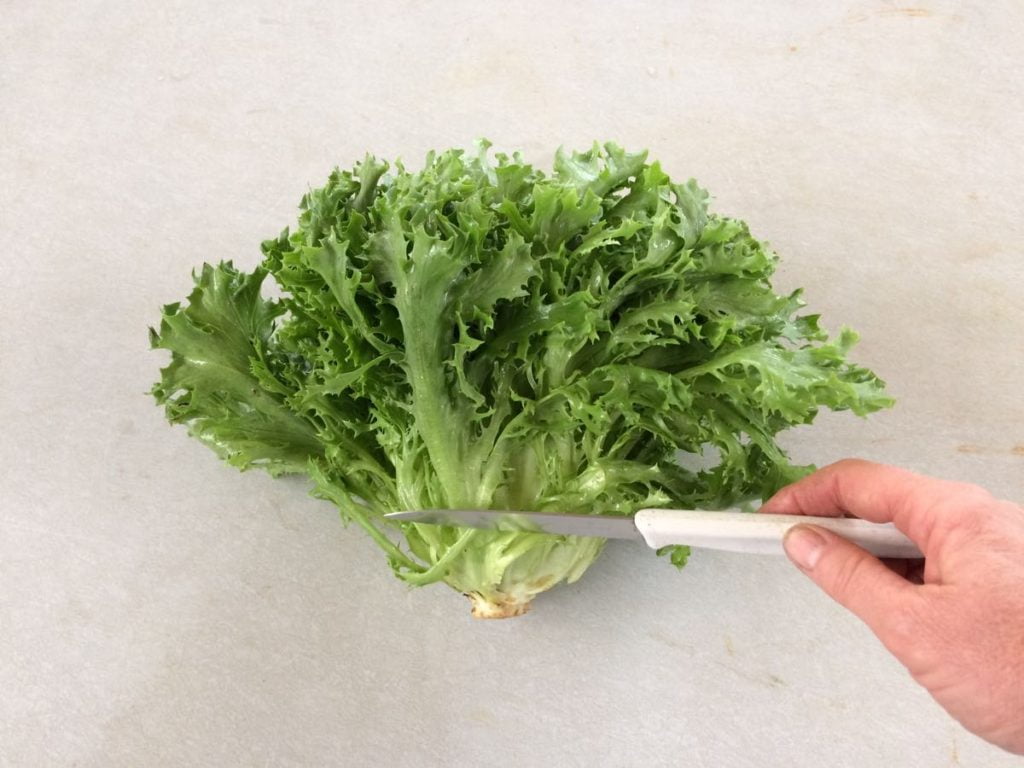
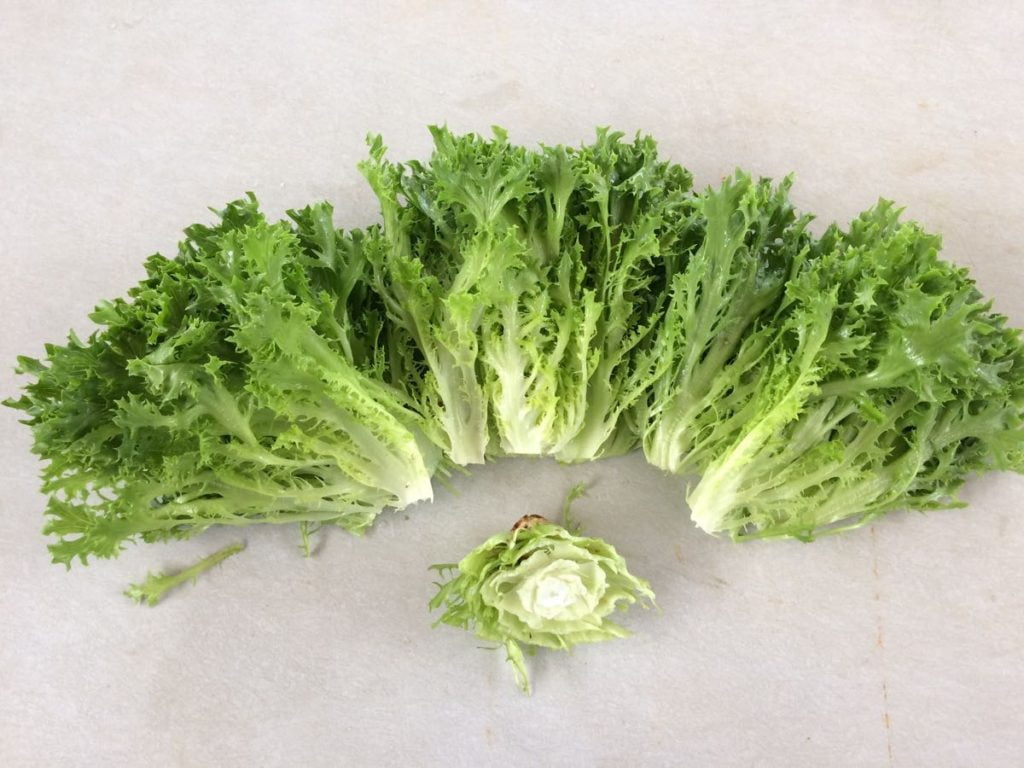
We’re pleased with the new ‘Salanova’ lettuce variety. Cut the lettuce head at the base and it falls apart into salad mix. Isn’t that great?! You’ll get either red Salanova or green Salanova this week.
RECIPES
Visit our Recipe Log, a list of all our 2017 recipes. We’ve already accumulated several zucchini recipes over the past two weeks.
LOCAL THYME RECIPES
Comforting Classics
Chopped Salad of Kohlrabi, Snap Peas, Chicken (other options listed) and Sweet Basil Dressing
Barefoot Contessa’s Roasted Broccoli with Pine Nuts, Lemon and Parmesan
San Franciscan Cioppino
Sweet Onion Rings with Basil Buttermilk Dip
Outside the Box Recipes
Snap Peas with Japanese Seasoning
Pasta Salad with Broccoli, Zucchini, Basil, Feta and a Medley of Olives
Roasted Chicken and Fennel with Oranges and Olives
Curried Squash Soup
Quick and Easy Meal
Kohlrabi and Lamb Stew
RECIPE FROM LAUREN
Summer Pad Thai
Pad thai is a quick easy meal, but it does require quite a bit of slicing and dicing. Get all your vegetables prepped before you start as things will move very quickly once you begin cooking. Lauren.
Takes 45 minutes
Serves 4-6
8 ounces rice noodles (Thai Kitchen is in most every grocery store and has great Pad Thai noodles)
1/4 cup peanut oil or other mild oil (vegetable or olive oil would both work fine), divided
1/4 cup tamarind paste (if you can find it, I never seem to have any on hand so I substitute 2 tablespoons lime juice with 2 tablespoons brown sugar or raw sugar)
1/4 cup fish sauce
1/3 cup honey
2 tablespoons rice wine vinegar
1 tablespoons soy sauce or tamari
1-2 teaspoons red pepper flakes
1/2 Walla Walla onion, diced
3 garlic scapes (if you have some leftover, skip it if you don’t)
2 eggs
1 head broccoli, finely chopped
2 pounds zucchini and summer squash, cut into matchsticks
1/2 cup chopped peanuts plus more for garnish
1/2 pound snap peas, end removed and thinly sliced, for garnish
Basil, thinly sliced, for garnish
Limes, quartered
- Place noodles in a large bowl.
- In a large stock pot bring enough water to cover the noodles to a boil. Pour over noodles and let stand for 7 minutes. Drain noodles, return to bowl and toss with 1 tablespoon peanut oil.
- Meanwhile, in a small sauce pan combine tamarind paste (or substitutions), fish sauce, honey, rice wine vinegar, soy sauce and red pepper flakes. Whisk to combine and then heat over medium heat until sugar and honey dissolve. Remove from heat.
- In a large skillet, heat remaining oil over medium heat. Add onion and garlic if using. Saute for 3-5 minutes until fragrant and soft. Add eggs and scramble gently. Once eggs are most cooked add the broccoli. Continue sauteing and cooking the eggs for 5 minutes until broccoli is bright green.
- Add noodles, zucchini, summer squash and sauce. Stir to combine then cook for 2 minutes until everything is warm and zucchini is just barely cooked. Stir in 1/2 cup peanuts just before serving.
- Serve warm with peanuts, snap peas, basil and lime wedges.
.
Fennel & Kohlrabi Salad
Borrowed from my dear friend Andrea Bemis of Dishing Up the Dirt
I always thought I couldn’t eat fennel raw until I shaved it real thin and paired it with some apple and a light homemade vinaigrette. Something about this simple salad transformed the way I looked at fennel. Now I love to eat raw fennel as a side to something real rich and hearty (like a grilled steak or porkchop). This recipe takes things a bit further pairing fennel with crunchy kohlrabi and onion alongside some walnuts and blue cheese. Together it makes for a powerhouse dish. PS Feel free to sub feta for blue cheese if you are a real blue cheese hater. It won’t make much of a difference. Lauren.
Takes 20 minutes
Serves 4
1/4 cup apple cider vinegar
3 tablespoons honey
1-1/2 teaspoons Dijon mustard
1/2 teaspoon celery seeds
1/2 teaspoon Kosher salt
1/2 teaspoon freshly ground black pepper
3-1/3 tablespoons extra virgin olive oil
1 large or 2 smaller kohlrabis, stems and greens discarded, peeled and cut into matchsticks
1 large fennel bulb, stems removed (and saved for another use), halved, cored and very thinly sliced (if you have a mandoline- use it!), plus a few fronds for serving
1/2 Walla Walla onion, very thinly sliced
1 apple (honey crisp or granny smith work best in my opinion), sliced into thin matchsticks
1/4 cup walnuts, roughly chopped and toasted
1/4 cup good quality blue cheese, crumbled
- In a large bowl wisk together the vinegar, honey, mustard, celery seeds, salt and pepper. Slowly whisk in the oil until well combined.
- Add all the thinly sliced vegetables (and fruit!) to the bowl and toss well to combine.
- Divide between plates and top with toasted walnuts, crumbled blue cheese and a few fennel fronts. Season to taste with additional salt and pepper if need be.
.
Week #7, June 29 2017
- On: June 29, 2017
 0
0

Steve sunk a tractor in the ground on Monday. Before plowing a wet bottom field, he attempted to set the plow to a shallower depth but accidentally set it deeper. He plowed a furrow that was too deep and got stuck. Steve came moping back to the house, worried that we would need help extracting the embedded tractor and plow. That’s expensive (if we hire a rig) or embarrassing (if we ask a neighbor for help). It’s difficult and risky when the tractor and implement are still hitched together. He didn’t sleep well at all that night. By morning, Steve and Roger had a plan that worked, using other tractors and a front-end loader. All was well but it was an unsettling moment for Steve. Beth
Veggie List and Veggie Notes
(June 29/30, 2017; week #7, purple EOW, moon Sampler)
Beth’s Box Logic: We planned this delivery with your July 4th celebrations in mind. You’ve got ingredients for …
– cole slaw (cabbage, scallions),
– cold salads (Romaine, peas, parsley),
– grilling (zucchini),
– pasta salad, our go-to meal for picnics (grilled zucchini, peas, Swiss chard, scallions, parsley) and
– cocktails (tomato juice)
You will find something festive to prepare. Have a great 4th of July!
Box Contents
Tipi tomato juice, 1 quart
‘Caraflex’ cabbage
Sugar snap peas, ~1.2 lb
Swiss chard, 1 big bunch
Zucchini & yellow summer squash, ~3 lb
Romaine lettuce
Scallions, 1 bunch
Curly parsley, 1 bunch
Next week’s box will probably contain sugar snap peas, beets with greens, zucchini, broccoli, sweet Walla Walla onion, basil and more.
‘Caraflex’ cabbage – This is a nice salad-type that we grow in summer. Don’t you love the pointy shape? It has thinner, more tender leaves than the usual green cabbage. Great in salads and slaws but can also be cooked. Here’s the description from the seed catalogue: “Inner leaves are tender, crunchy, and have an excellent, sweet and mild cabbage flavor. Perfect for summer salads, slaws, or cooked dishes.”
Swiss chard (pretty bundle of green leaves) – Our crew did a nice job mixing colors for pretty bunches. Swiss chard is a close relative of spinach, but requires a bit more cooking. Use as a substitute in any recipe that calls for spinach, just cook the chard a little longer. Both stems and leaves are delicious. The stems requite longer cooking, so cut them free from the leaves when preparing. That allows you to cook the stems longer.
Parsley – This is the most versatile, widely-used herb that we grow. This week, I plan to make a tabouleh-style salad with snap peas, grilled zucchini, scallions and lots of parsley.
Tipi tomato juice – We had this juice bottled from our tomatoes last summer. It’s a great way to capture ripe tomatoes at peak season, at a moment when we are swimming in tomatoes. Drink it or try making an easy soup. Simmer diced zucchini and Swiss chard in the juice. Add minced scallions and parsley near the end of cooking. Voila! Soup!
Storage: Store the juice out of sunlight at room temperature when unopened. Refrigerate after opening. The juice is already seasoned so do not add salt if you cook with it.
Ingredients: organic tomatoes from Tipi Produce, salt, organic garlic, organic onion, organic black pepper. I’ve posted the nutritional information here.
LOCAL THYME RECIPES
Comforting Classics
Greek Swiss Chard and Zucchini Soup
Pan Fried Tofu on Cabbage and Snap Pea Salad
Zucchini Scallion Fritters
Classic Coleslaw
Outside the Box Recipes
Zucchini and Swiss Chard Tart
Vietnamese Snap Pea Stir Fry
Orzo Salad with Grilled Summer Squash
Swedish Cabbage Soup
Quick and Easy Meal
Turkey, Bacon and Parsley Pesto Mayo Sandwich with Romaine
RECIPES FROM LAUREN
GRILLED CABBAGE, SNAP PEA & SCALLION SALAD
There’s little I enjoy more than bringing home a huge tote of vegetables and tossing them on the grill for a simple but amazing dinner. This week’s creation involves grilling a lot of things not commonly thought of as grillable but you’ll have to trust me that grilled cabbage and snap peas are a real thing of beauty. If you don’t have a grill or equipment good enough to keep veggies from falling through the grates you could broil your vegetables on a sheet pan for 15-20 minutes until very well charred in places. That was my go to “grilling” technique before we purchased an awesome grill last summer. And still my technique when summer storms keep me inside. Lauren.
Takes 30 minutes
Serves 4-6 as a side to some hearty cut of meat also done on the grill or 2 as a main dish
1/4 cup olive oil, divided
1 cabbage, cut it half lengthwise and cut in half
1 pound snap peas (or as many as you can spare), ends trimmed
1 bunch scallions, ends trimmed
Kosher salt and pepper
2 tablespoons rice wine vinegar
1 tablespoon toasted sesame oil
2 tablespoons brown sugar
1 tablespoon tamari or soy sauce
1 teaspoon fish sauce
1/2 teaspoon red pepper flakes
2 tablespoons toasted sesame seeds
- Drizzle one tablespoon of olive oil on a baking sheet. Add cabbage, snap peas and scallions. Drizzle with additional tablespoon of olive oil and then sprinkle generously with salt and pepper. Toss gently with your hands to coat veggies evenly with oil.
- Get your grill ready. The hotter the better. Grill veggies directly over heat (one of these fancy grill pans or baskets that keeps the veggies from falling through might be helpful) flipping so both sides get blackened in spots. This takes about 5-6 minutes for the scallions and peas and closer to 10 minutes for the cabbage. A little char is a great thing, especially for the cabbage. If you are broiling, just keep them on the baking sheet and put them RIGHT under the broiler for 20 minutes, flipping the veggies after 10 minutes.
- Remove veggies, allow to cool briefly. Add peas to a medium bowl. Slice cabbage and scallions thinly (as best you can) and add to the same bowl.
- Whisk rice wine vinegar, remaining olive oil, sesame oil, brown sugar, tamari, fish sauce and red pepper flakes together in a small bowl. Pour dressing over veggies. Add sesame seeds and stir to combine. Serve warm or cold.
.
ZUCCHINI & SWISS CHARD TART
Recipe adapted from New York Times
I make pie crust in my food processor following Smitten Kitchen’s basic guidelines for “all butter, really flaky pie dough” every single time I need a pie crust regardless of what the recipe calls for and I am NEVER disappointed. It’s simple, quick and incredibly flaky. Do note that this makes a double batch (aka two pie crusts) so either make half the Smitten Kitchen portion (which is a little more difficult in your food processor) or two tarts! Lauren.
Makes 1 tart
Serves 4-6
Takes 1 hour, 45 minutes (much of it inactive), a little longer if you make the dough from scratch
1 store-bought pie crust or follow instructions for my favorite pie crust (see note above)
2 tablespoons olive oil
2-3 scallions, white and pale green parts, diced
1 teaspoon Kosher salt, divided
1/2 teaspoon freshly ground black pepper, divided
1 bunch Swiss chard, stems removed and diced, leaves roughly chopped
2 pounds zucchini and/or summer squash, diced
1/4 cup minced curly parsley
3 eggs, beaten
3/4 cup Gruyere (or Swiss if you can’t find that) cheese
- If making pie crust from scratch, do this first so it has time to chill in the fridge for 20 minutes.
- Preheat the oven to 375 degrees.
- In a large saute pan, add olive oil, scallions and chard stems. Season with 1/2 teaspoon salt and 1/4 teaspoon pepper. Cook over medium heat for five minutes until fragrant. Add zucchini and chard leaves, stir often for 10 minutes. Zucchini should be tender but still bright green and greens should be wilted. Add parsley, cook about 1 minute longer just to combine flavors. Remove from heat and set aside.
- Beat the eggs in a large bowl. Stir in remaining salt and pepper. Add zucchini chard mixture and cheese. Mix everything together and then add remaining pepper.
- If making your own pie crust, roll it out into a circle and line a 9 or 9.5-inch pie pan. †If not, just grab your store-bought crust. Fill pie crust with zucchini chard mixture. Bake for 50 minutes or until center is set and top is golden brown. Allow to set for 15 minutes before serving. It’s fine to serve this warm or at room temperature.


