
Blog
Tomato juice for 2017.
- On: August 31, 2016
 0
0
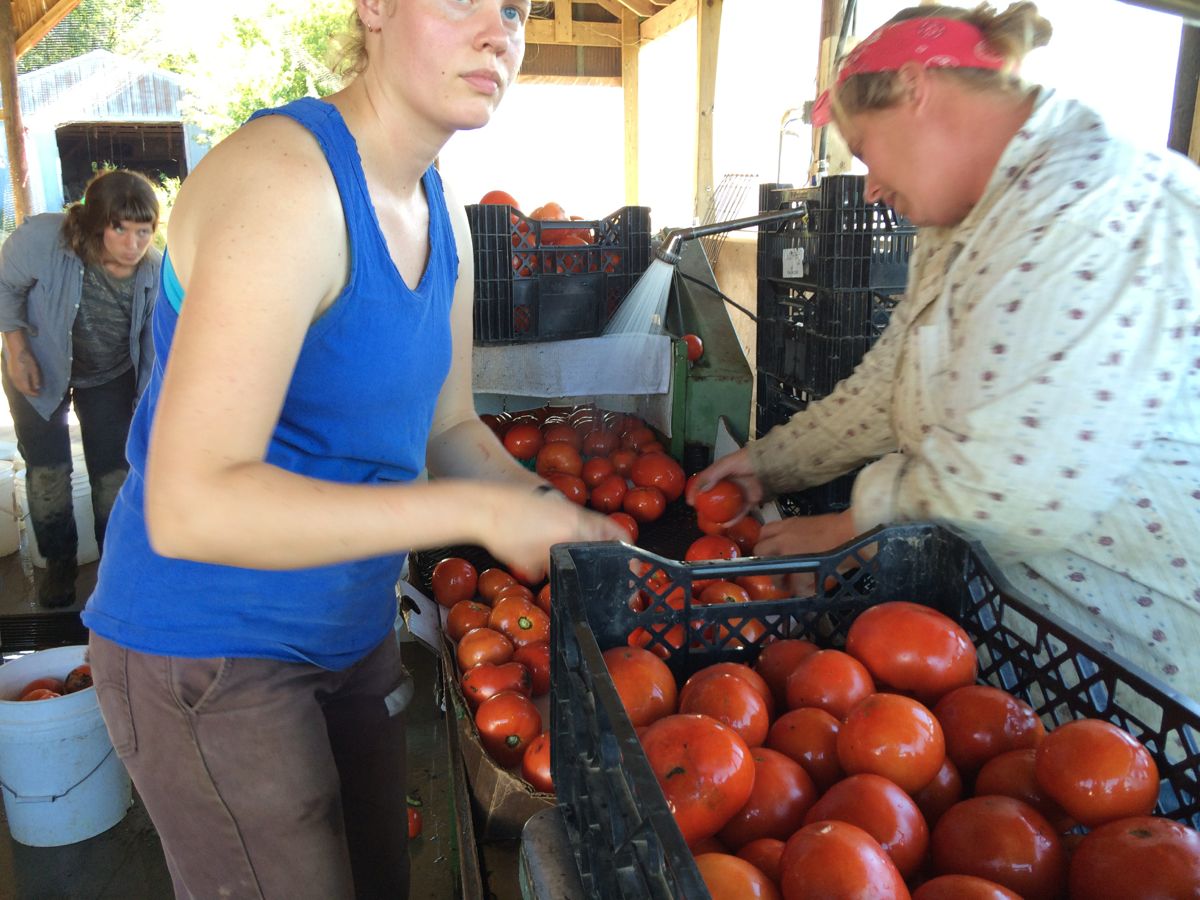
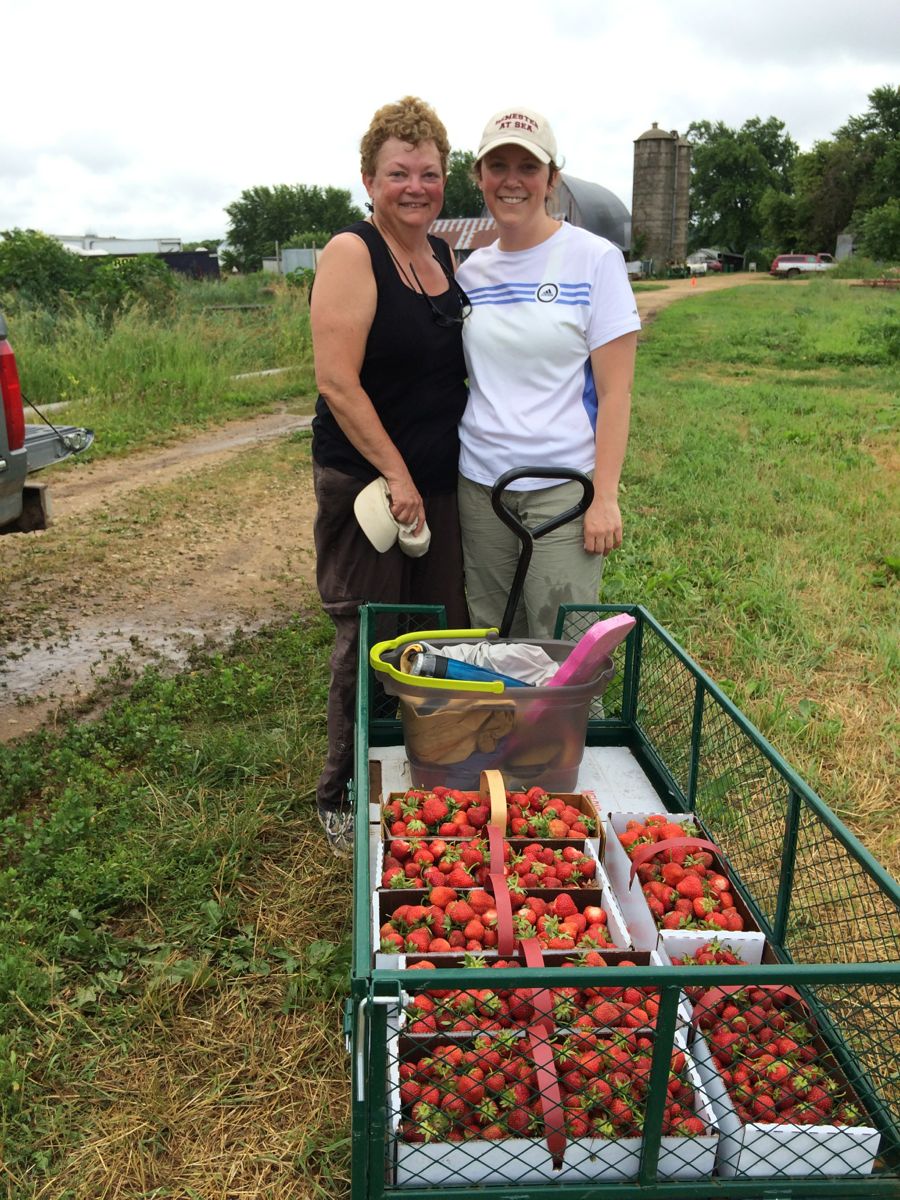
Charlotte, Osha and Maggie wash a gazillion tomatoes.
Tomato harvests are at their peak. We have more tomatoes than you need/want, so we will bottle some of this week’s tomatoes for next year’s tomato juice. We picked plum tomatoes for your CSA boxes this week, and will make ripe slicing tomatoes into juice. Contract Comestibles, a small food processor in East Troy, will process the juice for us. That is a job beyond us in every sense (time, ability, legality). Bottling is a great way to use surplus tomatoes at peak season, and we will be glad to have the juice tucked away for next year. The tomatoes are in very good shape, so we predict a fine batch of juice.
As you probably noticed, we usually pack 4 lb tomatoes per CSA box at peak season. We settled on that amount based on feedback from you folks. Shoot us an email if you have any thoughts on the amount. We are always open to suggestions and I have wondered if 4 lb per week is what everyone wants. Beth
Extra tomatoes for sale next week?
We offered extra plum tomatoes for sale to Friday sites this week. We think there will be enough to offer to the Thursday sites next week. Watch for emails from us mid-week.
Veggie list and veggie notes (Sept. 1/2, 2016, week #16, purple EOW)
Plum tomatoes, 4 lb
Edamame soybeans, 1 bundle
Sweet corn, 5 ears
Green beans, 0.85 lb
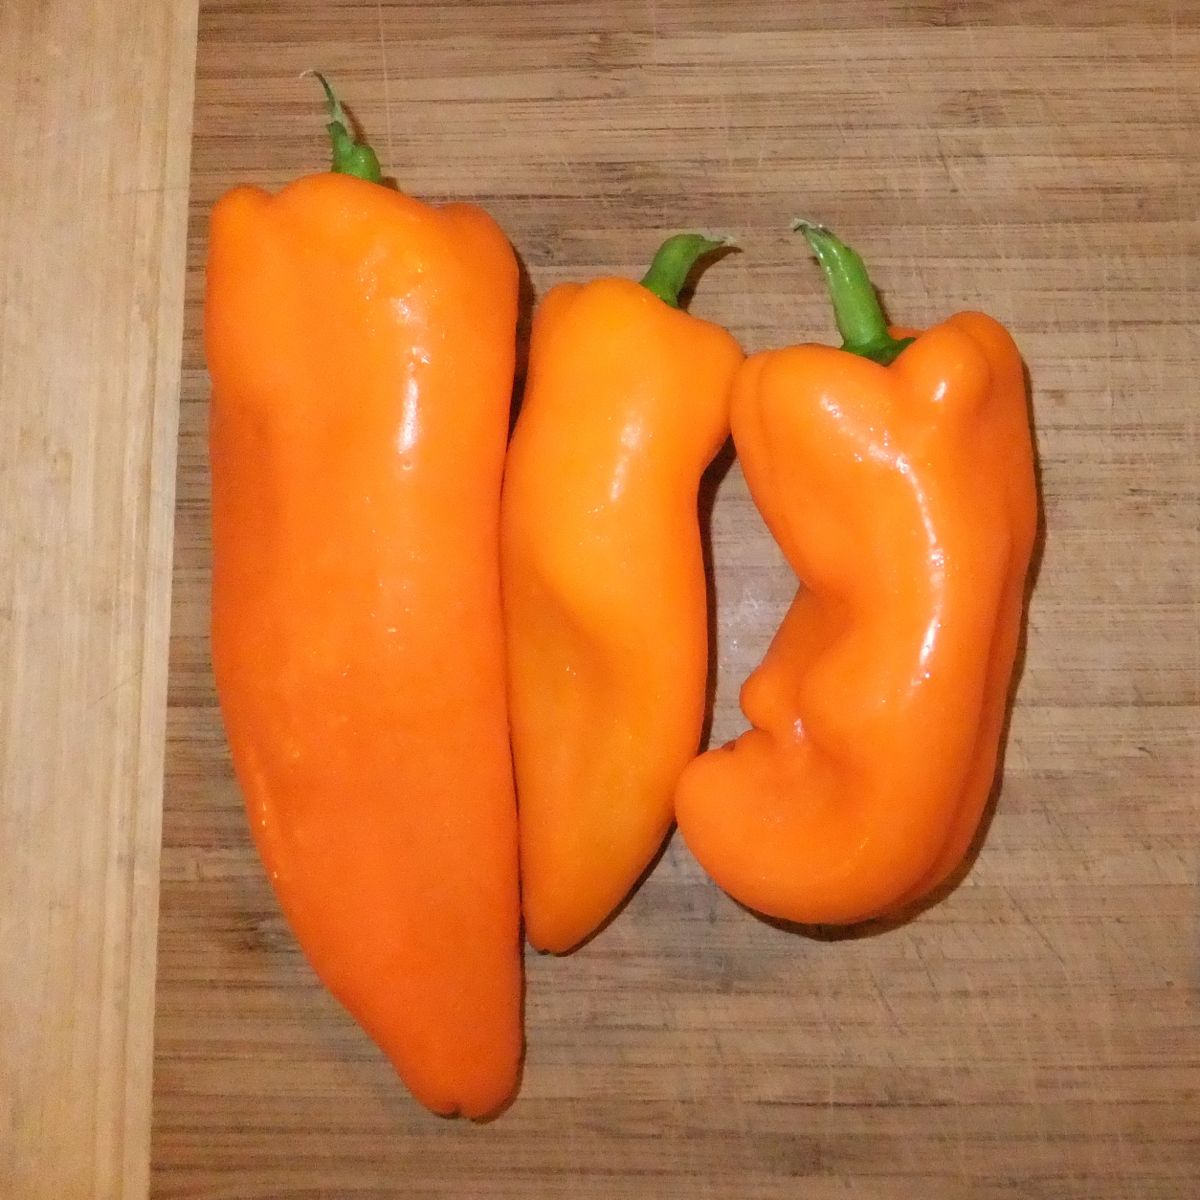
Colored frying peppers, ~3
Oranos OR lunchbox peppers
Cucumbers or pickles, ~1 lb
Sweet onion (Walla Walla or Zoey)
Jalapeño chile (HOT), 1
Thai or Italian basil, by site, 1 bunch
Some sites get watermelon.
Some sites get large broccoli.
Some sites get small broccoli + heirloom tomato.
Some sites get a zucchini too.
Next week’s box will probably contain tomatoes, peppers, broccoli, onions, and more.
Plum tomatoes – Plum tomatoes are meaty, with higher solids and lower water content than slicing tomatoes. They are the best tomato for sauce. They make a fine salad too.
Edamame soybeans (bundle of green stems with pods attached ) – These edible soybeans are a treat. Pull the pods from the stem and wash well. It helps to submerge the pods and rub them together. Boil in water until the pods have split and the beans are quite tender. Season with salt and pop the beans out of the pods and into your mouth. This Japanese specialty is becoming more and more popular in the USA.
Storage: Remove the pods from the stems promptly and refrigerate.
Sweet corn – This corn is a bit starchy so the best use is to cut the kernels from the cob and add to a recipe. This is the last corn of the season.
Oranos or lunchbox peppers – Oranos are orange. Lunchbox peppers are smaller and mixed colors: red, orange, yellow. Otherwise, these peppers are pretty similar. Sweet, flavorful, crunchy, they are the perfect size to pack for lunch the first week of school.
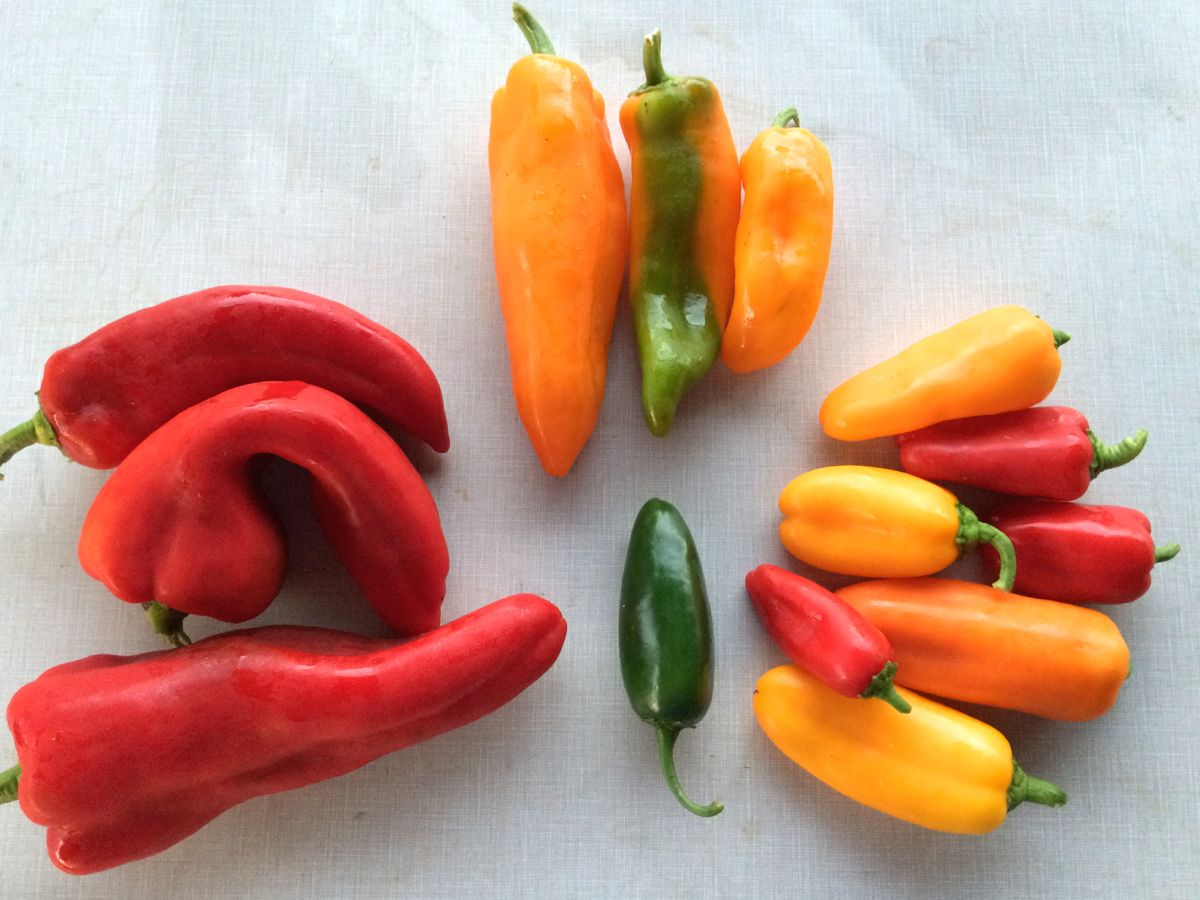
Pepper ID. Clockwise from left; Italian frying peppers, Oranos, lunchbox peppers. Jalapeño chile (HOT) in the middle.
RECIPES FROM LAUREN
A SAVORY YOGURT + EGG BREAKFAST SALAD SITUATION
Adapted ever so slightly from a recipe by my absolute favorite, Molly Yeh
Takes 20 mintues
Serves 2-4 based on your hunger level
2 cups plain yogurt (Greek yogurt preferred)
1 tablespoon olive oil
1 teaspoon Kosher salt, divided
1/2 teaspoon freshly ground black pepper, divided
Fried eggs
1 avocado, diced
1 large cucumber, seeded and diced (or 2 pickles, diced)
3 tomatoes, cored and diced
Handful of Thai basil or Italian basil leaves, roughly chopped
Buttery toast
- In a large bowl, combine yogurt, olive oil, 1/2 teaspoon Kosher salt and 1/4 teaspoon freshly ground black pepper †and stir until smooth.
- Spread the yogurt out on shallow bowls or plates. Top with a fried egg or two followed by avocado, cucumber and tomato. Sprinkle with remaining salt and pepper along with roughly chopped basil.
- Serve with toast and enjoy!
——————
CREAMY CORN GRITS WITH CHARRED PEPPERS & ONIONS
Takes 30 minutes, plus additional 30 minutes for bacon
Serves 4-6
2 tablespoons butter
5 ears corn, kernels cut off cob (no need to cook first!)
1 jalapeno, seeded and finely chopped
2 teaspoons Kosher salt
1 teaspoon freshly ground black pepper
2 cups whole milk
2 cups water
1 cups grits (also known as corn grits, cornmeal or polenta; here’s what I always buy)
3 colored sweet peppers, any
1 sweet onion, peeled and sliced into 1/2-inch rounds
1 tablespoon olive oil
4-8 tablespoons maple syrup
Candied bacon, technically optional but very much recommended (recipe here)
- If you plan to make the candied bacon, I’d recommend starting now and then the meal will all be done around the same time.
- In a large stock pot or sauce pan, melt butter. Add corn, jalapeno, salt and pepper and cook over medium heat until beginning to soften (about 5 minutes). Add in water and milk. Reduce heat to medium high and wait for mixture to just begin bubbling. Stir once or twice with a whisk while waiting for it to bubble to make sure nothing sticks to the bottom of the pan.
- Pour in grits slowly, whisking while you pour them in to create a smooth texture. Reduce heat to a low simmer and continue whisking every couple minutes to keep the mixture from clumping or sticking. When grits look creamy and consistent, they’re ready! They cook very quickly, about 10 minutes. If they cease up while you prepare other parts of your meal, just cook them over low heat and add more milk until they have the desired consistency.
- Preheat your grill to high. Place whole peppers directly over burner. Toss onions with olive oil and place these slices directly over burner as well. Flip every two minutes or so and take off the grill once peppers are blackened and onions have grill marks. Peppers with take 6-10 minutes. Onions will take 4-5 minutes.
- Roughly chop grilled onions and set to the side. Once cool to the touch, peel skin off peppers, remove seeds and cut into strips. Add to onions in a small bowl.
- Add about a half cup of grits to a large bowl, top with onions and peppers followed by candied bacon (if using). Drizzle with a tablespoon or two of maple syrup and enjoy!
——————
LOCAL THYME RECIPES
Comforting Classics
Broccoli Slaw
Sherry Vinegar Marinated Roasted Peppers
Pizza Margherita
Maque Choux
Outside the Box Recipes
Roasted Broccoli with Marcona Almonds and Smoked Paprika Vinaigrette
Grilled Sirloin Steaks (or portabello mushrooms) with Pepper and Caper Salsa
Salsa “Quemada”
Brown Butter and Corn Pasta
Quick and Easy Meal
Thai Cucumber, Green Bean and Tomato Salad

August 25, 2016
- On: August 24, 2016
- 0
I sat down to choose photos for tonight’s newsletter. Lo and beyond, I had filled my phone with photos of experimental basil. Why didn’t I take pictures of our photogenic crops and crew?? There are some weeding photos, but the crew nixed them as too unglamorous.
My ‘side job’ of tracking crop diseases is important farm work and gives me a welcome break from our focus on harvests and deliveries. In our small basil trial, I planted breeding lines from Bejo, the European seed company that developed the disease-resistant Eleonora variety that we grow in summer plantings. I approached Bejo and offered to test their newest lines and breeding materials. Bejo is selecting for resistance to downy mildew, a disease that ruined our summer basil plantings a few years ago. We have a better handle on that problem now, with Eleonora a useful part of the solution. I am very interested to see their newest breeding. I have to say that some of the experimental lines taste terrible … as in “spit-them-out-on-the-ground” terrible. However, the real test is how they react to downy mildew. It hasn’t shown up yet but spores blow into the state each year, so we will see it eventually.
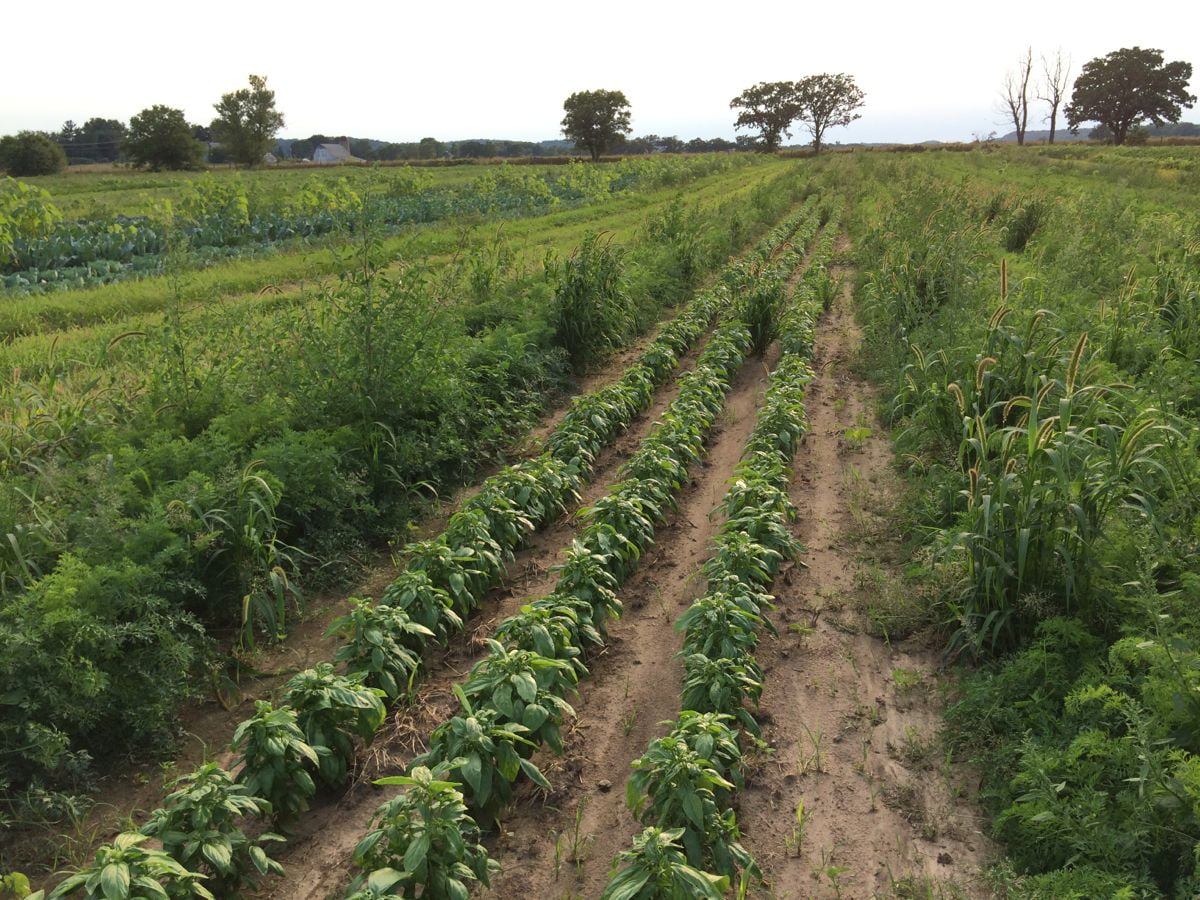
Experimental basil lines with carrots (and weeds) on either side.
We are still transplanting seedlings because we need to feed you into the fall. Our weekly Monday to Thursday harvest schedule means we usually transplant on Fridays. However, it’s rained the last four Thursday nights, ruling out Friday transplanting. The crew worked late this Tuesday to rush in a planting. Broccoli, napa cabbage, kohlrabi and the final basil are all tucked in the ground. Good thing, because it rained again Tuesday night and probably will again tonight. We still have one final transplanting to go, a small field of quick-growing, cold-hardy Asian greens. Then we can grease the transplanter and pack it up for the winter.
We feel lucky that we didn’t get much rain this spring, even though we grumbled about the extra irrigation work. Spring was rainy in much of Wisconsin, conditions that can jump-start disease problems for the rest of the year. Weather-related problems are popping up in some of our crops but could be much, much worse. However, we are having trouble staying ahead of the weeds because of the rain. Steve is beginning to despair about it. He cultivates the weeds but they simply re-root with the next rain.
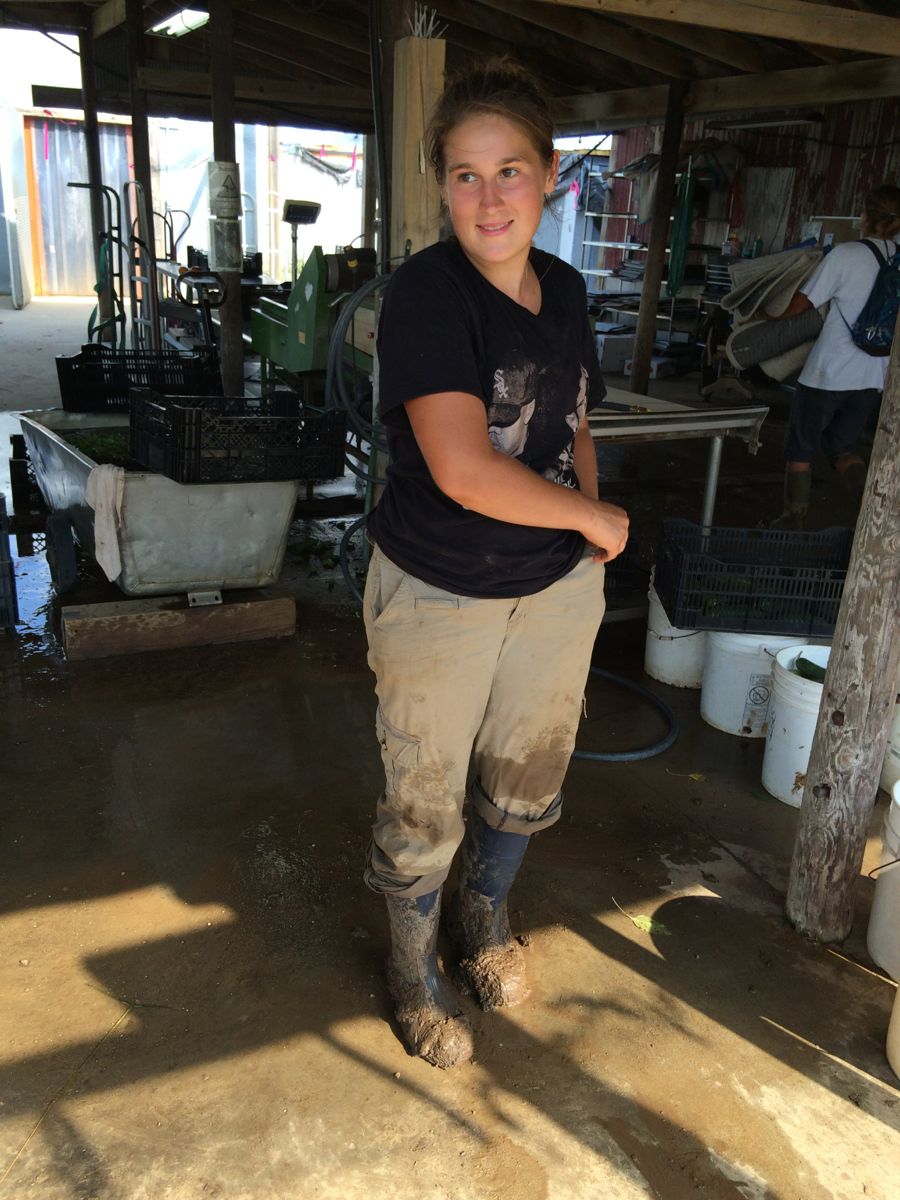

Check out Jackie’s boots after sweet corn harvest today. They got sucked off her feet in the mud. That tells you what our bottom fields look like.
Veggie list and veggie notes (August 25/26, 2016, week #15, green EOW)
Sweet corn, ~8 ears
Green beans, 1.25 lb
Collard greens, 1 bunch
Slicing tomatoes, 4 lb
Colored bell pepper, 1 – 2
Oranos peppers, 2 – 3
(Total peppers is ~4 per box.)
Cucumber(s) OR a few pickles, by site
Zucchini/squash, ~1
Walla Walla onion
Basil, 2 sprigs (Italian or Thai by site)
Garlic, 1 bulb
Some sites get an heirloom tomato.
Some sites get globe eggplant.
Next week’s box will probably contain tomatoes, peppers, melon, edamame soybeans, cucumbers and more.
Sweet corn – Looks like some of the corn will need trimming again this week. We harvested two separate plantings. One has bugs at the tip, one doesn’t.
Collard greens – First harvest from a fresh planting, these are quite nice.
Oranos peppers (orange, tapered, sweet) – These sweet orange peppers look like frying peppers but behave like bell peppers during cooking. We love them as a snack or lunchbox pepper – a perfect little package. Flavor is excellent, yummy. Really, can you tell that I like these peppers?
Heirloom tomatoes – New this week, we did not wash the heirloom tomatoes, to reduce handling and minimize bruising. They are fragile! There might be a little dirt or a dried leaf on the tomato, but we figure you can take care of that. We love these fragile tomatoes (and you tell us the same) so we continue to tweak how we grow and handle them. Here’s the info I sent a few weeks ago, for those who haven’t gotten an heirloom tomato yet:
If you find a single tomato in your box (not in the paper bag), then it’s an heirloom tomato. We tuck those near the top of the box where they won’t get damaged. Heirloom tomatoes are unusually flavorful and unusually fragile. Some are ripe and ready to eat. Some need a day or two to ripen. Place on your kitchen counter so you can keep an eye on it, and eat it as soon as it’s ripe. These bruise very easily so handle gently.
Basil – Some sites get Eleonora Italian basil this week, some sites get Thai basil.
Garlic – This week’s garlic is from our friend John Hendrickson of Stone Circle Farm.
Sweet Oranos snack peppers
RECIPES FROM LAUREN
GREEN BEAN & TOMATO SALAD WITH BUTTERMILK DRESSING
Takes 20 minutes
Serves 4-6
1 pound beans, trimmed
1/4 cup buttermilk
1/4 cup plain yogurt (Greek is great, but not essential; sour cream would also work if you don’t have yogurt on hand)
2 teaspoons fresh lemon juice
Ω teaspoon†minced garlic
1/2 sweet onion, minced
Handful basil, finely chopped
1 tablespoon olive oil, plus more for drizzling
Kosher salt and freshly ground black pepper
1 cup†diced tomatoes, cored (but not seeded)
- In a small bowl, whisk buttermilk, yogurt, lemon juice, garlic, onion, basil and olive oil together until totally smooth (I often do this in a mason jar and then just shake vigorously: I feel like the garlic and onions get better distributed this way). Season with salt and pepper. Set aside while you prepare the rest of the salad. This will help mellow the raw garlic and onion.
- Cook beans in a large pot of boiling salted water for 3 minutes. Drain and rinse with cold water. They should be just barely cooked.
- To serve, divide tomatoes among several small bowls. Drizzle with olive oil. Season with Kosher salt and freshly ground black pepper. Top with cooked beans. Shake (or whisk) buttermilk dressing a few times and top with a few spoonfuls of buttermilk dressing.†
——————
PEPPER & SWEET CORN FRITTATA
Serves 6-8
Takes 45 minutes
2 tablespoons butter
2 colored peppers (bell or orano), seeded and diced
1/2 sweet onion, diced
1/2 teaspoon Kosher salt
1/4 teaspoon black pepper
2 cups corn cut off the cob (from 2-3 ears), can be boiled first or not
2 medium tomatoes, cored and diced (no need to remove skin or seeds)
Handful of basil, chopped
2 ounces feta cheese, crumbled
6 eggs
1/3 cup whole milk
- Preheat oven to 350 degrees.
- Melt butter in a large pan or skillet (I used a well-seasoned 12-inch cast iron skillet) over medium heat. Once melted, add peppers, onion, salt and pepper, and saute until soft, about 10-15 minutes over medium low heat. A little bit of char or black is okay! Add corn, tomatoes and basil to pan and saute 5 minutes longer until ingredients are well-mixed and tomatoes are soft. If you feel there is too much liquid in the pan, feel free to drain a bit (I drained about 1/4 cup of tomato juice).
- In a large bowl, combine eggs and milk and whisk until smooth.
- Add feta to skillet distributing it evenly around the pan and immediately pour egg mixture over veggies and feta. Use a fork to ensure things are distributed evenly with the egg mixture and cook over medium heat for 10 minutes (or until the edges begin to set).
- Once the edges of the frittata have set, throw in the oven for 10 minutes until the center is firm and no longer wiggles. Serve warm.
——————
LOCAL THYME RECIPES
Comforting Classics
Collard Green and Cornmeal Soup
Lebanese Green Beans Braised in Tomatoes and Olive Oil
Corn Pudding
Penne a la Vodka
Outside the Box Recipes
Honey Mustard Glazed Chicken with Collard Cornbread Stuffing
Martinique Green Beans
Quinoa Tabbouleh with Corn
Summer Pasta with Tomato Water, Tomatoes and Garlic
Quick and Easy Meal
Monterey Jack and Sweet Pepper Quesadilla
August 18, 2016
- On: August 17, 2016
- 0
I am back from a trip to visit family, and have many things to tend to this week. I’ll write a newsletter next week once I’ve caught up. Beth
Veggie list and veggie notes (August 18/19, week #14, purple EOW)
Sweet corn, 8 ears
Watermelon; red, orange, or yellow.
(If melon is small, we’ll include a muskmelon.)
Tomatoes, 4 lb, slicing tomatoes
Heirloom tomato, 1 – 2
Bell peppers, mixed colors, 2
Cucumber or pickles, ~1 lb
Zucchini or summer squash, ~1 lb
Walla Walla onions, 1 – 2
Garlic, 1 bulb
Basil (Thai or Italian, depending on site), small bunch
Some sites will get eggplant this week.
Some sites will get lettuce.
Some sites will get extra bell peppers.
Next week’s box will probably contain sweet corn, green beans, tomatoes, peppers, basil, onions and more.
Sweet corn – Don’t be surprised if there is a caterpillar at the tip of your corn ear. Just cut off the tip. These bugs come with the territory when growing organic sweet corn.
Garlic – This batch of organic garlic is from our friend John Hendrickson of Stone Circle Farm.
Cucumber/pickles – The cucumbers are pretty rough-looking this week, with more insect scarring than we like. Nonetheless, they taste quite good, so we are packing them for you. These are the last cukes from our second planting. The third planting will be ready to pick in a week or two, and the cukes will be pretty again.
LOCAL THYME RECIPES
Comforting Classics
Corn and Tomato Risotto
Summertime Paella
Greek Style Pasta Salad
Taco Salad
Outside the Box Recipes
Summer Squash Carpaccio
Sriracha Lime Corn Salad
Spiced Vegetable Dal
Roman Chicken and Peppers
Quick and Easy Meal Idea
Summer Squash and Tomato Sandwiches
August 11, 2016
- On: August 10, 2016
- 0
Veggie list and veggie notes (August 11/12, 2016, week#13, green EOW)
Watermelon, orange or yellow
Slicing tomatoes, about 4 lb
Carrots, 1.6+ lb
Beets with greens, 1 bunch
Red bell pepper, 1 or 2
Sweet corn, 2 ears
Walla Walla onions, 1 or 2
Cucumber OR pickling cucumbers (a small amount)
Zucchini or squash, a few
Some sites will receive globe or Japanese eggplant.
Some sites will receive an heirloom tomato.
Some sites will receive cherry tomatoes.
Next week’s box will contain tomatoes, sweet corn, melon, peppers, onions, garlic and more.
Watermelon – We grow a lot of watermelons. The orange and yellow melons we are sending this week are among our favorites. Both types are tender and sweet. All are ripe and ready to eat. Uncut watermelons can be held at room temperature for up to one week. Refrigerate your melon after you cut it open.
Heirloom tomatoes – If you find a single tomato in your box (not in the paper bag), then it’s an heirloom tomato. We tuck those near the top of the box where they won’t get damaged. Heirloom tomatoes are unusually flavorful and unusually fragile. Some are ripe and ready to eat. Some need a day or two to ripen. Place on your kitchen counter so you can keep an eye on it, and eat it as soon as it’s ripe. These bruise very easily so handle gently.
RECIPES FROM LAUREN
BEET and CUCUMBER PANZANELLA
This salad does not store well because the bread gets excessively soggy. If you don’t expect to eat everything in one meal, toss all prepared ingredients together excluding the croutons. Store salad and croutons separately adding the amount you plant to use together 15 minutes before serving. Feta makes a nice addition to this salad if you are looking to make it a bit heavier. Fresh basil or fennel fronds also are a nice touch if you’ve got either around.
Takes 1 hour
Serves 4
Beets from one bunch, green removed
3 tablespoons olive oil, divided
5 cups wheat, rye or white sourdough bread, crust removed and torn into bite size pieces
1 teaspoon Kosher salt, divided
1/2 teaspoon freshly ground black pepper, divided
1 cucumber, diced
1/2 Walla Walla onion, diced
2-3 tablespoons balsamic vinegar
2 tablespoons honey
- Preheat oven to 425 degrees.
- Wrap beets individually or in pairs in aluminum foil and place in the preheated oven. If beets are large, half and wrap separately.†Roast for thirty minutes until soft.
- In a medium bowl, toss bread with 2 tablespoons olive oil, 1/2 teaspoon Kosher salt and 1/4 teaspoon ground black pepper until well-coated and even. Pour bread onto baking sheet and roast for 12 minutes or until dried out and browned evenly. Remove from oven occassionally and rotate if necessary.
- Once beets are roasted, remove from foil and allow to cool until able to touch with your barehands. Remove the peel (if it does not come off easily the beets need a little more time in the oven) and dice the beets into bite-size pieces.
- In a large bowl, add the beets, croutons, cucumber, onion, balsamic, honey and remaining olive oil, salt and pepper. Start with two tablespoons of balsamic, only adding more if you think it needs it. (I tend to like things on the excessively vinegary side so I’d add the full 3 tablespoons). Stir everything together until well combined and let sit for 15 minutes at room temperature. Taste and adjust seasonings as desired.
———-
SWEET CORN and PEPPER BBQ PIZZA
This pizza is just so summery I can hardly stand it. Tomatoes, peppers and onions on a pizza are just pure bliss pretty much any way you shake it, but this pizza adds a bit of extra interest with BBQ sauce and sweet corn. Any extra hot peppers you have lying around would be a great addition as well as pretty much any fresh herb you have on hand (cilantro, basil or parsley come to mind specifically).
Serves 6-8
Makes 1 large 12×16 pizza or 2-round pizzas
Takes 40 minutes (if using pre-made pizza dough, ~2 hours if making pizza dough from scratch)
1 batch pre-made pizza dough (or make your own using recipe below)
2 ears of corn
1/2 cup favorite BBQ sauce
3 large tomatoes, sliced
1/2 teaspoon Kosher salt
1 red pepper, diced
1 Walla Walla, diced
2 chicken breasts, cooked and diced, optional
2 cups shredded mozzarella cheese
For the pizza dough:
1-1/2 cups warm water
2 teaspoons active yeast
2 tablespoons honey
4 cups flour
2 teaspoons Kosher salt
- If you are making the dough from scratch, begin here. If not, skip to step 2. Combine warm water (but not hot!) with yeast and honey in a small bowl or measuring cup. Whisk to combine and let sit for 5 minutes. Combine flour and salt together in a large bowl. Make a well in the center of the flour mixture and pour in water with yeast. Stir to combine but do not work the dough at all, just stir until all the ingredients are incorporated together. Let dough rest for 15 minutes. Turn out onto a well-floured counter and knead for 3-5 minutes until smooth and uniform dough forms. Grease or oil a large clean bowl. Add dough, cover with plastic wrap or a towel and let rest in a warm place for an hour or until dough has doubled in size.
- Preheat oven to 450 degrees.
- Line a baking sheet with paper towel. Lay sliced tomatoes on top and sprinkle with Kosher salt. Let sit for 15 minutes so some of the juice leaves the tomatoes (this will keep your pizza from getting too soggy). Pat dry with a paper towel and set aside until ready to use.
- Bring a large pot of salted water to a boil. Add corn cobs and boil for 7 minutes. Strain and rinse with cold water until corn is cool to the touch. Cut corn cobs in half and then steadying them on a cutting board (cut-side down), remove kernels with a sharp knife. Set aside.
- Once dough has risen and is ready to be used, turn out onto a well-floured counter. Roll into two circles for pizza pans or one large rectangle to fit a large baking sheet. Very lightly oil baking pan(s) (with 1-2 teaspoons of olive oil). Place dough on pan and press out to the edges.
- Leaving a one-inch border around the edges, add BBQ sauce to dough.†Lay tomato slices over†crust in a single layer followed by red†pepper and onion. Add diced chicken if using and then sprinkle entire pizza(s) with cheese. Top the pizza(s) with corn. Bake for 20-25 minutes until crust is golden brown and cheese and corn are just beginning to brown.
———-
LOCAL THYME RECIPES
Comforting Classics
Panzanella
Watermelon Gazpacho
Carrot Cake with Cream Cheese Frosting
Beet, Beet Greens and Thai Basil Salad
Outside the Box Recipes
Romesco Sauce
Watermelon Feta and Basil Salad
Dragonwagon’s Millet Vegetable Cakes with Beets and Carrots
Carrot Beet Mustard Seed Salad
Quick and Easy Meal
Grilled Flatbreads with Tomatoes and Peppers
August 4, 2016
- On: August 03, 2016
- 0

This is the height of farm fashion. Maggie and Roger know how to rock the handkerchiefs. Clearly, they coordinated their outfits.
I’ll be gone next week.
I am taking our kids to visit family. Please limit communication with us until Monday 8/15/16. Steve is staying home to take care of everything. If there’s an urgent issue, call or send an email and Steve will help you. However, he already has a lot on his plate. Thank you! Beth
What does “OR” mean?
Often our weekly veggie list includes something like “watermelon OR muskmelon.” What does that mean? Sometimes our crops are overwhelming (get ready for tomatoes in August). At other times they ripen in fits and starts, eg. eggplant and the first harvest of almost any crop. When there are small amounts, we split them up among the sites. We make sure that all the boxes at a site are uniform so we can track who gets what. That lets us follow up to deliver muskmelons in future to the people who got watermelons this week, and vice versa.
When our list says “xxx OR yyy” please don’t open CSA boxes searching for your preference. All the boxes at your site are the same. Take your box off the top of the stack. When you open other members’ boxes, their produce warms up. No one wants that. Thanks for your help.
Veggie list and veggie notes (August 4/5, 2016, week #12, purple EOW)
Slicing tomatoes, 3.5 lb
Muskmelon, 1 or 2
Kale, 1 bunch
Carrots, 1.75 lb
Pickles OR Silver Slicers OR cucumbers, ~1 lb
Reddish peppers, 2 (Italian and/or bell)
Zucchini/squash, a few
Walla Walla onion, 1 or 2
Garlic, 1 large or 2 small
Jalapeño pepper (HOT), 1
Flat parsley
Each site receives globe eggplant OR Japanese eggplant OR broccoli OR cherry tomatoes OR an heirloom tomato.
Next week’s box will probably contain tomatoes, peppers, watermelon, cucumbers or pickles, onions, an herb and more.
Tomatoes – As usual, we have packed a mix of ripe and less-ripe tomatoes so you can stretch them through the week. The top two tomatoes in the photo below are ready to eat. The bottom tomatoes need to ripen at room temperature for a few days. Put on your counter or keep in a brown paper bag.
Storage: Tomatoes retain their best flavor and texture when stored at room temperature, no lower than 55oF. However, you should refrigerate your tomatoes if they are fully ripe and you don’t expect to eat them right away. It is better to sacrifice a little flavor and texture than lose your tomatoes to rot. Also, fully-ripe tomatoes are less sensitive to chilling injury.
Muskmelon – We are sending muskmelons two weeks in a row because they are so darn good. Let’s repeat last week’s instructions, for those getting their first muskmelon this week. We pick muskmelons at field-ripe stage. However, Steve says they will be even better if you let them ripen further on your counter for a day or two. Watch for a slight ‘give’ when you press the melon at the blossom end (opposite the stem end). Check for fragrance too. Eat or refrigerate when fully ripe.
Pickles OR Silver Slicers OR cucumbers – You will receive one of these types. See photo below for identification. This week, we have small amounts of pickles and a white cucumber called ‘Silver Slicer’ which is interesting and tasty. We don’t have enough for everyone this week, but we will try to distribute them to all the sites over the next few weeks. You will receive about 1 lb of one of these types. We’ve moved into a fresh planting so quality is very nice but amounts are small as yet. Don’t worry about pickling the pickles. They are excellent for salads because of their thin, tender skins. That’s what we choose when making a cucumber salad. Don’t peel the pickles or the Silver Slicers; it’s unnecessary.
Garlic – These bulbs are from our garlic harvest that I showed in the newsletter last week. They have already dried enough to send to you.
Jalapeño chili (HOT) – These are very hot.
Veggie ID
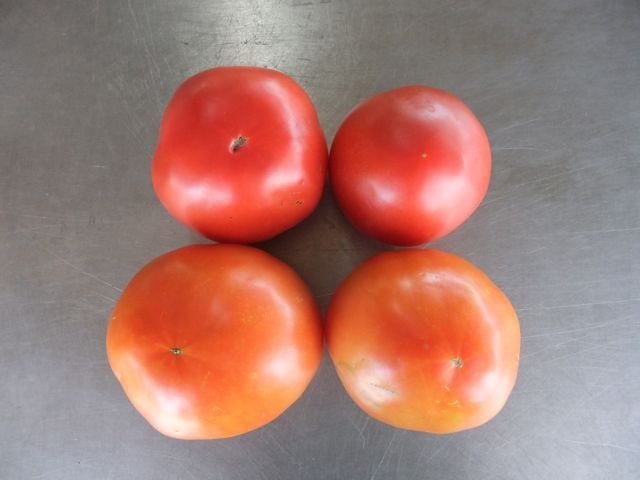
Ripe tomatoes (top) and less ripe tomatoes (bottom).
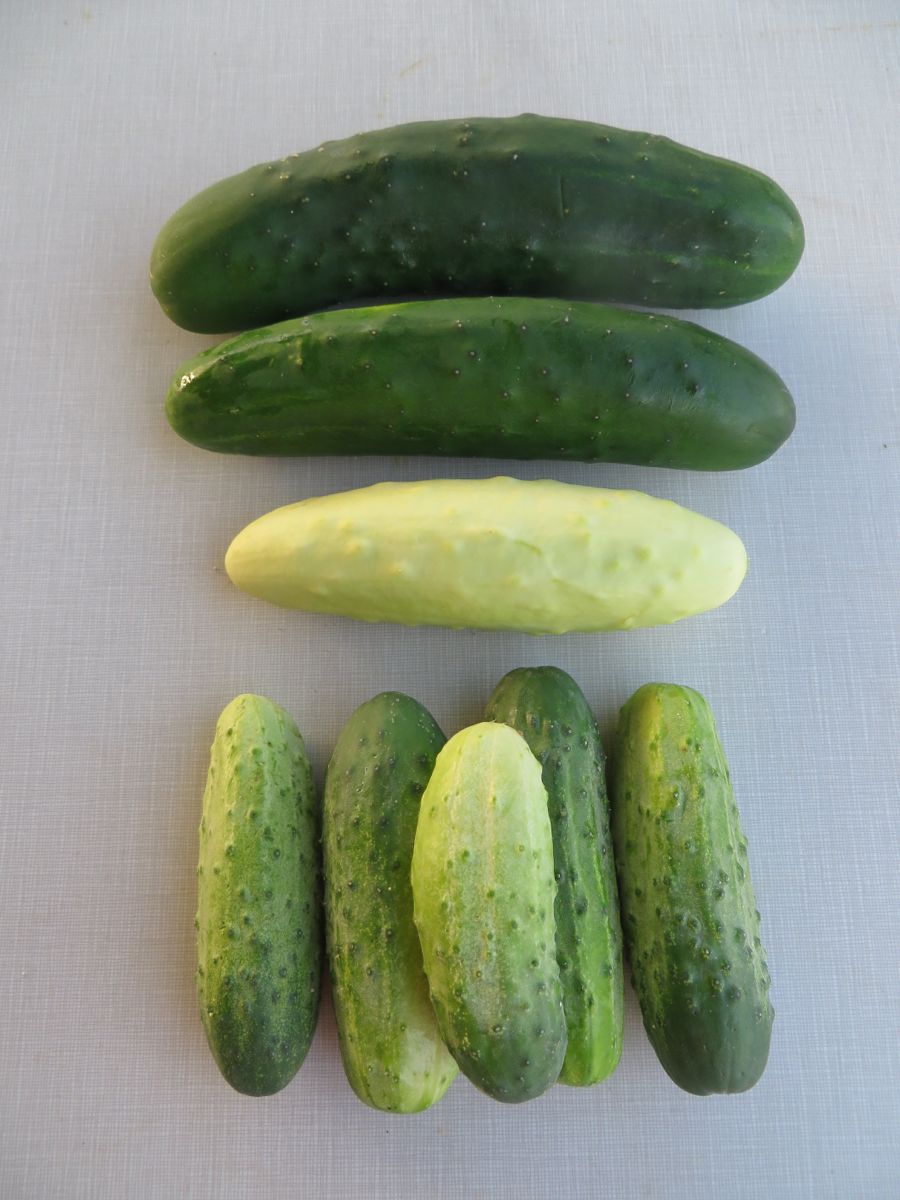
From top, slicing cucumbers, Silver Slicer cucumber, and pickling cucumbers. You will receive one of these types.
RECIPES FROM LAUREN
MUSKMELON SALSA
Adapted from Smitten Kitchen
I made two versions of this salsa. The first one was exactly as the recipe reads below. For the second version, I grilled the muskmelon and red pepper before preparing the salsa. I must say I preferred this one (though both are great!). If you feel like firing up the grill, follow the notes at the bottom.
Note from Beth: Lauren lives just down the road from us. She called earlier today to say “I have a great idea for a recipe but need to test it. Do you have any spare muskmelons and peppers?” She ran over, grabbed the produce and tested the recipes. What a gal!
Makes 4 cups of salsa
Takes 15 minutes, 30 if grilling
2 cups diced muskmelon*
1 red bell or Italian frying pepper, diced*
1/2 Walla Walla onion, diced
1 jalapeno, seeded and minced
2 tablespoon fresh lime juice
1/4 teaspoon Kosher salt
1/4 teaspoon ground cumin
1/4 teaspoon dried oregano
Combine all ingredients in a medium bowl and stir well to combine. Taste and adjust seasonings as desired. Serve with tortilla chips.
*Note: For a smokier flavor, you can grill the muskmelon and pepper. Turn your grill to high and place pepper directly on heat. Turn occasionally so it blackens evenly on all sides (about 10 minutes). Remove from grill and allow to cool for 5 minutes. Once cool enough to handle, remove peel. Then seed and dice. Cut muskmelon in half and remove seeds. Cut into slices and brush lightly with olive oil on both sides. Grill until marks form on both sides (about 3 minutes). Remove from grill, remove rinds and dice. Add diced pepper and muskmelon to all other ingredients in a medium bowl and stir to combine.
—————
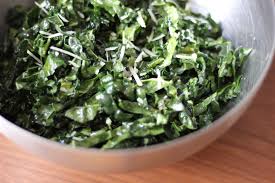
MY FAVORITE KALE SALAD
Adapted from Martha Stewart
I am literally always looking for an excuse to make this salad. Potlucks, parties, Tuesday, it is my favorite salad on earth. It also happens to be just the perfect way to use up all that kale in your box this week. Add carrots, bell pepper and cucumber (or silver slicer) as written below or any other vegetable you have on hand (scallions, radishes, green peppers and herbs all make tasty additions).†
Serves a crowd (6-10 easily)
Takes 20 minutes
1 bunch curly kale, center rib discard, chopped into small pieces (or try to chiffonade the kale, it’s well worth it!)
2 carrots, thinly sliced into coins
1 red bell or Italian frying pepper, diced
1 cucumber (or Silver Slicer or 2 pickles), cut into bite-sized pieces
1/4 cup olive oil
2 tablespoons peanut butter (or any favorite nut butter)
2 tablespoons apple cider vinegar
2 tablespoons light-brown sugar
1/2 teaspoon Kosher salt
1/2 cup salted roasted peanuts
- Throw washed, prepared vegetables together in a large salad bowl.
- In a small bowl, whisk together oil and peanut butter until smooth.† Add vinegar, sugar and salt. Pour half the dressing over the salad. Stir or shake to coat. Use more dressing as needed. Top with peanuts. Salad tastes better after sitting for a couple minutes. Serve cold or at room temperature.
—————
LOCAL THYME RECIPES
Comforting Classics
Charred Tomato and Pepper Salsa
Ginger Melon Sorbet
Spicy Kale
Gingered Carrots
Outside the Box Recipes
Norwegian Tomato and Cucumber Salad
White Wine Sangria with Melon
Kale Caesar
Vegetable Biriyani
Quick and Easy Meal
Slicing and Cherry Tomato Gazpacho
Kale Caesar Salad
Highlights of the week
- On: July 27, 2016
- 0
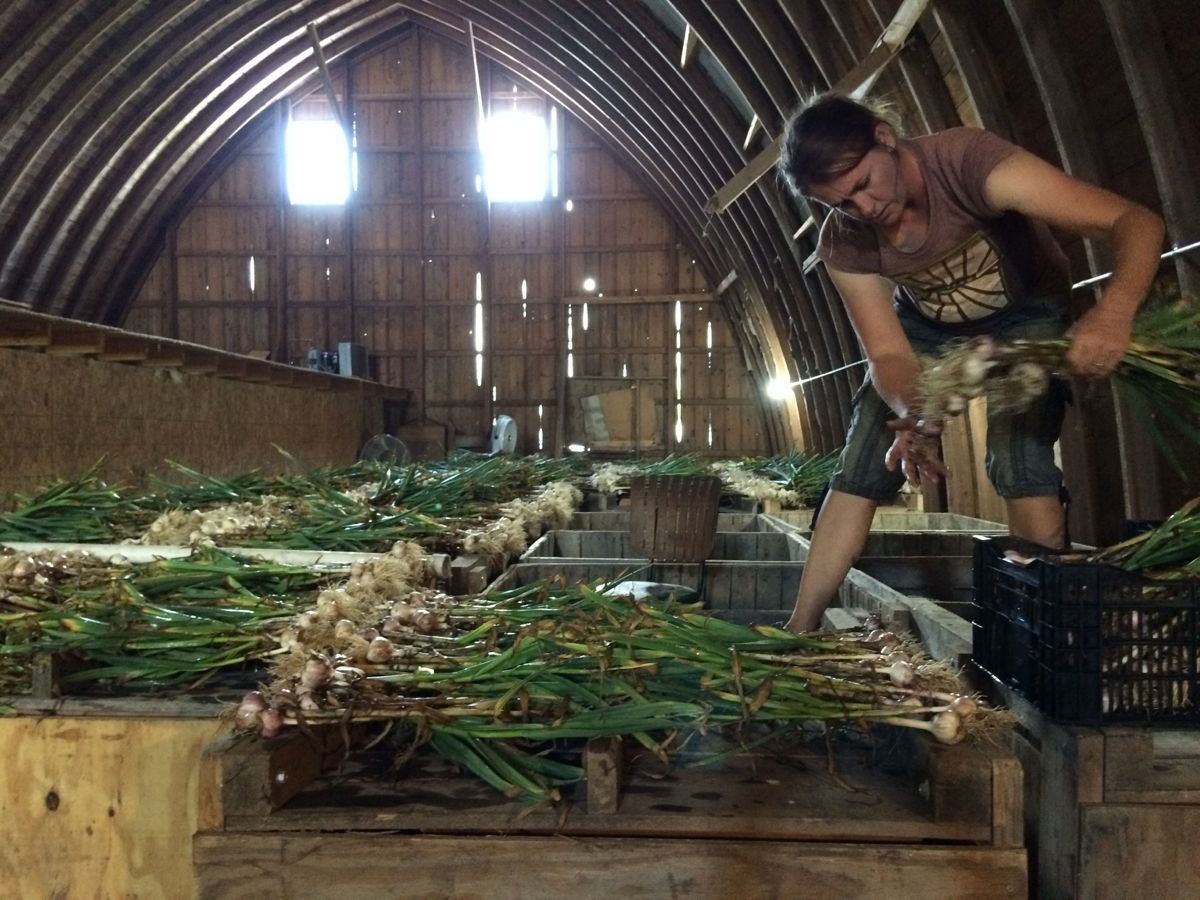
Karen spreads freshly harvested garlic plants.

It’s drying nicely in the barn loft.
Garlic harvest was an adventure this past week. This is a “new” crop for us. We’ve always bought most of the garlic for your CSA boxes from our friend John Hendrickson. We will continue to buy everything he can grow for us, but we want to deliver more garlic in the boxes, per your requests. On our annual survey, members consistently ask for more garlic.
This is our biggest garlic crop yet. We’ve dabbled and experimented and increased our seed stock over the past three years. We dug it on Friday and spread it to dry in our barn loft. Look closely at the photos and you’ll see that we spread it on overturned wooden bins, propped on the raised legs of the bins. It’s an easy way to get the garlic up in the air. The barn is dry and warm and the garlic is drying nicely. We will hold some back to plant for next year’s garlic and green garlic crops. The rest will go in the CSA boxes, maybe as soon as next week. You cannot believe how wonderful the barn smells.
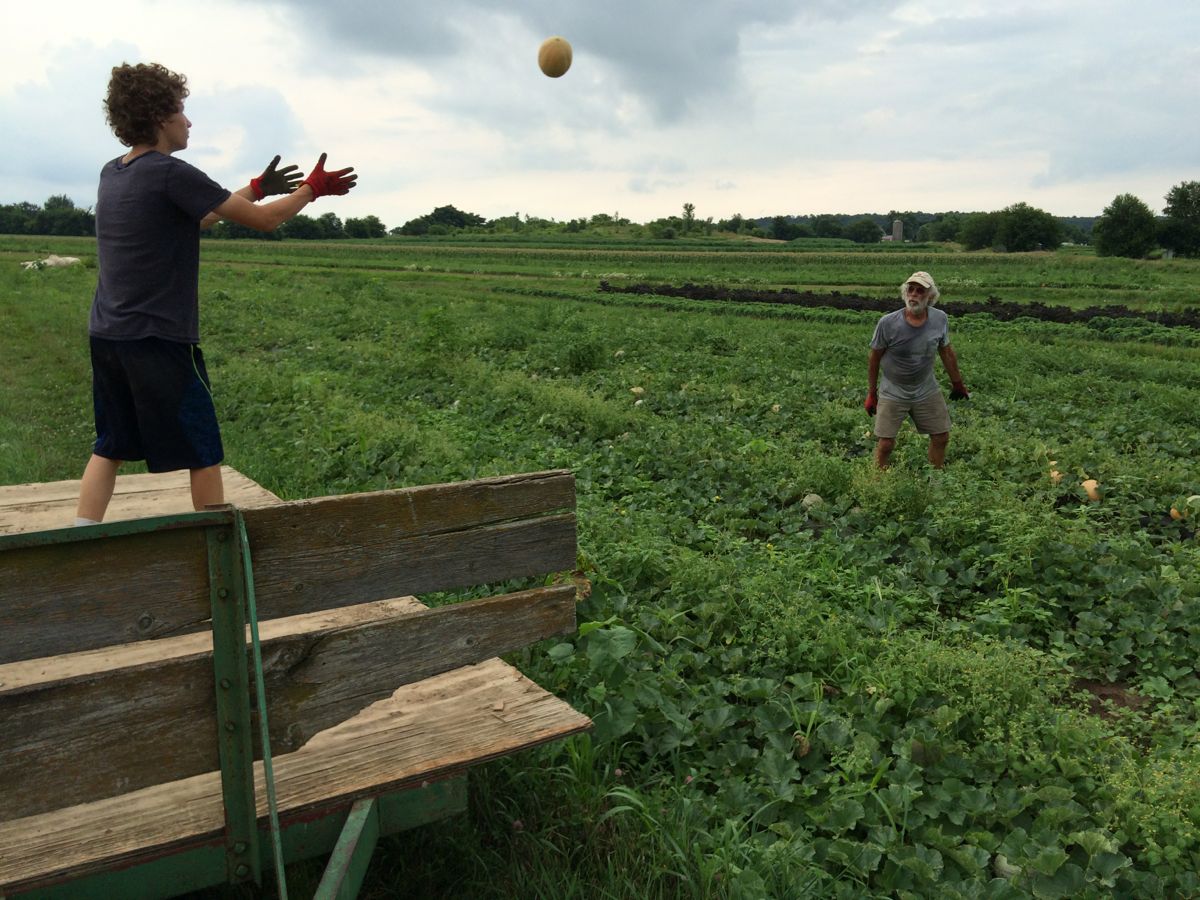
Steve and I harvested the first melons over the weekend with help from our son Ari. He has helped with melon harvests for three years but is bigger and stronger this summer, better able to handle heavy watermelons. Outpost and Willy Street coops will stock our watermelons this weekend. We have ripe muskmelons for you this week, and are planning watermelons for the CSA boxes next week.
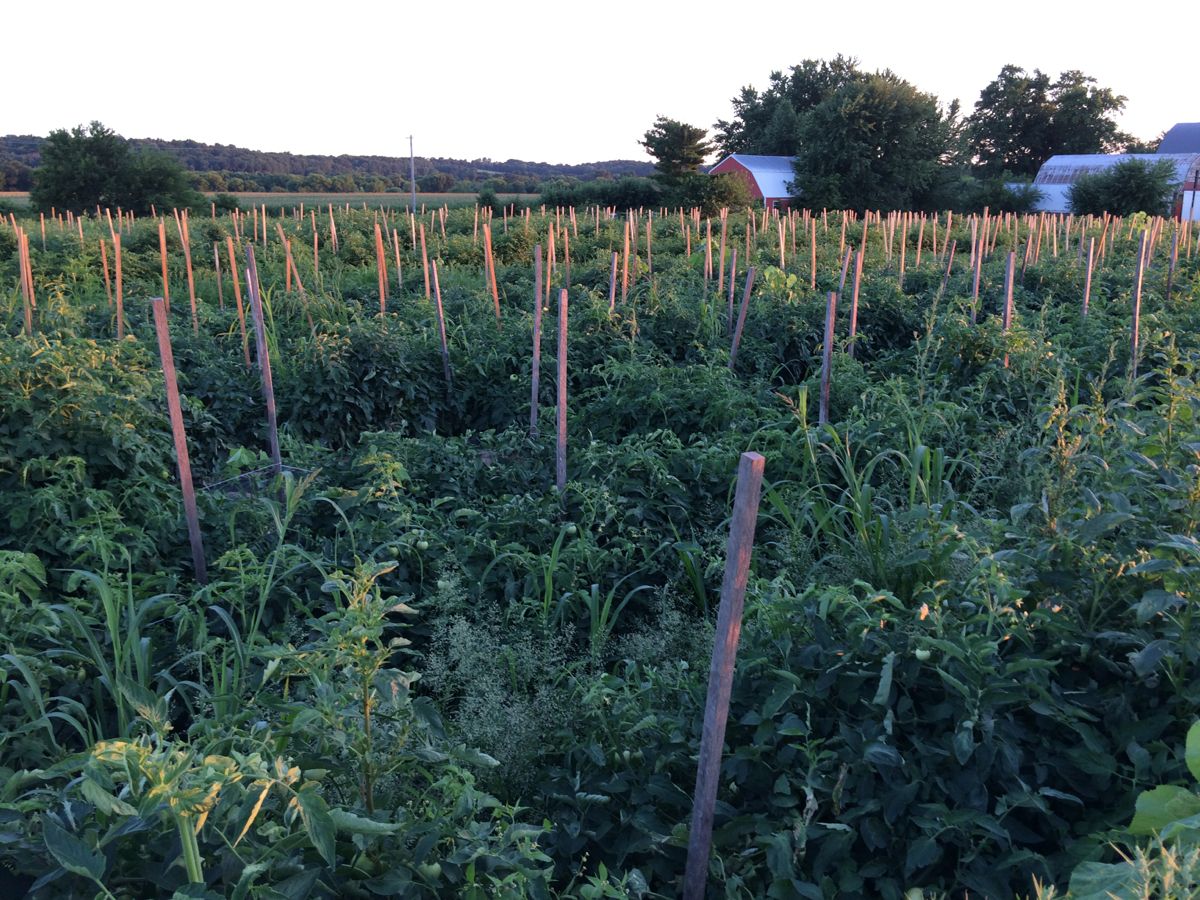
Staked melon field at dusk. It’s a pretty spot on the farm right now. The tomatoes are growing strongly. We’ll have more and more for the CSA boxes in the next few weeks.
Veggie list and veggie notes (July 28/29, 2016, week #11, green EOW)
Sweet corn, about 10 ears
Muskmelon, 1
Snap peas, 0.7 lb
Cherry tomatoes, 1 pint
Tomatoes, 1 or 2
Italian frying peppers, 2 or 3
Cucumbers, about 3
Zucchini & summer squash, 2+ lb
Walla Walla onion, 1 or 2
Dill flowers and ferns, 1 bundle
Each site gets globe eggplant OR Japanese eggplant OR broccoli OR extra cucumber OR an extra corn.
Next week’s box will probably contain melon, tomatoes, peppers, carrots, cucumbers, onions and more.
Sweet corn – Storage. Sweet corn is best when fresh, so we encourage you to eat it asap. Store in the refrigerator, in the husks if you have the room.
Cooking. It is quicker to steam sweet corn than to boil it.
1.) Stand ears of corn upright in a tall pot. Put one inch of water in the pot.
2.) Bring the water to a boil. If the corn is cold when you begin cooking, steam for 5 – 6 minutes. If the corn starts at room temperature, steam for 4 – 5 minutes. The cooking time will vary somewhat depending on how many ears are in the pot. Pay attention to how the corn smells. The scent changes once the corn is ready. Another clue: water will bead on the corn until it is cooked. Don’t overcook it.
Muskmelon – We picked the muskmelons at field-ripe stage. However, Steve says they will be even better if you let them ripen further on your counter for a day or two. Watch for a slight ‘give’ when you press the melon at the blossom end (opposite the stem end). Check for fragrance too. Eat or refrigerate when fully ripe.
Dill flowers and leaves – Your bundle contains both leaves (useful added to many dishes) and flowers (great for pickles). Use whichever part suits you best. A batch of sliced refrigerator pickles would be perfect, seasoned with the dill flowers and buds. Yes, you can pickle sliced ‘normal’ cucumbers. I always choose dill flowers over seed heads when pickling because the flavor is less harsh. Two to four flower umbels per quart of pickles. Pat of Local Thyme has a sweet-sour Refrigerator Dill Pickle recipe with turmeric and mustard. I’ll list our family favorite below.
Refrigerator Pickles
Hang on to this recipe. We should have some pickling cucumbers to share in the CSA boxes, as well as continued slicing cucumbers.
Beth’s notes: We stopped canning pickles years ago because we prefer the flavor and crunch of refrigerator pickles. They will be ready sooner if you slice the cucumbers. You can make refrigerator pickles with ‘normal’ cucumbers (sliced), or with pickling cucumbers (sliced or whole). We often add rings of sweet Walla Walla onions.
Per quart of pickles:
about 1.5 lb pickling cucumbers
optional: sliced red bell pepper strips, without blemishes
1 bay leaf
2 cloves garlic, crushed
2 dill heads (4 if they are small)
1/2 tsp. yellow mustard seed
Brine (enough for 1 quart of pickles)
1 pint water
1.5 Tbsp. pickling salt or table salt
1.5 Tbsp. white vinegar
Mix salt, vinegar and water. Set aside and stir occasionally until the salt dissolves.
Clean the pickles. Place the bay leaf, one garlic clove and one dill head at the bottom of a one-quart jar or container. Pack the jar with pickling cukes (and optional red bell pepper strips), adding the second garlic clove among the pickles. Feel free to slice large pickling cukes into spears to get them to fit compactly. Sprinkle mustard seed over the jar and add the second dill head. Make sure the salt is fully dissolved, then pour brine over the cukes to cover. Pour slowly to allow air bubbles to escape. Cover jar with a lid and refrigerate. Invert the sealed jar every few days to disperse the flavors.
Sliced pickles will be ready in a few days. Whole pickles need at least one week.
RECIPES FROM LAUREN
CHARRED ONION & CUCUMBER SALAD
Adapted from Bon Appetit
Serves 2-4 (but easily doubled!)
Takes 30 minutes
1 green Italian Frying pepper, sliced into circles, seeds removed
4 tablespoons red wine (or sherry) vinegar, divided
1 Walla Walla onion, cut into 1/4-inch slices
3 tablespoons olive oil, divided
Kosher salt and freshly ground black pepper
1 cucumber, cut in half, seeded and sliced
1 teaspoon dried oregano
1. Combine pepper with 2 tablespoons red wine vinegar in a large bowl. Toss several times to coat. Set aside while you prepare the rest of the veggies.
2. Preheat a grill to high. Lay onion slices on a baking sheet and drizzle with 1 tablespoon olive oil as well as a good sprinkling of salt and pepper. Place on grill and cook until charred with grill marks on each side (about 3 minutes each). Remove to baking sheet once charred and drizzle with remaining 2 tablespoons red wine vinegar while still warm. Again, toss to coat incorporate.
3. Pour onions (with all juices) into bowl with pepper. Add cucumber along with remaining olive oil, dried oregano and salt and pepper to taste. Toss well to combine and serve at room temperature.
– – – – – – – –
CHERRY TOMATO, ZUCCHINI, SUMMER SQUASH & CORN PIE
Borrowed and adapted ever so slightly from Smitten Kitchen
I’ve adapted Smitten Kitchen’s recipe ever so slightly because I just love it as it is. Also note that if making pies and pie dough isn’t your thing, these blistered cherry tomatoes with zucchini, summer squash, corn and onion (a.k.a. the filling) would make a lovely salad all on it’s own with just a couple more minutes in the skillet (and maybe a little bacon).
Makes 2 small pies
Serves 6-8
Takes 1 hour, 45 minutes
For the pastry:
2 1/2 cups all-purpose flour
1/2 teaspoon table salt
16 tablespoons cold unsalted butter, cut into pieces and chill again
1/2 cup plain yogurt or sour cream
4 teaspoons fresh lemon juice
1/2 cup ice water
For the filling:
1 tablespoon olive oil
1/4 teaspoon coarse Kosher or sea salt
1 pint cherry tomatoes
Red pepper flakes, optional
3 ears corn, cut from the cob (about 3 cups)
1 small zucchini, diced
1 small summer squash, diced
1 Walla Walla onion, diced
3/4 cup grated parmesan
Glaze:
1 egg yolk beaten with 1 teaspoon water
- Make dough:†Stir the flour and salt in a large bowl. Sprinkle bits of butter over dough and using a pastry blender or your fingertips, work it into the flour until the mixture resembles coarse meal, with the biggest pieces of butter the size of tiny peas. In a small bowl, stir together the sour cream, lemon juice and water and add this to the butter-flour mixture. With your fingertips or a wooden spoon, mix in the liquid until large lumps form. Pat the lumps into a ball. Wrap with plastic and†place in freezer for 20 minutes until chilled (or in fridge for up to 2 days).
- Make filling: Get down the saute pan with the lid. If you donít have one, any large lid will do. Add olive oil, tomatoes, salt and a pinch of red pepper flakes (if thatís your thing) to your saute pan then cover and heat over high heat. Roll the tomatoes around from time to time so that theyíll cook evenly. In a few minutes, youíll hear some putts and pops as the tomatoes burst a little. When most have, remove lid, turn heat down to medium and add zucchini and summer squash chunks along with diced onion. Saute for two minutes, until they soften. Add corn and cook one minute. Adjust seasonings if needed. Transfer mixture to a large plate and spread it out, so that it will cool faster. You want it cooled to at least lukewarm before assembling the pies.
- Assemble pies: Heat oven to 400 degrees. Divide dough in two. Keep half refrigerated while working with other half. On a floured counter, roll the dough out into a 12-inch round (it really doesnít need to be perfectly shaped since we’re going to be free-forming). Transfer to a parchment-lined baking sheet; I like to fold my dough gently, without creasing, in quarters then unfold it onto the baking pan. Sprinkle half tomato-zucchini-corn mixture with half of parmesan and spoon the mixture into the center of the dough, leaving a 2-inch border. If any liquid has puddle in plate, try to leave it there as you spoon. Fold the border over the filling, pleating the edge to make it fit. The center will be open. Repeat with the other portion of dough and other half of filling and cheese (leaving a small amount for the crust). Brush crusts with egg yolk glaze. Sprinkle glaze with last pinches of parmesan.
- Bake the pies: For 30 to 40 minutes, or until puffed and golden brown. Remove from the oven and let stand for 5 minutes, then slide the pies†onto serving plates. Cut into wedges and serve hot, warm or at room temperature.
– – – – – – – –
LOCAL THYME RECIPES
Comforting Classics
Sweet Creamed Corn
Grill Blistered Italian Frying Pepper Salad
Honey Whipped Cottage Cheese with Melon
Pickled Snap Peas
Outside the Box Recipes
Grilled Corn with Garlic and Ginger Soy-Butter
Muhammara
Chilled Tomato Muskmelon Soup
Quinoa Salad with Snap Peas and Zucchini
Quick and Easy Meal
We left the farm for 56 hours!
- On: July 20, 2016
- 1

College tour at Carleton.
Steve, the kids and I left the farm for 2 & 1/2 days to tour colleges in Minnesota. It has been ten years since all four of us have left the farm overnight during the growing season. Most years, I take the kids to visit family for a week in early August. Ten years ago, we talked Steve into coming with us for part of the trip. It was stressful and hectic and we haven’t tried it since. We were able to go to Minnesota because of our wonderful crew. We left a short list of instructions and called a few times each day. I can text during a college tour – that’s not hard! Anyway, we are very grateful for how everyone stepped up so we could go. Special thanks to Maggie, Simone, Kerry, Jon, and Billy. I hesitate to credit people by name because everyone pitched in.
Steve is in the thick of establishing our storage carrots, which complicated our trip. Early to mid-July is the time of year to plant carrots for fall harvest and winter storage. Carrot seedlings are tiny and fragile, and establishing each field takes many steps. Steve worked right up until we left, with the last moments spent planting carrots. (We plant a sequence of seven to nine fields each year.) New carrot seedings need irrigation or rain most days for 12 days after planting. It rained early Sunday morning, then we jumped in the car and drove west. How perfect. Within ten minutes of our return Tuesday night, Steve was on a tractor and hitching up irrigation.
Here are the steps we take when establishing a carrot field:
– The fall before, plant a rye and vetch cover crop.
– In June, mow the lush rye and vetch growth, then till it into the ground.
– Soil preparation involves multiple steps. Steve continues to tinker with the best sequence for field prep.
– Plant the carrot seeds.
– Irrigate every day for 12 days.
– On days five, six and seven, dig in the ground to check for sprouted carrot seeds. We are watching for the moment when the carrots have germinated and are still underground, but small weeds have emerged. That’s the moment to …
– Flame weed the carrots. Steve draws a set of LP burners over the carrot rows, flaming a strip where he planted the carrot seeds. The weeds shrivel and the carrots emerge unharmed in a day or two. This step saves a remarkable amount of weeding.
– Soon we will cultivate the fields by tractor and weed by hand twice. Harvest begins in October and will be completed by mid-November.
It is possible you are not interested in that many details. Please accept our over-sharing, as this is our most important work right now. Beth
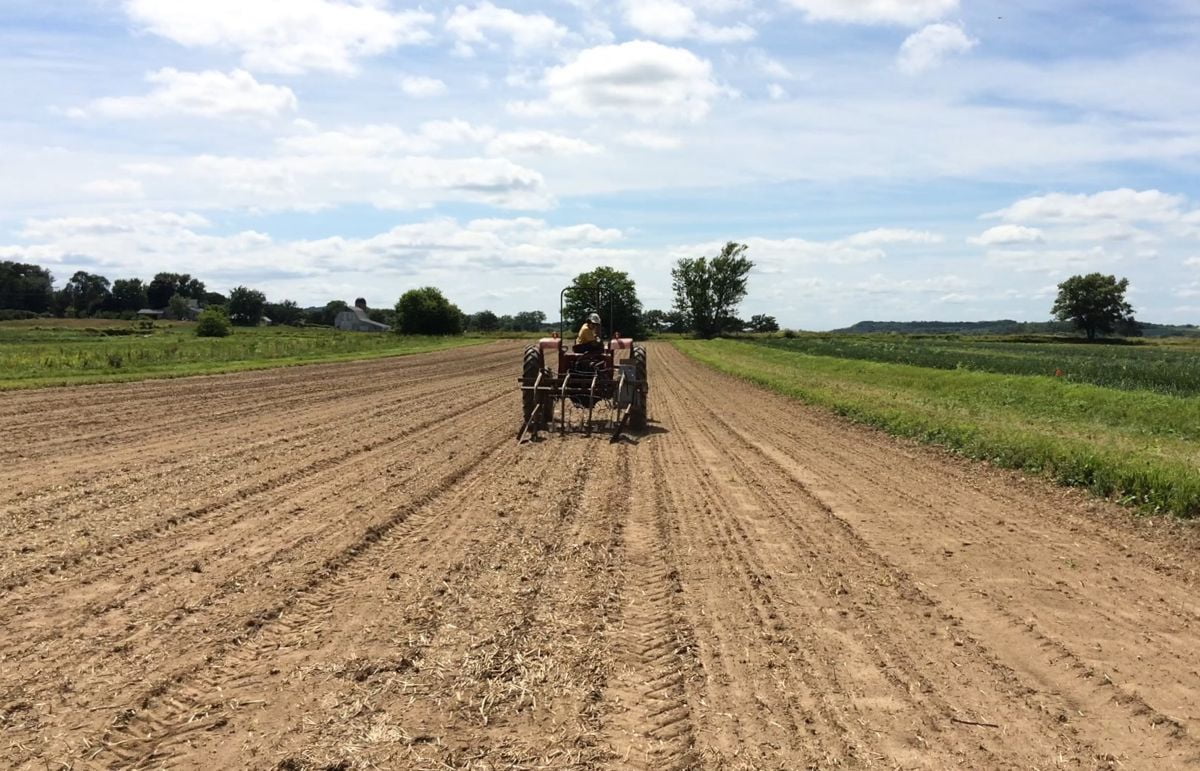
Steve flame-weeds a carrot field. Tiny weeds have emerged but the carrot seedlings are still safe underground. That’s the perfect time to flame.
Veggie list and veggie notes, July 21/22, 2016, week #10, purple EOW
There are a lot of ‘splits’ in this week’s box. See the last two lines of my list below. Tomatoes and eggplant are just getting started. Soon, the harvests will increase and we will be swimming in tomatoes, peppers and other summer crops. The melons are very, very close to ripening. Maybe next week? Maybe the following week? We decided to send two types of onions this week, to give you flexibility. We continue to send sweet Walla Walla onions but have added one big white onion so you also have an onion suitable for frying.
‘Caraflex’ cabbage, 1 medium or 2 small
Sweet corn, about 3 ears
Cucumbers, about 2
(a mix of #1 grade and #2 grade)
Green beans, 1.1 lb
Zucchini and summer squash, 3+ lb
Walla Walla onion, 1 or 2
White onion, 1 large
Green bell peppers, 2 medium
Basil, Italian, 1 husky sprig
Basil, Thai, 1 small bunch
Snap peas OR cherry tomatoes OR globe eggplant
An extra handful of beans OR 1-2 tomatoes OR Japanese eggplant OR a small kohlrabi OR an extra mini cabbage.
Next week’s box will probably contain sweet corn, snap peas, zucchini, cucumbers, onions, tomatoes, an herb and more.
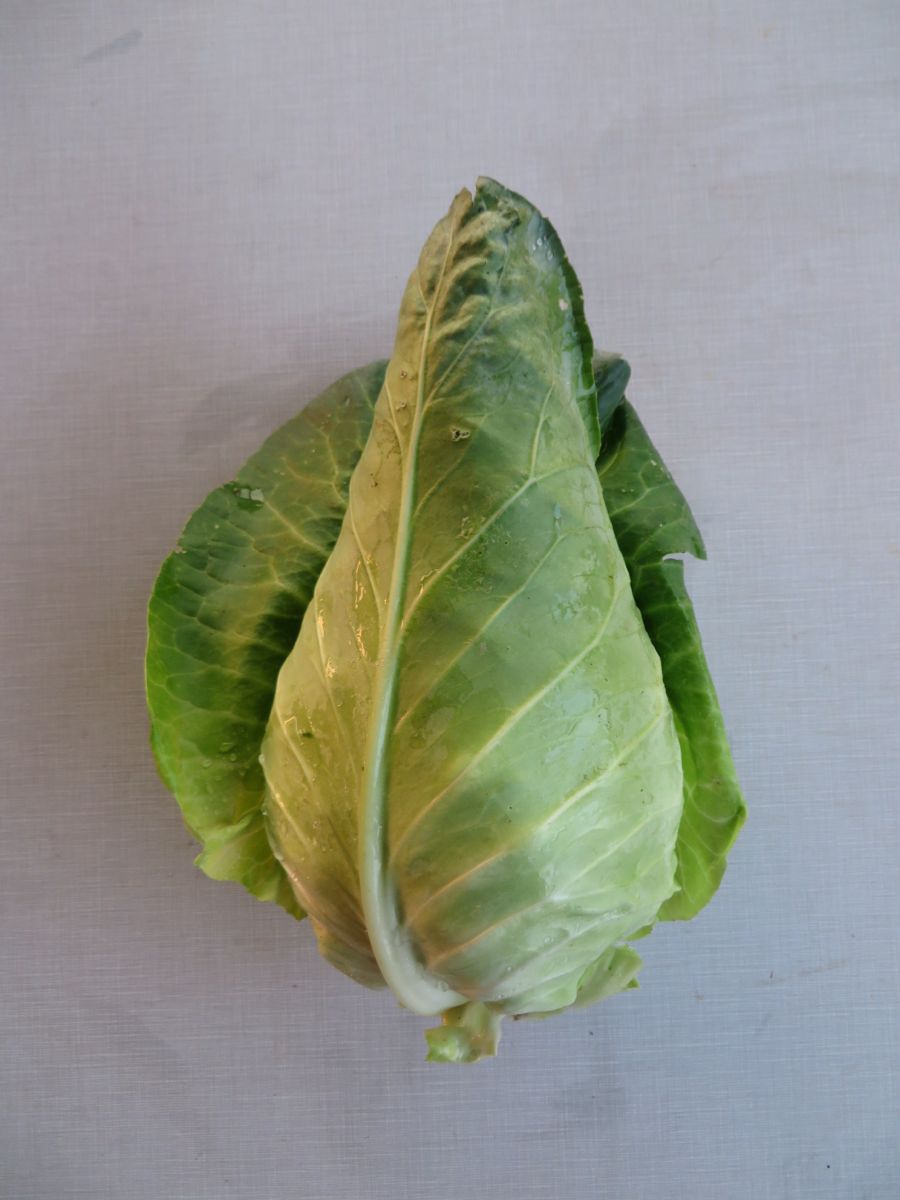
‘Caraflex’ cabbage – This is the same type of cabbage that we sent three weeks ago. Tender, crunchy, they are great for cole slaw and summer salads.
Sweet corn – We have just a few ears this week, as the field gets going. Most are on the young side. Personally, that’s my favorite stage. More will be ready next week.
Cucumbers – We will pack a mix of #1 and #2 grade cucumbers. The #2 grade cucumbers have scarring from wind damage, or are small. The bees are less active in hot weather and don’t spend as much time pollinating and we end up with some smaller cukes.
White onion & Walla Walla onion – You can distinguish these onions by their color. White onions are white. Walla Wallas are white to yellowish, with loose outer skins. See photos. They have distinct uses. Wallas are sweet onions – great for salads, or grilled kebobs, or added to dishes near the end of cooking. White onions are much more pungent and will fry better than Wallas. Pan-fry the white onion with your peppers and zucchini and basil for an tasty combination. Let’s face it; these early onions will have some soil attached. We harvest them as fresh onions. The outer roots and skins don’t have time to dry for easy removal. A quick wipe will clean them up.
Storage: Both Wallas and white onions are best refrigerated at this time of year.
Basils – We will pack two types of basil this week. See photo. Thai Magic is the the same licorice-scented basil we sent last week. Eleonora is an Italian basil.

White onion (left) and two Walla Walla onions (right). Note the light yellow color and loose skins of the Wallas.
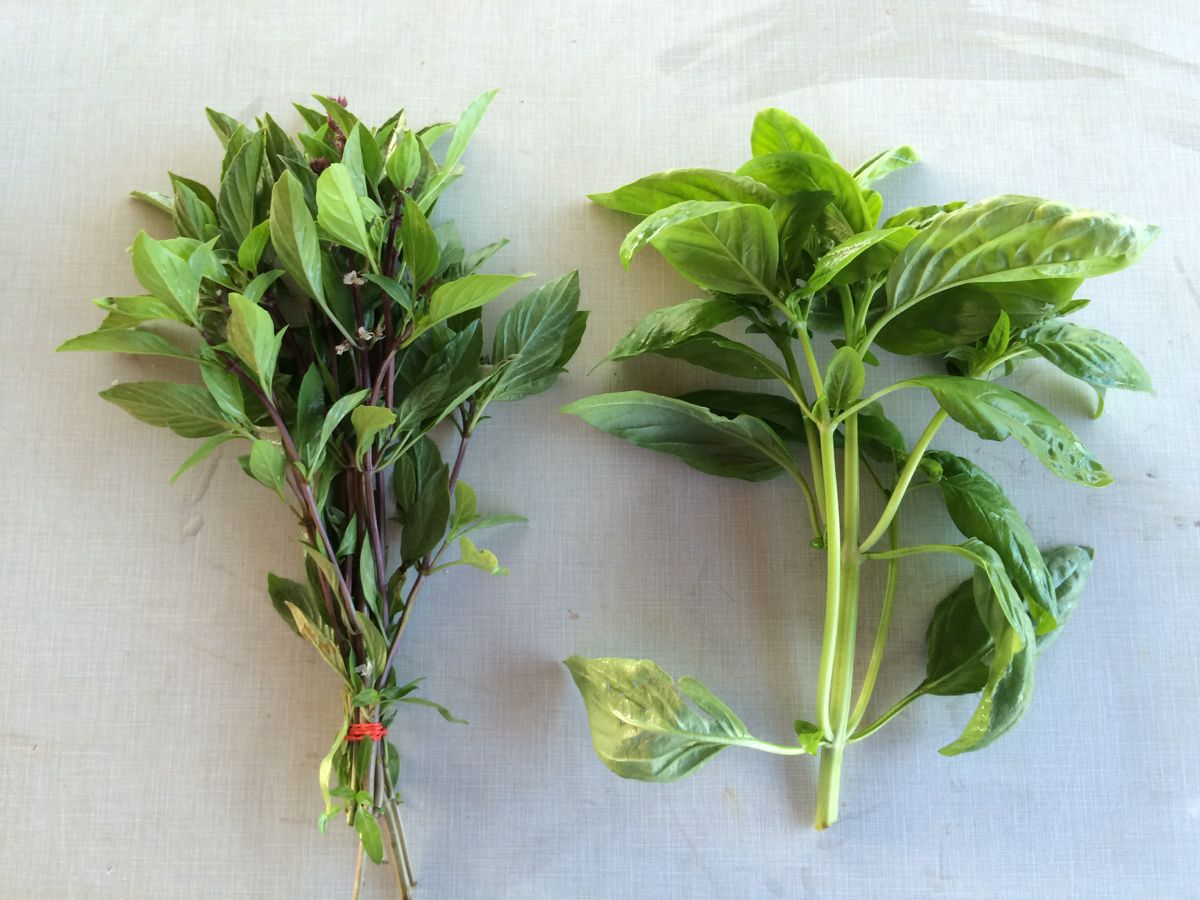
Thai Magic basil (left) and Italian basil (right). Both will be in the box this week.
RECIPES FROM LAUREN
SPICY CABBAGE & CORN COLESLAW
I had something like this at the Willy Street Co-op once and just couldn’t get the perfect combination of corn and cabbage out of my mind for months. This coleslaw is exactly what your summer table needs!
Takes 30 minutes
Serves 4-6
3 ears of corn, shucked
5 cups shredded green cabbage
1 white onion, diced
1/2 cup mayonnaise
1 tablespoon chili powder
2 teaspoons oregano
2 teaspoons cumin
1/4 teaspoon cayenne
2 limes, juiced
1 teaspoon spicy brown mustard
2 teaspoons honey
1 teaspoon kosher or sea salt
Fresh cracked black pepper, to taste
- Bring a large pot of salted water to boil. Fill a large bowl with ice water and set aside.
- Add corn to the boiling water. Boil for 1 minute. Drain, quickly rinse under cold water to stop the cooking process. Continue rinsing until corn feels cool to the touch.
- Using a knife, cut the corn off the cob. Learn a great technique here!
- In a large bowl combine the corn, cabbage, and onion.
- In a small bowl, whisk together the mayonnaise, chili powder, oregano, cumin, cayenne, lime juice, mustard, honey, salt, and pepper.
- Pour the dressing over the cabbage mixture and toss to coat. Chill and serve.
– – – – – – –
SUMMER SQUASH, ONION & BELL PEPPER PIZZA WITH ZUCCHINI CRUST
As usual, this recipe is very versatile. You could just make the zucchini pizza crust and top it with whatever you like (pizza sauce, pepperoni and mozzarella for example) or you can go totally vegetarian as I did and top it with CSA ingredients. I used pesto for the sauce because we always have pesto in our fridge in the summertime, but feel free to use any pizza sauce that you have on hand!
Takes 1 hour, 15 minutes
Serves 2-4
4 cups shredded zucchini (shredded with a cheese grater or food processor)
2 teaspoons Kosher salt, divided
1/3 cup all-purpose flour
1 cup Gouda cheese, divided
1/2 teaspoon garlic powder
1/2 teaspoon dried oregano
1/2 teaspoon dried basil
1 egg
2 tablespoons olive oil, divided
1 Walla Walla onion, thinly sliced
Freshly ground black pepper
1 green bell pepper, diced
1 summer squash, halved and sliced
1/3 cup prepared pesto, pizza sauce or other sauce of your choosing
8-10 Italian basil leaves
- Preheat oven to 525 degrees. Place baking stone, pizza pan or baking sheet you plan to bake pizza on in oven while it preheats. (Allow the pan to get really hot will help keep the pizza crust from sticking).
- Combine shredded zucchini and 1 teaspoon Kosher salt in medium bowl and let sit for 15 minutes. Wrap shredded zucchini in cheese cloth and squeeze until no water remains. This should take about 5 minutes as there is a lot of water in large zucchini. It’s important to get the majority of the water out to ensure a crispy (not soggy) crust! Combine the shredded zucchini, flour, 1/2 cup Gouda, garlic powder, oregano, basil and egg in a clean medium bowl. Stir ingredients together until mostly incorporated and then use your hands to make mixture smooth and even.
- Turn mixture out onto a piece of parchment paper. Press with your hands into a 10-inch circle about a 1/2-inch thick (or another shape if you don’t have a round baking pan). Remove baking stone, pizza pan or baking sheet from the oven and slide parchment (and crust) onto it. Place crust in oven and bake for 15 minutes until golden brown all over. Remove and let cool for 5 minutes.
- Meanwhile, prepare topping. Heat 1 tablespoon olive oil in a large skillet over medium heat. Add onion, 1/2 teaspoon Kosher salt and freshly ground black pepper. Reduce heat to medium low and cook for 10 minutes until well-softened and fragrant. Add remaining olive oil, bell pepper, summer squash, remaining Kosher salt and more freshly ground black pepper. Add a tablespoon water to the pan if things are sticking. Cook for additional 15 minutes. Set aside until ready to use.
- Once pizza crust has been allowed to cool, flip it so that golden brown side is down on the baking pan. Remove from parchment (use a spatula if it doesn’t come off easily). Top with sauce, followed by cooked veggies, then a handful of fresh basil leaves and remaining Gouda. Bake 10-15 minutes until pizza is cooked through and cheese is golden.
– – – – – – –
LOCAL THYME RECIPES
I asked Pat to prepare eggplant recipes, even though not everyone gets eggplant this week. It is an unfamiliar vegetable for some. Everyone will get eggplant in the coming weeks, so note any recipes you want to return to. Beth
Comforting Classics
Spicy Pan Fried Eggplant
Roasted Summer Squash with Crumbled Frico
Roasted Green Beans with Pecorino Romano
Warm Japanese Cabbage Salad
Outside the Box Recipes
Smoky Eggplant Chutney
Spiralized Zucchini “Noodles”
Green Beans and Cabbage with Coriander Butter
Cabbage Pie with Feta
Quick and Easy Meal
Cabbage, Zucchini and Pepper Fried Rice

whew
- On: July 13, 2016
- 1
It was a big week for us. Lots of new crops, lots of irrigation, lots of heat. We hosted a farm tour on Monday for 60 – 70 farmers, aspiring farmers, students, grocery managers, ag professionals and even a few CSA members. We’re glad to share our farming experience. Some business owners hold their knowledge as trade secrets. Not us. In farming, knowing what to do is the first step. Raising crops well takes many, many more steps. Beth
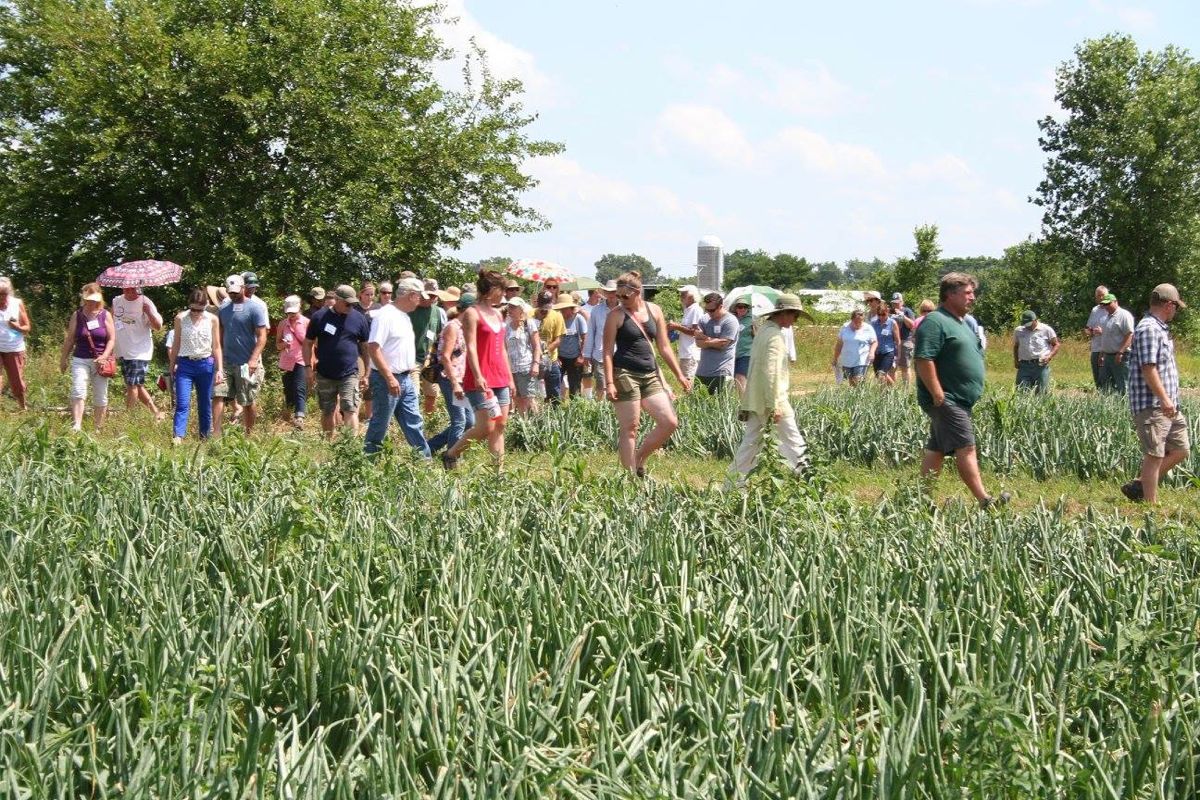
It was a good day, with nice turnout, although incredibly hot. Almost everyone stuck around for the 3 hour tour, despite the heat. We walked the length of the farm, stopping at individual fields to talk about each crop. Photo credit, MOSES.
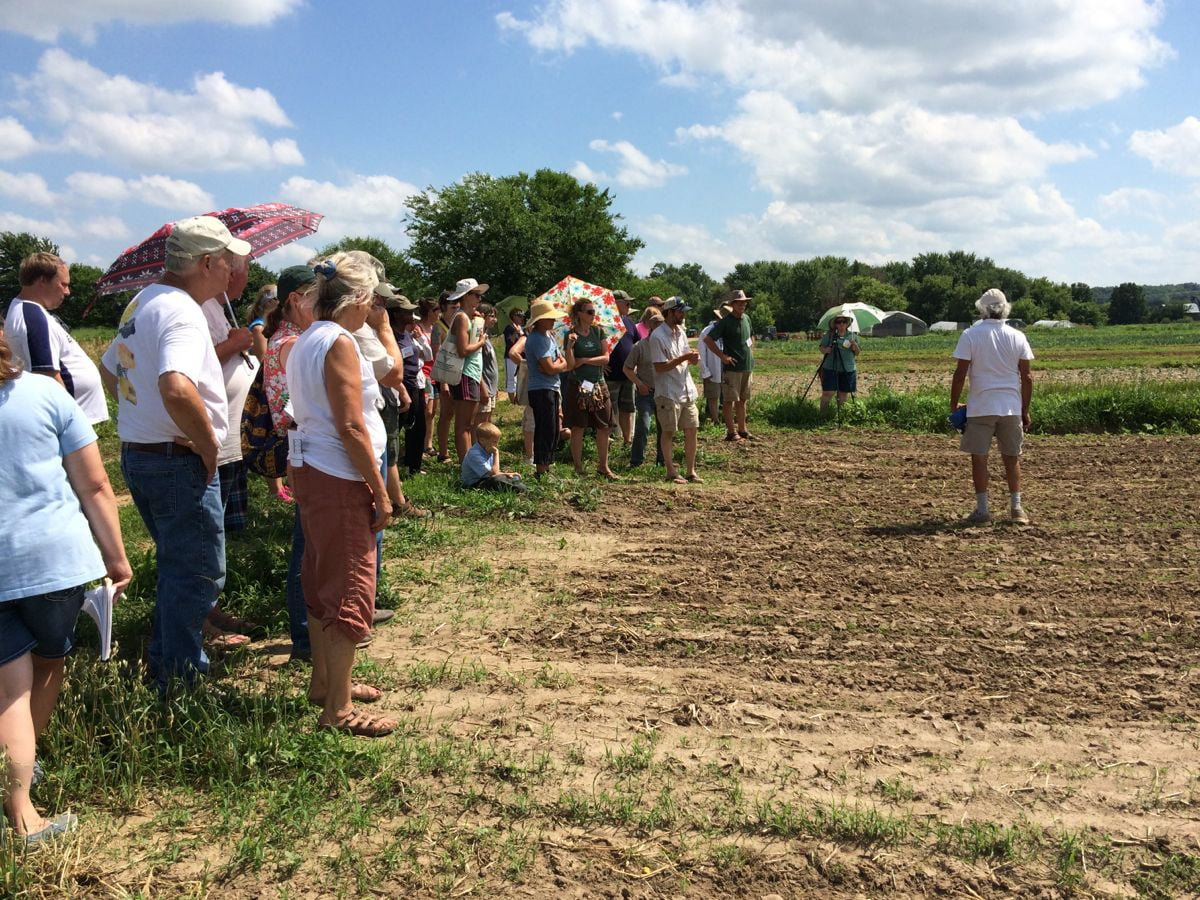
Steve explained the details of growing carrots for fall harvest. Seeded this time of year, so they need extra attention during hot, dry weather.
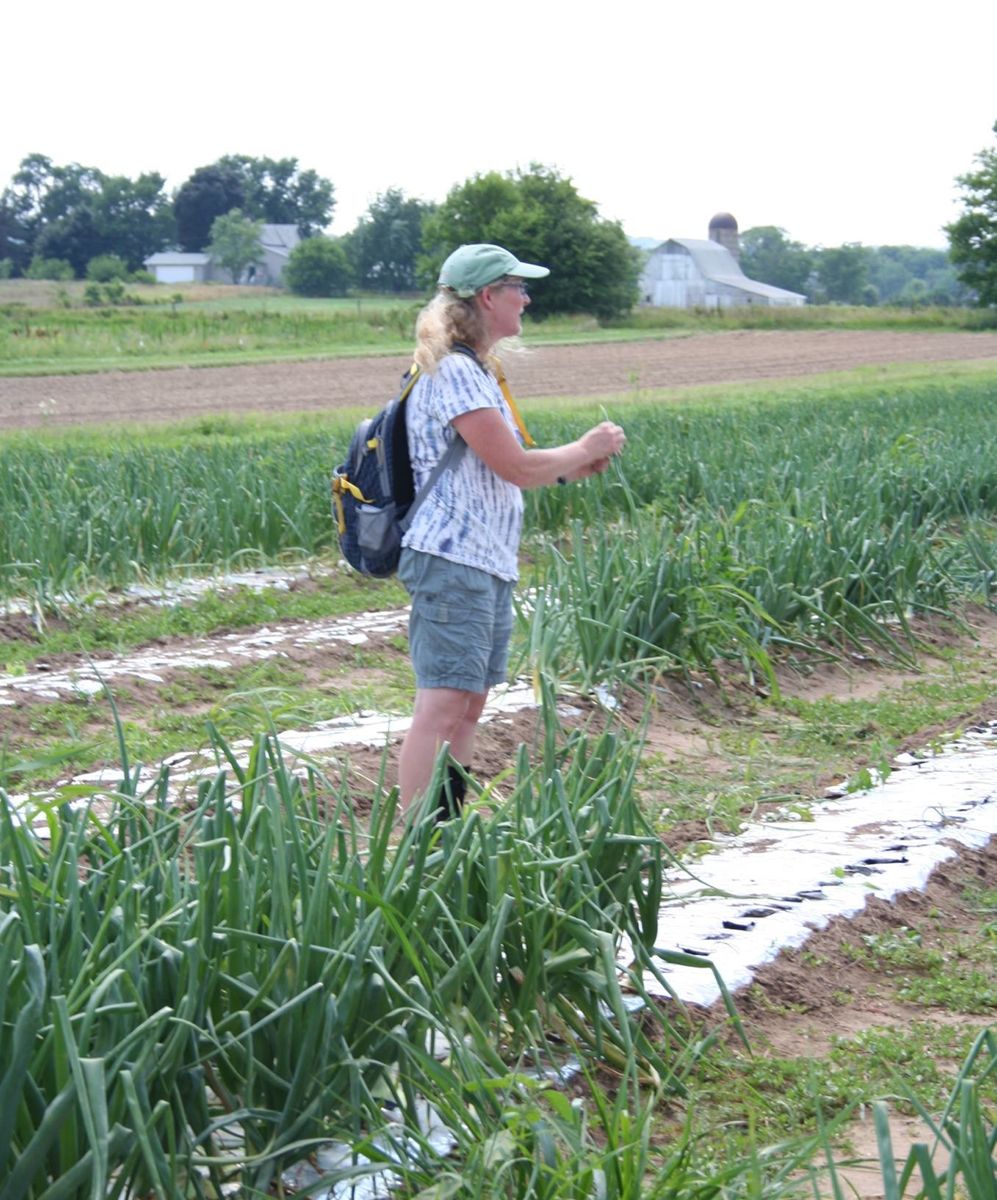
I talked about onion diseases and insects. Photo credit, MOSES

Alice in Dairyland (Ann O’Leary) attended! She has a special connection to our area, as a graduate of both the Evansville High School and Evansville 4H club. From left; Beth, Alice/Ann, Steve.
Veggie list and veggie notes (July 14/15, 2016, week #9, green EOW)
Carrots, 2 lb
Swiss chard, 1 bunch
Green beans, about 0.6 lb
Green bell peppers, 2
Walla Walla onion, 1 lg or 2 med
Zucchini & summer squash, 4+ lb
Cucumbers, 2
(One #1 grade, plus one or two #2 grade)
Thai basil, 1 husky sprig
Fresh garlic, 1 bulb or 2 small bulbs
Next week’s box will probably contain green beans, Caraflex cabbage, cucumber, zucchini/squash, onions and more.
Carrots – Here we go … the first summer carrots of the year.
Swiss chard (pretty bundle of green leaves) – Our crew did a nice job mixing colors for pretty bunches. Swiss chard is a close relative of spinach, but requires a bit more cooking. Use as a substitute in any recipe that calls for spinach, just cook the chard a little longer. Both stems and leaves are delicious. The stems requite longer cooking, so cut them free from the leaves when preparing. That allows you to cook the stems longer.
Green bell peppers – We have the first bell peppers for you. We harvested an early variety that tends to be medium or small. There are some oddball-looking ones, as expected this time of year.
Walla Walla onion – Yeah for the first Walla Wallas! These are sweet onions, crisp and very mild. Wonderful raw or lightly cooked. Do not try to fry these onions – it doesn’t work because of their high water content.
Zucchini and summer squash – We are sending a lot this week because the squash are at their peak production. Wow, they love hot weather.
‘Thai Magic’ basil – Great in Thai and Indonesian dishes, this Thai basil is a fine substitute for Italian basil. We really like this variety! The flavor is excellent, with a mild hint of anise, but no bitterness. The flavor is strong so try using half the amount you would add when using Italian basil. Taste and add more if you wish.
Fresh garlic – Here’s a treat. Harvested fresh this week and sent to you without drying, this garlic is super crunchy and tasty. The succulent skins peel off readily. Refrigerate.
RECIPES FROM LAUREN
Sesame Noodles with Cucumber
Adapted ever so slightly from Smitten Kitchen
Takes 30 minutes
Makes 4 generous servings
3/4 pound dry rice noodles (I love the flat ones often used in Pad Thai)
1 tablespoon smooth peanut butter
2 tablespoons tahini (more peanut butter is an acceptable substitution)
1/4 cup soy sauce
2 tablespoons rice vinegar
2 tablespoons toasted sesame oil
1 tablespoon granulated or brown sugar
2 teaspoons minced garlic (from 1 medium-large clove)
1 green bell pepper, seeded and minced
1 cucumber, very thinly sliced
1/2 cup roasted salted peanuts, roughly chopped
A handful of chopped fresh Thai basil
Sriracha or other garlic-chile paste to taste
1. Cook noodles according to package directions and rinse with cold water to stop the cooking process. Drain well. Set aside.
2. Meanwhile, whisk together peanut butter and tahini in the bottom of a small bowl until smooth, then add soy sauce, rice vinegar, sesame oil, sugar, garlic and green pepper. Stir until well-mixed. Adjust flavors to taste. It might seem a bit salty from the bowl, but should be just right when tossed with noodles.
3. Toss sauce with cold noodles in a large bowl.
4. Place a medium-sized knot of dressed noodles in each bowl, followed by a pile of cucumber. Garnish generously with peanuts and Thai basil. (When you serve, you are looking for a ratio of one: one in the noodles to crunchy delicious toppings department). Serve with Sriracha (or other garlic-chile paste) on the side.
– – – – – – –
Sweet Onion & Chard Quiche
Takes 1 hour, 20 minutes if using store bought crust (about an hour longer if not)
Serves 4-6.
1/2 batch of my Favorite Pie Dough, chilled(or store bought pie crust)
All-purpose flour (for surface)
1 large Walla Walla onion, cut in half and thinly sliced
2 tablespoons olive oil, divided
1 cup water
1 tablespoon balsamic vinegar
1 bunch chard, ribs removed, loosely chopped
2 tablespoons pure maple syrup
Kosher salt
Freshly ground black pepper
1 pound summer squash, halved and sliced
6 ounces sharp white cheddar cheese, grated (about 2 cups)
4 large eggs
3/4 cup creme fraiche (or sour cream)
3/4 cup heavy cream
- If preparing pie crust from scratch, preheat oven to 350 degrees and roll out chilled dough onto a well-floured surface. Transfer to a 9-inch pie pan and place in freezer for 15 minutes. Remove prepped crust from freezer, line with parchment or aluminum foil and fill with rice, dried beans or pie weights. Bake for 30 minutes until just beginning to brown.
- Meanwhile, prepare your filling. Heat one tablespoon olive oil in a large skillet over medium heat. Add onion and saute for 5 minutes until beginning to soften. Add water and balsamic. Bring to a boil, reduce to a simmer and cook for 10 minutes until the mixture has thickened considerably. Add chard and saute for 5 minutes until wilted. Add maple syrup along with salt and pepper to taste. Cook 5 minutes longer until liquid has turned a little syrupy. Remove mixture to a bowl (with any syrup) and wipe pan clean with a paper towel.
- Add remaining olive oil to pan. Add summer squash along with salt and pepper. Saute gently for 5 minutes until softened.
- Scatter cheese over the pre-baked pie crust. Top with summer squash followed by chard onion mixture, making sure to get any syrupy liquid into the quiche.
- In a medium bowl, whisk together eggs, crËme fraÓche and heavy cream. Season lightly with salt and pepper. Pour into quiche. Bake for 35-40 minutes until set and golden brown in spots.
– – – – – – –
LOCAL THYME RECIPES
Comforting Classics
SoCal Pickled Carrots for Tacos
Baked Orzo with Chard
Sesame Green Bean and Pepper Stir Fry
Farro Salad with Grilled Vegetables
Outside the Box Recipes
Pennies From Heaven
Pasta Salad with Creamy Goat Cheese and Romano Dressing
Green Beans with Wild Mushrooms
Chicken Breasts and Zucchini with Herbs
Quick and Easy Meal
Thai Green Bean and Cucumber Salad
July 7 2016
- On: July 09, 2016
- 0
Veggie List and Veggie Notes (July 7/8, 2016, week #8, purple EOW)
Beets with greens, 1 bunch
Snow peas, 1/4 – 1/3 lb
Cucumbers, about 3
Green zucchini
Yellow summer OR patty pan squash
Total zucchini and squash = 3 – 3.5+ lb
Romaine OR green leaf lettuce
Lacinato OR Red Russian kale, 1 bunch
Scallions, 1 bunch
Basil, 1 – 4 sprigs, depending on size
Next week’s box will probably contain Swiss chard, zucchini and summer squash, cucumbers, Walla Walla onion, carrots(?), an herb and more.
Beets with greens – Beet greens are tasty. They are similar to Swiss chard in flavor, texture & cooking time (the two crops are very closely related.) You can remove the thickest midribs before cooking if you wish, but it is not essential.
Storage: Cover and refrigerate. Separate the tops and roots if you don’t plan to eat the greens immediately, to preserve freshness in the roots. Beet greens are perishable and should be eaten soon. The beet roots will last for weeks.
LOCAL THYME RECIPES

Comforting Classics
Beet and Beet Green Risotto with Walnuts and Blue Cheese
Sweet Zucchini Pickles
Skewered Scallops with Cucumbers and Basil
Cheesy Kale Linguini
Outside the Box Recipes
Raw Beet Salad with Mustard Seeds or Beet and Beet Green Spaghetti with Poppy Seeds
Grilled Shrimp and Zucchini Salad with Creamy Lemon Dressing
Cucumber Buttermilk Salad Dressing
Catalan Wilted Kale
Quick and Easy Meal
Pinto Bean and Zucchini Soft Taco
June 30 2016, final version
- On: June 29, 2016
- 0

Tipi Field Day
Monday July 11, 1-4 pm.
We are hosting a field day organized by the Midwest Organic and Sustainable Education Service (MOSES). This is one of the responsibilities/opportunities of being chosen as this year’s Organic Farmers of the Year. We get so much from visiting other farms during the growing season. Now it’s our turn to show and tell. We will walk our fields and discuss the nitty gritty of farming techniques. With 45 crops and 350+ varieties, we make a lot of decisions. The discussion is intended for farmers, but the general public is welcome. Here is the official list of topics:
– CSA vegetable production
– Wholesale markets
– Pest and disease management
– Managing farm workers
– Whole Farm Revenue Protection — learn about this new USDA risk management option.
Visit the MOSES site to register.
Extra basil sales
We might have enough basil to sell extras to CSA members in the next two weeks. Could happen next week, could be the following week. Watch for emails from us. We usually offer it for sale on Wednesday or Thursday, for delivery with the CSA boxes that week.
Let’s review vacation rescheduling
Are you going on vacation and need to reschedule a CSA box? Let’s review the basics. This is the same information we provided in the CSA Handbook in spring.
– Go here to reschedule.
– Reschedule up to two boxes per season.
– Deadline = the Sunday before delivery, by midnight.
– Be prepared to choose your replacement date when you reschedule. Otherwise, your change registers as simply a cancellation.
– FYI, I provide the rescheduling link at the bottom of my Wednesday night email each week. Then you don’t have to hunt for it.
A last few u-pick photos
I want to share just a few more favorites, this time from our Sunday 6/26 u-pick.
Here’s my favorite project. Claire and mom Laurie made jam to give away as wedding favors at Claire’s upcoming wedding. Awww, that makes me happy.

Talk about fashion sense! Look at these cuties! There was a beautiful parade of colorful mud boots at the u-pick. That’s not surprising since it rained overnight. Love the boots on these happy helpers.

Check out Maggie’s farm fashion. She came to help members during the u-pick. After 20 years working on the farm, she knows how to dress for every occasion.
Veggie list and veggie notes (June 30/July 1, 2016, week #7, green EOW)
‘Caraflex’ cabbage
We planned this delivery with your July 4th celebrations in mind. You’ve got ingredients for …
– cole slaw (cabbage, scallions),
– cold salads (lettuce, fennel, peas, cucumbers, kohlrabi),
– grilling (zucchini, scallions),
– dessert (rhubarb), and
– pasta salad. Almost everything in this delivery fits well in pasta salads, our go-to meal for picnics (fennel, grilled zucchini, peas, cucumbers, scallions, basil.) You will find something festive to prepare. Have a great 4th of July!
Caraflex cabbage, 2 small (or 1 medium)
Fennel, 1 large or 2 small
Snap peas, about 1/3 lb
Snow peas, a handful
(Both types of peas will be in one bag.)
Cucumbers, about 2
Zucchini and summer squash, 3 – 3.5 lb
Red bibb OR green leaf lettuce
Kohlrabi, 1 large or 2-3 small
Scallions, 1 bunch
Basil, 1 sprig
Rhubarb, 1.25 – 1.5 lb
Next week’s box will probably contain zucchini, cucumbers, scallions, basil and much more.
‘Caraflex’ cabbage – This ia a nice salad-type that we grow in summer. Don’t you love the pointy shape? It has thinner, more tender leaves than the usual green cabbage. Great in salads and slaws but can also be cooked. Here’s the description from the seed catalogue: “Inner leaves are tender, crunchy, and have an excellent, sweet and mild cabbage flavor. Perfect for summer salads, slaws, or cooked dishes.”
Fennel (large vegetable with a fat bulb and lacy fronds) – Fennel is a ‘swing vegetable’; it can be used raw or cooked. Clean well and slice as thinly as possible for use in raw salads. It is good simply prepared with olive oil, lime or lemon juice, salt and shaved parmesan cheese. Cooking softens and sweetens fennel, and mellows its anise flavor. Both the bulb and leaves are edible. Here are ideas from Alice Water of Chez Panisse about how to use fennel: ‘It’s strong anise characteristic seems to suit fish particularly well. … We use fennel all the time. We add the feathery leaves to marinades for fish and to numerous salads, sauces and soups and we use them as a garnish, too. … The bulbs are sliced and served raw in salads in various combinations with other vegetables, parboiled for pastas; caramelized and served as a side dish; braised whole; or cooked in vegetable broths & fish stocks.”
Snap and snow peas – See last week’s newsletter for a photo to distinguish these two types of peas. This is a disappointing pea year for us (and for you), and quantities are small. Our first two plantings were hit hard by a soil-borne disease called Aphanomyces root rot, which weakened most of the plants before they set peas. Ironically, this disease was the subject of Beth’s master’s thesis. One thing she learned is that there is no ‘cure’ for this problem. We’re debating which cultural controls to attempt next year. We have a third planting in a different field that should be ready in mid-July. Let’s hope it does better than the first two plantings.
Cucumbers – The first cukes, just in time for July 4th picnics!
Basil (curly-leaved sprig) – This is the variety ‘Napoletano.’ The leaves are larger and more frilly than most basils. We like this variety because it remains tender and flavorful even as the plants mature.
Storage: Basil will blacken if stored in the refrigerator. It is best stored at room temperature with the cut ends in water, for example in a glass or teacup. Give the stem a fresh trim. You will receive one sturdy sprig this week.
RECIPES FROM LAUREN
Cucumber and Snow Pea Salad with Ricotta & Goat Cheese
This is a great (super quick, super simple) weeknight dinner, salad or side dish. It can very easily be scaled up or down, or adapted with any other raw veggies you have on hand. Kohlrabi, radishes or broccoli would all be great additions!
Makes enough for 4 as a side
Takes 20 minutes
1 cucumber, cut in 1/8-inch slices
10-15 snow or snap peas, ends removed, thinly sliced
4 scallions, thinly sliced
1/2 cup ricotta cheese
1/4 cup goat cheese
2 tablespoons olive oil
1/2 teaspoon Kosher salt
1/4 teaspoon black pepper
- In a small bowl, combine ricotta, goat cheese, olive oil, salt and pepper. Whisk with a fork until smooth and well-combined. Add the dark green portion of the scallions to this mixture. Fold in gently.
- Place a scoop into the center of one, two or four plates (however many people will be eating the dish). Place cucumbers around the ricotta & goat cheese mixture. Top with snow or snap peas and the white and pale green portion of the scallions. Sprinkle with extra salt to taste.
– – – – – – –
Summer Vegetable Strata
Adapted slightly from Alexandra’s Kitchen
If you are using a loaf of two-day old bread, you won’t need to take any further steps to dry them out. If it’s not old stale bread, you can toast it in the oven the day before, then slice and leave it out to dry overnight.†If you are using a rustic loaf with a thick crust, the texture of the dish will be better if you remove it.
Takes 90 minutes
Serves 8-10
10 eggs
2 1/2 cups whole milk (2% would probably be fine, too)
2 teaspoons kosher salt
1 zucchini
1 summer squash
1 fennel, fronds and core removed
8 oz. cheddar or gruyere (or other favorite cheese)
1 loaf day old bread, see note above
5-6 basil leaves, roughly chopped
1. Preheat oven to 350oF. In a large bowl, whisk eggs, milk and salt together. Set aside.
2. Using the shredder attachment of the food processor (or a cheese grater), slice up the zucchini, squash, and fennel. Send any cheese through cheese grater as well.
3. Cut the bread into 1/2-inch cubes. Add to the bowl of eggs. Add the vegetables and basil to the bowl as well. Toss everything together until well-combined.
4. Butter a 9×13-inch baking dish. Pour egg mixture into pan. Cover with foil. Bake for 20 minutes. Remove foil and continue baking for 40 to 50 minutes longer. Let rest 10 minutes before serving.
– – – – – – –
LOCAL THYME RECIPES
Comforting Classics
Shanghai Noodles with Ground Pork (or chicken or tofu) and Cabbage
Lemon Basil Marinated Summer Squash
Roasted Fennel
Rhubarb Mostarda
Outside the Box Recipes
Indian Spiced Fennel and Cabbage
Pasta Salad with Summer Squash, Crushed Almonds and Parmesan
Spicy Fennel Kohlrabi Slaw
Pan Seared Pork Tenderloin with Rhubarb Rosé Sauce
Quick and Easy Meal
Fennel, Olive and Goat Cheese Flatbreads

