
Farm Newsletter
We left the farm for 56 hours!
- On: July 20, 2016
 1
1

College tour at Carleton.
Steve, the kids and I left the farm for 2 & 1/2 days to tour colleges in Minnesota. It has been ten years since all four of us have left the farm overnight during the growing season. Most years, I take the kids to visit family for a week in early August. Ten years ago, we talked Steve into coming with us for part of the trip. It was stressful and hectic and we haven’t tried it since. We were able to go to Minnesota because of our wonderful crew. We left a short list of instructions and called a few times each day. I can text during a college tour – that’s not hard! Anyway, we are very grateful for how everyone stepped up so we could go. Special thanks to Maggie, Simone, Kerry, Jon, and Billy. I hesitate to credit people by name because everyone pitched in.
Steve is in the thick of establishing our storage carrots, which complicated our trip. Early to mid-July is the time of year to plant carrots for fall harvest and winter storage. Carrot seedlings are tiny and fragile, and establishing each field takes many steps. Steve worked right up until we left, with the last moments spent planting carrots. (We plant a sequence of seven to nine fields each year.) New carrot seedings need irrigation or rain most days for 12 days after planting. It rained early Sunday morning, then we jumped in the car and drove west. How perfect. Within ten minutes of our return Tuesday night, Steve was on a tractor and hitching up irrigation.
Here are the steps we take when establishing a carrot field:
– The fall before, plant a rye and vetch cover crop.
– In June, mow the lush rye and vetch growth, then till it into the ground.
– Soil preparation involves multiple steps. Steve continues to tinker with the best sequence for field prep.
– Plant the carrot seeds.
– Irrigate every day for 12 days.
– On days five, six and seven, dig in the ground to check for sprouted carrot seeds. We are watching for the moment when the carrots have germinated and are still underground, but small weeds have emerged. That’s the moment to …
– Flame weed the carrots. Steve draws a set of LP burners over the carrot rows, flaming a strip where he planted the carrot seeds. The weeds shrivel and the carrots emerge unharmed in a day or two. This step saves a remarkable amount of weeding.
– Soon we will cultivate the fields by tractor and weed by hand twice. Harvest begins in October and will be completed by mid-November.
It is possible you are not interested in that many details. Please accept our over-sharing, as this is our most important work right now. Beth
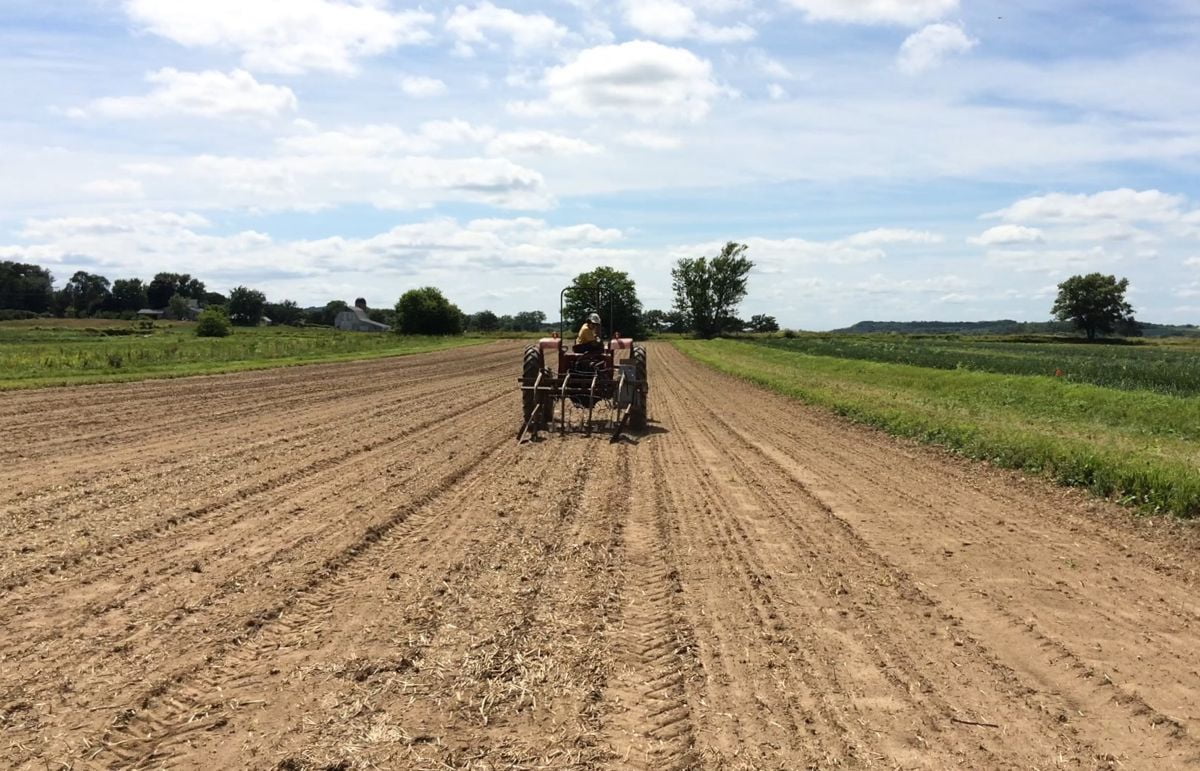
Steve flame-weeds a carrot field. Tiny weeds have emerged but the carrot seedlings are still safe underground. That’s the perfect time to flame.
Veggie list and veggie notes, July 21/22, 2016, week #10, purple EOW
There are a lot of ‘splits’ in this week’s box. See the last two lines of my list below. Tomatoes and eggplant are just getting started. Soon, the harvests will increase and we will be swimming in tomatoes, peppers and other summer crops. The melons are very, very close to ripening. Maybe next week? Maybe the following week? We decided to send two types of onions this week, to give you flexibility. We continue to send sweet Walla Walla onions but have added one big white onion so you also have an onion suitable for frying.
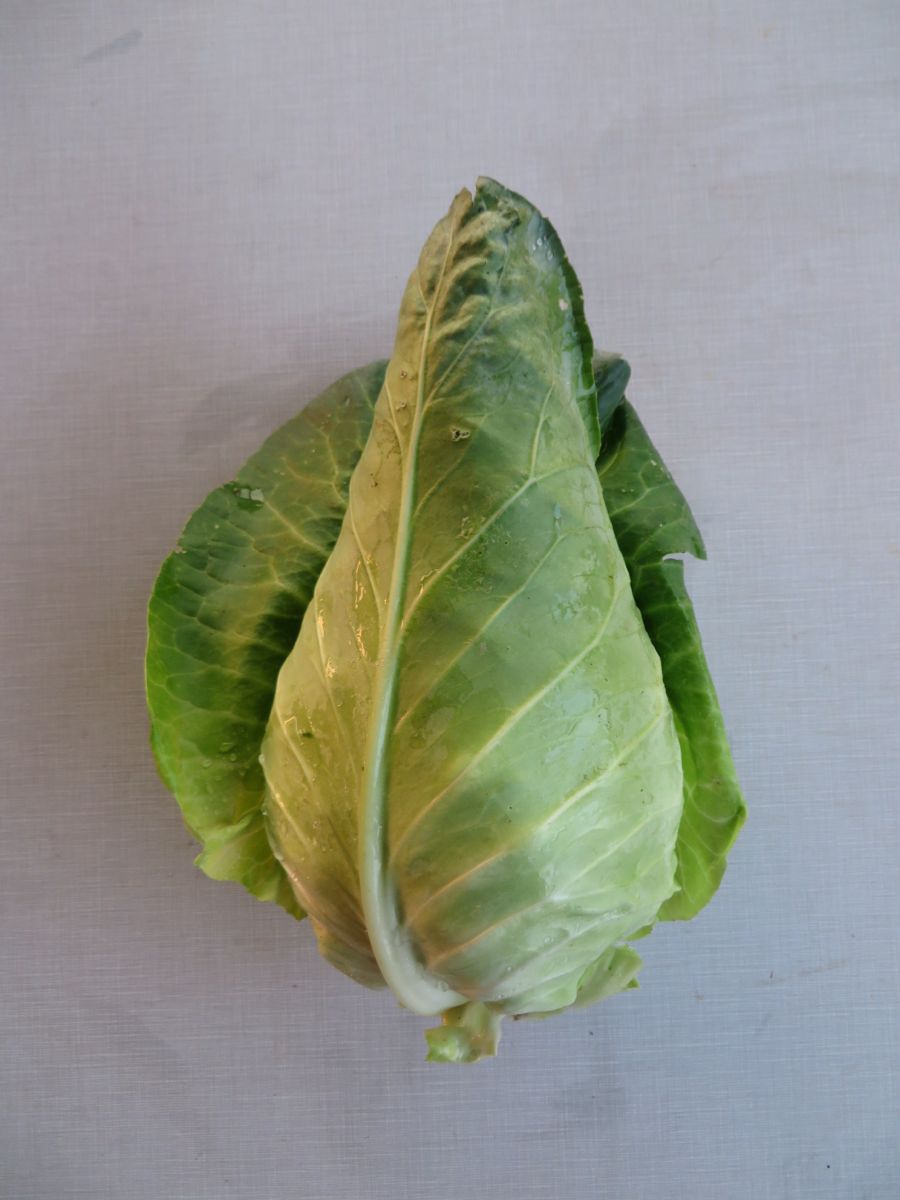
‘Caraflex’ cabbage, 1 medium or 2 small
Sweet corn, about 3 ears
Cucumbers, about 2
(a mix of #1 grade and #2 grade)
Green beans, 1.1 lb
Zucchini and summer squash, 3+ lb
Walla Walla onion, 1 or 2
White onion, 1 large
Green bell peppers, 2 medium
Basil, Italian, 1 husky sprig
Basil, Thai, 1 small bunch
Snap peas OR cherry tomatoes OR globe eggplant
An extra handful of beans OR 1-2 tomatoes OR Japanese eggplant OR a small kohlrabi OR an extra mini cabbage.
Next week’s box will probably contain sweet corn, snap peas, zucchini, cucumbers, onions, tomatoes, an herb and more.
‘Caraflex’ cabbage – This is the same type of cabbage that we sent three weeks ago. Tender, crunchy, they are great for cole slaw and summer salads.
Sweet corn – We have just a few ears this week, as the field gets going. Most are on the young side. Personally, that’s my favorite stage. More will be ready next week.
Cucumbers – We will pack a mix of #1 and #2 grade cucumbers. The #2 grade cucumbers have scarring from wind damage, or are small. The bees are less active in hot weather and don’t spend as much time pollinating and we end up with some smaller cukes.
White onion & Walla Walla onion – You can distinguish these onions by their color. White onions are white. Walla Wallas are white to yellowish, with loose outer skins. See photos. They have distinct uses. Wallas are sweet onions – great for salads, or grilled kebobs, or added to dishes near the end of cooking. White onions are much more pungent and will fry better than Wallas. Pan-fry the white onion with your peppers and zucchini and basil for an tasty combination. Let’s face it; these early onions will have some soil attached. We harvest them as fresh onions. The outer roots and skins don’t have time to dry for easy removal. A quick wipe will clean them up.
Storage: Both Wallas and white onions are best refrigerated at this time of year.
Basils – We will pack two types of basil this week. See photo. Thai Magic is the the same licorice-scented basil we sent last week. Eleonora is an Italian basil.

White onion (left) and two Walla Walla onions (right). Note the light yellow color and loose skins of the Wallas.
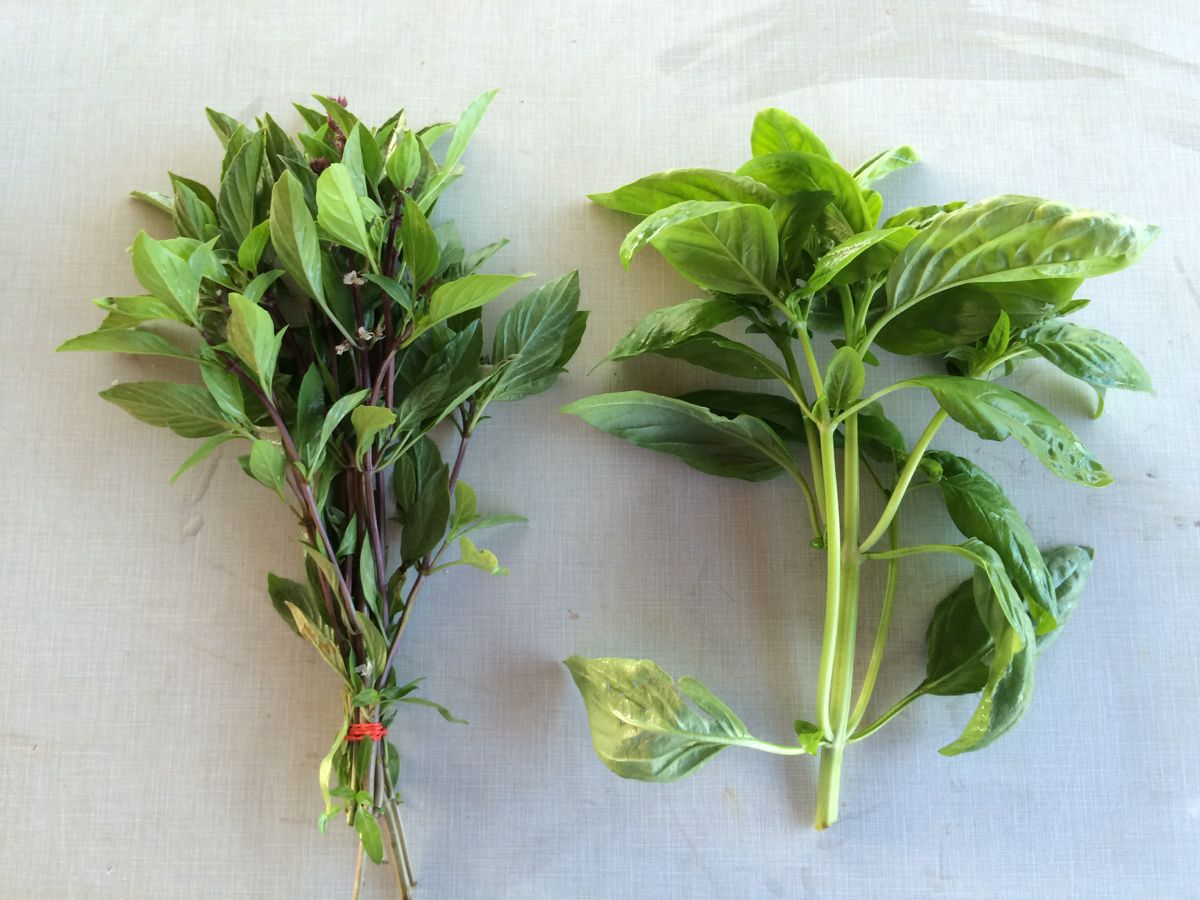
Thai Magic basil (left) and Italian basil (right). Both will be in the box this week.
RECIPES FROM LAUREN
SPICY CABBAGE & CORN COLESLAW
I had something like this at the Willy Street Co-op once and just couldn’t get the perfect combination of corn and cabbage out of my mind for months. This coleslaw is exactly what your summer table needs!
Takes 30 minutes
Serves 4-6
3 ears of corn, shucked
5 cups shredded green cabbage
1 white onion, diced
1/2 cup mayonnaise
1 tablespoon chili powder
2 teaspoons oregano
2 teaspoons cumin
1/4 teaspoon cayenne
2 limes, juiced
1 teaspoon spicy brown mustard
2 teaspoons honey
1 teaspoon kosher or sea salt
Fresh cracked black pepper, to taste
- Bring a large pot of salted water to boil. Fill a large bowl with ice water and set aside.
- Add corn to the boiling water. Boil for 1 minute. Drain, quickly rinse under cold water to stop the cooking process. Continue rinsing until corn feels cool to the touch.
- Using a knife, cut the corn off the cob. Learn a great technique here!
- In a large bowl combine the corn, cabbage, and onion.
- In a small bowl, whisk together the mayonnaise, chili powder, oregano, cumin, cayenne, lime juice, mustard, honey, salt, and pepper.
- Pour the dressing over the cabbage mixture and toss to coat. Chill and serve.
– – – – – – –
SUMMER SQUASH, ONION & BELL PEPPER PIZZA WITH ZUCCHINI CRUST
As usual, this recipe is very versatile. You could just make the zucchini pizza crust and top it with whatever you like (pizza sauce, pepperoni and mozzarella for example) or you can go totally vegetarian as I did and top it with CSA ingredients. I used pesto for the sauce because we always have pesto in our fridge in the summertime, but feel free to use any pizza sauce that you have on hand!
Takes 1 hour, 15 minutes
Serves 2-4
4 cups shredded zucchini (shredded with a cheese grater or food processor)
2 teaspoons Kosher salt, divided
1/3 cup all-purpose flour
1 cup Gouda cheese, divided
1/2 teaspoon garlic powder
1/2 teaspoon dried oregano
1/2 teaspoon dried basil
1 egg
2 tablespoons olive oil, divided
1 Walla Walla onion, thinly sliced
Freshly ground black pepper
1 green bell pepper, diced
1 summer squash, halved and sliced
1/3 cup prepared pesto, pizza sauce or other sauce of your choosing
8-10 Italian basil leaves
- Preheat oven to 525 degrees. Place baking stone, pizza pan or baking sheet you plan to bake pizza on in oven while it preheats. (Allow the pan to get really hot will help keep the pizza crust from sticking).
- Combine shredded zucchini and 1 teaspoon Kosher salt in medium bowl and let sit for 15 minutes. Wrap shredded zucchini in cheese cloth and squeeze until no water remains. This should take about 5 minutes as there is a lot of water in large zucchini. It’s important to get the majority of the water out to ensure a crispy (not soggy) crust! Combine the shredded zucchini, flour, 1/2 cup Gouda, garlic powder, oregano, basil and egg in a clean medium bowl. Stir ingredients together until mostly incorporated and then use your hands to make mixture smooth and even.
- Turn mixture out onto a piece of parchment paper. Press with your hands into a 10-inch circle about a 1/2-inch thick (or another shape if you don’t have a round baking pan). Remove baking stone, pizza pan or baking sheet from the oven and slide parchment (and crust) onto it. Place crust in oven and bake for 15 minutes until golden brown all over. Remove and let cool for 5 minutes.
- Meanwhile, prepare topping. Heat 1 tablespoon olive oil in a large skillet over medium heat. Add onion, 1/2 teaspoon Kosher salt and freshly ground black pepper. Reduce heat to medium low and cook for 10 minutes until well-softened and fragrant. Add remaining olive oil, bell pepper, summer squash, remaining Kosher salt and more freshly ground black pepper. Add a tablespoon water to the pan if things are sticking. Cook for additional 15 minutes. Set aside until ready to use.
- Once pizza crust has been allowed to cool, flip it so that golden brown side is down on the baking pan. Remove from parchment (use a spatula if it doesn’t come off easily). Top with sauce, followed by cooked veggies, then a handful of fresh basil leaves and remaining Gouda. Bake 10-15 minutes until pizza is cooked through and cheese is golden.
– – – – – – –
LOCAL THYME RECIPES
I asked Pat to prepare eggplant recipes, even though not everyone gets eggplant this week. It is an unfamiliar vegetable for some. Everyone will get eggplant in the coming weeks, so note any recipes you want to return to. Beth
Comforting Classics
Spicy Pan Fried Eggplant
Roasted Summer Squash with Crumbled Frico
Roasted Green Beans with Pecorino Romano
Warm Japanese Cabbage Salad
Outside the Box Recipes
Smoky Eggplant Chutney
Spiralized Zucchini “Noodles”
Green Beans and Cabbage with Coriander Butter
Cabbage Pie with Feta
Quick and Easy Meal
Cabbage, Zucchini and Pepper Fried Rice


whew
- On: July 13, 2016
- 1
It was a big week for us. Lots of new crops, lots of irrigation, lots of heat. We hosted a farm tour on Monday for 60 – 70 farmers, aspiring farmers, students, grocery managers, ag professionals and even a few CSA members. We’re glad to share our farming experience. Some business owners hold their knowledge as trade secrets. Not us. In farming, knowing what to do is the first step. Raising crops well takes many, many more steps. Beth
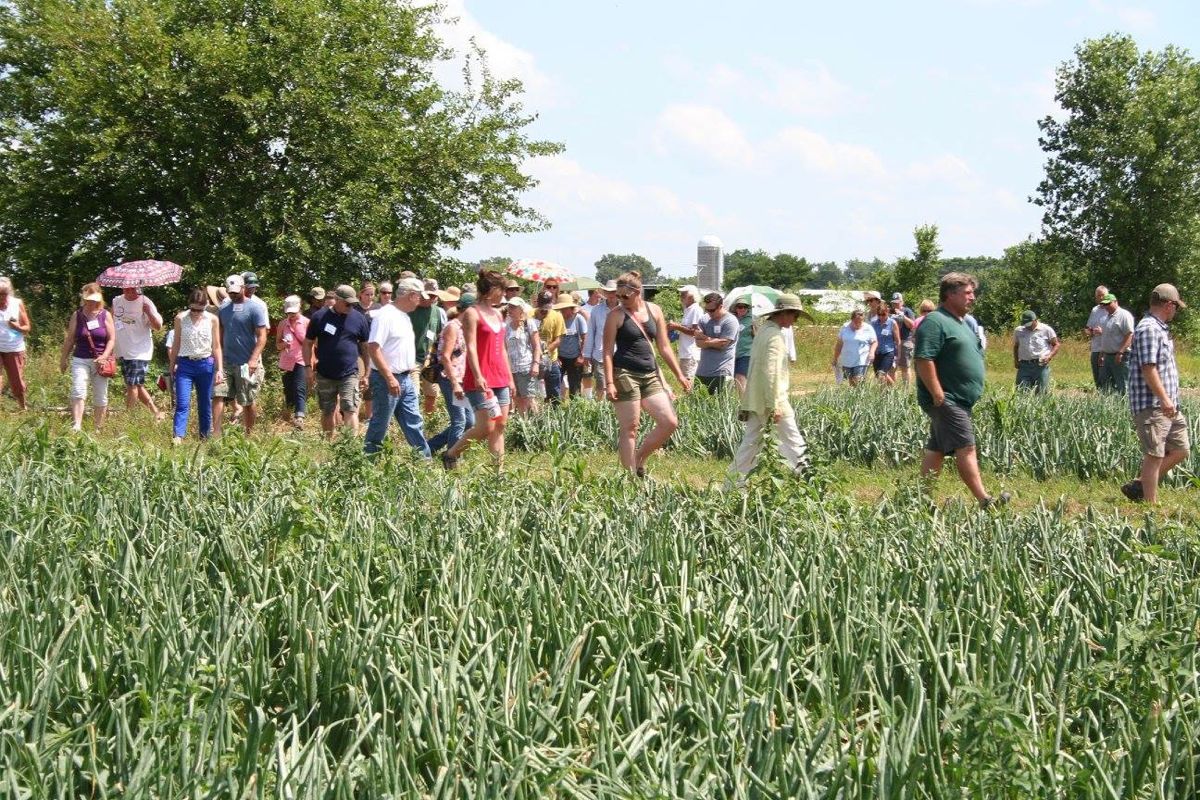
It was a good day, with nice turnout, although incredibly hot. Almost everyone stuck around for the 3 hour tour, despite the heat. We walked the length of the farm, stopping at individual fields to talk about each crop. Photo credit, MOSES.
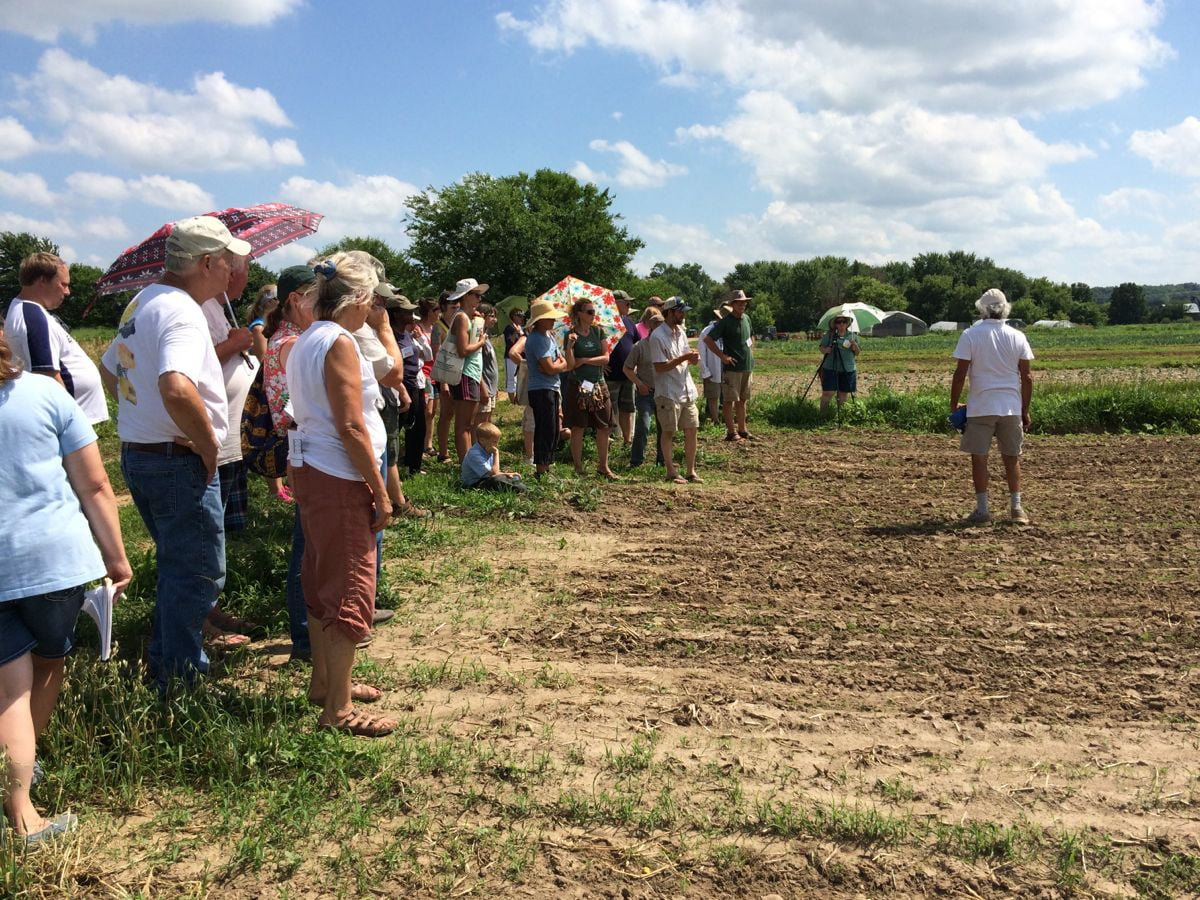
Steve explained the details of growing carrots for fall harvest. Seeded this time of year, so they need extra attention during hot, dry weather.
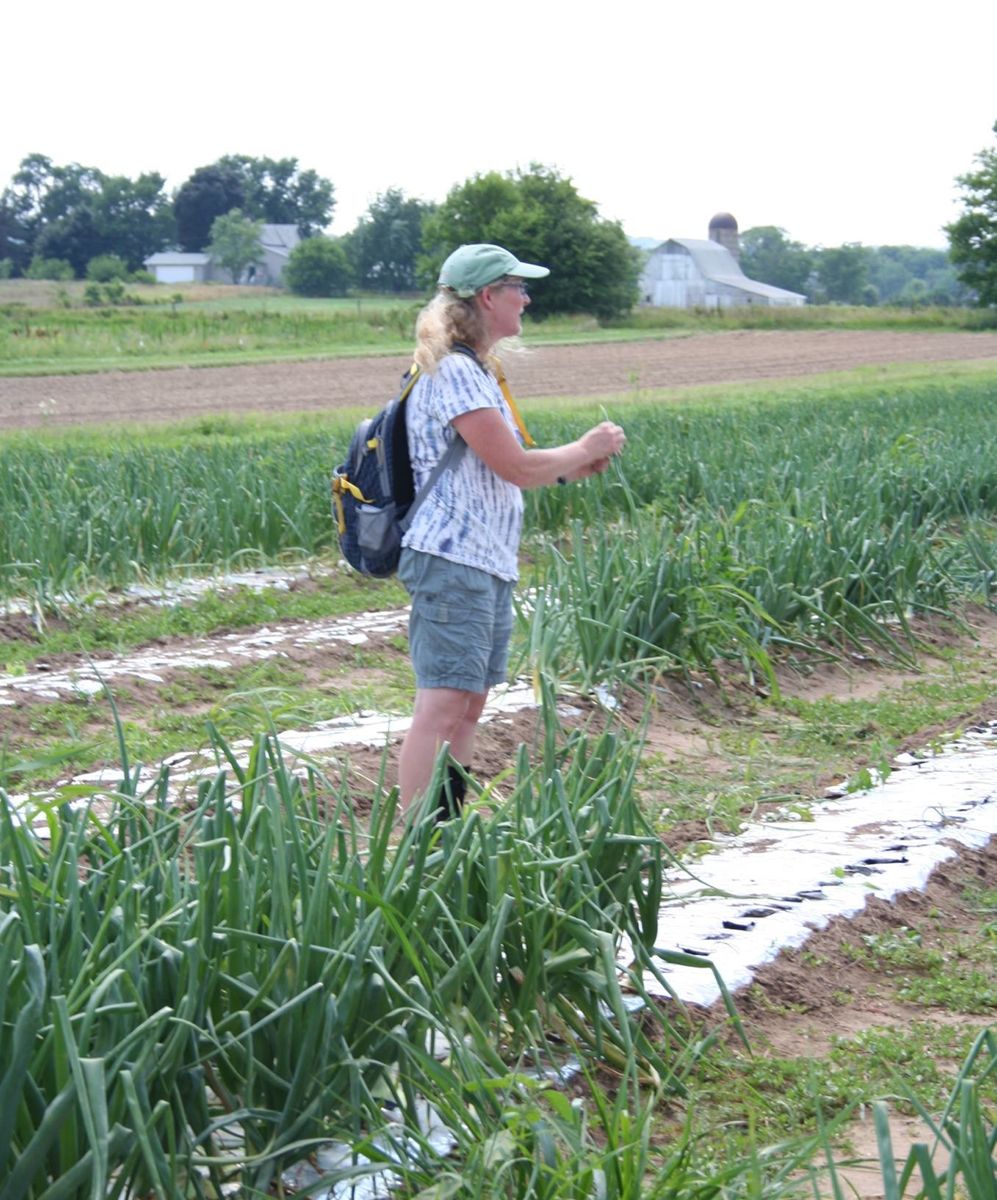
I talked about onion diseases and insects. Photo credit, MOSES

Alice in Dairyland (Ann O’Leary) attended! She has a special connection to our area, as a graduate of both the Evansville High School and Evansville 4H club. From left; Beth, Alice/Ann, Steve.
Veggie list and veggie notes (July 14/15, 2016, week #9, green EOW)
Carrots, 2 lb
Swiss chard, 1 bunch
Green beans, about 0.6 lb
Green bell peppers, 2
Walla Walla onion, 1 lg or 2 med
Zucchini & summer squash, 4+ lb
Cucumbers, 2
(One #1 grade, plus one or two #2 grade)
Thai basil, 1 husky sprig
Fresh garlic, 1 bulb or 2 small bulbs
Next week’s box will probably contain green beans, Caraflex cabbage, cucumber, zucchini/squash, onions and more.
Carrots – Here we go … the first summer carrots of the year.
Swiss chard (pretty bundle of green leaves) – Our crew did a nice job mixing colors for pretty bunches. Swiss chard is a close relative of spinach, but requires a bit more cooking. Use as a substitute in any recipe that calls for spinach, just cook the chard a little longer. Both stems and leaves are delicious. The stems requite longer cooking, so cut them free from the leaves when preparing. That allows you to cook the stems longer.
Green bell peppers – We have the first bell peppers for you. We harvested an early variety that tends to be medium or small. There are some oddball-looking ones, as expected this time of year.
Walla Walla onion – Yeah for the first Walla Wallas! These are sweet onions, crisp and very mild. Wonderful raw or lightly cooked. Do not try to fry these onions – it doesn’t work because of their high water content.
Zucchini and summer squash – We are sending a lot this week because the squash are at their peak production. Wow, they love hot weather.
‘Thai Magic’ basil – Great in Thai and Indonesian dishes, this Thai basil is a fine substitute for Italian basil. We really like this variety! The flavor is excellent, with a mild hint of anise, but no bitterness. The flavor is strong so try using half the amount you would add when using Italian basil. Taste and add more if you wish.
Fresh garlic – Here’s a treat. Harvested fresh this week and sent to you without drying, this garlic is super crunchy and tasty. The succulent skins peel off readily. Refrigerate.
RECIPES FROM LAUREN
Sesame Noodles with Cucumber
Adapted ever so slightly from Smitten Kitchen
Takes 30 minutes
Makes 4 generous servings
3/4 pound dry rice noodles (I love the flat ones often used in Pad Thai)
1 tablespoon smooth peanut butter
2 tablespoons tahini (more peanut butter is an acceptable substitution)
1/4 cup soy sauce
2 tablespoons rice vinegar
2 tablespoons toasted sesame oil
1 tablespoon granulated or brown sugar
2 teaspoons minced garlic (from 1 medium-large clove)
1 green bell pepper, seeded and minced
1 cucumber, very thinly sliced
1/2 cup roasted salted peanuts, roughly chopped
A handful of chopped fresh Thai basil
Sriracha or other garlic-chile paste to taste
1. Cook noodles according to package directions and rinse with cold water to stop the cooking process. Drain well. Set aside.
2. Meanwhile, whisk together peanut butter and tahini in the bottom of a small bowl until smooth, then add soy sauce, rice vinegar, sesame oil, sugar, garlic and green pepper. Stir until well-mixed. Adjust flavors to taste. It might seem a bit salty from the bowl, but should be just right when tossed with noodles.
3. Toss sauce with cold noodles in a large bowl.
4. Place a medium-sized knot of dressed noodles in each bowl, followed by a pile of cucumber. Garnish generously with peanuts and Thai basil. (When you serve, you are looking for a ratio of one: one in the noodles to crunchy delicious toppings department). Serve with Sriracha (or other garlic-chile paste) on the side.
– – – – – – –
Sweet Onion & Chard Quiche
Takes 1 hour, 20 minutes if using store bought crust (about an hour longer if not)
Serves 4-6.
1/2 batch of my Favorite Pie Dough, chilled(or store bought pie crust)
All-purpose flour (for surface)
1 large Walla Walla onion, cut in half and thinly sliced
2 tablespoons olive oil, divided
1 cup water
1 tablespoon balsamic vinegar
1 bunch chard, ribs removed, loosely chopped
2 tablespoons pure maple syrup
Kosher salt
Freshly ground black pepper
1 pound summer squash, halved and sliced
6 ounces sharp white cheddar cheese, grated (about 2 cups)
4 large eggs
3/4 cup creme fraiche (or sour cream)
3/4 cup heavy cream
- If preparing pie crust from scratch, preheat oven to 350 degrees and roll out chilled dough onto a well-floured surface. Transfer to a 9-inch pie pan and place in freezer for 15 minutes. Remove prepped crust from freezer, line with parchment or aluminum foil and fill with rice, dried beans or pie weights. Bake for 30 minutes until just beginning to brown.
- Meanwhile, prepare your filling. Heat one tablespoon olive oil in a large skillet over medium heat. Add onion and saute for 5 minutes until beginning to soften. Add water and balsamic. Bring to a boil, reduce to a simmer and cook for 10 minutes until the mixture has thickened considerably. Add chard and saute for 5 minutes until wilted. Add maple syrup along with salt and pepper to taste. Cook 5 minutes longer until liquid has turned a little syrupy. Remove mixture to a bowl (with any syrup) and wipe pan clean with a paper towel.
- Add remaining olive oil to pan. Add summer squash along with salt and pepper. Saute gently for 5 minutes until softened.
- Scatter cheese over the pre-baked pie crust. Top with summer squash followed by chard onion mixture, making sure to get any syrupy liquid into the quiche.
- In a medium bowl, whisk together eggs, crËme fraÓche and heavy cream. Season lightly with salt and pepper. Pour into quiche. Bake for 35-40 minutes until set and golden brown in spots.
– – – – – – –
LOCAL THYME RECIPES
Comforting Classics
SoCal Pickled Carrots for Tacos
Baked Orzo with Chard
Sesame Green Bean and Pepper Stir Fry
Farro Salad with Grilled Vegetables
Outside the Box Recipes
Pennies From Heaven
Pasta Salad with Creamy Goat Cheese and Romano Dressing
Green Beans with Wild Mushrooms
Chicken Breasts and Zucchini with Herbs
Quick and Easy Meal
Thai Green Bean and Cucumber Salad
July 7 2016
- On: July 09, 2016
- 0
Veggie List and Veggie Notes (July 7/8, 2016, week #8, purple EOW)
Beets with greens, 1 bunch
Snow peas, 1/4 – 1/3 lb
Cucumbers, about 3
Green zucchini
Yellow summer OR patty pan squash
Total zucchini and squash = 3 – 3.5+ lb
Romaine OR green leaf lettuce
Lacinato OR Red Russian kale, 1 bunch
Scallions, 1 bunch
Basil, 1 – 4 sprigs, depending on size
Next week’s box will probably contain Swiss chard, zucchini and summer squash, cucumbers, Walla Walla onion, carrots(?), an herb and more.
Beets with greens – Beet greens are tasty. They are similar to Swiss chard in flavor, texture & cooking time (the two crops are very closely related.) You can remove the thickest midribs before cooking if you wish, but it is not essential.
Storage: Cover and refrigerate. Separate the tops and roots if you don’t plan to eat the greens immediately, to preserve freshness in the roots. Beet greens are perishable and should be eaten soon. The beet roots will last for weeks.
LOCAL THYME RECIPES

Comforting Classics
Beet and Beet Green Risotto with Walnuts and Blue Cheese
Sweet Zucchini Pickles
Skewered Scallops with Cucumbers and Basil
Cheesy Kale Linguini
Outside the Box Recipes
Raw Beet Salad with Mustard Seeds or Beet and Beet Green Spaghetti with Poppy Seeds
Grilled Shrimp and Zucchini Salad with Creamy Lemon Dressing
Cucumber Buttermilk Salad Dressing
Catalan Wilted Kale
Quick and Easy Meal
Pinto Bean and Zucchini Soft Taco
June 30 2016, final version
- On: June 29, 2016
- 0

Tipi Field Day
Monday July 11, 1-4 pm.
We are hosting a field day organized by the Midwest Organic and Sustainable Education Service (MOSES). This is one of the responsibilities/opportunities of being chosen as this year’s Organic Farmers of the Year. We get so much from visiting other farms during the growing season. Now it’s our turn to show and tell. We will walk our fields and discuss the nitty gritty of farming techniques. With 45 crops and 350+ varieties, we make a lot of decisions. The discussion is intended for farmers, but the general public is welcome. Here is the official list of topics:
– CSA vegetable production
– Wholesale markets
– Pest and disease management
– Managing farm workers
– Whole Farm Revenue Protection — learn about this new USDA risk management option.
Visit the MOSES site to register.
Extra basil sales
We might have enough basil to sell extras to CSA members in the next two weeks. Could happen next week, could be the following week. Watch for emails from us. We usually offer it for sale on Wednesday or Thursday, for delivery with the CSA boxes that week.
Let’s review vacation rescheduling
Are you going on vacation and need to reschedule a CSA box? Let’s review the basics. This is the same information we provided in the CSA Handbook in spring.
– Go here to reschedule.
– Reschedule up to two boxes per season.
– Deadline = the Sunday before delivery, by midnight.
– Be prepared to choose your replacement date when you reschedule. Otherwise, your change registers as simply a cancellation.
– FYI, I provide the rescheduling link at the bottom of my Wednesday night email each week. Then you don’t have to hunt for it.
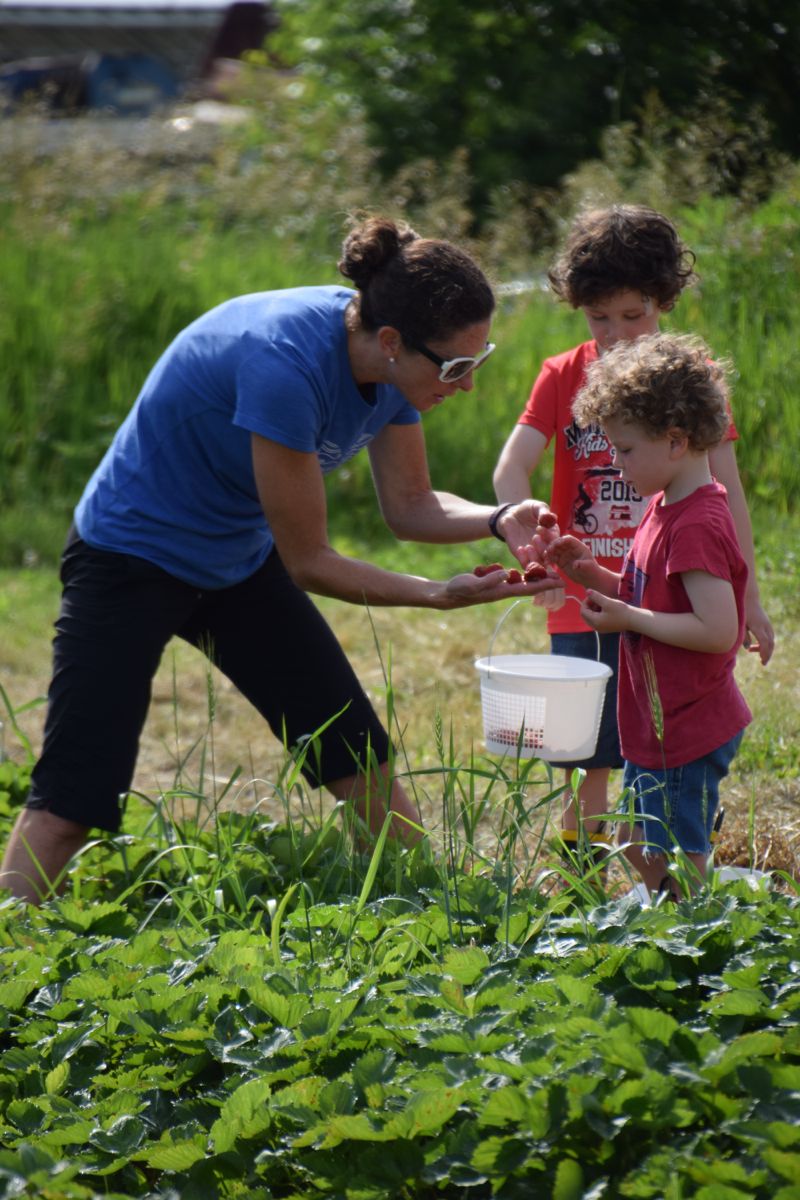
A last few u-pick photos
I want to share just a few more favorites, this time from our Sunday 6/26 u-pick.
Here’s my favorite project. Claire and mom Laurie made jam to give away as wedding favors at Claire’s upcoming wedding. Awww, that makes me happy.
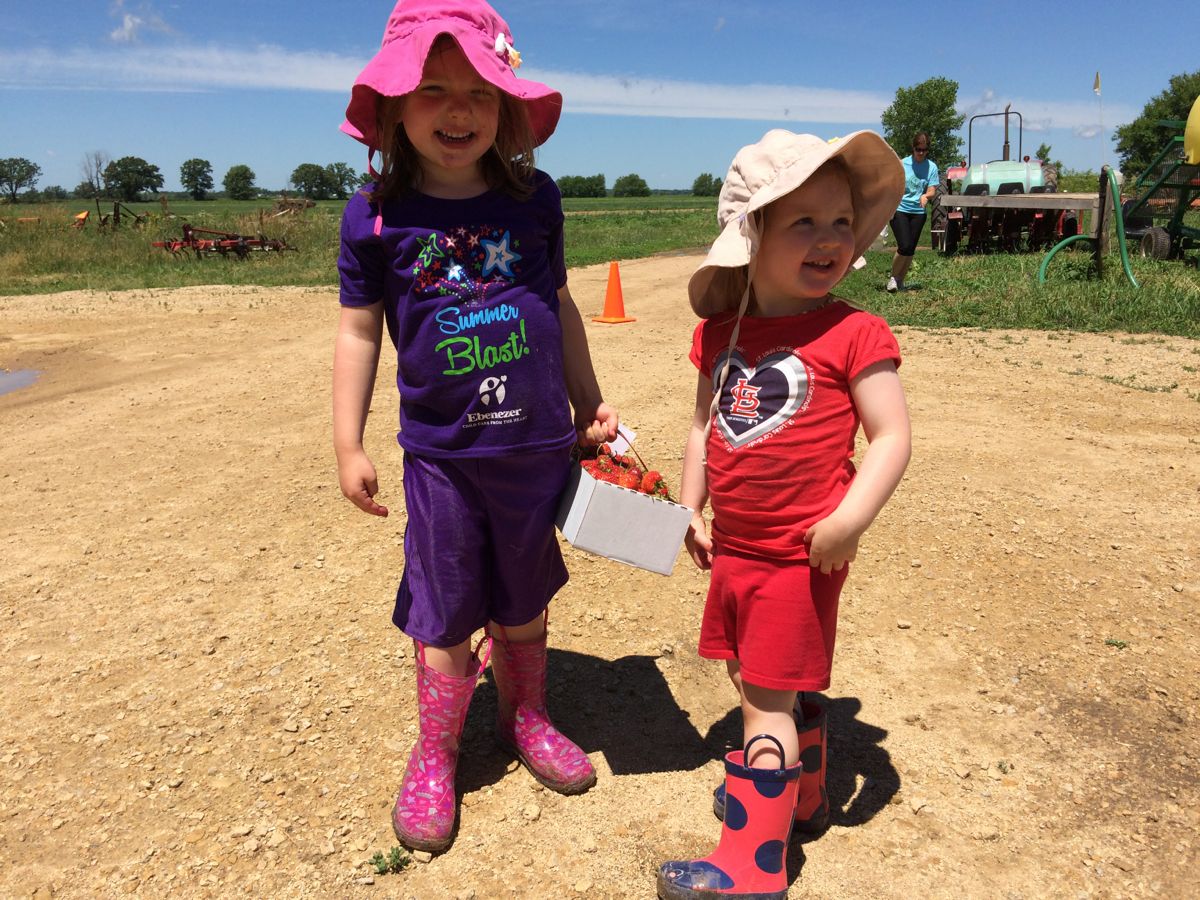
Talk about fashion sense! Look at these cuties! There was a beautiful parade of colorful mud boots at the u-pick. That’s not surprising since it rained overnight. Love the boots on these happy helpers.
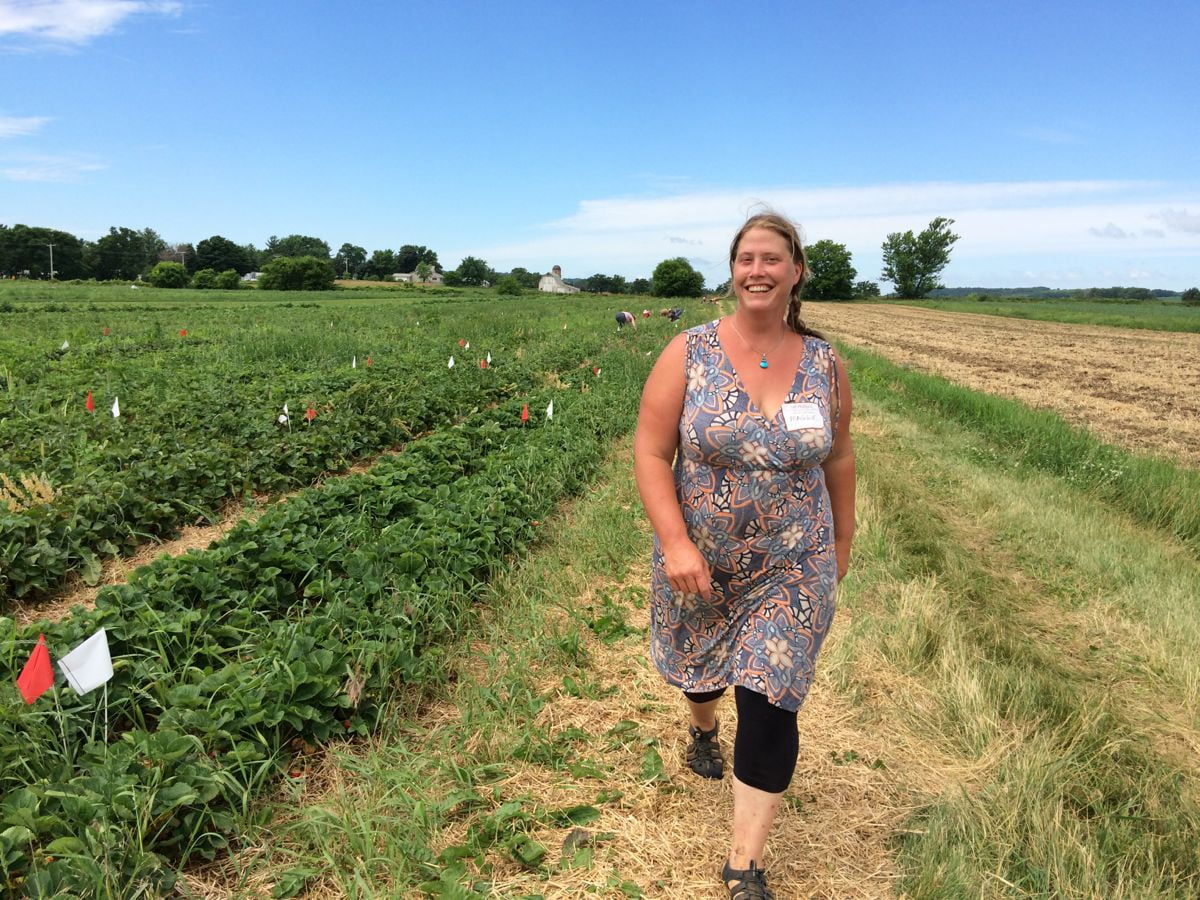
Check out Maggie’s farm fashion. She came to help members during the u-pick. After 20 years working on the farm, she knows how to dress for every occasion.
Veggie list and veggie notes (June 30/July 1, 2016, week #7, green EOW)
‘Caraflex’ cabbage
We planned this delivery with your July 4th celebrations in mind. You’ve got ingredients for …
– cole slaw (cabbage, scallions),
– cold salads (lettuce, fennel, peas, cucumbers, kohlrabi),
– grilling (zucchini, scallions),
– dessert (rhubarb), and
– pasta salad. Almost everything in this delivery fits well in pasta salads, our go-to meal for picnics (fennel, grilled zucchini, peas, cucumbers, scallions, basil.) You will find something festive to prepare. Have a great 4th of July!
Caraflex cabbage, 2 small (or 1 medium)
Fennel, 1 large or 2 small
Snap peas, about 1/3 lb
Snow peas, a handful
(Both types of peas will be in one bag.)
Cucumbers, about 2
Zucchini and summer squash, 3 – 3.5 lb
Red bibb OR green leaf lettuce
Kohlrabi, 1 large or 2-3 small
Scallions, 1 bunch
Basil, 1 sprig
Rhubarb, 1.25 – 1.5 lb
Next week’s box will probably contain zucchini, cucumbers, scallions, basil and much more.
‘Caraflex’ cabbage – This ia a nice salad-type that we grow in summer. Don’t you love the pointy shape? It has thinner, more tender leaves than the usual green cabbage. Great in salads and slaws but can also be cooked. Here’s the description from the seed catalogue: “Inner leaves are tender, crunchy, and have an excellent, sweet and mild cabbage flavor. Perfect for summer salads, slaws, or cooked dishes.”
Fennel (large vegetable with a fat bulb and lacy fronds) – Fennel is a ‘swing vegetable’; it can be used raw or cooked. Clean well and slice as thinly as possible for use in raw salads. It is good simply prepared with olive oil, lime or lemon juice, salt and shaved parmesan cheese. Cooking softens and sweetens fennel, and mellows its anise flavor. Both the bulb and leaves are edible. Here are ideas from Alice Water of Chez Panisse about how to use fennel: ‘It’s strong anise characteristic seems to suit fish particularly well. … We use fennel all the time. We add the feathery leaves to marinades for fish and to numerous salads, sauces and soups and we use them as a garnish, too. … The bulbs are sliced and served raw in salads in various combinations with other vegetables, parboiled for pastas; caramelized and served as a side dish; braised whole; or cooked in vegetable broths & fish stocks.”
Snap and snow peas – See last week’s newsletter for a photo to distinguish these two types of peas. This is a disappointing pea year for us (and for you), and quantities are small. Our first two plantings were hit hard by a soil-borne disease called Aphanomyces root rot, which weakened most of the plants before they set peas. Ironically, this disease was the subject of Beth’s master’s thesis. One thing she learned is that there is no ‘cure’ for this problem. We’re debating which cultural controls to attempt next year. We have a third planting in a different field that should be ready in mid-July. Let’s hope it does better than the first two plantings.
Cucumbers – The first cukes, just in time for July 4th picnics!
Basil (curly-leaved sprig) – This is the variety ‘Napoletano.’ The leaves are larger and more frilly than most basils. We like this variety because it remains tender and flavorful even as the plants mature.
Storage: Basil will blacken if stored in the refrigerator. It is best stored at room temperature with the cut ends in water, for example in a glass or teacup. Give the stem a fresh trim. You will receive one sturdy sprig this week.
RECIPES FROM LAUREN
Cucumber and Snow Pea Salad with Ricotta & Goat Cheese
This is a great (super quick, super simple) weeknight dinner, salad or side dish. It can very easily be scaled up or down, or adapted with any other raw veggies you have on hand. Kohlrabi, radishes or broccoli would all be great additions!
Makes enough for 4 as a side
Takes 20 minutes
1 cucumber, cut in 1/8-inch slices
10-15 snow or snap peas, ends removed, thinly sliced
4 scallions, thinly sliced
1/2 cup ricotta cheese
1/4 cup goat cheese
2 tablespoons olive oil
1/2 teaspoon Kosher salt
1/4 teaspoon black pepper
- In a small bowl, combine ricotta, goat cheese, olive oil, salt and pepper. Whisk with a fork until smooth and well-combined. Add the dark green portion of the scallions to this mixture. Fold in gently.
- Place a scoop into the center of one, two or four plates (however many people will be eating the dish). Place cucumbers around the ricotta & goat cheese mixture. Top with snow or snap peas and the white and pale green portion of the scallions. Sprinkle with extra salt to taste.
– – – – – – –
Summer Vegetable Strata
Adapted slightly from Alexandra’s Kitchen
If you are using a loaf of two-day old bread, you won’t need to take any further steps to dry them out. If it’s not old stale bread, you can toast it in the oven the day before, then slice and leave it out to dry overnight.†If you are using a rustic loaf with a thick crust, the texture of the dish will be better if you remove it.
Takes 90 minutes
Serves 8-10
10 eggs
2 1/2 cups whole milk (2% would probably be fine, too)
2 teaspoons kosher salt
1 zucchini
1 summer squash
1 fennel, fronds and core removed
8 oz. cheddar or gruyere (or other favorite cheese)
1 loaf day old bread, see note above
5-6 basil leaves, roughly chopped
1. Preheat oven to 350oF. In a large bowl, whisk eggs, milk and salt together. Set aside.
2. Using the shredder attachment of the food processor (or a cheese grater), slice up the zucchini, squash, and fennel. Send any cheese through cheese grater as well.
3. Cut the bread into 1/2-inch cubes. Add to the bowl of eggs. Add the vegetables and basil to the bowl as well. Toss everything together until well-combined.
4. Butter a 9×13-inch baking dish. Pour egg mixture into pan. Cover with foil. Bake for 20 minutes. Remove foil and continue baking for 40 to 50 minutes longer. Let rest 10 minutes before serving.
– – – – – – –
LOCAL THYME RECIPES
Comforting Classics
Shanghai Noodles with Ground Pork (or chicken or tofu) and Cabbage
Lemon Basil Marinated Summer Squash
Roasted Fennel
Rhubarb Mostarda
Outside the Box Recipes
Indian Spiced Fennel and Cabbage
Pasta Salad with Summer Squash, Crushed Almonds and Parmesan
Spicy Fennel Kohlrabi Slaw
Pan Seared Pork Tenderloin with Rhubarb Rosé Sauce
Quick and Easy Meal
Fennel, Olive and Goat Cheese Flatbreads
Berry podcast + photos
- On: June 22, 2016
- 0
Did you miss our farm u-pick this past weekend? Here’s a chance to see and to hear what it was like. Friend and Tipi CSA member Julie Garrett has pioneered a podcast series for WORT-FM 89.9 titled “5 Minutes on the Farm.” Each episode features a local Wisconsin farmer talking about what’s currently in season and what’s happening on their farm. The podcasts post on WORT’s website every Wednesday afternoon, and includes a photo gallery, SoundCloud file, and a seasonal recipe. Julie has gotten to know many, many farmers during her four years working for FairShare CSA coalition. This is her newest effort to strengthen connections between consumers and the farms that feed them. Julie visited us this weekend during the strawberry u-pick to interview Steve about berries and farming. Listen here.
Julie is an excellent photographer too (and all-around creative gal!). Here are some of her shots from the u-pick. I’ve created an album with more photos on our Facebook page.

It was a good outing for families.

You gotta test the berries!
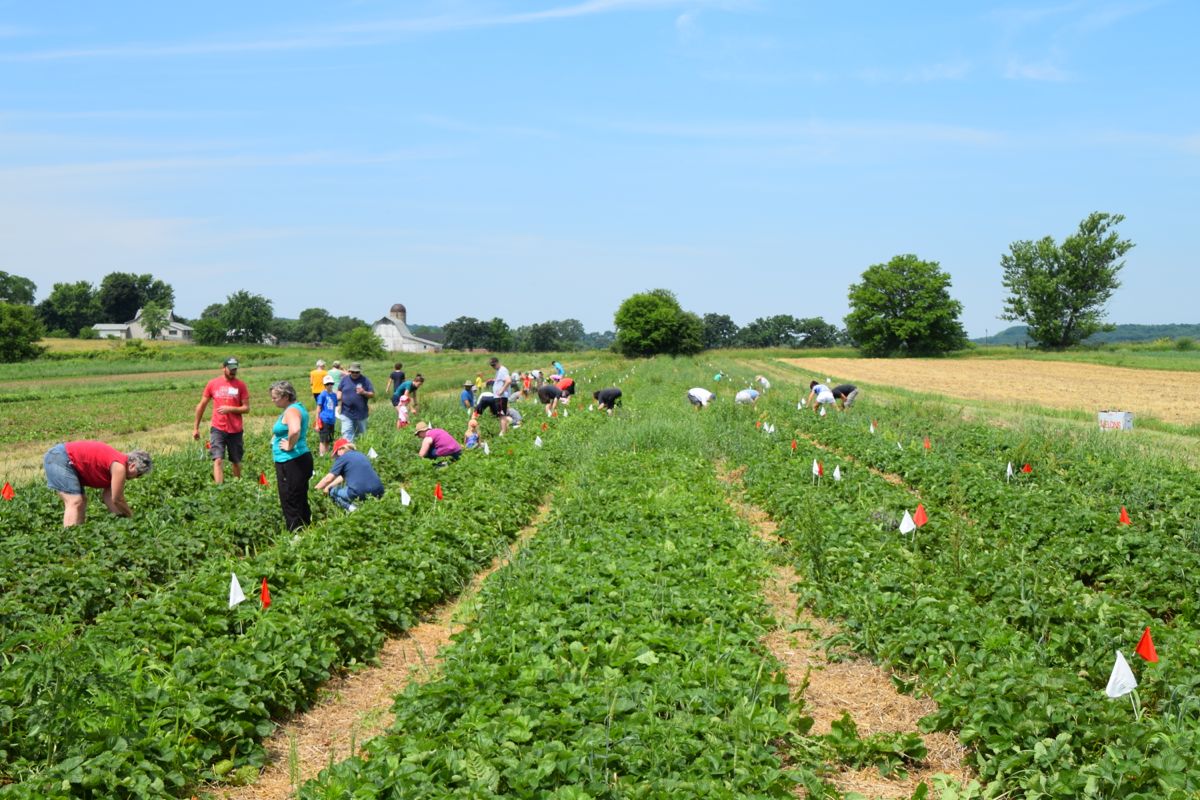
Steve and I think this was our best strawberry u-pick in terms of picking quality. The berries were at their peak, ripe, and incredibly abundant.
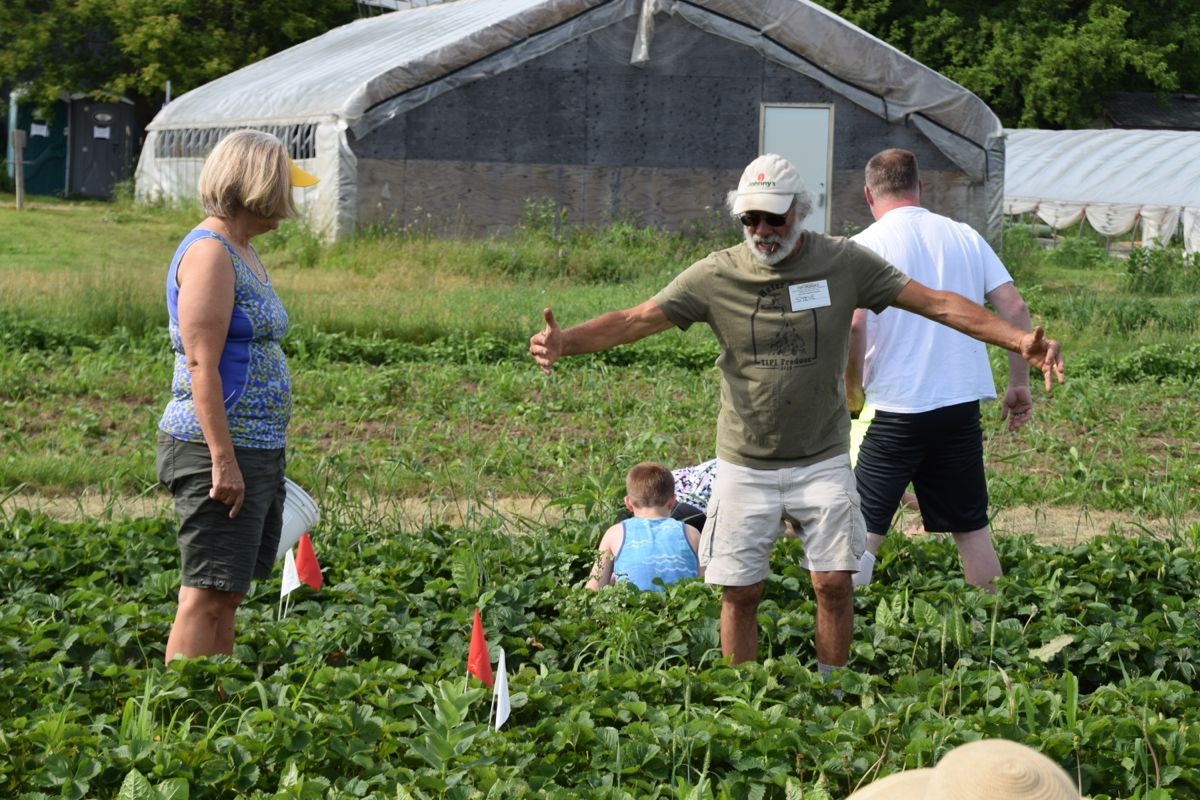
Steve explains how and where to pick.
Head over to our Facebook page to see more photos.
Second strawberry u-pick.
Tipi CSA members, read our emails for info about the upcoming berry u-pick. The season is winding down, so the berries will be smaller and the picking slower.
Veggie list and veggie notes (June 23/24, 2016, week #6, purple EOW)
Strawberries, 1 quart + 1 pint
Snap peas, 3/4 lb
Snow peas, 1/3 lb
(Both types of peas are in one bag.)
Zucchini and summer squash, 3+ lb
Napa cabbage, 1
Collard greens, 1 bunch
Red romaine lettuce, 1
Daikon radish, 1 or 2
Garlic scapes, a handful
Everyone gets some broccoli OR an extra 1 pt strawberries
Next week’s box will probably contain zucchini & summer squash, fennel, kohlrabi, scallions, lettuce, greens, and more.
Strawberries – The berries are ripe. Eat asap. We grew six strawberry varieties this year. Some hold up to the weather better than others. If one of your containers looks riper or more fragile than the other, eat that one first. Don’t be surprised if one container is not quite full. That’s one of our strategies to distribute the berries evenly to all.
Zucchini and summer squash – You will receive yellow summer squash and/or green zucchini.
Napa cabbage (large, pale green cabbage with crinkled leaves) – This is an interesting vegetable, useful for both fresh, raw salads and for cooking. Napa’s most famous use is fermented kimchi. I like to prepare a fresh, unfermented kimchi. Same seasonings, but it’s ready to eat right away. You will be amazed at how much shredded napa cabbage shrinks when prepared this way. See here for an example, but cut the salt in half: Grilled Flank Steak with Kimchi-style Coleslaw.
Storage: Napa stores very well. Cut off wedges as needed and keep the rest covered and refrigerated, and it will keep for several weeks. Peel off the outer layer and it will be ready to use. Here are a few preparation ideas from the ‘Asparagus to Zucchini’ cookbook.
– Chop raw napa into green salads.
– Substitute napa in traditional coleslaw.
– Chinese cabbage cooks quickly. Steam 3-5 minutes, or until leaves are wilted down but remain slightly crisp.
– Substitute napa cabbage for common cabbage in recipes, but reduce the cooking time by 2 minutes.
– Napa cabbage is the main ingredient in egg rolls. Try making an egg roll mixture to eat as a cooked side dish instead of preparing time-consuming egg rolls.
Daikon radish (slender white roots) – These Asian radishes are good cooked or raw. We often make a sliced radish salad, with Asian-style dressing (rice vinegar, mirin, sesame oil, soy sauce, minced garlic). Even a brief marination mellows the radish’s sharpness.
Garlic scapes (curly green things) – Garlic scapes grow at the top of garlic plants. They look like flower buds but are actually clusters of tiny bulblets. We snap off the young scapes to direct the plants’ energy into forming garlic bulbs underground. Use scapes as a substitute for garlic cloves. They can be minced, mixed with olive oil, and added to stir fries or simple pasta dishes. The scapes can be sautéed, but will not brown like garlic cloves. Expect them to retain their crunch even when cooked, and to be milder than garlic cloves, closer in pungency to the green garlic we’ve sent. Most of this week’s scapes are from John Hendrickson of Stone Circle Farm who grows organic garlic for our CSA, but some are from our garlic field.
Snap peas and snow peas. These will be together in one bag.
– Snap peas (plump pea pods) – These peas should be eaten pod and all. They are delicious raw, or very lightly cooked or stir-fried. They might need a quick rinse to remove faded gray blossoms. Store in the refrigerator. Here’s how to remove the strings from the snap peas. Snap off the stem end and pull the string down the concave side of the pod (the inward-curing side). Throw away the string and eat the pod.
– Snow peas (flat pea pods) – These are excellent stir fried or in raw salads. The thicker pea pods will usually have two strings along the edges. Remove them when you snap the stem off.
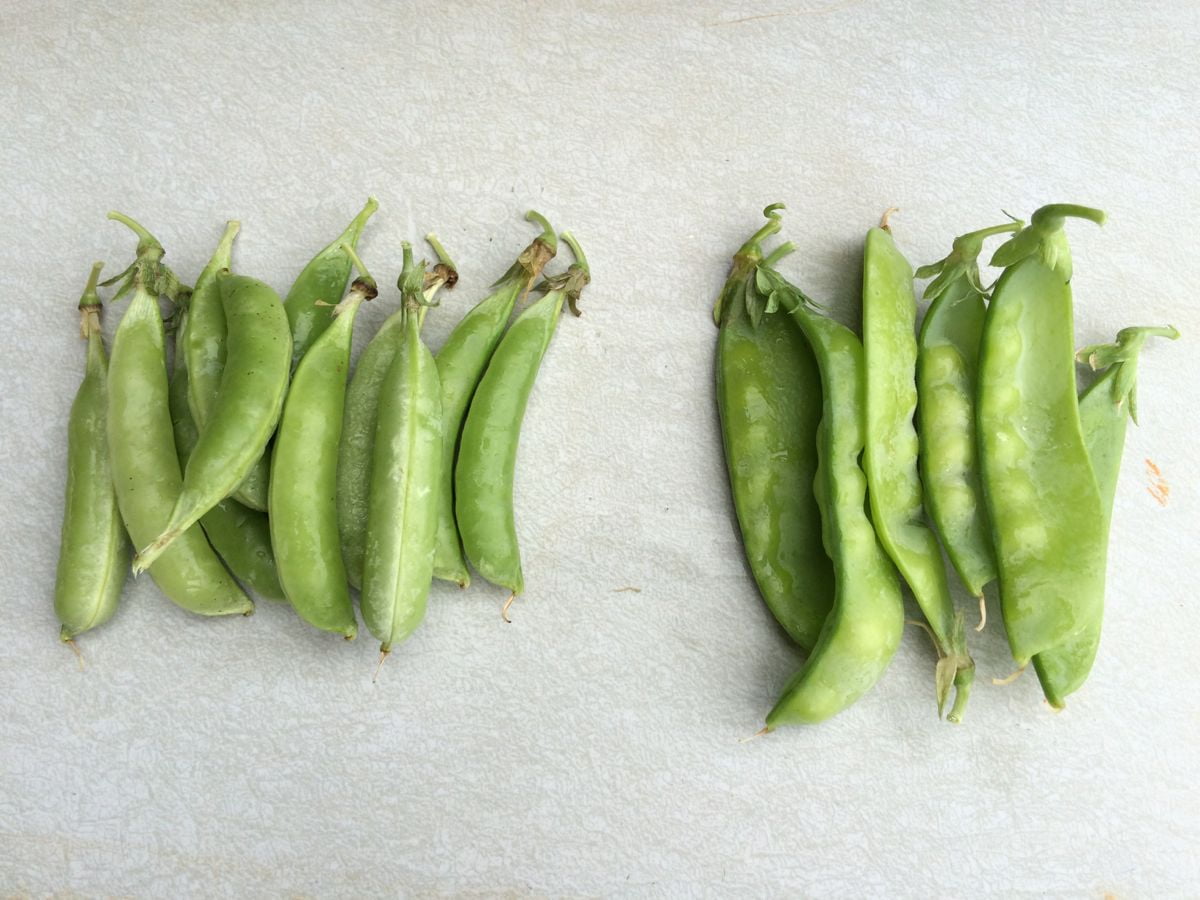
Snap peas on left, snow peas on right. The snap peas are plumper.
RECIPES FROM LAUREN
Napa Cabbage Bowl with Coconut Peanut Dressing
Adapted from 101 Cookbooks
In true Lauren fashion, this recipe is super duper versatile. In my opinion, the rice noodles, the peanuts and the dressing are essential, but everything else can be substituted or increased (or decreased) or left off. Use this recipe as guideline and deviate widely (or not) as you desire. I choose to use napa cabbage as the leafy green for the base of this bowl because I love it, but lettuce or kale could also be used. The snow and snap peas are a bright fresh addition, but you could use really any blanched raw veggie instead (broccoli, beans, asparagus, etc). The daikon adds a delicious crunch but is also optional or substitutable.
Takes 30 minutes
Serves 4-6
6 cups thinly sliced napa cabbage (green leafy portion and white core)
1/2 pound snow peas, ends trimmed
1/3 pound snap peas, ends trimmed
8 ounces rice noodles
1 cup thinly sliced daikon radish
1-1/2 cups roasted peanuts
1-2 limes, quartered
Coconut Peanut Dressing:
1/2 cup peanut butter
1-1/2 cups coconut milk
2-3 garlic scapes, minced (about 2 tablespoons)
3 tablespoons brown sugar
2 tablespoons fresh lime juice (about 1 lime)
1 tablespoon soy sauce
1/2 teaspoon cayenne pepper
- Bring large pot of well-salted water to a boil on the stove.
- Prepare your sauce by combining all ingredients in a medium bowl. Whisk well until combined and smooth. Taste and adjust seasonings as needed. More soy sauce will make it saltier. More lime juice will make it brighter. More brown sugar will make it sweeter. You get the picture. Set aside until ready to use. Add a tablespoon or two of hot water if you find the mixture too thick.
- Once water comes to a boil, add snow and snap peas (or any other raw veggies you plan to use). Blanch for just under a minute and then remove with a slotted spoon to a colander. Rinse with cold water to stop the cooking.
- Bring the water back up to a boil and then add the rice noodles. Cook according to package directions. (Mine took 4 minutes). Strain and rinse with cold water to stop the cooking.
- Now you have two options for serving. If you plan to eat it all at once, toss the noodles, cabbage, peanuts and dressing together in an extra-large bowl. Top with blanched veggies and daikon. Serve with lime wedge. If you don’t plan to eat it all at once, get everything all in one place so people can “build their own” bowl starting with the noodles, followed by the cabbage, and then the coconut peanut dressing. Folks can add peanuts, blanched veggies and daikon to their liking. It will store much better in its component parts than once tossed all together. The dressing will keep in your fridge for a week.
◊ ◊ ◊ ◊ ◊ ◊ ◊

Early Summer Vegetarian Cobbler with Basil Parmesan Biscuits
Adapted from My Name is Yeh
This dish is the perfect buttery, robust comfort food you need to celebrate the true beginning of summer. Zucchini and squash have arrived and they are on full display in this creamy dish. Don’t feel guilty if you don’t feel like making the biscuits from scratch. Pillsbury biscuits are a completely acceptable substitution, or you could also leave the biscuits off entirely and make a quick side dish instead of a cobbler.
Makes enough for 4-6
Takes 1 hour
6 tablespoons butter
1 large†zucchini, quartered and sliced
1 large summer squash, quartered and sliced
3-4 garlic scapes, chopped
Pinch Kosher salt
1/2 cup flour
2 cups chicken stock
1 cup water
2-3†cups roughly chopped packed collard greens, stems removed
1-1/2 cup whole milk
1 cup finely shredded Parmesan
Freshly ground black pepper
Basil Parmesan Biscuits:
9 tablespoons butter
2-1/2 cup all-purpose flour
2 teaspoons sugar
1 tablespoon baking powder
3/4 teaspoon Kosher salt
3/4 teaspoon baking soda
1/4 cup finely shredded Parmesan
2-3 tablespoons basil, leaves cut in a chiffonade
3/4 cup buttermilk
1 egg, beaten
- Preheat oven to 425 degrees.
- If you plan to make the biscuits, cut your butter into small cubes and place in a small bowl or measuring cup. Place in the freezer (or fridge) until ready to use.
- Melt butter in a large oven-proof skillet. If you plan to double the sauce, make sure the pan is at least a couple inches deep (a Dutch oven would work nicely if doubling). Add zucchini, summer squash, scallions (or onion) and a pinch of salt. Saute over medium low heat for 10 minutes until well softened. Add garlic and cook until fragrant (about one minute). Add flour and stir until well combined and it evenly coats the veggies (about 2 minutes). Add chicken stock and stir. The mixture should bubble gently and thicken slightly (if it doesn’t turn up the heat a bit). Add the water and again stir to combine. Let simmer for a couple minutes and then add the collard greens, milk, Parmesan and a good helping of pepper. Let simmer gently until it reaches the desired consistency then remove from heat. This will only take a couple minutes. Feel free to add more milk if you feel it’s gotten too thick. Taste and adjust salt and pepper as desired.
- Prepare your biscuits by combining flour, sugar, baking powder, salt and baking soda together in a large bowl. Stir to combine. Incorporate butter using two forks or a pastry cutter. The butter should be incorporated with the flour mixture in rough, pea-sized pieces. Feel free to use your fingers if that works better for you. Once well incorporated, add the Parmesan and basil. Stir to combine and then add buttermilk. Stir until loose dough forms, then turn out onto unfloured counter and knead until all dough comes together. Cut out 6-7 biscuits, brush with egg wash and place on top of liquid mixture.
- Bake for 20 minutes until biscuits are golden brown. Let rest for 5-10 minutes before eating as it will be very, very hot. Then devour immediately.
LOCAL THYME RECIPES
Comforting Classics
Napa Cabbage Slaw with Oranges
Ponzu Chicken, Napa Cabbage and Snap Pea Salad
Parmesan Zucchini Coins
Curried Daikon
Outside the Box Recipes
Roasted Chinese Cabbage
Pasta Carbonara with Snap Peas
Greek Stewed Zucchini
Korean Daikon Rice Cake Soup
Quick and Easy Meal Idea
Collard Greens Pesto Bruschetta

